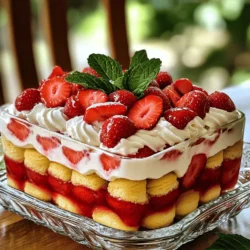
Strawberry Shortcake Icebox Cake
Make your dessert dreams come true with this delightful Strawberry Shortcake Icebox Cake! Layers of fresh strawberries, whipped cream, and ladyfingers create a heavenly treat perfect for any occasion. With simple ingredients and easy-to-follow steps, you'll impress your guests with this no-bake dessert.