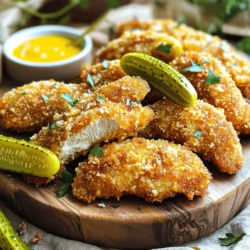
Pickle Brined Chicken Tenders
Elevate your weeknight dinners with these Zesty Pickle Brined Chicken Tenders that are bursting with flavor! This recipe features tender chicken marinated in tangy pickle juice for a unique twist. With a crispy breadcrumb coating and easy frying method, these tenders are perfect for any meal or snack. Ready to impress your family and friends?