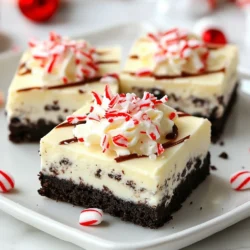
No-Bake Peppermint Oreo Bars
Delicious and festive no-bake bars made with Oreo cookies, cream cheese, and peppermint.
Ingredients
- 24 cookies Oreo cookies, crushed
- 0.5 cup unsalted butter, melted
- 1 cup cream cheese, softened
- 1 cup powdered sugar
- 1 teaspoon peppermint extract
- 1 cup whipped topping
- 0.5 cup chocolate chips (for topping)
- 0.5 teaspoon vegetable oil (for chocolate)
- 1 cup crushed peppermint candies or candy canes (for garnish)
Instructions
- In a mixing bowl, combine the crushed Oreo cookies and melted butter until well blended.
- Press the Oreo mixture firmly into the bottom of an 8-inch square pan to create a crust.
- In a separate bowl, beat the softened cream cheese with an electric mixer until smooth.
- Gradually add the powdered sugar and peppermint extract to the cream cheese, mixing until well combined.
- Fold in the whipped topping gently until fully integrated, creating a smooth filling.
- Spread the cream cheese mixture evenly over the Oreo crust in the pan.
- In a microwave-safe bowl, combine the chocolate chips and vegetable oil. Microwave in 30-second intervals, stirring in between, until melted and smooth.
- Drizzle the melted chocolate over the cream cheese layer, using a spatula to spread it evenly if necessary.
- Sprinkle crushed peppermint candies or candy canes over the top for a festive touch.
- Cover the pan with plastic wrap and refrigerate for at least 4 hours or until set.
- Once set, cut into bars and serve chilled.
Notes
Best served chilled after refrigeration.