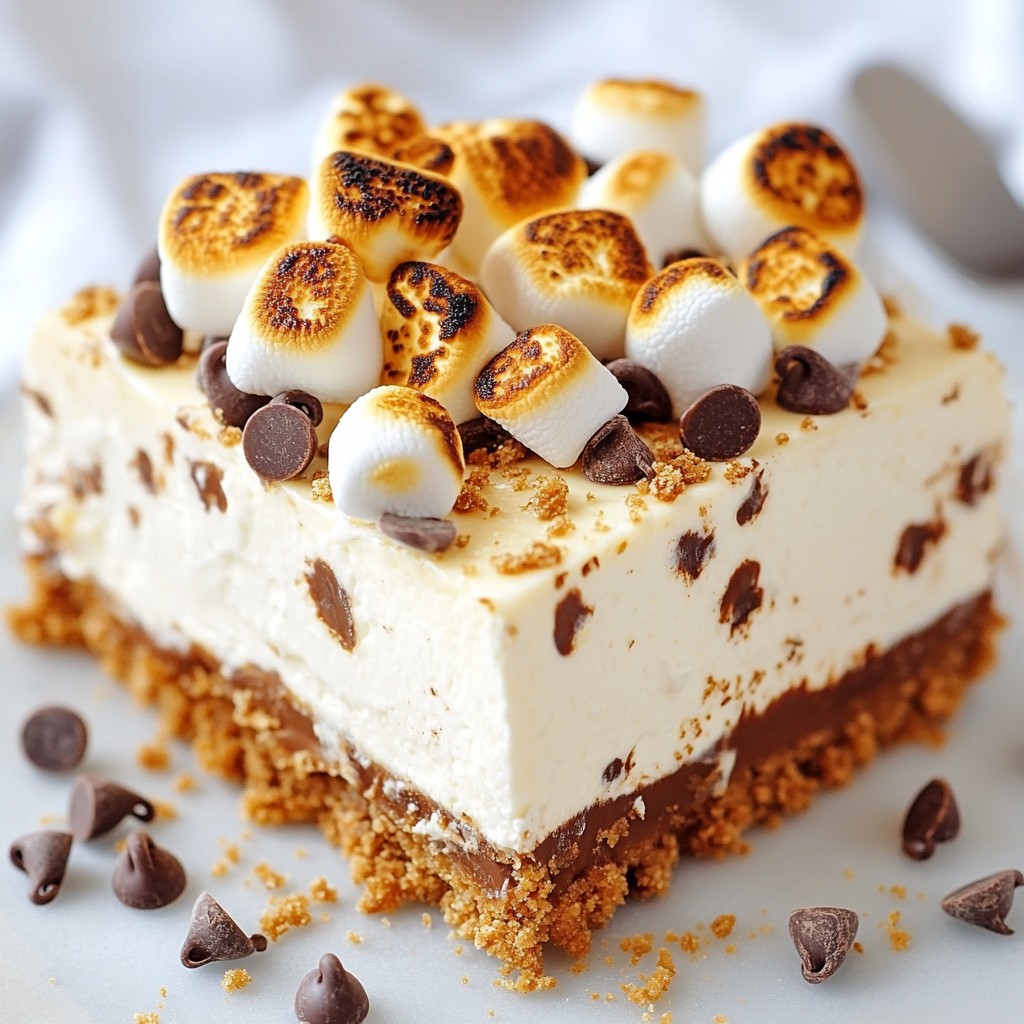
Craving a sweet treat that's easy to make? Look no further! This S'Mores No Bake Cheesecake combines rich chocolate, creamy cheesecake, and a crunchy graham cracker crust. It’s a fun twist on a classic dessert that anyone can whip up—no oven needed! In this post, I’ll guide you through simple steps, give you some tips, and share delicious variations. Let’s dive into this delightful dessert!
Why I Love This Recipe
- No-Bake Convenience: This cheesecake requires no baking, making it quick and easy to prepare, perfect for warm days or when you're short on time.
- Decadent Flavor: The combination of cream cheese, chocolate, and marshmallows brings the classic s'mores flavor to a delightful cheesecake form.
- Customizable Toppings: Feel free to get creative with toppings; adding toasted marshmallows or a drizzle of chocolate sauce can elevate the dessert even further.
- Perfect for Gatherings: This cheesecake serves a crowd and is sure to impress guests at parties, picnics, or family gatherings.
Ingredients
List of Ingredients
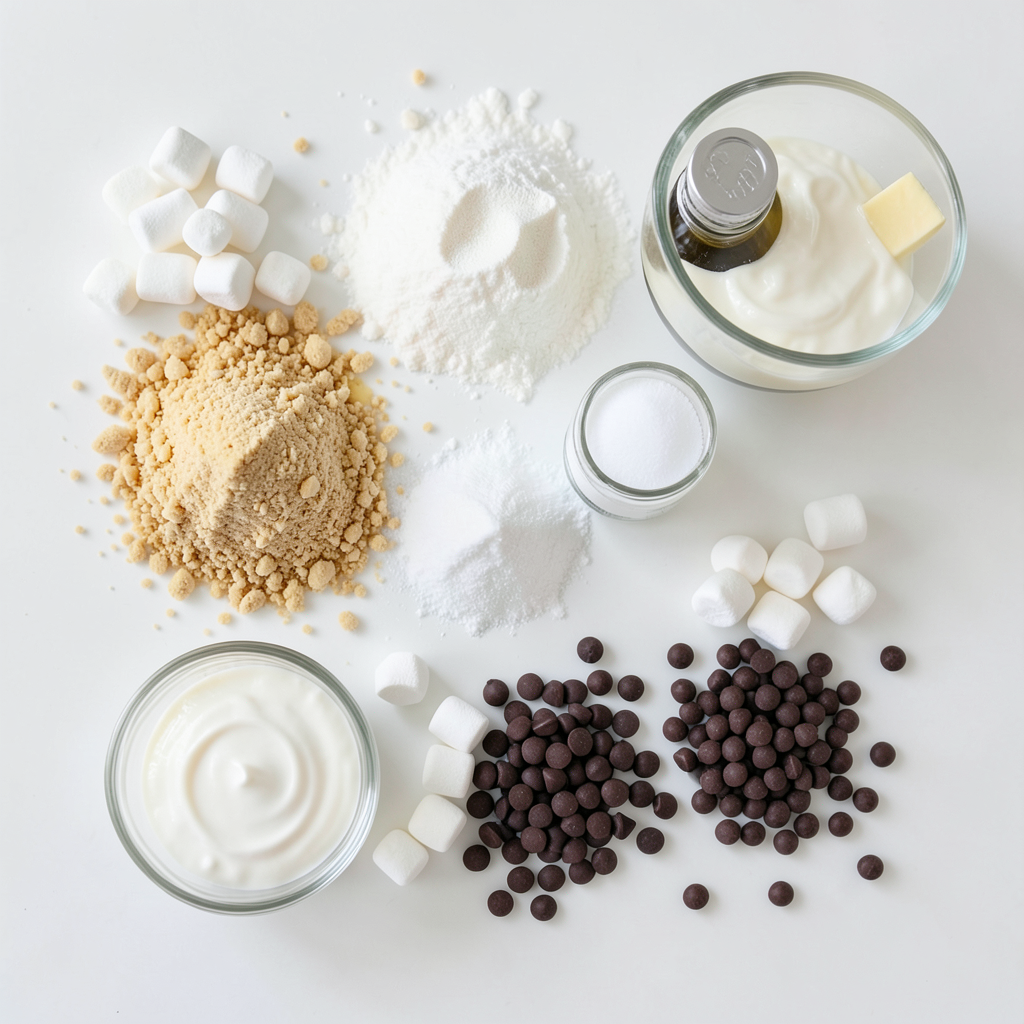
To create a delicious S'Mores No Bake Cheesecake, you will need:
- 1 ½ cups graham cracker crumbs
- ½ cup unsalted butter, melted
- 2 tablespoons sugar
- 8 oz cream cheese, softened
- ½ cup powdered sugar
- 1 teaspoon vanilla extract
- 1 cup heavy whipping cream
- 1 cup miniature marshmallows
- ½ cup milk chocolate chips
- ½ cup mini chocolate chips (for topping)
- Extra marshmallows for garnish
Equipment Needed
You will need a few tools to make this treat:
- Mixing bowls
- A 9-inch springform pan
- Electric mixer or whisk
- Spatula
- Plastic wrap
- Refrigerator
Substitutions & Alternatives
If you need to swap ingredients, here are some options:
- Use gluten-free graham crackers for a gluten-free version.
- For a dairy-free option, try vegan cream cheese and coconut cream.
- You can use dark chocolate chips instead of milk chocolate for a richer flavor.
- Swap powdered sugar with maple syrup for a natural sweetener.
These swaps will help you customize your cheesecake to fit your dietary needs or tastes. Enjoy exploring these options!
Step-by-Step Instructions
Preparing the Crust
Start by mixing 1 ½ cups of graham cracker crumbs, ½ cup of melted butter, and 2 tablespoons of sugar in a bowl. Stir well until it looks like wet sand. Take a 9-inch springform pan and press the mixture firmly into the bottom. This makes your crust nice and even. After that, put the pan in the fridge. This helps it set up well.
Making the Cheesecake Filling
In a large bowl, add 8 oz of softened cream cheese, ½ cup of powdered sugar, and 1 teaspoon of vanilla extract. Beat these together until smooth and creamy. In another bowl, whip 1 cup of heavy cream until it forms stiff peaks. Gently fold the whipped cream into the cream cheese mixture. Do this carefully to keep the air in the cream. Then, fold in 1 cup of miniature marshmallows and ½ cup of milk chocolate chips. This adds the special s'mores touch.
Chilling the Cheesecake
Take the crust out of the fridge and pour the cheesecake filling on top of it. Use a spatula to smooth the top. Cover the cheesecake with plastic wrap, and then put it back in the fridge for at least 4 hours. This helps the cheesecake set properly. Once it is firm, you can remove it from the springform pan. Top it with ½ cup of mini chocolate chips and extra marshmallows for a fun look. Enjoy your delicious treat!
Tips & Tricks
Achieving the Perfect Consistency
To get the right texture, start with softened cream cheese. Beat it well. This helps it mix smoothly. When you whip the heavy cream, stop when you see stiff peaks. This adds lightness to the filling. Fold the whipped cream gently into the cream cheese mix. Be careful not to deflate it. This keeps your cheesecake airy and fluffy.
Serving Suggestions
When serving, slice the cheesecake into equal pieces. This helps everyone get a fair share. You can serve it with a drizzle of chocolate syrup for extra flavor. A side of fresh berries also works well. They add color and a fresh taste. If you want more crunch, sprinkle chopped nuts on top.
Presentation Tips
To make your cheesecake look great, use a clean knife for cutting. Wipe it after each slice. This keeps your pieces neat. For a fun touch, lightly toast the marshmallows on top with a kitchen torch. This gives a lovely, golden look. Add mini chocolate chips and extra marshmallows for decoration. A little creativity makes a big difference!
Pro Tips
- Chill the Mixing Bowls: Before whipping the cream, chill the mixing bowl and beaters in the freezer for about 10 minutes. This helps the cream whip faster and achieve better volume.
- Use Room Temperature Ingredients: Ensure your cream cheese is at room temperature for easier blending with the other ingredients, resulting in a smoother cheesecake filling.
- Experiment with Toppings: Feel free to customize your cheesecake with different toppings like crushed cookies, caramel drizzle, or even fruit to make it your own!
- Perfect Slicing: For clean slices, use a warm knife to cut through the cheesecake. Simply dip the knife in hot water, wipe it dry, and then cut.
Variations
Flavored Cheesecake Options
For a twist on flavor, try adding different extracts. You can use almond or mint extract. A chocolate cheesecake will delight fans of rich flavors. Just mix cocoa powder into the cream cheese blend. For a fruity option, add pureed strawberries or raspberries to the filling. This gives a fresh taste and beautiful color.
Different Toppings
You can get creative with toppings. Instead of just mini chocolate chips, try crushed cookies or nuts. Fresh fruit like strawberries or blueberries can add a nice touch. You can also drizzle caramel or chocolate sauce on top. For a fun look, use different kinds of marshmallows, like flavored ones.
Dietary Adjustments (Gluten-Free, Vegan)
To make this cheesecake gluten-free, use gluten-free graham cracker crumbs. This keeps the taste and texture similar. For a vegan version, swap cream cheese for a plant-based alternative. Use coconut cream instead of heavy cream for richness. Sweeten it with maple syrup or a sugar substitute. These options let everyone enjoy this treat!
Storage Info
How to Store Leftovers
To store your S'Mores No Bake Cheesecake, keep it in the fridge. Use an airtight container to keep it fresh. You can also cover it with plastic wrap. Make sure the cheesecake is cool before you cover it. This helps keep the texture right.
Freezing Instructions
If you want to freeze the cheesecake, slice it first. Wrap each slice in plastic wrap tightly. Then place the slices in a freezer bag. Try to remove as much air as you can. This will help prevent freezer burn. You can freeze it for up to three months.
Shelf Life
The cheesecake lasts about five days in the fridge. After that, it may lose its taste and texture. If you have frozen it, eat it within three months for the best flavor. Always check for signs of spoilage before you eat. Enjoy your treat!
FAQs
Can I make this cheesecake ahead of time?
Yes, you can make this cheesecake ahead of time. It tastes even better after a day in the fridge. Just cover it well with plastic wrap. This helps keep it fresh. Make sure to chill it for at least four hours. You can even prepare it up to two days in advance.
How do I prevent the crust from getting soggy?
To keep your crust crisp, use melted butter and press it firmly. Make sure to chill the crust before adding the filling. Avoid adding the cheesecake filling until the crust is set. Also, keep the cheesecake covered and stored in the fridge until you're ready to serve.
Can I use different types of chocolate?
Absolutely! You can use dark chocolate or white chocolate instead. Each type will give your cheesecake a unique flavor. If you prefer a richer taste, dark chocolate works great. For a sweeter touch, try white chocolate. Just remember to adjust the amounts to suit your taste!
You learned about cheesecake ingredients and how to prepare each step. Remember to choose the right tools and ingredients for the best result. Don't forget the tips for smooth texture and great presentation. Consider adding your favorite flavors or toppings to make it yours. Store leftovers properly to enjoy later. Whether you plan ahead or experiment, making cheesecake is fun and tasty. Enjoy every step of your cheesecake journey!