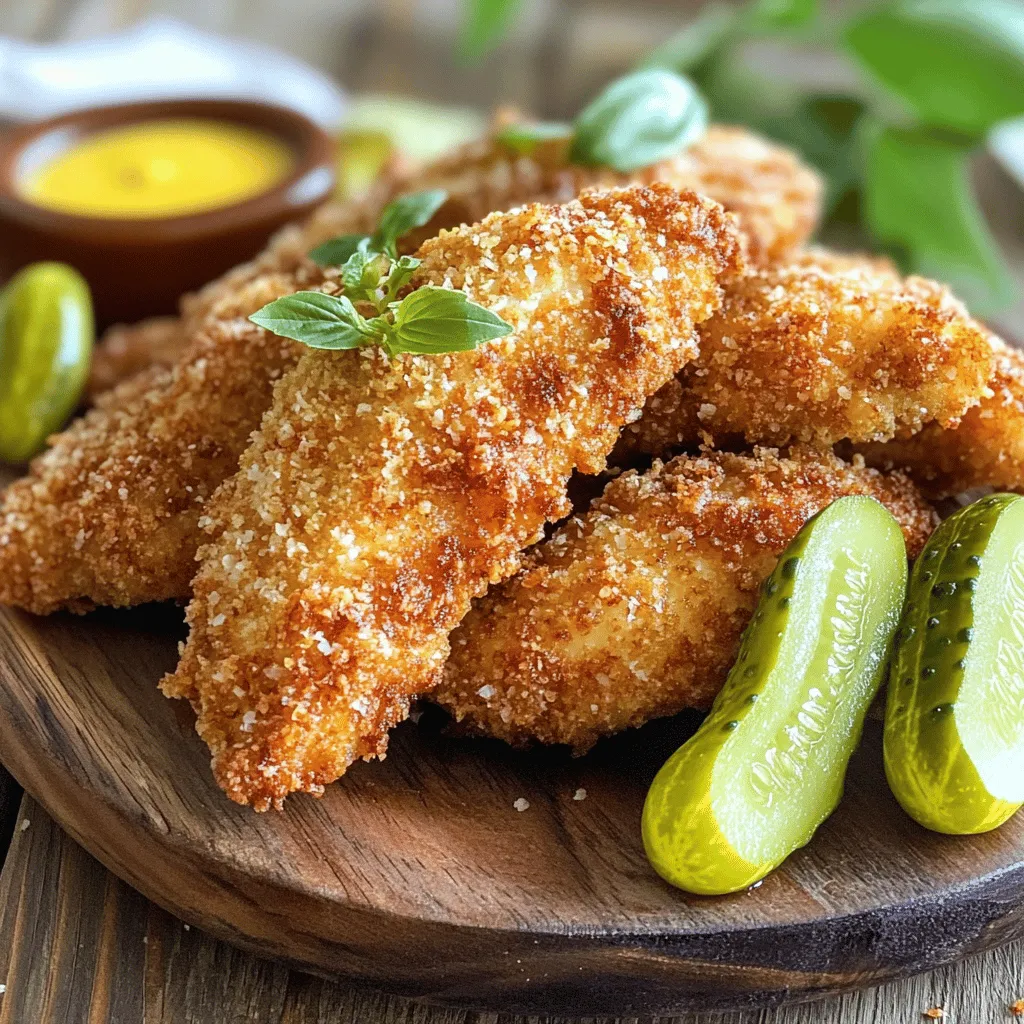
Are you ready to take your chicken tenders to a whole new level? Pickle brined chicken tenders are not just juicy; they burst with flavor! By soaking chicken in pickle juice, you transform bland meat into a zingy delight. In this post, I’ll guide you step-by-step through the easy process of making these tender, tasty bites. Say goodbye to boring dinners and hello to a meal that your family will crave!
Ingredients
Main Ingredients
– 1 lb chicken tenders
– 1 cup pickle juice
– 1 cup buttermilk
Dry and Coating Ingredients
– 1 cup all-purpose flour
– 1 teaspoon garlic powder
– 1 teaspoon onion powder
– 1 teaspoon smoked paprika
– 1/2 teaspoon cayenne pepper
– Salt and black pepper to taste
– 1 cup breadcrumbs
Cooking Ingredients
– Oil for frying
Pickle brined chicken tenders require a few key ingredients to shine. First, use 1 lb of chicken tenders. They cook quickly and remain juicy. Next, grab 1 cup of pickle juice. This juice adds tang and moisture. You can use juice from your favorite pickles.
Buttermilk is the next must-have. A cup of buttermilk helps tenderize the chicken. It adds a rich flavor too.
For the coating, you’ll need 1 cup of all-purpose flour. Then, mix in garlic powder, onion powder, smoked paprika, and cayenne pepper. This mix gives the chicken a nice kick. Adjust the cayenne level to your spice preference.
Season the flour with salt and black pepper to taste. Lastly, use 1 cup of breadcrumbs for that perfect crunch. I recommend using Panko breadcrumbs. They offer extra texture and crispiness.
Don’t forget the oil for frying! It helps to cook the tenders evenly. Be ready to enjoy a juicy and flavorful meal.
Step-by-Step Instructions
Preparing the Brine
To start, combine your chicken tenders with pickle juice in a bowl. Make sure the tenders are fully submerged. This step is key. Let the chicken brine for at least two hours in the fridge. For the best taste, aim for overnight. This helps the chicken absorb all that tangy flavor.
Making the Buttermilk Mixture
Next, prepare the buttermilk mixture. Rinse the chicken lightly under cold water after brining. In a new bowl, mix one cup of buttermilk with a pinch of salt and black pepper. Soak the chicken tenders in this mix for about 30 minutes. This step keeps them juicy and moist.
Coating the Chicken
Now it’s time to coat the chicken. In a shallow dish, whisk together flour, garlic powder, onion powder, smoked paprika, cayenne pepper, salt, and black pepper. Take each chicken tender out of the buttermilk. Let any excess liquid drip off. Dredge them in the flour mixture, shaking off the extra. Then dip them back in the buttermilk. Finally, coat them in breadcrumbs. This two-step process adds crunch.
Frying the Tenders
Let’s get frying! Heat about half an inch of oil in a large skillet over medium-high heat. The oil must be hot before adding chicken. Carefully add the tenders in batches. Avoid overcrowding the pan. Fry each side for about 4-5 minutes. You want them golden brown and cooked through, reaching an internal temperature of 165°F.
Final Steps
Once cooked, use a slotted spoon to transfer the tenders to a plate lined with paper towels. This drains excess oil and keeps them crispy. Serve your tasty chicken tenders hot. Enjoy them with dipping sauces like ranch or spicy aioli. You’re ready for a delicious meal!
Tips & Tricks
Perfecting the Brine
To make your chicken tenders juicy, you need a good brine. I suggest marinating the chicken for at least 2 hours. For the best flavor, let it soak overnight. This longer time gives the chicken a great taste.
For the brine, you can use different pickles. Dill pickles add a nice tang. Bread and butter pickles offer a sweeter taste. Try your favorite to see what you like best.
Improving Texture
The coating makes a big difference. Panko breadcrumbs are my top choice. They give a crunchy texture that regular breadcrumbs lack. If you want more crunch, double coat your tenders. Dip them in buttermilk, then flour, then back in the buttermilk, and finally in Panko.
When frying, make sure the oil is hot. This helps create a crispy shell. Don’t crowd the pan. Fry in batches for even cooking. Each side should take about 4-5 minutes.
Dipping Sauce Suggestions
The right sauce can take your tenders up a notch. Ranch dressing pairs well with the tangy chicken. Spicy aioli also works great if you want a kick.
If you want to make your own sauce, here’s a simple recipe. Mix equal parts mayo and yogurt. Add a squeeze of lemon juice and a pinch of garlic powder. This sauce is creamy and fresh!Enjoy your cooking!
Variations
Healthier Alternatives
You can make chicken tenders in a healthier way. Baking is a great option instead of frying. To bake, preheat your oven to 425°F. Use a baking sheet lined with parchment paper for easy cleanup. Spray the tenders lightly with oil. Bake for about 20-25 minutes until golden brown and cooked through. This method reduces fat and keeps the tenders juicy.
If you want to change ingredients for your diet, consider these swaps:
– Use almond flour instead of all-purpose flour for a gluten-free option.
– Substitute Greek yogurt for buttermilk for a lower-fat choice.
Flavor Variations
You can boost flavor with fun spices and herbs. Try adding dried oregano, thyme, or cumin to the coating mix. These spices add depth and warmth to your tenders. You can also infuse flavors in the pickle brine. Add crushed garlic or chili flakes to the pickle juice for a kick. This extra step makes your tenders stand out.
Serving Suggestions
Chicken tenders pair well with many sides. Consider crispy fries or a fresh salad. Coleslaw also adds a nice crunch and tang. If you have leftovers, get creative! Chop the chicken and toss it in a salad or make a wrap with your favorite veggies. You can even add them to pasta for a quick meal. Enjoy these tasty options!
Storage Info
Refrigerating Leftovers
To store your leftover pickle brined chicken tenders, place them in an airtight container. Make sure to cool them to room temperature before sealing. This helps keep them fresh. You can store them in the fridge for up to three days. After that, they may lose their great taste and texture.
Freezing Tips
If you want to save some for later, freezing is a good option. First, let the cooked tenders cool completely. Then, wrap them in plastic wrap or place them in a freezer bag. Try to remove as much air as possible. They can last up to three months in the freezer. When you are ready to eat them, thaw them in the fridge overnight for best results. This keeps the meat juicy and tender.
Reheating Guidelines
To reheat your chicken tenders, you want to keep them crispy. The best method is to use an oven. Preheat your oven to 375°F (190°C). Place the tenders on a baking sheet lined with parchment paper. Bake them for about 10-15 minutes. This way, the coating stays crunchy. Avoid microwave reheating, as it can make the coating soggy. Enjoy your tenders just as delicious as when they were first made!
FAQs
What is pickle brining and why is it used?
Pickle brining is soaking meat in pickle juice. This adds flavor and moisture. The acid in the juice breaks down meat fibers, making them tender. Using pickle brine makes chicken tenders juicy and full of taste. It is an easy way to enhance your dish with minimal effort.
Can I use other types of meat?
Yes, you can use other meats. Pork, turkey, or even firm fish work well. Just adjust cooking times as needed. Each type brings its unique flavor. However, chicken tenders are the most popular choice for this method.
How can I make these tenders gluten-free?
To make these tenders gluten-free, use alternatives. For flour, try almond or coconut flour. For breadcrumbs, use gluten-free options like crushed rice cereal or gluten-free panko. These swaps maintain crunchy texture while keeping the recipe safe for gluten-free diets.
What is the best way to ensure chicken is cooked through?
The best way to check doneness is by using a meat thermometer. Chicken should reach an internal temperature of 165°F. This ensures it is safe to eat. Always check the thickest part of the meat for accurate results.
How long can I keep the leftovers?
You can store leftovers in the fridge for about 3 days. Make sure to keep them in an airtight container. For longer storage, freezing is an option. Cooked chicken tenders can last up to 3 months in the freezer. Just reheat them properly to maintain their crunch.
In this article, I shared key steps to make delicious chicken tenders. We covered ingredients, from chicken and pickle juice to spices and coatings. I walked you through brining, coating, and frying to achieve that crispy texture. Remember, marinating longer gives more flavor, while choosing the right breadcrumbs enhances crunch.
Embrace your creativity with flavors and serving ideas. Cooking can be fun! Enjoy your tender chicken and wow your friends or family.