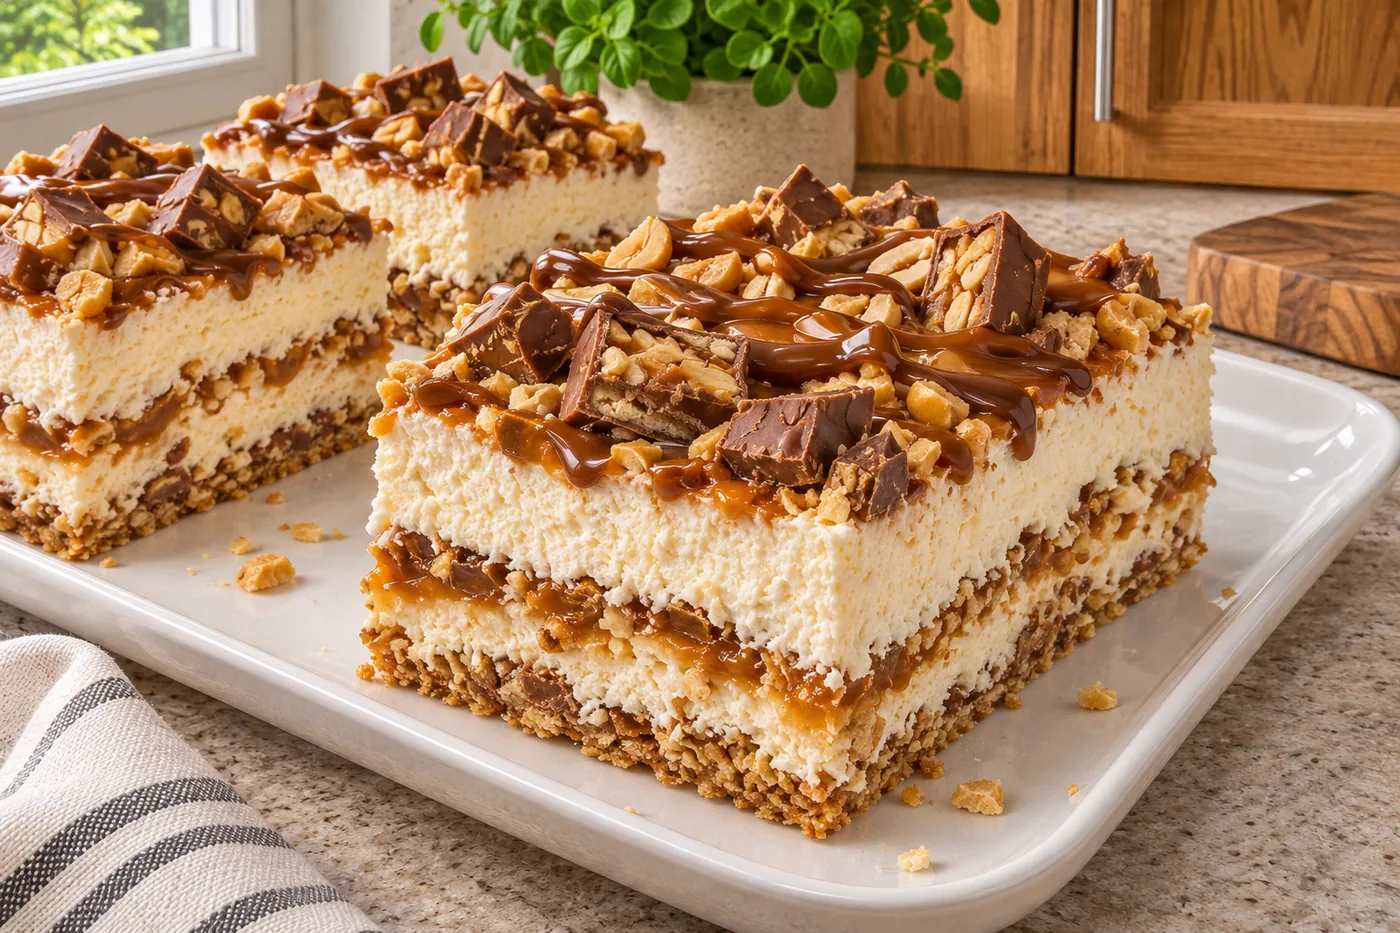
I remember the first time I made no-bake peanut caramel cheesecake bars for a family gathering. The moment I took them out of the fridge, the rich aroma of peanut butter and caramel filled the kitchen, and my kids couldn't resist sneaking a taste before dinner!
What sets this recipe apart is its perfect balance of creamy cheesecake and rich caramel, all without the hassle of baking. Trust me, these bars will become a favorite in your home, just like they did in mine.
Why This Recipe Works
- Cream Cheese Provides Structure: The cream cheese is crucial for giving the cheesecake bars their rich texture. It firms up as it chills, creating a creamy yet stable filling that holds its shape when cut.
- Peanut Butter Adds Flavor and Creaminess: Peanut butter not only brings a delicious nutty flavor but also contributes to the smooth mouthfeel of the cheesecake. I experimented with both creamy and crunchy varieties, finding that crunchy gives delightful texture while creamy results in a smoother finish.
- Graham Cracker Crust Holds Together: The combination of graham cracker crumbs, sugar, and melted butter creates a sturdy crust that provides the perfect contrast to the soft filling. I found that pressing the mixture firmly into the pan ensures it doesn’t crumble when serving.
- Heavy Cream for Whipped Topping: Using cold heavy cream helps create a light, airy topping that balances the richness of the cheesecake. I whipped it just until soft peaks formed, resulting in a fluffy texture that complements the dense filling beautifully.
Ingredients
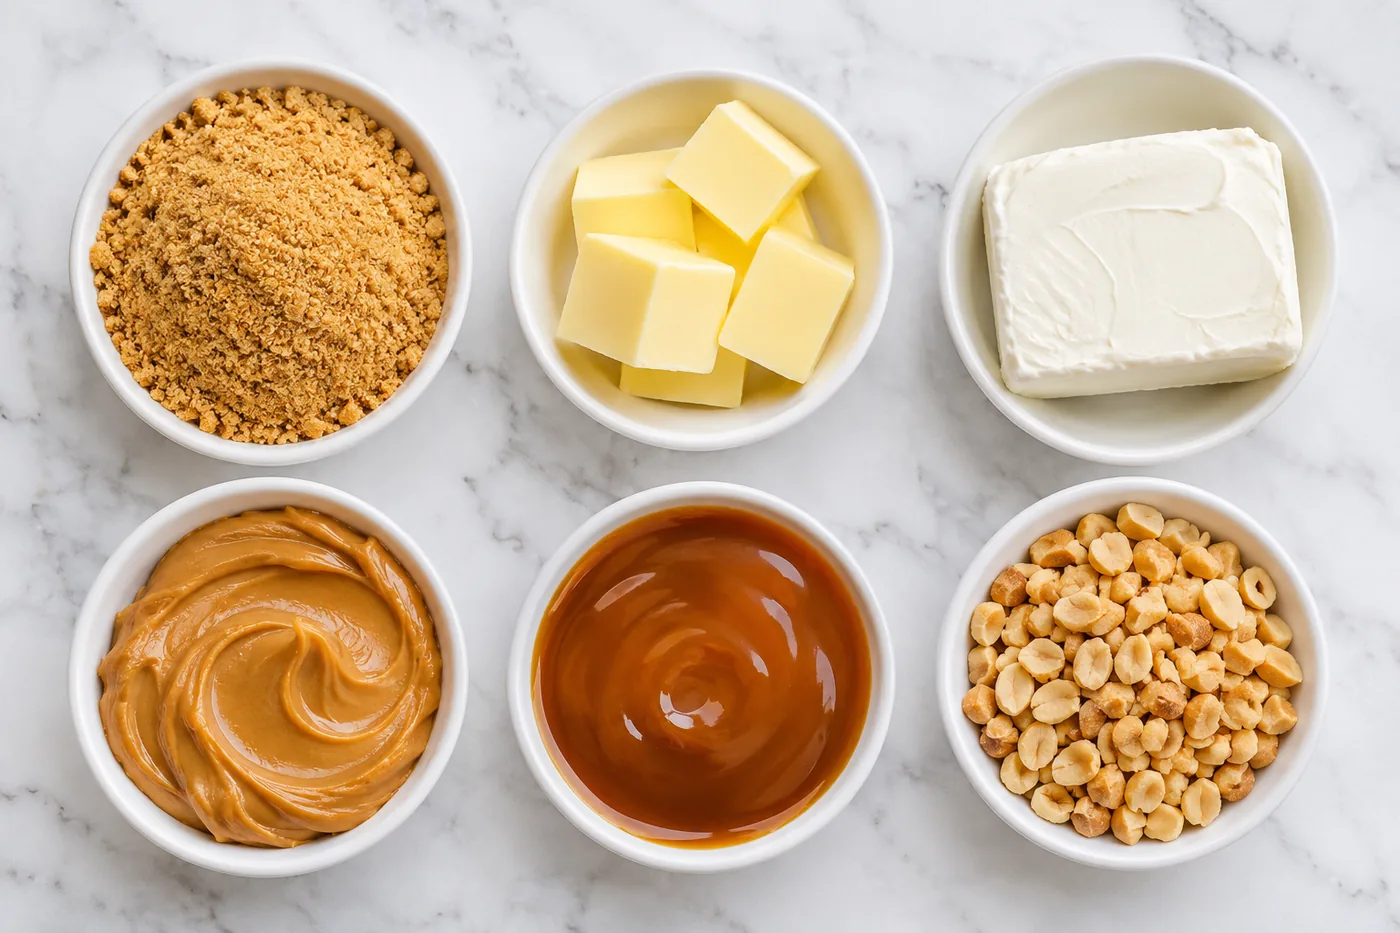
What You'll Need
- 1 cup graham cracker crumbs look for finely crushed crumbs for a smooth crust texture
- 1/4 cup granulated sugar adds sweetness to the crust; adjust based on preference
- 1/2 cup unsalted butter, melted provides richness; use unsalted for better control of salt
- 8 oz cream cheese, softened make sure it's at room temperature for easy mixing
- 1/2 cup powdered sugar adds sweetness and smoothness to the filling
- 1 tsp vanilla extract pure vanilla enhances overall flavor; avoid imitation
- 1 cup peanut butter, creamy or crunchy choose your favorite style; crunchy adds texture, creamy blends smoothly
- 1/2 cup heavy cream, cold whipping cream creates a light and airy texture in the filling
- 1/2 cup caramel sauce, store-bought or homemade homemade caramel adds a special touch, but store-bought is convenient
- 1/4 cup chopped peanuts, for garnish adds a nice crunch; use unsalted to avoid overpowering flavors
When picking up ingredients, look for high-quality peanut butter and cream cheese, as they significantly impact the flavor of these no-bake peanut caramel cheesecake bars. If you can, opt for fresh graham crackers to crush at home for the best crust texture.
Easy Substitutions
- Dairy-free: swap cream cheese for a dairy-free cream cheese — the texture will be slightly different, but it will still hold together well.
- Gluten-free: swap graham cracker crumbs for gluten-free cookie crumbs — the flavor may vary, but the crust will still be delicious.
- Lower calorie: swap heavy cream for coconut whipped cream — it will be lighter, but expect a subtle coconut flavor.
Step-by-Step Instructions
Prep the Crust
- In a medium bowl, combine 1 ½ cups of graham cracker crumbs, ¼ cup of granulated sugar, and ½ cup of melted butter. Mix until everything is well combined — it should resemble damp sand, which helps it hold together when pressed into the dish.
- Press the mixture firmly into the bottom of an 8x8 inch square baking dish. Make sure it's even, as this forms the base for your no-bake peanut caramel cheesecake bars. Chill in the refrigerator for 10 minutes to help it set before adding the filling.
Make the Cheesecake Filling
- In a large bowl, beat 16 oz of softened cream cheese, ½ cup of powdered sugar, and 1 teaspoon of vanilla extract using an electric mixer on medium speed for about 2 minutes — you want it to be smooth and creamy without lumps, which will make your filling velvety.
- Add 1 cup of creamy peanut butter to the cream cheese mixture and continue mixing for another minute until fully incorporated. The mixture should now be thick and smooth, perfect for your cheesecake layer.
- In a separate bowl, whip 1 cup of cold heavy cream until stiff peaks form, which takes about 3-4 minutes. This will give your cheesecake a light, airy texture, making each bite melt in your mouth.
- Gently fold the whipped cream into the peanut butter mixture until no streaks remain. Be careful not to deflate the whipped cream too much, as that will keep your filling light.
Assemble & Chill
- Spread the peanut butter cheesecake mixture evenly over the chilled crust, smoothing it out with a spatula. This layer should be thick and creamy, creating a wonderful contrast to the crust below.
- Drizzle caramel sauce generously over the top of the cheesecake layer. This adds a sweet, gooey finish that complements the peanut flavor beautifully.
- Sprinkle ½ cup of chopped peanuts on top of the caramel for an extra crunch — it’s visually appealing and adds texture. Cover the dish with plastic wrap and refrigerate for at least 2 hours to set. Once set, cut into bars and serve chilled. Enjoy every bite of these no-bake peanut caramel cheesecake bars!
Tips & Tricks
The Importance of Cream Cheese Temperature
Make sure your cream cheese is truly at room temperature. I’ve made the mistake of using it straight from the fridge, and the filling came out lumpy, which was a total bummer. Letting it sit on the counter for at least 30 minutes before mixing helps achieve that smooth, creamy texture we all want in our cheesecake bars.
Whipping Cream Secrets
When whipping your heavy cream, use a chilled bowl and beaters for best results. I usually pop them in the freezer for about 10 minutes before I start. This little trick helps the cream make faster and hold its shape, giving you those beautiful stiff peaks that are essential for a fluffy filling.
Pro Tips
- Use Natural Peanut Butter: Opt for natural peanut butter with minimal ingredients for a richer flavor. I made the mistake of using a processed brand once, and the texture was way too oily and sweet. Natural peanut butter has a creamier consistency that blends beautifully into the cheesecake.
- Chill the Bars Overnight: Letting the cheesecake bars chill overnight is key for the best texture. I’ve rushed it before, but the flavors really meld and the bars set perfectly after a full night in the fridge. Trust me, it’s worth the wait.
- Add Salt for Balance: A pinch of salt can enhance the sweetness and richness of the filling. I usually sprinkle a little sea salt on top before serving; it adds a lovely contrast that enhances every bite. Just a dash makes a world of difference.
- Use a Non-Stick Spray: Spraying your baking dish with non-stick spray will help you lift the bars out cleanly. I learned this the hard way when my first batch crumbled apart, leaving half stuck to the dish. A quick spray saves you from that mess!
- Top with Chopped Peanuts: Finishing the bars with chopped peanuts adds a pleasureful crunch and visual appeal. I like to toast them lightly for an extra layer of flavor. It's a simple touch that makes your no-bake peanut caramel cheesecake bars feel gourmet.
Variations & Customizations
Flavor Twists
Chocolate Lovers
Add 1/2 cup mini dark chocolate chips to the cream cheese mixture before spreading it into the crust. The bars turn into a decadent chocolate-peanut butter dream, with rich pockets of melted chocolate that create a pleasureful contrast to the creamy filling.
Banana Nut
Fold in 1 ripe banana, mashed, and 1/4 teaspoon cinnamon into the cream cheese mixture. The bars take on a sweet, fruity flavor, and the banana adds a lovely creaminess, making each bite feel like a slice of comfort.
Kid-Friendly
Funfetti Surprise
Stir in 1/4 cup rainbow sprinkles into the cream cheese mixture. These bars burst with color and whimsy, making them a hit at kids’ parties, and the sprinkles add a fun crunch that kids will love.
Storage & Meal Prep
Room Temperature
These no-bake peanut caramel cheesecake bars can sit at room temperature for about 2 hours if covered. Use an airtight container to keep them fresh and avoid any unwanted moisture.
Refrigerator
In the refrigerator, they’ll stay fresh for up to 5 days. Make sure to let them cool completely before wrapping them individually in plastic wrap or storing them in an airtight container to prevent them from drying out.
Freezer
You can freeze these bars for up to 2 months. I recommend flash freezing them on a sheet pan first, then wrapping each bar tightly in plastic wrap. To thaw, simply place them in the refrigerator overnight before enjoying.
Meal Prep
For meal prep, consider doubling the recipe to have plenty on hand for the week. Prepare them the night before you want to serve, and store them in a well-sealed container. They’ll stay fresh for up to 5 days in the fridge, making them a fantastic make-ahead treat.
Frequently Asked Questions
Can I use a different nut butter instead of peanut butter?
Yes, you can use almond butter or cashew butter for a different flavor. Just make sure it's a smooth variety to maintain the creamy texture of the cheesecake.
Why did my no-bake peanut caramel cheesecake bars turn out too soft?
If your bars are too soft, it might be due to not chilling them long enough. Make sure to let them set in the refrigerator for at least four hours for the best results.
Are these no-bake peanut caramel cheesecake bars gluten-free?
To make them gluten-free, simply choose gluten-free graham crackers for the crust. The rest of the ingredients are naturally gluten-free.
Can I make these cheesecake bars ahead of time?
Absolutely! These bars are perfect for making a day or two in advance. Just store them in an airtight container in the refrigerator until you're ready to serve.
What can I serve with no-bake peanut caramel cheesecake bars?
These bars pair wonderfully with fresh fruit, like sliced bananas or strawberries, for a refreshing contrast. A drizzle of chocolate sauce on top also adds a nice touch.
These no-bake peanut caramel cheesecake bars are a pleasureful way to indulge your sweet tooth without turning on the oven — they're rich, creamy, and always a hit at gatherings. For the best texture, let them chill overnight so they set perfectly. I can't wait for you to try this recipe; please leave a comment or share your thoughts on social media!