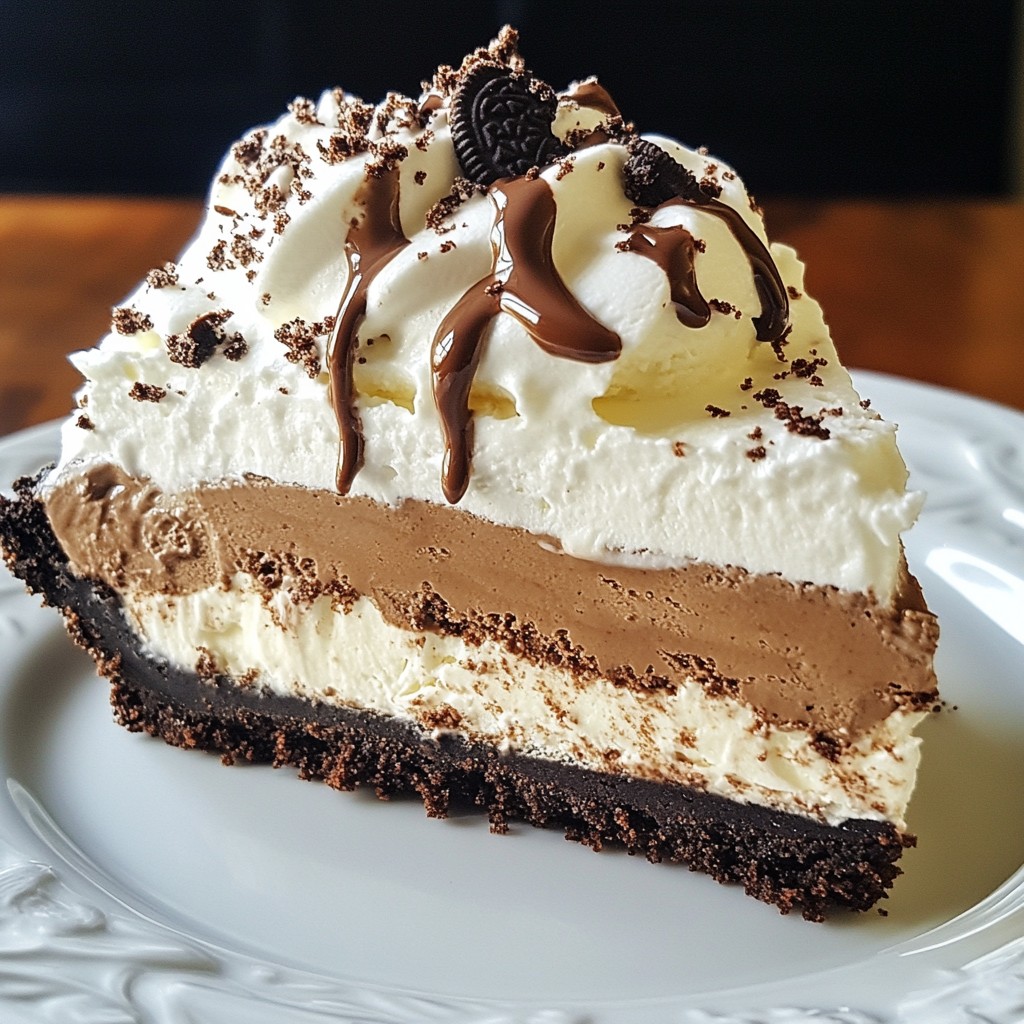
Are you ready to cool off with an easy, no-bake treat that blends rich coffee and creamy chocolate? This Mocha Oreo Ice Cream Pie is the perfect dessert for any occasion. With simple ingredients and quick steps, anyone can make this delightful pie at home. Let’s dive into how you can whip up this delicious treat that will impress your family and friends. Grab your mixing bowl and get started!
Why I Love This Recipe
- Decadent Flavor Combo: This pie perfectly blends the rich taste of chocolate with the boldness of coffee, making it an irresistible treat for dessert lovers.
- No-Bake Delight: With minimal effort, you can create a stunning dessert that requires no baking, perfect for warm days or when you want to keep the oven off.
- Versatile Presentation: Whether for a dinner party or a casual family gathering, this pie can be dressed up with garnishes, making it suitable for any occasion.
- Easy to Customize: Feel free to experiment with different ice cream flavors or toppings to make this recipe your own, ensuring it’s always a crowd-pleaser.
Ingredients
Main Ingredients for Mocha Oreo Ice Cream Pie
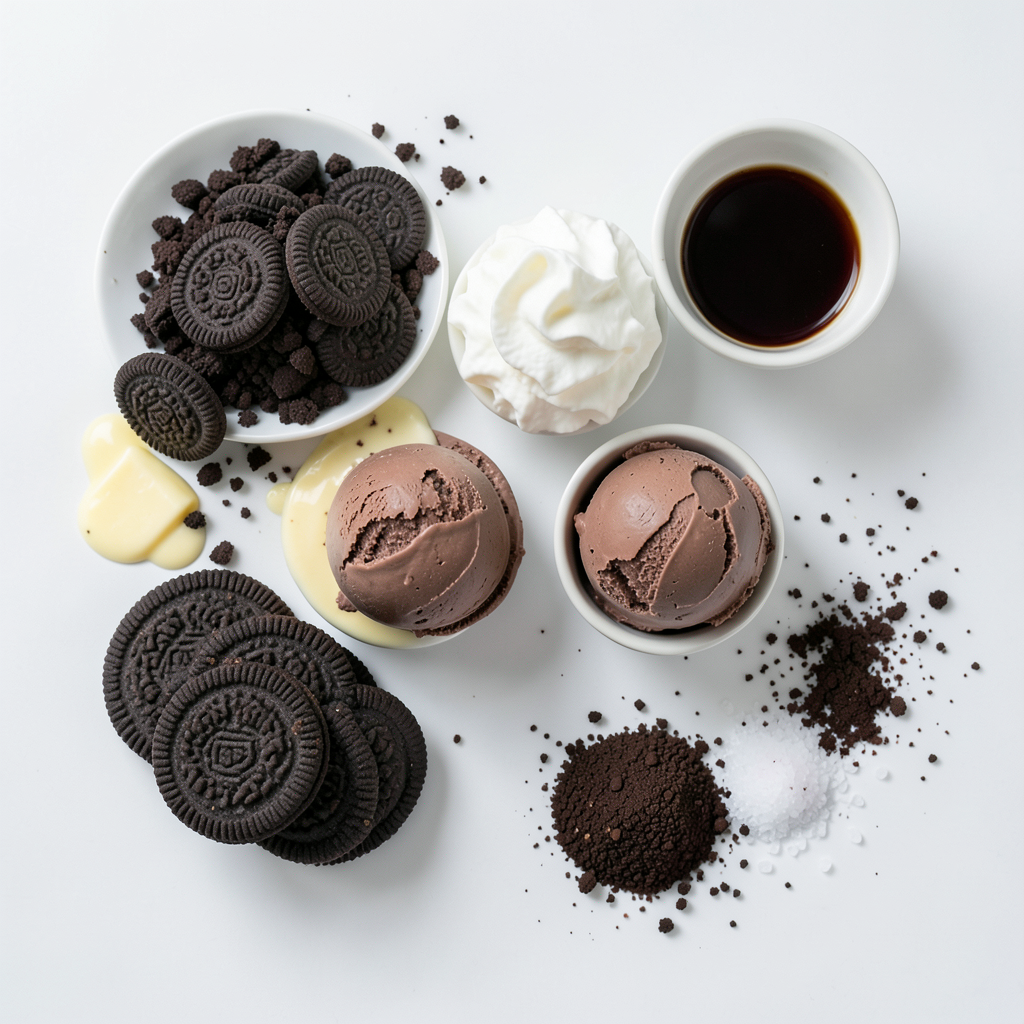
To make Mocha Oreo Ice Cream Pie, gather these key ingredients:
- 24 Oreo cookies, finely crushed
- 1/4 cup unsalted butter, melted
- 2 cups coffee ice cream
- 1 cup chocolate ice cream
- 1 cup whipped cream, divided
- 1/4 cup strong brewed coffee, cooled
- 1/4 cup chocolate syrup
- 1 tablespoon instant coffee granules
- A pinch of sea salt
- Extra Oreo crumbs for topping
Each ingredient plays a vital role in building layers of flavor. The crushed Oreos form a rich, chocolatey crust. The coffee and chocolate ice creams bring creamy texture and a boost of flavor.
Optional Garnishes and Toppings
Here are some fun ideas to enhance your pie:
- Chocolate shavings
- Sprinkles
- Chopped nuts
- Fresh mint leaves
These toppings add color and crunch. You can choose the ones you like best to make your pie look appealing.
Substitutes for Common Ingredients
If you don’t have some ingredients, here are easy swaps:
- For Oreos, use any chocolate sandwich cookies.
- Instead of unsalted butter, you can try coconut oil.
- Use vanilla ice cream if you want a different flavor.
- For whipped cream, you can substitute with cool whip.
These substitutions keep the pie yummy while offering variety. Feel free to mix and match based on what you have at home!
Step-by-Step Instructions
Preparing the Oreo Crust
First, grab a mixing bowl. You will need to combine 24 finely crushed Oreo cookies with 1/4 cup of melted unsalted butter. Stir until the crumbs look well-coated. This mix forms the tasty crust. Next, press it firmly into the bottom and up the sides of a 9-inch pie dish. Make sure it’s even. Once pressed, chill the crust in the freezer for 15 minutes. This helps it set nicely.
Layering the Coffee Ice Cream
After 15 minutes, take the crust out of the freezer. Now, you need to soften 2 cups of coffee ice cream. Let it sit for a few minutes until it’s spreadable. Once soft, layer the coffee ice cream over the crust. Smooth it out evenly using a spatula or a spoon. Return the pie to the freezer for another 15 minutes. This layer will give you a rich coffee flavor.
Mixing and Adding the Chocolate Ice Cream
Now, let’s work on the chocolate layer. In a separate bowl, slightly soften 1 cup of chocolate ice cream. This step makes it easier to mix. Add in 1/4 cup of cooled strong brewed coffee, 1 tablespoon of instant coffee granules, and a pinch of sea salt. Mix until everything is well blended. Once mixed, spread this chocolate mixture evenly over the coffee ice cream layer. Return the pie to the freezer for an additional 15 minutes. This will help the flavors meld together.
Tips & Tricks
Best Practices for a Smooth Ice Cream Layer
To get a smooth ice cream layer, softening is key. Let the ice cream sit out for a few minutes. You want it spreadable but not melted. Use an offset spatula or the back of a spoon to spread it evenly. This helps avoid lumps and keeps your layers neat.
How to Soften Ice Cream Quickly
If you need to soften ice cream fast, try this trick. Take the ice cream tub out of the freezer. Cut it into chunks using a knife. Spread the chunks on a plate. This increases the surface area and speeds up softening. Wait about five to ten minutes. You’ll get the perfect texture without waiting too long.
Freezing Techniques for Optimal Texture
To freeze your pie for the best texture, cover it well. Use plastic wrap or a lid to prevent ice crystals. Freeze it for at least four hours. This gives the flavors time to blend. If you want to keep it longer, wrap it in foil too. This helps keep it fresh and tasty.
Pro Tips
- Crust Consistency: Ensure the crust mixture is tightly packed to create a sturdy base for the pie. A well-pressed crust holds up better when slicing and serving.
- Ice Cream Softening: Let the ice cream soften for just a few minutes before layering. This makes it easier to spread without melting the layers below.
- Layering Flavors: For a more intense coffee flavor, consider adding a splash of coffee liqueur to the chocolate ice cream mixture.
- Garnishing: Use a vegetable peeler to create chocolate shavings for an elegant garnish. This adds a touch of sophistication to your dessert presentation.
Variations
Different Ice Cream Flavors to Try
You can switch up the ice cream flavors in this pie. Use mint chocolate chip for a fresh twist. Try vanilla for a lighter taste. You can even mix in caramel swirl ice cream for a fun change. Each flavor brings a new experience.
Vegan or Dairy-Free Alternatives
If you want a vegan version, use dairy-free ice cream. Look for coconut or almond milk-based ice cream. You can also use vegan whipped cream. These swaps keep the creamy texture while being plant-based. This way, everyone can enjoy this treat!
Including Different Cookie Types
Oreo cookies are great, but you can try other cookies too. Use chocolate wafer cookies for a rich base. Or, use graham crackers for a crunchier crust. You can even mix in some peanut butter cookies. Each cookie adds its own flavor to the pie!
Storage Info
Properly Storing Leftover Pie
After enjoying your Mocha Oreo Ice Cream Pie, you may have leftovers. To keep it fresh, cover the pie tightly with plastic wrap or foil. This prevents freezer burn and keeps flavors intact. Store the pie in the freezer. Proper storage will allow it to stay tasty for up to two weeks.
Freezing Tips for Extended Storage
If you want to freeze the pie for a longer time, consider slicing it first. This makes it easy to grab a piece anytime. Place each slice in an airtight container or wrap it in plastic wrap. Label the containers with the date. This way, you won’t forget how long it has been in the freezer.
How to Thaw the Ice Cream Pie
When you're ready to enjoy a slice, remove it from the freezer. Let it sit at room temperature for about 10 to 15 minutes. This helps soften the ice cream, making it easier to slice. Avoid using a microwave to thaw, as it can melt the pie unevenly. Enjoy your slice with a dollop of whipped cream on top!
FAQs
Can I make Mocha Oreo Ice Cream Pie in advance?
Yes, you can make Mocha Oreo Ice Cream Pie ahead of time. This pie is perfect for prepping a day or two before your event. Just cover it with plastic wrap once it sets. This way, flavors meld together, and you save time on the special day.
How long can I store the pie in the freezer?
You can store the pie in the freezer for up to two weeks. Just ensure it's well-wrapped to prevent freezer burn. After two weeks, the taste may change, but it should still be safe to eat.
What other toppings pair well with this recipe?
You can get creative with toppings! Here are some great options:
- Shaved chocolate
- Chopped nuts
- Fresh berries
- Caramel sauce
- A sprinkle of cocoa powder
Each topping adds a unique twist to the pie. Enjoy experimenting with flavors and textures!
You learned how to make a delicious Mocha Oreo Ice Cream Pie. We covered the best ingredients and optional toppings. I shared step-by-step instructions to help you create the perfect layers. You also received tips for smooth ice cream and storage. You can be creative with flavors or choose vegan options. This dessert is easy to prepare and fun to share. Enjoy making this treat that everyone will love!