WANT TO SAVE THIS RECIPE?
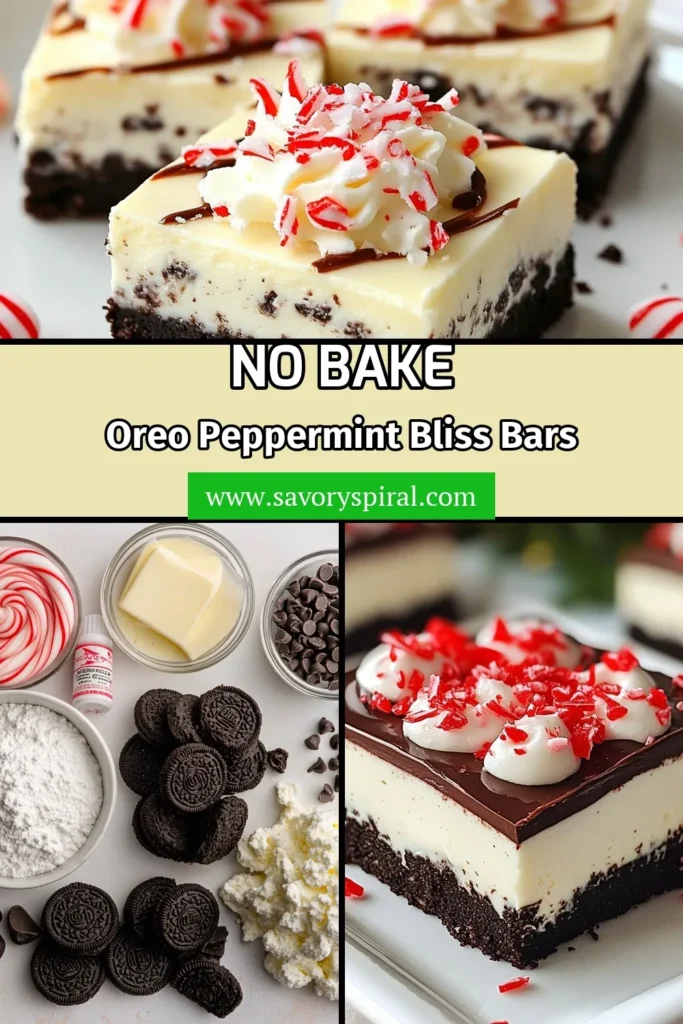
Craving a sweet, minty treat? You’re in the right place! No-Bake Peppermint Oreo Bars are easy and fun to make. With just a few simple ingredients, you’ll create a delicious dessert that everyone will love. I’ll guide you through each step so you can impress your family and friends. Grab your Oreos and let’s get started on this tasty journey!
Why I Love This Recipe
- Easy to Make: This recipe requires no baking, making it a hassle-free dessert option for any occasion.
- Festive Flavor: The combination of peppermint and chocolate creates a delightful holiday-inspired treat.
- Perfect for Sharing: Cut into bars, these are great for parties, potlucks, or simply sharing with friends and family.
- Customizable Toppings: Feel free to get creative with additional toppings like nuts, sprinkles, or different flavored candies.
Ingredients
List of Ingredients
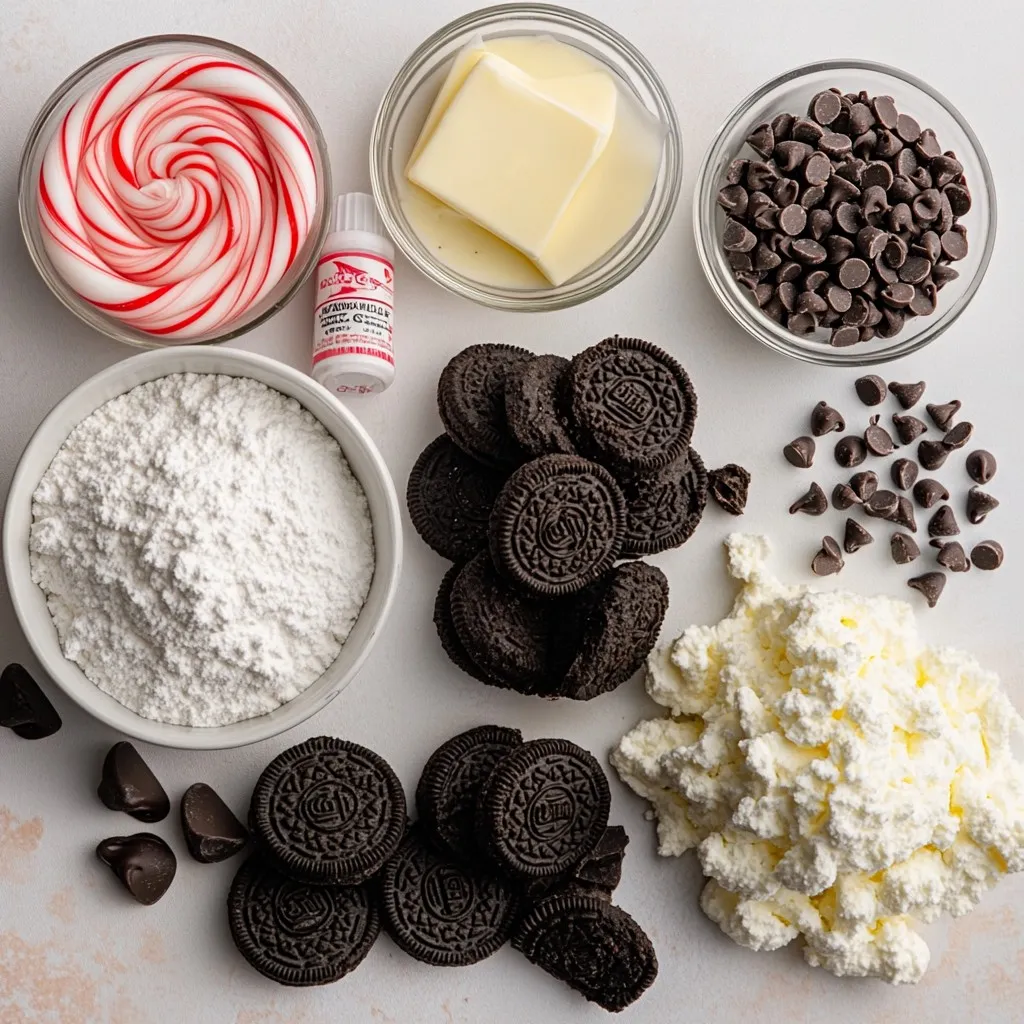
– 24 Oreo cookies, crushed
– 1/2 cup unsalted butter, melted
– 1 cup cream cheese, softened
– 1 cup powdered sugar
– 1 teaspoon peppermint extract
– 1 cup whipped topping
– 1/2 cup chocolate chips (for topping)
– 1/2 teaspoon vegetable oil (for chocolate)
– Crushed peppermint candies or candy canes (for garnish)
Ingredient Notes
Using high-quality Oreo cookies gives a richer taste. I prefer the classic Oreos, but double-stuffed can work too. The unsalted butter adds flavor and helps bind the crust. Choosing full-fat cream cheese creates a smooth and creamy filling. Powdered sugar dissolves easily, making the mix sweet and light. Peppermint extract gives that fresh, minty flavor. Whipped topping adds lightness to the filling. For the topping, I use chocolate chips for a nice contrast. The vegetable oil helps the chocolate melt smoothly.
Substitutions and Variations
If you want a gluten-free option, use gluten-free cookies. You can swap cream cheese with a dairy-free alternative for a vegan version. For a sweeter touch, add more powdered sugar to the filling. If you dislike mint, use vanilla extract instead of peppermint. You can also add crushed nuts or sprinkles for added texture. Feel free to switch up the chocolate topping with white chocolate or even caramel sauce for a fun twist!

Step-by-Step Instructions
Preparing the Oreo Crust
To start, gather your ingredients. You will need 24 Oreo cookies and 1/2 cup of melted butter.
1. Crush the Oreos: Place the Oreo cookies in a bag. Use a rolling pin to crush them. Aim for fine crumbs. You can also use a food processor for this part.
2. Mix with Butter: In a mixing bowl, combine the crushed Oreos with the melted butter. Stir until the crumbs are well coated.
3. Press into Pan: Grab an 8-inch square pan. Pour the Oreo mixture into the pan. Use your hands or the bottom of a glass to press it down firmly. This creates a solid crust for your bars.
Making the Cream Cheese Filling
Next, it’s time to make the filling. You will need 1 cup of softened cream cheese, 1 cup of powdered sugar, 1 teaspoon of peppermint extract, and 1 cup of whipped topping.
1. Beat the Cream Cheese: In a separate bowl, use an electric mixer to beat the cream cheese until it’s smooth and creamy.
2. Add Sugar and Peppermint: Gradually mix in the powdered sugar and peppermint extract. Keep mixing until everything is well blended.
3. Fold in Whipped Topping: Gently fold in the whipped topping. This makes the filling light and fluffy. Make sure it’s all mixed together without over-beating.
Assembling and Topping the Bars
Now, you will put everything together. You will also need 1/2 cup of chocolate chips and 1/2 teaspoon of vegetable oil for the topping, plus crushed peppermint candies for garnish.
1. Spread the Filling: Pour the cream cheese mixture over the Oreo crust. Spread it evenly with a spatula.
2. Melt the Chocolate: In a microwave-safe bowl, add the chocolate chips and vegetable oil. Microwave in 30-second bursts, stirring in between. Once melted, it should be smooth.
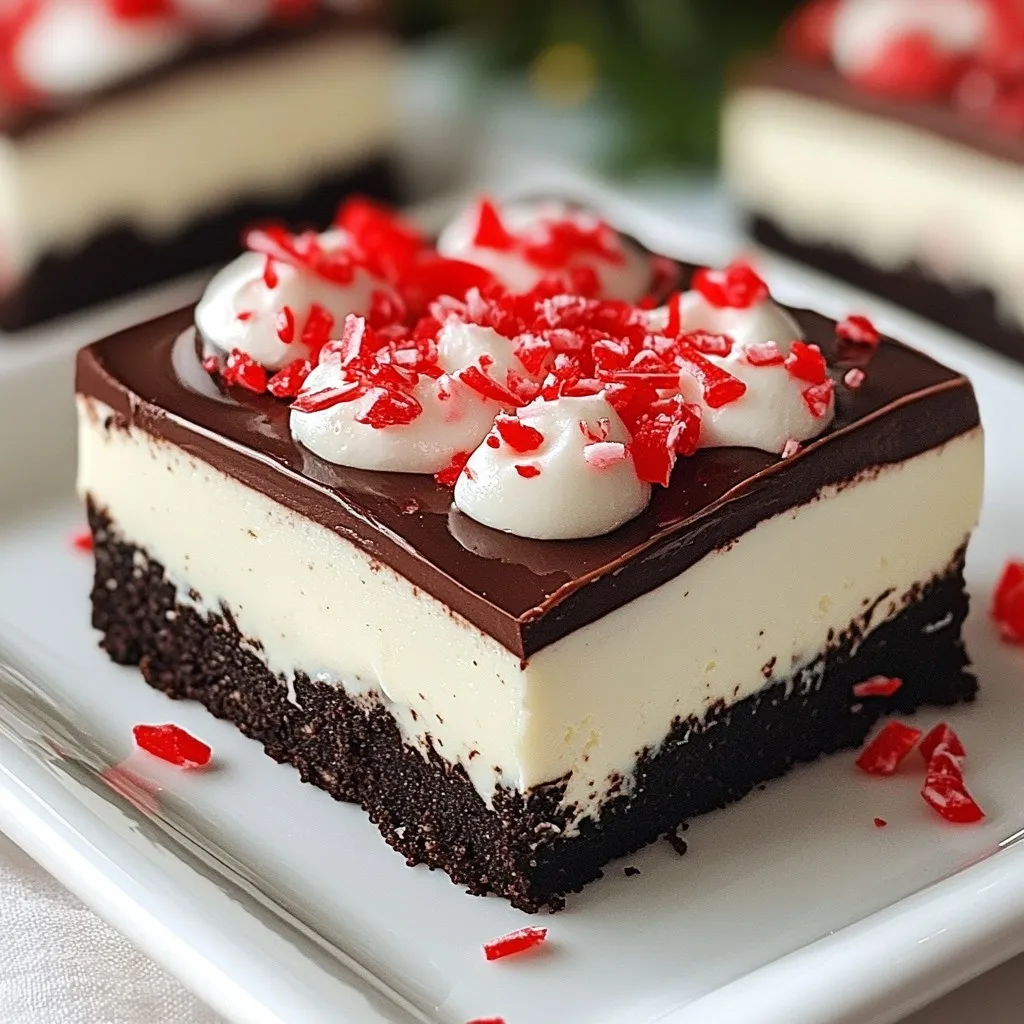
3. Drizzle the Chocolate: Drizzle the melted chocolate over the cream cheese layer. Use a spatula to spread it out if needed.
4. Add Peppermint: Sprinkle the crushed peppermint candies on top. This adds a nice crunch and a festive look.
5. Chill the Bars: Cover the pan with plastic wrap. Refrigerate for at least 4 hours or until the bars are set.
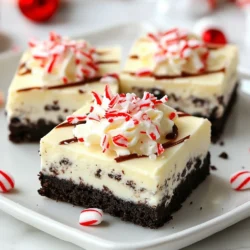
Once they are ready, cut them into squares and enjoy your delicious No-Bake Peppermint Oreo Bars!
Tips & Tricks
How to Achieve the Best Texture
To get the best texture for your No-Bake Peppermint Oreo Bars, focus on the crust. Crush the Oreo cookies finely. This gives a smooth base. Mix the crushed cookies well with melted butter. Press the mixture firmly into your pan. This step helps the crust hold together. For the cream cheese layer, make sure your cream cheese is softened. This helps it blend easily with the sugar and peppermint extract. Lastly, fold in the whipped topping gently. This keeps the filling light and airy.
Storage Tips for Freshness
To keep your bars fresh, cover them well. Use plastic wrap or a tight lid. Store them in the fridge. They stay good for about a week. If you want to keep them longer, consider freezing. Cut the bars first, then wrap them in plastic. Place them in a freezer-safe bag. They can last up to three months in the freezer. Just remember to thaw them in the fridge before serving.
Serving Suggestions
These bars are perfect for holiday gatherings. Cut them into small squares for easy serving. You can add a dollop of whipped cream on top. For more flavor, serve with hot chocolate. Try pairing them with coffee or tea for a nice touch. The bars also look great on a dessert table. Top them with extra crushed peppermint candies for a pop of color.
Pro Tips
- Use Room Temperature Ingredients: Ensure your cream cheese is at room temperature for easier mixing and a smoother filling.
- Chill Thoroughly: Allow the bars to chill for at least 4 hours to ensure they set properly and are easy to cut.
- Customize the Topping: Feel free to mix in other crushed candies or nuts into the topping for added texture and flavor.
- Perfect Chocolate Drizzle: Adding vegetable oil to the melted chocolate will help it drizzle smoothly over the bars.
Variations
Alternative Flavor Combinations
You can change these bars from peppermint to other flavors. Try using different cookies. For a twist, use chocolate sandwich cookies instead of Oreos. Swap the peppermint extract for vanilla or almond extract. You can also add other flavors. Think of using crushed cookies like ginger snaps or even chocolate mint cookies. Each change gives a new taste that keeps these bars fun!
Vegan Adaptations
Want a vegan version? It’s easy! Use vegan cream cheese and whipped topping. Replace butter with coconut oil or vegan butter. For the crust, you can find vegan cookies at stores. This way, you still enjoy the great taste without animal products. Just ensure all your ingredients are vegan-friendly.
Allergy-Friendly Options
If you have allergies, you can modify the recipe. Use gluten-free cookies to make it safe for those with gluten issues. For nut allergies, check that all your ingredients are nut-free. To keep it dairy-free, use a plant-based cream cheese. You can make this treat work for many diets. Just be careful about checking labels to avoid allergens.
Storage Info
How to Store Leftover Bars
After making the No-Bake Peppermint Oreo Bars, you might have leftovers. To keep them fresh, cover the pan with plastic wrap. You can also transfer the bars to an airtight container. Make sure to place a layer of parchment paper between layers if stacking them. This keeps the bars from sticking together.
Freezing Instructions
You can freeze these bars for later enjoyment. First, cut them into pieces. Wrap each piece in plastic wrap. Then, place them in a freezer-safe bag or container. Make sure to remove as much air as possible to avoid freezer burn. They can last up to three months in the freezer. When ready to eat, thaw them in the fridge overnight.
Shelf Life Tips
These bars are best enjoyed fresh but can last for about a week in the fridge. Store them in an airtight container to keep them moist. If you notice any signs of drying out or off smells, it’s best to discard them. Always check for freshness before serving, especially if they have been stored for a while.
FAQs
Can I use different cookies for the crust?
Yes, you can use other cookies. Try chocolate wafer cookies or graham crackers. They both work well. Just crush them the same way. Keep the melted butter amount the same. This change can give your bars a new flavor twist!
How long do No-Bake Peppermint Oreo Bars last?
These bars last for about one week in the fridge. Store them in an airtight container. They stay fresh and tasty. If you want to keep them longer, consider freezing them. They can last up to three months in the freezer.
Can I make these bars ahead of time?
You can make these bars a day or two in advance. This helps the flavors blend. Just cover them well and chill in the fridge. The longer they sit, the better they taste. Enjoy them at your next gathering or holiday party!
You learned about making No-Bake Peppermint Oreo Bars from start to finish. We covered the key ingredients, from the Oreo crust to the filling. You now know how to assemble and add toppings. Tips and tricks help you get the best texture and freshness. Plus, we explored fun variations and storage methods.
Try these bars for a fun treat. They are easy to make and delicious. Enjoy sharing them with friends and famil
No-Bake Peppermint Oreo Bars
Delicious and festive no-bake bars made with Oreo cookies, cream cheese, and peppermint.
Prep Time 20 minutes mins
Total Time 4 hours hrs 20 minutes mins
Course Dessert
Cuisine American
Servings 16
Calories 200 kcal
- 24 cookies Oreo cookies, crushed
- 0.5 cup unsalted butter, melted
- 1 cup cream cheese, softened
- 1 cup powdered sugar
- 1 teaspoon peppermint extract
- 1 cup whipped topping
- 0.5 cup chocolate chips (for topping)
- 0.5 teaspoon vegetable oil (for chocolate)
- 1 cup crushed peppermint candies or candy canes (for garnish)
In a mixing bowl, combine the crushed Oreo cookies and melted butter until well blended.
Press the Oreo mixture firmly into the bottom of an 8-inch square pan to create a crust.
In a separate bowl, beat the softened cream cheese with an electric mixer until smooth.
Gradually add the powdered sugar and peppermint extract to the cream cheese, mixing until well combined.
Fold in the whipped topping gently until fully integrated, creating a smooth filling.
Spread the cream cheese mixture evenly over the Oreo crust in the pan.
In a microwave-safe bowl, combine the chocolate chips and vegetable oil. Microwave in 30-second intervals, stirring in between, until melted and smooth.
Drizzle the melted chocolate over the cream cheese layer, using a spatula to spread it evenly if necessary.
Sprinkle crushed peppermint candies or candy canes over the top for a festive touch.
Cover the pan with plastic wrap and refrigerate for at least 4 hours or until set.
Once set, cut into bars and serve chilled.
Best served chilled after refrigeration.
Keyword dessert, no-bake, Oreo, peppermint
WANT TO SAVE THIS RECIPE?