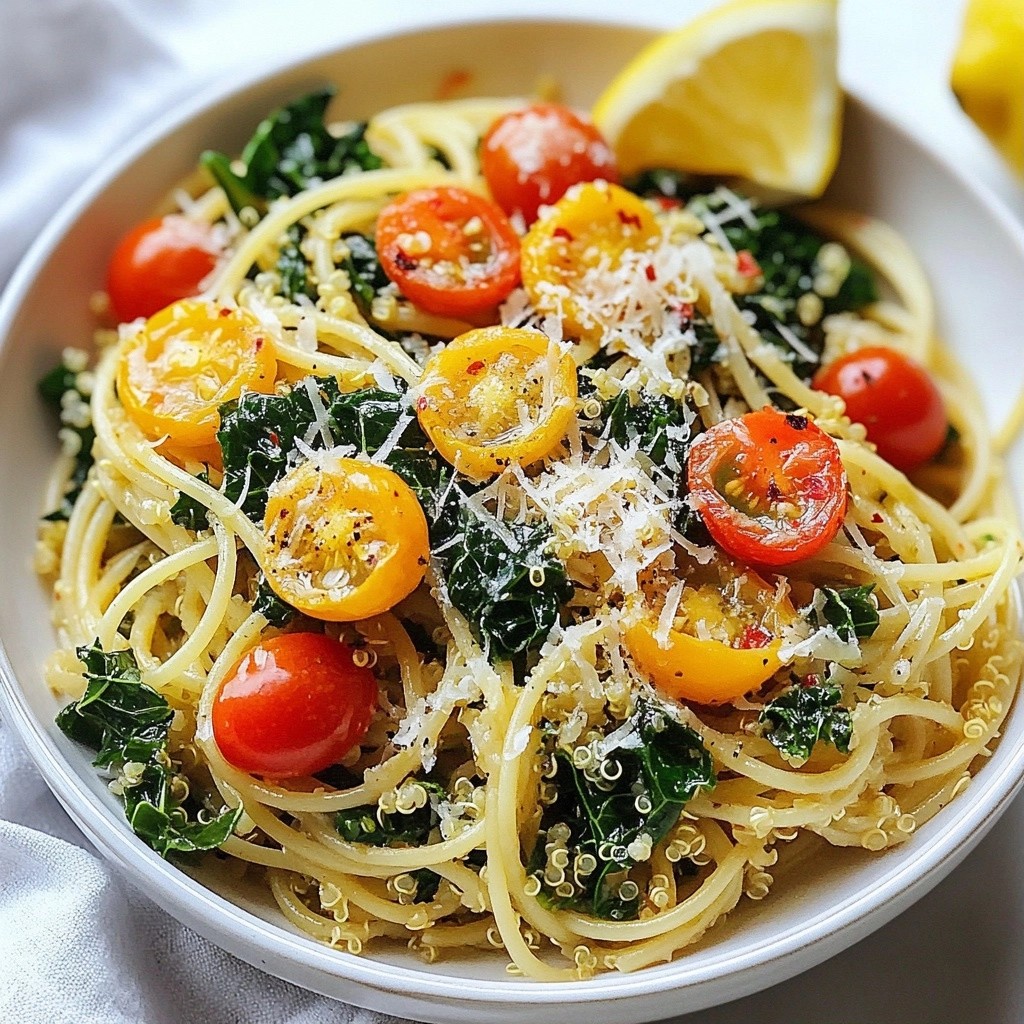
Are you ready to enjoy a hearty meal in under 30 minutes? Skillet Lasagna Roll Ups are quick, tasty, and perfect for busy weeknights. This dish combines creamy ricotta, flavorful marinara, and gooey mozzarella, all wrapped up in lasagna noodles. Whether you're cooking for family or trying to impress guests, this recipe is a surefire hit. Let’s dive into the ingredients and get started on this easy comfort food!
Why I Love This Recipe
- Comforting and Delicious: This skillet lasagna roll-up recipe combines all the comforting flavors of traditional lasagna in a fun, easy-to-eat format.
- Quick and Easy Prep: With only 20 minutes of prep time, this recipe is perfect for busy weeknights when you want a hearty meal without spending hours in the kitchen.
- Customizable: You can easily modify the filling by adding your favorite vegetables or protein, making it a versatile dish to suit your taste preferences.
- One-Pan Wonder: Cooking everything in one skillet means less cleanup, allowing you to enjoy your meal without worrying about a pile of dishes afterwards.
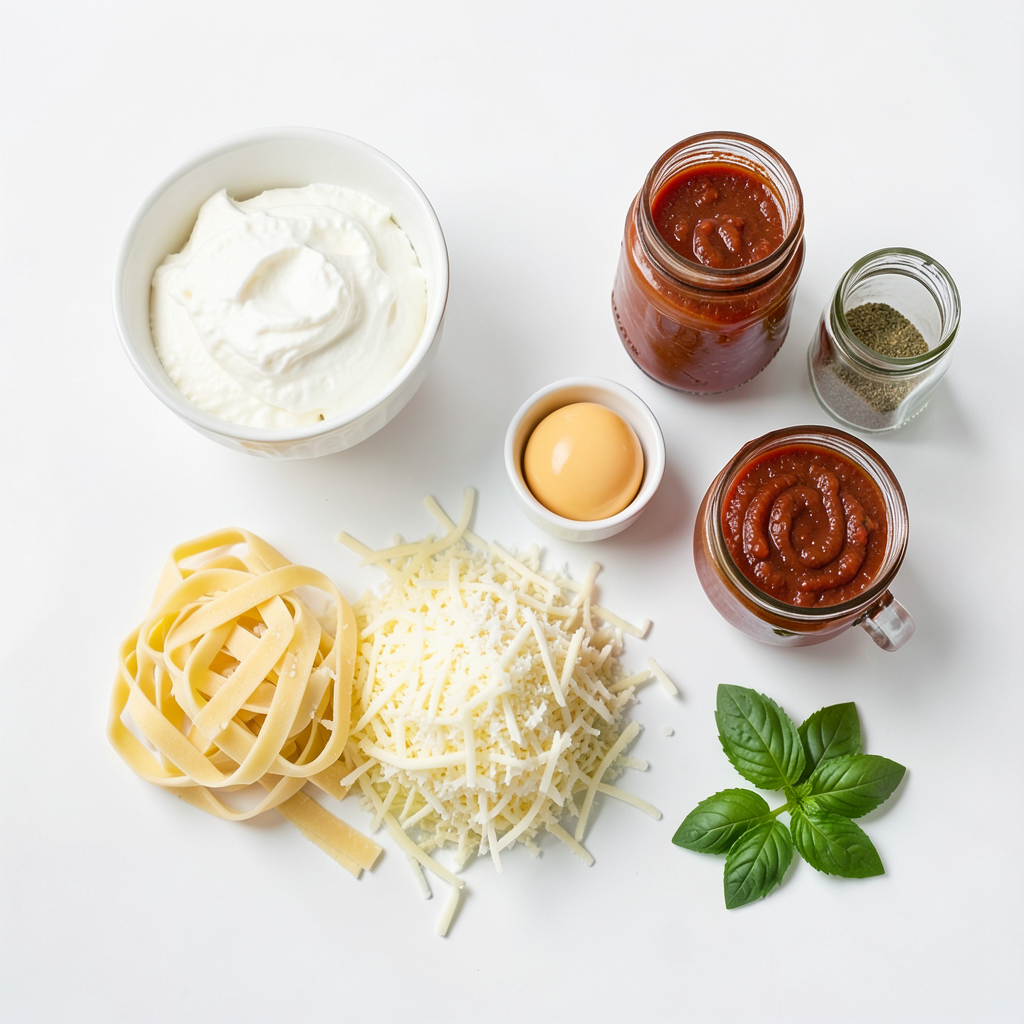
Ingredients
List of Ingredients
- 8 lasagna noodles
- 2 cups ricotta cheese
- 1 cup shredded mozzarella cheese
- 1/2 cup grated Parmesan cheese
- 1 egg, beaten
- 2 cups marinara sauce
- 1 tablespoon olive oil
- 1 teaspoon dried oregano
- 1 teaspoon garlic powder
- Salt and pepper to taste
- Fresh basil leaves for garnish
Optional Ingredients
- Extra cheese varieties
- Vegetables to add in
For this recipe, I love using fresh ingredients. Fresh basil adds a great touch. You can mix in extra cheeses like provolone or gouda for more flavor. If you want to boost nutrition, add veggies. Spinach or zucchini works well. Just chop them small and mix into the cheese.
This list makes it easy to gather everything before you cook. It helps to have all your ingredients ready. This way, you can focus on making your skillet lasagna roll-ups. Cooking is fun, and having good ingredients makes it even better!
Step-by-Step Instructions
Cooking the Lasagna Noodles
To cook the noodles al dente, bring a large pot of salted water to a boil. Add the lasagna noodles and cook for about 8-10 minutes. Check them a minute before the time is up. They should be firm but not hard. Drain the noodles in a colander and rinse them under cold water. This stops the cooking and keeps them from sticking.
Preparing the Cheese Mixture
In a mixing bowl, combine 2 cups of ricotta cheese, half of the mozzarella cheese, and 1/2 cup of grated Parmesan cheese. Add in one beaten egg, 1 teaspoon of dried oregano, and 1 teaspoon of garlic powder. Season with salt and pepper. Mix everything well until smooth. You want it creamy but thick enough to spread easily.
Assembling the Roll Ups
Take one lasagna noodle and spread about 2 tablespoons of the cheese mixture across its length. Carefully roll it up and place it seam-side down in a large skillet. Repeat this with the rest of the noodles and cheese mixture. Make sure they fit snugly in the skillet for even cooking.
Cooking in the Skillet
Spread a thin layer of marinara sauce on the bottom of the skillet over medium heat. Once all the roll-ups are in, pour the remaining marinara sauce over them. Sprinkle the rest of the mozzarella cheese on top. Cover the skillet with a lid. Cook on low heat for 15-20 minutes, or until the cheese is melted and bubbly. Remove from heat and let it sit briefly. Enjoy the delicious flavors!
Tips & Tricks
Best Practices for Even Cooking
Covering your skillet is key. It helps the heat stay inside and cook the roll-ups evenly. When you cover the skillet, the cheese melts nicely and bubbles up. Check the roll-ups after 15 minutes. You want the cheese to be melted and gooey. If it looks bubbly, it’s done!
Presentation Ideas
Serving the roll-ups right from the skillet adds a cozy touch. It feels homey and welcoming. If you want to impress, plate them individually. Drizzle some warm marinara sauce over each roll-up. Add a sprinkle of cheese and fresh basil for a pop of color. This makes your meal look beautiful and tasty.
Make-Ahead Tips
You can prep ingredients ahead of time. Cook the noodles and mix the cheese filling a day in advance. Store them in the fridge until you’re ready to cook. For storing roll-ups, place them in an airtight container. They stay fresh for up to three days. This makes weeknight dinners quick and easy!
Pro Tips
- Use Fresh Herbs: Fresh basil adds a burst of flavor at the end; don’t skip this garnish for a fresh taste.
- Cook Noodles Al Dente: Cooking the lasagna noodles slightly firmer than usual helps them hold up during rolling and prevents them from becoming mushy.
- Experiment with Cheeses: Try adding ricotta with herbs or a mix of different cheeses for a richer flavor profile.
- Let it Rest: Allow the skillet lasagna to sit after cooking for a few minutes; this helps it set and makes serving easier.
Variations
Meat Lover’s Skillet Lasagna Roll Ups
You can easily make your skillet lasagna roll ups meatier. Simply add ground beef or sausage to the cheese mixture. Cook the meat in a pan until it’s brown, then mix it into the ricotta blend. This adds flavor and protein. You now have a hearty meal.
Vegetable Skillet Lasagna Roll Ups
For a fresh twist, add vegetables! Spinach, zucchini, or mushrooms work well. Sauté the vegetables first to soften them. Mix them into the cheese filling for added color and taste. This option is great for veggie lovers and adds nutrients to your meal.
Gluten-Free Alternatives
If you need gluten-free options, use gluten-free lasagna noodles. They are easy to find at grocery stores. Make sure to follow the cooking instructions on the package. You can also switch to dairy-free cheese if you avoid dairy. This keeps the dish tasty and suitable for different diets.
Storage Info
How to Store Skillet Lasagna Roll Ups
To keep your Skillet Lasagna Roll Ups fresh, follow these steps:
- Refrigeration guidelines: Place any leftover roll-ups in an airtight container. They can stay in the fridge for up to 3 days. Make sure they are cooled before sealing the container. This helps keep them from getting soggy.
- Freezing for long-term storage: If you want to store them longer, freeze the roll-ups. First, let them cool completely. Then, wrap each roll-up in plastic wrap, and place them in a freezer-safe bag. They will last for about 2 months. When ready to eat, thaw and reheat.
Reheating Techniques
When it’s time to enjoy your leftovers, use these methods:
- Best methods for reheating: The best way to reheat is in the oven. Preheat your oven to 350°F. Place the roll-ups in a baking dish, cover with foil, and bake for about 20 minutes. This keeps them warm and helps melt the cheese without drying them out.
- Ensuring texture remains: If you use the microwave, heat in short bursts. Start with one minute, then check. Add a splash of marinara sauce to keep them moist. This helps the roll-ups stay soft and tasty.
FAQs
Can I use no-boil lasagna noodles?
Yes, you can use no-boil lasagna noodles. They save time and effort. These noodles cook while baking. However, they may absorb more sauce, making the dish drier. You can add extra marinara sauce to keep it moist. If you choose this option, check the cooking time. Follow the package instructions for best results.
What can I serve with Skillet Lasagna Roll Ups?
You can serve many tasty sides with these roll-ups. Here are some great options:
- Garlic bread
- A simple green salad
- Roasted vegetables
- Steamed broccoli
- Caesar salad
These sides add freshness and balance to your meal.
How long does it take to cook in the skillet?
Cooking in the skillet takes about 15-20 minutes. Make sure to cover the skillet. This helps the cheese melt evenly. After cooking, let it sit for a few minutes. This allows the flavors to set and makes serving easier.
In this blog post, we explored the tasty world of skillet lasagna roll-ups. We covered the key ingredients needed, from lasagna noodles to cheeses and sauces. I shared step-by-step instructions, useful tips, and creative variations for everyone. Finally, we discussed storage methods and answered common questions.
Skillet lasagna roll-ups are not only easy to make, but they also let you get creative with flavors. Enjoy your cooking journey!