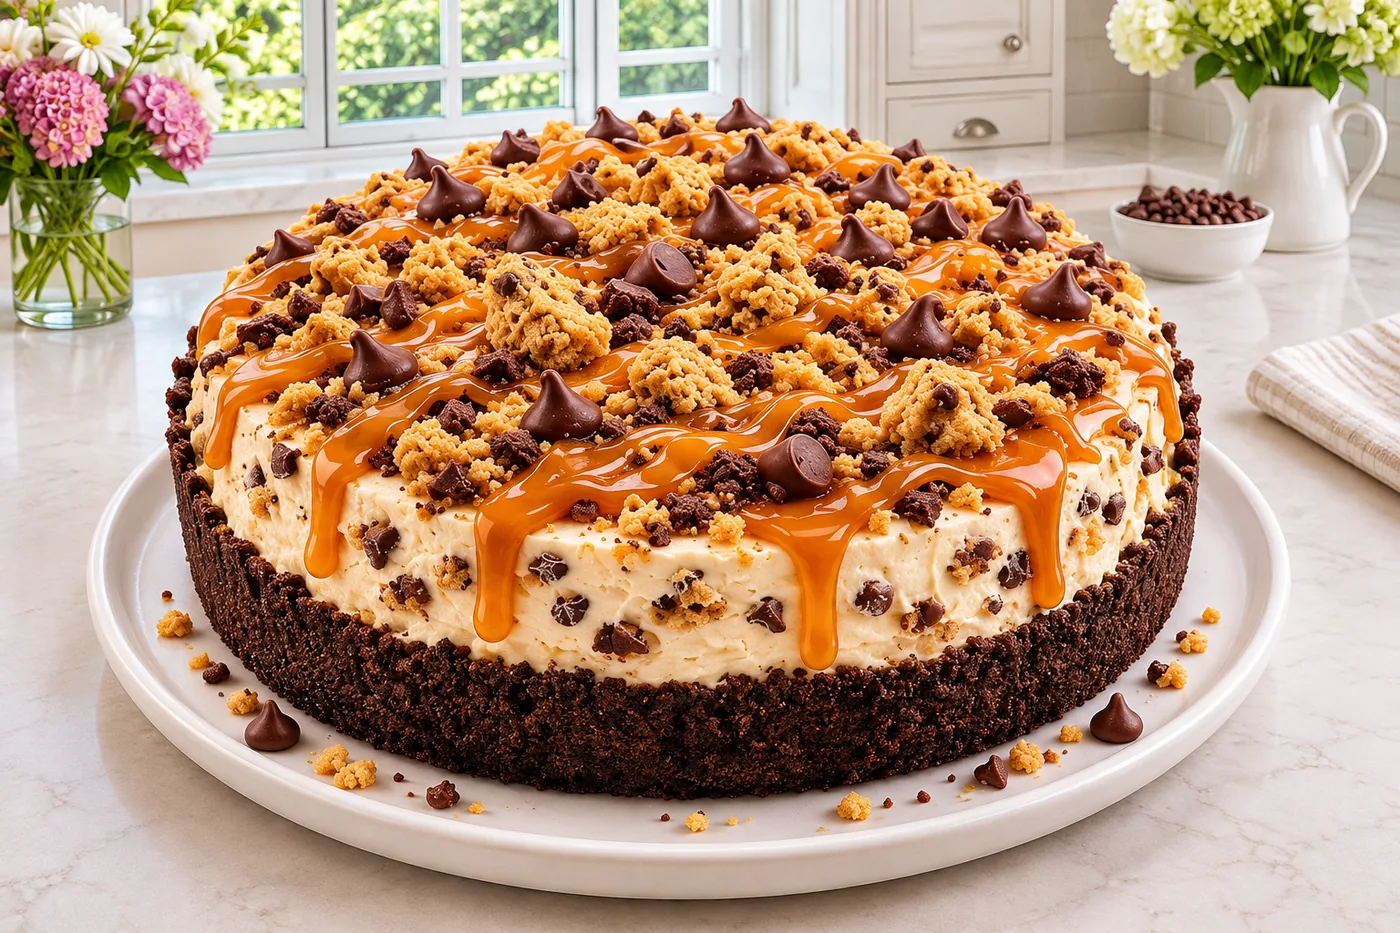
I remember the first time I bit into a slice of no-bake caramel chocolate chip cookie cheesecake. The creamy texture, sweet caramel, and gooey chocolate chips were pure bliss, and I knew I had to recreate it at home.
What sets this recipe apart is the delightful crunch of cookie crumbs mixed with a smooth cream cheese filling, making every bite a perfect balance of textures and flavors.
Why This Recipe Works
- Cream cheese provides structure: The cream cheese gives the cheesecake its rich, creamy texture while helping it hold its shape without baking. I found that using softened cream cheese made it easier to blend smoothly, creating that smooth mouthfeel we crave.
- Heavy cream adds lightness: Incorporating chilled heavy cream into the mixture creates a fluffy texture. Whipping it to soft peaks before folding in helps trap air, making the cheesecake light yet decadent. I learned that over-whipping can lead to a grainy texture, so keep an eye on it!
- Caramel sauce enhances flavor depth: The addition of caramel sauce not only sweetens the cheesecake but also adds a complex layer of flavor. It melds beautifully with the cream cheese, making each bite a pleasureful contrast of sweet and creamy. I drizzled extra caramel on top for that inviting, sticky finish.
- Chocolate chip cookies create a crunchy base: Crushed chocolate chip cookies provide a satisfying crunch that balances the smooth filling. The buttery flavor from the cookies complements the caramel and cream cheese perfectly. I tried using different cookie brands and found that the classic chocolate chip gave the best flavor.
Ingredients
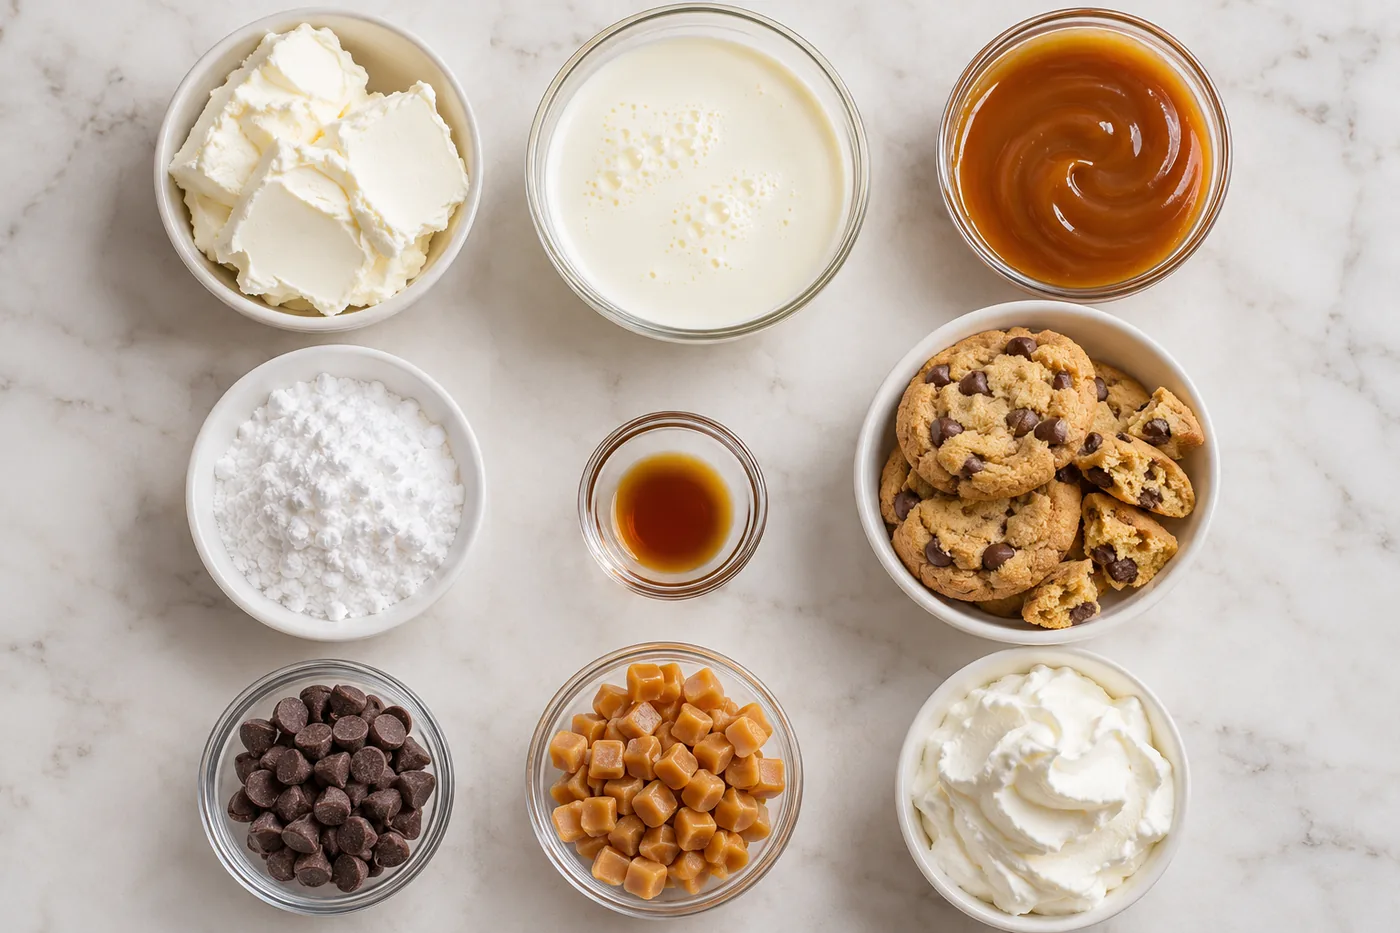
What You'll Need
- 1 cup cream cheese, softened choose full-fat for creaminess; it’s the base of your cheesecake filling.
- 1 cup heavy cream, chilled whipping cream gives stability and volume, creating a light texture.
- 1/2 cup caramel sauce, plus extra for drizzling store-bought or homemade; makes the cheesecake sweet and decadent.
- 1/2 cup powdered sugar, sifted sifting prevents clumping and ensures a smooth filling.
- 1 tsp vanilla extract pure vanilla enhances all flavors; avoid imitation for best results.
- 1 cup chocolate chip cookies, crushed use your favorite brand for flavor; they provide the crust and texture.
- 1/4 cup chocolate chips, for topping semi-sweet chips balance the sweetness of the cheesecake.
- 1/4 cup caramel bits, optional for garnish adds extra caramel flavor if you want more sweetness.
- 1/2 cup whipped cream, for topping homemade or store-bought; it adds a light, fluffy finish.
When picking out cream cheese, look for a brand that’s rich and creamy for the best texture. High-quality chocolate chips make a big difference in flavor, so splurge a little on those. The no-bake caramel chocolate chip cookie cheesecake truly shines with fresh ingredients.
Easy Substitutions
- Dairy-free: swap cream cheese for a dairy-free cream cheese — the flavor will be slightly different but still creamy.
- Gluten-free: swap regular chocolate chip cookies for gluten-free cookies — this keeps the flavor intact while making it suitable for those with gluten sensitivities.
- Lower calorie: swap heavy cream for a lighter whipped topping — the texture will be less rich, but it will cut calories significantly.
Step-by-Step Instructions
Prep & Mix
- In a mixing bowl, combine the softened cream cheese and powdered sugar. Beat with an electric mixer on medium speed for 2 minutes until smooth — this helps create a creamy base without lumps.
- Add the chilled heavy cream and vanilla extract to the cream cheese mixture. Beat on high speed for 3-4 minutes until thick and fluffy, achieving that light and airy texture that makes the cheesecake tempting.
- Fold in the 1/2 cup of caramel sauce gently with a spatula until just combined, ensuring you maintain the fluffy texture while adding a rich, sweet flavor.
Layer & Chill
- In a 9-inch springform pan, layer half of the crushed chocolate chip cookies evenly on the bottom. This forms a solid base that adds a pleasureful crunch to the cheesecake.
- Spread half of the cream cheese mixture over the cookie layer, smoothing it out with a spatula. Make sure to cover the cookies completely for even flavor throughout the cheesecake.
- Repeat the layering process with the remaining cookies and cream cheese mixture, creating distinct layers that will look beautiful when sliced.
- Refrigerate the cheesecake for at least 2 hours to set. This waiting period allows the flavors to meld beautifully and the cheesecake to firm up, so it slices cleanly.
Serve & Enjoy
- Once set, top with whipped cream, chocolate chips, and drizzle extra caramel sauce over the top to introduce extra sweetness and texture. The contrast of the creamy cheesecake and crunchy toppings is divine.
- Slice the cheesecake and serve immediately. The moment you cut through, you’ll see those beautiful layers, making it a showstopper at any gathering.
Tips & Tricks
Choose the Right Caramel Sauce
I recommend using a thick, high-quality caramel sauce for this no-bake caramel chocolate chip cookie cheesecake. Thin sauces can lead to a soggy base, which makes the layers lose their distinctness. If you have time, making your own caramel can be a fun project and adds a personal touch. Just be sure to let it cool completely before incorporating it into your cheesecake mixture.
Chill Out for Best Results
After assembling your cheesecake, give it plenty of time to chill in the refrigerator. I usually let mine sit overnight if I can resist the temptation! This helps the layers set properly and makes slicing easier. If you’re in a hurry, at least aim for 4-6 hours of chilling; otherwise, you risk it being too soft and messy when you cut into it.
Pro Tips
- Use room temperature cream cheese: Starting with room temperature cream cheese ensures a smooth and lump-free mixture. I made the mistake of using cold cream cheese once, and the texture was grainy, which ruined the cheesecake's creamy consistency.
- Chill your mixing bowl: Chilling your mixing bowl before whipping the cream can help achieve stiffer peaks. I often place my mixing bowl in the freezer for about 10 minutes; it makes a noticeable difference in the texture of the whipped cream.
- Layer with purpose: When layering your cheesecake, make sure to press down gently after each layer. This helps to eliminate air pockets and ensures a more cohesive slice when serving; I learned this the hard way when my first cheesecake fell apart!
- Use a food processor for cookies: Crushing chocolate chip cookies in a food processor creates a finer crumb, which leads to a better texture in your crust. I used to crush them by hand, but the uniformity from a processor makes all the difference.
- Let flavors meld overnight: For the best flavor, let your cheesecake chill overnight before serving. It allows the caramel and cream cheese flavors to deepen; trust me, the wait is worth it!
Variations & Customizations
Flavor Twists
Peanut Butter Delight
Fold in 1/2 cup creamy peanut butter after mixing the cream cheese and powdered sugar. This adds a rich, nutty flavor that complements the sweetness of the caramel, resulting in a denser, almost protein bar-like texture.
Mint Chocolate Chip
Add 1/2 teaspoon peppermint extract to the vanilla extract for a refreshing twist. The cheesecake takes on a cool, minty flavor, while the chocolate chips provide delightful bursts of sweetness, making each bite feel like a rich dessert after a fresh mint.
Seasonal Versions
Pumpkin Spice Cheesecake
Mix in 1/2 cup pumpkin puree and 1 teaspoon pumpkin pie spice with the cream cheese and powdered sugar. This variation creates a beautifully spiced cheesecake that captures the essence of fall, with warm, cozy flavors and a lovely orange hue.
Storage & Meal Prep
Room Temperature
You can keep your no-bake caramel chocolate chip cookie cheesecake at room temperature for up to 2 hours. Make sure to store it in an airtight container to prevent it from drying out or absorbing any odors from the kitchen.
Refrigerator
In the refrigerator, it will stay fresh for about 5 days. Use a tightly sealed container, and make sure the cheesecake has completely cooled before placing it inside. I recommend wrapping it in plastic wrap if you have individual slices, to keep them moist.
Freezer
For longer storage, you can freeze the cheesecake for up to 2 months. Flash freeze individual slices on a sheet pan first, then wrap each slice in plastic wrap and place them in a freezer-safe container. To thaw, simply transfer the slices to the refrigerator for a few hours or overnight.
Meal Prep
I suggest doubling the recipe for gatherings or meal prep. You can prepare it the night before and store it in the fridge, where it will stay fresh for up to 5 days. Use a glass container with a tight-fitting lid for best results. No need to reheat; just enjoy it cold!
Frequently Asked Questions
Can I use a different type of cheese instead of cream cheese?
Yes, you can use mascarpone cheese for a richer flavor and creamier texture. Just keep in mind that this may alter the overall taste and structure of your cheesecake.
What should I do if my cheesecake is too soft?
If your cheesecake turns out too soft, it may need more chilling time. You can also try adding a bit of powdered sugar to help stabilize it.
How can I make this recipe gluten-free?
To make a gluten-free version, use gluten-free cookie crumbs for the crust. Many brands offer gluten-free options that work just as well as traditional cookies.
Can I add fruit to my no-bake caramel chocolate chip cookie cheesecake?
Absolutely! Sliced bananas or fresh berries can add a nice touch of flavor and color. Just be sure to layer them on top or fold them in gently to avoid overpowering the cheesecake.
How long can I keep leftovers in the fridge?
Leftover cheesecake can be stored in the refrigerator for up to five days. Just cover it well to prevent it from absorbing any other odors in the fridge.
This no-bake caramel chocolate chip cookie cheesecake is the ultimate crowd-pleaser, with layers of creamy goodness and decadent flavors that will leave everyone asking for seconds. For an extra touch, try adding a sprinkle of sea salt on top before serving to balance the sweetness. I can't wait for you to make this — share your experience in the comments or pin it for later!