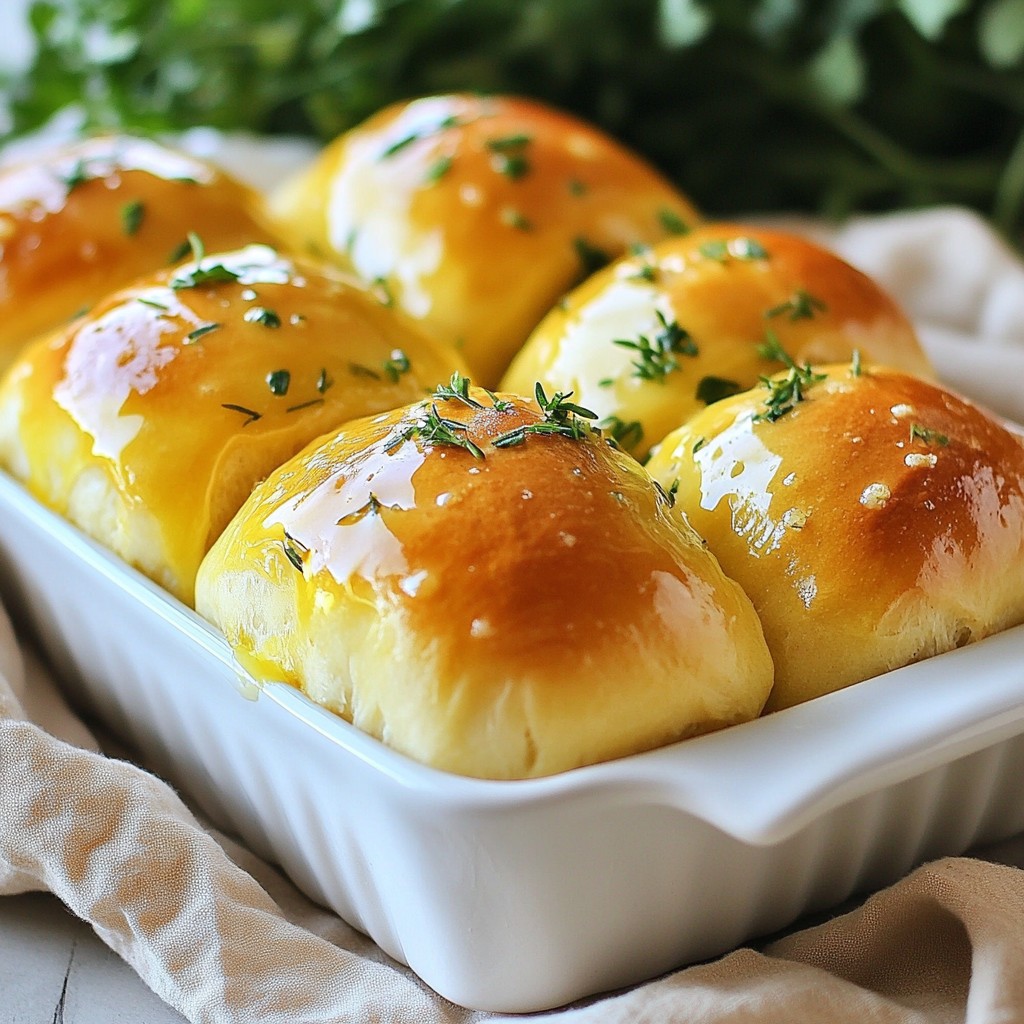
If you crave warm, buttery rolls bursting with flavor, these Garlic Herb Dinner Rolls are for you. Imagine soft, savory bites made with fresh garlic and herbs, perfect for any meal. In this easy recipe, you'll learn how to create delightful rolls that impress your guests. Let’s dive into the ingredients and steps to make these mouthwatering treats right at home!
Why I Love This Recipe
- Comforting Aroma: The fragrant blend of garlic and fresh herbs fills your kitchen with a warm, inviting scent.
- Perfectly Soft Texture: These rolls bake up light and fluffy, making them the ideal accompaniment to any meal.
- Versatile Serving Options: Enjoy them as a side dish, appetizer, or even as a base for sliders.
- Easy to Make: With simple ingredients and straightforward steps, these rolls are achievable even for beginner bakers.
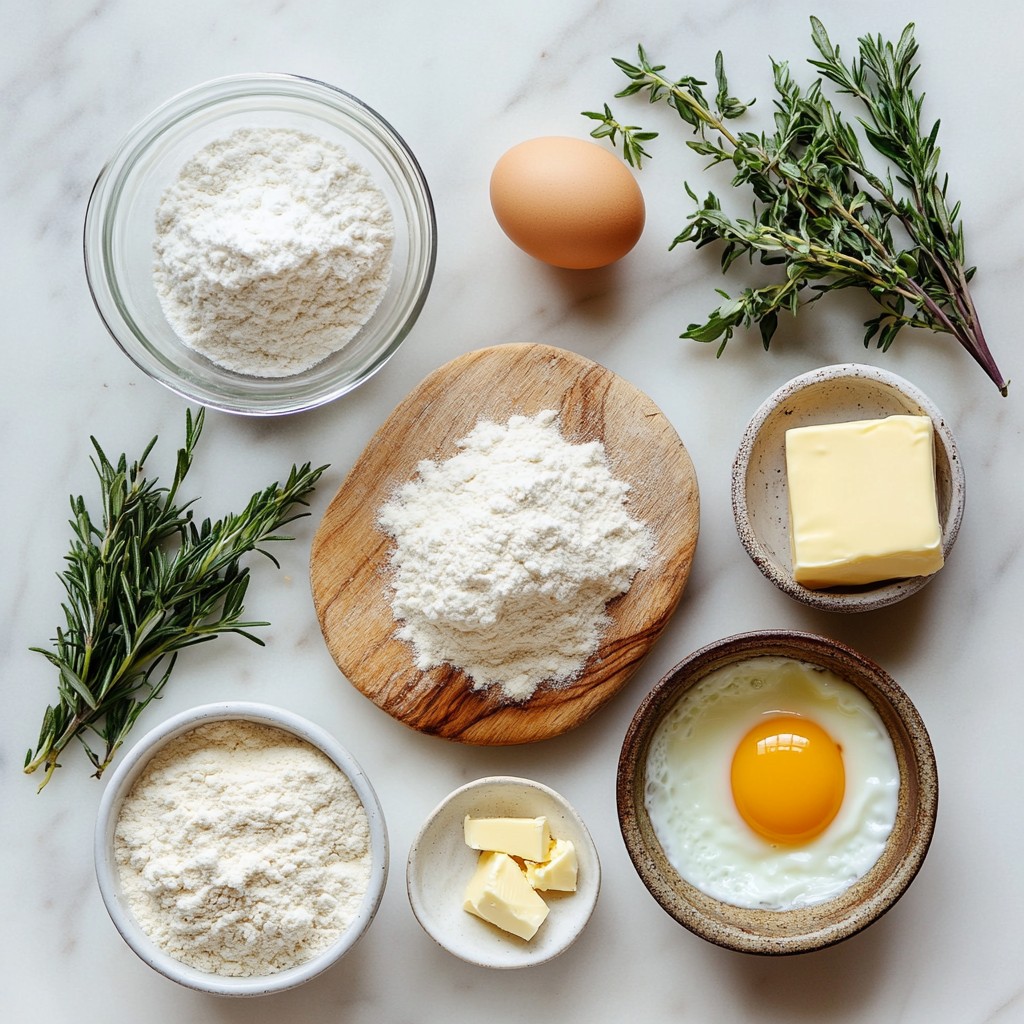
Ingredients
List of Ingredients
- 3 ½ cups all-purpose flour
- 1 packet (2 ¼ tsp) instant yeast
- 1 tablespoon sugar
- 1 teaspoon salt
- 1 cup warm milk (110°F)
- 1/4 cup unsalted butter, melted
- 2 cloves garlic, minced
- 1 tablespoon fresh parsley, chopped
- 1 tablespoon fresh rosemary, chopped
- 1 tablespoon fresh thyme, chopped
- 1 egg, beaten (for egg wash)
Gather these ingredients before you start. Fresh herbs and garlic add great flavor. The warm milk helps yeast grow, making your rolls soft. I always recommend using unsalted butter. This lets you control the salt level in your rolls.
You can find all these items at a local store. If you want to save time, pre-measure all the ingredients. This makes the cooking process smooth and fun.
Having everything ready helps keep you focused. No need to rush around while the dough waits. Each ingredient plays a role in building flavor and texture.
Make sure your yeast is fresh. Old yeast may not rise well. Use a kitchen scale for precise measurements if you can. This helps ensure your rolls turn out perfect every time.
Step-by-Step Instructions
Mixing the Dough
First, grab a large mixing bowl. Combine 2 cups of all-purpose flour, instant yeast, sugar, and salt. Mix these dry ingredients well. In another bowl, take 1 cup of warm milk and whisk in 1/4 cup of melted unsalted butter. Slowly pour this milk mixture into the dry mix. Stir it as you add the liquid.
Kneading and Rising
Next, add the minced garlic and chopped herbs to the dough. This includes parsley, rosemary, and thyme. Mix until all the herbs are evenly spread. Now, knead the dough on a lightly floured surface. Do this for about 8 to 10 minutes until it feels smooth and elastic. Once you finish, place the dough in a greased bowl. Cover it with a clean kitchen towel and let it rise in a warm spot. This should take about 1 hour or until it doubles in size.
Shaping and Baking
After the dough has risen, punch it down gently. Divide it into 12 equal pieces. Shape each piece into a ball. Place them in a greased 9x13-inch baking dish. Cover the rolls with the kitchen towel again and let them rise for another 30 minutes. While they rise, preheat your oven to 375°F (190°C). Once the rolls have risen, brush the tops with a beaten egg. This will give them a golden finish. Bake for 20 to 25 minutes. They should turn golden brown and be cooked through. Enjoy the aroma as they bake!
Tips & Tricks
Perfecting Your Rolls
To knead dough effectively, start with a clean surface. Use your palms to push the dough away from you, then fold it back. Turn the dough a quarter turn and repeat. Keep kneading for about 8 to 10 minutes. The dough should feel smooth and elastic. If it sticks, add a bit of flour.
To achieve a perfect rise, find a warm spot in your kitchen. You can turn on your oven for a minute, then turn it off. Cover the dough with a clean kitchen towel to keep it warm. Let it rise until it doubles in size. This usually takes about an hour.
Flavor Enhancements
For extra flavor, try adding herbs like basil or oregano. You can also mix in spices such as garlic powder or onion powder. These will boost the taste of your rolls.
Using garlic butter is another great way to enhance flavor. After baking, brush the tops with melted garlic butter. This adds a rich, savory finish that everyone will love. You can easily make garlic butter by mixing melted butter with minced garlic and a pinch of salt.
Pro Tips
- Use Fresh Herbs: Fresh herbs enhance the flavor of your dinner rolls significantly. Always choose fresh over dried for the best taste.
- Knead Properly: Ensure you knead the dough until it is smooth and elastic, which helps develop the gluten structure for fluffy rolls.
- Perfect Rising Environment: Place the dough in a warm, draft-free area to rise effectively; your oven with the light on is a great spot.
- Egg Wash for Shine: Brushing the rolls with an egg wash before baking gives them a beautiful golden color and a shiny finish.
Variations
Herb Blends
You can change the flavor of your garlic herb dinner rolls by using different herbs. Try adding fresh basil or oregano for a new twist. These herbs bring a bright taste that pairs well with garlic. For a spicy kick, mix in red pepper flakes. This adds heat and makes the rolls exciting. You can experiment with other herbs like dill or cilantro, too!
Dietary Adjustments
If you need gluten-free options, use gluten-free flour. This makes the rolls light and fluffy without gluten. For those who want vegan alternatives, replace the butter with coconut oil. You can also skip the egg wash or use a plant-based milk to brush the tops. These changes still give you tasty rolls without animal products.
Storage Info
Storing Leftover Rolls
To keep your garlic herb dinner rolls fresh, store them in an airtight container. This method keeps them soft and prevents them from drying out. If you plan to eat them within a few days, place the container at room temperature. For longer storage, refrigerate the rolls. Wrap them in plastic wrap before putting them in the fridge. This helps maintain moisture and flavor.
If you want to freeze the rolls, make sure they are completely cool. Then, wrap each roll tightly in plastic wrap. After wrapping, place them in a freezer-safe bag. Label the bag with the date. Frozen rolls can last up to three months. When you’re ready to eat them, just thaw them in the fridge overnight.
Reheating Tips
To reheat your garlic herb dinner rolls, the oven is a great option. Preheat your oven to 350°F (175°C). Place the rolls on a baking sheet and cover them with foil. Heat for about 10-15 minutes. This keeps them soft and warm.
If you need a quicker method, use the microwave. Place a roll on a microwave-safe plate. Cover it with a damp paper towel to keep moisture in. Heat on high for about 10-15 seconds. Check the roll to see if it’s warm enough. If not, heat in short bursts until it’s just right. Enjoy your rolls warm!
FAQs
Common Questions About Garlic Herb Dinner Rolls
How long do dinner rolls last? Dinner rolls last about three days at room temperature. Store them in a bag or container to keep them fresh. For longer storage, freeze them for up to three months.
Can I prepare the dough in advance? Yes, you can prepare the dough in advance. After kneading, let it rise once. Then, punch it down and wrap it tightly. You can store it in the fridge for up to 24 hours. Let it come to room temperature before shaping.
What can I serve with garlic herb dinner rolls? These rolls pair well with soups, salads, and roasted meats. They also complement pasta dishes. You can serve them with garlic butter or a herb-infused olive oil for added flavor.
How can I make the rolls softer? To make the rolls softer, add a bit more butter to the dough. You can also use milk instead of water. This gives the rolls a richer taste and a softer texture.
Can I use dried herbs instead of fresh? Yes, you can use dried herbs instead of fresh. Use about one-third of the amount. Dried herbs are more potent, so adjust to your taste.
You now have a clear path to making garlic herb dinner rolls. We discussed ingredients, step-by-step instructions, and tips for perfecting your rolls. You learned about variations and how to store leftovers.
Enjoy experimenting with different herbs and flavors to make these rolls your own. With each batch, you'll improve your skills and impress your friends and family. Now, it's time to start baking and savor the delicious results!