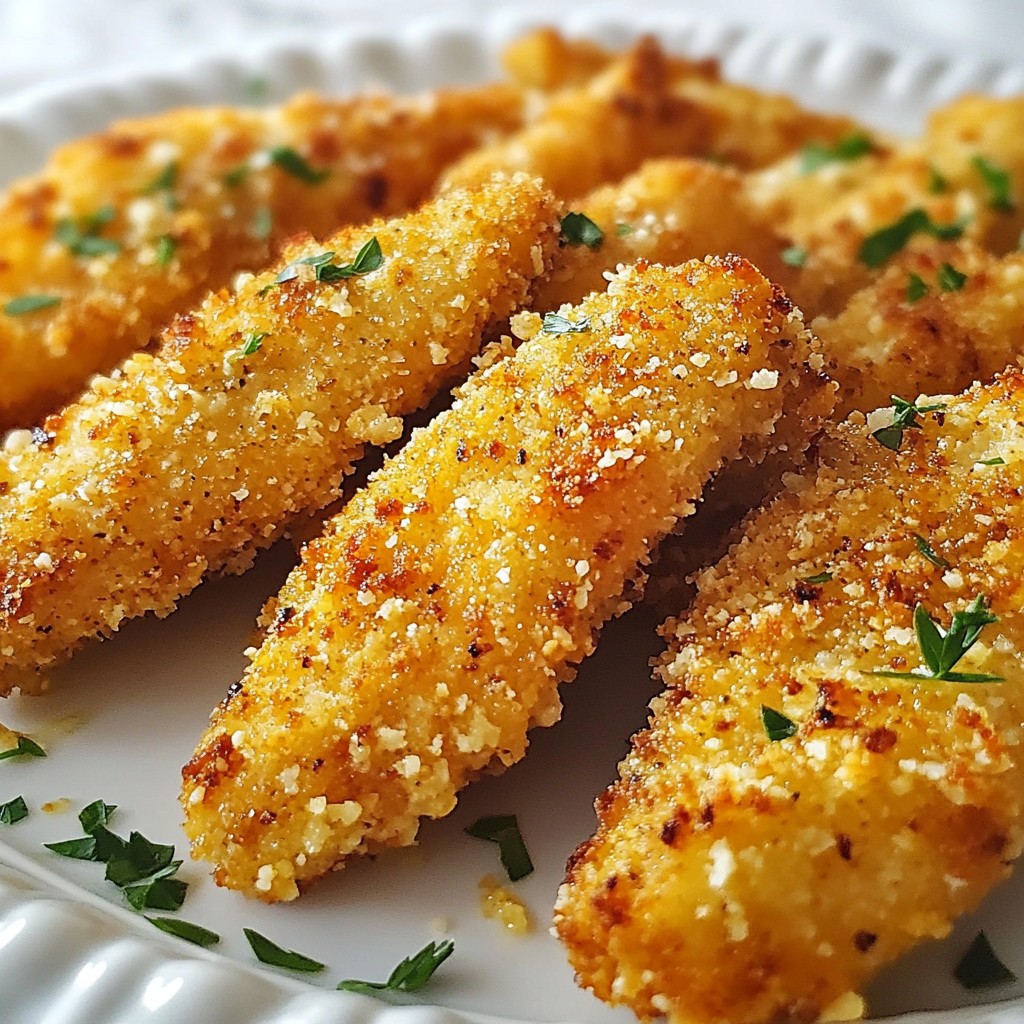
If you crave crispy, flavorful snacks, you've come to the right place. My Crispy Garlic Parmesan Chicken Tenders are a game-changer for dinner or game day. With simple ingredients and easy steps, you’ll impress your family and friends in no time. Imagine biting into tender chicken with a golden, crunchy crust that bursts with garlic and cheese. Let’s dive into this deliciousness together!
Why I Love This Recipe
- Easy to Prepare: This recipe requires minimal prep time, making it perfect for a quick weeknight dinner.
- Crispy Texture: The combination of panko breadcrumbs and Parmesan cheese gives these tenders a delightful crunch.
- Flavorful Garlic: The addition of fresh garlic and spices infuses the chicken with bold flavors that everyone will love.
- Healthy Baked Option: Baking instead of frying keeps the dish lighter while still satisfying your craving for crispy chicken.
Ingredients
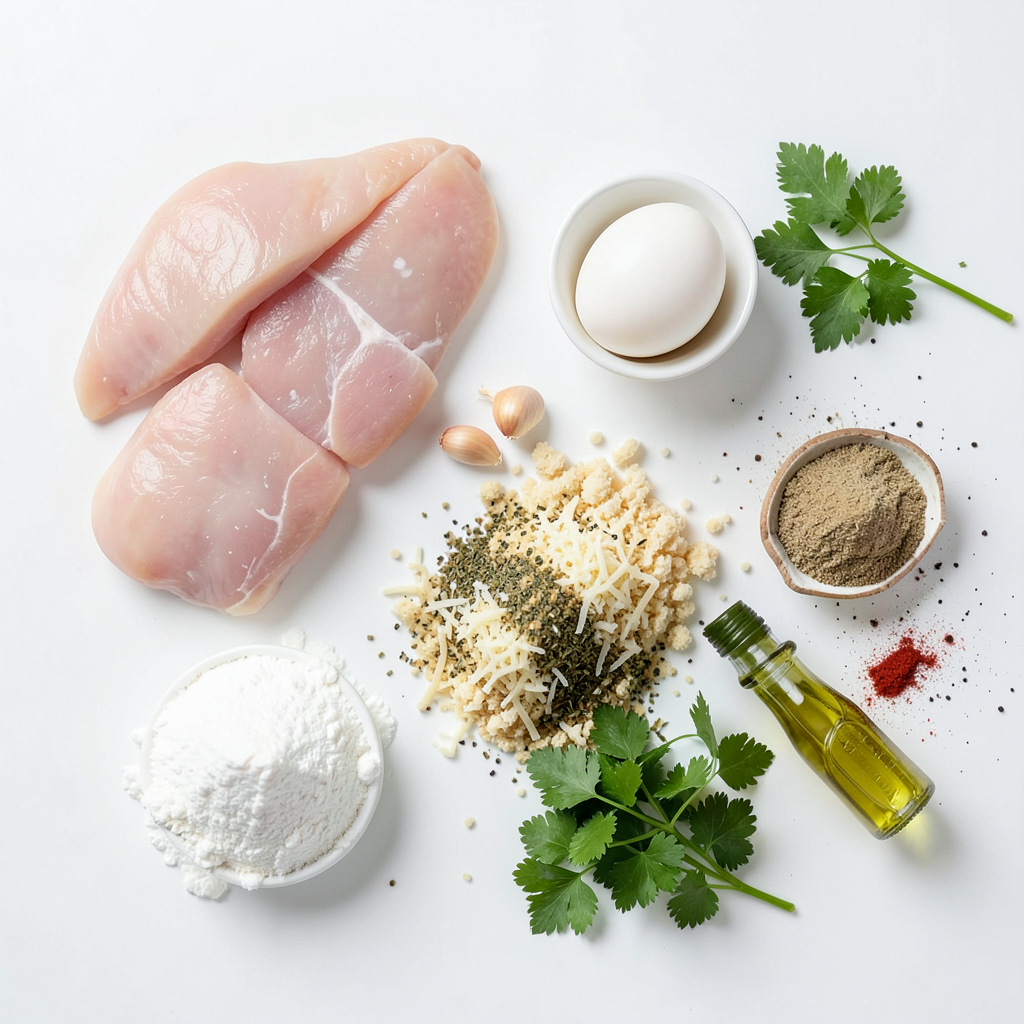
For Crispy Garlic Parmesan Chicken Tenders, you will need the following ingredients:
- 1 pound chicken tenders
- 1 cup all-purpose flour
- 2 large eggs
- 1 cup breadcrumbs (preferably panko)
- 1 cup grated Parmesan cheese
- 4 cloves garlic, minced
- 1 teaspoon garlic powder
- 1 teaspoon dried oregano
- 1 teaspoon paprika
- Salt and pepper to taste
- ½ cup fresh parsley, chopped (for garnish)
- Olive oil spray (or cooking spray)
These ingredients create a delightful blend of flavors. The chicken tenders are juicy and tender. The garlic adds a rich flavor, while the Parmesan gives a nice cheesy crunch. The spices enhance the dish, making it truly special.
Using panko breadcrumbs is key. They are lighter and crispier than regular breadcrumbs. Fresh parsley gives a pop of color and freshness. Always season the flour, and the breadcrumb mix well. This step ensures every bite bursts with taste.
Gather these items before you start. It makes cooking easier and more fun. Happy cooking!
Step-by-Step Instructions
Prepping the Oven and Baking Sheet
First, set your oven to 400°F (200°C). This heat makes the chicken crispy. Next, take a baking sheet and cover it with parchment paper. This keeps the tenders from sticking and helps with cleanup.
Preparing Dry Ingredients
In a shallow bowl, add one cup of all-purpose flour. Sprinkle in salt, pepper, and one teaspoon of garlic powder. Stir these together until mixed well. This flour mix gives the chicken flavor and helps the coating stick.
Breading the Chicken Tenders
In another bowl, whisk two large eggs until they are smooth. This will help the coating stick to the chicken. In a third bowl, combine one cup of breadcrumbs, one cup of grated Parmesan cheese, four minced garlic cloves, one teaspoon of dried oregano, and one teaspoon of paprika. Mix everything well. Each chicken tender gets three coats: flour, egg, and breadcrumbs.
1. Take a chicken tender and coat it in the flour mix. Shake off any extra flour.
2. Dip it into the egg, letting the extra drip off.
3. Finally, press it into the breadcrumb mix, making sure it sticks well.
Baking the Chicken Tenders
Place all the coated chicken tenders on the prepared baking sheet. Make sure they are spaced apart. Lightly spray the tenders with olive oil. This step helps them get golden brown. Bake them in the oven for 20-25 minutes. Flip them halfway through cooking. Check that the inside reaches 165°F to ensure they are safe to eat.
Garnishing and Serving Suggestions
Once baked, take the chicken tenders out and let them cool for a few minutes. They will be hot! Sprinkle chopped fresh parsley on top for color and flavor. Serve these crispy chicken tenders with marinara sauce or ranch dressing for dipping. A fresh garden salad on the side adds a nice touch to your meal. Enjoy your delicious creation!
Tips & Tricks
Achieving the Perfect Crunch
To get that crispy texture, use panko breadcrumbs. They add an extra layer of crunch. Don’t skip the olive oil spray. It helps achieve golden brown goodness. Remember to coat each tender well. Press the breadcrumb mixture onto the chicken. This helps it stick better.
Recommended Cooking Times
Bake the chicken tenders at 400°F for 20-25 minutes. Flip them halfway through cooking. This ensures even browning. Check the internal temperature. It should reach 165°F for safety. If you want extra crunch, bake a few minutes longer. Just watch closely to avoid burning.
Spice and Flavor Adjustments
Feel free to play with spices. Add cayenne for heat or lemon zest for brightness. Fresh herbs like thyme or rosemary can elevate the dish, too. Adjust salt and pepper based on your taste. You can also mix in some Parmesan into the breadcrumb mixture for an extra cheesy kick. Keep experimenting until you find your favorite flavor!
Pro Tips
- Use Panko Breadcrumbs: They create a lighter, crispier coating than regular breadcrumbs, enhancing the texture of your chicken tenders.
- Season Each Layer: Ensure that you season the flour, egg, and breadcrumb mixtures. This builds flavor at every step of the coating process.
- Don’t Overcrowd the Baking Sheet: Give each chicken tender space to breathe; this helps them cook evenly and achieve maximum crispiness.
- Rest Before Serving: Allow the chicken tenders to rest for a few minutes after baking. This helps the juices redistribute, making them juicier when you bite in.
Variations
Alternative Coating Mixtures
You can change up the coating for fun. Try using crushed cornflakes instead of breadcrumbs. This gives a nice crunch. You can also use almond flour for a gluten-free option. Mix in some ranch seasoning to add extra flavor. If you want a spicy kick, add cayenne pepper to the flour mix.
Flavor Additions
Herbs and spices can boost the taste. Try adding Italian seasoning to the breadcrumb mix. Fresh herbs like thyme or rosemary can add a fresh touch. You can also use smoked paprika for a deeper flavor. Adding some lemon zest can brighten things up, too. Don’t be afraid to experiment!
Cooking Method Variations
You can cook these tenders in different ways. An air fryer gives them a crispy texture with less oil. Set the air fryer to 380°F and cook for about 15 minutes. Flip them halfway for even cooking. You can also use a skillet for frying. Heat oil over medium heat and fry for 3-4 minutes on each side until golden. Each method gives a unique twist!
Storage Info
Refrigerating Leftovers
Store leftover chicken tenders in an airtight container. They stay fresh in the fridge for up to three days. Make sure they cool down before sealing. This helps keep them crispy for your next meal.
Freezing Chicken Tenders
You can freeze chicken tenders for later use. Place them in a freezer-safe bag or container. They will last for up to three months. For best results, freeze them after cooking, but you can also freeze uncooked ones. Just remember to defrost before cooking.
Reheating Instructions
To reheat, place the tenders in the oven. Set it to 375°F (190°C). Bake for about 10-15 minutes until heated through. This method helps restore the crispiness. You can also use an air fryer, which works well for keeping them crunchy. Enjoy your tasty tenders any time!
FAQs
Can I use chicken breasts instead of tenders?
Yes, you can use chicken breasts. Just cut them into strips. This will give you a similar shape to tenders. The cooking time may change, so check for doneness. The chicken should reach 165°F internally.
What dipping sauces go well with chicken tenders?
Many sauces pair well with chicken tenders. Some popular choices are:
- Marinara sauce
- Ranch dressing
- Honey mustard
- Barbecue sauce
- Buffalo sauce
These sauces add flavor and excitement to your meal. Try a few to find your favorite!
How can I make this recipe gluten-free?
To make the recipe gluten-free, use gluten-free flour and gluten-free breadcrumbs. Make sure to check the labels. You can also use crushed cornflakes as a crunchy alternative. This way, you can enjoy crispy chicken tenders without gluten.
Can I prepare these chicken tenders ahead of time?
Yes, you can prep these chicken tenders in advance. After breading, place them on a baking sheet. Cover and store them in the fridge for up to 24 hours. When ready to cook, just bake them as directed. You can also freeze them before baking. Just remember to thaw before cooking.
You learned how to make tasty chicken tenders with basic ingredients and simple steps. We covered how to prepare, bread, and bake them to get the perfect crunch. I shared tips for flavor variations and smart storage methods. Enjoy experimenting with different tastes and cooking methods to find your favorite! With these easy tips and guides, you're ready to serve delicious chicken tenders anytime. Your kitchen adventures can now be fun and rewarding.