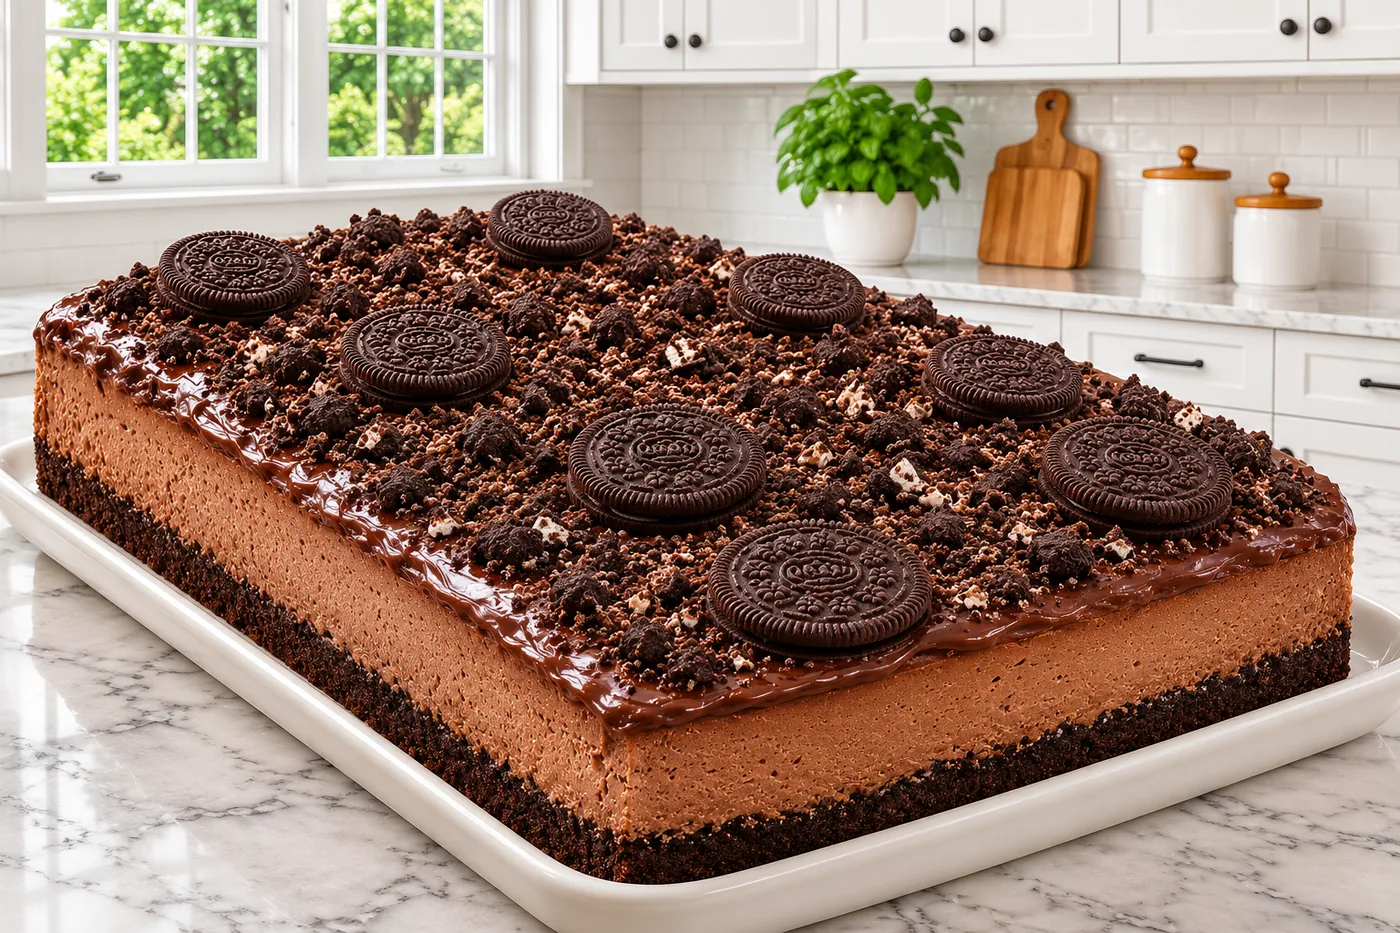
I remember the first time I made chocolate cookie cheesecake for a family gathering. The moment I pulled it from the oven, the rich aroma filled the kitchen, and I couldn’t wait to dig in!
What makes this chocolate cookie cheesecake stand out is its creamy filling, perfectly balanced with a crunchy cookie crust. It’s a pleasureful treat that leaves everyone asking for seconds.
Why This Recipe Works
- Cream Cheese Creates Creaminess: The softened cream cheese lends a rich and velvety texture to the cheesecake layer, ensuring it melds wonderfully with the whipped cream. I found that using room temperature cream cheese prevents lumps, making the mixture smooth and easy to blend.
- Chocolate Cookie Crust Adds Crunch: Using chocolate cookie crumbs for the crust gives a pleasureful crunch that contrasts beautifully with the creamy filling. I tested both homemade and store-bought crumbs, and the store-bought ones saved me time while still providing great flavor.
- Heavy Cream for Stability: The heavy cream, whipped to soft peaks, adds airiness to the cheesecake, making it light and fluffy. I discovered that chilling the heavy cream beforehand helps it make faster and hold its shape better, giving you that perfect cloud-like texture.
- Sour Cream Balances Sweetness: The addition of sour cream introduces a slight tang that beautifully balances the sweetness of the chocolate. Trust me, it cuts through the richness and makes each bite feel less heavy, enhancing the overall flavor profile.
Ingredients
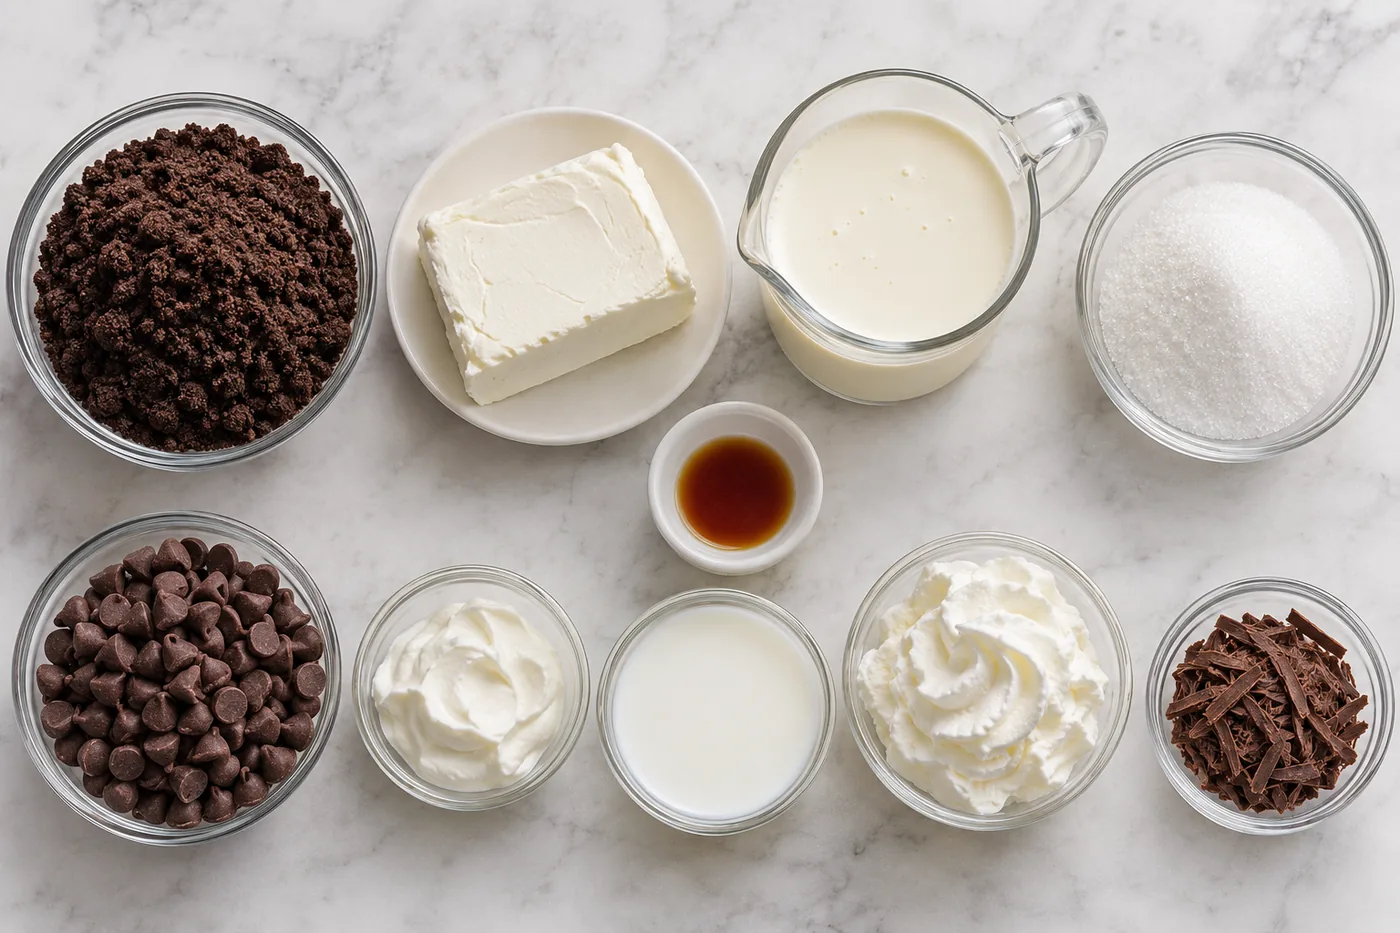
What You'll Need
- 1 cup chocolate cookie crumbs store-bought or homemade; homemade gives you more control over sweetness and texture.
- 4 oz cream cheese softened for easy mixing; it adds creaminess and richness to the cheesecake.
- 1 cup heavy cream chilled for optimal whipping; this creates a light, airy texture.
- 1/2 cup granulated sugar balances the richness of cream cheese and chocolate.
- 1 tsp vanilla extract adds depth of flavor; pure vanilla extract is best.
- 1 cup chocolate chips melted for a smooth texture; use high-quality chocolate for the best flavor.
- 1/4 cup sour cream adds tanginess and creaminess; look for full-fat for richness.
- 1/4 cup milk helps to thin the batter; any milk works, but whole milk is creamier.
- 1/2 cup whipped cream for topping; homemade is fluffier and more flavorful.
- 1 oz chocolate shavings for garnish; they add an elegant touch and extra chocolate flavor.
When making this chocolate cookie cheesecake, choose high-quality chocolate for the best flavor. Fresh cream cheese is crucial for a smooth filling, and don’t skip the chilled heavy cream—it makes all the difference in texture. Homemade cookie crumbs can enhance the taste and freshness of the crust.
Easy Substitutions
- Dairy-free: swap cream cheese for a dairy-free cream cheese — result changes to a slightly different texture but still creamy.
- Gluten-free: swap chocolate cookie crumbs for gluten-free chocolate cookies — result changes to a similar taste and texture, just ensure the cookies are certified gluten-free.
- Lower calorie: swap heavy cream for a lighter whipped topping — result changes to a less rich cheesecake but still enjoyable.
Step-by-Step Instructions
Prep & Mix
- 1. In a mixing bowl, combine chocolate cookie crumbs and 2 tablespoons of melted chocolate chips; mix until well combined. This creates a rich, flavorful crust that holds together nicely.
- 2. Press the cookie mixture firmly into the bottom of a 9-inch springform pan to form the crust. Make sure it's evenly packed for a sturdy base that won't crumble when you slice the cheesecake.
- 3. In a separate bowl, beat the softened cream cheese with an electric mixer on medium speed for 2 minutes until smooth. This step is crucial for a creamy texture, eliminating lumps that would ruin the cheesecake's mouthfeel.
- 4. Add the remaining melted chocolate chips, granulated sugar, vanilla extract, and sour cream to the cream cheese; mix until fully incorporated. The sour cream adds a pleasureful tang, balancing the sweetness of the chocolate.
- 5. In another bowl, whip the chilled heavy cream until stiff peaks form, about 3-5 minutes. This aeration creates a light texture in the cheesecake, making it less dense.
Fold & Chill
- 1. Gently fold the whipped cream into the chocolate mixture until no white streaks remain. Be careful not to deflate the whipped cream, as it adds volume to your cheesecake.
- 2. Pour the cheesecake filling over the crust in the springform pan, smoothing the top with a spatula. This ensures an even layer, which is visually appealing and allows for even slicing later.
- 3. Refrigerate the cheesecake for at least 4 hours, or until set. You’ll know it’s ready when it feels firm to the touch and holds its shape when gently shaken.
- 4. Once set, remove the sides of the springform pan and top with whipped cream and chocolate shavings before serving. This final touch adds elegance and a touch of extra sweetness to your chocolate cookie cheesecake.
Tips & Tricks
The Importance of Chilling Your Crust
After baking your chocolate cookie crust, let it cool completely before adding the cheesecake filling. I made the mistake of pouring the filling onto a warm crust once, and let me tell you, the result was a gooey mess! Chilling helps the crust set properly, ensuring that it holds its shape when you slice into your cheesecake.
Mind the Mixing Speed
When blending the cheesecake filling, keep your mixer on low speed. Overmixing can introduce too much air, leading to cracks in your cheesecake as it bakes. I learned this the hard way with a batch that looked great but had a crater in the center. A gentle mix keeps it creamy and smooth, giving you that perfect texture.
Pro Tips
- Chill Your Cheesecake Before Slicing: Let your chocolate cookie cheesecake cool in the fridge for at least four hours, or even overnight. This helps the filling set up nicely, making it easier to cut clean slices. Trust me, I once tried to slice it warm, and it turned into a gooey mess!
- Use Room Temperature Ingredients: Make sure your cream cheese and eggs are at room temperature before mixing. This promotes a smoother texture and prevents lumps in your cheesecake filling. I learned the hard way that cold ingredients can lead to a bumpy, uneven batter.
- Add a Touch of Espresso Powder: Incorporate a teaspoon of espresso powder into the cheesecake batter to enhance the chocolate flavor. It deepens the overall taste without making it taste like coffee. I was surprised by how much this little addition elevated my recipe!
- Opt for High-Quality Chocolate: Use a high-quality chocolate for the ganache topping. The richer the chocolate, the more intense the flavor of your cheesecake will be. I’ve tried various brands, and I always come back to a dark chocolate with at least 70% cocoa for the best results.
- Avoid Overmixing the Batter: Gently mix your batter until just combined to prevent incorporating too much air. Overmixing can lead to cracks in your cheesecake as it bakes. I’ve ruined a few beautiful cheesecakes by not paying attention to this!
Variations & Customizations
Flavor Twists
Mint Chocolate Chip
Fold in ½ cup mini chocolate chips and 1 tsp peppermint extract after mixing. This version has a refreshing minty twist, perfect for the holidays. The chocolate and mint flavors blend beautifully, creating a pleasureful contrast that’s both creamy and cool.
Espresso Delight
Incorporate 1 tbsp instant espresso powder into the melted chocolate before mixing. This variation adds a rich coffee flavor that deepens the chocolate experience. The result is a decadent cheesecake with a smooth, velvety texture and a subtle, energizing kick.
Seasonal Versions
Pumpkin Spice
Mix in ½ cup canned pumpkin puree and 1 tsp pumpkin pie spice after blending the cream cheese and sugar. This seasonal twist gives the cheesecake a warm, spiced flavor and a lovely orange hue. It’s creamy and comforting, reminiscent of fall gatherings.
Storage & Meal Prep
Room Temperature
Store your chocolate cookie cheesecake at room temperature for up to 2 hours in an airtight container to keep it fresh. Beyond that, it’s best to refrigerate to avoid any spoilage.
Refrigerator
In the refrigerator, it will stay fresh for about 5 days. Make sure to let it cool completely before wrapping it in plastic wrap or placing it in a sealed container to prevent moisture buildup.
Freezer
You can freeze it for up to 2 months. For best results, flash freeze individual slices on a sheet pan before wrapping each slice tightly in plastic wrap and then placing them in a freezer-safe bag. Thaw overnight in the fridge before enjoying.
Meal Prep
To make meal prep easier, consider doubling the recipe. You can prep it the night before or over the weekend. Store slices in individual airtight containers, and they'll stay fresh for 5 days in the fridge. Reheat in the microwave for about 20-30 seconds on low power for a warm treat.
Frequently Asked Questions
Can I use a different type of cookie for the crust?
Yes, you can definitely use other cookie types like graham crackers or vanilla wafers. Just keep in mind that the flavor and texture will change, so adjust the sugar content if needed.
Why did my chocolate cookie cheesecake crack on top?
Cracks often happen due to rapid temperature changes or overmixing the batter. Make sure to bake it slowly and let it cool gradually to prevent this.
How long can I keep chocolate cookie cheesecake in the fridge?
You can store it in the fridge for up to five days. Just cover it well to keep it fresh and minimize any moisture loss.
Can I make this cheesecake dairy-free?
Absolutely! Use dairy-free cream cheese and a non-dairy whipped topping. The texture might differ slightly, but it will still be delicious.
What can I serve with chocolate cookie cheesecake?
Consider topping it with fresh berries or a drizzle of chocolate sauce for added flavor. A dollop of whipped cream also works beautifully to complement the rich cheesecake.
This chocolate cookie cheesecake is a decadent treat that always impresses my family and friends, and it’s surprisingly easy to make! For the best texture, chill it overnight to let those flavors meld beautifully. I can’t wait for you to try it—let me know how yours turns out by leaving a comment or sharing your creation on Pinterest!