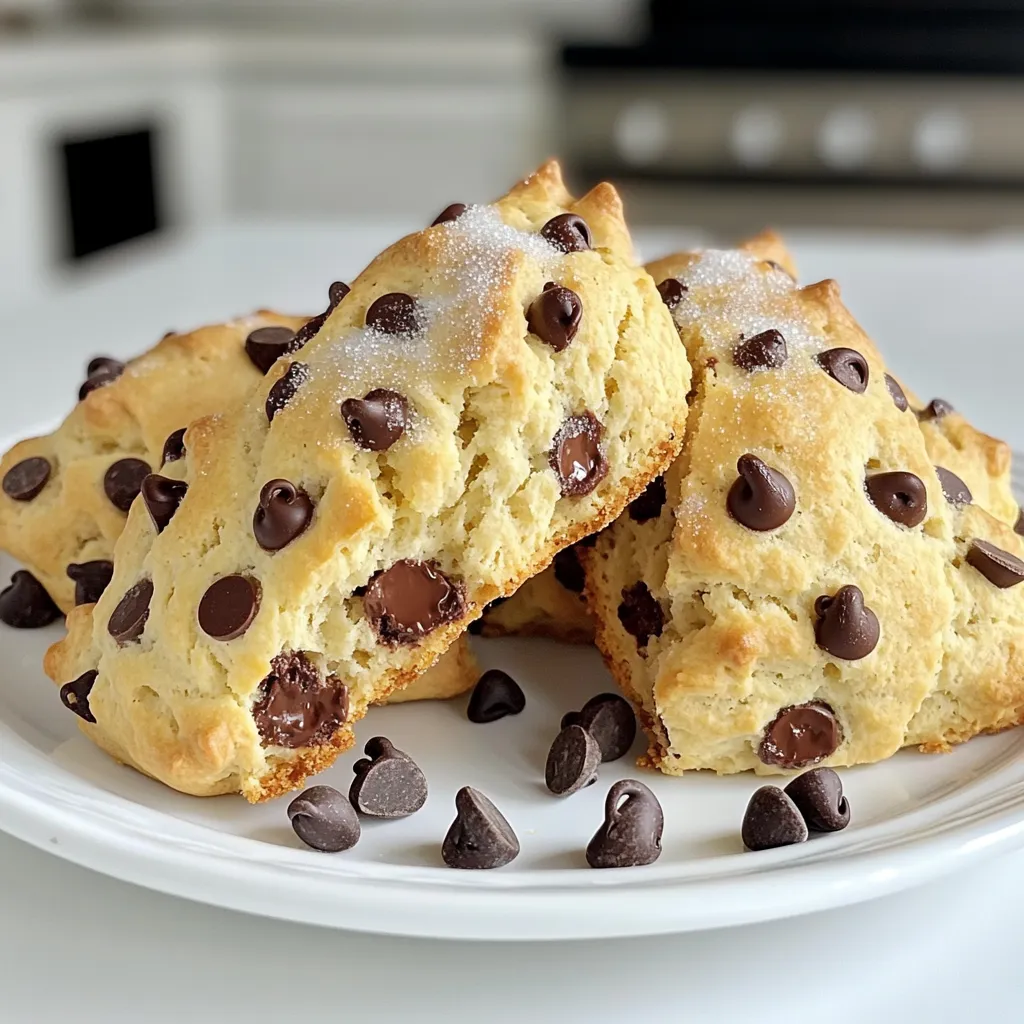
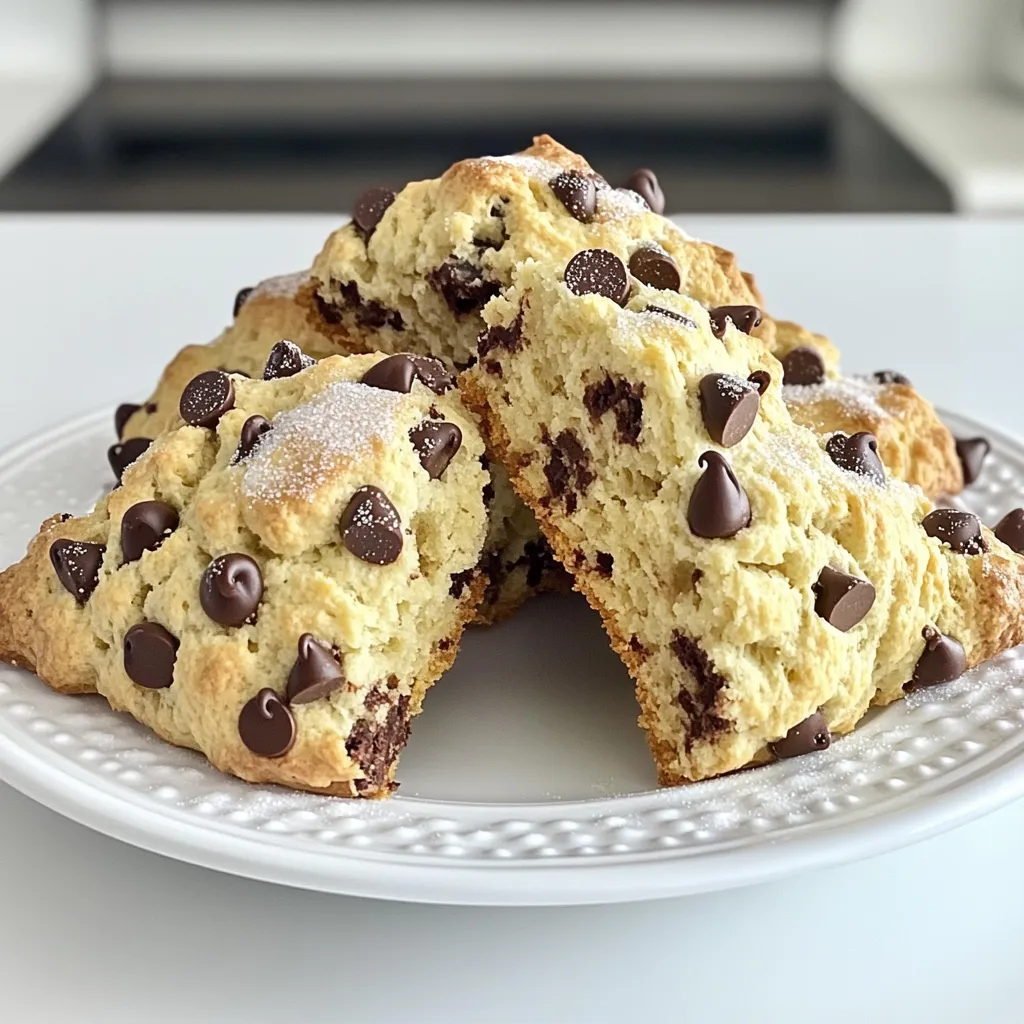
Do you dream of fresh, warm scones from a bakery? Look no further! My Chocolate Chip Scones Bakery Style recipe is easy and delivers that perfect, flaky texture. With just a few simple ingredients, you’ll whip up delicious treats that will impress everyone. Whether you’re a baking pro or just getting started, I’ll guide you through each step. Get ready to treat yourself to a sweet moment of joy!
Ingredients
List of Ingredients
– 2 cups all-purpose flour
– 1/2 cup granulated sugar
– 1 tablespoon baking powder
– 1/2 teaspoon salt
– 1/2 cup cold unsalted butter, cubed
– 3/4 cup heavy cream
– 1 large egg
– 1 teaspoon vanilla extract
– 1 cup semi-sweet chocolate chips
– Extra granulated sugar for topping
Ingredient Tips
Best flour types for scones:
I recommend using all-purpose flour. It gives scones a nice balance of softness and structure. You can also try cake flour for lighter scones.
Choosing chocolate chip varieties:
Semi-sweet chocolate chips work best. They melt nicely and add a rich flavor. You can experiment with dark chocolate for a bolder taste.
Importance of cold butter:
Using cold butter is key. It creates flaky layers in the scone. When the cold butter melts in the oven, it helps the scones rise. Use a pastry cutter or your fingers to work it into the flour quickly. This keeps the butter cold.
Step-by-Step Instructions
Preparation Steps
1. Preheat your oven to 400°F (200°C). This heat helps the scones rise well.
2. Line a baking sheet with parchment paper. This makes clean-up easy and prevents sticking.
3. In a large bowl, whisk together 2 cups of flour, 1/2 cup of sugar, 1 tablespoon of baking powder, and 1/2 teaspoon of salt. Make sure it is mixed well.
4. Add 1/2 cup of cold, cubed unsalted butter to the bowl. Use a pastry cutter or your fingers to work the butter into the flour mix. Stop when it looks like coarse crumbs.
Mixing Ingredients
5. In another bowl, whisk together 3/4 cup of heavy cream, 1 large egg, and 1 teaspoon of vanilla extract until it is blended smoothly.
6. Pour the cream mix into the flour mix. Gently stir until just combined, being careful not to overmix.
7. Fold in 1 cup of semi-sweet chocolate chips. Keep a few chips aside to sprinkle on top before baking.
Shaping and Baking
8. Turn the dough onto a lightly floured surface. Knead it a few times until it holds together.
9. Pat the dough into a circle, about 1 inch thick. This shape helps the scones bake evenly.
10. Cut the dough into 8 equal wedges. Place them on the prepared baking sheet, leaving some space between each scone.
11. Sprinkle the tops with extra sugar and the reserved chocolate chips. This adds a nice crunch and sweetness.
12. Bake for 15-20 minutes. You want them golden brown. A toothpick inserted should come out clean.
13. Let the scones cool slightly on the baking sheet before moving them to a wire rack. This helps them stay soft.
Tips & Tricks
Achieving Bakery-Style Texture
To make your scones light and fluffy, pay attention to ingredient temperatures. Use cold butter straight from the fridge. This helps create that flaky texture we love in bakery-style scones. Warm butter will melt too fast and ruin the texture.
Next, do not overmix the dough. When you combine the wet and dry ingredients, stir gently. Stop when you see no dry flour. Overmixing can lead to tough scones, and we want them soft and tender.
Flavor Enhancements
You can easily boost the flavor of your scones. Try adding mix-ins like diced fruit or nuts. Walnuts or blueberries can bring a fun twist to your chocolate chip scones. Spices like cinnamon can also add warmth and depth.
For toppings, think beyond just sugar. Drizzling melted chocolate on top after baking adds a rich touch. You could also use a simple glaze made from powdered sugar and milk for extra sweetness.
Troubleshooting Common Issues
If your scones turn out too dry, check the butter and cream amounts. Make sure your butter is cold and cubed. Also, consider adding a bit more cream if the dough feels too crumbly.
For even baking, space the scones apart on the baking sheet. This allows heat to circulate around them. If they are too close, they might bake unevenly. Rotate the baking sheet halfway through baking for best results.
Variations
Flavor Variations
You can switch things up by adding fruits. Blueberries or cranberries work great. They bring a fresh burst of flavor. Just fold in about a cup of your chosen fruit. You can also try different chocolates. Dark, milk, or even white chocolate give a new taste. Each type adds its own twist to the scone.
Dietary Adjustments
Want a gluten-free version? You can use gluten-free flour blends. They work well in this recipe. Just make sure to check that your baking powder is also gluten-free. If you need a dairy-free option, swap the heavy cream for a plant-based cream. Coconut cream is a lovely choice. It adds richness without the dairy.
Presentation Ideas
To make your scones shine, think about glazing. A simple icing of powdered sugar and water adds sweetness. You can also use melted chocolate for a rich finish. For special occasions, plate your scones with fresh fruit or whipped cream. This makes them look stunning and inviting.
Storage Info
How to Store Scones
To keep your chocolate chip scones fresh, store them in an airtight container. This method locks in moisture and flavor. Place parchment paper between layers if stacking. This helps prevent sticking. You can keep them at room temperature for up to two days. For longer storage, consider freezing them.
To freeze scones, let them cool completely first. Wrap each scone tightly in plastic wrap. Then, place them in a freezer bag or airtight container. They can last for up to three months in the freezer. When you want to enjoy them, just take out the number you need.
Reheating Tips
To reheat scones without drying them out, use the oven. Preheat it to 350°F (175°C). Place the scones on a baking sheet and cover them with foil. Heat for about 10-15 minutes. This helps maintain their soft texture.
You can also use a microwave. Place a scone on a microwave-safe plate. Add a damp paper towel on top. Heat in short bursts of 10 seconds until warm.
After reheating, serve your scones warm. A pat of butter adds richness. For a sweet twist, drizzle some chocolate sauce on top! Enjoy them with coffee or tea for a perfect pair.
FAQs
Common Questions About Chocolate Chip Scones
Can I use different types of flour?
Yes, you can try whole wheat flour or almond flour. Whole wheat adds a nutty taste. Almond flour makes them gluten-free. Just note that texture may change a bit.
How do I know when the scones are done baking?
Look for a golden-brown color on top. You can also insert a toothpick. If it comes out clean, your scones are ready.
Baking Tips
What’s the secret to fluffy scones?
Using cold butter is key. It creates small pockets of air. Also, mix gently. Overmixing makes them tough.
How can I make my chocolate chip scones less sweet?
Reduce the sugar in the dough. You can also use dark chocolate. It has less sugar than semi-sweet chips.
Storing and Serving
How long do scones last?
Scones stay fresh for about two days at room temperature. They can last up to a week in the fridge.
What can I pair my scones with for serving?
Serve them with butter, jam, or clotted cream. They also go well with coffee or tea. Enjoy them warm for the best taste!
You now know how to make delicious chocolate chip scones. We covered ingredients, steps, and tips. Use cold butter and avoid overmixing for the best texture. Don’t forget to try fun variations, like adding fruits or glazing options. Store your scones right to keep them fresh. With these tips, you can bake like a pro. Enjoy your scones as a treat or share with others! Happy baking!