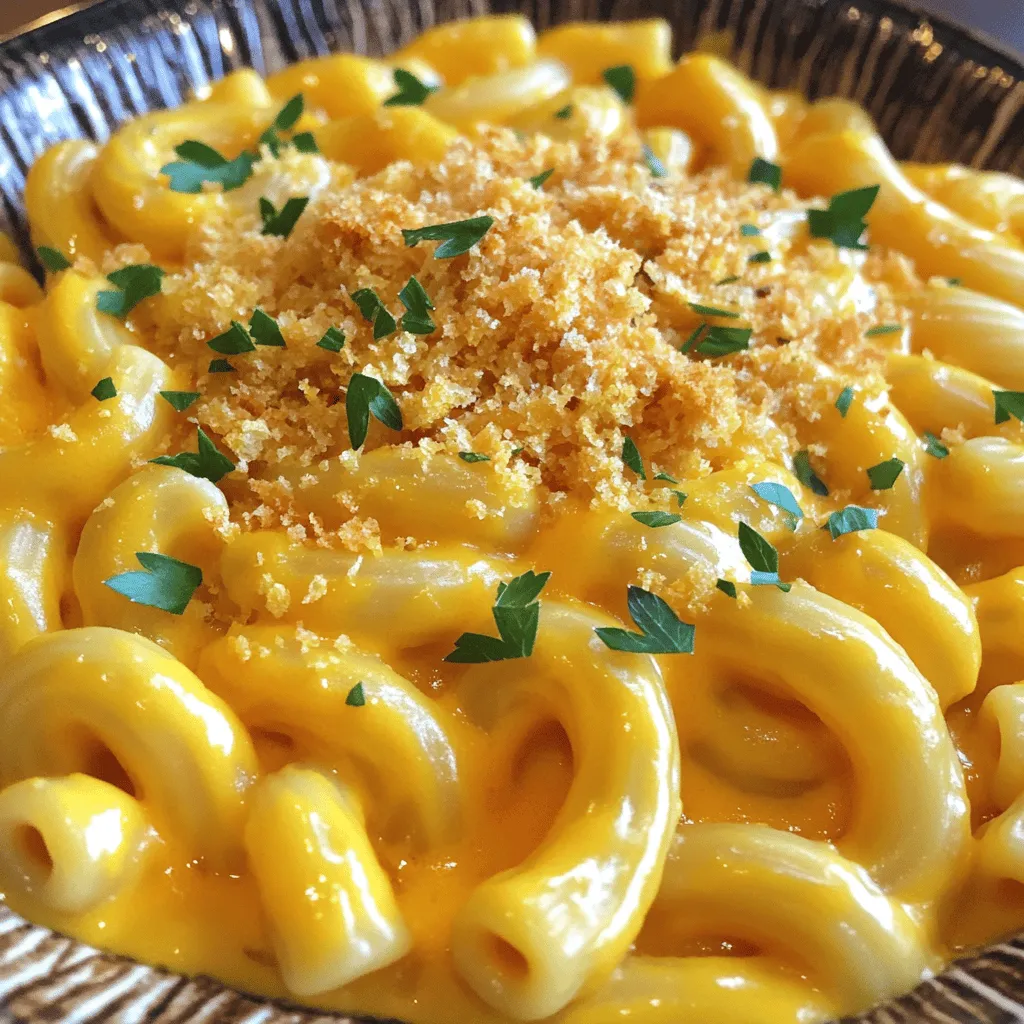
Craving a bowl of warmth and comfort? Butternut Squash Mac and Cheese is your answer! This creamy dish combines the rich flavor of roasted butternut squash with gooey cheese and pasta for a delightful twist on a classic favorite. Whether you’re a busy parent or a cooking novice, this recipe is easy to follow and irresistibly tasty. Let’s dive into the ingredients and get started on this creamy comfort dish!
Ingredients
List of Main Ingredients
– 2 cups elbow macaroni
– 1 medium butternut squash, peeled and cubed
– 3 cups milk (whole or almond for dairy-free)
Additional Flavoring Ingredients
– 2 tablespoons olive oil
– 1 medium onion, diced
– 2 cloves garlic, minced
Seasonings and Toppings
– 1 teaspoon ground nutmeg
– 1 teaspoon smoked paprika
– Salt and pepper to taste
– 1/2 cup breadcrumbs (optional, for topping)
– Fresh parsley for garnish (optional)
When I make butternut squash mac and cheese, I start with key ingredients. For the main part, I use elbow macaroni, butternut squash, and milk. The pasta gives a nice base. The squash adds creaminess and a hint of sweetness. Using milk helps make it rich and smooth.
Next, I add flavor with olive oil, onion, and garlic. The olive oil helps cook the onion. The onion and garlic create a strong base for the dish. Their flavors blend well with the squash.
Seasonings bring everything together. I use ground nutmeg and smoked paprika. They add depth and warmth. Salt and pepper are a must for taste. If I want a crunchy topping, I add breadcrumbs. For a finishing touch, fresh parsley looks and tastes great.
These ingredients come together to create a warm, creamy dish that feels like a hug. When I serve this, everyone smiles. It’s comfort food at its best!
Step-by-Step Instructions
Preparing the Butternut Squash
– Preheat your oven to 400°F (200°C).
– Take the cubed butternut squash and drizzle it with 1 tablespoon of olive oil.
– Add salt and pepper to taste, then mix well.
– Spread the squash on a baking sheet.
– Roast it for 25-30 minutes until it’s tender and nicely caramelized.
Cooking the Pasta
– Bring a large pot of salted water to a boil.
– Cook the elbow macaroni until it is al dente, as per package directions.
– Drain the macaroni and set it aside for later.
Making the Cheese Sauce
– In a large saucepan, heat the remaining tablespoon of olive oil over medium heat.
– Add the diced onion and cook for about 5 minutes until it turns translucent.
– Next, add minced garlic and cook for another minute until fragrant.
– Take the roasted squash and put it in a blender.
– Add the onion and garlic mix, along with 1 cup of milk.
– Blend until smooth. Adjust the thickness with more milk if needed.
– Return the squash mix to the saucepan over low heat.
– Gradually whisk in the shredded cheddar and mozzarella cheese.
– Stir until the cheese melts and forms a creamy sauce. Add salt and pepper to taste.
Combining All Ingredients
– Add the cooked macaroni to the cheese sauce.
– Mix well until each piece of pasta is coated in the creamy sauce.
Final Touches
– If you like, transfer the mac and cheese to a baking dish.
– Sprinkle breadcrumbs on top for a crispy finish.
– Broil in the oven for 3-5 minutes until the top is golden brown.
Tips & Tricks
Perfecting the Cheese Sauce
To make a smooth and creamy cheese sauce, use fresh cheese. Pre-grated cheese can clump. Gradually add cheese to the warm butternut squash mixture. Whisk continuously as the cheese melts. For extra creaminess, add more milk if needed. You can mix cheese types based on your taste. Sharp cheddar gives a strong flavor, while mozzarella adds stretch. For a tangy twist, try a bit of goat cheese or fontina.
Roasting Techniques
Roasting butternut squash brings out its natural sweetness. Start by peeling and cubing the squash. Toss it with olive oil, salt, and pepper. Spread the cubes in a single layer on a baking sheet. This helps them cook evenly. Roast at 400°F (200°C) for about 25-30 minutes. You know it’s done when it’s tender and has caramelized edges. A fork should easily pierce the cubes.
Time-Saving Tips
Prep ingredients ahead of time for a quicker cook. You can chop the squash and onions the night before. Store them in the fridge to save time. Cook the pasta while the squash roasts. This way, everything is ready at once. If you want to multi-task, start the cheese sauce while the pasta cooks. This makes your cooking flow smoother and faster.

Variations
Add-Ins and Enhancements
You can boost your butternut squash mac and cheese with tasty add-ins. Adding vegetables like spinach or kale brings new flavors and nutrients. These greens cook quickly and add a nice color. You can also stir in cooked chicken or crispy bacon for extra protein. This makes the dish heartier and more filling, perfect for a family meal.
Dietary Modifications
If you need a gluten-free dish, use gluten-free pasta. Many brands offer elbow macaroni made from rice or corn. For a dairy-free option, swap regular cheese for vegan cheese. Nutritional yeast is a great choice. It adds a cheesy flavor without dairy, making the dish creamy while keeping it vegan.
Flavor Variations
Don’t hesitate to mix up the cheese! Sharp cheddar and mozzarella are classic, but you can try gouda or fontina for a unique taste. Mixing different cheeses gives depth to the flavor. Adding spices or herbs can also enhance the dish. Try a pinch of cayenne for heat, or fresh thyme for a touch of earthiness. These small changes can make your mac and cheese truly special!
Storage Info
Storing Leftovers
To store leftover butternut squash mac and cheese, let it cool first. Then, place it in an airtight container. Make sure the lid seals tightly. This helps keep the flavors fresh. You can keep it in the fridge for up to five days. If you want to enjoy it later, consider freezing it.
Reheating Instructions
When reheating, you want to keep it creamy. The best way is to use a microwave or a stovetop. If using a microwave, place it in a bowl and add a splash of milk. Heat in short bursts, stirring in between. On the stovetop, warm it gently over low heat. Stir in milk as needed to avoid dryness. This keeps the dish smooth and delicious.
Freezing Tips
To freeze mac and cheese, first let it cool completely. Then, transfer it to a freezer-safe container. Be sure to leave some space at the top for expansion. It can last up to three months in the freezer. When ready to eat, thaw it in the fridge overnight. Reheat it gently, adding a bit of milk to restore creaminess. This way, you can enjoy your creamy comfort dish any time!
FAQs
What can I substitute for butternut squash?
You can use pumpkin or sweet potato if you want a similar taste. Carrots also work well. They add a nice sweetness to the dish. Just make sure to cook them until soft. Then, blend them into the cheese sauce just like the butternut squash.
Can I make this recipe ahead of time?
Yes, you can prepare this dish ahead of time. Cook the pasta and roast the squash in advance. Store them in the fridge. When you are ready, just mix them with the cheese sauce. Reheat everything on the stove or in the oven. This saves time and makes dinner easy.
What type of cheese works best for mac and cheese?
Sharp cheddar and mozzarella are great choices. They melt well and give a rich flavor. You can also try Gruyère or fontina for extra creaminess. Mixing cheeses adds depth to the taste. Just remember to shred your cheese for the best melting results.
Is it necessary to broil the mac and cheese?
Broiling is not required, but it adds a nice touch. It makes the top crispy and golden brown. This gives a great texture contrast with the creamy sauce. If you skip it, your mac and cheese will still taste wonderful. But broiling makes it look and feel special.
This guide covered a delicious mac and cheese recipe featuring butternut squash. We discussed key ingredients, from the elbow macaroni to the seasonings and toppings. You learned step-by-step instructions for making a creamy cheese sauce. We also shared tips for perfecting the dish and offered variations to suit your taste.
In the end, this recipe is both fun and flexible. Enjoy trying different flavors and make it your own! You’ll create a meal that will please everyone at your table.