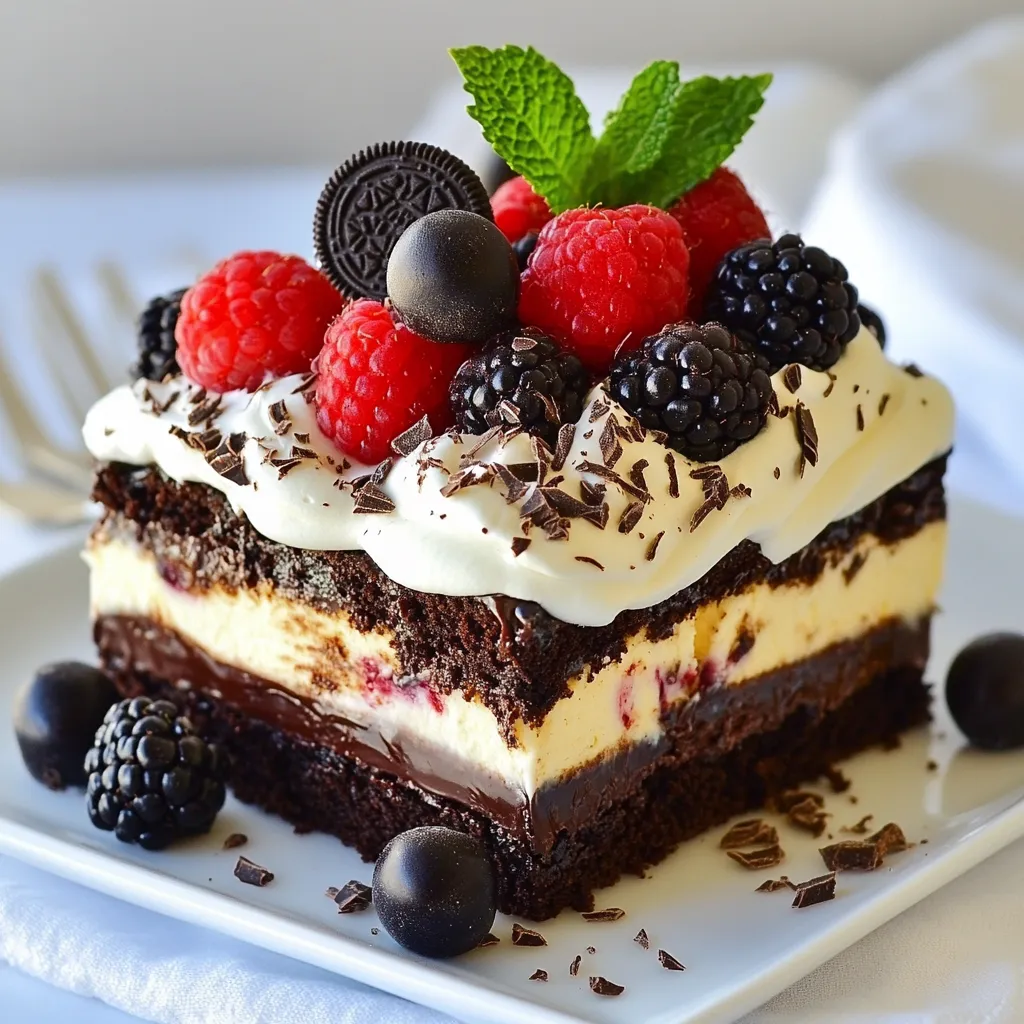
Craving a dessert that is both easy and delicious? Let me introduce you to the Brownie Refrigerator Cake! This delightful layered treat combines rich brownies, fluffy whipped cream, and creamy chocolate ganache, topped with crushed Oreos and fresh berries. It’s perfect for any occasion and super simple to make. Stick around as I guide you through each step and share tips to customize this tasty dessert just for you!
Why I Love This Recipe
- Decadent Layers: This cake features rich brownie layers combined with fluffy whipped cream and luscious chocolate ganache, creating a delightful texture in every bite.
- Easy to Assemble: With simple layering steps, this dessert is perfect for both novice and experienced bakers, making it a stress-free treat for any occasion.
- Chill Time Perfection: Refrigerating the cake allows the flavors to meld beautifully, ensuring a refreshing and indulgent dessert that can be made ahead of time.
- Customizable Ingredients: Feel free to swap in your favorite cookies or fruits, allowing you to personalize the cake to suit your taste and preferences.
Ingredients
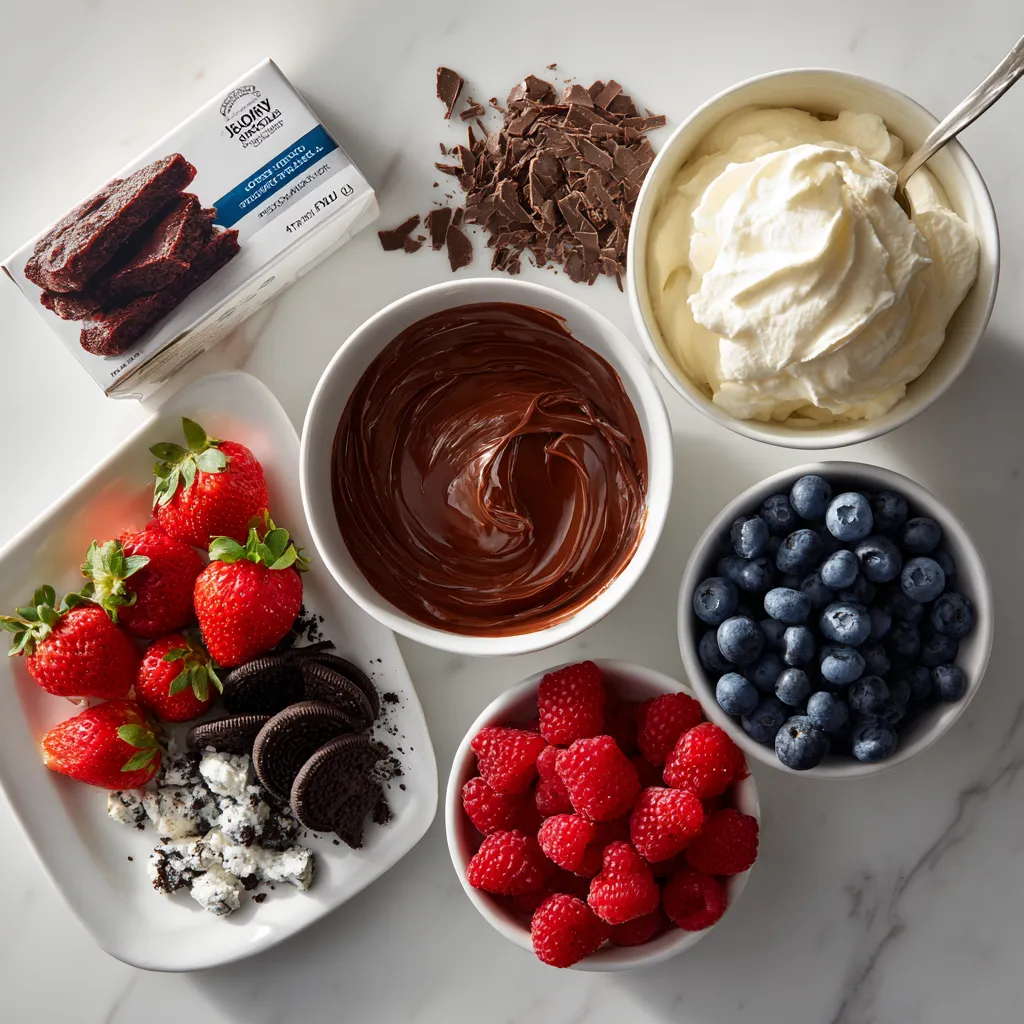
When making a Brownie Refrigerator Cake, you need fresh and tasty ingredients. Here’s what you will need:
– 1 box brownie mix (plus ingredients as directed on box)
– 2 cups whipped cream
– 1 cup chocolate ganache (1 cup chocolate chips and ½ cup heavy cream)
– 1 cup crushed Oreo cookies
– 1 cup mixed berries (strawberries, raspberries, blueberries)
– ¼ cup chocolate shavings (for garnish)
Each ingredient plays a key role in the taste and look of this cake. The brownie mix forms a rich base. The whipped cream adds a light and fluffy layer. Chocolate ganache gives a deep, sweet flavor. Crushed Oreos bring a crunchy texture, while mixed berries add a fresh burst of color and taste. Finally, chocolate shavings on top make it look extra special.
Using high-quality ingredients will make your dessert shine. For the best flavors, choose fresh berries and good chocolate chips. This will elevate your cake from good to great!
Step-by-Step Instructions
How to Prepare the Brownies
First, bake the brownies according to the package instructions. Make sure to use a 9×13 inch pan. This size works best for layers. Once the brownies are done, let them cool completely. This step is key. Warm brownies can mess up your layers.
Making the Chocolate Ganache
Next, it’s time to make the chocolate ganache. In a small saucepan, heat ½ cup of heavy cream over medium heat. Stir it until it simmers, but do not let it boil. Remove it from the heat and add 1 cup of chocolate chips. Stir until it is smooth. Allow the ganache to cool slightly before using it. This helps it thicken up a bit.
Layering the Refrigerator Cake
Now, we get to the fun part—layering! Cut the cooled brownies into small squares. In a rectangular dish, start with a layer of brownie squares at the bottom. Next, add a layer of whipped cream. Drizzle some chocolate ganache over that layer. Then, sprinkle crushed Oreo cookies on top.
After the Oreo layer, add a layer of mixed berries. Spread them evenly for a nice look. Repeat this layering process until you run out of ingredients. Finish with a layer of whipped cream on top.
Finally, cover the dish with plastic wrap. Refrigerate for at least 4 hours. For the best flavor, chill it overnight. The layers will set perfectly this way.
Tips & Tricks
Achieving the Perfect Brownie Texture
For the best brownies, choose a mix with rich cocoa flavor. Look for a brand that uses quality ingredients. Follow the box directions closely for the best end result.
Here are some tips to bake brownies perfectly:
– Use a 9×13 inch pan: This size ensures even baking.
– Line the pan with parchment: This helps with easy removal.
– Don’t overbake: Check for a toothpick inserted in the center. It should come out with a few moist crumbs.
Customizing the Ganache
You can use different chocolate types for your ganache. If you like dark chocolate, use dark chocolate chips. For a sweeter taste, go for milk chocolate.
To achieve smooth ganache, heat the cream gently until it simmers. Remove from heat before adding chocolate chips. Stir until the mix is smooth. Allow it to cool slightly for the best texture.
Layering Techniques for Presentation
Layering is key for a stunning dessert. Start with a layer of brownie squares. Use an even hand to spread the whipped cream. Drizzle the ganache slowly for a nice effect.
To garnish, sprinkle chocolate shavings on top. This adds a nice touch and makes it look fancy. Use a vegetable peeler to create shavings from a chocolate bar. This will help you get nice, thin pieces.
Pro Tips
- Use Quality Chocolate: For the ganache, use high-quality chocolate chips for a richer flavor and smoother texture.
- Layering Technique: Ensure each layer is spread evenly to create a beautiful presentation when sliced.
- Chill Overnight: For the best flavor and texture, refrigerate the cake overnight to allow the layers to meld together.
- Garnish Just Before Serving: Add chocolate shavings right before serving to keep them fresh and visually appealing.
Variations
Gluten-Free Brownie Refrigerator Cake
To make a gluten-free brownie refrigerator cake, start with a gluten-free brownie mix. Many brands offer great options that taste just as rich and chocolatey. You can find these mixes in most grocery stores.
For the layers, use gluten-free cookies instead of Oreos. You can try crushed almond flour cookies or gluten-free graham crackers. This keeps the dessert tasty while being safe for those who avoid gluten.
Vegan Options
For a vegan brownie refrigerator cake, substitute eggs and dairy in your brownie mix. You can use flax eggs or applesauce as an egg replacement. This makes your brownies just as moist.
Use plant-based whipped cream instead of regular cream. Brands like So Delicious or CocoWhip work well. For the ganache, try using dairy-free chocolate chips. Melt them with coconut milk for a rich, creamy texture.
Seasonal Variations
Seasonal fruits can add a fresh twist to your cake. In summer, use peaches or cherries between the layers. They add sweetness and a pop of color.
For the holidays, mix in spices like cinnamon or nutmeg. You can even layer in pumpkin puree for a festive touch. These variations keep your dessert exciting all year long!
Storage Info
How to Properly Store the Cake
To keep your Brownie Refrigerator Cake fresh, follow these steps:
– Cover the dish: Use plastic wrap to cover the cake tightly. This helps keep moisture in and prevents the cake from absorbing odors in the fridge.
– Refrigerate promptly: Place the cake in the fridge as soon as you finish serving. This keeps it safe and tasty.
– Shelf life: The cake stays good for about 3 to 5 days in the fridge. After that, the texture and taste may change.
Freezing Instructions
Yes, you can freeze this delightful cake for later enjoyment!
– Freezing the cake: Cut the cake into portions and layer them with parchment paper. This way, the pieces do not stick together. Place in an airtight container or heavy-duty freezer bag.
– Best thawing methods: To serve, move the cake from the freezer to the fridge. Let it thaw overnight. If you’re in a hurry, you can leave it at room temperature for about 1 to 2 hours. This way, you get a nice, cool dessert ready to enjoy!
FAQs
Can I use homemade brownies instead of a box mix?
Yes, you can use homemade brownies. They can be more rich and tasty. However, they may not be as uniform in size. Store-bought mixes are quick and easy. They give you a consistent texture. If you have the time, I recommend homemade for the best flavor.
How long should the cake chill in the refrigerator?
You should chill the cake for at least 4 hours. This allows the layers to set well. For the best taste, let it chill overnight. The flavors blend together beautifully when you wait.
What can I substitute for whipped cream?
If you can’t use whipped cream, there are great options. You can try Greek yogurt for a healthy twist. Coconut cream is a tasty dairy-free choice. Silken tofu blended until smooth works well too. Each of these will change the flavor a bit, but they will still be delicious!
This blog post guides you through creating a delicious brownie refrigerator cake. We covered the essential ingredients and step-by-step instructions for baking, making ganache, and layering. We also shared tips for perfect textures, customization options, and variations for different diets. Remember, baking is flexible. You can adjust ingredients to suit your taste. Enjoy this dessert, and share it with friends and family. Whether you choose classic or seasonal options, this recipe is sure to impress. Happy bakin