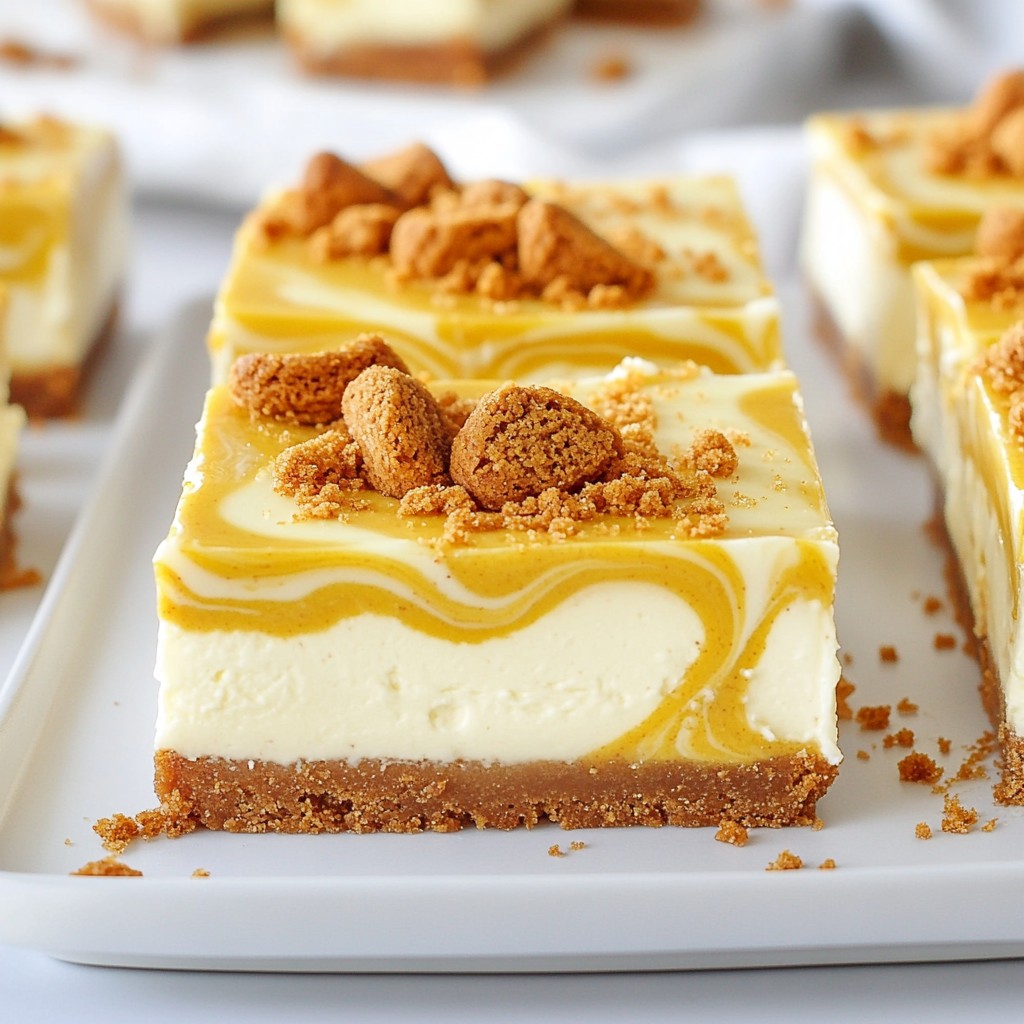
Are you ready for a treat that’s creamy and oh-so-delicious? Let me introduce you to Biscoff Cheesecake Bars! These bars blend crunchy Biscoff cookies with a rich cheesecake filling, creating a dessert you can't resist. Whether for a special occasion or a simple snack, these bars will impress everyone. Dive into this guide to learn how to make these mouthwatering treats step by step.
Why I Love This Recipe
- Delicious Flavor Combination: The rich cream cheese pairs perfectly with the caramel notes of Biscoff, creating a decadent dessert.
- Easy to Make: With simple ingredients and straightforward steps, these cheesecake bars come together quickly, even for beginners!
- Perfect for Sharing: Cut these bars into small squares, making them perfect for parties, gatherings, or a sweet treat to share with friends.
- Gorgeous Presentation: The swirls of Biscoff spread not only taste amazing but also look stunning, making these bars a showstopper on any dessert table.
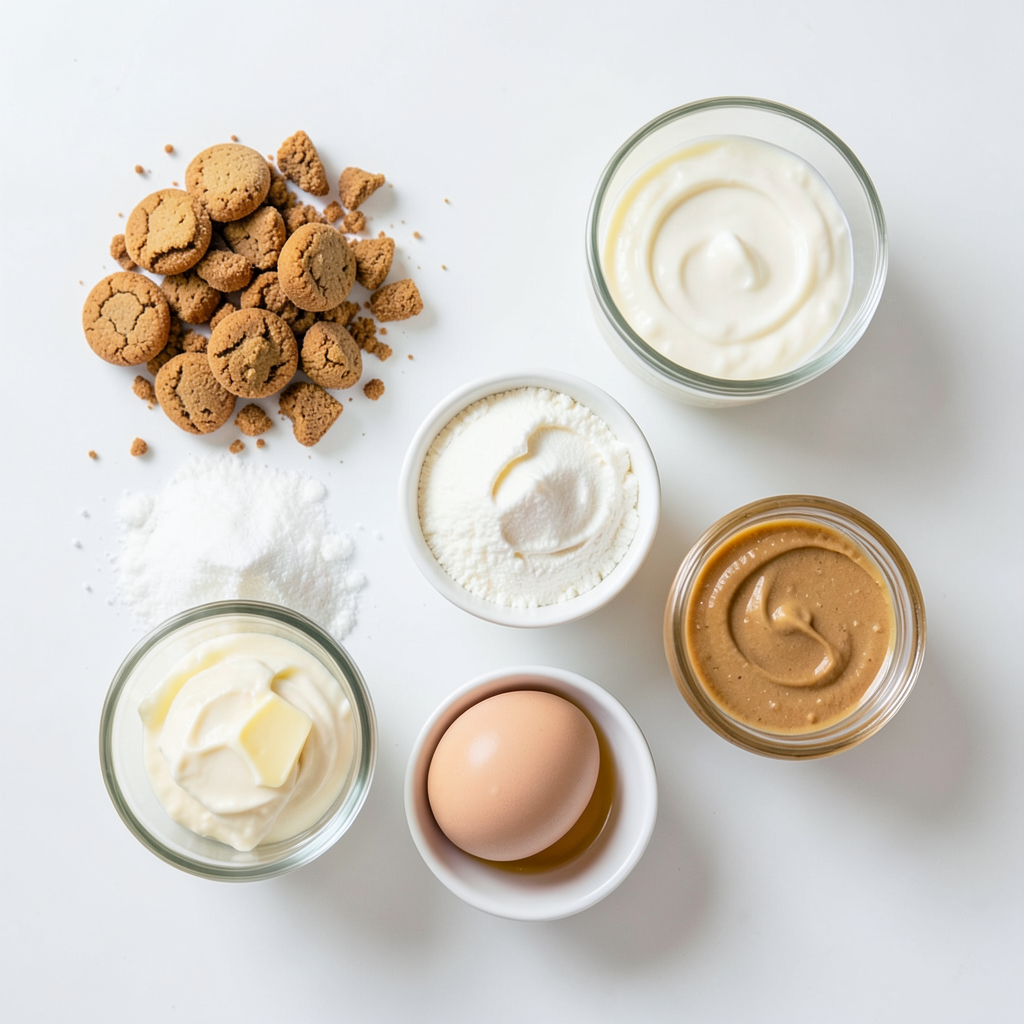
Ingredients
List of Ingredients
- 200g Biscoff cookies
- 100g unsalted butter
- 400g cream cheese
- 150g granulated sugar
- 200ml heavy cream
- 1 teaspoon vanilla extract
- 2 large eggs
- 100g Biscoff spread
- A pinch of salt
Measurement Details
For the Biscoff cheesecake bars, precise measurements are key to success. Here are the exact amounts you'll need:
- 200g Biscoff cookies: This will create a rich and flavorful crust.
- 100g unsalted butter: Melted to mix with the cookie crumbs.
- 400g cream cheese: Softened for a creamy filling.
- 150g granulated sugar: Sweetens the cheesecake perfectly.
- 200ml heavy cream: Adds richness and smoothness.
- 1 teaspoon vanilla extract: Enhances flavor.
- 2 large eggs: Binds the mixture together.
- 100g Biscoff spread: Used for swirls and topping.
- A pinch of salt: Balances the sweetness.
For substitutions, you can use gluten-free cookies if needed. If you prefer a lighter option, try using reduced-fat cream cheese. You can also swap heavy cream with coconut cream for a dairy-free version.
Step-by-Step Instructions
Preparation Steps
1. Preheat your oven to 350°F (175°C). Line an 8x8-inch baking dish with parchment paper. Leave some overhang to help you lift the bars later.
2. In a medium bowl, mix 200g of crushed Biscoff cookies with 100g of melted unsalted butter. Stir until all the crumbs are coated in butter.
3. Firmly press the cookie mixture into the bottom of the baking dish. Make sure it is even. Bake for 10 minutes, then let it cool.
Combining the Cheesecake Mixture
1. In a large bowl, beat 400g of softened cream cheese with 150g of granulated sugar until smooth and creamy.
2. Add 200ml of heavy cream, 1 teaspoon of vanilla extract, and a pinch of salt. Beat again until fully mixed.
3. Add 2 large eggs one at a time, mixing well after each. Do not overmix, as this can affect the texture.
Baking Process
1. Gently swirl 100g of Biscoff spread into the cheesecake mixture. This creates a lovely marbled effect.
2. Pour the cheesecake batter over the cooled crust in the baking dish. Spread it evenly.
3. Bake for 30-35 minutes. The edges should set, but the center can still jiggle a bit.
4. Once baked, turn off the oven and crack the oven door. Let the bars cool inside for 1 hour.
5. After cooling, refrigerate for at least 4 hours, or overnight for the best results. When set, cut into bars and enjoy!
Tips & Tricks
Baking Tips
- Ensuring the cheesecake is evenly baked: Bake the cheesecake in a preheated oven. This helps the bars cook evenly. Check for doneness by looking for set edges and a slight jiggle in the center. This jiggle means it's still creamy inside.
- How to achieve a smooth texture: Make sure your cream cheese is softened before mixing. This prevents lumps. Mix the cream cheese and sugar well until creamy. Adding heavy cream, vanilla, and salt helps create a smooth mix.
- Importance of cooling slowly: After baking, turn off the oven and crack the door. Let the cheesecake bars cool inside for one hour. This slow cooling helps prevent cracks. Then refrigerate for at least four hours, or overnight. Chilling helps the bars firm up nicely.
Serving Tips
- Presentation ideas: Dust the cheesecake bars with crushed Biscoff cookies before serving. This adds a nice touch. Drizzle extra Biscoff spread on top for extra flavor. You can also add whipped cream for a delicious garnish.
- Best serving practices: To cut perfect slices, use a sharp knife. Dip the knife in hot water, then wipe it dry. This helps the knife glide through the bars smoothly. Serve chilled for the best taste and texture.
Pro Tips
- Use Room Temperature Ingredients: Ensure your cream cheese and eggs are at room temperature for a smoother batter and better incorporation.
- Don’t Overmix: Once you add the eggs, mix just until combined to avoid creating a dense cheesecake.
- Chill Overnight: For the best flavor and texture, allow the cheesecake bars to chill overnight before slicing.
- Perfect Swirls: Use a toothpick or skewer to create beautiful swirls of Biscoff spread in the cheesecake mixture without overmixing.
Variations
Flavor Enhancements
You can easily change the taste of your Biscoff cheesecake bars. Adding chocolate or caramel swirls can be fun. Just melt some chocolate or caramel and swirl it into the cheesecake batter. This adds a rich flavor and looks great too. You can also use other flavored spreads instead of Biscoff. Try peanut butter or Nutella for a twist. Each option gives you a new way to enjoy these delicious bars.
Dietary Modifications
If you want a gluten-free version, use gluten-free cookies for the crust. Many brands offer gluten-free options. This way, everyone can enjoy the dessert. For a vegan adaptation, you can replace cream cheese with a plant-based cream cheese. Use coconut cream instead of heavy cream and flax eggs instead of regular eggs. These swaps will create a tasty vegan cheesecake that everyone will love.
Storage Info
Refrigeration Guidelines
Biscoff cheesecake bars can stay fresh in the fridge for up to five days. To keep them tasty, store them in an airtight container. This will protect them from odors and moisture. If you can't find a container, cover the dish tightly with plastic wrap or aluminum foil.
Freezing Instructions
If you want to save some for later, freezing is a great option. Wrap each bar in plastic wrap, then place them in a freezer bag. This method helps prevent freezer burn. You can freeze them for up to three months.
When you're ready to enjoy the bars, take them out and place them in the fridge overnight to thaw. This slow process helps keep their creamy texture. If you're in a hurry, you can let them sit at room temperature for about 30 minutes. Enjoy your delightful Biscoff cheesecake bars!
FAQs
Common Questions
Can I use different types of cookies for the crust? Yes, you can use other cookies. Try chocolate or graham cracker cookies. Each cookie gives a unique taste. Just crush them and mix with melted butter as you would with Biscoff cookies.
How can I tell if my cheesecake is done? The cheesecake is done when the edges look set. The center should still jiggle slightly. If it looks too firm, it may overbake. Keep an eye on it towards the end.
Is it necessary to refrigerate before serving? Yes, refrigerating is key. It helps the cheesecake set and improves flavor. Chill for at least four hours, but overnight is best. This way, you get perfect bars.
Troubleshooting
What to do if the cheesecake cracks? If cracks appear, don’t worry! They can happen. Here’s what to do: Let the cheesecake cool slowly. You can also cover the top with whipped cream or chocolate. This hides cracks and adds flavor.
Solutions for a soggy crust If your crust is soggy, it may need more baking time. Try baking the crust a bit longer next time. Ensure the crust is firmly pressed down. You can also bake it longer before adding the filling.
You now have all the tools to make Biscoff Cheesecake Bars. We covered the key ingredients, exact measurements, and step-by-step instructions. I shared helpful tips for perfect texture and presentation. You can also explore flavor variations and dietary options.
Remember, patience is key in baking. Enjoy your delicious creation!