Skip to content
DisclaimerTerms Of UseGDPR PolicyCookie Policy

savoryspiral

  • Home
  • Drinks
  • Appetizers
  • Dinner
  • Dessert
  • About
  • Contact
  • Privacy Policy
DisclaimerTerms Of UseGDPR PolicyCookie Policy

Charlotte

- 1 pound fresh green beans, trimmed - 3 tablespoons unsalted butter - 4 cloves garlic, minced - 1 teaspoon lemon zest - 1 tablespoon lemon juice - Salt and pepper to taste - 1/4 teaspoon red pepper flakes (optional) - Fresh parsley, chopped for garnish To make garlic butter green beans, you need fresh green beans. They give a crisp texture and a bright color. I choose unsalted butter for cooking. It melts well and blends nicely with the garlic. You will need minced garlic, which adds rich flavor. Fresh garlic works best. Lemon zest and juice bring brightness. They help cut through the richness of the butter. Season your dish with salt and pepper. If you like heat, add red pepper flakes. Finally, fresh parsley adds a touch of color and flavor as a garnish. I like to keep my ingredients simple and fresh. You can find all these ingredients at your local store. For the full recipe, check out the detailed instructions. First, fill a medium pot with salted water and bring it to a boil. This salt helps bring out the flavor of the green beans. Once boiling, add 1 pound of fresh green beans. Boil them for 3-4 minutes. You want them bright green and tender-crisp. Next, prepare an ice bath. Fill a large bowl with ice and cold water. After the green beans finish cooking, quickly transfer them to the ice bath. This stops the cooking and keeps the beans crunchy. Let them sit for about 5 minutes, then drain well. Now, it’s time to make the garlic butter. In a large skillet, add 3 tablespoons of unsalted butter. Heat the skillet over medium heat until the butter melts. Once melted, add 4 cloves of minced garlic. Sauté the garlic for 1-2 minutes. You want it fragrant but not browned. This step adds a rich flavor to the dish. Now, add the blanched green beans to the skillet. Stir them gently to coat with the garlic butter. Drizzle in 1 tablespoon of lemon juice and add 1 teaspoon of lemon zest. These add brightness and balance to the dish. Stir well to combine. Next, season the beans with salt, pepper, and 1/4 teaspoon of red pepper flakes if you like some heat. Sauté everything for an additional 2-3 minutes. This ensures the beans heat through and absorb the flavors. Now you have a delicious side dish ready to serve! For the full recipe, check out the earlier section. - Overcooking the green beans: This can make them mushy. Cook them just until bright green and tender. - Not using enough seasoning: Garlic and butter need a good balance of salt. Taste as you cook. - Fresh vs. dried garlic: Fresh garlic gives a strong taste. Dried garlic can be convenient but lacks freshness. Always choose fresh when you can. - Importance of butter quality: Use high-quality unsalted butter. It enhances flavor and allows you to control the salt level. - How to garnish effectively: Fresh parsley adds color and freshness. Sprinkle it on right before serving for best effect. - Serving suggestions on various dishes: Garlic butter green beans pair well with grilled meats, pasta, or rice. They add a pop of color and flavor to any plate. For the complete cooking process, check the Full Recipe. {{image_2}} You can easily change the flavor of garlic butter green beans. Adding nuts, like almonds or walnuts, gives a nice crunch. Nuts add protein and healthy fats too. They make the dish feel more special. You can also add cheese. Parmesan or feta brings a creamy texture that pairs well with the beans. Cheese adds saltiness and depth to the dish. If you want a lighter option, try olive oil instead of butter. Olive oil keeps the flavor but cuts down on saturated fat. It works well in this recipe and adds a nice taste. You can also add other vegetables. Carrots or bell peppers mix well with green beans. They add color and nutrients, making the dish even better. You can cook green beans in different ways. Cooking in the oven gives them a roasted flavor. Just toss them with garlic butter and bake until tender. The stovetop method is quick and easy. It lets you watch the beans closely. Grilling green beans adds a smoky taste that is hard to beat. The high heat gives them a char that enhances the flavor. You can try any of these methods to switch things up. For the full recipe, check out the Garlic Butter Green Beans section. To keep your garlic butter green beans fresh, store them in the fridge. Use an airtight container to prevent moisture loss. These beans stay good for about 3 to 4 days. After that, they may lose flavor and texture. When reheating, aim to keep the beans crisp. The best way is to use a skillet over medium heat. Add a splash of water or a little butter to help steam them. This method helps avoid sogginess and keeps the beans tasty. If you have extra green beans, freezing is a great option. First, let them cool completely. Place them in freezer-safe bags, and remove as much air as possible. They can last up to 3 months in the freezer. To thaw, move them to the fridge overnight. Reheat them in a skillet to bring back their texture. Enjoy your garlic butter green beans even after a long time! To keep green beans crunchy, cook them for 3-4 minutes. This time allows them to be bright green and tender but still crisp. After cooking, quickly move them to an ice bath. This stops the cooking and preserves their crunch. For a firmer bite, reduce the cooking time by one minute. Yes, you can prepare garlic butter green beans ahead of time. Cook the beans and garlic butter as directed. Let them cool, then store in an airtight container. You can keep them in the fridge for up to three days. Reheat them in a skillet over low heat to maintain their taste and texture. Many spices enhance garlic butter green beans. Consider trying: - Thyme for an earthy flavor - Basil for a fresh note - Onion powder for extra depth - Paprika for a smoky taste Feel free to mix and match to find what you love best. Absolutely! This recipe is vegetarian-friendly. It uses butter and fresh vegetables. Always check your butter brand to ensure it suits your dietary needs. You can also swap butter with olive oil for a vegan option. Enjoy this dish with confidence, knowing it fits many diets. Garlic butter green beans combine simple ingredients for a tasty dish. We covered the main steps: preparing the beans, making garlic butter, and combining them well. I shared tips to avoid mistakes, enhance flavor, and serve nicely. If you want to change things up, we explored variations too. Remember that storing and reheating correctly keeps your dish fresh. Enjoy these green beans as a side or healthy snack!

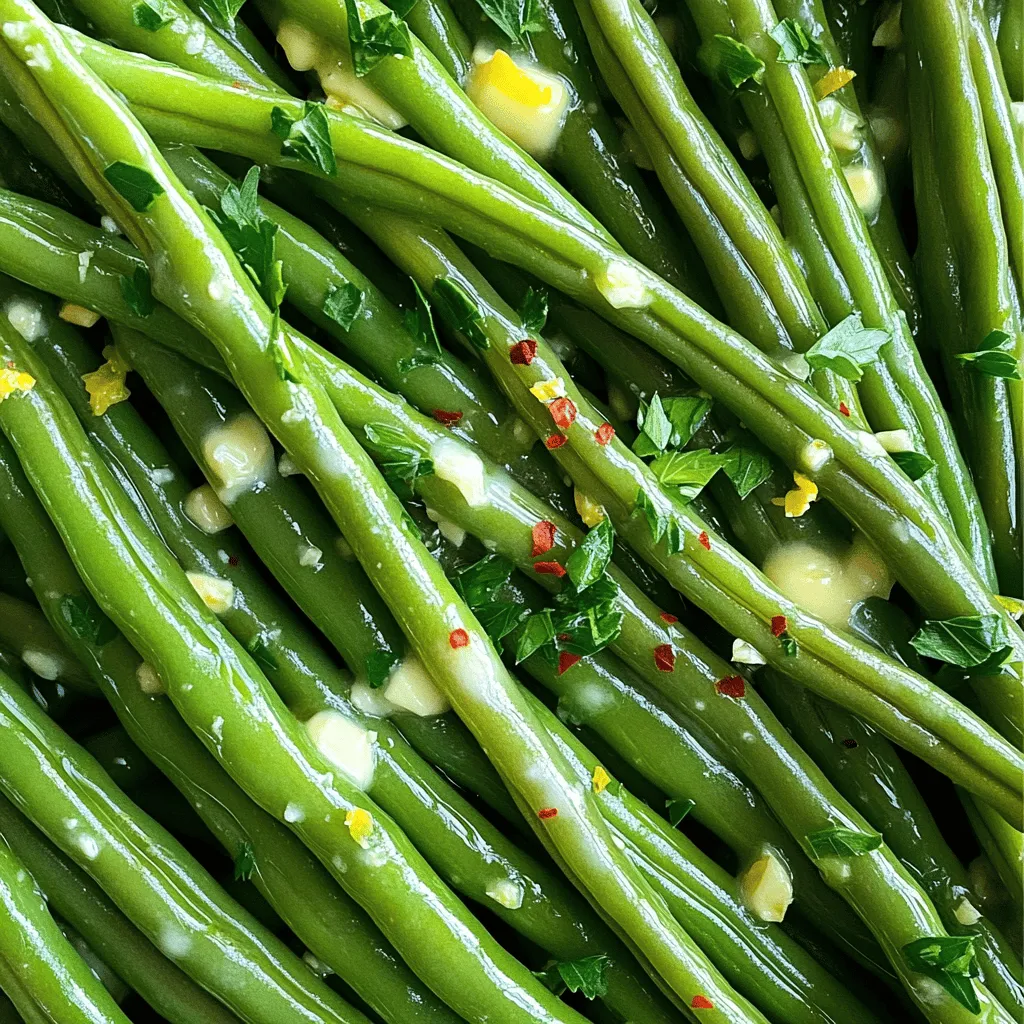
Garlic Butter Green Beans Flavorful and Simple Recipe

Looking for a quick yet delicious side dish? Garlic Butter Green Beans are your answer! This simple recipe combines fresh

- 1 lb fresh asparagus, trimmed - 1/2 cup grated Parmesan cheese - 1/2 cup breadcrumbs (panko recommended for extra crunch) - 2 large eggs - 1 teaspoon garlic powder - 1/2 teaspoon onion powder - 1/2 teaspoon paprika - Salt and pepper to taste - Cooking spray or olive oil for drizzling I love using fresh asparagus for this dish. It has a bright green color and a nice crunch. The Parmesan cheese brings a salty note, which pairs perfectly with the asparagus. I always choose panko breadcrumbs. They give these fries the best crunch and texture. For seasoning, I use garlic powder, onion powder, and paprika. They add depth and flavor to each bite. Don't forget to adjust the salt and pepper to your taste. These simple ingredients make a big difference in the final dish. When it comes to cooking, I like to use cooking spray or a drizzle of olive oil. This helps the fries get crispy in the oven. You will see how delicious and crunchy they turn out. For the full recipe, check out the details above. Preheat your oven to 425°F (220°C). This hot temperature helps get the fries crispy. Line a baking sheet with parchment paper. This makes cleanup easy and helps the fries not stick. In a bowl, mix the following ingredients: - 1/2 cup grated Parmesan cheese - 1/2 cup breadcrumbs (panko is best) - 1 teaspoon garlic powder - 1/2 teaspoon onion powder - 1/2 teaspoon paprika - Salt and pepper to taste Whisk these together well. In another bowl, beat 2 large eggs until smooth. This will help the crumbs stick to the asparagus. Take each spear of asparagus and dip it in the beaten eggs. Make sure to let any extra egg drip off. Then, roll the asparagus in the breadcrumb mix. Make sure to cover it all. This gives the fries a nice crunchy coating. Place the coated asparagus on the lined baking sheet. Arrange them in a single layer. Leave space between each spear. This helps them get crispy. Lightly spray the asparagus fries with cooking spray or drizzle with olive oil. This adds flavor and helps with crispiness. Put the baking sheet in the oven and bake for 12-15 minutes. Check for tenderness and golden color. The fries should be crunchy and delicious. Remove them from the oven and let them cool slightly before serving. You can find the Full Recipe to follow along easily. To get that perfect crunch, spacing matters. When placing your asparagus on the baking sheet, leave space between each spear. This allows hot air to flow around them. If they are too close, they will steam instead of crisp up. Trust me, spacing is key to getting the best results. Want to kick up the flavor? Try adding spices! A sprinkle of cayenne pepper brings heat. You can also use Italian seasoning or a pinch of cumin. Mix and match to find what you love. Each spice can change the taste, making your fries unique. Presentation can make your dish even more appealing. Serve the asparagus fries on a long platter. Pair them with dips like marinara or garlic aioli. A sprinkle of fresh parsley adds color and freshness. These small details make your meal look gourmet. For the full recipe, check out the details above. {{image_2}} You can change the cheese to suit your taste. Swap out Parmesan for Cheddar or Romano. Each cheese offers a unique flavor. Cheddar adds a sharp taste. Romano gives a salty kick. Try them for a fun twist on this recipe. If you need a gluten-free dish, it's easy! Just use gluten-free breadcrumbs. They work just as well in creating that crispy texture. This option makes the dish suitable for everyone. Enjoy it without worry! Want to make it more colorful? Add other veggies! Zucchini or bell peppers work great. Slice them thinly and coat them just like the asparagus. This mix adds more flavors and nutrition. Plus, it makes a fun and vibrant dish! For the full recipe, check out the detailed instructions that guide you step by step. To keep your baked Parmesan asparagus fries fresh, store them in an airtight container. This helps keep them from getting soggy. Place them in the fridge for up to three days. If you want to enjoy them later, make sure they cool down first before sealing. When reheating, I recommend using the oven. This method helps maintain the crispiness of the fries. Preheat your oven to 350°F (175°C). Place the fries on a baking sheet and heat for about 10 minutes. If you're in a hurry, you can use the microwave, but they may lose some crunch. Yes, you can freeze asparagus fries! If you want to freeze them, do it before baking. Arrange the coated fries on a baking sheet lined with parchment paper. Freeze them for about an hour until solid, then transfer them to a freezer bag. You can bake them straight from the freezer. Just add a few extra minutes to the cooking time. Yes, you can use frozen asparagus for this recipe. Just follow these tips: - Thaw the asparagus: Let it sit in the fridge overnight or run it under warm water. - Pat dry: Make sure to dry the asparagus well before coating. This helps the breading stick. - Adjust cooking time: Frozen asparagus may need a few extra minutes in the oven. Keep an eye on it for best results. You can tell when asparagus fries are done by checking these signs: - Tenderness: The asparagus should be easily pierced with a fork. - Color: Look for a golden brown color on the breading. - Crispiness: The fries should feel crisp and crunchy to the touch. Yes, you can prepare baked asparagus fries in advance. Here’s how: - Pre-coat the asparagus: Follow the breading steps and coat the asparagus. - Store in the fridge: Place the coated asparagus in an airtight container until ready to bake. - Baking later: When you're ready, just bake as directed. You may need to add a few extra minutes to cook them through. For the full recipe, check out the detailed instructions above! In this post, we covered a simple way to make tasty baked asparagus fries. We discussed the main ingredients and seasoning needed for crispiness. I shared easy steps to coat and bake your asparagus, plus tips to enhance flavor and serve. Remember, you can play with different cheeses and veggies. Storing leftovers properly keeps them fresh. With these tricks, your asparagus fries will be a hit. Enjoy your cooking adventure!

Baked Parmesan Asparagus Fries Crispy and Flavorful

Looking for a tasty snack that’s both healthy and easy to make? Baked Parmesan Asparagus Fries are your answer! With

To make Easy Zucchini Lasagna, gather the following ingredients: - 3 medium zucchinis, sliced into thin strips - 1 cup ricotta cheese - 1 cup mozzarella cheese, shredded - ½ cup grated Parmesan cheese - 1 egg - 2 cups marinara sauce - 1 teaspoon dried oregano - 1 teaspoon garlic powder - Salt and pepper to taste - Fresh basil leaves for garnish Choose fresh zucchinis. Look for firm, glossy ones with no soft spots. They should feel heavy for their size. For cheese, use high-quality ricotta and mozzarella. Fresh cheese melts better and adds more flavor. When picking marinara sauce, check the label. Look for simple ingredients without added sugars or preservatives. If you're lactose intolerant, swap ricotta with a dairy-free alternative. For gluten-free diets, ensure your marinara sauce is gluten-free. You can also add layers of cooked ground turkey or beef for extra protein. If you want a vegan option, try using tofu blended with nutritional yeast instead of cheese. To start, you need to prepare the zucchini. Slice three medium zucchinis into thin strips. I like using a mandoline for even slices, but a sharp knife works too. After slicing, lay the strips on paper towels. Lightly sprinkle them with salt. This step helps draw out excess moisture. Let the zucchini sit for about ten minutes. This will help keep your lasagna from getting watery. Next, let’s make the ricotta filling. In a mixing bowl, combine one cup of ricotta cheese, one egg, one teaspoon of dried oregano, and one teaspoon of garlic powder. Don’t forget to add a pinch of salt and pepper to taste. Mix everything well until it turns smooth and creamy. This filling adds rich flavor to your lasagna. Now it's time to layer the lasagna. Start by spreading a thin layer of marinara sauce at the bottom of a 9x13 inch baking dish. Place half of the zucchini strips over the sauce, slightly overlapping them. Next, spread half of your ricotta mixture on top of the zucchini. Then, add another layer of marinara sauce and a sprinkle of mozzarella cheese. Repeat these layers with the remaining zucchini, ricotta mixture, marinara, and mozzarella. Finish with a layer of marinara sauce and a generous topping of grated Parmesan cheese. For baking, cover the dish with aluminum foil. Place it in your preheated oven at 375°F (190°C). Bake for 30 minutes. After that, remove the foil and bake for an additional 15 to 20 minutes. You want the cheese to be bubbly and golden brown. Once done, let the lasagna cool for about ten minutes before slicing. This resting time helps the layers set, making it easier to serve. For a beautiful presentation, garnish with fresh basil leaves. Enjoy this easy zucchini lasagna! You can find the full recipe above for all the details. When choosing zucchini, look for firm and smooth skin. The color should be bright green. Avoid zucchini that feels soft or has blemishes. Smaller zucchinis tend to be sweeter and more tender. If you find small ones, grab them! They work great in your lasagna. To keep your lasagna from getting soggy, salt the zucchini before using it. Lay the sliced zucchini on paper towels and sprinkle with salt. Let it sit for about 10 minutes. This draws out extra moisture. After that, pat the slices dry before layering them in the dish. This simple step helps keep your lasagna nice and firm. You can easily make this dish fit different diets. For a dairy-free option, swap the ricotta and mozzarella with vegan cheese. If you want a gluten-free meal, use gluten-free marinara. You can also add cooked ground turkey or beef for extra protein. Adjust the recipe to fit your needs, and enjoy every bite! For the full recipe, visit the recipe section. {{image_2}} This Easy Zucchini Lasagna is a fun twist on the classic dish. Instead of pasta, we use fresh zucchini. You slice the zucchini into thin strips, which makes it light and healthy. Each layer is filled with creamy ricotta, savory marinara, and gooey mozzarella. This recipe takes about 55 minutes from start to finish and serves six people. You will love how easy it is to make and how great it tastes! This lasagna is nutritious and packed with flavor. Each serving provides a good mix of proteins, fats, and carbs. Here is a quick look at the nutrition per serving: - Calories: 320 - Protein: 18g - Fat: 15g - Carbohydrates: 32g - Fiber: 2g - Sugar: 4g These numbers can vary based on the brands you use and any changes made to the recipe. For a complete meal, I suggest serving the lasagna with a fresh side salad. You can add mixed greens, cherry tomatoes, and a light vinaigrette. If you want more flavor, sprinkle some extra Parmesan on top of the lasagna before serving. Enjoy it warm, and don’t forget to garnish with fresh basil leaves for a nice touch! For the full recipe, you can check the section above. For a delicious vegetarian twist, you can add more veggies. Bell peppers, spinach, or mushrooms work great. You can also use a mix of your favorite vegetables. Just slice them thin and layer them like the zucchini. This way, you keep all the flavor and nutrients. You can even swap ricotta for cottage cheese if you want a different taste. If you need a gluten-free option, you can skip the traditional pasta. The zucchini makes a great substitute. Just be sure to slice the zucchini thin enough. You can also use gluten-free marinara sauce. Look for brands that are certified gluten-free to stay safe. If you want to add some meat, ground turkey or beef works well. Cook the meat in a pan before mixing it with the marinara sauce. Layer it in between the zucchini and cheese. This gives you a hearty meal that fills you up. You can also use cooked sausage for a bolder flavor. You can find the full recipe for Easy Zucchini Lasagna above. Yes, you can make Easy Zucchini Lasagna ahead of time. Just follow the steps in the Full Recipe, but do not bake it. Cover your dish tightly with plastic wrap or foil and store it in the fridge. It will stay fresh for up to 24 hours. When you are ready, bake it as directed. To store leftover lasagna, let it cool completely first. Then, place it in an airtight container. You can also wrap individual portions in plastic wrap. Keep it in the fridge for up to four days. This way, you can enjoy it later without losing flavor. Absolutely! Freezing zucchini lasagna is easy. After baking, let it cool completely. Then, wrap it tightly in plastic wrap and foil. Label it with the date. You can freeze it for up to three months. When you want to eat it, thaw it in the fridge overnight and reheat. If you need a substitute for ricotta cheese, try cottage cheese or cream cheese. You can also use Greek yogurt for a lighter option. Blend it smooth for a similar texture. Each option adds a unique flavor but works well in this recipe. Zucchini lasagna lasts about four days in the fridge. Make sure it is in an airtight container to keep it fresh. If you notice any unusual smells or changes in texture, it’s best to discard it. Always prioritize safety when eating leftovers. This blog post covered everything you need for Easy Zucchini Lasagna. We looked at the key ingredients, tips for fresh quality, and ways to adapt for dietary needs. I shared step-by-step instructions for preparation, layering, and baking. You learned how to choose the best zucchini and avoid a watery lasagna. In my final thoughts, this dish is not just tasty; it's simple and versatile too. Enjoy making this healthy option for your next meal!

Easy Zucchini Lasagna Quick and Flavorful Recipe

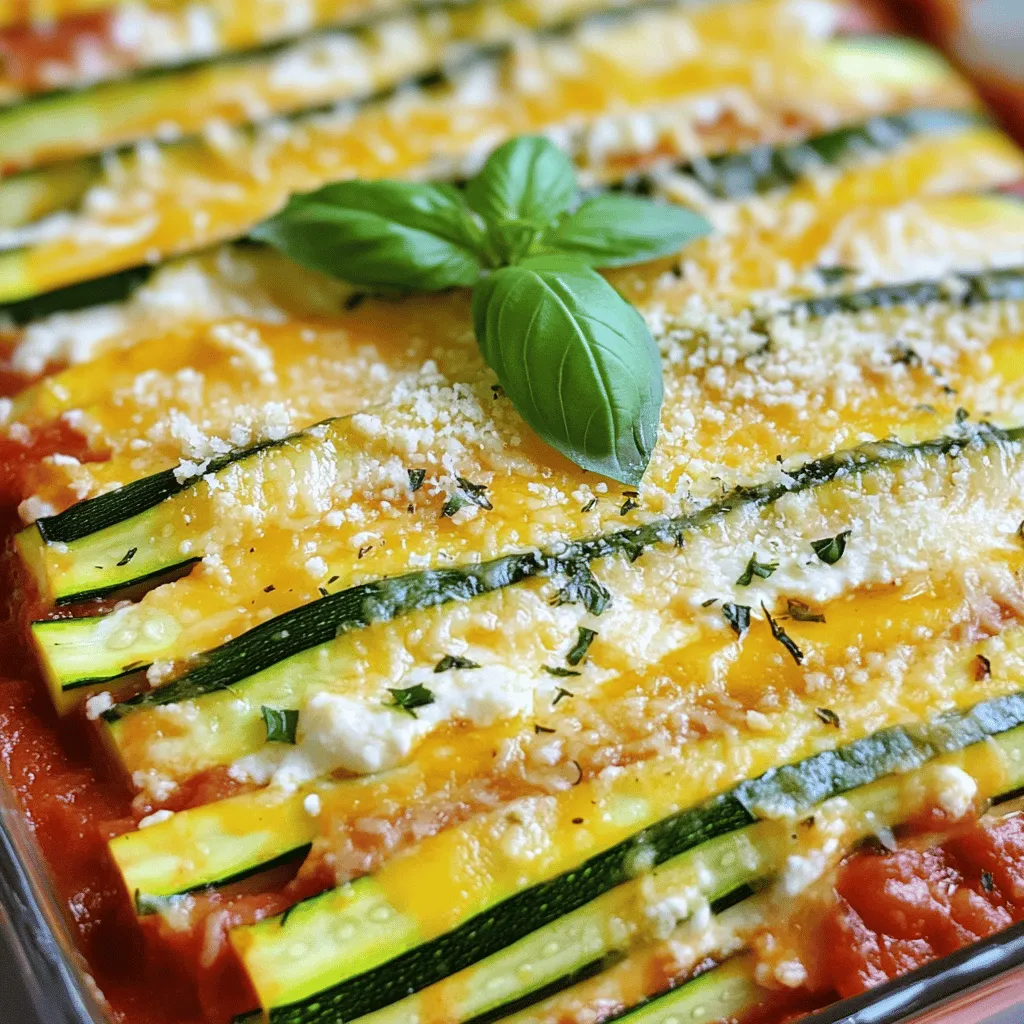
If you’re looking for a healthy twist on a classic dish, you’ve found it! This Easy Zucchini Lasagna is quick

- 1 ½ cups graham cracker crumbs - ½ cup unsalted butter, melted - 2 cups cream cheese, softened - 1 cup powdered sugar - 1 teaspoon vanilla extract - 1 cup heavy whipping cream - 2 cups fresh peaches, peeled and sliced - 1 tablespoon lemon juice - 1 tablespoon gelatin powder (optional, for a firmer texture) - 3 tablespoons cold water (if using gelatin) Use standard measuring cups and spoons for accuracy. This helps ensure great results. - Graham cracker crumbs: These form a sweet, crunchy base. You can crush whole crackers or buy pre-made crumbs. - Cream cheese: Use full-fat cream cheese for the best flavor and texture. Ensure it is soft for easy mixing. - Fresh peaches: Look for ripe, juicy peaches. They add natural sweetness and flavor to the cheesecake. - Gelatin powder: This is optional. It helps the cheesecake hold its shape. If you skip it, the cheesecake remains creamy and soft. - Heavy whipping cream: Whipping it adds lightness to the filling. Make sure to whip it until stiff peaks form. This recipe combines these ingredients to create a rich and creamy delight. Check out the Full Recipe for complete guidance! To start, take a mixing bowl. Combine the graham cracker crumbs with melted butter. Mix until it looks like wet sand. Grab a 9-inch springform pan and press the mixture firmly into the bottom. This creates your crust. Chill the crust in the fridge for 30 minutes. This helps it set well. In a large bowl, beat the softened cream cheese with an electric mixer. You want it smooth and creamy. Gradually add the powdered sugar and vanilla extract. Keep mixing until everything blends nicely. In another bowl, whip the heavy cream until it forms stiff peaks. This step adds lightness to your cheesecake. Gently fold the whipped cream into the cream cheese mixture. Make sure it mixes well without losing air. Next, take your fresh peach slices. Toss them in lemon juice. This keeps them from turning brown. Add half of the peach slices to the cream cheese mixture. Fold them in gently to keep the filling fluffy. If you want a firmer cheesecake, you can use gelatin. Dissolve the gelatin powder in cold water. Let it sit for 5 minutes, then heat it gently until melted. Stir this into your cream cheese mix before adding the peaches. Now, pour the cheesecake filling over your chilled crust. Smooth the top with a spatula. Decorate with the remaining peach slices on top. Cover the cheesecake with plastic wrap. Refrigerate it for at least 4 hours or, better yet, overnight. This chilling time is key for the cheesecake to set properly. When you’re ready to serve, carefully remove the sides of the springform pan. Slice and enjoy your peachy treat! For the full recipe, check out the complete instructions above. One big mistake is skipping the chilling step. This step helps the cheesecake set properly. If you rush, your cheesecake can be too soft. Another mistake is not mixing the cream cheese enough. You want it smooth to avoid lumps. Always use room temperature cream cheese. Cold cream cheese doesn’t blend well. For a rich and creamy texture, whip your heavy cream until stiff peaks form. Be gentle when folding it into the cream cheese mixture. This keeps the cheesecake light and fluffy. If you want a firmer texture, use gelatin. Dissolve it in cold water first, then heat until melted. This step helps your cheesecake hold its shape better. Using fresh peaches makes a big difference. They add bright flavor and great texture. Tossing them with lemon juice helps keep them fresh and bright. You can also add a splash of almond extract for depth. This little twist can elevate the flavor. Always choose ripe, fragrant peaches for the best taste. You’ll love how fresh ingredients make your cheesecake shine. For the complete recipe, check the [Full Recipe]. {{image_2}} You can switch peaches for other fruits. Try strawberries, blueberries, or raspberries. Each fruit gives a new taste. I love using mixed berries for a colorful look. You can also use tropical fruits like mango or pineapple. These fruits add a fun twist to your cheesecake. If you need gluten-free options, use gluten-free graham crackers for the crust. You can also swap cream cheese for dairy-free cream cheese if you're lactose intolerant. For a lower-sugar version, use a sugar substitute in place of powdered sugar. These swaps keep the cheesecake tasty and friendly for many diets. Want to amp up the flavor? Add a pinch of cinnamon or nutmeg to the filling. A drop of almond or coconut extract can make the flavor pop. You can even fold in some lemon zest for a zing. These little twists make a big difference and keep every bite exciting. Feel free to explore these options and make this No-Bake Peach Cheesecake your own. For the complete recipe, check out the Full Recipe section. To store your leftover no-bake peach cheesecake, first cover it well. Use plastic wrap or aluminum foil to keep it fresh. You can also use an airtight container. Place it in the fridge. This way, it stays cool and tasty for up to three days. You can freeze your cheesecake for later. First, let it chill in the fridge for at least four hours. Once set, wrap it tightly in plastic wrap. Then, put it in a freezer-safe container. This helps prevent freezer burn. You can freeze it for up to two months. When you’re ready to enjoy it, thaw it in the fridge overnight before serving. The cheesecake lasts about three days in the fridge. After that, it may lose its taste and texture. Always check for signs of spoilage, like off smells or changes in color. Use leftover cheesecake in fun ways. Crumble it over yogurt or mix it into smoothies for a tasty treat. You can also make mini cheesecakes in jars for easy snacks. For the full recipe, check out the details above. A no-bake cheesecake is a creamy dessert that doesn’t need an oven. It uses cream cheese, sugar, and whipped cream to create a smooth filling. You mix everything and chill it in the fridge until it sets. This makes it easy and fun to make, perfect for warm days. Yes, you can use canned peaches instead of fresh ones. Just make sure to drain them well. Canned peaches often have added sugar, so you might want to cut back on the sugar in the recipe. Fresh peaches add a nice texture and taste, but canned peaches work fine, too. You will know the cheesecake is set when it feels firm to the touch. After chilling for at least four hours, check the edges. They should be firm, while the center may still be a bit soft. If you press gently, it should not jiggle much. If you like it firmer, leave it in the fridge for longer. You can serve your cheesecake with a variety of tasty options. Here are some ideas: - Fresh peach slices on top - A drizzle of honey or caramel sauce - A dollop of whipped cream - A scoop of vanilla ice cream These additions can make your cheesecake even more delightful. You’ve learned how to make a no-bake peach cheesecake step by step. We covered all the ingredients, measurements, and key notes. I also shared tips to prevent common mistakes and achieve the best texture. You discovered fun variations, storage tips, and answers to FAQs. Now you’re ready to impress with your cheesecake. Enjoy making this sweet treat!

No-Bake Peach Cheesecake Rich and Creamy Delight

Get ready to treat your taste buds with my No-Bake Peach Cheesecake! This rich and creamy delight is easy to

To make a delicious Rustic Tomato Galette, gather these ingredients: - 2 cups all-purpose flour - 1/2 teaspoon sea salt - 1/4 cup cold unsalted butter, cubed - 1/4 cup cold water - 4 medium tomatoes, sliced (mix of heirloom and cherry) - 1 cup shredded mozzarella cheese - 2 tablespoons Dijon mustard - 1 tablespoon fresh basil, chopped - 1 tablespoon fresh thyme, chopped - 1/2 teaspoon garlic powder - Salt and pepper to taste - 1 egg (for egg wash) Using fresh ingredients makes a big difference. Choose ripe tomatoes for the best flavor. Look for tomatoes that feel heavy for their size and have a rich color. Fresh herbs, like basil and thyme, add bright notes to your galette. Always check for crispness and aroma when picking herbs. Fresh mozzarella provides a creamy texture that contrasts well with the tomatoes. You can customize this recipe easily. If you don’t have all-purpose flour, try whole wheat flour for a nuttier taste. For a dairy-free option, use plant-based butter and cheese. If you want a zesty kick, replace Dijon mustard with pesto. You can also swap tomatoes for other seasonal veggies, like zucchini or bell peppers. Enjoy experimenting to find your favorite mix! Start by mixing the flour and sea salt in a large bowl. Next, add the cold butter. Use a pastry cutter or your fingers to mix until it looks like coarse crumbs. This step is key for a flaky crust. Then, slowly add cold water, one tablespoon at a time. Mix until the dough comes together, but do not overwork it. Shape the dough into a disk, wrap it in plastic wrap, and chill it in the fridge for at least 30 minutes. While the dough chills, prepare the filling. In a medium bowl, combine the sliced tomatoes, mozzarella cheese, and Dijon mustard. Then, add fresh basil, thyme, garlic powder, salt, and pepper. Mix well to blend all the flavors. Letting it sit for a bit helps enhance the taste. Once the dough is chilled, preheat your oven to 400°F (200°C). On a floured surface, roll out the dough into a rough circle about 12 inches wide. Place it on a baking sheet lined with parchment paper. Spread the tomato mixture in the center, leaving a 2-inch border. Fold the edges over the filling, creating pleats for a rustic look. Beat the egg and brush it over the edges for a lovely golden finish. Then, bake for 30-35 minutes, until the crust is golden and the tomatoes soften. Let it cool for about 10 minutes before slicing. Serve warm or at room temperature. For extra flair, serve it on a wooden board with fresh basil and balsamic glaze. For the full recipe, check out the recipe section above. To get that charming rustic look, you want to keep it simple. Roll out your dough into a rough circle, not a perfect one. The edges should be uneven, giving it a hand-made feel. When you fold the edges over the filling, let them overlap. This creates height and texture, which is key to the rustic vibe. One common mistake is overworking the dough. You want it to be flaky, not tough. Mix just until the flour and butter combine, then add the water. Another mistake is using too much filling. Keep the filling within the 2-inch border. If you fill it too much, the galette may leak while baking. For this recipe, you need a few basic tools: - Large mixing bowl - Pastry cutter (or your fingers) - Rolling pin - Parchment paper - Baking sheet - Sharp knife for slicing tomatoes - Egg wash brush These tools will help you create a beautiful Rustic Tomato Galette. For the best results, make sure your ingredients are cold, especially the butter. This helps create a flaky crust. If you follow these tips, your galette will look and taste amazing. For a complete guide, check the Full Recipe. {{image_2}} You can switch up the cheese in your galette for a new taste. Mozzarella gives a nice stretch, but you can try others too. Goat cheese adds a tangy punch. Feta cheese brings a salty element that works well with tomatoes. For a richer flavor, consider using aged cheddar. Each cheese brings its own unique twist to the dish. Feel free to add seasonal veggies to your galette. Zucchini works well in summer. Bell peppers add sweetness and color. Spinach or kale can boost nutrition. Just chop them into small pieces and mix them with the tomatoes. This adds texture and flavor. You can make this dish your own by using what’s fresh. If you need a gluten-free option, substitute the all-purpose flour with a gluten-free blend. Look for blends that include xanthan gum for better texture. For a vegan galette, swap the butter for coconut oil or vegan butter. Use a plant-based cheese to keep the galette creamy. This way, everyone can enjoy this savory delight. To keep your Rustic Tomato Galette fresh, store it in an airtight container. This helps trap moisture and keeps the crust crisp. If you have leftover slices, place parchment paper between them. This keeps the crust from getting soggy. Store the container in the fridge and enjoy it within three days. When it's time to eat the galette again, I recommend using the oven for reheating. Preheat your oven to 350°F (175°C). Place the galette on a baking sheet. Heat it for about 10-15 minutes. This method warms the galette evenly while keeping the crust crispy. You can also reheat slices in a toaster oven for a quick snack. If you want to save your galette for later, freezing is a great option. First, let it cool completely. Once cooled, wrap the galette tightly in plastic wrap. Then, place it in a freezer bag, removing as much air as you can. You can freeze it for up to three months. When you're ready to eat, thaw it in the fridge overnight and reheat as mentioned above. Enjoy the tasty flavors again! For the full recipe, check out the Rustic Tomato Galette details above. A rustic tomato galette is a freeform pie. It has a flaky crust filled with fresh tomatoes and cheese. The dish showcases seasonal flavors and is easy to make. You can enjoy it warm or at room temperature. The beauty of a galette lies in its charm. It looks homemade and has a deliciously messy feel. You can use any mix of tomatoes for variety. Heirloom, cherry, or even grape tomatoes work well. This dish is perfect for any meal. Serve it for lunch, dinner, or as a snack. You can make a rustic tomato galette ahead of time. To do this, prepare the dough and filling. Store the dough in the fridge for up to two days. You can also assemble the galette and chill it. Just cover it with plastic wrap. Bake it when you're ready to serve. If you want to freeze it, do so before baking. Wrap it tightly in plastic wrap and foil. When you are ready to bake, no need to thaw. Just add a few extra minutes to the baking time. Yes, you can use different herbs in the recipe. If you prefer, try oregano or rosemary. These herbs add a distinct flavor to the galette. You can mix and match based on your taste. Fresh herbs work best, but dried herbs can also be used. Just remember, dried herbs are stronger, so use less. The key is to find a blend you love. Don’t be afraid to experiment and have fun with it! You now know how to make a delicious rustic tomato galette. We discussed key ingredients, tips for that rustic look, and how to bake it perfectly. I shared storage tips and how you can adjust the recipe to fit your needs. Remember, there’s room for creativity with different cheeses or seasonal veggies. Enjoy making and sharing this delightful dish with friends and family. Your culinary skills will shine with this easy yet tasty recipe!

Rustic Tomato Galette Simple and Savory Delight

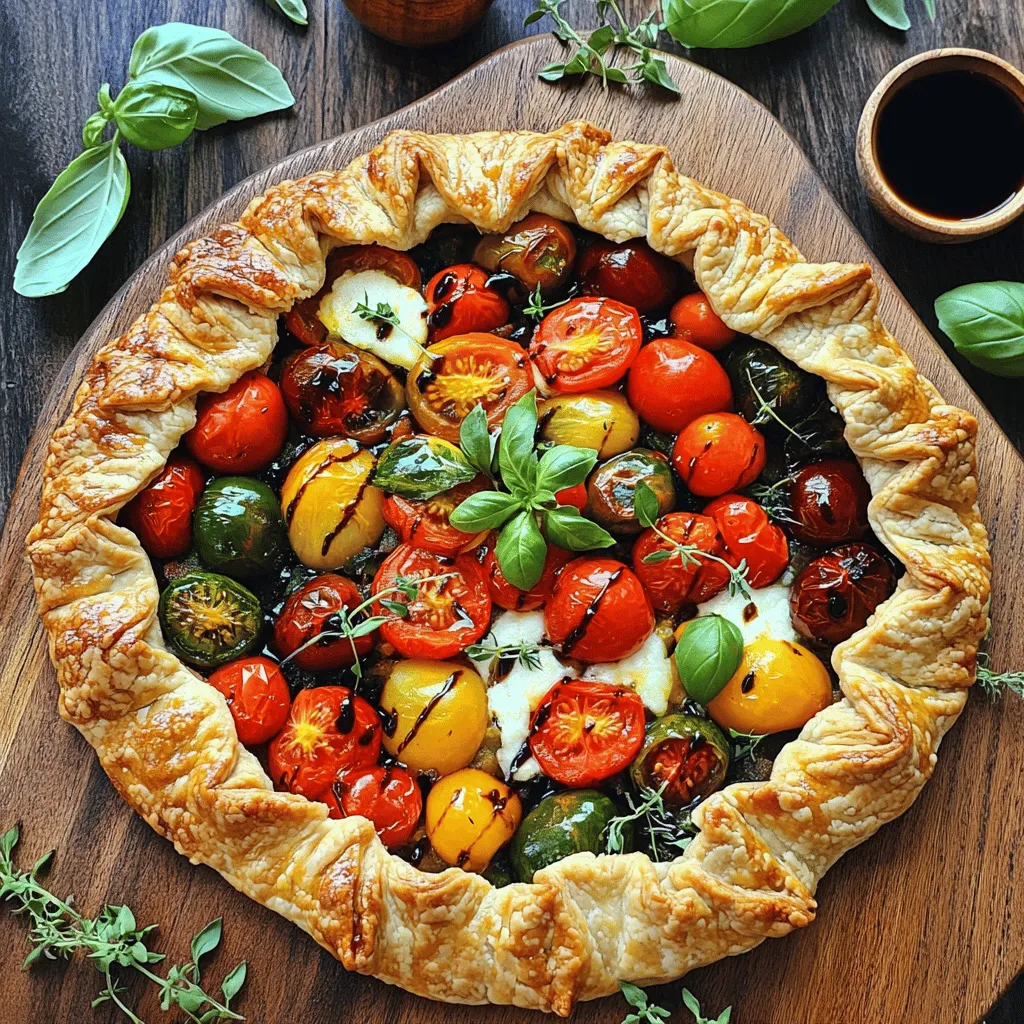
Welcome to my kitchen, where today, we make a Rustic Tomato Galette. This savory dish bursts with flavor and makes

To make Classic Okra Stew, you need fresh ingredients and pantry staples. This stew is hearty and filling. It brings comfort to your table. - 1 pound fresh okra, sliced into rounds - 1 medium onion, chopped - 2 cloves garlic, minced - 1 bell pepper (any color), diced - 2 medium tomatoes, chopped - 1 can (15 oz) diced tomatoes (with juice) - Fresh parsley, for garnish - 4 cups vegetable broth - 1 tablespoon olive oil - 1 teaspoon smoked paprika - 1 teaspoon dried thyme - 1 teaspoon cayenne pepper (adjust to taste) - Salt and pepper, to taste Gather these ingredients from your kitchen or local market. Fresh okra adds a unique taste. The spices give it warmth and depth. The Full Recipe makes it easy to follow along. Gathering your ingredients is key to a smooth cooking process. Here’s what you need: - 1 pound fresh okra, sliced into rounds - 1 medium onion, chopped - 2 cloves garlic, minced - 1 bell pepper (any color), diced - 2 medium tomatoes, chopped - 4 cups vegetable broth - 1 teaspoon smoked paprika - 1 teaspoon dried thyme - 1 teaspoon cayenne pepper (adjust to taste) - 1 can (15 oz) diced tomatoes (with juice) - 1 tablespoon olive oil - Salt and pepper, to taste - Fresh parsley, for garnish Start by washing all the fresh veggies. Slice the okra into rounds. Chop the onion and bell pepper, and mince the garlic. Keep the ingredients close to your cooking area for easy access. In a large pot, heat the olive oil over medium heat. Add the chopped onion and bell pepper to the pot. Sauté them until they soften, about five minutes. Then, stir in the minced garlic. Cook for one more minute until it smells good. Next, add the sliced okra. Cook it for about five to seven minutes. This helps reduce the sliminess of the okra, which is a common concern. After that, sprinkle in the smoked paprika, thyme, cayenne pepper, salt, and pepper. Stir everything well to combine the flavors. Now, pour in the vegetable broth and diced tomatoes. Make sure to include the juice from the canned tomatoes. Bring the mix to a gentle simmer. Reduce the heat to low and cover the pot. Let it simmer for about 30 to 40 minutes. Stir occasionally until the okra is tender and the flavors blend nicely. Once the stew is ready, taste it. Adjust the seasoning if you need to. When serving, ladle the hot stew into deep bowls. Garnish it with freshly chopped parsley for a pop of color. For a nice touch, serve it with crusty bread on the side. You can even add a wedge of lemon or lime for a fresh zing. Enjoy this hearty meal! You can find the full recipe [here](#). Okra can be slimy, but I have some tricks to help. First, you can slice the okra and let it sit for about 30 minutes. This helps draw out some of the moisture. Another great tip is to cook the okra at a high heat for a short time. Stir it often to keep it from sticking. When you add it to the stew, give it a quick sauté before mixing in the broth. This step reduces the sliminess and enhances the flavor. Serve your okra stew hot for the best taste. The warmth brings out the flavors and makes the dish feel cozy. I recommend letting it simmer gently for about 30 minutes to meld the flavors. After cooking, let it cool for a few minutes before serving. This way, it won’t burn your mouth. Use a deep bowl to serve and enjoy the warmth. Garnishing makes your stew look and taste even better. Fresh parsley adds a nice pop of color and flavor. You can sprinkle some on top right before serving. For a zesty twist, try adding a squeeze of lemon or lime juice. This brightens the dish and balances the flavors. If you love heat, consider adding a slice of jalapeño or a dash of hot sauce for extra kick. These small touches make your Classic Okra Stew shine! For the full recipe, check out the details above. {{image_2}} You can easily make this stew vegan. Simply replace the vegetable broth with a homemade version or a store-bought one. Use more fresh veggies like zucchini or corn for added taste. You can also add lentils for protein. They cook well in the broth and add a nice texture. If you like heat, add more cayenne pepper or crushed red pepper flakes. You can also stir in jalapeños or serrano peppers. These spicy ingredients give the stew a kick. Try adding a splash of hot sauce right before serving for extra flavor. To change the texture, think about how you cut the okra. Slicing it thin makes it more tender. Alternatively, leave it in larger chunks for a hearty bite. You can also add beans like kidney or black beans for creaminess. This adds both flavor and depth to the stew. Feel free to explore these variations. They allow you to make the stew your own while keeping it delicious. For the complete recipe, check out the Full Recipe section above. After making your okra stew, let it cool down to room temperature. Once it cools, store it in an airtight container. Place it in the fridge for up to four days. This keeps the flavors fresh. When you are ready to eat, just take it out and enjoy. If you want to save your stew for later, freezing is great. Use a freezer-safe container or a heavy-duty freezer bag. Make sure to leave some space at the top. This allows the stew to expand. It can last up to three months in the freezer. When ready to eat, thaw it in the fridge overnight. To reheat, you have a few options. You can warm it on the stove or in the microwave. If using the stove, heat it over low heat, stirring often. If using the microwave, heat it in short bursts. Stir between each burst to ensure even heating. Always check the temperature before serving. You want it hot but not bubbling. Enjoy your comforting meal again! Okra stew is a savory dish that features okra as the main ingredient. It often includes tomatoes, onions, and spices. This stew is thick, hearty, and full of flavor. It's a popular dish in Southern and Creole cooking. Many people enjoy it for its unique taste and comforting warmth. You can serve it as a main dish or side. Yes, you can use frozen okra in your stew. Frozen okra is often pre-cut and ready to use. Just add it straight from the bag to your pot. It may have a bit more moisture, so watch your cooking time. You might need to simmer it a little longer to get the right texture. Okra stew pairs well with many sides. Here are some great options: - Crusty bread for dipping - Rice or quinoa for a filling meal - Cornbread for a Southern touch - A fresh green salad for balance - A squeeze of lemon or lime for zest You can choose any of these to make your meal even better! For the full recipe, check out the Classic Okra Stew section above. This blog post covered every step to make okra stew. I detailed the ingredients, from fresh picks to pantry staples. You learned the cooking process, plus tips to reduce okra's sliminess. Variations allow you to customize the dish to your taste. I also shared how to store leftovers and answered common questions. Now, you’re ready to create a tasty meal. Enjoy making your own okra stew!

Classic Okra Stew Comforting and Hearty Meal

Are you ready to dive into a warm bowl of Classic Okra Stew? This hearty dish combines fresh ingredients and

To make herb roasted yellow squash, you need these simple items: - 4 medium yellow squash, sliced into half-moons - 3 tablespoons olive oil - 2 teaspoons fresh thyme, chopped - 2 teaspoons fresh rosemary, chopped - 1 teaspoon garlic powder - 1 teaspoon onion powder - Salt and pepper to taste - Zest of 1 lemon - 2 tablespoons grated Parmesan cheese (optional) If you don't have fresh herbs, you can use dried ones. Use one-third of the amount needed for fresh herbs. For thyme and rosemary, use 1 teaspoon of dried herbs. This gives you great flavor without needing fresh herbs. Want to spice it up? You can add some extra seasonings! Try: - Smoked paprika for a smoky taste - Cumin for a warm flavor - Chili flakes for some heat Mix these into your squash for more depth in flavor. You can adjust based on your taste. Enjoy experimenting! First, gather your ingredients. You need four medium yellow squash, sliced into half-moons. In a large mixing bowl, pour in three tablespoons of olive oil. Next, add the sliced squash. Make sure the squash is well-coated with the olive oil. Then, chop two teaspoons each of fresh thyme and rosemary. Add them to the bowl along with one teaspoon of garlic powder and one teaspoon of onion powder. Don’t forget to sprinkle in salt and pepper to taste. Finally, add the zest of one lemon for a fresh kick. Toss everything together until the squash is evenly coated. Now, preheat your oven to 425°F (220°C). Spread the seasoned squash on a baking sheet lined with parchment paper. This makes for easy cleanup later. Roast the squash in the oven for 20 to 25 minutes. Halfway through, flip the pieces for even cooking. You want the squash to be tender and golden brown. To check if the squash is done, poke a piece with a fork. It should slide in easily. If it’s still firm, roast for a few more minutes. If you like cheese, sprinkle two tablespoons of grated Parmesan over the squash during the last five minutes of roasting. This adds a nice flavor. Once out of the oven, let the squash cool for a few minutes before serving warm. You can find the full recipe for this dish to enjoy at home! Use fresh herbs for the best flavor. I like thyme and rosemary the most. They pair well with yellow squash. You can also try basil or oregano. Each herb adds its own taste. Mix and match to find your favorite combo. To roast squash perfectly, use high heat. Preheat your oven to 425°F. Spread the squash in a single layer on the pan. This helps it cook evenly. Flip the pieces halfway to brown them well. Roast until tender and golden brown, about 20-25 minutes. Serve the roasted squash on a bright platter. Garnish it with fresh herbs for color. A drizzle of olive oil adds shine. You can also top it with Parmesan for a savory kick. Pair it with grilled chicken or fish for a full meal. Check out the Full Recipe for more ideas! {{image_2}} You can mix in other veggies with your yellow squash. Consider adding bell peppers, zucchini, or carrots. These add color and crunch. Chop them into similar sizes for even cooking. Toss them in the same herb mix. This creates a tasty and colorful dish. To make this dish vegan, skip the Parmesan cheese. You can also use nutritional yeast for a cheesy flavor. It adds a nice umami taste without dairy. Use the same herbs and spices to keep it flavorful. If you want cheese but not Parmesan, try feta or goat cheese. Both add a tangy flavor. You can crumble them over the squash before roasting. Or, mix them in right after roasting. This gives a creamy touch to your dish. Explore these variations to make your herb roasted yellow squash even better! For more details, check the Full Recipe. After enjoying your herb roasted yellow squash, let it cool to room temperature. Place the leftovers in an airtight container. This helps keep the squash fresh. Store the container in the fridge. The squash will stay good for about 3 to 5 days. To reheat, use an oven or a microwave. If you choose the oven, preheat it to 350°F (175°C). Spread the squash on a baking sheet. Bake for about 10 minutes or until warm. In the microwave, heat in 30-second bursts. Stir in between to heat evenly. You can freeze herb roasted yellow squash! First, cool it completely. Then, place it in a freezer-safe bag. Squeeze out all the air before sealing. This helps prevent freezer burn. The squash can stay in the freezer for up to 3 months. When ready to eat, thaw it in the fridge overnight. Reheat as mentioned above for the best taste. For the full recipe, check out the instructions earlier in the article! Yes, you can use yellow zucchini instead of yellow squash. Both have a similar taste and texture. They both roast well, too. The main difference is in their shape. Yellow squash has a more curved shape, while zucchini is more cylindrical. Feel free to swap them in your recipe. Herb roasted yellow squash pairs well with many dishes. You can serve it with grilled chicken or fish for a complete meal. It also works great as a side for pasta. If you want a vegetarian option, serve it with quinoa or a fresh salad. The flavors of the squash enhance any dish you choose. You can keep leftovers in the fridge for about 3 to 5 days. Store them in an airtight container for best results. If you want to enjoy them later, consider freezing them. Just make sure they are completely cool before you freeze them. You can reheat them in the oven or microwave when you're ready to eat. Check out the Full Recipe for more details. This blog post covers how to prepare herb roasted yellow squash. We explored the best ingredients, including seasoning and substitutes. I shared step-by-step instructions and tips for perfect roasting. You learned about variations to make the dish your own, including vegan options. We also discussed storage, reheating, and answers to your common questions. Remember, cooking is about creativity. Use these tips to make the dish yours. Enjoy your culinary journey!

Herb Roasted Yellow Squash Flavorful and Simple Recipe

Are you ready to elevate your vegetable game? I’m excited to share my Herb Roasted Yellow Squash recipe, which is

Here’s what you need to make stuffed zucchini boats. Gather these fresh items for a tasty meal: - 4 medium zucchini - 1 cup cooked quinoa - 1 cup cherry tomatoes, halved - 1 bell pepper, diced - 1 cup black beans, drained and rinsed - 1 cup corn (fresh or canned) - Spices and seasonings: cumin, smoked paprika, garlic powder, salt, pepper - 1/2 cup shredded cheese (cheddar or mozzarella) - Fresh parsley for garnish Each ingredient plays an important role. The zucchini serves as a perfect vessel. Quinoa adds protein and a nice texture. Cherry tomatoes give a sweet burst, while the bell pepper adds crunch. Black beans boost fiber and flavor, and corn adds sweetness. Spices like cumin and smoked paprika bring warmth and depth. The cheese melts beautifully on top, creating a golden crust. Finally, fresh parsley brightens the dish with color and taste. For the full recipe, check the details above. Enjoy the mix of flavors and textures in every bite. 1. Preheat your oven to 375°F (190°C). 2. Take each zucchini and slice it in half lengthwise. 3. Use a spoon to scoop out the seeds. This creates the boat shape. 4. Place the zucchini halves in a baking dish, cut side up. 1. In a large bowl, add the cooked quinoa, cherry tomatoes, diced bell pepper, black beans, and corn. 2. Sprinkle in the cumin, smoked paprika, garlic powder, salt, and pepper. 3. Mix everything well. Make sure the spices are evenly spread. 1. Stuff each zucchini half with the filling. Press down lightly to pack it in. 2. Top each stuffed zucchini with shredded cheese. 3. Cover the dish with aluminum foil. 4. Bake for 20 minutes. 5. Remove the foil and bake for another 10 to 15 minutes. The zucchini should be tender, and the cheese should be melted. 6. Once done, take it out of the oven. Let it cool a bit before serving. Garnish with fresh parsley. For the full recipe, refer to the earlier section. Enjoy this tasty, nutritious meal! To get the best texture in your zucchini, choose firm ones. Look for zucchini that feels heavy and has smooth skin. Cut them in half lengthwise and scoop out seeds carefully. This helps create the boat shape without making them too watery. To avoid watery zucchini boats, you can sprinkle salt inside the scooped halves. Let them sit for about 10 minutes. The salt draws out extra moisture. Pat them dry before stuffing. This prevents them from getting soggy during cooking. For a flavor boost, add spices like chili powder or oregano to your filling. Fresh herbs like basil or cilantro can also brighten the dish. If you want a kick, consider adding red pepper flakes. If you want to switch up the cheese, try goat cheese or feta. These add a tangy taste that pairs well with the other ingredients. For a creamy texture, you can even use ricotta cheese. Each option creates a unique flavor twist in your stuffed zucchini boats. For the full recipe, check the details above and enjoy your cooking! {{image_2}} To make stuffed zucchini boats vegan-friendly, simply omit the cheese. You won't lose flavor! Instead, you can boost nutrition with protein-rich options. Try using lentils or tofu as substitutes. Cooked lentils add a hearty texture and extra fiber. Tofu can absorb all the lovely flavors from the spices and veggies. Just crumble it into the filling mix. Get creative with your fillings! For an Italian-inspired twist, add marinara sauce and Italian herbs. This gives your boats a rich and savory flavor. You can use basil, oregano, and thyme for that perfect Italian taste. For a Mediterranean option, include feta cheese and olives. The briny olives and creamy feta add a unique taste. You can mix in sun-dried tomatoes, too, for extra punch. These variations keep every bite exciting. You can also find the full recipe to explore these ideas further. Enjoy the fun of making stuffed zucchini boats! To keep your stuffed zucchini boats fresh, use airtight containers. Glass or plastic containers work well. Make sure the zucchini boats cool down before sealing. Store them in the fridge for up to three days. If you want to keep them longer, consider freezing them. Wrap each boat in plastic wrap, then place them in a freezer-safe bag. They can last up to three months in the freezer. When you are ready to eat, reheat your zucchini boats carefully. The best way is to use the oven. Preheat it to 350°F (175°C). Place the zucchini on a baking sheet and cover with foil. This keeps the filling moist. Heat for about 15-20 minutes. If you prefer the microwave, use a microwave-safe dish. Cover it with a damp paper towel. Heat in short bursts, checking often to avoid drying out. Enjoy your delicious meal warm! Yes, you can swap quinoa for other grains. Rice works well, both white and brown. Couscous is a quick option. Farro or barley also adds a nice chew. Each grain gives a unique texture and taste. Just remember to adjust cooking times based on the grain you choose. Look for a few signs of doneness. First, the zucchini should be tender but not mushy. You can test this with a fork. Second, the filling should be hot all the way through. The cheese on top should be melted and bubbly. This tells you the boats are ready to enjoy! Absolutely! You can prep the zucchini and filling ahead. Just stuff the zucchini and cover them. Store in the fridge for up to a day before baking. For longer storage, freeze them unbaked. When you're ready, bake them straight from the freezer. Just add a few extra minutes to the cooking time. Stuffed zucchini boats pair well with many sides. A fresh salad adds crunch and color. Garlic bread is a great choice for dipping. You can also serve them with roasted vegetables for added flavor. Another option is a light soup to complete the meal. These sides make a lovely balance with your boats. Stuffed zucchini boats offer a tasty and healthy meal option. We covered essential ingredients, easy prep steps, and useful tips. You can personalize your boats with varied fillings or spices. Store leftovers properly to keep them fresh. Remember, cooking should be fun and flexible. Try new flavors as you make this dish your own. Enjoy the process and the delicious results. Happy cooking!

Stuffed Zucchini Boats Flavorful and Nutritious Meal

Are you looking for a meal that’s both tasty and packed with nutrition? Stuffed zucchini boats are the perfect answer!

To make a delicious Greek yogurt peach parfait, gather the following ingredients: - 2 ripe peaches, diced - 1 cup Greek yogurt (plain or vanilla) - 1/2 cup granola (your choice, preferably nutty) - 2 tablespoons honey or maple syrup - 1 teaspoon vanilla extract (optional) - 1/4 teaspoon cinnamon - Fresh mint leaves, for garnish These ingredients work well together to create a tasty and nutritious treat. The peaches add sweetness and juiciness, while the Greek yogurt gives a creamy texture. You can choose plain yogurt for a tangy kick or vanilla for a sweeter flavor. Granola adds crunch and makes the parfait more filling. Honey or maple syrup gives a touch of sweetness, and cinnamon adds warmth. Fresh mint leaves not only look good but also bring a fresh taste. For the full recipe, check out the details provided earlier. Enjoy making your parfait! First, wash the peaches under cold water. This step is important to remove any dirt or residue. Next, dice the peaches into small, bite-sized pieces. This helps with easy layering later. Set the diced peaches aside. They will add a sweet and juicy layer to your parfait. Now, let’s mix the Greek yogurt. In a bowl, combine one cup of Greek yogurt with two tablespoons of honey or maple syrup. If you like, add one teaspoon of vanilla extract for extra flavor. Sprinkle in one-fourth teaspoon of cinnamon. Mix everything until it’s smooth and creamy. This yogurt blend is the base of your parfait. To build your parfait, grab a glass or parfait dish. Start with a layer of the Greek yogurt mixture at the bottom. This creamy layer is a perfect start. Next, add a layer of your diced peaches. Their sweetness will balance the yogurt. Then, sprinkle a layer of granola for a crunchy texture. Repeat these layers until your glass is full. Make sure to end with a layer of yogurt on top. Drizzle a little honey or maple syrup for a sweet touch. Finally, add a sprinkle of granola and some fresh mint leaves for garnish. This adds color and flavor to your tasty treat. Enjoy your Greek Yogurt Peach Parfait! For the full recipe, check the details provided above. When making a Greek yogurt peach parfait, the type of yogurt you choose matters. I often use plain Greek yogurt. It has a tangy taste and pairs well with sweet fruits. However, if you prefer a sweeter note, vanilla Greek yogurt works great too. Adjust the sweetness to your liking. You can add honey or maple syrup. Start with a little, then taste and add more if needed. Layering is key for a pretty parfait. Aim for even layers of yogurt, peaches, and granola. This makes each bite delicious. Use clear glasses to show off those beautiful layers. It adds visual appeal and makes your parfait look fancy. Picking the right peaches is essential. Choose ripe peaches with a nice color. They should feel slightly soft when you press them. For granola, go for a nutty type. It adds a nice crunch and flavor. Look for granola with whole nuts and seeds for the best texture. These choices will elevate your parfait, making it tasty and fun to eat. For the full recipe, check out the details above. {{image_2}} You can make your Greek yogurt peach parfait even better. Try adding fresh berries like strawberries or blueberries. These fruits add color and flavor. You can also use bananas for a sweet twist. If you want some crunch, add nuts or seeds. Almonds, walnuts, or chia seeds work well. They give your parfait a nice texture and boost nutrition. If you prefer a dairy-free option, use dairy-free yogurt. There are many tasty types available now. You can also try flavored Greek yogurt if you want a twist. Peach, vanilla, or honey yogurt can add extra flavor to your parfait. You can adjust the sweetness of your parfait. Instead of honey or maple syrup, try agave syrup. You can also use fruit puree for a natural sweetener. If you want to spice things up, add a hint of nutmeg or cardamom. These spices can give your parfait a warm, cozy flavor. For the full recipe, refer to the section above. To keep your Greek yogurt peach parfait fresh, store it in an airtight container. This helps prevent the parfait from drying out. If you plan to make multiple servings, keep the ingredients separate. Store the yogurt, peaches, and granola in their own containers. This keeps each part fresh and tasty. If stored correctly, your parfait can last up to three days in the fridge. Check for signs of spoilage like sour smells or moldy yogurt. Fresh peaches can brown quickly, so eat them within a day or two after cutting. You can prepare the yogurt mixture a few days in advance. Just mix the yogurt, honey, vanilla, and cinnamon, then keep it in the fridge. Dice the peaches the night before for a quick breakfast. When you're ready to eat, simply layer the yogurt, peaches, and granola in your favorite glass. It’s super simple and saves time! For the full recipe, refer to the main section above. Yes, you can use frozen peaches. They are a great option when fresh peaches are out of season. Frozen peaches are often picked at their peak ripeness, so they still taste sweet. However, they can become mushy when thawed. This may change the texture of your parfait. If you use them, let them thaw in the fridge overnight. Then, chop them into small pieces before layering. This recipe makes two servings. Each serving is a satisfying snack or breakfast. You can easily adjust the recipe. If you want to make more, just double or triple the ingredients. This way, you can enjoy it with family or friends. Each parfait will still have a balance of yogurt, fruit, and granola. Yes, you can prepare this parfait the night before. Just layer the yogurt and peaches in a glass. However, keep the granola separate. It stays crunchy this way. When you're ready to eat, add the granola on top. This keeps the texture nice and fresh. Enjoy your tasty Greek yogurt peach parfait! This blog post guides you through making a tasty peach parfait. We covered the best ingredients, simple steps to prepare, and tips for perfecting it. You can personalize your parfait with different fruits and yogurt types. Also, I shared storage advice to keep your parfait fresh. With these tips, you can enjoy a healthy treat anytime. Try making this parfait for breakfast or dessert. It’s quick, easy, and oh-so-delicious! Enjoy your parfait journey!

Greek Yogurt Peach Parfait Tasty and Nourishing Treat

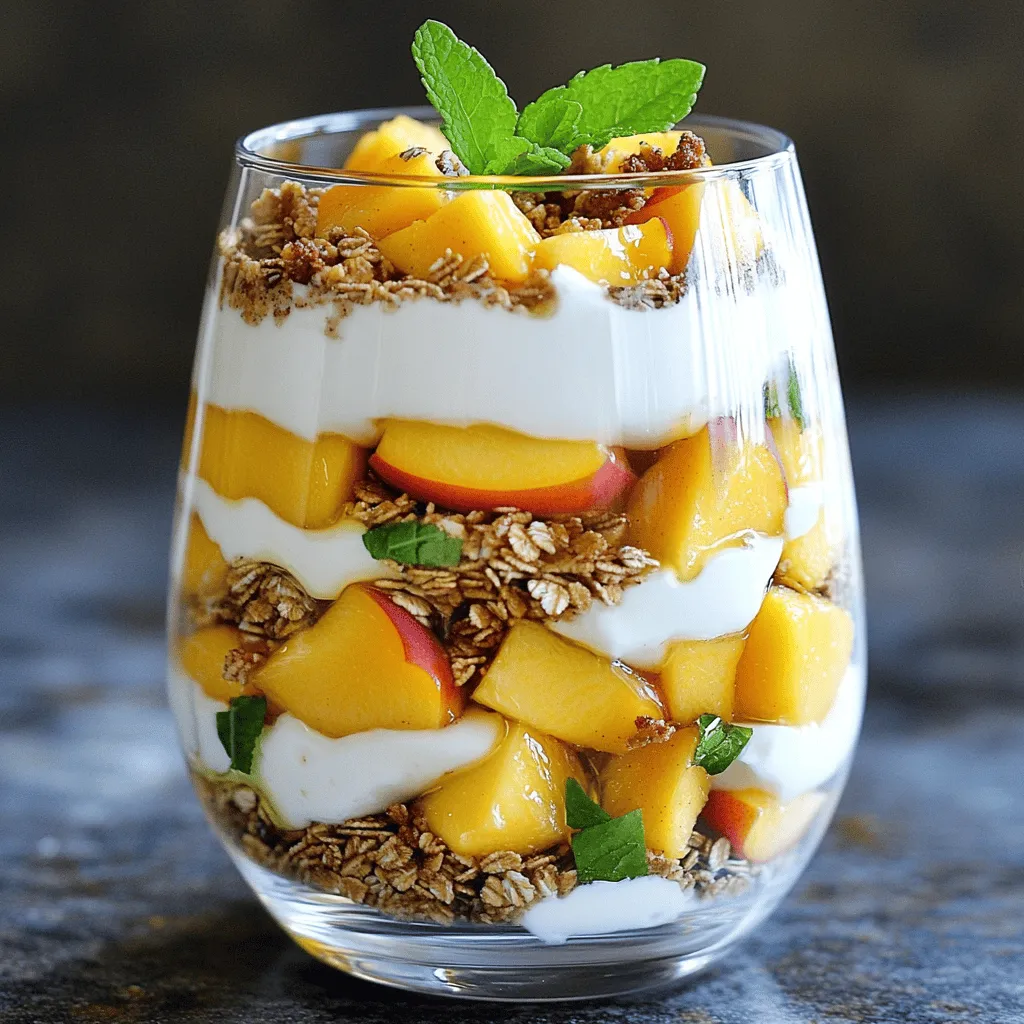
Looking for a quick and healthy treat? Dive into this Greek Yogurt Peach Parfait! It’s not just tasty; it’s a

To make Baked Zucchini Parmesan Chips, you need: - 2 medium zucchinis - 1 cup grated Parmesan cheese - 1 cup breadcrumbs (preferably whole wheat) - 1 teaspoon garlic powder - 1 teaspoon onion powder - 1 teaspoon dried oregano - 1/2 teaspoon black pepper - 1/2 teaspoon salt - 2 large eggs - Olive oil spray These ingredients work together to create a crunchy, tasty snack that satisfies. Zucchini is low in calories and high in nutrients. It has a lot of water, so it helps keep you hydrated. Eating zucchini can improve your digestion because it has fiber. The fiber helps your tummy feel good. Zucchini also gives you vitamins A and C. These vitamins help keep your skin healthy and boost your immune system. If you want to switch things up, you can try different ingredients. For example, use nutritional yeast instead of Parmesan for a vegan option. You can swap breadcrumbs with crushed nuts for extra crunch. If you don’t have garlic powder, fresh garlic works well too. Just chop it finely. Use any herbs you like if you want to change the flavor. This way, you can make the recipe fit your taste! For the full recipe, refer back to the beginning. To start, wash the zucchinis well. Then, slice them into thin rounds. Aim for about 1/4 inch thick. This size helps them cook evenly. Place the slices on a clean kitchen towel. Pat them dry to remove excess moisture. This step makes your chips crispier. Next, grab two bowls. In one bowl, beat the eggs until mixed well. In the second bowl, combine the grated Parmesan cheese, breadcrumbs, garlic powder, onion powder, dried oregano, black pepper, and salt. Mix these ingredients together. Now, take a zucchini slice. Dip it in the egg mixture, letting any extra drip off. After that, coat it in the breadcrumb mix. Press gently to help it stick. Repeat this for all the zucchini slices. Now, preheat your oven to 225°F (110°C). Line two baking sheets with parchment paper. Place the coated zucchini chips in a single layer on the sheets. Lightly spray them with olive oil to help them crisp up. Bake the chips for about 1.5 hours. Flip them halfway through for even cooking. Keep an eye on them to avoid burning. Once they turn golden and crispy, take them out. Let them cool for a few minutes before serving. For more details, check out the full recipe. To make your zucchini chips extra crispy, slice them thin. Aim for about 1/4 inch thickness. Thinner slices will cook faster and crisp up better. After slicing, sprinkle some salt on the zucchini rounds. Let them sit for about 10 minutes. This helps draw out moisture. Pat them dry with paper towels before coating. Finally, spray them lightly with olive oil. This will help them crisp up in the oven. If you have leftover zucchini chips, store them in an airtight container. Let them cool completely before sealing to avoid moisture buildup. Keep them at room temperature for the best texture. They will stay fresh for about 2 days. For longer storage, consider freezing them. Place chips in a single layer on a baking sheet and freeze. Once frozen, transfer them to a freezer bag. Serve your baked zucchini chips warm for the best taste. I love to pair them with marinara sauce for dipping. You can also try ranch dressing or a garlic aioli for added flavor. For a fun twist, sprinkle some fresh herbs on top before serving. You can also mix in different spices into the breadcrumb coating for unique flavors. Check out the Full Recipe for more ideas! {{image_2}} You can change up the cheese in this recipe. Try cheddar or mozzarella for a new taste. You can also add spices like paprika or cayenne for some heat. Mixing in some Italian seasoning can give it a nice herb flavor too. Each change can make the chips taste unique and fun. You can easily make these chips vegan. Instead of eggs, use a flaxseed meal. Mix one tablespoon of flaxseed meal with three tablespoons of water. Let it sit for five minutes until it thickens. For cheese, try nutritional yeast or vegan cheese. These swaps keep the great flavor while being plant-based. Pair your zucchini chips with tasty dips. Marinara sauce adds a classic touch. You can also serve them with hummus or guacamole for a fun twist. If you like a kick, try a spicy ranch dressing. These dips make your snack more exciting and tasty. For the full recipe of Baked Zucchini Parmesan Chips, check out the main article. After you make these tasty zucchini chips, let them cool completely. Store them in an airtight container. I like to use a glass jar or a plastic food container. This keeps them fresh and crispy. Avoid stacking the chips; they might break. You can also place parchment paper between layers to protect them. If stored properly, baked zucchini chips last about 3 to 5 days in the fridge. They may lose some crunch after a couple of days, so enjoy them fresh! Before eating, check for any signs of dampness or off-smells. If they seem stale, you can reheat them in the oven for a few minutes to regain some crispiness. You can freeze baked zucchini chips for longer storage. First, make sure they are fully cooled. Place them in a single layer on a baking sheet. Freeze them for about an hour. Once frozen, transfer them to a freezer bag. They can last up to 2 months in the freezer. When you’re ready to eat, bake them straight from the freezer. Enjoy the crispy goodness anytime! For the full recipe, check out the earlier section. Yes, you can air fry these chips. Air frying gives them a nice crunch. Set your air fryer to 375°F (190°C). Cook the zucchini chips for 10-15 minutes. Flip them halfway for even cooking. Keep an eye on them to avoid burning. If you want extra crunch, spray them lightly with olive oil. The best temperature to bake zucchini chips is 225°F (110°C). This low heat helps the chips dry out. It takes longer but makes them crispy. Bake for about 1.5 hours. Always flip them halfway through cooking. This ensures they cook evenly and get that perfect crunch. To add some heat, use spices like cayenne pepper or chili powder. Mix these spices into your breadcrumb mixture. You can also add crushed red pepper flakes. Adjust the amount based on your taste. Try adding hot sauce to the egg mixture for an extra kick. Enjoy your spicy twist on these delicious chips! For the full recipe, check out the details above. Baked zucchini parmesan chips are a tasty, healthy snack. We covered the key ingredients and their health benefits, along with easy steps to prepare them. I shared tips for extra crispiness and creative variations, including vegan options. Proper storage methods ensure you enjoy leftovers longer. If you're ready to whip up this delicious dish, go for it! You'll love how easy it is to make and enjoy. Your healthy snack game just got a boost with these baked zucchini chips.

Baked Zucchini Parmesan Chips Crispy and Delicious Snack

Looking for a tasty and healthy snack? Try my Baked Zucchini Parmesan Chips! These chips are crispy, easy to make,

Older posts
Newer posts
← Previous Page1 … Page6 Page7 Page8 … Page46 Next →

dsad

© 2025 savoryspiral • Built with GeneratePress

Our Policies

  • Copyright Policy
  • Cookie Policy
  • GDPR Policy
  • Privacy Policy
  • Disclaimer
  • Terms Of Use

More Information

  • Home
  • About
  • Contact
  • Appetizers
  • Dessert
  • Dinner
  • Drinks
©2025, savoryspiral About Back To Top