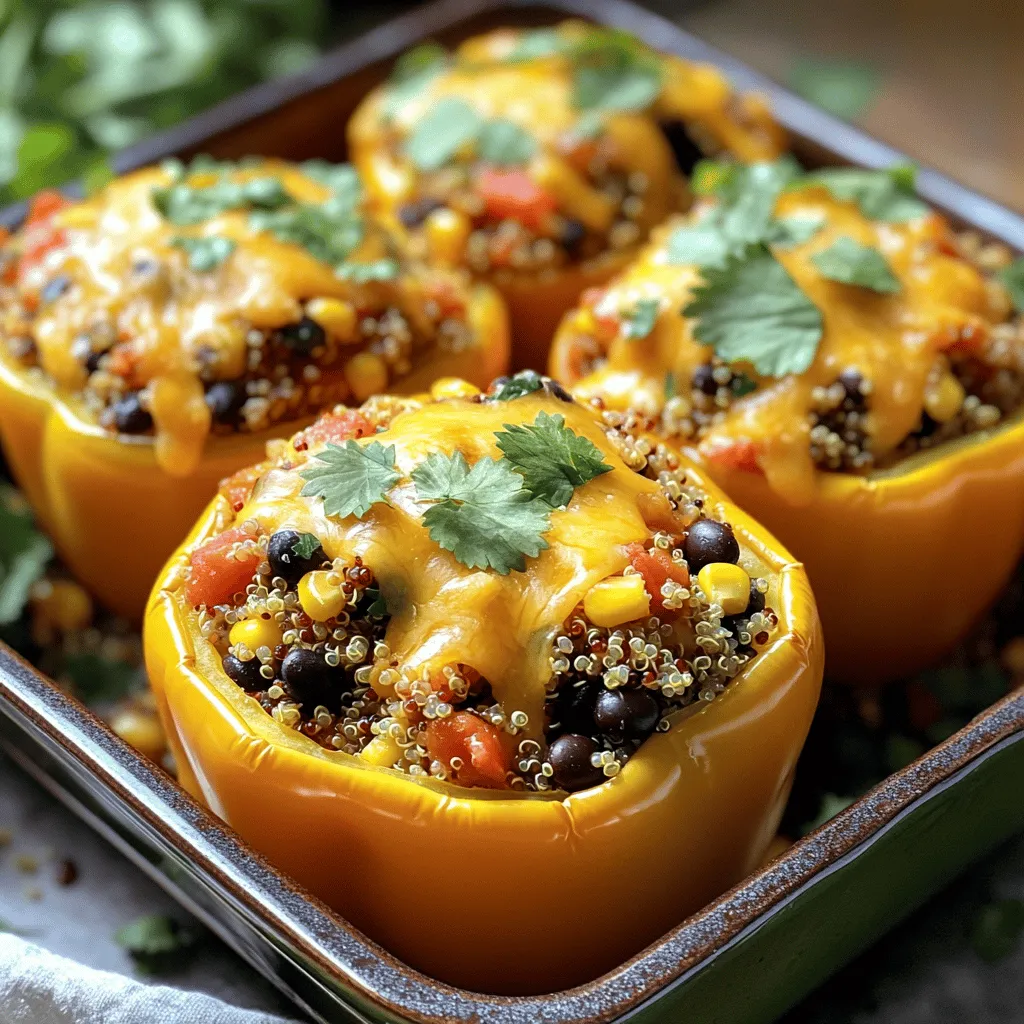
Savory Stuffed Bell Pepper Boats Easy Flavorful Meal
Get ready to dive into a delicious and simple meal with my Savory Stuffed Bell Pepper Boats! These vibrant peppers
Get ready to dive into a delicious and simple meal with my Savory Stuffed Bell Pepper Boats! These vibrant peppers
. To start, gather your ingredients for the marinade. In a mixing bowl, combine: - 3 tablespoons olive oil - 4 cloves garlic, minced - Zest of 1 lemon - Juice of 1 lemon - 1 teaspoon crushed red pepper flakes - Salt and pepper to taste Whisk these together. This will create a flavorful mix that will bring out the best in the shrimp. Next, add 1 pound of large shrimp, peeled and deveined, to your marinade. Make sure each shrimp is fully coated. Cover the bowl and let it sit in the fridge for at least 30 minutes. This step is key. It allows the shrimp to absorb all the tasty flavors. When the shrimp are ready, soak wooden skewers in water for 10-15 minutes. This prevents them from burning on the grill. Preheat your grill or grill pan over medium-high heat. Now, thread the marinated shrimp onto the skewers. Place them close but not too tight. Grill the skewers for about 2-3 minutes on each side. They should turn pink and opaque when done. Once cooked, remove the skewers from the grill. Garnish with freshly chopped parsley, and serve with lemon wedges for extra zest. Enjoy this easy and tasty dish! For the full recipe, check out the "Full Recipe" section. Grilling shrimp is easy if you follow a few key tips. First, always use large shrimp. They hold up well on skewers and cook nicely. Make sure they are peeled and deveined. This makes for a cleaner bite. Soak wooden skewers in water for at least 10-15 minutes. This prevents them from burning on the grill. Preheat your grill to medium-high heat. A hot grill gives you nice, charred marks. To get the best flavor, marinate your shrimp for at least 30 minutes. Use a mix of olive oil, garlic, lemon zest, lemon juice, and spices. This combination makes the shrimp bright and tasty. If you want an extra kick, add more crushed red pepper flakes. When grilling, do not overcrowd the skewers. This helps each shrimp get even heat. Flip them only once to keep them juicy. Pair your lemon garlic shrimp skewers with fresh, light sides. A simple green salad with a lemon vinaigrette works great. You can also serve grilled veggies like zucchini or bell peppers. Rice or quinoa add a nice touch too. For a fun twist, serve them with garlic bread. The options are endless! For the full recipe, check the earlier section. {{image_2}} You can add colorful vegetables to your skewers. Bell peppers, zucchini, and cherry tomatoes work great. Cut them into bite-sized pieces. Mix them with the shrimp for a tasty treat. They add flavor and nutrition. You can use any vegetable you like. Just make sure they grill well! If you want to switch things up, try different marinades. A soy sauce and ginger mix is delicious. You can also use a honey and mustard blend for a sweet twist. Each marinade gives the shrimp a new flavor. Experimenting helps you find what you love best. Don't be afraid to play with herbs too! To spice things up, add more crushed red pepper flakes. You can also mix in some hot sauce for extra heat. If you prefer a milder dish, skip the red pepper. You can use lemon zest and garlic for great flavor without the spice. Adjust the heat to match your taste! To store leftover shrimp skewers, let them cool first. Place them in an airtight container. Keep them in the fridge for up to two days. This helps keep them fresh and tasty. Reheat shrimp skewers in the oven for the best results. Preheat your oven to 350°F (175°C). Place the skewers on a baking tray and cover with foil. Heat for about 10 minutes until warm. You can also use a microwave. Just heat for 30 seconds at a time until they are warm. To freeze shrimp skewers, wrap them tightly in plastic wrap. Then, place them in a freezer bag. Label the bag with the date. They can last up to three months in the freezer. When ready to eat, thaw them in the fridge overnight. Reheat them as mentioned above for the best taste. Enjoy these delicious shrimp skewers later! For more details, check the Full Recipe. For skewers, I prefer large or jumbo shrimp. They hold their shape well during grilling. Plus, they cook evenly and stay juicy. Look for shrimp that are fresh or frozen with no added preservatives. Yes, you can use a stovetop grill or an oven. If using a stovetop grill, preheat it to medium-high. For the oven, broil the skewers at high heat. Both methods work well for cooking shrimp. Soak wooden skewers for about 10 to 15 minutes. This helps prevent them from burning on the grill. Make sure to keep them submerged in water during this time. Yes, you can prepare the shrimp ahead of time. Marinate them and store in the fridge for up to 24 hours. Just remember to grill them fresh for the best flavor and texture. You can find the full recipe for Lemon Garlic Shrimp Skewers in the article above. It includes all the details you need for this tasty dish! In this post, we covered how to make tasty shrimp skewers from start to finish. We discussed the best ingredients, marinating steps, and grilling tips. You learned how to add your own twist with different flavors and sides. Remember, fresh shrimp is great, but frozen works too. Store leftovers properly to enjoy later. Now, get grilling and enjoy your delicious shrimp skewers!](https://savoryspiral.com/wp-content/uploads/2025/07/b69c8250-8420-4ab4-9dda-49522a027f07.webp)
Get ready to fire up the grill! In this post, I’ll share my easy Lemon Garlic Shrimp Skewers recipe that
![- Firm tofu - Sweet chili sauce - Fresh vegetables To make a tasty Sweet Chili Tofu Stir Fry, you need a few key ingredients. The main star is firm tofu, which gives a great texture. You will also use sweet chili sauce for a burst of flavor. Fresh vegetables add crunch and color to your dish. Choose vibrant options like bell peppers and snap peas for the best results. - Sesame seeds - Fresh cilantro For a finishing touch, use sesame seeds and fresh cilantro. These optional garnishes add a nice look and extra flavor. They make your dish pop and look more inviting. You can find the full recipe with all details to guide you through the cooking process. First, you need to press the tofu. This step removes extra moisture. Lay the tofu on a plate. Place a towel on top and add something heavy, like a pan. Let it sit for at least 15 minutes. After pressing, cut the tofu into 1-inch cubes. Next, toss the cubes in cornstarch. This coating helps the tofu become crispy when cooked. Now it’s time to heat the oil. Pour 2 tablespoons of vegetable oil into a large non-stick skillet or wok. Turn the heat to medium-high. Once the oil is hot, add the tofu cubes in a single layer. Cook them for about 5 minutes on each side. Look for a golden color and crispy texture. Once done, remove the tofu from the pan and set it aside. In the same skillet, add your fresh vegetables. Use sliced red and yellow bell peppers, snap peas, julienned carrot, and chopped green onions. Stir-fry these veggies for about 4 to 5 minutes. You want them tender but still crisp. After that, add the minced garlic and ginger. Stir for about 1 minute until you smell their fragrant aroma. Return the crispy tofu to the pan. Pour in the sweet chili sauce and soy sauce. Mix everything gently to coat the tofu and veggies evenly. Let it cook for another 2 to 3 minutes until everything is heated through. Drizzle sesame oil over the stir fry, and season with salt and pepper to taste. Give it one last stir to combine. For the complete recipe, check the [Full Recipe]. To avoid soggy tofu, press it well. Place the block between two plates. Add weight on top. This helps drain excess moisture. Aim for at least 15 minutes. After pressing, cut the tofu into 1-inch cubes. For cornstarch, use it lightly. Toss the tofu cubes in a bowl with cornstarch. Ensure even coating. This creates a crispy crust when frying. It makes a big difference in texture. To add more flavor, consider spices. Garlic powder or onion powder works great. You can also try red pepper flakes for extra heat. Adjust sweetness by adding more sweet chili sauce. If you like it spicier, add hot sauce. Taste as you cook. This helps you find the right balance of flavors. For ideal accompaniments, serve your stir fry with rice or noodles. They soak up the sauce well. You can use jasmine rice or even quinoa for a twist. For presentation, use a large bowl. Garnish with sesame seeds and fresh cilantro. This adds color and freshness. A pop of color makes the dish more inviting. Remember, we eat with our eyes first! For the full recipe, check out the complete guide. {{image_2}} You can change up the veggies in your stir fry. Use what you have on hand. For a twist, try: - Broccoli florets - Zucchini slices - Mushrooms - Baby corn Seasonal veggies work great too. In spring, add fresh asparagus. In the fall, mix in squash. This keeps the dish fresh and exciting. If you want a different protein, chicken or shrimp can work well. Cook them until golden, just like the tofu. You can also try tempeh for a vegan option. It has a nice texture, too. Need gluten-free? Switch soy sauce for tamari. It tastes great and fits your needs. For low-carb, skip the carrots and use more greens. You can add leafy vegetables like spinach or bok choy for extra nutrition. For a full recipe, check out the Sweet Chili Tofu Stir Fry! To keep your Sweet Chili Tofu Stir Fry fresh, store leftovers in the fridge. Use an airtight container to prevent moisture loss. This way, your dish stays tasty for up to three days. Make sure to cool the stir fry before sealing it in. When reheating, focus on keeping the tofu crispy. The stovetop method works best. Heat a pan over medium heat, add a splash of oil, and stir the tofu gently until warm. If you use a microwave, heat it in short bursts. This helps avoid soggy tofu. You can freeze the stir fry, but tofu's texture may change. Place it in a freezer-safe container after cooling. It lasts for about three months. When ready to eat, thaw it overnight in the fridge. Reheat using the stovetop for the best texture. You can store Sweet Chili Tofu Stir Fry in the fridge for up to four days. Keep it in an airtight container to maintain freshness. The tofu may lose some crispness over time, but the flavor remains great. Yes, you can make this recipe ahead of time. To prepare, cook the tofu and vegetables as directed. Allow the stir fry to cool before storing it in the fridge. You can reheat it when ready to eat. This makes it easy for meal prep. I love serving Sweet Chili Tofu Stir Fry with rice or noodles. You can also pair it with: - Jasmine rice - Brown rice - Quinoa - Rice noodles These sides complement the stir fry's sweet and savory flavors well. Sweet Chili Tofu Stir Fry has a mild heat level. The sweet chili sauce adds more sweetness than spice. If you want to adjust the heat, consider these tips: - Add red pepper flakes for extra spice. - Use a spicy chili sauce instead of sweet. - Serve with fresh sliced chili on the side. Feel free to adjust the spice to your liking! For the full recipe, check out the details above. Sweet Chili Tofu Stir Fry combines firm tofu, fresh veggies, and a tasty sauce. You learned how to prepare, cook, and season the dish perfectly. Remember to press the tofu and add your favorite spices for flavor. Use the tips to make this meal your own. Customize with different veggies or proteins. Store leftovers wisely and enjoy them later. With this guide, you're all set to make a delicious stir fry that suits your taste and needs.](https://savoryspiral.com/wp-content/uploads/2025/07/557c728d-5cc5-4c6a-b671-4d6bfea7fac1.webp)
Are you craving something quick, tasty, and healthy? This Sweet Chili Tofu Stir Fry is your answer! Packed with flavor,
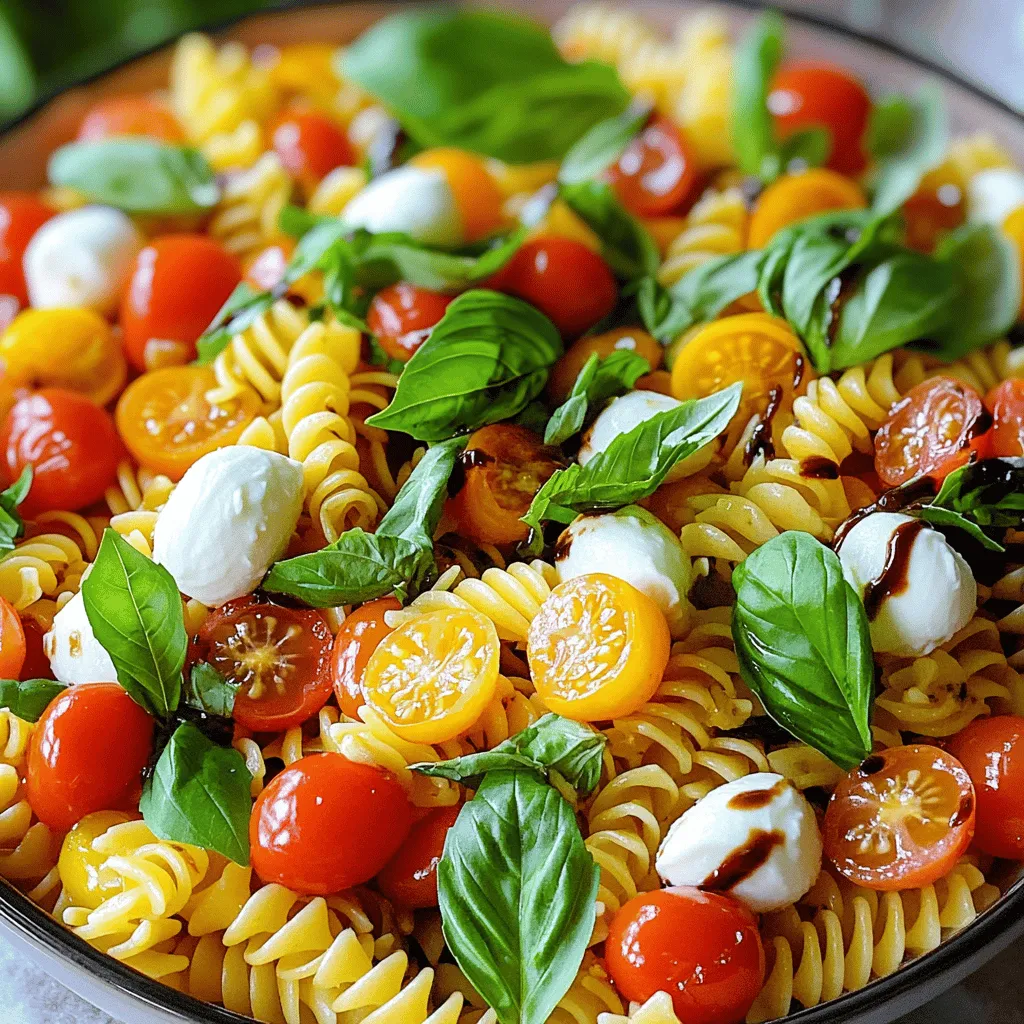
Are you ready to whip up a delicious dish in no time? This Easy Caprese Pasta Salad is fresh, flavorful,

Looking for a quick and tasty meal? These crispy air fryer chicken tenders are your answer! With just a few
![To make Buffalo chicken dip, you need some key ingredients. Here’s what you will need: - 2 cups cooked chicken, shredded - 1 cup cream cheese, softened - 1/2 cup Greek yogurt (or sour cream) - 1 cup sharp cheddar cheese, shredded - 1/2 cup buffalo sauce (adjust to taste) - 1/4 cup green onions, chopped - 1 teaspoon garlic powder - Salt and pepper to taste - Tortilla chips or veggie sticks for serving These ingredients create a rich and tasty dip. The cream cheese and Greek yogurt give it a creamy texture. The buffalo sauce adds heat and flavor, making it a crowd-pleaser. If you lack some items, don’t worry! You can swap them easily. - Instead of chicken, try shredded turkey or even canned chicken. - For a lighter dip, use low-fat cream cheese or Greek yogurt. - If you don’t have sharp cheddar, feel free to use mozzarella or Monterey Jack cheese. - For spice, you can mix in hot sauce or use a spicier buffalo sauce. These swaps keep the dip delicious. You can adjust it to fit what you have at home. Garnishes can make your dip even more appealing. Here are some fun ideas: - Extra chopped green onions add color. - A sprinkle of paprika gives it a nice touch. - You could also add crumbled blue cheese for extra flavor. When serving, use sturdy tortilla chips or fresh veggie sticks. These add a nice crunch. You can also use a slow cooker to keep the dip warm at parties. Enjoy your Buffalo chicken dip with friends and family! 1. First, preheat your oven to 350°F (175°C). This step warms the dip evenly. 2. In a large mixing bowl, add the softened cream cheese and Greek yogurt. Mix until smooth and creamy. 3. Gradually stir in the buffalo sauce. Taste as you go to find your perfect heat. 4. Add the shredded chicken, half of the cheddar cheese, chopped green onions, and garlic powder. Mix thoroughly until well combined. 5. Season your mixture with salt and pepper to taste. This step adds flavor depth. 6. Transfer the mixture to an oven-safe dish. Spread it evenly across the dish. 7. Top your dip with the remaining cheddar cheese. This will create a golden crust. 8. Bake in the preheated oven for about 20-25 minutes. The dip should be hot, bubbly, and slightly golden. 9. Once done, remove it from the oven. Let it cool for a few minutes before serving. - Use softened cream cheese for easy mixing. Cold cream cheese can create lumps. - If the dip feels too thick, add a bit more Greek yogurt or buffalo sauce. - Stir gently to keep the dip smooth. Overmixing can make it grainy. For the full recipe, refer to the Buffalo Chicken Bliss Dip section above! To make your dip less spicy, use less buffalo sauce. Start with 1/4 cup and taste. You can add more if you want it hotter. For a milder flavor, use a mild buffalo sauce or mix it with extra Greek yogurt. This helps balance the heat without losing flavor. Store any leftover dip in an airtight container. It will keep well in the fridge for about three days. Make sure to let it cool completely before sealing. This helps prevent moisture buildup. If you want to keep it longer, consider freezing the dip. It can last up to three months in the freezer. When you are ready to enjoy your dip again, you can reheat it easily. Preheat your oven to 350°F (175°C). Place the dip in an oven-safe dish and heat for about 15 to 20 minutes. Stir halfway through to ensure even heating. You can also use a microwave. Heat in short bursts of 30 seconds, stirring in between. Enjoy your warm dip with chips or veggies! {{image_2}} If you love heat, try adding jalapeños or cayenne pepper. These spices will kick up the flavor. You can also mix in some hot sauce or switch to a spicy buffalo sauce. For an added crunch, toss in some crushed red pepper flakes. This gives the dip a great balance of spice and creaminess. You can make Buffalo chicken dip lighter by using Greek yogurt instead of cream cheese. This swap cuts calories but keeps the taste rich. You can also use shredded rotisserie chicken for a quick option. For a veggie boost, add chopped bell peppers or spinach. They add color and nutrients without changing the flavor. To make a vegetarian version, use shredded jackfruit or chickpeas in place of chicken. Both options soak up the buffalo sauce well. You can keep the cream cheese and yogurt, or try dairy-free versions to suit your needs. Serve with fresh veggies like carrots and celery for a fun twist. Check the [Full Recipe] for more tips on making this dip your own! To store Buffalo Chicken Dip, let it cool first. Then, cover it tightly with plastic wrap or transfer it to a container. You can keep it in the fridge for up to three days. If you want to enjoy it again later, freezing is a great option. To freeze Buffalo Chicken Dip, place it in an airtight container. Make sure to leave some space at the top for expansion. Seal it well to prevent freezer burn. You can freeze it for up to three months. When you're ready to eat it, move it to the fridge to thaw overnight. For storing Buffalo Chicken Dip, glass or plastic containers with tight lids work best. Make sure they are freezer-safe if you plan to freeze the dip. Avoid using metal containers, as they may react with the buffalo sauce. Always label your containers with the date, so you know how long it's been stored. You can serve this dip with many tasty options. I like using tortilla chips. They add a nice crunch. Veggie sticks are also great. Carrots and celery work well here. You can even use pita chips for something different. Each option gives a unique taste and texture. Yes, you can make this dip ahead of time. Prepare it and store it in the fridge. Cover it tightly so it stays fresh. You can bake it later when you are ready to serve. This makes it a great choice for parties or game days. This dip lasts for about 3 to 4 days in the fridge. Just keep it in an airtight container. If you want to keep it longer, consider freezing it. Remember to thaw it before baking. It’s perfect to have on hand for quick snacks or last-minute guests. You can find the full recipe for Buffalo Chicken Dip above. Buffalo chicken dip is fun to make and share. We covered the key ingredients and ways to customize them. I shared smart preparation tips and how to get that creamy texture. You learned how to adjust the spice and store leftovers safely. If you're feeling creative, I listed tasty variations and ways to serve it. Keep this guide handy, and enjoy making great buffalo chicken dip anytime.](https://savoryspiral.com/wp-content/uploads/2025/07/30c6a734-a88d-4fc9-be3f-78c2b29d3c5d.webp)
Looking for a tasty and easy appetizer? Buffalo Chicken Dip is the answer! Packed with flavor and perfect for parties,

If you crave a dish that packs a flavor punch, Taco Stuffed Sweet Potatoes are a must-try! This tasty meal
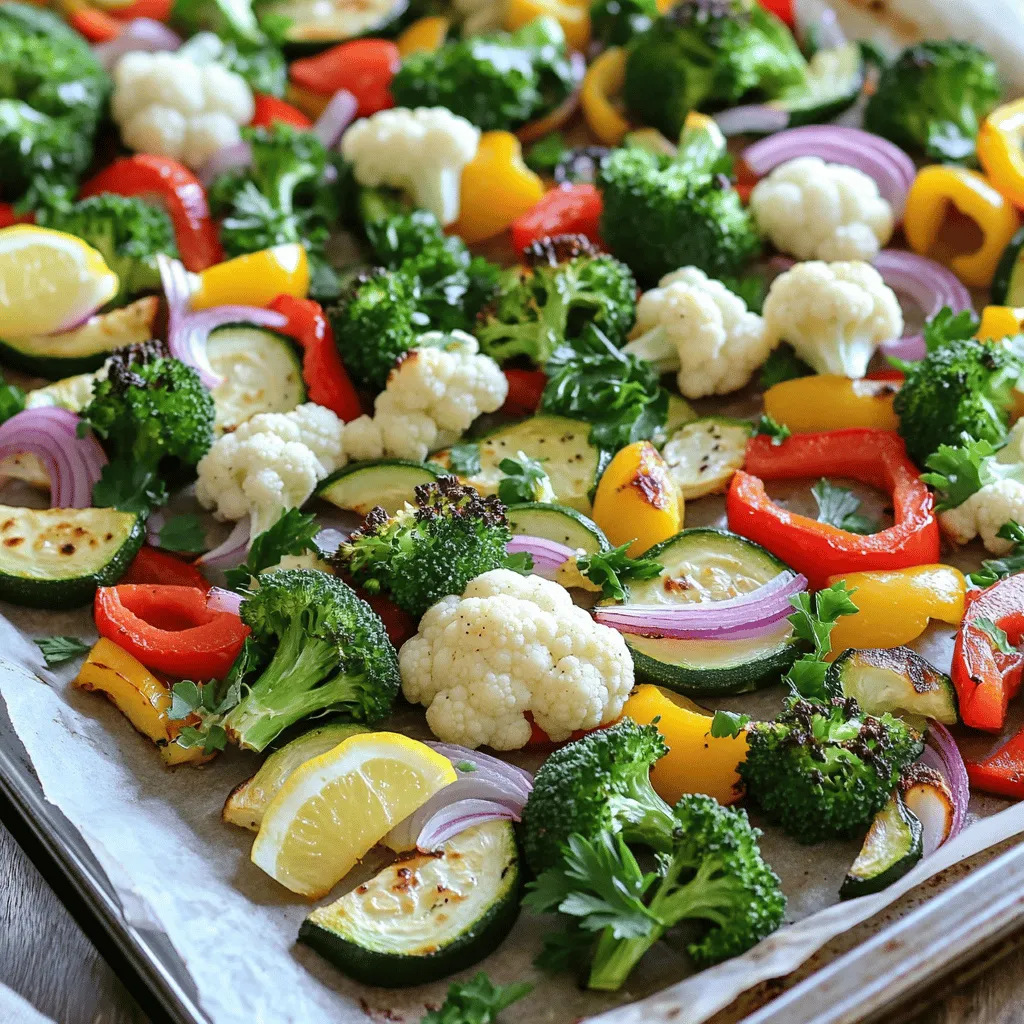
Brighten your meals with my Sheet Pan Lemon Roasted Veggies! This dish is loaded with taste and color, making it

Are you ready to elevate your baking game? Cheddar chive biscuits are flaky, delicious, and packed with flavor. This easy

Craving a warm, tasty dish that feels like a hug in a bowl? You’re in the right place! My Easy
