Skip to content
DisclaimerTerms Of UseGDPR PolicyCookie Policy

savoryspiral

  • Home
  • Drinks
  • Appetizers
  • Dinner
  • Dessert
  • About
  • Contact
  • Privacy Policy
DisclaimerTerms Of UseGDPR PolicyCookie Policy

Charlotte

- 2 pounds of fresh blue crabs, cleaned and quartered - 4 ears of corn, shucked and cut in half - 1 pound of baby red potatoes, halved - 1 pound of andouille sausage, cut into 1-inch pieces - 1 large onion, quartered - 4 garlic cloves, crushed - 4 quarts of water The main stars of the crab boil are fresh blue crabs. They provide rich flavor and a fun eating experience. You also need corn, potatoes, and andouille sausage for a hearty meal. These ingredients balance the seafood's sweetness and add texture to each bite. - 2 tablespoons Old Bay seasoning - 1 tablespoon paprika - 1 tablespoon salt - 1 teaspoon cayenne pepper (adjust to taste) Seasoning is crucial for a great crab boil. Old Bay seasoning adds a classic taste that pairs well with seafood. Paprika gives a nice color and a mild flavor. Cayenne pepper adds heat, but you can adjust it based on your preference. - Lemon wedges - Fresh parsley, chopped Garnishes make the dish look appealing. Lemon wedges add a bright, zesty touch. Fresh parsley not only adds color but also a hint of freshness. They enhance the flavors and make your crab boil feast inviting and festive. For the full recipe, check [Full Recipe]. Start by filling a large pot with 4 quarts of water. Place the pot on high heat. Bring the water to a boil. Once boiling, add your seasonings. Include 2 tablespoons of Old Bay seasoning, 1 tablespoon of paprika, 1 tablespoon of salt, and 1 teaspoon of cayenne pepper. Stir well to mix the flavors. The water should smell fragrant and inviting. This base is key to your crab boil’s flavor. Now, it’s time to add the potatoes. Place 1 pound of halved baby red potatoes into the pot. Cover the pot and cook for about 10 minutes. After 10 minutes, add 1 pound of cut andouille sausage and 4 ears of corn, which you’ve cut in half. Cover again and cook for another 5 minutes. Timing is crucial here; it helps every ingredient cook just right. Next, it’s time to add the star of the show: the crab. Add 2 pounds of cleaned and quartered blue crabs and 4 crushed garlic cloves to the pot. Gently stir everything together. Cover the pot and cook for another 5 to 7 minutes. You’ll know the crabs are done when they turn bright red. Once cooked, remove the pot from heat and let it rest for a few minutes. Carefully drain the mix using a colander. Transfer the crab, corn, potatoes, and sausage to a large serving platter or even a newspaper-covered table. This adds a fun twist to your meal. Finish by garnishing with lemon wedges and chopped parsley for a fresh touch. Enjoy every bite of your Signature Crab Boil Feast! For the complete recipe, check out the Full Recipe. To get the best crab boil, avoid common mistakes. First, do not overcrowd the pot. If you add too much food at once, it cooks unevenly. Second, always season the water well. This step makes a big difference in flavor. Lastly, do not overcook the crab. It can become tough. Aim for a bright red color to know it's ready. When cooking for larger groups, use these tips. Prepare your crab boil in batches. This method lets you control cooking time better. You can also set up multiple pots if space allows. Just keep the broth at the right heat. Make sure to keep the cooked food warm while you finish the rest. Use aluminum foil to cover it, or place it in a warm oven. To amp up flavor, try adding more spices. Consider garlic powder or onion powder for depth. Fresh herbs like thyme or dill can also brighten the dish. For dips, melted butter is classic. You can mix in lemon juice or hot sauce for a twist. Offering a range of dips allows guests to customize their meal. This adds a fun touch to the gathering. {{image_2}} You can make your crab boil even more exciting by adding other seafood. Shrimp, lobster, or clams will give your meal more depth and flavor. - Shrimp: Use large shrimp. They cook quickly and soak up the spices well. - Lobster: Add lobster tails for a luxurious touch. They pair nicely with crab. - Clams: Include fresh clams for a briny flavor. Make sure they open while cooking. Each seafood adds its own taste and texture. Mix and match to find your favorite combo. Not everyone loves seafood. If you want a veggie version, there are great plant-based options. - Mushrooms: Use large portobello mushrooms for a hearty base. - Cauliflower: This can mimic the texture of crab when cooked well. - Chickpeas: They add protein and a nice bite. You can still use all the same seasonings. The spices will make the veggies pop with flavor. The signature crab boil varies by region. Southern and Cajun styles have their own unique spins. - Southern-style: Focuses on crab, corn, and potatoes. It is simple and tasty. - Cajun-style: Adds more spices like cayenne and garlic. It is bold and spicy. Try experimenting with different spices and ingredients to create your own version. Each twist can bring something new to your gathering. After the feast, you may have crab boil leftovers. Store them in an airtight container. Make sure to cool the food to room temperature before sealing. This helps keep the flavors fresh. Use the leftovers within three days for the best taste. If you want to keep them longer, consider freezing. To reheat crab boil leftovers, avoid the microwave if possible. Instead, use a pot on the stove. Add a little water to the pot to create steam. Heat on low and cover with a lid. This method keeps the crab moist and tasty. Stir gently to warm everything evenly. You can also use a steamer for the best results. Yes, you can freeze crab! First, let the crab cool completely. Then, place it in a freezer-safe bag. Remove as much air as possible to prevent freezer burn. Make sure to label the bag with the date. You can freeze crab for up to three months. When ready to eat, thaw it in the fridge overnight and reheat as described. A Signature Crab Boil Feast is a fun and flavorful dish. It features tender crab, sweet corn, and hearty potatoes. This dish often brings people together for a lively meal. You cook it in one pot, making cleanup easy. The blend of spices creates a unique flavor that makes it special. You can tell crabs are done when they turn bright red. The meat should be opaque and firm. When you pull off a leg, the meat should come out easily. If the shells feel light and hollow, that is a good sign too. Yes, you can prep some parts in advance. You can season the water and chop the veggies ahead of time. Just store them in the fridge until you need them. However, cook the crab and other items fresh for the best taste. You can serve coleslaw, garlic bread, or a fresh salad. These sides add crunch and balance the meal. Some people enjoy dipping bread in the spicy broth. You can also try serving a fruit salad for a refreshing touch. For the full recipe, check out Signature Crab Boil Feast. In this blog post, we explored the art of making a delicious crab boil. We covered the key ingredients, including fresh blue crabs, corn, and andouille sausage. I shared how to prepare the boiling base and the proper cooking sequence for perfect flavors. We also looked at tips to avoid mistakes and how to enhance your dish. Remember, you can add more seafood or try vegetarian options for variety. Finally, effective storage and reheating tips will help keep your meal fresh. Enjoy your next crab boil!

Signature Crab Boil Feast for Flavorful Gatherings

Ready to make your next gathering unforgettable? A Signature Crab Boil Feast is all about fun, flavor, and friends! With

To make this nourishing soup, you need a few key items: - 1 cup red lentils, rinsed - 1 medium onion, diced - 2 cloves garlic, minced - 1 teaspoon fresh ginger, grated - 2 tablespoons olive oil - 1 teaspoon ground turmeric - 1 teaspoon cumin - ½ teaspoon coriander - 4 cups vegetable broth - 1 cup coconut milk - 2 large carrots, diced - 1 stalk celery, diced - Juice of 1 lemon - Salt and pepper to taste - Fresh cilantro leaves for garnish These ingredients create a warm and comforting blend. The red lentils are soft and creamy. They cook quickly and soak up flavors. The turmeric adds a golden hue and health benefits. You can enhance your soup with some fun toppings. Here are some ideas: - Crushed red pepper flakes for heat - A dollop of yogurt for creaminess - Sliced green onions for crunch - Toasted pumpkin seeds for a nutty flavor These garnishes add a burst of color and texture. They also let you customize the soup to your taste. Each ingredient brings its own benefits: - Red lentils: High in protein and fiber, they support digestion. - Turmeric: Known for its anti-inflammatory properties, it promotes health. - Coconut milk: Adds healthy fats and creaminess, making the soup rich. - Carrots: Packed with vitamins, they boost your immune system. - Onions and garlic: They support heart health and add flavor. This soup is not just tasty; it’s good for you too! It’s a complete meal packed with nutrients. For the full recipe, check the link above. To start, gather all your ingredients. You will need: - 1 cup red lentils, rinsed - 1 medium onion, diced - 2 cloves garlic, minced - 1 teaspoon fresh ginger, grated - 2 tablespoons olive oil - 1 teaspoon ground turmeric - 1 teaspoon cumin - ½ teaspoon coriander - 4 cups vegetable broth - 1 cup coconut milk - 2 large carrots, diced - 1 stalk celery, diced - Juice of 1 lemon - Salt and pepper to taste - Fresh cilantro leaves for garnish Next, dice the onion, mince the garlic, and grate the ginger. Rinse the lentils in cold water. This step helps remove any dirt or debris. Prepare the carrots and celery by dicing them into small pieces. Now, heat the olive oil in a large pot over medium heat. Once hot, add the diced onions, minced garlic, and grated ginger. Sauté them for about 5 minutes. You want the onions to turn translucent. This step draws out the flavors. After that, stir in the ground turmeric, cumin, and coriander. Cook for an additional 1-2 minutes. Toasting the spices enhances their taste. Next, add the diced carrots and celery to the pot. Stir everything together and cook for another 3-4 minutes. The vegetables should begin to soften. Now, it’s time to add the rinsed lentils and vegetable broth. Bring this mixture to a boil. Once boiling, reduce the heat and let it simmer. Cook for about 20-25 minutes or until the lentils are tender. Once the lentils are cooked, stir in the coconut milk and lemon juice. Allow the soup to simmer for another 5-10 minutes. This adds creaminess and brightness to the soup. Now, season the soup with salt and pepper to taste. Adjust the flavors as needed. Once done, remove the pot from heat. Let the soup sit for a few minutes before serving. This helps the flavors meld together. Serve the soup hot and garnish with fresh cilantro leaves. They add a nice touch of color and flavor. For the full recipe, check out the provided link. To boost the taste of your Golden Turmeric Lentil Soup, try a few simple tricks. First, use fresh spices. Ground spices lose their kick over time. Second, add a pinch of cayenne for heat if you like spicy food. You can also toss in some fresh herbs like thyme or bay leaves while cooking. This adds layers of flavor. Lastly, finish the soup with a swirl of lemon juice. It brightens the dish and brings all the flavors together. Many home cooks make mistakes that dull the soup's taste. One common error is not sautéing the onions, garlic, and ginger long enough. Take your time to let them soften and release their aroma. Another mistake is using low-quality vegetable broth. A rich broth makes a big difference. Finally, don’t skip the salt and pepper. These seasonings help balance the flavors. Remember to adjust them as you go along for the best results. To make the most of your soup, pair it with crunchy bread or a simple salad. A side of whole grain bread complements the soup's rich texture. You can also serve it with a fresh green salad dressed with a light vinaigrette. For a heartier meal, add cooked quinoa or brown rice directly to the soup. This boosts the fiber and protein content. Check out the Full Recipe for more ideas on how to enjoy this delicious dish! {{image_2}} You can swap red lentils for green or brown lentils. They will change the soup's color and texture. If you want a richer flavor, try adding sweet potatoes. You can also use yellow onions if you don’t have white ones. If you are out of coconut milk, try using almond milk or cashew cream for a creamy touch. This soup is already vegan and gluten-free. All the ingredients fit those diets. If you want to add protein, toss in some chickpeas. They blend well and boost nutrition. Make sure to check labels on store-bought broth to ensure it is gluten-free. You can add leafy greens like spinach or kale. They cook down quickly and add vitamins. For extra fiber, consider adding diced bell peppers or zucchini. Top with nuts or seeds for a crunchy bite. These additions make the soup fun and more nourishing. For the full recipe, visit the section above. After you enjoy your Golden Turmeric Lentil Soup, let it cool. Transfer the soup into an airtight container. Store it in the fridge. It will stay fresh for about 3 to 4 days. If you want to enjoy it later, freezing is a great option. To reheat your soup, pour it into a pot. Warm it on medium heat. Stir it often to prevent sticking. You can also use the microwave. Heat in short bursts, stirring in between. Make sure it’s hot all the way through before serving. If you want to freeze the soup, use freezer-safe containers. Leave some space at the top for expansion. Label the containers with the date. You can freeze it for up to 3 months. When you’re ready to eat, thaw it overnight in the fridge before reheating. Enjoy your soup anytime! For the complete recipe, check out the Full Recipe. Turmeric has many health benefits. It helps reduce inflammation in the body. It may also boost your immune system. This spice contains curcumin, which fights free radicals. Lentils are rich in protein and fiber. They help keep your heart healthy and support digestion. Together, turmeric and lentils create a powerful dish. This combo can help you feel great while enjoying a tasty meal. Yes, you can make this soup in a slow cooker! Start by sautéing the onions, garlic, and ginger in a pan. Then, add them to the slow cooker. Next, add the remaining ingredients: lentils, spices, broth, and veggies. Set the slow cooker on low for 6 to 8 hours. Your soup will be ready and full of flavor! This method makes it easy to enjoy the soup anytime. Golden Turmeric Lentil Soup can last 4 to 5 days in the fridge. Be sure to store it in an airtight container. If you want it to last longer, consider freezing it. This soup can stay good in the freezer for about 3 months. Just thaw it overnight in the fridge before reheating. You can enjoy delicious soup anytime you want! For the full recipe, check out the details above. This blog post covered the main ingredients and their benefits for Golden Turmeric Lentil Soup. I shared clear steps for preparation and cooking, plus tips to enhance flavors. You learned about easy variations for your diet and how to store leftovers. In conclusion, making this soup is simple and rewarding. It’s healthy, comforting, and adaptable. Enjoy exploring recipes that nourish your body and delight your taste buds.

Golden Turmeric Lentil Soup Flavorful and Nourishing

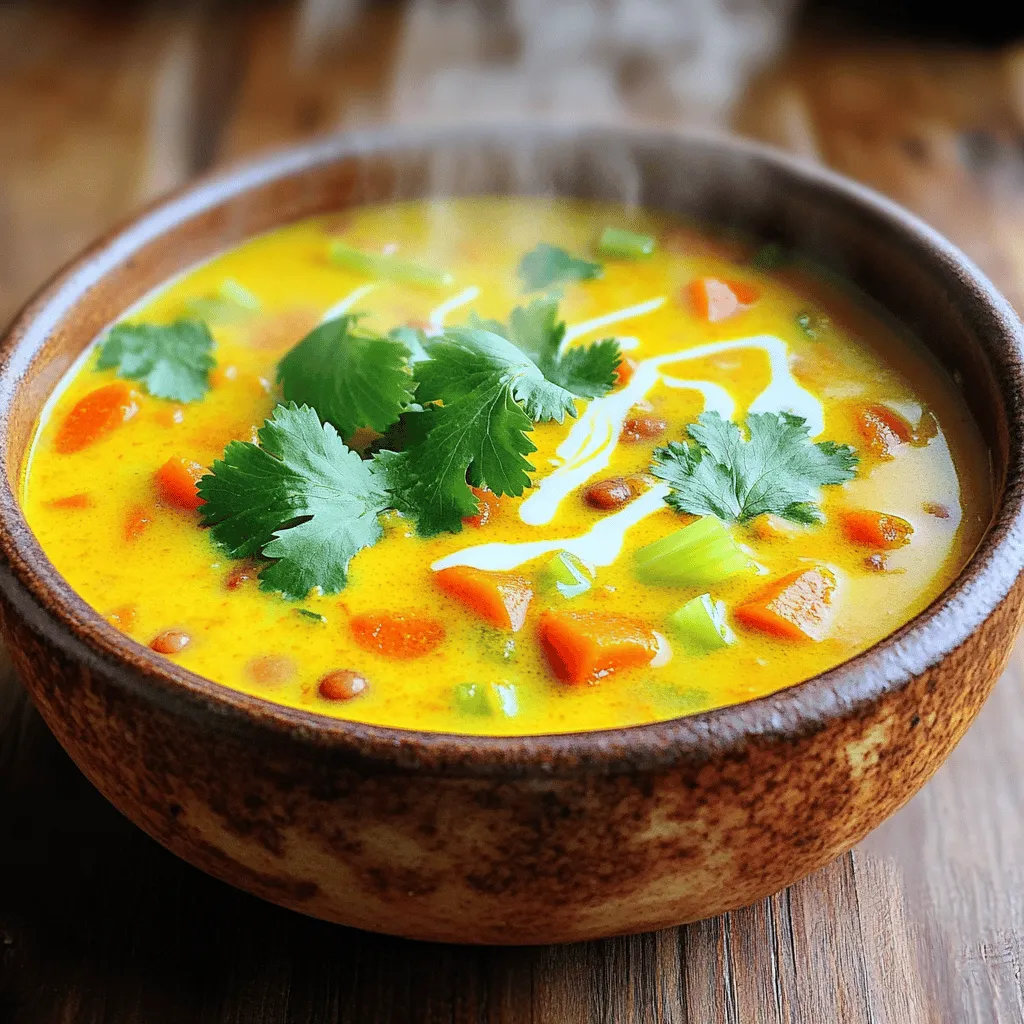
Are you ready to warm your soul with a bowl of Golden Turmeric Lentil Soup? This nutritious dish delights your

For Amish Brick Chicken, you need a few key items. Here’s what you will use: - 4 bone-in, skin-on chicken thighs - 4 bone-in, skin-on chicken drumsticks - 2 tablespoons olive oil - 2 tablespoons apple cider vinegar - 1 tablespoon smoked paprika - 1 tablespoon garlic powder - 1 tablespoon onion powder - 1 teaspoon salt - 1 teaspoon black pepper - Fresh herbs for garnish, like thyme or rosemary These ingredients form the base of the dish, giving you a savory flavor. If you don’t have something on hand, here are some easy swaps: - Chicken thighs can be replaced with chicken breasts, but they may dry out. - Use lemon juice instead of apple cider vinegar for a zesty kick. - If you lack smoked paprika, regular paprika will work, but the smoky flavor will be less intense. - For fresh herbs, use dried herbs, but reduce the amount since they’re stronger. These substitutes keep the recipe flexible and fun. Fresh herbs really make a difference in this dish. They add bright flavor and lovely aroma. When you sprinkle fresh thyme or rosemary on top, it elevates the whole meal. Fresh herbs also provide nutrients and enhance the look of your plate. Using herbs can turn a simple dish into something special. So, don't skip this step! If you want a detailed recipe, check out the full recipe for Amish Brick Chicken. First, you need to prepare the chicken. Start with four bone-in, skin-on chicken thighs and four drumsticks. Pat them dry with paper towels. Drying helps the skin get crispy when cooked. This step is key for a great texture. Next, it's time to marinate. In a large bowl, mix together: - 2 tablespoons olive oil - 2 tablespoons apple cider vinegar - 1 tablespoon smoked paprika - 1 tablespoon garlic powder - 1 tablespoon onion powder - 1 teaspoon salt - 1 teaspoon black pepper Add the chicken pieces to the bowl, ensuring they are well-coated. Cover the bowl with plastic wrap. Let the chicken marinate in the fridge for at least one hour. For the best flavor, let it sit overnight. Now, heat your grill or grill pan over medium heat. If you use a grill, prepare for direct grilling. Remove the chicken from the marinade, shaking off any extra. Place the chicken thighs skin-side down on the grill. To create that classic brick effect, put a heavy cast iron skillet or a brick wrapped in aluminum foil on top of the thighs. This weight helps sear the skin. Grill for about 10 to 12 minutes. After that, carefully remove the weight. Flip the chicken skin-side up, and put the weight back on. Grill for another 10 to 12 minutes. Make sure the chicken reaches an internal temperature of 165°F (75°C). Once it's done, remove the chicken from the grill. Tent it with foil and let it rest for 5 to 10 minutes. This resting time helps lock in the juices. Finally, garnish with fresh herbs before serving. Enjoy your delicious Amish Brick Chicken! For the full recipe, check [Full Recipe]. To get that perfect crispy skin, start by drying the chicken. Patting it dry helps remove moisture. This is key for a nice crunch when grilling. Next, do not skip the marinating step. It adds flavor and helps crisp the skin. Use olive oil in your marinade. It not only adds taste but also promotes browning. Use medium heat for grilling Amish Brick Chicken. Too high heat can burn the skin before the inside cooks. Place the chicken skin-side down first. This helps render fat and creates crispiness. Press down with a heavy skillet or a brick wrapped in foil. This step helps to sear the chicken evenly. Flip the chicken halfway through cooking. This ensures both sides get that beautiful golden color. If the skin is not crispy, check your heat. Insufficient heat can lead to soggy skin. If the chicken sticks to the grill, try oiling the grates before cooking. A good non-stick surface helps a lot. If your chicken is undercooked, check the internal temperature. It should be at least 165°F (75°C). Use a meat thermometer for accuracy. If it is overcooked, lower the grill's heat in future tries. This will help keep your chicken juicy and tender. For the full recipe, be sure to check out the detailed instructions. {{image_2}} You can change the flavor of Amish Brick Chicken by using different marinades. For a sweet twist, try adding honey or maple syrup to your base marinade. This will balance the smokiness of the paprika. If you want a spicy kick, mix in some cayenne pepper or hot sauce. A citrus marinade with lemon juice or lime can brighten the dish. Each option gives you a fresh taste and can keep things exciting. You can cook Amish Brick Chicken on the grill or in the oven. Grilling gives the chicken a smoky flavor and crispy skin. The high heat from the grill helps the chicken cook evenly. If you choose the oven, preheat it to 425°F (220°C). Place the chicken on a baking sheet with the weight on top. Bake for about 35-40 minutes, or until the chicken is cooked through. Both methods yield delicious results, so choose what works best for you. When serving Amish Brick Chicken, think about great sides. Coleslaw adds crunch and freshness. Grilled vegetables bring color and flavor. Cornbread is a warm, comforting choice too. You can also serve it with a simple salad for a lighter meal. Don’t forget to garnish your chicken with fresh herbs. This adds a pop of color and enhances the flavor. For more ideas, check out the Full Recipe for inspiration. After cooking Amish Brick Chicken, cool it to room temperature. Store the chicken in an airtight container. It can stay in the fridge for up to four days. If you want to keep it longer, consider freezing it. To freeze Amish Brick Chicken, wrap each piece tightly in plastic wrap. Then, place the wrapped chicken in a freezer-safe bag. Make sure to remove as much air as possible. This method keeps the chicken fresh for up to three months. When you’re ready to eat, thaw it overnight in the fridge. Reheat chicken in the oven for the best texture. Preheat the oven to 350°F (175°C). Place the chicken on a baking sheet and cover it with foil. Heat for about 20-25 minutes or until the internal temperature reaches 165°F (75°C). You can also use the microwave, but it may not keep the skin crispy. For those who prefer it, check out the Full Recipe for more cooking tips. Amish Brick Chicken is a tasty dish made using chicken parts cooked under weight. The method gives the chicken a crispy skin and juicy meat. You marinate the chicken in spices, then grill it with a heavy skillet or brick on top. This method helps cook the chicken evenly while sealing in the flavor. You can find the full recipe to try this delicious meal yourself. Yes, you can use boneless chicken for this recipe. Boneless chicken cooks faster, so watch it closely. The key is to ensure it stays juicy and flavorful. You might skip the weight part, as boneless pieces will not need it. Just grill them until they reach the right temperature. Grill bone-in chicken thighs for about 10-12 minutes on each side. For boneless chicken, grill for about 6-8 minutes per side. Always check the internal temperature. Chicken should reach 165°F (75°C) to be safe. This ensures your chicken is fully cooked and tasty. This blog post covered the key ingredients, preparation, and cooking tips for Amish Brick Chicken. It highlighted the importance of fresh herbs and offered substitutes. I shared step-by-step grilling techniques and addressed common issues to help you succeed. With variations in marinades and cooking methods, you can customize this dish. Finally, I provided storage tips so you can enjoy leftovers safely. Follow these guidelines, and you’ll have delicious Amish Brick Chicken every time.

Amish Brick Chicken Savory and Simple Recipe

If you’re looking for a mouthwatering meal that’s easy to make, try Amish Brick Chicken. This simple recipe uses bold

- 1 lb chicken breast, cut into bite-sized pieces - 4 tablespoons unsalted butter - 4 cloves garlic, minced - 8 oz pasta (fettuccine or spaghetti) The main ingredients are key to this dish. The chicken breast provides protein and flavor. I recommend cutting the chicken into bite-sized pieces. This helps it cook evenly and makes it easy to eat. The unsalted butter adds richness. Garlic gives the dish a lovely aroma and taste. Use fresh garlic for the best flavor. The pasta, either fettuccine or spaghetti, serves as the perfect base. It soaks up the garlic butter sauce well. - 1 teaspoon Italian seasoning - Salt and pepper to taste - ¼ cup fresh parsley, chopped - Zest of 1 lemon Seasoning is vital for enhancing flavor. Italian seasoning brings warmth and depth. Salt and pepper are simple yet essential. Adjust the amounts to your liking. Fresh parsley adds color and freshness. It brightens up the dish. Lemon zest gives a burst of citrus flavor. This lifts the richness of the butter and chicken. - 1 cup freshly grated Parmesan cheese Parmesan cheese is a star ingredient. It adds a salty, nutty flavor. I recommend using freshly grated cheese. It melts better and tastes much richer. This cheese blends beautifully with the pasta and chicken. It creates a creamy texture that makes the dish irresistible. For the full list of ingredients and their amounts, check the Full Recipe. 1. Start by boiling salted water in a large pot. This step is key for flavor. 2. Once the water boils, add the pasta. Cook it according to the package instructions until it’s al dente. This usually takes about 8 to 10 minutes. 3. When the pasta is ready, drain it carefully, but keep ½ cup of that pasta water. This water is gold for your sauce. 1. Take your chicken breast and cut it into bite-sized pieces. This helps with even cooking. 2. Season the chicken well. Use salt, pepper, and Italian seasoning for a nice flavor boost. 1. In a large skillet, melt 2 tablespoons of butter over medium heat. 2. Add the chicken pieces to the skillet. Cook them for about 5 to 7 minutes. You want them golden brown and fully cooked. 3. Once cooked, take the chicken out and set it aside. 4. In the same skillet, add the remaining 2 tablespoons of butter. Let it melt. 5. Add minced garlic next. Sauté this for about a minute until it smells amazing. 6. Now, return the chicken to the skillet. Mix it well with the garlic butter. If it looks dry, add a splash of the reserved pasta water. 7. Next, toss in the cooked pasta. Make sure it gets coated in that delicious garlic butter. 8. Finally, remove from heat and stir in the grated Parmesan cheese, lemon zest, and fresh parsley. This will make everything creamy and flavorful. 9. Serve the garlic butter chicken bites over pasta in bowls. Add extra parsley and Parmesan if you like. For the full recipe, check the main section above. Enjoy your tasty meal! To get the chicken bites just right, pay attention to cooking time. Aim for about 5-7 minutes for a perfect golden brown. If you cut the chicken pieces smaller, they will cook faster. Always check that they reach an internal temperature of 165°F. For the best sear, use a hot skillet. This helps lock in flavors and moisture. Don’t overcrowd the pan; cook in batches if needed. This ensures each piece gets that nice brown color. You can add more depth to the dish with extra seasoning. Try adding paprika, garlic powder, or crushed red pepper for a little heat. If you like herbs, fresh thyme or rosemary work great too. Adding vegetables can make your dish colorful and nutritious. Consider bell peppers, spinach, or zucchini. Just sauté them with the garlic for a flavorful mix. When plating, use wide bowls for a nice presentation. Start with a layer of pasta, then add the chicken bites on top. Finish with a sprinkle of fresh parsley and extra Parmesan. For sides, a simple green salad pairs well. A light vinaigrette complements the richness of the dish. You can also serve garlic bread on the side for a complete meal. For the full recipe, check the earlier section. {{image_2}} You can switch up the pasta to fit your needs. Here are some great ideas: - Gluten-free pasta: If you need a gluten-free option, choose rice or quinoa pasta. They cook nicely and taste great. - Whole wheat pasta: For a healthier twist, whole wheat pasta adds more fiber. It gives a nutty flavor that pairs well with garlic butter. You can easily change the protein in this dish: - Substituting chicken with shrimp: Shrimp cooks quickly and adds a sweet flavor. Simply sauté shrimp until they turn pink. - Vegetarian options using tofu: For a meat-free meal, use firm tofu. Press it to remove water, then cube and sauté until golden. Want to add a kick or a twist? Try these flavor changes: - Adding spice with red pepper flakes: Sprinkle in red pepper flakes for heat. Just a pinch will make it pop! - Incorporating lemon or lime juice for tanginess: A squeeze of lemon or lime juice brightens up the dish. It adds freshness and balances the richness of the butter. For the complete recipe, check out the Full Recipe. To keep your garlic butter chicken bites fresh, use airtight containers. Glass containers work well, but plastic also does the job. Make sure to let the dish cool down before sealing it. In the fridge, you can store leftovers for about 3 to 4 days. This way, you can enjoy your tasty meal later! When reheating, I suggest using the stove for the best results. Heat a skillet on low and add a splash of water. This keeps the pasta moist. Stir often until everything is warm. If using a microwave, cover the dish to trap steam. Heat it in short bursts to avoid overcooking. No one likes dry pasta! If you want to save some for later, freezing is a great choice. Portion out the chicken and pasta into freezer-safe bags. Press out excess air before sealing. This helps prevent freezer burn. When you’re ready to eat, thaw it in the fridge overnight. For quick meals, you can also microwave it straight from the freezer, but this may take a bit longer. Yes, you can use chicken thighs. They are juicier and have more flavor. Thighs cook well and stay tender. However, they take a few minutes longer to cook. If you prefer leaner meat, stick with chicken breast. To add creaminess, stir in heavy cream while making the sauce. You can also use cream cheese for a rich taste. Adding more Parmesan cheese enhances the flavor too. Just remember to mix it well to get a smooth sauce. If you lack fresh garlic, garlic powder works as a good substitute. Use about 1/4 teaspoon for each clove. You can also try garlic salt, but reduce other salt in the recipe. Another option is to use shallots for a mild garlic taste. To add heat, try red pepper flakes for a mild kick. You can also mix in hot sauce while cooking. Sriracha or chili oil adds flavor and spice. Adjust the amount to match your taste preference. This blog post covered a simple and tasty chicken pasta dish. We discussed the key ingredients, including chicken, butter, and pasta. I provided step-by-step instructions to guide you through cooking and saucing. You learned tips to make your chicken and pasta shine with flavor. In the end, don't hesitate to try different variations or storage methods. Get creative with your cooking, and enjoy the process!

Garlic Butter Chicken Bites with Parmesan Pasta Delight

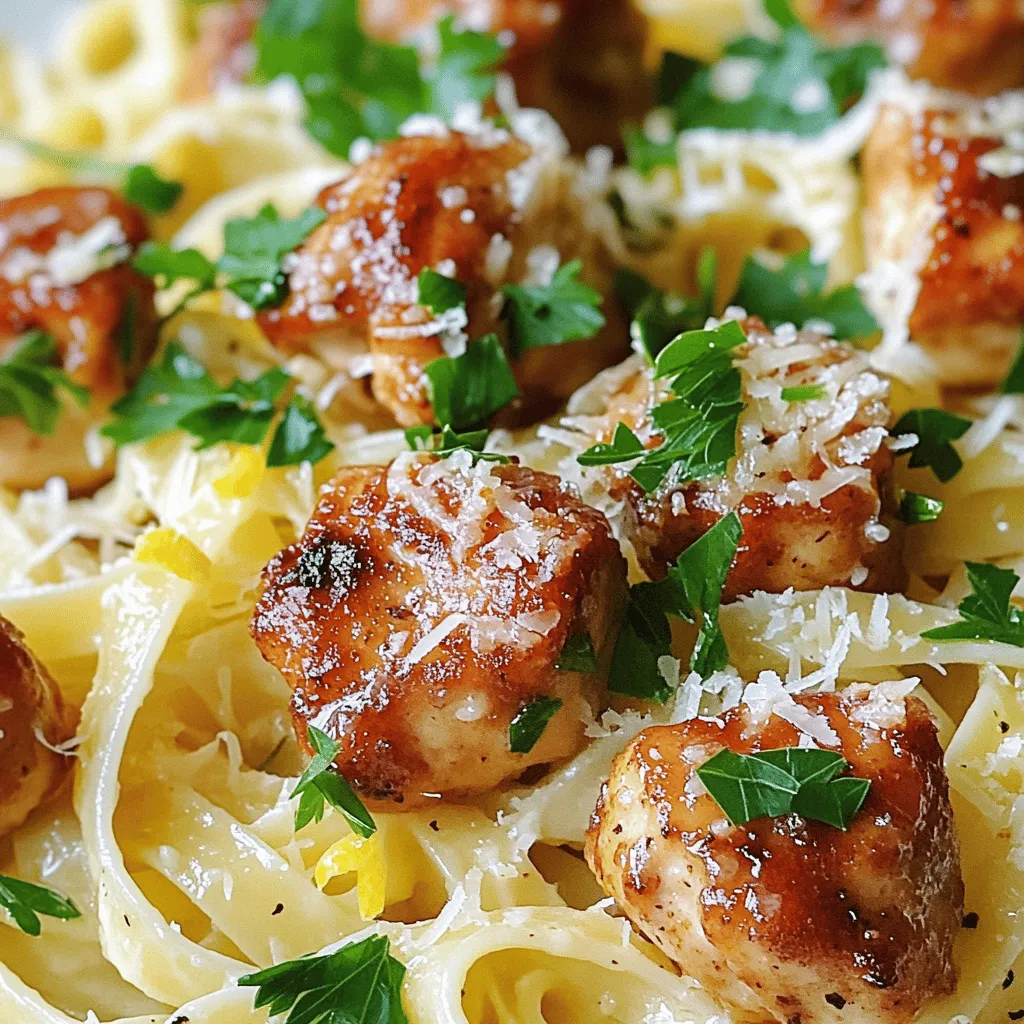
Are you ready to wow your taste buds? Garlic Butter Chicken Bites with Parmesan Pasta Delight is a dish that’s

- 2 pounds baby potatoes - 4 tablespoons olive oil - 2 teaspoons dried oregano - 1 teaspoon garlic powder - Salt and pepper to taste - 1 cup crumbled feta cheese - 1/2 cup kalamata olives, pitted and sliced - 1/4 cup fresh parsley, chopped - Zest of 1 lemon - Juice of 1 lemon To make great smashed Greek potatoes, you need the best ingredients. Start with baby potatoes. Look for smooth, firm potatoes without any dark spots. They should feel heavy for their size. This shows they are fresh and full of moisture. When it comes to feta cheese, opt for authentic Greek feta. It has a creamy texture and a rich flavor. Check the label for sheep's milk or a mix of sheep and goat's milk. This will give you the best taste for your dish. You can make this dish even better with some extra herbs. Try adding fresh dill or mint for a twist. These herbs pair well with the feta and olives. For toppings, consider adding roasted red peppers or sun-dried tomatoes. They bring more color and flavor to the dish. Feel free to get creative with what you have on hand! For the full recipe, check out the instructions provided above. Preparing the Potatoes Start by washing 2 pounds of baby potatoes. Place them in a large pot and cover with water. Add a good pinch of salt to the water. Bring it to a boil. Cook for about 15 to 20 minutes. The potatoes should be fork-tender. Once cooked, drain them and let them cool for a bit. Making the Smashing Mixture While the potatoes cool, grab a small bowl. Mix 4 tablespoons of olive oil, 2 teaspoons of dried oregano, 1 teaspoon of garlic powder, salt, and pepper. This mixture adds a lot of flavor to the potatoes. Preheating the Oven Preheat your oven to 425°F (220°C). This temperature helps achieve crispy, golden edges on the potatoes. Proper Smashing Technique Once the potatoes are cool enough to handle, place them on a lined baking sheet. Use the bottom of a cup or a fork to gently smash each potato. Flatten them but keep them intact. This allows the edges to crisp up nicely while baking. Adding Feta and Olives After baking for about 25 to 30 minutes, take the potatoes out of the oven. Sprinkle 1 cup of crumbled feta cheese and 1/2 cup of sliced kalamata olives over the tops. Return them to the oven for an extra 5 to 7 minutes to warm the cheese. Drizzling Lemon Juice Once the potatoes are out of the oven, drizzle fresh lemon juice over them. Add some lemon zest and chopped parsley as well. This will give the dish a bright, fresh taste. For the full recipe, check the earlier section. To ensure even cooking, start with uniform baby potatoes. This helps them cook at the same rate. Boil them until fork-tender, which usually takes 15 to 20 minutes. After boiling, let them cool slightly before smashing. This keeps them from falling apart. For perfect crispiness, brush the smashed potatoes with olive oil. Bake them at 425°F until golden, about 25 to 30 minutes. Smashed Greek potatoes pair well with grilled chicken or fish for a full meal. They also match nicely with a fresh Greek salad, adding a nice balance. For beverages, try a crisp white wine like Sauvignon Blanc. Alternatively, serve with sparkling water, which brightens the meal. For creative plating, use a large platter to showcase the potatoes. Arrange them in a circle for a fun look. Garnishing is key! Sprinkle chopped parsley and lemon zest on top for color and flavor. Add lemon wedges around the platter for extra flair. This will invite your guests to dive in and enjoy! {{image_2}} You can change the cheese to make this dish your own. Try using goat cheese or ricotta for a different taste. Each cheese brings its own flavor and creaminess. You can also swap baby potatoes for sweet potatoes for a sweeter, healthier option. The cooking method stays the same, but the taste will be unique. For a vegan version, replace feta cheese with a plant-based cheese. Nutritional yeast can also add a cheesy flavor without dairy. If you need gluten-free options, this recipe is naturally gluten-free! Just ensure that any additional toppings are also gluten-free, like olives and spices. Add local spices to give your potatoes a new flavor. For example, try adding smoked paprika for a bit of warmth. You can also use seasonal ingredients like roasted garlic or fresh herbs. These small changes can make the dish fit any time of year or occasion. For the full recipe, check out the detailed instructions provided above. To keep your smashed Greek potatoes fresh, store them in an airtight container. Place them in the fridge. They taste best within three to four days. Avoid stacking them too high, as this can cause them to become mushy. For reheating, use the oven for the best results. Preheat it to 350°F (175°C). Place the potatoes on a baking sheet. Heat them for about 10 to 15 minutes, until warm and crisp again. You can also use a microwave, but they may lose some crispiness. If you want to save some for later, you can freeze your smashed potatoes. First, let them cool completely. Then, place them in a single layer on a baking sheet. Freeze them for about two hours until firm. After that, transfer them to a freezer bag or airtight container. To thaw and reheat, take them out of the freezer and let them sit in the fridge overnight. Reheat them in the oven at 350°F (175°C) for about 15 to 20 minutes. This method helps keep them crispy. You can keep smashed Greek potatoes in the fridge for about three to four days. If stored properly, they last for up to three months in the freezer. Watch for signs of spoilage. If you see mold or an off smell, it's best to discard them. Freshness is key to enjoying their delicious taste. Can I use other potatoes for this recipe? Yes, you can use other types of potatoes. I like baby potatoes for their creaminess. However, russet or Yukon gold potatoes work well too. Just keep in mind that cooking times may vary. How do I know when the potatoes are done? The potatoes are done when they are fork-tender. You should be able to easily pierce them. This usually takes about 15-20 minutes boiling. What if I don’t have feta cheese? If you don't have feta, try using goat cheese or ricotta. Both will give you a nice creaminess. Shredded mozzarella can also work in a pinch. Can I make this recipe ahead of time? Yes, you can prep the potatoes ahead. Boil and smash them, then keep them in the fridge. Bake them just before serving for the best taste. What are the best garnishes for smashed potatoes? I love adding fresh parsley and lemon zest. You can also sprinkle some extra feta on top. Chopped green onions or fresh dill can elevate the dish as well. How should I serve them for a dinner party? Serve your smashed potatoes on a large platter. This makes it easy for guests to help themselves. Add lemon wedges for a bright touch and invite everyone to dig in. For more details, check the Full Recipe. This blog post covered a tasty recipe for smashed baby potatoes. We looked at the ingredients, preparation steps, and how to make them delicious and crispy. Remember to choose quality potatoes and feta for the best taste. You can personalize the dish with herbs or toppings you love. Finally, storing tips ensure you enjoy leftovers at their best. I hope you give this recipe a try and enjoy every bite!

Smashed Greek Potatoes with Feta Delightful Side Dish

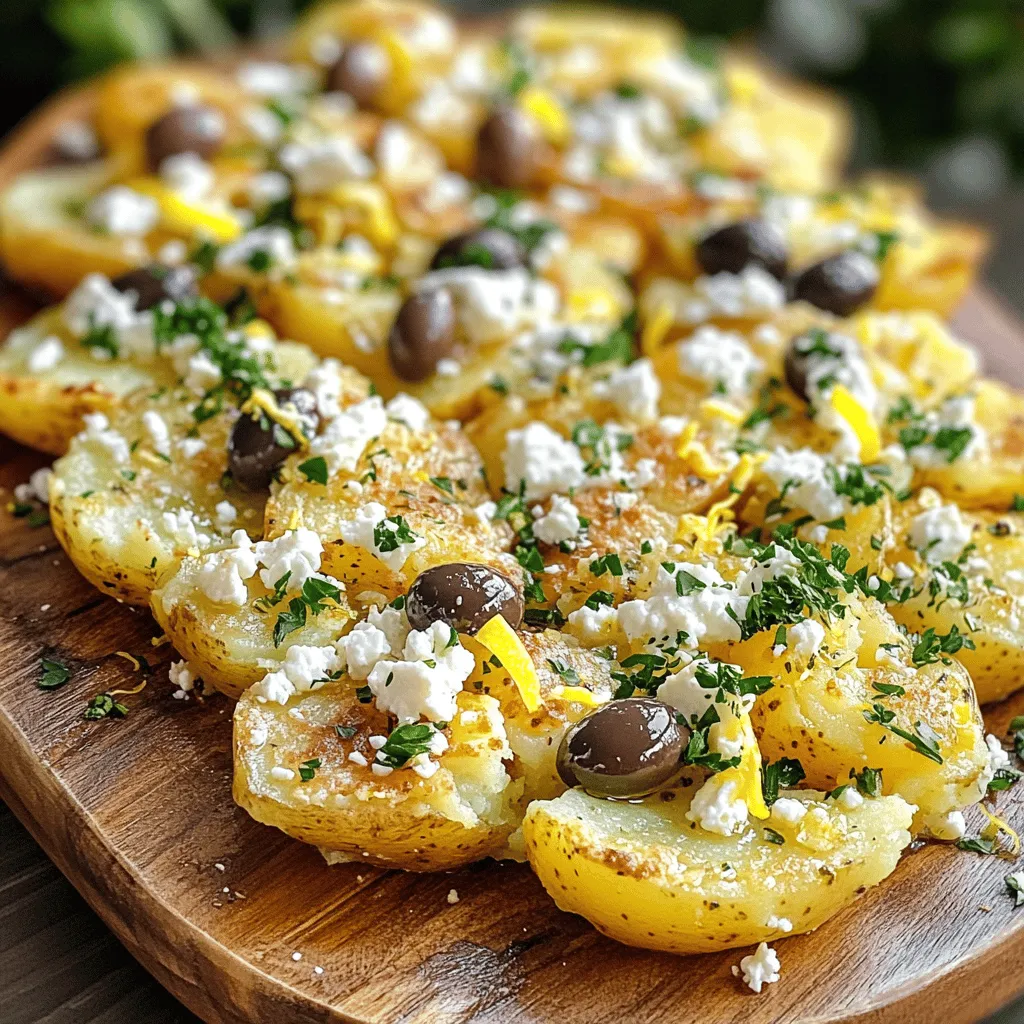
Are you ready to elevate your side dish game? Smashed Greek Potatoes with Feta are the perfect blend of crispy,

To make Cream Cheese Stuffed French Toast, you will need the following ingredients: - 8 slices of thick bread (like brioche or challah) - 4 ounces cream cheese, softened - 2 tablespoons powdered sugar - 1 teaspoon vanilla extract - 2 large eggs - 1 cup milk - 1 teaspoon cinnamon - 1 tablespoon butter (for frying) - Maple syrup, for serving - Fresh berries (optional, for garnish) The cream cheese filling is the star of this dish. Here’s what you need: - 4 ounces cream cheese, softened - 2 tablespoons powdered sugar - 1 teaspoon vanilla extract Mix these three items together. You want a smooth and creamy texture. This blend adds a sweet and rich flavor to the toast. Choosing the right bread is key. I recommend using thick-cut bread. Here are my top picks: - Brioche: This bread is soft and buttery. It absorbs the egg mixture well. - Challah: This bread has a rich flavor and is slightly sweet, making it a perfect match. - Texas toast: If you want a thicker slice, this bread works great too. These options give the toast a nice taste and hold the filling well. Enjoy crafting your delicious breakfast! To make the filling, start with a medium bowl. Add the softened cream cheese, powdered sugar, and vanilla extract. Mix them well until smooth and creamy. This step is key. A good filling makes a big difference in taste. Set the bowl aside while you prepare the toast. Now, take four slices of your thick bread. Spread a generous amount of the cream cheese mixture on each slice. Make sure to cover it well. Next, top with the remaining bread slices to form sandwiches. Press down lightly to hold them together. This helps the filling stay inside during cooking. Heat a skillet or griddle over medium heat. Add one tablespoon of butter and let it melt. In a shallow bowl, whisk together two large eggs, one cup of milk, and one teaspoon of cinnamon. Dip each sandwich into this egg mixture. Coat both sides, but don’t soak them too long. Once the skillet is hot, place the dipped sandwiches on it. Cook for about 3-4 minutes on each side. Look for a golden brown color and a slight crisp. When done, remove them from the skillet. Serve warm, drizzled with maple syrup and fresh berries if you like. This step brings your dish to life. Enjoy your delightful cream cheese stuffed French toast! For the complete recipe, check out the Full Recipe section. To make the best cream cheese stuffed French toast, you need a good filling. Use a smooth, creamy mixture so it spreads easily. Mix softened cream cheese with powdered sugar and vanilla extract. Make sure there are no lumps. This step is key for great flavor. Spread a generous layer on the bread. Don't be shy; the more, the better! Getting that perfect golden brown color is all about heat. Start with a medium heat on your skillet. If the heat is too low, your toast may soak up too much egg mixture. If it’s too high, the outside burns before the inside cooks. Cook each side for about 3-4 minutes. Look for a nice golden shade, and trust your senses! Serve your cream cheese stuffed French toast with maple syrup. It adds a sweet touch that melts into each bite. Fresh berries make a great garnish too. They add color and a burst of flavor. You can also pair it with whipped cream or a dusting of powdered sugar. For a fun twist, serve it with a side of bacon for a salty contrast. Enjoy! {{image_2}} You can mix it up with flavors! Add chocolate chips to your cream cheese for a sweet twist. You can also stir in fresh fruit, like strawberries or blueberries, for a fruity kick. If you love banana, mash it into the filling too. Each flavor gives a new taste. If you need gluten-free bread, use your favorite brand. Many stores offer tasty gluten-free options. For a dairy-free version, swap cream cheese with a dairy-free cream cheese. Use almond or coconut milk instead of regular milk. These swaps make it easy to enjoy this dish, even with dietary needs. Toppings can take your dish to the next level. Try whipped cream or yogurt for a creamy touch. Fresh fruit adds color and taste. Nuts, like almonds or walnuts, give a nice crunch. You can also sprinkle powdered sugar for sweetness. Serve with crispy bacon or sausages for a hearty meal. Each topping adds fun and flavor to your plate. Check out the Full Recipe for more ways to enjoy this dish! To keep your cream cheese stuffed French toast fresh, place leftovers in an airtight container. Store them in the fridge for up to three days. This helps maintain flavor and texture. If you want to save them for longer, freezing is a great option. When you are ready to eat the leftovers, use the oven for reheating. Preheat your oven to 350°F (175°C). Place the stuffed French toast on a baking sheet. Heat for about 10 to 15 minutes until warm and crispy. You can also use a microwave, but the toast may get soft. If you want to freeze your stuffed French toast, first let it cool down completely. Wrap each piece in plastic wrap, then place them in a freezer bag. They can last up to three months in the freezer. When you’re ready to enjoy, just thaw in the fridge overnight and reheat. For a quick meal, you can cook directly from frozen, adding a few extra minutes to your cooking time. You will love how easy this makes breakfast! To make Cream Cheese Stuffed French Toast, start by mixing cream cheese, powdered sugar, and vanilla in a bowl. Then, spread this mixture on half of the bread slices. Top these with the other slices to form sandwiches. Next, whisk eggs, milk, and cinnamon in a shallow bowl. Heat butter on a skillet and dip each sandwich into the egg mix. Cook on medium heat for about 3-4 minutes per side until golden. Finally, serve warm with maple syrup and fresh berries. This full recipe will guide you through every step. Yes, you can use other cheeses. Mascarpone adds a rich flavor. Ricotta works well too, offering a lighter texture. For a twist, try goat cheese for a tangy bite. Each cheese gives a unique taste, so feel free to experiment. Thick bread works best for French toast. I recommend brioche or challah for their rich flavors and soft texture. Sourdough also makes a great option, giving a nice tang. The key is to choose bread that can soak up the egg mix without falling apart. You can prepare the cream cheese filling a day in advance. Assemble the sandwiches and store them in the fridge. Just before cooking, dip them in the egg mixture. If you want to make it even earlier, you can freeze the assembled sandwiches. Thaw in the fridge overnight before cooking. There are many great toppings to try! Fresh fruits like strawberries or blueberries add sweetness. Whipped cream makes it extra special. You can also sprinkle nuts or chocolate chips for crunch. A dusting of powdered sugar can give it a nice finish. Get creative with your favorite flavors! In this guide, I covered how to make delicious cream cheese stuffed French toast. We explored the ingredients needed, the steps for preparation, and tips for cooking. I shared variations to keep things fun and exciting. Remember to store leftovers properly for later enjoyment. With this knowledge, you can impress anyone with your breakfast skills. Try different flavors and toppings to find your favorite. Now, you are ready to make a tasty meal that's simple and satisfying. Enjoy your cooking adventure!

Cream Cheese Stuffed French Toast Delightful Recipe

Are you ready to make breakfast magical? This Cream Cheese Stuffed French Toast recipe will wow your taste buds! You’ll

- 12 large sea scallops - 2 tablespoons olive oil - 1 cup heavy cream - Salt and black pepper, to taste - 1 teaspoon red pepper flakes - 1 teaspoon smoked paprika - 2 tablespoons unsalted butter - 2 garlic cloves, minced - 1 tablespoon fresh lemon juice - 2 tablespoons fresh parsley, chopped (for garnish) When cooking seared scallops, having the right ingredients is key. The sea scallops shine in this dish. They are sweet and tender. Use large scallops for the best sear. The olive oil helps them brown nicely. Heavy cream gives a rich texture to the sauce. For the spices, simple salt and pepper enhance the scallops' natural flavor. Red pepper flakes add a kick. Smoked paprika brings warmth and depth. The butter makes the sauce creamy and smooth. Fresh garlic adds a bold taste. Lemon juice brightens the dish, making it fresh. Finally, parsley adds color and a hint of earthiness. This combination of ingredients creates a delightful dish. It's easy to prepare yet impressively delicious. For the full recipe, check out the recipe section! - Rinse and dry the scallops. - Season with salt and black pepper. Start by rinsing your scallops under cold water. This removes any salt or debris. After rinsing, pat them dry with paper towels. Drying helps create a nice crust when searing. Next, sprinkle salt and black pepper on both sides of the scallops. This simple seasoning enhances their natural flavor. - Heat olive oil in a skillet. - Sear scallops on each side. Now, heat two tablespoons of olive oil in a large skillet. Use medium-high heat for the best results. When the oil is hot, carefully place the scallops in the skillet. Avoid overcrowding the pan; it’s better to cook them in batches. Sear the scallops for about 2-3 minutes until they turn golden brown. Then, flip them and sear the other side for another 2-3 minutes. Remove the scallops from the skillet and set them aside. - Sauté garlic and spices. - Add heavy cream and lemon juice. - Coat scallops in the sauce. In the same skillet, lower the heat to medium. Add two tablespoons of unsalted butter and let it melt. Once melted, add two minced garlic cloves. Sauté the garlic for about 30 seconds until it smells great. Then, stir in one teaspoon of red pepper flakes and one teaspoon of smoked paprika. Cook this mix for another minute to bring out the flavors. Next, pour in one cup of heavy cream and one tablespoon of fresh lemon juice. Stir well and let the sauce simmer for about 3-4 minutes until it thickens slightly. Finally, return the scallops to the skillet. Gently coat them in the spicy cream sauce. Let them warm up for 1-2 minutes. Your scallops are now ready to serve! For the complete recipe, check the Full Recipe section above. To achieve that perfect sear, start by drying your scallops. Pat them down with paper towels until they are completely dry. This step is key. A wet surface leads to steaming, not searing. Next, avoid overcrowding in the skillet. If you crowd the scallops, they won’t get that lovely brown crust. Sear them in batches if needed. This helps each scallop cook evenly. You can customize the spice level of your dish easily. Start with one teaspoon of red pepper flakes. This amount gives a nice kick without being overwhelming. If you want more heat, add another half teaspoon. For less heat, consider using smoked paprika alone. This spice adds flavor without the burn. Presentation matters. Serve the seared scallops in the center of a white plate. Drizzle the spicy cream sauce over them and sprinkle with fresh parsley. For sides, try sautéed green beans or a fresh arugula salad. These add vibrant colors and balance to your plate. For more delicious ideas, check the Full Recipe for extra serving tips. {{image_2}} You can add color and nutrition by including vegetables. Think about sautéing spinach or bell peppers with your scallops. These veggies bring fresh flavors to the dish. You can also serve your scallops with a side salad. A simple mix of greens, tomatoes, and a light dressing can balance the meal. If you want to change things up, try different sauces. A tomato-based sauce can add a rich, tangy twist. Simply simmer canned tomatoes with herbs for a great option. Another tasty choice is garlic butter sauce. Just melt butter, add minced garlic, and pour it over the scallops for a savory treat. For those who need dairy-free options, try using coconut cream. It gives a rich texture and a hint of sweetness. If you're looking for gluten-free options, rest easy. Scallops are naturally gluten-free. Just ensure any sauces you use are also gluten-free. This way, everyone can enjoy this delightful dish. Store any leftovers in airtight containers. Glass or plastic containers work well. Make sure to let the scallops cool before sealing them. This helps keep them fresh. Place the containers in the fridge. Use the leftovers within two days for the best taste. To reheat scallops, use a skillet on low heat. Add a splash of water or broth to keep them moist. Cover the skillet to trap steam and heat through. Avoid using the microwave. It can make the scallops tough and dry. You can freeze the scallops and sauce. First, let them cool completely. Place them in freezer-safe bags. Remove as much air as possible. When ready to use, thaw in the fridge overnight. Reheat gently for the best flavor and texture. You want to see a nice golden-brown crust on each scallop. Perfect scallops feel firm but tender. When you cut them, they should be opaque and not translucent. Timing is key; avoid overcooking them, as they can become tough. Each side should take about 2-3 minutes on high heat. Keep an eye on them, and you will get it just right. Yes, you can use frozen scallops! Thaw them overnight in the fridge for best results. Pat them dry before cooking to get a good sear. Frozen scallops can differ in texture and flavor. They may not be as sweet or tender as fresh ones. However, if handled correctly, they can still taste great in your dish. Seared scallops pair well with many side dishes. Try sautéed green beans or a fresh arugula salad for a light touch. You can also serve them over creamy risotto for a filling meal. For drinks, a crisp white wine like Sauvignon Blanc works well. It complements the scallops without overpowering them. To wrap up, we've explored the key ingredients and steps to make seared scallops with a spicy cream sauce. You learned about the importance of seasoning and cooking techniques that enhance flavor. Don't forget the tips for customizing spice levels and serving suggestions that can elevate your dish further. With these insights, you can create a delightful meal that impresses everyone. Enjoy your culinary adventure and let your creativity shine in the kitchen!

Seared Scallops with Spicy Cream Sauce Delight

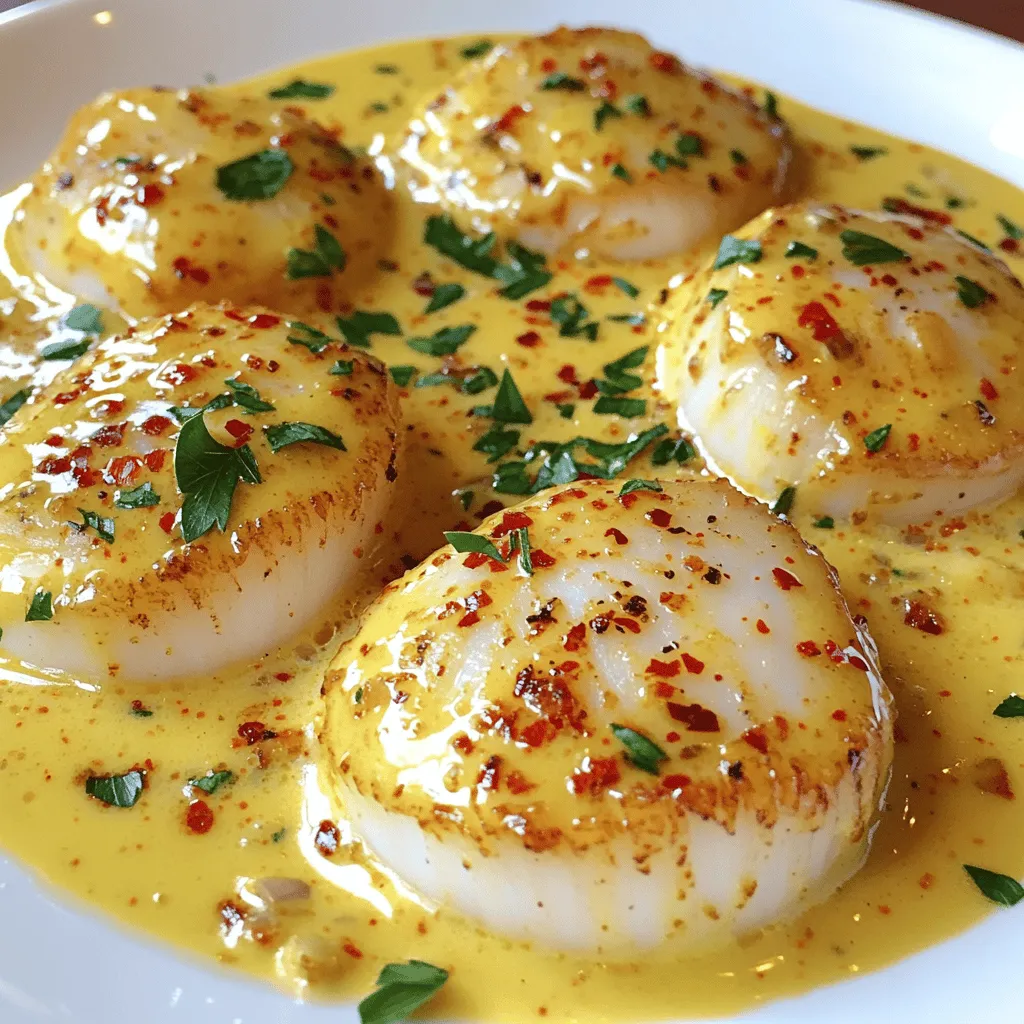
Welcome to a delicious journey! Today, I share my easy recipe for seared scallops with spicy cream sauce. These tender,

Sweet Potato and Black Bean Chili is a hearty dish. It combines sweet potatoes and black beans. You will love how easy it is to make. This recipe serves 4-6 people. - 2 medium sweet potatoes, peeled and diced - 1 can black beans, rinsed and drained - 1 can diced tomatoes (14 oz) - 1 bell pepper (any color), chopped - 1 onion, diced - 2 cloves garlic, minced - 1 tablespoon chili powder - 1 teaspoon cumin - 1 teaspoon smoked paprika - 1 cup vegetable broth - 2 tablespoons olive oil - Salt and pepper to taste - Fresh cilantro, for garnish - Avocado slices, for serving (optional) - Lime wedges, for serving (optional) These ingredients work well together. Sweet potatoes add a nice sweetness. Black beans provide protein and texture. The spices enhance the flavor, making this chili a winner. You can find the full recipe for Sweet Potato and Black Bean Chili in the provided link. 1. Sautéing the onions and garlic Start by heating the olive oil in a large pot over medium heat. Add the diced onion and minced garlic. Cook them for about 3-4 minutes. You want the onion to turn soft and clear. 2. Cooking the sweet potatoes and bell pepper Next, toss in the chopped bell pepper and diced sweet potatoes. Cook these veggies for about 5 minutes. This step helps them soften before adding the spices. 1. Adding spices and liquids Now, add the chili powder, cumin, smoked paprika, salt, and pepper. Stir well to coat the sweet potatoes and bell pepper in those great spices. Then pour in the diced tomatoes and vegetable broth. Bring everything to a boil. 2. Simmering until tender Once it boils, reduce the heat to low. Cover the pot and let it simmer for 25-30 minutes. This will make the sweet potatoes tender and allow the flavors to blend. 3. Incorporating black beans Finally, stir in the rinsed and drained black beans. Simmer for another 5-10 minutes. This step warms the beans and mixes their flavor into the chili. For the full recipe, check out the sections above. Enjoy your cooking! How to adjust spiciness levels You can change the heat by adding more or less chili powder. If you want it spicy, add a bit of cayenne pepper. For less heat, skip the cayenne. Always taste as you go. This way, you can find the perfect balance for you. Best seasonings for enhanced flavor I love using cumin and smoked paprika in my chili. They add warmth and depth. Fresh herbs, like cilantro, also brighten the dish. If you want a kick, try adding a pinch of cinnamon. It brings out the sweetness of the sweet potatoes. Presentation ideas with garnishes Serve your chili in bowls. Top it with fresh cilantro and avocado slices. A squeeze of lime on top adds a nice touch. You can also sprinkle some cheese for extra creaminess. The colors make the dish look fun and inviting. Complementary side dishes Pair the chili with warm cornbread or tortilla chips. A simple green salad works well, too. These sides balance the hearty chili. They make your meal feel complete and satisfying. Don't forget to share your chili on social media! Everyone loves a good food pic. For the full recipe, check the section above. {{image_2}} You can easily change the beans or vegetables in this chili. Try kidney beans, pinto beans, or chickpeas. Each bean brings its own taste. You can also switch up the veggies. Zucchini, corn, or carrots work great for added flavor and texture. For gluten-free options, this chili is already safe. Just check the broth label. You can use low-sodium broth to reduce salt. This helps keep your chili healthy and tasty. Adding different spices or herbs can change the chili's taste. Try oregano or thyme for a fresh twist. You could also spice it up with cayenne pepper or red pepper flakes. This gives you control over the heat level. If you want a non-vegetarian version, add cooked ground meat, like turkey or beef. Brown the meat before adding the other ingredients. It adds richness and depth. You can also toss in some chorizo for a smoky flavor. These variations let you customize the chili to fit your taste. Have fun experimenting! For the complete recipe, check the Full Recipe section. You can store your sweet potato and black bean chili in the fridge. Place it in an airtight container. It will stay fresh for about 4 to 5 days. If you want to keep it longer, consider freezing it. Pour the chili into freezer-safe bags or containers. Make sure to leave some space for expansion. It can last up to 3 months in the freezer. Reheating your chili is easy. The best way is on the stove. Pour the chili into a pot and heat it over low to medium heat. Stir often to keep it from burning. You can also use the microwave. Place the chili in a microwave-safe bowl. Heat it in short bursts, stirring in between. To keep the flavor and texture, avoid high heat. This way, you won't dry it out or change its taste. Add a splash of vegetable broth if it seems thick after reheating. Enjoy your chili just as delicious as when you first made it! For the full recipe, check out the previous sections. How long does Sweet Potato and Black Bean Chili last in the fridge? Sweet Potato and Black Bean Chili can last about 4 to 5 days in the fridge. Keep it in a sealed container to keep it fresh. Can I prepare this chili in advance? Yes, you can make this chili a day or two ahead. It tastes even better after the flavors meld together. Just store it in the fridge until you're ready to eat. What can I serve with Sweet Potato and Black Bean Chili? You can enjoy this chili with various sides. Some great options include: - Cornbread - Rice - Tortilla chips - A simple green salad Is Sweet Potato and Black Bean Chili vegan-friendly? Yes, this chili is vegan-friendly! It uses plant-based ingredients, making it a great choice for everyone. You can feel good serving it to all your guests. If you want to try making this dish, check out the Full Recipe for step-by-step instructions. This article explored the delightful and healthy sweet potato and black bean chili recipe. We covered the ingredients, cooking steps, and tips for the best flavor. You also learned about variations and how to store and reheat leftovers. In conclusion, this chili is simple and tasty. Whether you follow the recipe exactly or make your own changes, enjoy every bite. Make it your own and share it with friends!

Sweet Potato and Black Bean Chili Savory Comfort Dish

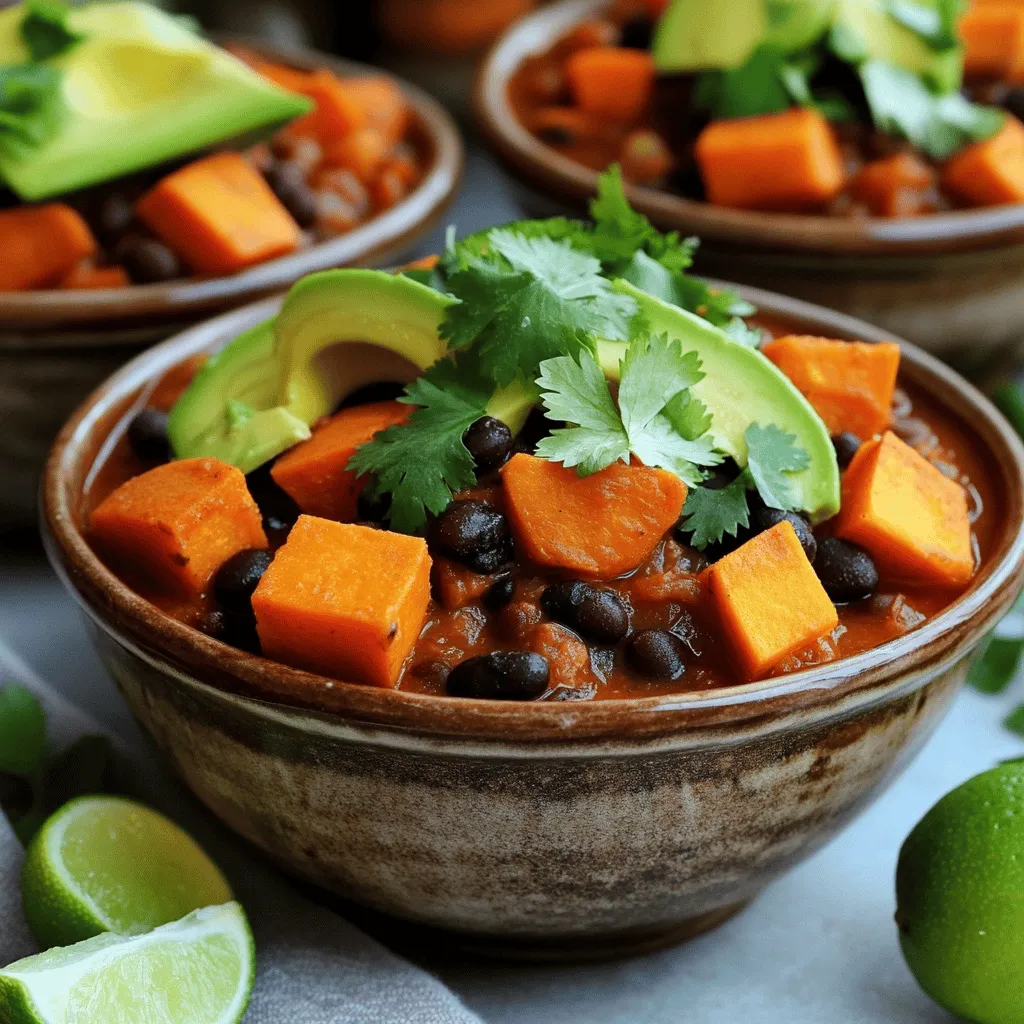
If you’re craving a warm and hearty dish, look no further than Sweet Potato and Black Bean Chili. This savory

To make a delicious lemon cake, gather these ingredients: - 2 cups all-purpose flour - 1 ½ cups granulated sugar - ½ cup unsalted butter, softened - 1 cup buttermilk - 3 large eggs - 2 tablespoons lemon zest - ¼ cup fresh lemon juice - 2 teaspoons baking powder - 1 teaspoon baking soda - ½ teaspoon salt - 1 teaspoon vanilla extract - 1 cup powdered sugar (for frosting) - 2 tablespoons lemon juice (for frosting) You will need some tools to bake this cake: - Two 9-inch round cake pans - Large mixing bowl - Hand or stand mixer - Whisk for dry ingredients - Measuring cups and spoons - Rubber spatula - Wire rack for cooling If you need alternatives, here are a few options: - Use yogurt instead of buttermilk. - Swap granulated sugar for coconut sugar for a healthier option. - You can use lemon extract if you don't have fresh lemons. - For gluten-free, replace flour with a gluten-free blend. First, set your oven to 350°F (175°C). This temperature is perfect for baking. While the oven heats, grab two 9-inch round cake pans. Grease them with butter and dust with flour. This helps the cake release easily after baking. In a large bowl, add the softened butter and granulated sugar. Use a mixer to beat them together until they look light and fluffy. This step adds air, making your cake soft. It takes about 3-5 minutes to achieve the right texture. In another bowl, mix the flour, baking powder, baking soda, and salt. Use a whisk to blend these well. Mixing dry ingredients separately helps distribute the baking powder evenly. This way, your cake rises beautifully. Now, add the dry mixture to the butter and sugar mix. Alternate this with buttermilk. Start and end with the dry mix. Stir until everything is just combined. Pour the batter into the prepared pans. Bake for 25-30 minutes. Check doneness by inserting a toothpick in the center. It should come out clean. Once the cakes are done, take them out of the oven. Let them cool in the pans for about 10 minutes. Then, transfer the cakes to a wire rack. Allow them to cool completely before frosting. For the frosting, mix powdered sugar and lemon juice until smooth. Spread frosting between the layers and on top. You can garnish with lemon zest or slices for extra flair. For the full recipe, check out the complete details! To get a moist and fluffy lemon cake, focus on a few key steps. First, use room temperature ingredients. This includes butter, eggs, and buttermilk. They mix better if they are not cold. Second, do not overmix your batter. Mix until just combined to keep the cake light. Lastly, baking time matters. Check your cake a few minutes early. If a toothpick comes out clean, it is done. For a stronger lemon flavor, consider adding more lemon zest. The zest adds a bright, fresh taste. If you prefer a subtler flavor, reduce the zest. You can also play with the lemon juice. More juice gives a tangy kick. Less juice makes it sweeter. Adjust based on your taste. Watch out for a few common pitfalls. First, don’t skip the baking powder. It helps your cake rise. If you do not have buttermilk, make your own. Mix milk with a bit of vinegar, and let it sit for five minutes. Avoid opening the oven too soon. This can cause the cake to sink. Lastly, let the cake cool fully before frosting. This helps the frosting stay put and look nice. For all the details on making this cake, check out the Full Recipe above! {{image_2}} You can switch up the frosting for your lemon cake. Here are a few tasty ideas: - Cream Cheese Frosting: Blend cream cheese with powdered sugar and lemon juice. This adds a rich, tangy flavor. - Whipped Cream: Whip heavy cream and sugar until soft peaks form. This gives a light and fluffy topping. - Lemon Glaze: Mix powdered sugar with lemon juice for a simple, sweet glaze. Pour it over the cake for a shiny finish. Want to make your lemon cake even more special? Here are some fun add-ins: - Fresh Berries: Fold in raspberries or blueberries for a fruity burst. - Nuts: Add chopped walnuts or almonds for a crunchy texture. - Chocolate Chips: Mix in white chocolate or dark chocolate chips for a sweet twist. You can easily make this cake gluten-free or vegan. Here’s how: - Gluten-Free: Replace all-purpose flour with a gluten-free flour blend. Ensure the baking powder is also gluten-free. - Vegan: Swap eggs with applesauce or flaxseed meal mixed with water. Use plant-based butter and non-dairy milk for a delicious vegan option. For the full recipe, check the [Full Recipe]. To keep your lemon cake fresh, wrap it tightly. Use plastic wrap or aluminum foil. Store it in an airtight container. If you have frosting left, store it separately. This helps keep the cake moist and the frosting creamy. Always place the cake in a cool, dry area. Avoid sunlight and heat. If you want to freeze your lemon cake, follow these steps: 1. Let the cake cool completely. 2. Wrap each layer in plastic wrap. 3. Place the wrapped layers in a freezer bag. 4. Label the bag with the date. 5. To thaw, move the cake to the fridge overnight. 6. Once thawed, frost and serve as desired. Lemon cake lasts about 5 days in the fridge. If kept at room temperature, it stays fresh for about 3 days. Always check for signs of spoilage before eating. If you notice any mold or off smells, throw it away. For the best taste, enjoy it fresh! For the full recipe, refer to the earlier section. Yes, you can make this cake ahead of time. Here are some tips: - Bake the cakes a day or two before serving. - Cool completely before wrapping each layer in plastic wrap. - Store in the fridge to keep it fresh. - Frost the cake on the day you plan to serve it. This keeps the frosting from getting soft. - You can also freeze the layers. Just wrap them tightly and store for up to three months. To check if the cake is done, look for these signs: - Golden-brown tops that spring back when lightly touched. - Toothpick test: Insert a toothpick in the center. It should come out clean or with a few crumbs. - Edges pulling away: The cake edges may pull slightly from the pan. This lemon cake pairs well with many delicious options: - Fresh berries like strawberries or blueberries add color and flavor. - A scoop of vanilla ice cream makes a great creamy contrast. - Whipped cream on top adds a light and airy touch. - Mint leaves as a garnish give a fresh pop. - Serve with tea or lemonade for a refreshing drink pairing. For the full recipe of this delightful cake, check the [Full Recipe]. This blog post covered everything you need to make a delicious lemon cake. We detailed the ingredients, tools, and substitutions to help you get started. You learned step-by-step instructions for baking and frosting the cake. We also shared tips for perfect texture and flavor enhancement. Variations and storage tips ensure your cake stays fresh and tasty. With this guide, you're ready to bake with confidence. Enjoy your lemon cake journey!

Delicious Lemon Cake Fresh and Flavorful Dessert

Are you ready for a treat that’s bright, fresh, and bursting with flavor? This Delicious Lemon Cake is the perfect

- 2 cups cooked shredded chicken - 1 cup cream cheese, softened - 1 cup ranch dressing - 1 cup shredded cheddar cheese - 1 cup frozen broccoli florets - 1 cup cooked brown rice - 1/2 cup green onions, chopped - 1 teaspoon garlic powder - 1 teaspoon onion powder - Salt and pepper to taste - 1/2 cup crispy fried onions (for topping) For this dish, you need simple and tasty ingredients. Start with cooked shredded chicken. It gives the casserole its main flavor. Next, cream cheese adds richness and creaminess. The ranch dressing brings a zesty touch. Shredded cheddar cheese melts beautifully on top, making it extra delicious. Frozen broccoli florets add color and nutrients. Cooked brown rice acts as a hearty base, giving you energy. Green onions add a fresh crunch. Garlic powder and onion powder boost the flavor. Finally, salt and pepper help tie all the tastes together. You can find the full recipe for Crack Chicken Casserole online. Cooking is fun and easy with these fresh ingredients! 1. Preheat your oven to 350°F (175°C). This helps the casserole cook evenly. 2. Grease a 9x13 inch casserole dish. It stops the food from sticking. 3. In a large bowl, mix together the cooked chicken, cream cheese, and ranch dressing. You want a smooth mix. 4. Add the cooked brown rice and stir well. This adds a nice texture. 5. Toss in the frozen broccoli, garlic powder, onion powder, and half of the cheddar cheese. Mix until well combined. 6. Season with salt and pepper to your liking. Taste as you go. 1. Pour the chicken mixture into the greased casserole dish. Spread it evenly. 2. Sprinkle the remaining cheddar cheese on top. This will melt and create a nice crust. 3. Bake in the preheated oven for 25-30 minutes. Check if the cheese is melted and bubbly. 4. In the last 5 minutes, take it out and add crispy fried onions on top. It adds a great crunch. 5. Return to the oven and bake for an additional 5 minutes. 1. Once done, remove the casserole from the oven. Let it cool for a few minutes. This makes it easier to serve. 2. Garnish with chopped green onions. They add a fresh taste and color. 3. Serve straight from the dish or on individual plates. Enjoy your meal! For the full recipe with all the details, click [Full Recipe]. - How to shred chicken efficiently To shred chicken, I find it easy to use two forks. Hold one fork to steady the meat. Use the other fork to pull apart the chicken into fine shreds. This method works fast and keeps the chicken moist. - Best practices for blending cream cheese Always let your cream cheese sit out a bit. This softens it, making it easy to mix. I recommend using a hand mixer for a smooth blend. This ensures no lumps in your casserole. - Substitutions for dietary restrictions You can swap the cream cheese for a dairy-free option like cashew cream. For gluten-free needs, use gluten-free ranch dressing and brown rice. These swaps keep the dish tasty and suitable for all. - Cooking times for alternative ovens If you’re using a convection oven, reduce the baking time by about 5 minutes. Check for doneness a bit early, as these ovens cook faster. Always look for melted cheese and bubbling edges. - Serving in the baking dish vs. individual plates Serving directly from the baking dish gives a homey feel. If you want a fancy touch, use individual plates. This makes each serving special and great for guests. - Garnishing for visual appeal Add chopped green onions on top before serving. This gives a nice burst of color and freshness. You can also sprinkle extra fried onions for crunch and style. {{image_2}} You can easily change the protein in this dish. Try turkey instead of chicken. If you want a veggie option, use tofu. Both options keep the dish tasty and filling. You can also swap out the veggies. Spinach and bell peppers work great. They add color and flavor to your casserole. Want to kick up the taste? Add spices like paprika or cayenne. Fresh herbs like parsley or thyme can also give it a fresh twist. You can change the sauces, too. Try barbecue sauce for a sweet and smoky flavor. Or, use hot sauce for some heat. This dish is perfect for meal prep. You can make it ahead for busy weeknights. Just assemble it, cover it, and store it in the fridge. It stays fresh for a few days. You can also freeze portions. Just cut them into serving sizes and wrap well. When you’re ready, thaw and bake. This way, you always have a quick meal on hand. For the full recipe, check the earlier section. To store your Crack Chicken Casserole, let it cool first. Then, place it in an airtight container. This keeps it fresh. You can keep it in the fridge for up to five days. If you want to enjoy it later, make sure to eat it within this time frame. Freezing the casserole is easy. Cut it into portions before freezing. This makes it simple to reheat later. Use a freezer-safe container or wrap it tightly in foil. You can freeze it for up to three months. When you’re ready to eat, thaw it in the fridge overnight. To reheat, place it in the oven at 350°F (175°C) for about 25 minutes. This will warm it up nicely without drying it out. Leftovers can be fun! You can turn them into a tasty wrap. Just take a tortilla, add the casserole, and roll it up. You can also make a quick soup. Just add chicken broth and heat it on the stove. For the best results when reheating, use the oven or stovetop. This keeps the flavors strong and the texture nice. Microwaving is fine but may not give you the best taste. How do I make Crack Chicken Casserole gluten-free? To make Crack Chicken Casserole gluten-free, use gluten-free ranch dressing and brown rice. Check the labels of all products. Gluten-free options for fried onions are also available. This way, you can enjoy the same great taste without gluten! Can I use rotisserie chicken for the recipe? Yes, rotisserie chicken is a great choice! It saves time and adds flavor. Just shred the chicken and mix it with the other ingredients. This little shortcut makes the dish even easier to prepare. What to serve with Crack Chicken Casserole? Crack Chicken Casserole pairs well with a green salad or steamed vegetables. You can also serve it with crusty bread for a hearty meal. These sides balance the rich flavors of the casserole. How long does the casserole last in the fridge? The casserole lasts about three to four days in the fridge. Store it in an airtight container to keep it fresh. Just reheat it in the oven or microwave when you're ready to eat. Can I substitute cream cheese for a dairy-free option? Yes, you can use dairy-free cream cheese or a cashew cheese spread. These options work well in the recipe. They keep the dish creamy without dairy, making it suitable for those with dairy allergies. What type of ranch dressing works best? I recommend using a ranch dressing you enjoy. Homemade ranch adds a fresh taste, while store-bought options are quick and easy. Just ensure it has a good balance of flavor to complement the dish! This blog post detailed how to make a delicious Crack Chicken Casserole. We explored the ingredients, provided step-by-step instructions, and shared useful tips. You learned about storage, meal prep ideas, and creative ways to use leftovers. That said, this recipe is flexible and fun. You can adjust it to fit your taste. Try different proteins or veggies to keep things exciting. Enjoy cooking, and make this dish your own!

Crack Chicken Casserole Easy and Flavorful Delight

Crack Chicken Casserole is a dish that packs a punch with flavor! It’s easy to make and perfect for busy

Older posts
Newer posts
← Previous Page1 … Page43 Page44 Page45 … Page48 Next →

dsad

© 2025 savoryspiral • Built with GeneratePress

Our Policies

  • Copyright Policy
  • Cookie Policy
  • GDPR Policy
  • Privacy Policy
  • Disclaimer
  • Terms Of Use

More Information

  • Home
  • About
  • Contact
  • Appetizers
  • Dessert
  • Dinner
  • Drinks
©2025, savoryspiral About Back To Top