![The key to a great no-bake Nutella pumpkin cheesecake lies in its ingredients. Here’s what you need: - 1 ½ cups graham cracker crumbs - ½ cup unsalted butter, melted - 1 cup cream cheese, softened - 1 cup pumpkin puree - 1 cup Nutella - ¾ cup powdered sugar - 1 teaspoon vanilla extract - 1 teaspoon pumpkin pie spice - 1 cup heavy whipping cream Each ingredient plays a vital role in creating the creamy delight. The graham cracker crumbs form a sturdy base, while the melted butter binds them together. Cream cheese gives the cheesecake its rich texture, and pumpkin puree adds a lovely autumn flavor. Nutella brings a chocolatey twist that pairs well with pumpkin. Using high-quality ingredients matters. Fresh cream cheese and pure pumpkin puree enhance the taste and texture. Always choose Nutella that is smooth and rich. For the best results, use unsalted butter to control the saltiness in your dessert. Toppings can elevate your cheesecake. Here are some fun ideas: - Chocolate shavings - Pumpkin seeds These add texture and a burst of flavor. Chocolate shavings add a sweet crunch, while pumpkin seeds give a nutty note. For a finishing touch, consider drizzling with chocolate sauce or caramel. This adds a sweet contrast to the creamy cheesecake. For the full recipe, check out [Full Recipe]. To start, you need to make the crust. In a mixing bowl, combine 1 ½ cups of graham cracker crumbs with ½ cup of melted unsalted butter. Mix until the crumbs look like wet sand. Next, take this mixture and press it firmly into the bottom of a 9-inch springform pan. Make sure it is even and packed tight. Now, place the pan in the fridge while you prepare the filling. This step helps the crust set well. Now, let’s make the creamy filling. In a large mixing bowl, beat 1 cup of softened cream cheese with an electric mixer. Beat until it is smooth and creamy. Then, add in 1 cup of pumpkin puree, 1 cup of Nutella, ¾ cup of powdered sugar, 1 teaspoon of vanilla extract, and 1 teaspoon of pumpkin pie spice. Mix everything together until it is well combined and smooth. In another bowl, whip 1 cup of heavy whipping cream until stiff peaks form. This means it should hold its shape when you lift the whisk. Gently fold the whipped cream into your pumpkin-Nutella mixture. Be careful not to deflate the whipped cream; you want to keep it light and airy. Once combined, pour this filling onto the prepared crust. Smooth the top with a spatula. Cover the cheesecake and refrigerate for at least 4 hours or until it is firm. When ready, run a knife around the edges of the springform pan and gently release the sides. Your No-Bake Nutella Pumpkin Cheesecake is now ready to enjoy! For the full recipe, check out the details above. To make your cheesecake smooth, avoid lumps in the cream cheese. Start by letting the cream cheese sit at room temperature for about 30 minutes. This helps it soften. Use a hand mixer to beat it until it is creamy. Scrape down the sides of the bowl often. This step ensures everything mixes well. When you whip the cream, aim for stiff peaks. Gently fold the whipped cream into the pumpkin-Nutella mixture. Use a spatula and scoop from the bottom. This method keeps the air in the whipped cream. It helps the cheesecake stay light and fluffy. Garnishing makes your cheesecake shine. After you take it out of the fridge, sprinkle chocolate shavings on top. Add pumpkin seeds for a nice crunch. You can also drizzle some chocolate sauce around the edges for flair. To cut and serve, use a sharp knife. Dip the knife in hot water before each slice. This helps get clean cuts. Serve each slice on a plate, and enjoy with friends or family. If you want less sweetness, you can reduce the powdered sugar. Start by cutting it down by a quarter. Taste as you go, and adjust until you are happy. For pumpkin pie spice, if you don’t have it, mix cinnamon, nutmeg, and ginger. Use one teaspoon of this mix as a great alternative. It adds flavor without needing pumpkin pie spice. For the full recipe, check out the details in the earlier section. {{image_2}} You can make your No-Bake Nutella Pumpkin Cheesecake even more fun. Adding chocolate chips gives it a nice crunch. I love mixing in some mini chocolate chips for surprise bites of chocolate. You can also try adding spices like cinnamon or nutmeg. These spices bring warmth and depth to the flavor, making each bite richer. If you want to switch things up, consider using different nut butters. Almond butter or cashew butter can offer a unique taste. These nut butters add creaminess while keeping that nutty flavor. Just pick a nut butter you enjoy! For those who need gluten-free options, use gluten-free graham crackers. They work just as well for the crust. You can also try almond flour for a different texture. If you need a vegan version, swap cream cheese with a vegan cream cheese. Use coconut cream instead of heavy whipping cream for a dairy-free treat. If you have allergies, be mindful of the ingredients. For nut allergies, you can leave out Nutella and use sunflower seed butter. This keeps the cheesecake creamy and tasty without nuts. Always read labels to ensure safety for your dietary needs. For the full recipe, check out the detailed instructions to make this cheesecake your own! To keep your cheesecake fresh, always cover it well. Use plastic wrap or a tight lid. This keeps out air and smells from your fridge. The best place is on the middle shelf, where the temperature stays even. If you have leftovers, slice them into pieces. This helps with serving later. Place slices in an airtight container. You can also put a piece of parchment paper between each slice. This stops them from sticking. Your cheesecake will stay fresh for up to five days in the fridge. Freezing your cheesecake is easy and great for meal prep. First, let the cheesecake set completely in the fridge. Once it is firm, use a sharp knife to slice it. Next, wrap each slice in plastic wrap. Make sure to cover all sides well. Then, place the wrapped slices in a freezer bag. Squeeze out as much air as you can before sealing. These slices can last up to three months in the freezer. When you are ready to enjoy a slice, take it out of the freezer. Let it thaw in the fridge for about four hours. You can also thaw it at room temperature for about an hour. Once thawed, you can serve it as is or add some chocolate shavings or pumpkin seeds for a tasty touch. For more details on how to make this delicious treat, check out the Full Recipe. Yes, you can use a different crust. If you want a gluten-free option, try almond flour or gluten-free cookies. You can also use crushed Oreos for a sweet chocolate base. Just make sure it holds well when pressed into the pan. This cheesecake can last up to five days in the fridge. Keep it in an airtight container to stay fresh. The flavors will deepen over time, which makes it even better! Absolutely! You can make this cheesecake up to two days ahead. Just prepare it, cover it well, and chill it in the fridge. This helps save time on the day you plan to serve it. You can omit pumpkin puree, but it will change the flavor. The cheesecake will taste less seasonal and not as creamy. If you want to keep some creaminess, try adding more cream cheese or Nutella instead. To wrap up, we explored the key ingredients for your No-Bake Nutella Pumpkin Cheesecake. Using quality components ensures the best flavor and texture. We covered the steps for preparation, from the crust to the filling, and techniques for the perfect mix. Remember to consider your variations and dietary needs to make it your own. Finally, the right storage will keep your cheesecake fresh. Enjoy making this delightful dessert and share it with friends and family! Your cheesecake adventure starts now!](https://savoryspiral.com/wp-content/uploads/2025/05/e5863aea-d7c9-402b-a4fd-10f507d1ec3f.webp)
No-Bake Nutella Pumpkin Cheesecake Creamy Delight
Are you ready to dive into a dessert that combines the rich flavors of Nutella and pumpkin? In this guide,
Are you ready to dive into a dessert that combines the rich flavors of Nutella and pumpkin? In this guide,
![The heart of any great dish is its ingredients. For French Onion Meatballs, we focus on fresh, simple items that pack a lot of flavor. - Ground beef - Onion - Olive oil - Garlic - Thyme - Salt - Pepper - Egg - Breadcrumbs - Beef broth - Gruyère cheese - Fresh parsley (optional for garnish) These ingredients come together to create a rich, hearty meal. The ground beef provides a strong base, while the onion and garlic add depth. Olive oil helps sauté the onions, bringing out their sweetness. Thyme gives the dish an earthy note, while salt and pepper enhance all the flavors. The egg and breadcrumbs act as binders, keeping the meatballs together. Gruyère cheese melts into a creamy layer, adding a touch of luxury. Finally, a sprinkle of fresh parsley brightens up the dish, making it look as good as it tastes. For the full recipe to create these delicious meatballs, refer to the section above. These ingredients will guide you through the steps to make a dish that impresses family and friends alike. Enjoy cooking! Start by preheating the oven to 400°F (200°C). This step is key for juicy meatballs. Next, gather your tools. You will need a large bowl, a baking sheet, and a skillet. Line the baking sheet with parchment paper. This makes for easy cleanup later. In your skillet, heat one tablespoon of olive oil over medium heat. Add the finely chopped onion. Cook for about 6-8 minutes. You want the onion to turn translucent and slightly golden. This adds great flavor. Then, add two cloves of minced garlic and one teaspoon of dried thyme. Cook for one more minute until fragrant. Remove from heat and let it cool for a bit. In a large bowl, combine one pound of ground beef, the cooled onion and garlic mix, one teaspoon of salt, and ½ teaspoon of black pepper. Add one beaten egg and ¾ cup of breadcrumbs. Mix everything gently with your hands. Be careful not to overmix; you want tender meatballs. Now, roll the mixture into balls about 1 to 1.5 inches in size. Place them on the prepared baking sheet. Bake the meatballs in your preheated oven for about 20 minutes. They should be cooked through and golden brown. While they bake, pour one cup of beef broth into a saucepan and bring it to a simmer. After the meatballs are done, add them to the simmering broth for about 5 minutes. This step makes them extra tasty. Finally, sprinkle one cup of grated Gruyère cheese on top of the meatballs in the pan. Let it melt for 2-3 minutes. Now, they are ready to serve! For the full recipe, check out the [Full Recipe]. To make tender meatballs, mix your ingredients well but don’t overdo it. Overmixing makes them tough. Use the right proportions too. Aim for 1 pound of ground beef for this recipe. Always add breadcrumbs and egg to bind everything together. This mix keeps the meatballs juicy. If you want to add moisture, consider using sautéed onions, as they bring flavor and softness. Spices and herbs can boost taste. I like to stick with thyme in this dish. It pairs well with beef and onion. You can also add a pinch of paprika or cayenne for a little kick. Fresh herbs like parsley also add a nice touch. Consider mixing in some Worcestershire sauce for depth. Just a tablespoon can change the flavor game. For sides, try serving with crusty bread or mashed potatoes. Both soak up the rich broth well. You can also pair with a fresh salad for a light touch. Presentation matters, so place the meatballs in a shallow bowl. Pour some broth over them and sprinkle with fresh parsley. This makes your dish look inviting and delicious. Want to elevate it further? Serve with a side of Gruyère cheese for extra flavor. For the full recipe, check it out [Full Recipe]. {{image_2}} You can swap ground beef for other proteins. Ground turkey or chicken works well. If you're looking for a lighter option, try using lean ground turkey. For a unique twist, use ground lamb for a rich flavor. If you prefer plant-based meals, try using lentils or chickpeas. Just make sure to mash them well before mixing. Each protein will change the taste, but they all pair well with the onion and cheese. While Gruyère cheese is classic, you can use other cheeses too. Swiss cheese has a mild flavor and melts well. If you want a stronger taste, try sharp cheddar. For a creamy texture, use mozzarella. You can even mix cheeses for extra flavor. Just keep in mind, the cheese should melt nicely over the meatballs to create that delicious topping. Experiment with different broths or sauces to change the flavor. You can use chicken broth for a lighter option. Vegetable broth is great for a plant-based dish. If you want a kick, try adding a splash of wine or Worcestershire sauce to your broth. For a richer taste, use beef broth with added herbs like rosemary or bay leaves. Each choice adds its own twist to these hearty meatballs. For the full recipe of French Onion Meatballs, check out the details above. To keep your French onion meatballs fresh, store them correctly. Place the cooled meatballs in an airtight container. You can refrigerate them for up to three days. If you want to keep them longer, freeze the meatballs. Use a freezer-safe bag or container for this. They can last up to three months in the freezer. Just remember to label the container with the date. Reheating meatballs is easy. You can use a microwave or oven. For the microwave, put the meatballs in a safe dish with a little broth. Heat them in short bursts, checking often. For the oven, preheat it to 350°F (175°C). Place the meatballs in a baking dish with some broth. Cover with foil and heat for about 15 minutes. This keeps the meatballs juicy and full of flavor. Planning ahead makes cooking easier. You can prepare the meatball mixture a day before. Store it in the fridge, covered. When ready to cook, shape the meatballs and bake them. You can also freeze the raw meatballs. Just roll them and place on a baking sheet. Freeze until solid, then transfer to a bag. When you want to eat them, bake from frozen; just add a few more minutes to the cooking time. For the full recipe, check out the detailed steps above. Yes, you can use turkey or chicken instead of beef. They work well in this recipe. Ground turkey gives a lighter taste, while chicken adds a nice flavor. You can also try plant-based meats. These options can make the dish healthier and still tasty. To make gluten-free meatballs, swap regular breadcrumbs for gluten-free ones. You can also use crushed gluten-free crackers or oats. Check your other ingredients too. Some sauces and broths may also contain gluten, so read labels carefully. Serve these meatballs with creamy mashed potatoes or crusty bread. They also pair well with a fresh salad or steamed veggies. For a cozy touch, try serving them over pasta or rice. These sides enhance the hearty flavor of the meatballs and make a complete meal. You now have a complete guide to making tasty meatballs. We covered all the main steps, starting with choosing the right ingredients and preparing them properly. I showed you how to sauté onions, mix the meat, and bake the meatballs to perfection. Plus, I shared tips for flavor boosts and varying your recipe. Remember to store your leftovers wisely and feel free to experiment with different proteins or sauces. With these steps, you can cook meatballs that everyone will love. Happy cooking!](https://savoryspiral.com/wp-content/uploads/2025/05/c1e42a1c-2769-479f-9f99-dbf9ca08e28e.webp)
Are you ready to indulge in a dish that’s both hearty and packed with flavor? French Onion Meatballs combine rich
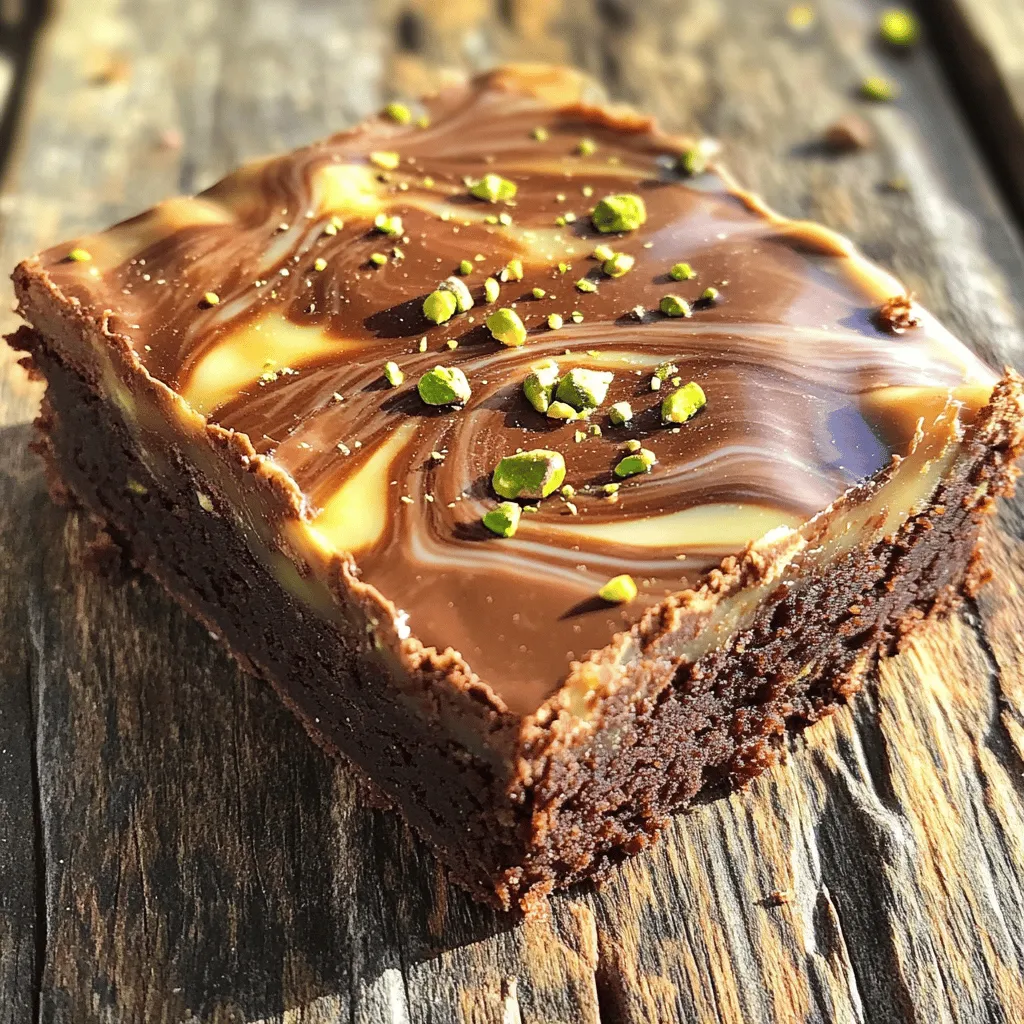
Are you ready to indulge in a treat that combines rich chocolate with a unique crunch? In this blog, I’ll

Dive into a bowl of warmth with my Creamy Potato Cheeseburger Soup. This dish blends rich flavors and hearty ingredients.
![To create this delightful mango mousse, you will need just three simple ingredients: - 2 ripe mangoes, peeled and diced - 1 cup heavy whipping cream - 1/4 cup sweetened condensed milk These ingredients work together to make a rich, creamy dessert that is full of tropical flavor. The ripe mangoes give a fresh taste, while the heavy cream adds a smooth texture. Sweetened condensed milk brings the right sweetness to balance everything. When choosing mangoes, look for fruit that feels slightly soft when you press it gently. A ripe mango should have a sweet aroma near the stem. If the skin shows some wrinkles, that is a good sign it is ripe. Select mangoes with a bright color; they may be yellow, orange, or red depending on the variety. Using high-quality heavy cream makes your mousse fluffy and light. It whips up beautifully and gives the mousse a rich texture. Sweetened condensed milk is key as it helps to sweeten the dish without adding extra ingredients. Make sure to choose a brand you trust for the best flavor. The combo of these ingredients ensures a delicious and creamy mango mousse. For the full recipe, check out Mango Paradise Mousse. First, choose ripe mangoes. They should feel soft but not mushy. Wash them well. Peel the mangoes and cut them into small pieces. This helps them blend smoothly. Place the diced mangoes in a blender. Add the sweetened condensed milk. Blend until the mix is creamy and smooth. Make sure there are no lumps left. This mixture gives your mousse its rich flavor. Next, take your heavy whipping cream and pour it into a mixing bowl. Use an electric mixer to whip the cream. Start on low speed, then increase it. Watch for soft peaks to form. This means the cream is ready. Be careful not to overwhip; otherwise, it can become clumpy. You want it light and fluffy, perfect for your mousse. Now, it’s time to mix the two parts together. Start by taking a small amount of whipped cream and mix it into the mango blend. This lightens the mango mix. After that, gently fold in the rest of the whipped cream. Use a spatula and be gentle. You want to keep the air in the cream. This gives your mousse a light texture. When everything is smooth, divide the mousse into serving cups. Refrigerate for at least 2 hours to let it set. Enjoy your creamy treat! For the full recipe, check [Full Recipe]. To get the best texture, use ripe mangoes. The fruit should feel soft when you press it. A good mango makes the mousse creamy and smooth. Blend the mangoes with sweetened condensed milk until it looks like a silky puree. This step is key to a light mousse. Folding is an art. First, take a small amount of whipped cream and mix it with the mango puree. This makes it easier to blend the two. Use a spatula and gently lift the mixture from the bottom. Repeat until you see no streaks. Be gentle; you want to keep the air in the cream. Watch for a few common pitfalls. First, don’t overwhip the cream. You want soft peaks, not clumps. If you overwhip, the mousse will be too thick. Second, don’t rush the folding process. It’s easy to deflate the cream if you mix too hard. Lastly, always chill the mousse for at least two hours. This helps it set properly. For the full recipe, check out the details above! {{image_2}} You can boost your mango mousse with extra flavors. Try adding a splash of vanilla extract for warmth. A squeeze of lime juice can give it a nice zing. If you love spices, a pinch of cardamom adds a unique twist. Chopped mint leaves bring a fresh touch. You can also mix in other fruits like passionfruit or berries for added fun. Just keep the base of mango so it stays creamy and delicious. If you want a lighter mousse, swap out the sweetened condensed milk. Use honey or maple syrup instead. These natural sweeteners can give a nice flavor without too much sugar. You can also try using stevia or monk fruit for a low-calorie option. Just remember to taste as you go. Different sweeteners can change how sweet your mousse tastes. Serving your mousse can be just as fun as making it. Use small glasses or jars for a pretty look. Top each cup with fresh mango slices or a mint leaf. You can also sprinkle crushed nuts or granola on top for crunch. If you want to impress, serve it with a drizzle of coconut cream or chocolate sauce. This will make your mousse not only tasty but also beautiful. For the full recipe, check out the link above! To store leftover mango mousse, place it in an airtight container. Use a lid that seals well to keep the air out. This helps maintain its creamy texture and fresh taste. If you have multiple servings, consider dividing them into smaller containers. This makes it easy to grab a treat later! The mango mousse can last up to three days in the fridge. Make sure your fridge is set to a safe temperature, around 40°F (4°C). Always check for any signs of spoilage before eating. If you see any changes in color or smell, it’s best to throw it away. To keep it fresh, avoid leaving it out at room temperature for more than two hours. If you want to keep the mousse longer, you can freeze it. Pour the mousse into freezer-safe containers. Leave some space at the top for expansion as it freezes. When you’re ready to eat it, thaw the mousse in the fridge overnight. This keeps it smooth and creamy. However, freezing may change the texture a bit, so it's best enjoyed fresh. For the full recipe, check out the link above! Yes, you can use frozen mangoes. Just thaw them first. This helps them blend well. Make sure to drain any excess liquid. The texture may change slightly, but the taste remains great. Check the mousse after two hours in the fridge. It should feel firm but still jiggle a bit. If it holds its shape when scooped, it's ready to eat. You can also gently press the top with a clean finger. If it feels set, you’re good to go! You can use coconut cream or a mix of cream and sugar. Just blend sugar into the cream until it dissolves. This will give you a similar sweetness. Another option is to try maple syrup or honey, but adjust to taste. For the best flavor, stick to the original recipe. For the full recipe, check below. In this post, I discussed how to make 3 Ingredient Mango Mousse. We covered essential ingredients, like ripe mangoes and quality cream. I shared step-by-step instructions for blending and whipping. Tips for achieving the right texture and avoiding common mistakes were also included. Mango mousse is easy and fun to make. With a few tweaks and add-ins, you can enjoy variations that suit your taste. I hope these insights inspire you to create this delicious treat!](https://savoryspiral.com/wp-content/uploads/2025/05/9c5eb861-d397-44eb-a358-ca1051013ea3.webp)
Are you ready to whip up a delicious treat with just three simple ingredients? This 3 Ingredient Mango Mousse is
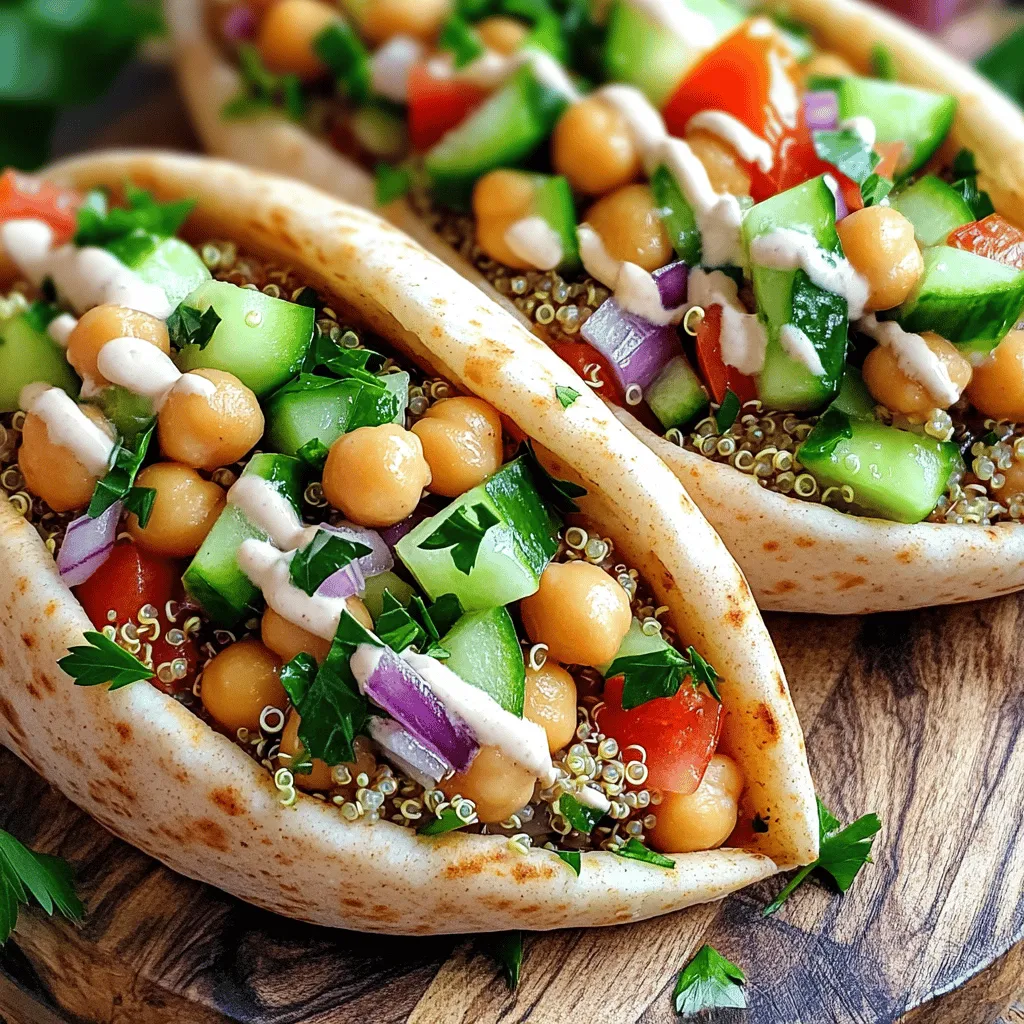
If you want a meal packed with flavor and easy to make, Middle Eastern stuffed pita is your answer! With
![Creating Million Dollar Lasagna is simple once you gather the right ingredients. Here’s what you need: - 12 lasagna noodles - 1 pound ground beef - 1 pound Italian sausage, casings removed - 2 cups ricotta cheese - 2 cups mozzarella cheese, shredded - 1 cup Parmesan cheese, grated - 1 large egg - 3 cups marinara sauce (store-bought or homemade) - 2 teaspoons Italian seasoning - 1 teaspoon garlic powder - Salt and pepper to taste - Fresh basil leaves for garnish The lasagna noodles serve as the base. You can use either fresh or dried noodles. I prefer the dried ones as they hold their shape well. For meat, I use ground beef and Italian sausage. This mix gives a rich, hearty taste. If you want a lighter option, you can use turkey. Cheese is key in lasagna. I love using ricotta for creaminess, mozzarella for meltiness, and Parmesan for flavor. The blend makes each bite delicious. Marinara sauce can be store-bought for convenience or homemade for freshness. I often make my own. It’s easy and tastes better! Seasonings like Italian seasoning and garlic powder add depth to the sauce. Always taste and adjust salt and pepper. Lastly, fresh basil leaves brighten the dish. They add a pop of color and flavor when you serve it. You can check the [Full Recipe] for more details on how to cook this amazing dish! First, preheat your oven to 375°F (190°C). This step is key for even baking. While the oven heats, boil a large pot of salted water. Cook the lasagna noodles until they are al dente. This means they should still have a bit of bite. Drain the noodles and set them aside. Next, grab a large skillet and heat it over medium. Add the ground beef and Italian sausage. Cook until browned, breaking up the meat with a spoon. Once browned, drain any fat from the skillet. Now, add your marinara sauce, garlic powder, Italian seasoning, salt, and pepper. Stir it well to mix all the flavors. Let this simmer for about 10 minutes. This makes the sauce rich and tasty. In a bowl, combine the ricotta cheese, egg, half of the grated Parmesan, salt, and pepper. Mix it until smooth. This mixture adds creaminess to the lasagna. Now it’s time to build the layers. Start by spreading a layer of your meat sauce in a 9x13 inch baking dish. Place three lasagna noodles on top of the sauce. Next, spread one-third of the ricotta mixture over those noodles. Follow with a layer of mozzarella cheese. Repeat these layers two more times. For the top layer, use noodles, the remaining meat sauce, and finish with the rest of the mozzarella and Parmesan. Cover the dish with aluminum foil carefully so it does not touch the cheese. Bake for 25 minutes. Then remove the foil and bake for another 15 to 20 minutes. You want the cheese on top to be bubbly and golden. This makes for a delicious finish. Don’t forget to check the [Full Recipe] for precise measurements and times. To make perfect Million Dollar Lasagna, follow these tips: - Prevent noodle sticking: Cook the noodles in salted water. Stir them often while they cook. After draining, rinse them with cold water. This keeps them from sticking together. - Melt cheese well: Use fresh mozzarella for the best melt. Shredding it yourself helps it melt smoothly. Mix mozzarella with a bit of cream cheese for extra creaminess. Great presentation makes your lasagna shine: - Serve beautifully: Slice the lasagna into squares and place them on plates. A sprig of fresh basil on each plate adds color. - Garnish for flair: Sprinkle extra Parmesan on top before serving. A drizzle of olive oil can also enhance the look and flavor. Busy cooks can save time with these tricks: - Use prepped ingredients: Buy pre-cooked meat or jarred marinara sauce. This cuts down on prep time. - Quick-cooking alternatives: Try no-boil lasagna noodles. They save time and still taste great. For the full recipe, check out the detailed instructions above. {{image_2}} For a tasty vegetarian version, swap out the meat. Use hearty vegetables like mushrooms, zucchini, and spinach. These veggies add rich flavors and textures. Sauté them before adding to the layers. This gives a nice depth to the dish. You can still use the same cheese and sauce for great taste. Try adding fresh herbs like basil or oregano for even more flavor. This variation is perfect for anyone wanting a meatless meal. To elevate your Million Dollar Lasagna, think about gourmet ingredients. Truffle oil is a fantastic option. Just a drizzle can add a fancy touch. You can also add fresh spinach or artichokes for a burst of flavor. Another idea is using a mix of gourmet cheeses. A blend of gouda, fontina, or even goat cheese can make your lasagna special. These additions create unique flavor profiles that will impress your guests. If you need gluten-free options, there are many choices. Look for lasagna noodles made from rice or corn. These work well and hold up nicely. You can also make your own noodles using almond flour or chickpea flour. For the sauce, ensure that it is gluten-free. Many store-bought sauces are safe, but always check the label. With these swaps, you can enjoy a delicious lasagna without worrying about gluten. Store your Million Dollar Lasagna in an airtight container. This keeps the flavors fresh. You can refrigerate it for up to four days. If you want to save it longer, freeze it. Wrap it tightly in plastic wrap and then foil. This way, it can last up to three months in the freezer. To reheat, I suggest using the oven. Preheat it to 350°F (175°C). Place the lasagna in a baking dish. Cover the dish with foil to keep it moist. Heat for about 30 minutes. If you want, add a bit of marinara sauce on top. This helps keep the lasagna flavorful and prevents drying out. Million Dollar Lasagna can last up to four days in the fridge. If frozen, it can stay good for three months. Just remember to check for signs of freezer burn if frozen for a long time. Always trust your senses; if it smells or looks off, it's best to toss it. Million Dollar Lasagna stands out due to its special ingredients and cooking style. I use both ground beef and Italian sausage for a rich flavor. The blend of cheeses, including ricotta, mozzarella, and Parmesan, gives it a creamy texture. I also add Italian seasoning and garlic powder for extra taste. This lasagna is hearty and satisfying, making it a crowd favorite. Yes, you can prepare Million Dollar Lasagna ahead of time. First, cook the noodles and meat sauce as usual. Then, layer everything in your baking dish. Cover it with plastic wrap and store it in the fridge for up to 24 hours. When ready to bake, remove the wrap and cover with foil. Bake as usual, adding extra time if it's cold from the fridge. Customizing Million Dollar Lasagna is easy! You can swap the ground beef for turkey or chicken. Use spinach or mushrooms to add more veggies. If you like spicy food, try adding crushed red pepper flakes to the sauce. You can also change the cheese blend; use feta or goat cheese for a different flavor. I love pairing Million Dollar Lasagna with a fresh salad. A simple Caesar salad or a mixed green salad works well. Garlic bread is another great side. The crispy bread complements the soft lasagna nicely. You can even serve it with a side of roasted vegetables for added nutrition. Million Dollar Lasagna combines simple ingredients and steps for a rich dish. You start with quality noodles, meats, cheeses, and sauces. The assembly is key, layering flavors carefully. Expert tips enhance texture and presentation, making each slice a delight. Plus, options for vegetarians and the gluten-free make this dish accessible. With a bit of prep, you can enjoy delicious leftovers too. Transform your meals and impress your guests with this easy recipe. Cooking is all about creativity and fun, so don’t hesitate to make it your own!](https://savoryspiral.com/wp-content/uploads/2025/05/c46839f7-ca28-41b7-8342-08714c197e4e.webp)
Looking to impress at your next dinner? Try my Million Dollar Lasagna! This flavorful and hearty recipe combines rich meat,
![- Chicken and Pasta For this dish, I use two boneless, skinless chicken breasts. They cook quickly and stay juicy. I pair the chicken with eight ounces of fettuccine pasta. This wide pasta holds the creamy sauce well. - Dairy and Seasonings You need four tablespoons of unsalted butter for richness. The sauce comes together with one cup of heavy cream and one cup of chicken broth. I add one teaspoon of Italian seasoning for flavor and a bit of salt and pepper to taste. - Garlic and Herbs Garlic is key to this dish. I use four cloves, minced. For a fresh touch, I like to garnish with chopped parsley. - Vegetables to Consider Adding vegetables boosts nutrition and flavor. Consider spinach or sun-dried tomatoes. Both add a bright taste and color. - Additional Proteins If you want more protein, try adding shrimp or cooked sausage. Just adjust the cooking time. - Skillet and Pot A large skillet is a must for making the sauce. You also need a big pot for cooking the pasta. - Measuring Cups and Spoons Use measuring cups and spoons for accuracy. This ensures all flavors balance well. For the full recipe, check out the details above. How to Prepare the Fettuccine To start, boil a large pot of water. Add a good amount of salt to the water. This helps flavor the pasta. Once it boils, add the fettuccine. Cook it based on the package directions. Usually, this takes about 8-10 minutes. Stir occasionally to prevent sticking. When it’s done, it should be slightly firm, or al dente. Tips for Perfectly Al Dente Pasta To get that perfect texture, taste the pasta a minute before the time ends. It should have a little bite to it, not mushy. Reserve 1/2 cup of the pasta water before draining. This water can help adjust your sauce later for the right thickness. Seasoning the Chicken Breasts While the pasta cooks, season the chicken breasts. Use salt, pepper, and Italian seasoning. Make sure to coat both sides well. This adds a nice flavor when you sear it. Searing Instructions Heat a large skillet over medium-high heat. Melt 2 tablespoons of butter in the skillet. Once it’s hot, add the chicken breasts. Cook each side for about 5-7 minutes. The chicken should turn golden brown and be fully cooked. Remove it from the skillet and let it rest. After resting, slice it into strips for the pasta. Sautéing the Garlic In the same skillet, add the remaining 2 tablespoons of butter. Then, add the minced garlic. Sauté for about 1 minute. You want the garlic fragrant but not browned. Burnt garlic can taste bitter. Incorporating Liquid Ingredients Next, pour in the chicken broth. Let it simmer for 2-3 minutes to reduce slightly. Then, stir in the heavy cream. Bring this mixture to a gentle simmer. It will thicken as it warms. This is the base for your creamy sauce. For the full recipe, check the details above. - Overcooking the Chicken: Cook your chicken just until it turns golden brown. If you cook it too long, it gets dry. Always check with a meat thermometer. Aim for 165°F for safe eating. - Undercooking the Pasta: Boil the fettuccine until it's al dente. It should be firm but cooked through. If it's too soft, it will mush up in the sauce. - Enhancing the Garlic Butter Sauce: Use fresh garlic for the best flavor. Sauté the garlic lightly to avoid burning it. You can add more herbs like thyme for an extra kick. - Using Pasta Water Effectively: Reserve some pasta water before draining. This starchy water helps thicken the sauce. Add it a little at a time to get the right consistency. - Best Garnishes: Fresh parsley not only looks good but adds freshness. A sprinkle of grated Parmesan cheese can give a nice salty touch. - Pairing Options: This dish goes well with a crisp green salad. You can also serve it with garlic bread for a perfect meal. Check out the Full Recipe for step-by-step guidance on making this creamy delight! {{image_2}} Using Different Pasta Types You can switch up the pasta to fit your taste. Penne, spaghetti, or even whole wheat pasta work great. Each type brings its own twist to the dish. I often use gluten-free pasta for my friends with dietary needs. It tastes just as good! Alternative Proteins If chicken isn’t your thing, try shrimp, tofu, or even a veggie mix. Shrimp cooks fast and adds a nice seafood flavor. Tofu is perfect for a plant-based meal. Just make sure to season it well to keep the flavor strong. Making it Gluten-Free To make this dish gluten-free, choose gluten-free pasta. You can easily find this in stores. The sauce remains the same. Just be careful not to overcook the gluten-free pasta, as it can get mushy. Dairy-Free Options For a dairy-free version, swap heavy cream with coconut milk or almond milk. Nutritional yeast can replace Parmesan cheese. This keeps the dish creamy while being kind to your tummy. Adding Different Herbs and Spices Herbs like basil or thyme can change the dish’s flavor. Fresh herbs add bright notes, while dried ones give depth. You can also try adding lemon zest for a citrus kick. Changing the Heat Level If you like heat, add more red pepper flakes. You can also try crushed red pepper for a stronger spice. For milder flavors, skip the spices or add sweet bell peppers for a nice crunch. These variations make creamy garlic butter chicken pasta fun and personal! For the full recipe, check out the [Full Recipe]. - Refrigeration Guidelines: Store any leftover creamy garlic butter chicken pasta in an airtight container. Keep it in the fridge for up to three days. Make sure to let it cool down before sealing. - Freezing Considerations: If you want to keep it longer, you can freeze the pasta. Use a freezer-safe container and store for up to two months. Thaw it in the fridge overnight before reheating. - Best Methods to Reheat Pasta: Reheat your pasta on the stove or in the microwave. For the stove, add a splash of chicken broth to a skillet and warm it over low heat. Stir until heated through. In the microwave, cover it with a lid to avoid splatters. - Avoiding a Dry Texture: To keep the pasta creamy, add a bit of reserved pasta water or extra chicken broth while reheating. This adds moisture and helps restore the creamy texture. - How Long It Lasts in the Fridge: In the fridge, your creamy garlic butter chicken pasta lasts about three days. Always check for freshness before eating. - Signs of Spoilage: Look for changes in smell or color. If the pasta smells sour or has a strange texture, it’s best to discard it. Fresh food should always be your priority. Enjoy cooking and savoring this dish! For the full recipe, check out the earlier sections. To make this dish, follow these steps: 1. Cook the Pasta: Boil fettuccine until al dente, then drain and keep some pasta water. 2. Sear the Chicken: Season chicken with salt, pepper, and Italian spice. Cook in butter until golden. 3. Make the Sauce: Sauté minced garlic in butter. Add chicken broth and simmer. Stir in heavy cream. 4. Combine Ingredients: Toss in the pasta and add Parmesan. Adjust thickness with reserved pasta water. 5. Finish: Mix in sliced chicken and heat through. Season to taste and serve with parsley. For the full recipe, check the link provided. Yes, you can use different pasta shapes. Here are some great options: - Penne: It holds sauce well and is easy to eat. - Linguine: A flat pasta similar to fettuccine but thinner. - Rotini: Its twists catch the sauce nicely. - Spaghetti: A classic choice that works well with creamy sauces. This dish pairs well with several sides. Consider these options: - Garlic Bread: Perfect for soaking up the sauce. - Salad: A fresh green salad adds crunch and balance. - Steamed Vegetables: Broccoli or green beans add color and nutrients. - Roasted Asparagus: Adds a fancy touch and complements the flavors. In this post, we explored how to make Creamy Garlic Butter Chicken Pasta. We covered ingredients, tools, and step-by-step instructions. You learned about common mistakes and how to store leftovers. Variations let you customize your dish for different tastes. This dish is tasty and easy to make. Try the tips and variations to make it your own. Enjoy cooking and sharing this meal with friends and family!](https://savoryspiral.com/wp-content/uploads/2025/05/b768fcf8-0fca-4a51-8ff0-55f5c4718d1a.webp)
Are you ready to indulge in a dish that feels both cozy and fancy? Creamy Garlic Butter Chicken Pasta is

If you crave comfort food, Käsespätzle, or German Cheese Spaetzle, is for you! This cheesy dish is warm, satisfying, and
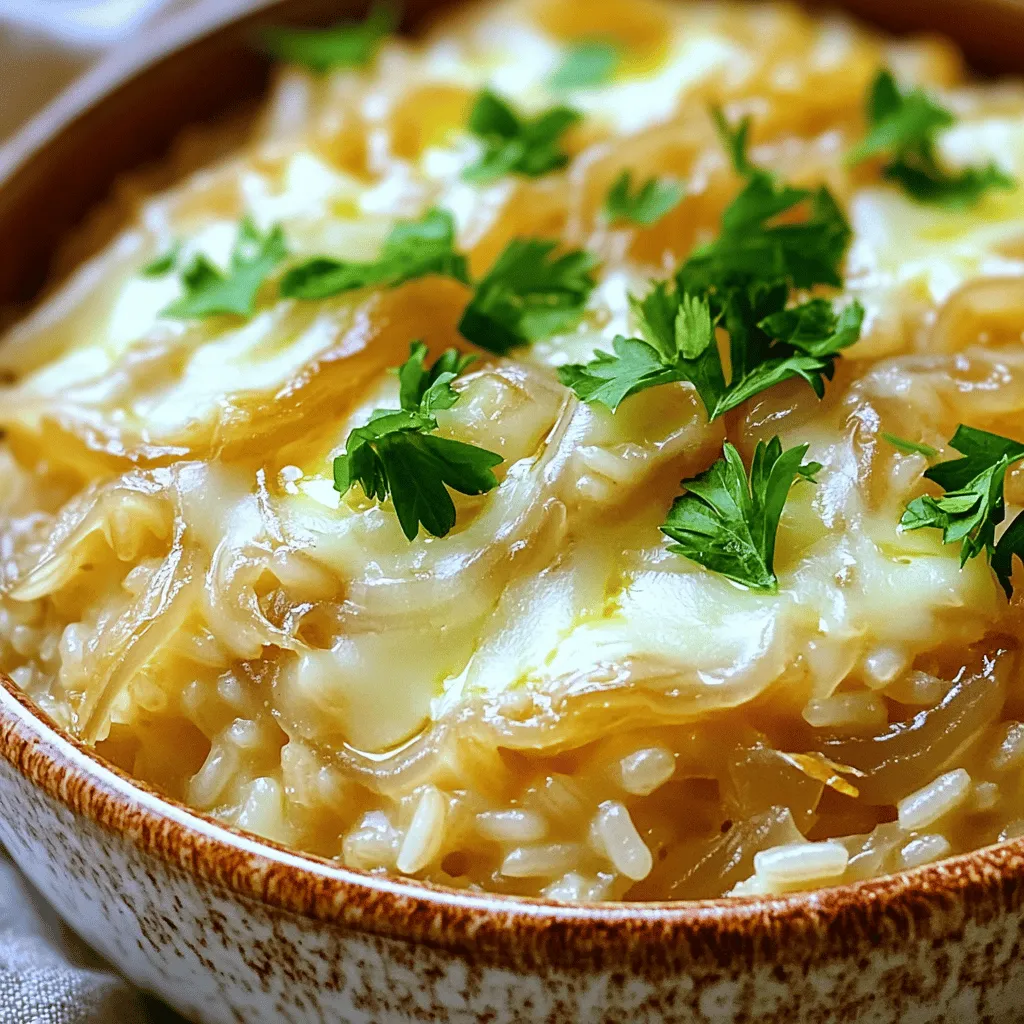
If you’re craving a bowl of warm comfort, look no further than French Onion Soup Rice. This dish combines creamy
