Skip to content
DisclaimerTerms Of UseGDPR PolicyCookie Policy

savoryspiral

  • Home
  • Drinks
  • Appetizers
  • Dinner
  • Dessert
  • About
  • Contact
  • Privacy Policy
DisclaimerTerms Of UseGDPR PolicyCookie Policy

Charlotte

- 14 oz firm tofu - 2 tablespoons cornstarch - 2 tablespoons vegetable oil - 1 red bell pepper, sliced - 1 yellow bell pepper, sliced - 1 cup broccoli florets - 1 carrot, thinly sliced - 3 green onions, chopped - 2 cloves garlic, minced - 1 inch ginger, grated - 1/4 cup low-sodium soy sauce - 2 tablespoons honey or maple syrup - 1 tablespoon rice vinegar - 1 tablespoon sesame oil - 1 teaspoon sesame seeds, toasted I love using firm tofu for this dish. It holds its shape well. Start by draining and pressing it. This step removes extra water, which helps the tofu crisp nicely when cooked. Remember to toss it in cornstarch too. This way, it gets a great golden crust. Fresh vegetables are key for color and taste. Bell peppers add sweetness, while broccoli gives a nice crunch. Don’t forget the carrot. It brings a lovely orange hue and sweetness. These veggies also soak up the teriyaki sauce, making each bite delicious. The teriyaki sauce brings it all together. Low-sodium soy sauce is a must for flavor. Honey or maple syrup adds a touch of sweetness. Rice vinegar gives it a nice tang. Lastly, sesame oil adds a nutty depth that makes this dish shine. - Green onions - Toasted sesame seeds Garnishes make any dish pop. Green onions add freshness and crunch. Toasted sesame seeds give a nutty flavor and a nice visual. Both make your stir fry look and taste even better. - Skillet or wok - Knife and cutting board - Mixing bowls You need a good skillet or wok for this recipe. A wide pan helps the veggies cook evenly. A sharp knife and cutting board make prep easy. Mixing bowls are handy for combining the sauce and tossing the ingredients. For the full recipe, check out the details above. To start, drain and press your firm tofu. This helps remove excess water. Cut the tofu into bite-sized cubes. Next, toss the cubes in cornstarch. Ensure each piece is well coated. This coating makes the tofu crispy when cooked. If you want the best texture, press the tofu for at least 30 minutes. Place it between two plates with a weight on top. Heat 1 tablespoon of vegetable oil in your skillet over medium-high heat. The oil should shimmer but not smoke. Add the coated tofu cubes in a single layer. Fry for 4-5 minutes on each side. You want them golden and crispy. Once done, take the tofu out and set it aside. Now, it’s time for the veggies. First, add the sliced bell peppers, broccoli, and carrot to the skillet. Stir-fry them for about 5-7 minutes. Keep them crisp but tender. After that, add minced garlic and grated ginger. Stir-fry for one more minute until fragrant. For the teriyaki sauce, combine the soy sauce, honey or maple syrup, rice vinegar, and sesame oil in a bowl. Whisk these ingredients together until well mixed. This sauce will coat your stir-fry evenly. Reintroduce the crispy tofu to the skillet. Pour the teriyaki sauce over the mixture. Toss everything together for 2-3 minutes. This allows the tofu to soak up the sauce. Finally, sprinkle with chopped green onions and toasted sesame seeds. Toss gently one last time to mix. For the full recipe, refer to the guide above! To make great teriyaki, you need a balance of sweetness and saltiness. The soy sauce gives salt, while honey or maple syrup adds sweetness. Use less soy sauce for less saltiness. If you like it sweeter, add more honey or syrup. You can try different sauces too. Honey adds a floral note, while maple syrup gives a rich flavor. Each option changes the taste a bit, so feel free to experiment and find your favorite. Tofu can be bland if not cooked right. The best way to get crispy tofu is to coat it with cornstarch. This helps it get golden and crunchy when frying. Heat the oil well before adding the tofu. This step is key for that crispy texture. If you're looking for soy sauce alternatives, you have options. Tamari is a great gluten-free choice. Coconut aminos work well too, as they are less salty and sweet. Both give a nice flavor to the dish. If you're out of an ingredient, don’t worry! You can swap out bell peppers for other veggies like snap peas or zucchini. If you don’t have honey or maple syrup, try brown sugar. For those who want vegan options, use maple syrup instead of honey. You can also use tofu or tempeh for protein. If you want a non-vegan option, chicken or shrimp works nicely. Just adjust the cooking time for these proteins. For the full recipe, check out the detailed instructions and enjoy your cooking adventure! {{image_2}} You can make this stir fry even better by adding more veggies. Here are some fun ideas: - Snap peas - Baby corn - Zucchini - Mushrooms These seasonal additions add color and crunch. Using frozen vegetables is a smart choice too. They are quick and easy. Plus, they keep nutrients locked in. Just toss them in the pan straight from the freezer. If you want to switch it up, try chicken or shrimp. Both options taste great with teriyaki sauce. To keep the flavor consistent, marinate your protein in the same sauce. Cook it the same way as the tofu to keep things simple and tasty. Need a gluten-free option? Use tamari instead of soy sauce. It has a similar taste and works well in this recipe. For serving, try using quinoa or rice noodles. These grains pair nicely with the stir fry and keep it gluten-free. Enjoy your delicious Teriyaki Tofu Stir Fry with these easy swaps! Leftovers of Teriyaki Tofu Stir Fry last about 3 to 4 days in the fridge. Store them in an airtight container to keep all the flavors fresh. To avoid sogginess, place the tofu and vegetables separately if possible. It’s best to eat the stir fry cold or reheat it gently in a skillet. Yes, you can freeze Teriyaki Tofu Stir Fry! However, the texture may change slightly after thawing. To freeze, place it in a freezer-safe bag or container. Remove as much air as possible to prevent freezer burn. For reheating frozen stir fry, let it thaw in the fridge overnight. Then, heat it in a skillet over low heat until warm. Stir gently to keep the tofu from breaking apart. For the full recipe, check the earlier sections! You can add heat in a few ways: - Use sliced fresh chili peppers. - Add red pepper flakes for a kick. - Mix in some sriracha or chili paste in the sauce. These methods will boost your dish's warmth and flavor. Yes, this recipe works great for meal prep. Here’s how: - Cook the tofu and veggies as instructed. - Let them cool and place them in airtight containers. - Store in the fridge for up to four days. You can easily reheat it for a quick meal later. Yes, you can use other types of tofu. Here’s the difference: - Silken tofu is soft and great for soups. - Soft tofu is also tender and crumbles easily. - Firm tofu holds its shape well, perfect for stir fry. For this recipe, firm tofu is best for a good texture. Pair your stir fry with these tasty sides: - Steamed rice or quinoa for a filling base. - A fresh salad for a crunchy contrast. - Noodles for a different texture and flavor. These options complement the stir fry nicely and make a complete meal. For the full recipe, check out the earlier section. You learned how to make a delicious Teriyaki Tofu Stir Fry. We covered key ingredients like firm tofu and fresh veggies. I shared tips on making the perfect sauce and cooking methods for crispy tofu. You can customize this dish with various proteins and vegetables. Finally, enjoy your stir fry fresh or store it for later. Experiment with flavors and have fun in the kitchen! Now, grab your tools and get cooking!

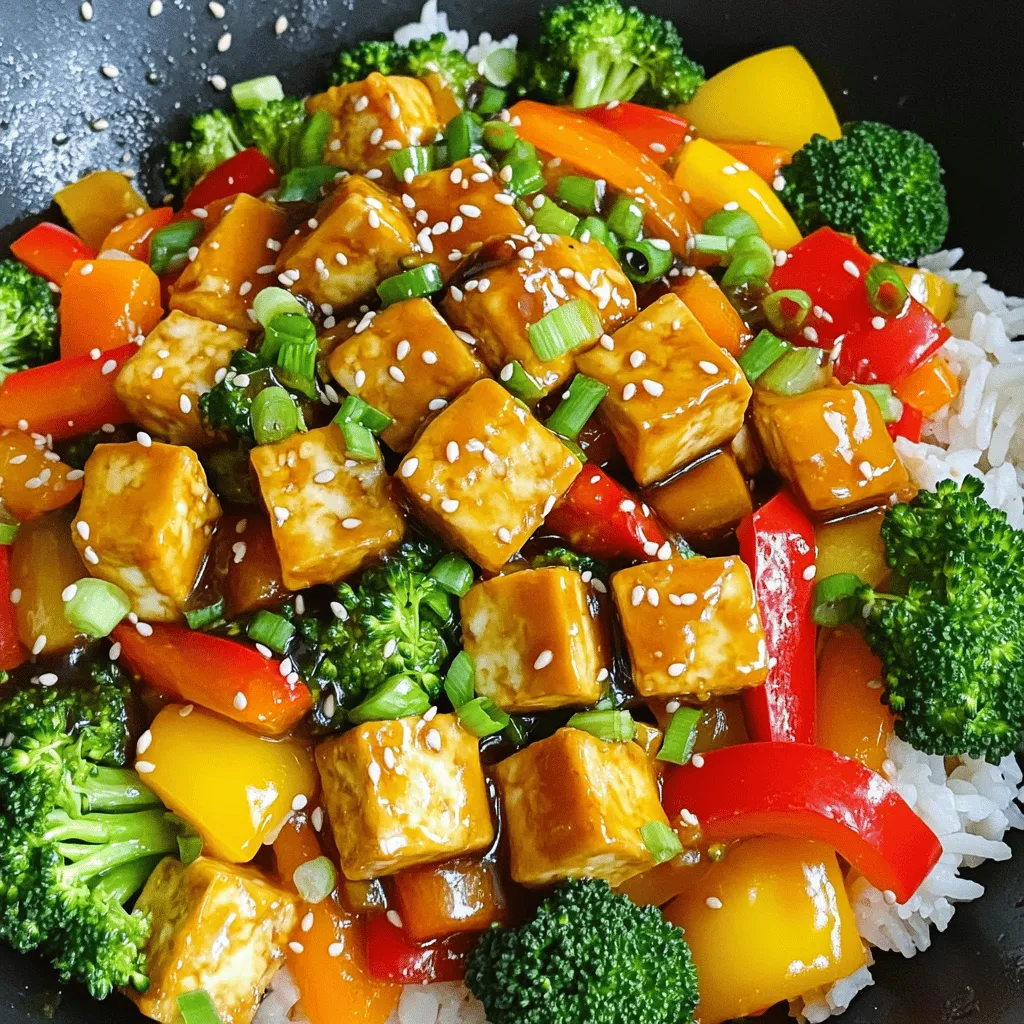
Teriyaki Tofu Stir Fry Delightful and Easy Recipe

Are you ready to elevate your weeknight dinners? My Teriyaki Tofu Stir Fry is not just easy—it’s a burst of

To make one-pan chicken fajitas, gather these fresh and tasty ingredients: - Chicken and Vegetables - 2 boneless, skinless chicken breasts, sliced into thin strips - 1 red bell pepper, sliced - 1 green bell pepper, sliced - 1 yellow onion, sliced - Spices and Seasoning - 3 tablespoons olive oil - 2 teaspoons chili powder - 1 teaspoon ground cumin - 1 teaspoon smoked paprika - 1/2 teaspoon garlic powder - Salt and pepper to taste - Garnishes and Serving Suggestions - Fresh cilantro, for garnish - Lime wedges, for serving - Flour or corn tortillas, for serving Each ingredient plays a key role in the flavor and texture of the dish. The chicken adds protein, while the peppers and onion bring sweetness and crunch. The spices give it that classic fajita kick, and the cilantro and lime add freshness. Remember, you can find the full recipe in the main article. Enjoy cooking! Preparing the Chicken First, take the chicken breasts and slice them into thin strips. This helps them cook faster. Make sure the pieces are even for even cooking. Slicing the Vegetables Next, slice the red and green bell peppers, as well as the yellow onion. Aim for thin slices, so they cook quickly. You want them to be tender and colorful in the pan. Mixing the Marinade In a large mixing bowl, combine the chicken, bell peppers, and onion. Drizzle olive oil over everything. Then, add chili powder, cumin, smoked paprika, garlic powder, salt, and pepper. Toss everything well to coat it with the spices. Heating the Skillet Heat a large skillet over medium-high heat. You want it hot enough to get a nice sear on the chicken. This step is key for great flavor. Cooking the Chicken and Veggies Add the chicken and vegetable mixture to the hot skillet. Cook for about 8-10 minutes. Stir occasionally to ensure even cooking. The chicken should be fully cooked, and the veggies should be tender and slightly charred. Final Adjustments Taste the fajita mixture and adjust the seasoning if needed. If everything tastes great, remove it from the heat. Plating the Fajitas Serve the fajita mixture on a large platter or in a bowl. This makes it easy for everyone to grab what they want. Best Accompaniments Garnish with fresh cilantro and lime wedges for a burst of flavor. These add freshness and brightness to the dish. Tips for Warm Tortillas Warm your tortillas before serving. You can do this in a dry skillet or wrap them in foil and heat them in the oven. Warm tortillas make the fajitas extra tasty! For more details, you can check out the Full Recipe. Avoiding Overcooking To avoid overcooking, keep an eye on the chicken. Cook it for about 8-10 minutes. Stir occasionally to ensure even cooking. Chicken should reach 165°F in the thickest part. Overcooked chicken becomes dry, so check its color. Look for a nice golden brown on the outside. Ensuring Tenderness For tender chicken, slice it into thin strips. This helps it cook quickly and evenly. Marinating the chicken for 30 minutes can also add juiciness. Use olive oil and spices to enhance flavor and moisture. Remember, letting the chicken rest for a few minutes after cooking keeps it juicy. Adding Extra Peppers You can add more bell peppers for a colorful dish. Try using orange or purple peppers for variety. Each pepper brings a unique flavor and sweetness. Feel free to toss in some jalapeños for heat. They add a kick to your fajitas that many love. Using Different Spices Experiment with spices to find your perfect blend. Try adding oregano for an earthy taste. You can also use paprika for a sweeter flavor. For a smoky taste, chipotle powder works well. Don’t be afraid to taste and adjust as you cook. Pan Choices A large skillet or cast-iron pan works best for this recipe. Cast iron retains heat well, giving a nice sear. Make sure your pan is hot before adding the chicken. This helps lock in the juices and flavor. Avoid overcrowding the pan; cook in batches if needed. Utensils for Easy Cooking Use a wooden spoon or spatula to stir the chicken and veggies. This prevents scratching your pan. Tongs also work well for flipping the chicken. Keep a sharp knife handy for slicing. A cutting board is essential for prep work. {{image_2}} You can easily swap chicken for tofu. Tofu soaks up flavors well. Cut it into small cubes. Marinate it just like the chicken. When cooked, it offers a nice texture. Adding more vegetables is a great idea. Try zucchini, mushrooms, or corn. They add color and taste. Mix and match your favorite veggies for fun. This keeps the dish fresh and exciting. Shrimp or beef also works great in fajitas. Shrimp cooks quickly and adds a nice flavor. Just be careful not to overcook it. Beef adds a heartiness that many love. Slice it thin for the best texture. You can use marinades for added flavor. A simple mix of lime juice and garlic works well. Let the meat soak up the flavors for a few hours. This step makes a big difference in taste. Transform your fajitas into a fajita salad. Start with a base of lettuce. Add the cooked chicken and veggies on top. Drizzle with lime juice for zing. This makes a light and healthy meal. Serving with rice or quinoa is another fun option. Layer rice on the bottom of a bowl. Top it with your fajita mix. This adds a filling element and makes it a complete meal. You'll love the blend of flavors! For the full recipe, check out the complete guide! - Refrigeration Guidelines: Place leftover chicken fajitas in an airtight container. They stay fresh in the fridge for up to three days. Make sure they cool down before sealing. - Freezing Fajitas: For longer storage, freeze the fajitas. Use a freezer bag or container. They can last up to three months. - Best Methods for Reheating: The best way to reheat fajitas is in a skillet. Heat over medium until warmed through. You can also use the microwave, but it may make them soggy. - Avoiding Loss of Flavor: To keep the flavor, add a splash of water or broth when reheating. This helps to keep them moist. - How Long They Last: If stored correctly, fajitas last three days in the fridge and three months in the freezer. - Signs of Spoilage: Look for changes in color or smell. If the fajitas look dry or have a strange odor, it's best to toss them out. To make the best one-pan chicken fajitas, start with fresh ingredients. Use two boneless chicken breasts. Slice them into thin strips. Next, cut one red bell pepper, one green bell pepper, and one onion. Mix everything in a bowl with olive oil and spices. Heat a skillet on medium-high heat, then cook for 8-10 minutes. Stir often until the chicken is cooked and veggies are tender. Serve with warm tortillas and lime wedges. For a detailed guide, check out the Full Recipe. Yes, you can prepare the ingredients in advance. Slice the chicken and veggies a day before. Store them in airtight containers in the fridge. This saves time when you are ready to cook. You can even mix the spices ahead of time. Just keep everything separate until you are ready to cook. You can use either flour or corn tortillas for chicken fajitas. Flour tortillas are soft and easy to roll. Corn tortillas have a nice flavor and are gluten-free. Choose the one you like best. Warm them up in a pan or microwave before serving. This makes them more tasty and pliable. One serving of these fajitas has about 300 calories. Each serving has around 25 grams of protein. The dish also includes healthy fats from olive oil. It’s low in carbs if you skip the tortillas. This meal is a great option for a balanced diet. Absolutely! You can use other vegetables in your fajitas. Try adding zucchini, mushrooms, or asparagus. Just slice them thinly like the peppers and onion. This adds more flavor and nutrients. Adjust cooking time if necessary, as some veggies cook faster than others. In this post, I shared a detailed guide to making chicken fajitas. We covered essential ingredients, step-by-step cooking, tips to enhance flavor, and storage methods. You can easily adjust the recipe for vegetarians or try different proteins. Remember, cooking can be fun and creative! With these tips, you’ll serve up perfect fajitas every time. Enjoy making this dish with your loved ones, and let your kitchen shine with flavor!

One-Pan Chicken Fajitas Quick and Easy Meal Idea

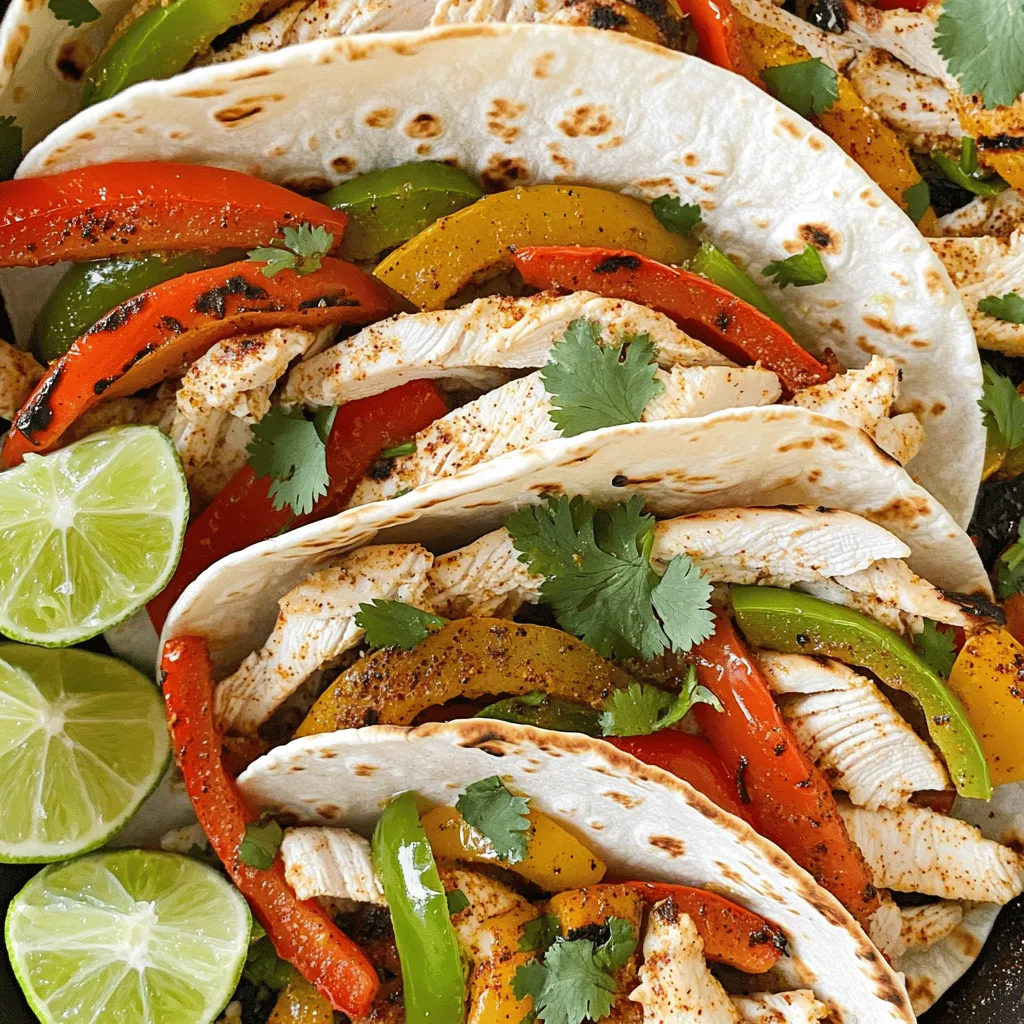
Looking for a quick and tasty meal? One-Pan Chicken Fajitas are your answer! With just one skillet, you can whip

- 1 cup rolled oats - 2 cups vegetable broth - 1 cup fresh spinach, chopped - 1/2 cup cherry tomatoes, halved - 1 garlic clove, minced - 1 tablespoon olive oil - 1/4 teaspoon red pepper flakes (optional) - Salt and pepper to taste - 1 tablespoon nutritional yeast (optional) - 1 poached egg (optional) The ingredients for savory oatmeal are simple yet full of flavor. Rolled oats serve as the base, giving you a hearty texture. Vegetable broth adds warmth and depth. Fresh spinach brings a pop of color and nutrients. Cherry tomatoes add sweetness and a juicy bite. Garlic enhances the dish with its fragrant taste. Olive oil adds richness and a smooth mouthfeel. Red pepper flakes can give a spicy kick if you like. Don't forget the seasonings, salt and pepper, to tie everything together. Nutritional yeast provides a cheesy taste, and a poached egg adds protein. This combination makes for a quick and healthy meal. Each serving of savory oatmeal contains about 300 calories. It has 10 grams of protein, 45 grams of carbs, and 10 grams of fats. You also get vitamins A and C from spinach. The fiber in oats helps with digestion. This meal offers a good balance of nutrients to keep you energized. - Oatmeal: Oats are high in fiber. They help lower cholesterol and keep you full longer. - Spinach: Spinach is packed with vitamins and minerals. It supports eye health and boosts immunity. - Garlic: Garlic has many health benefits. It may help lower blood pressure and has anti-inflammatory properties. These ingredients not only make your meal tasty but also nourish your body in many ways. You can find the full recipe above to get started on this delightful dish. 1. Heat olive oil: Start by pouring 1 tablespoon of olive oil into a medium saucepan. Set the heat to medium. This oil adds flavor and helps cook the garlic. 2. Sauté garlic: Add 1 minced garlic clove to the hot oil. Stir it for about 1 minute. You want it fragrant but not burnt. Keep an eye on it! 3. Toast rolled oats: Now, add 1 cup of rolled oats to the pan. Stir them for about 2 minutes. This step brings out the nutty flavor of the oats. Make sure to coat them in the garlic oil. 1. Add vegetable broth: Carefully pour 2 cups of vegetable broth into the pan with the toasted oats. Stir to mix everything well. 2. Simmer and cook: Bring the mixture to a gentle simmer. Then, lower the heat and let it cook for about 5-7 minutes. Stir it occasionally. You want the oats to soak up most of the broth and become tender. 1. Incorporate spinach and tomatoes: When the oats are cooked, add 1 cup of chopped spinach and 1/2 cup of halved cherry tomatoes. Stir them in and let everything cook for 2-3 minutes. The spinach will wilt nicely. 2. Seasoning: Sprinkle in salt, pepper, and optional red pepper flakes to taste. If you like a cheesy flavor, add 1 tablespoon of nutritional yeast. Stir everything together until well combined. 3. Optional poached egg: For a heartier meal, top your savory oatmeal with a poached egg. The yolk adds richness and extra protein. Enjoy this quick and healthy meal at any time of day! For the full recipe, check the details above. To make your savory oatmeal shine, use fresh herbs and spices. Fresh basil or parsley adds bright notes. Garlic and onion powder can deepen the flavor. Red pepper flakes give a nice kick. Adjust seasoning to taste. Always start with a little salt and pepper. You can add more if needed, but it's hard to take it out once added. Properly toasting your oats is key. It brings out their nutty flavor. Heat olive oil in your pan first. Add the oats and stir for a few minutes. This step makes a big difference in taste. For even cooking, stir the oats often. This ensures they cook uniformly and absorb the broth well. Presentation matters! Serve the oatmeal in deep bowls. Top it with a poached egg for a fancy touch. Drizzle with olive oil for a glossy finish. Garnish with fresh black pepper and extra cherry tomatoes. Pair it with a light salad or a fruit smoothie for balance. Enjoy your meal warm and fresh for the best experience. {{image_2}} You can easily change the ingredients in savory oatmeal. If you don’t have spinach, try kale or Swiss chard. They add nice greens and flavor. For tomatoes, you can use bell peppers or even zucchini. Each swap brings its own taste. You can also switch the grains. Instead of rolled oats, try quinoa or farro. Both grains add a unique texture. They also bring extra nutrition. To make your savory oatmeal even better, add cheese or nuts. Feta cheese adds a nice salty flavor. Cheddar gives creaminess. Nuts like walnuts or almonds add crunch and healthy fats. If you like spice, add jalapeños or hot sauce. Red pepper flakes can also heat things up. Adjust the spice to your taste for a fun twist. For vegan options, skip the poached egg and cheese. Use plant-based cheese if you want a cheesy flavor. You can also use vegetable broth to keep it vegan. If you need gluten-free oatmeal, choose certified gluten-free oats. Always check labels for hidden gluten. This dish can easily fit your dietary needs. To store leftover savory oatmeal, let it cool first. Place it in an airtight container. This keeps the flavors fresh. You can store it in the fridge for up to three days. Just remember to check for any signs of spoilage before using. Moisture can alter the taste and texture. Freezing savory oatmeal is easy. Spoon the cooled oatmeal into freezer-safe containers. Leave some space at the top, as it expands when frozen. You can freeze it for up to three months. When you want to eat it, take it out and place it in the fridge overnight to thaw. To reheat, warm it in a pot over low heat. Add a splash of broth or water to help it regain a creamy texture. Stir often to avoid sticking. Making oatmeal ahead of time is smart. You can cook a big batch and store it. Divide it into servings for quick meals. Store the oats and toppings separately. This keeps the toppings fresh and prevents sogginess. For best results, prepare the oats and keep them plain. You can add spinach, tomatoes, and seasonings right before eating. This ensures every bite is fresh and tasty. You can find the complete recipe for savory oatmeal with spinach in the Full Recipe section. Yes, you can make savory oatmeal without broth. You can use water instead. For more flavor, try using milk or a plant-based milk. This adds creaminess without broth. You can also add herbs and spices for taste. A splash of soy sauce or miso paste works well too. To boost protein, consider adding a poached egg on top. You can also mix in cooked beans, like chickpeas or black beans. Tofu is another great choice; just sauté it before adding. Nutritional yeast adds protein too, plus a cheesy taste. Yes, you can prepare savory oatmeal ahead of time. Cook the oatmeal and store it in a sealed container. Keep it in the fridge for up to three days. You can also pre-chop spinach and tomatoes. Just add them when you reheat. To reheat oatmeal, add a splash of water or broth. Heat it in the microwave or on the stove. Stir often to prevent sticking. If it gets too thick, add more liquid. This keeps the texture creamy and delicious. Yes, this recipe is great for kids! To make it kid-friendly, keep the spices mild. Use less garlic or skip it if they don’t like it. You can also let them choose toppings, like cheese or a fried egg. This makes it fun and tasty for them. For the full recipe, check out Savory Oatmeal with Spinach and a Touch of Garlic. This blog post covered a simple, nutritious savory oatmeal recipe. We discussed ingredients like oats, spinach, and garlic, and their health benefits. I walked you through preparation, cooking techniques, and flavor tips. You can swap ingredients, store leftovers, and even meal prep. In my view, savory oatmeal is a great choice for any meal. It's healthy and easy to customize to your taste. Try it out, and enjoy the many ways to make it your own.

Savory Oatmeal with Spinach Quick and Healthy Meal

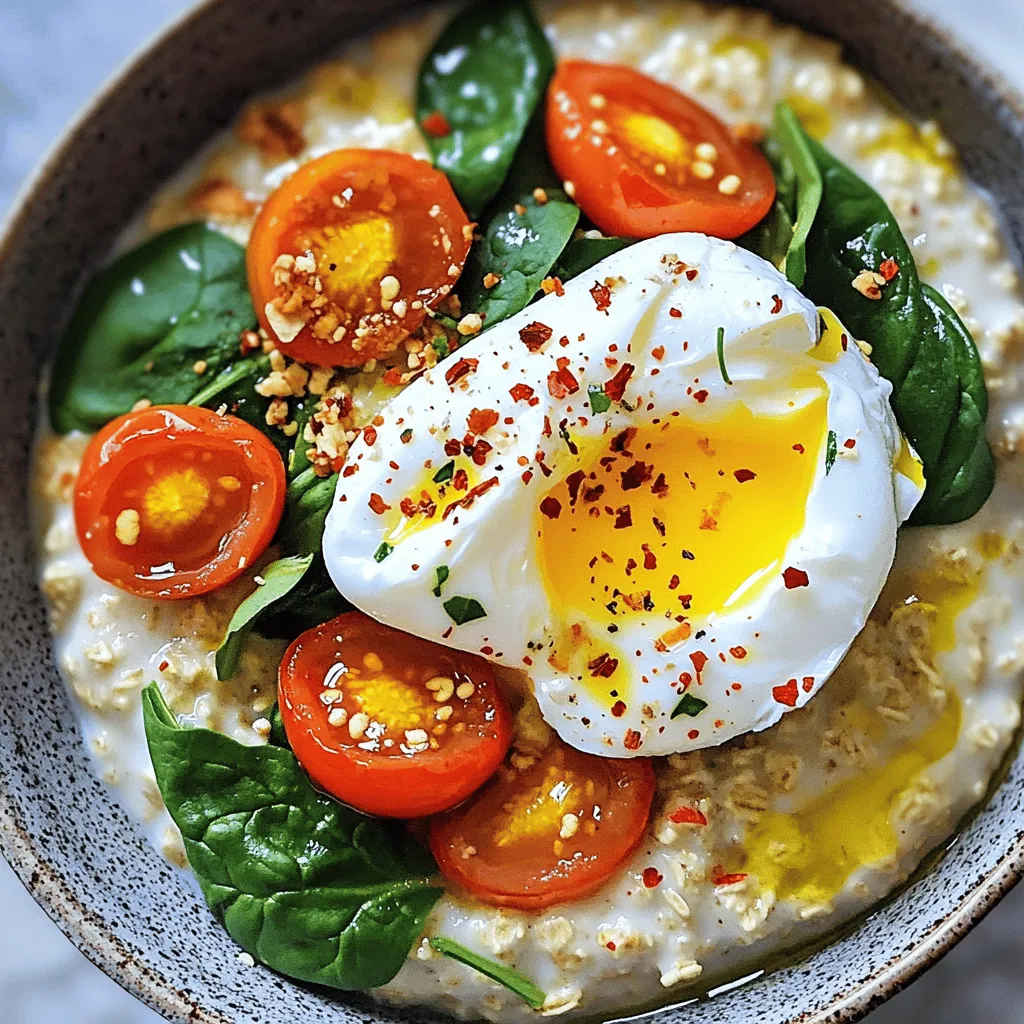
Are you ready to transform your breakfast routine? Savory Oatmeal with Spinach is a quick and healthy meal that packs

To make Baked Chicken Parmesan, you need the right ingredients. Here’s what you will use: - 2 large chicken breasts - 1 cup breadcrumbs (preferably seasoned) - 1/2 cup grated Parmesan cheese - 1 teaspoon Italian seasoning - 1/2 teaspoon garlic powder - 1/2 teaspoon onion powder - 1 large egg - 1 cup marinara sauce - 1 1/2 cups shredded mozzarella cheese - Fresh basil leaves for garnish - Olive oil spray - Salt and pepper to taste These items create a tasty and crispy dish. The chicken breasts should be large and juicy. Seasoned breadcrumbs add great flavor and crunch. Parmesan cheese gives a rich taste, while mozzarella melts beautifully on top. Using fresh herbs like basil not only adds color but also a pop of freshness. Olive oil spray helps achieve that golden-brown crust. Salt and pepper enhance all the flavors together. For a complete guide on how to combine these ingredients, check the Full Recipe. With this list, you can create a dinner that impresses family and friends. Enjoy cooking! 1. Preheat your oven to 400°F (200°C). Prepare a large baking sheet by lining it with parchment paper. 2. In a shallow bowl, mix together the breadcrumbs, grated Parmesan cheese, Italian seasoning, garlic powder, onion powder, salt, and pepper. Make sure it is well combined. 1. Take a large egg and beat it in a separate bowl. Set this aside. 2. Dip each chicken breast into the beaten egg, letting any extra egg drip off. 3. Next, coat the chicken with the breadcrumb mixture. Press gently to make sure the crumbs stick well. 1. Place the coated chicken breasts on the prepared baking sheet. Lightly spray the tops with olive oil. This helps the chicken turn a nice golden color. 2. Bake in the preheated oven for 20 to 25 minutes. The chicken should be cooked through with golden brown breadcrumbs. 3. After baking, take the sheet out and spoon marinara sauce over each chicken breast. 4. Sprinkle shredded mozzarella cheese on top of the marinara. 5. Put the baking sheet back in the oven for another 5 to 7 minutes. The cheese should melt and bubble. 6. Once it's done, let the chicken rest for a few minutes. Garnish with fresh basil leaves before serving. For the complete details on this delicious dish, refer to the Full Recipe. To achieve crispy breadcrumbs, use seasoned breadcrumbs. They add flavor right away. Mix them with grated Parmesan, garlic powder, and onion powder. This mix gives texture and taste. Press the breadcrumbs onto the chicken firmly. This helps them stick well. Lightly spray the tops with olive oil before baking. This step ensures a golden and crispy finish. For juicy chicken, start with butterflied breasts. This helps them cook evenly. Bake at 400°F (200°C) for 20-25 minutes. If you have a meat thermometer, check for 165°F (74°C) inside. Let the chicken rest for a few minutes after baking. This keeps the juices inside. You’ll enjoy every bite of tender chicken. Adding herbs can elevate your dish. Fresh basil pairs wonderfully with marinara sauce. You can also try oregano or thyme for a twist. For a kick, add red pepper flakes to the breadcrumb mix. This gives a nice heat that many enjoy. Feel free to adjust the spices to suit your taste. Experimenting can lead to delightful surprises! {{image_2}} You can switch up the chicken and cheese to fit your taste. For chicken, you might use turkey or even eggplant for a veggie twist. If you want a different cheese, try provolone or gouda. These options can add unique flavors to your dish. For gluten-free needs, use gluten-free breadcrumbs. You can also make a vegetarian version by using chickpea patties instead of chicken. These changes keep the dish tasty while meeting dietary needs. Baked Chicken Parmesan pairs well with many sides. I love serving it on a bed of spaghetti with extra marinara sauce. A simple green salad with a light vinaigrette also makes a great side. You can even add garlic bread for an extra touch. For the full recipe, check out the recipe section above! To keep your Baked Chicken Parmesan fresh, store it in the fridge. Place the chicken in an airtight container. Make sure to separate any extra sauce for later use. This helps prevent the breading from getting soggy. Leftovers can last for about three to four days in the fridge. If you want to save some Baked Chicken Parmesan for later, freezing is a great option. Let the chicken cool to room temperature first. Wrap each piece tightly in plastic wrap. Then, place them in a freezer-safe bag or container. This prevents freezer burn. You can freeze the chicken for up to three months. When it's time to enjoy your leftovers, here’s how to reheat them. For best results, use an oven. Preheat it to 350°F (175°C). Place the chicken on a baking sheet and cover it with foil. Heat for about 15-20 minutes or until warm. If you like, add a little more marinara sauce and cheese before heating. This keeps the chicken moist and tasty. Bake Baked Chicken Parmesan for 20-25 minutes at 400°F (200°C). Make sure the chicken is cooked fully. The breadcrumb coating should turn golden brown. Always check that the internal temperature reaches 165°F (75°C) for safety. Yes, you can use frozen chicken. If you choose frozen, thaw it first. This helps the chicken cook evenly. Frozen chicken may need a few extra minutes in the oven. Make sure to check for doneness before serving. Baked Chicken Parmesan pairs well with many sides. Here are some ideas: - Spaghetti with marinara sauce - Garlic bread for dipping - A fresh green salad - Roasted vegetables for a colorful plate - Steamed broccoli for a healthy crunch These sides add flavor and balance the meal. Enjoy experimenting with different pairings! For the full recipe, check out the detailed instructions above. This guide covered how to make delicious Baked Chicken Parmesan. You learned about the key ingredients, from chicken to marinara. I shared easy steps for preparation and baking, plus tips for a great texture. We explored variations to fit different diets and the best ways to store leftovers. Remember, cooking can be fun and creative. Enjoy your meal and try new flavors. Happy cooking!

Baked Chicken Parmesan Crispy and Flavorful Dinner

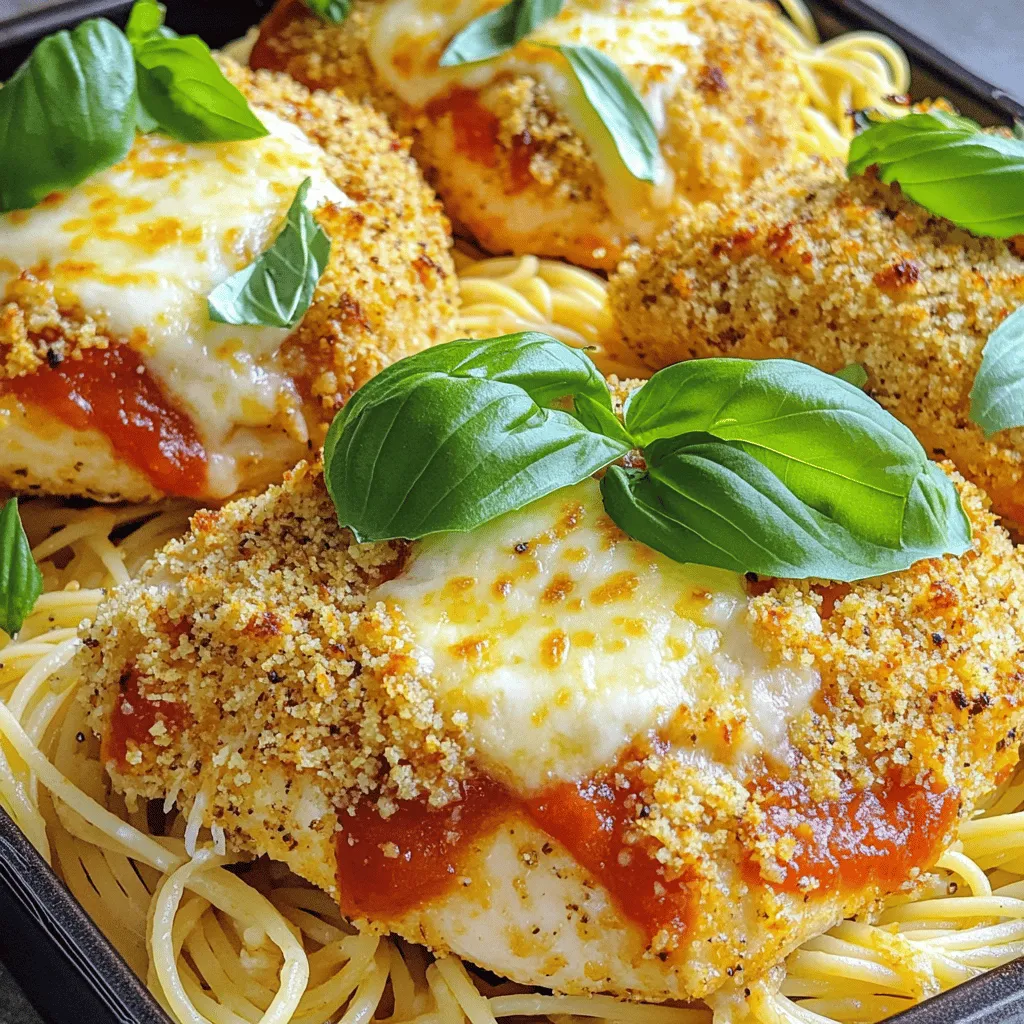
Are you craving a delicious and easy dinner? Look no further! This Baked Chicken Parmesan is both crispy and packed

Here’s what you need to make tasty banana bread overnight oats: - 1 cup rolled oats - 1 ripe banana, mashed - 1 cup almond milk (or any milk of choice) - 1 tablespoon chia seeds - 1 teaspoon vanilla extract - 1 teaspoon ground cinnamon - 1/4 cup walnuts, chopped - 2 tablespoons maple syrup (optional, for sweetness) - Pinch of salt These ingredients work well together. The oats give you fiber, while the banana adds natural sweetness. Chia seeds help with texture and keep you full. Almond milk makes it creamy, but you can use any milk you like. Ground cinnamon adds warmth, and walnuts give a nice crunch. Finally, a pinch of salt enhances all the flavors. For the full recipe, just follow the steps, and you will have a delicious breakfast ready to go! Start by taking a medium-sized bowl. In this bowl, combine the following ingredients: - 1 cup rolled oats - 1 ripe banana, mashed - 1 cup almond milk (or any milk of choice) - 1 tablespoon chia seeds Mix these ingredients well. You want the oats to soak up the milk and banana flavor. Next, add: - 1 teaspoon vanilla extract - 1 teaspoon ground cinnamon These will give your oats that warm, cozy taste of banana bread. Stir everything until it's smooth. Now it’s time to stir the mixture thoroughly. Ensure all the oats are wet and the banana is well mixed. If you like your oats sweeter, add: - 2 tablespoons maple syrup (optional, for sweetness) Mix again until the syrup is blended in. Next, fold in: - 1/4 cup walnuts, chopped Save a few walnuts for later. This adds a nice crunch. Take two jars or airtight containers. Divide the mixture evenly between them. Seal each container tightly. Place them in the fridge overnight. This helps the oats soften and absorb flavors. You can also let them sit for at least 4 hours if you’re short on time. In the morning, give the oats a good stir. If they seem thick, add more almond milk for a creamier texture. Top with the reserved walnuts and banana slices if you want. Enjoy your banana bread overnight oats cold or warmed! Make sure to check the Full Recipe for all the details. To get the right texture, start with the milk. I use almond milk, but you can choose any milk you like. If you want a thicker mix, add less milk. For a creamier mix, use more. The soaking time is key too. Let the oats sit overnight. This makes them soft and ready to eat in the morning. When it comes to sweeteners, I prefer maple syrup. It gives a nice flavor. You can also try honey or agave. If you want to spice it up, add nutmeg or ginger. These spices bring warmth and depth to your oats. A little goes a long way! Toppings make your oats look great and taste better. I love adding banana slices and chopped walnuts on top. You can also sprinkle some cinnamon for extra flavor. Serve them in clear jars to show off the layers. This makes breakfast feel special. Enjoy your banana bread overnight oats in style! For more details, check out the Full Recipe. {{image_2}} You can easily make this dish nut-free. Instead of walnuts, try sunflower seeds or pumpkin seeds. They give a nice crunch and add nutrients. For a dairy-free option, use oat milk or coconut milk. Both choices keep the oats creamy and delicious. Want a chocolate twist? Add a tablespoon of cocoa powder to the oats. This adds a rich flavor. You can also mix in different fruits. Berries, like strawberries or blueberries, add a fresh taste. Diced apples work well too, giving a nice crunch in every bite. If you want to cut back on sugar, use less maple syrup or skip it altogether. You can also use a sugar substitute like stevia or monk fruit. To boost protein, add a scoop of protein powder or Greek yogurt. This makes your breakfast more filling and nutritious. To keep your banana bread overnight oats fresh, use airtight containers. This helps to lock in flavors and moisture. Store the oats in the fridge for up to five days. The oats will maintain good taste and texture if sealed well. Just remember to give them a good stir before serving. You can freeze banana bread overnight oats for quick breakfasts. Divide the mixture into individual, freezer-safe containers. Be sure to leave some space in each container. The oats will expand as they freeze. They can last up to three months in the freezer. To defrost, simply move a container to the fridge overnight. You can also use the microwave for quick thawing. When you’re ready to eat, you can warm the oats in the microwave. Place them in a bowl and heat for 30 seconds. Stir and check the warmth. If needed, heat for another 15 seconds. To keep the oats creamy, add a splash of almond milk before heating. This helps maintain the smooth texture. Enjoy your tasty breakfast warm or cold! Yes, you can make Banana Bread Overnight Oats ahead of time. This recipe works great for meal prep. You can prepare a few jars at once. Just make sure to seal them tightly. Store them in the fridge. They will taste fresh for up to five days. This helps you save time on busy mornings. If you want to swap almond milk, there are many options. You can use regular cow's milk. Oat milk is also a great choice. Coconut milk adds a nice flavor, too. For a nut-free option, try soy milk or rice milk. Choose what fits your dietary needs best. Leftover overnight oats can last up to five days in the fridge. Store them in an airtight container. Make sure to check for any signs of spoilage before eating. If you see changes in color or smell, it’s best to toss them. Enjoy your Banana Bread Overnight Oats fresh for the best taste. In this post, we explored the ingredients and steps to make delicious overnight oats. You learned how to prepare the base, mix in flavors, and store them for later. We shared tips on achieving great texture and enhancing sweetness. You also discovered variations, storage tips, and answers to common questions. Try these ideas to create your perfect breakfast. With simple adjustments, you can enjoy oats your way. Happy cooking!

Tasty Banana Bread Overnight Oats Recipe Guide

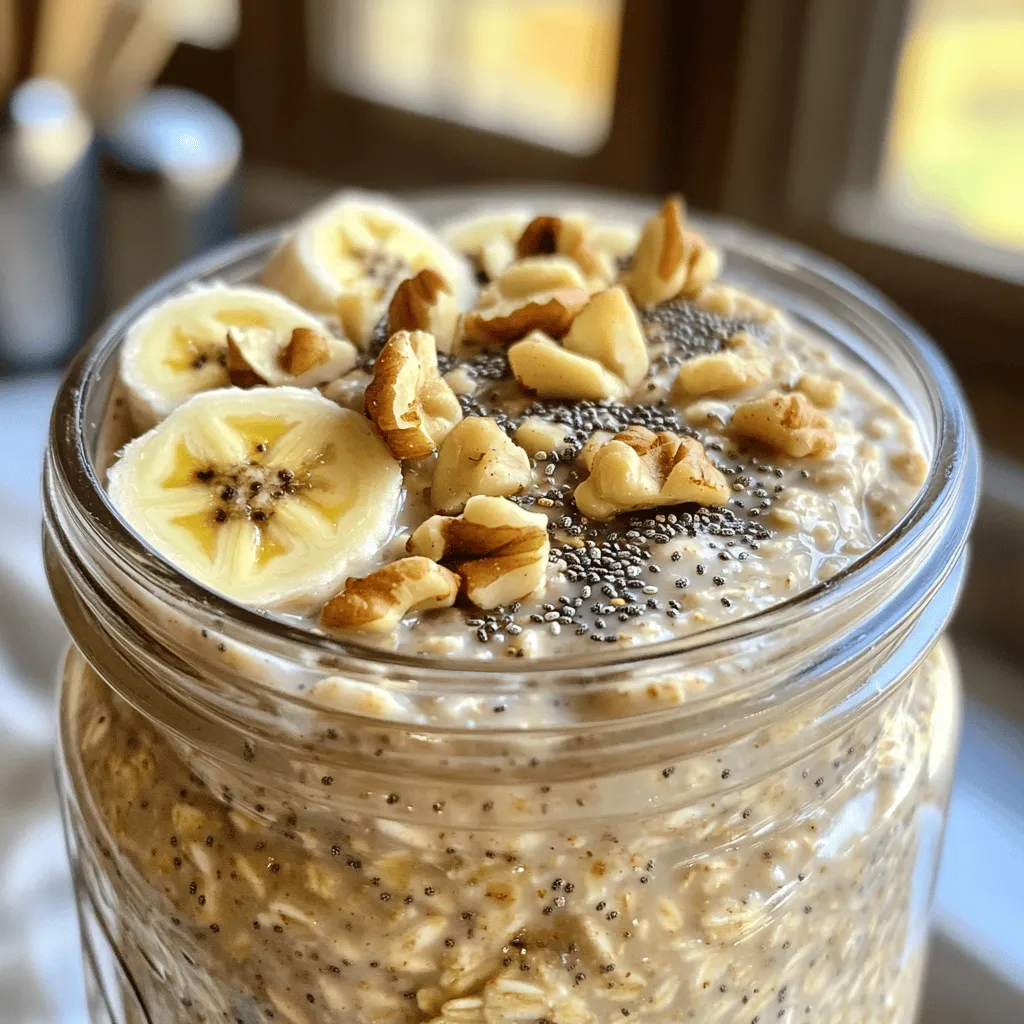
Are you ready to enjoy breakfast with a twist? My Tasty Banana Bread Overnight Oats Recipe Guide is just what

- Eggplants and cheeses: You need 2 medium eggplants. They should be sliced into 1/2-inch rounds. For cheese, use 2 cups of fresh mozzarella and 1/2 cup of grated Parmesan. - Breading ingredients: Prepare 1 cup of all-purpose flour, 2 large beaten eggs, and 1 cup of breadcrumbs. You can use seasoned breadcrumbs for extra flavor. - Marinara sauce and seasonings: Use 1 cup of marinara sauce. Add salt and pepper to taste for seasoning. - Variations on cheeses: You can mix cheeses like provolone or fontina for a different taste. - Herbs and spices to enhance taste: Fresh herbs like basil and oregano work well. Try adding garlic powder or red pepper flakes for a kick. - Calories per serving: Each serving has about 400 calories. - Breakdown of macronutrients: Expect around 20 grams of protein, 30 grams of carbs, and 25 grams of fat. This serves as a hearty meal packed with flavor. For the complete cooking method, refer to the Full Recipe. To start, sprinkle salt on the eggplant slices. This step is vital. It draws out moisture and bitterness. Let the slices sit for about 30 minutes. After that, rinse them well and pat them dry with paper towels. This process helps improve flavor and texture in your Eggplant Parmesan Stacks. Next, set up a breading station. You need three shallow dishes. Fill one with flour, the second with beaten eggs, and the third with breadcrumbs. Take each eggplant slice and coat it well. First, dip it in flour to dry it. Then, coat it in egg. Finally, roll it in the breadcrumbs. Press gently to make sure the crumbs stick. Now it's time to fry the eggplant slices. Heat olive oil in a large skillet over medium-high heat. Add the breaded slices in batches. Fry each slice for about 3-4 minutes on each side. You want them golden brown and crispy. Drain the fried slices on paper towels to remove excess oil. This step makes a big difference in texture. Preheat your oven to 375°F (190°C). In an oven-safe dish, begin layering your stacks. Start with one fried eggplant slice. Add a spoonful of marinara sauce on top. Then, place a few slices of mozzarella cheese. Sprinkle some Parmesan cheese and add chopped basil. Repeat this layering until you use all the ingredients. Make sure to finish with mozzarella and Parmesan on top for a nice golden crust. Once you've assembled your stacks, place them in the oven. Bake for 25-30 minutes. Look for the cheese to be melted and bubbly. This is the sign that your Eggplant Parmesan Stacks are done. Enjoy the rich flavors and textures in every bite. For the complete recipe, check the Full Recipe section. To make great Eggplant Parmesan stacks, avoid sogginess. Here are some tips: - Salt the Eggplant: Sprinkle salt on the slices. Let them sit for 30 minutes. This removes moisture and bitterness. - Dry Well: Rinse and pat the slices dry after salting. This step is key for crispiness. - Fry in Batches: Don’t crowd the pan. Fry a few slices at a time. This ensures even frying and a golden crust. Pair your stacks with tasty sides: - Fresh Salad: A simple green salad adds a nice crunch. - Garlic Bread: Warm, crusty garlic bread complements the dish well. - Roasted Veggies: Roasted seasonal vegetables enhance the meal's flavor. To keep leftovers fresh: - Store in an Airtight Container: Use a container to seal in flavor. Refrigerate for up to three days. - Reheat in the Oven: For best results, reheat in the oven at 350°F (175°C). Bake for about 15 minutes. This helps keep the cheese melty and the eggplant crisp. For the complete recipe, check out the Full Recipe section. {{image_2}} You can boost the nutrition of your Eggplant Parmesan Stacks. Try adding vegetables like spinach or zucchini. These options add color and taste, making the dish more vibrant. You can also use gluten-free breadcrumbs if you need a gluten-free option. Ground nuts or crushed cornflakes work well too. The sauce can change the dish's flavor. You might try using pesto instead of marinara. This gives a fresh taste. Barbecue sauce is another fun choice if you want something sweet and smoky. For cheese, mix mozzarella with gouda or feta cheese. Each cheese adds a unique flavor, making your stacks even more special. You don’t have to stick to just stacks. You can layer the ingredients lasagna-style in a baking dish. This makes serving easier and looks great! For toppings, consider fresh herbs like parsley or a sprinkle of chili flakes for heat. A drizzle of balsamic glaze adds a nice touch too. Looking for more ideas? Check out the Full Recipe for even more ways to enjoy Eggplant Parmesan Stacks! You can try a few options if you need a substitute for breadcrumbs. Gluten-free breadcrumbs work well. You can find them in many stores. Another option is crushed cornflakes. They add a nice crunch. You could also use ground nuts like almonds or walnuts. They offer a unique flavor. Salting the eggplant helps remove excess moisture. Slice the eggplant and sprinkle salt on both sides. Let it sit for about 30 minutes. This draws out water and bitterness. Afterward, rinse the slices under cold water. Pat them dry with a towel. This step is key for a tasty dish. Yes, you can prep these stacks in advance. You can bread the eggplant and fry it earlier. Store the fried slices in the fridge. You can layer the stacks in an oven-safe dish. Cover them tightly with plastic wrap. This keeps them fresh until you are ready to bake. You can freeze these stacks for later. Assemble the stacks but do not bake them. Wrap the dish tightly in foil or plastic wrap. This prevents freezer burn. When you are ready to eat, thaw them overnight in the fridge. Bake as directed in the Full Recipe. This keeps the taste fresh and delicious. To make Eggplant Parmesan Stacks, you need the following ingredients: - 2 medium eggplants, sliced into 1/2-inch rounds - 1 cup all-purpose flour - 2 large eggs, beaten - 1 cup breadcrumbs (can use seasoned for added flavor) - 1 cup marinara sauce - 2 cups fresh mozzarella cheese, sliced - 1/2 cup grated Parmesan cheese - 1/4 cup fresh basil leaves, chopped - Olive oil for frying - Salt and pepper to taste You can follow these steps for the full recipe: 1. Prepare the Eggplant: Sprinkle salt on the eggplant slices. Let them sit for 30 minutes. This draws out moisture. Rinse and pat dry. 2. Set Up Breading Station: Place flour in a dish, beaten eggs in another, and breadcrumbs in a third. 3. Bread the Eggplant: Dip each slice in flour, then in eggs, and then coat with breadcrumbs. Press gently. 4. Fry the Eggplant: Heat olive oil in a large skillet. Add breaded slices in batches. Fry for 3-4 minutes each side until golden. Drain on paper towels. 5. Assemble the Stacks: Preheat your oven to 375°F (190°C). In an oven-safe dish, layer fried eggplant, marinara, mozzarella, Parmesan, and basil. Repeat until all are used. Finish with mozzarella and Parmesan. 6. Bake: Bake for 25-30 minutes. Look for melted, bubbly cheese. 7. Serve: Cool slightly before slicing into squares. Add more basil if desired. - Preparation Time: 45 minutes - Cooking Duration: 30 minutes - Total Time: 1 hour 15 minutes This recipe makes 4 servings. Each serving is packed with flavor and nutrients. Enjoy the taste of eggplant, cheese, and herbs. You’ve learned how to make great Eggplant Parmesan Stacks. We covered essential ingredients, flavorful options, and easy cooking steps. Remember to salt and dry your eggplants for the best taste. Explore variations like adding vegetables or different sauces to make it your own. Don’t forget tips for perfecting the dish and storing leftovers. With this knowledge, you can create a delicious meal that impresses everyone. Enjoy your cooking journey!

Eggplant Parmesan Stacks Flavorful and Easy Recipe

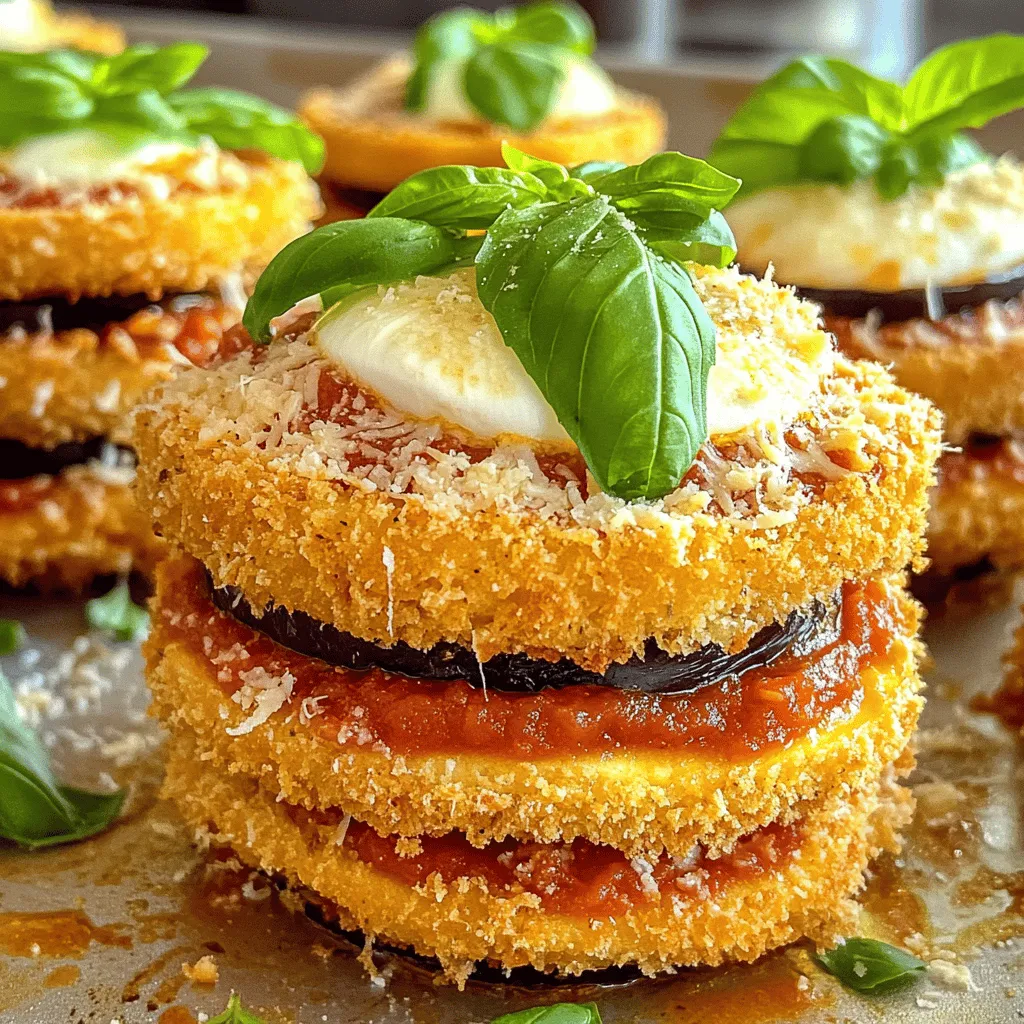
Craving a hearty, delicious meal that’s easy to make? Look no further than my Eggplant Parmesan Stacks! This dish combines

To make a tasty vegetable fried rice, you need some key items. Here’s what you will need: - 2 cups cooked jasmine rice (preferably day-old) - 1 cup broccoli florets - 1 cup bell peppers (red, yellow, and green), diced - 1 cup snap peas, trimmed and halved - 1 medium carrot, diced - 2 green onions, sliced - 3 cloves garlic, minced - 2 tablespoons soy sauce (low sodium) - 1 tablespoon sesame oil - 1 tablespoon olive oil These ingredients create a colorful and flavorful dish. Using day-old rice helps keep it from getting mushy. Fresh veggies add crunch and nutrition. In addition to the essential items, some staples make your dish even better: - Eggs (optional, for protein) - Salt and pepper to taste - Sesame seeds for garnish Eggs add richness, while salt and pepper enhance the taste. Sesame seeds give a nice touch when serving. Want to take your fried rice up a notch? Consider these options: - Additional vegetables like zucchini or corn - Fresh herbs like cilantro or basil - Spices such as ginger or chili flakes These extras can bring more depth and excitement to your dish. Explore these options for a unique twist. For the full recipe, you can refer to the detailed instructions provided above. To make vegetable fried rice, start with fresh veggies. Gather your ingredients: - 2 cups cooked jasmine rice (preferably day-old) - 1 cup broccoli florets - 1 cup bell peppers (red, yellow, and green), diced - 1 cup snap peas, trimmed and halved - 1 medium carrot, diced - 2 green onions, sliced - 3 cloves garlic, minced - 2 tablespoons soy sauce (low sodium) - 1 tablespoon sesame oil - 1 tablespoon olive oil - 2 eggs, lightly beaten (optional) - Salt and pepper to taste - Sesame seeds for garnish Wash and chop all your vegetables. This step saves time when cooking. Use day-old rice for the best texture. It helps prevent mushiness in your fried rice. Heat the olive oil in a large skillet or wok over medium heat. Add the minced garlic and sauté for about 30 seconds, until fragrant. Toss in the diced carrots and broccoli florets. Stir-fry for 3-4 minutes until they are slightly tender. Next, add the diced bell peppers and snap peas. Stir-fry for another 2-3 minutes. This adds a colorful crunch and keeps the veggies bright. Push the vegetables to one side of the pan. If using eggs, add them to the empty side. Scramble the eggs until cooked, then mix them with the veggies. Add the day-old jasmine rice to the skillet, breaking up any clumps. Pour the soy sauce and sesame oil over the rice. Stir everything together, ensuring the rice and vegetables are evenly coated with the sauce. Cook for an additional 3-5 minutes, allowing the rice to get slightly crispy. Finally, stir in the sliced green onions and season with salt and pepper to taste. Remove from heat. To combine ingredients well, use high heat. This helps to cook the rice quickly and evenly. Stir constantly to avoid burning. If you want more flavor, add extra soy sauce or sesame oil. A pinch of salt and pepper can enhance the taste. Remember to mix well so each bite is full of flavor. Serve hot, garnished with sesame seeds for that perfect finishing touch. For the full recipe, check out the complete guide. To cook great fried rice, start with day-old rice. Fresh rice is moist and sticky, which makes it clump. Let your rice cool in the fridge overnight for best results. Use a large skillet or wok to give your rice room to fry. Heat the pan before adding oil. This helps to cook the veggies quickly and evenly. One common mistake is overcrowding the pan. When you add too many veggies, they steam instead of fry. This can make the rice soggy. Another issue is not using enough oil. A bit of oil helps the rice fry and adds flavor. Also, don’t skip the soy sauce. It gives your dish a savory kick. To get that perfect texture, break up any clumps of rice before adding it to the pan. Stir-fry the rice over high heat for a few minutes. This helps to get a nice crispy texture. If you like eggs, add them to the pan after the veggies. Scramble them first, then mix with the rice. This keeps everything light and fluffy. For the full recipe, check out the Colorful Veggie Delight Fried Rice. {{image_2}} To make your vegetable fried rice more filling, add protein. You can include chopped chicken, shrimp, or tofu. Cook your protein first, then set it aside. Add it back when you mix in the rice. This method keeps everything juicy and tasty. If you want a vegetarian or vegan option, skip the eggs. Use tofu or tempeh instead for protein. You can also add more veggies like zucchini or mushrooms. These options add texture and flavor. Boost the flavor of your fried rice with sauces and spices. Try adding sriracha or chili paste for heat. A splash of rice vinegar adds tang. Experiment with fresh herbs, like cilantro or basil, for a fresh twist. Mixing these flavors will make your dish unique. For the full recipe, check out the link provided. To keep your vegetable fried rice fresh, store it in an airtight container. This prevents moisture loss and keeps it flavorful. Make sure to cool the fried rice before sealing it. This helps avoid condensation, which can make your rice soggy. When you’re ready to enjoy leftovers, reheat the fried rice in a skillet. Add a splash of water or broth to keep it moist. Stir it well over medium heat until it’s hot throughout. You can also microwave it in a bowl, covered with a damp paper towel. This method helps steam the rice without drying it out. If you have extra fried rice, freezing is a great option. Use a freezer-safe container or bag. Divide it into portions to make it easier to thaw later. Label with the date, so you know when to use it. When ready to eat, thaw it in the fridge overnight. Reheat it in a skillet for the best taste. For the full recipe, check out the Colorful Veggie Delight Fried Rice. I recommend using jasmine rice for the best flavor. Jasmine rice has a nice aroma and a soft texture. Day-old rice works best because it is less sticky. This makes it easier to fry without clumping. Freshly cooked rice can be used, but it may be too wet. Rinse your rice before cooking to remove excess starch. This helps create the perfect fried rice. Yes, you can make it without soy sauce. Just skip the soy sauce in the recipe. Instead, you can use coconut aminos or tamari for a soy-free option. These will still give you a nice flavor. You can also add extra spices or herbs to enhance taste. Consider using a splash of lemon juice for brightness. To make Vegetable Fried Rice gluten-free, use gluten-free soy sauce, like tamari. You can also swap soy sauce with coconut aminos. Always check labels to ensure all ingredients are gluten-free. For added flavor, include fresh herbs or citrus zest. Adjust cooking times and methods to fit your preferences and dietary needs. For the complete recipe, check out the Full Recipe. In this article, we explored the essentials of making great vegetable fried rice. We covered key ingredients and helpful tips to ensure perfect texture and flavor. You learned about variations to fit different diets and proper storage to keep leftovers tasty. Remember, great fried rice starts with good ingredients and careful cooking. Enjoy trying out these tips and make your next meal a hit!

Vegetable Fried Rice Tasty One-Pan Meal Idea

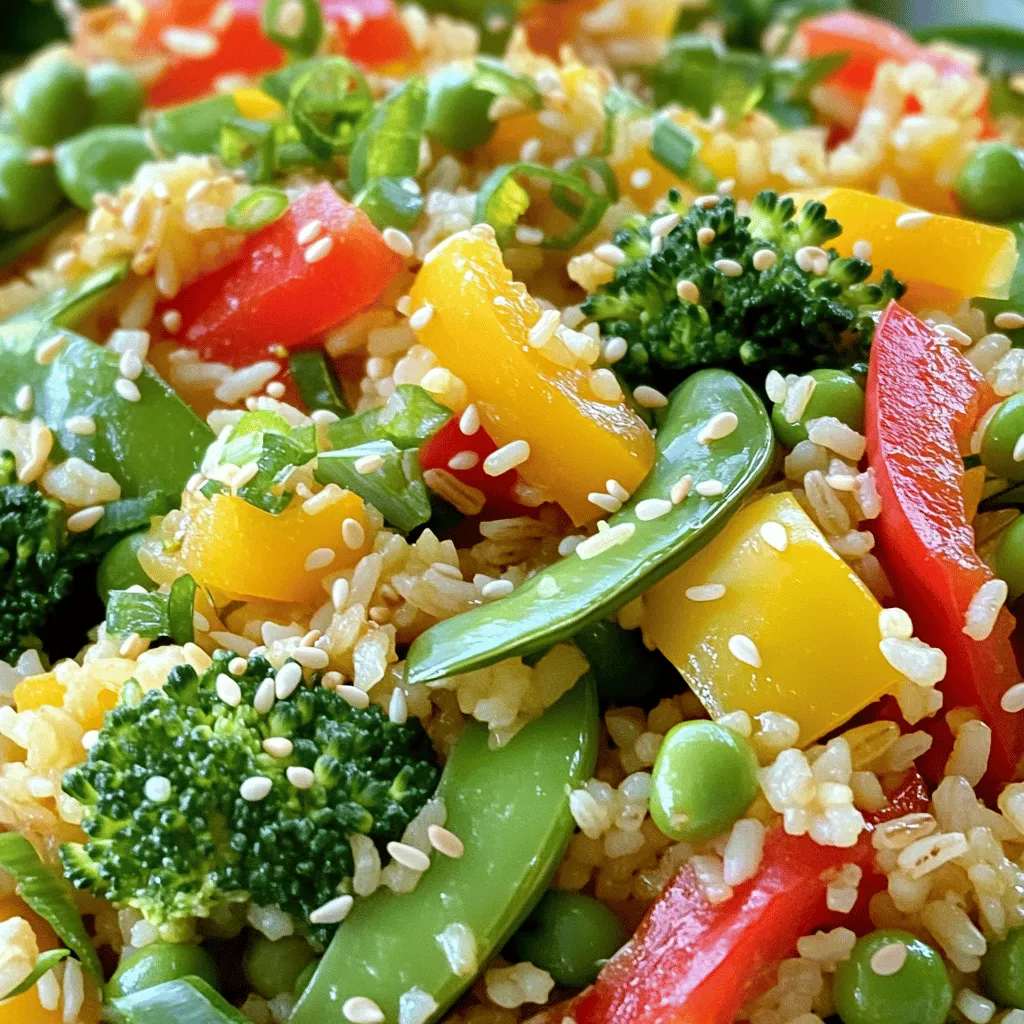
Looking for a quick, tasty meal? You’ve found it! Vegetable Fried Rice is a colorful, one-pan dish that’s easy to

For this recipe, you need simple and fresh ingredients. The main items are: - 1 lb (450g) boneless, skinless chicken breasts, cut into 1-inch cubes - 1/4 cup honey - 1/4 cup Dijon mustard - 2 tablespoons olive oil - 1 tablespoon apple cider vinegar - 2 cloves garlic, minced - 1 teaspoon smoked paprika - Salt and pepper to taste - Wooden or metal skewers (if using wooden skewers, soak in water for 30 minutes) These ingredients come together to create a sweet and tangy flavor that makes the skewers shine. To make your meal complete, consider these extras: - Fresh parsley or cilantro for garnish - Extra honey mustard sauce for dipping These small touches elevate the dish and add color to your plate. Choosing the right ingredients is key to great flavor. Here are some tips: - Chicken: Look for fresh, high-quality chicken. It should be pink and firm. - Honey: Use pure honey for the best taste. Avoid blends or processed honey. - Mustard: Dijon mustard adds a nice bite. Check labels for real ingredients. - Olive Oil: Use extra virgin olive oil for flavor and health benefits. - Garlic: Fresh garlic works best. Avoid pre-minced garlic as it loses flavor. By picking quality ingredients, you enhance the taste of your honey mustard chicken skewers. For the full recipe, check out the detailed instructions above. To start, gather your ingredients. You will need honey, Dijon mustard, olive oil, apple cider vinegar, minced garlic, smoked paprika, salt, and pepper. In a bowl, whisk these together until smooth. This marinade is the key to flavor. It will make your chicken juicy and tasty. Next, cut your chicken into 1-inch cubes. Add these cubes to your marinade. Make sure each piece is well coated. This helps the chicken absorb all those great flavors. Cover the bowl and place it in the fridge. Let it marinate for at least 30 minutes. If you have more time, letting it sit for up to 4 hours is even better. When you are ready to grill, heat your grill or grill pan over medium-high heat. While it warms up, thread the marinated chicken onto the skewers. Leave a little space between each piece. This helps them cook evenly. Once the grill is hot, place the skewers on it. Grill the chicken for about 10-12 minutes. Turn them occasionally until they are golden and cooked through. You want the internal temperature to reach 165°F (75°C). After grilling, let the skewers rest for a couple of minutes before serving. You can find the full recipe in the article for more details. To make the best honey mustard chicken skewers, focus on your marinade. Start with the right ratio of honey and Dijon mustard. I use equal parts, which gives a sweet and tangy flavor. Add olive oil for smoothness and apple cider vinegar for a little zing. You can also mix in minced garlic for extra taste. Let the chicken soak up these flavors for at least 30 minutes. For a richer taste, marinate it for up to 4 hours. This step is key to making your chicken juicy and full of flavor. Grilling chicken skewers at the right temperature is crucial. I recommend preheating your grill to medium-high heat. This helps the chicken cook evenly and get that nice golden brown. If your grill is too hot, the outside may burn while the inside stays raw. If it’s too low, the chicken will dry out. You want it to be hot enough to create grill marks but not so hot that it chars the meat. Aim for around 400°F (204°C) for perfect results. When serving your honey mustard chicken skewers, presentation matters. Place the skewers on a wooden platter for a rustic look. I like to garnish them with fresh parsley or cilantro to add color. Serve with a small bowl of extra honey mustard sauce on the side. This way, guests can dip their skewers, which makes it more fun. Pair these skewers with a fresh salad or grilled veggies for a complete meal. You can find the full recipe for more details on how to make these delicious skewers. {{image_2}} If you want a meatless option, try using tofu or tempeh. Both soak up flavors well. Cut them into cubes like the chicken. Marinate them just as you would the chicken. For a smoky taste, use smoked tofu. Grilling gives it a crispy edge that is so nice. You can also use halloumi cheese. It grills beautifully and has a great taste. While honey mustard is a favorite, you can explore other sauces. Try a tangy barbecue sauce for a sweet and smoky flavor. A spicy sriracha sauce adds a kick that many love. If you prefer a creamy touch, ranch or tzatziki pairs well too. Each sauce brings a new twist to your skewers. You can even mix sauces for a unique flavor blend. Adding veggies to your skewers boosts flavor and nutrition. Bell peppers, zucchini, and cherry tomatoes work great. Cut them into similar sizes for even cooking. Red onion adds sweetness and color. Mushrooms are another excellent choice; they soak up the marinade well. Don't forget to season your veggies just like the chicken. Grilling them gives a nice char and depth of flavor. To store leftover honey mustard chicken skewers, let them cool first. Place them in an airtight container. You can keep them in the fridge for up to three days. If you want, you can cover them tightly with plastic wrap instead. When you're ready to eat the skewers again, you can reheat them easily. Use a microwave for about 1-2 minutes. Check that they are hot throughout. You can also reheat them on a skillet over medium heat for about 5 minutes. This way, they stay juicy and tasty. You can freeze leftover skewers if you won't eat them soon. Wrap each skewer in plastic wrap, then put them in a freezer bag. They can stay fresh for up to three months. When you want to eat them, thaw in the fridge overnight. Then, reheat as mentioned above. For the best flavor, try to eat them within a month. For the full recipe, check the main article. You should marinate the chicken for at least 30 minutes. This helps the meat soak up all the tasty flavors. If you have more time, try marinating for up to 4 hours. The longer it sits, the better it tastes! Yes, you can! Chicken is great, but you can use pork, beef, or shrimp. Just cut them into bite-sized pieces, like the chicken. Adjust the cooking time for each meat. Always check that your meat is cooked through. Grill your chicken skewers over medium-high heat. This gives them a nice brown color and keeps them juicy. Turn them every few minutes to cook evenly. Use a meat thermometer to ensure the chicken reaches 165°F (75°C). Absolutely! You can mix plain Greek yogurt with mustard and a little honey. This gives you a creamy and tangy dip that is lower in sugar. You can also use mustard with a splash of lemon juice for a fresh taste. You can find pre-made honey mustard chicken skewers at many grocery stores. They often sell them in the deli or frozen section. Check local farmers' markets or specialty food shops for fresh options, too. If you want to try making them at home, check out the Full Recipe for easy steps! In this blog post, we explored how to make honey mustard chicken skewers from start to finish. We discussed the key ingredients, detailed step-by-step instructions, and offered tips for grilling. We shared variations for vegetarian options and different sauces, as well as storage tips for leftovers. Making these skewers can be fun and tasty. They'll impress your friends at any gathering. Try out these ideas, and enjoy your cooking adventures!

Honey Mustard Chicken Skewers Flavorful Grilling Delight

Fire up your grill; it’s time for a tasty treat! Honey Mustard Chicken Skewers bring bold flavors to your summer

- Chicken breast - Coconut milk - Aromatic vegetables Coconut curry chicken starts with fresh, tender chicken breast. Cut it into small, bite-sized pieces. This helps it cook evenly and soak up the flavors. Next, you need creamy coconut milk. It adds richness and a hint of sweetness. Finally, aromatic vegetables like onion, garlic, and ginger create a fragrant base for the dish. - Curry powder and turmeric - Garlic and ginger - Fish sauce and lime juice To bring depth to your coconut curry chicken, use curry powder and turmeric. These spices add warmth and color. Garlic and ginger are key for a bright flavor. They help your dish sing! For umami notes, consider fish sauce. A squeeze of lime juice adds a fresh burst. These flavors work together to create a balanced and delicious meal. - Fresh cilantro - Optional vegetables (bell pepper, spinach) Garnish your curry with fresh cilantro. It adds a pop of color and taste. You can also add optional vegetables like bell pepper and spinach. They not only enhance the dish’s look but also boost its nutrition. With these ingredients, your coconut curry chicken will be both tasty and pleasing to the eye. For the full recipe, check out the provided link. First, chop the chicken breast into small pieces. This helps it cook evenly. You can marinate the chicken in a little salt and pepper for extra flavor. Next, finely chop the onion. Mince the garlic and grate the ginger. These three create a strong and tasty base for your curry. In a large saucepan, heat the coconut oil over medium heat. Add the chopped onion and sauté until it turns translucent. This should take about 3-4 minutes. Now, stir in the minced garlic and grated ginger. Cook for another minute until it smells great. Now, add the chicken pieces to the pan. Sear the chicken until it is lightly browned on the edges. This takes about 5-7 minutes. Sprinkle in the curry powder and turmeric, stirring well to coat the chicken. Cook for another minute to toast the spices. Pour in the coconut milk and mix everything together. Bring the mixture to a gentle simmer. This is when the magic happens! Add the sliced bell pepper and cook for an additional 8-10 minutes. The chicken should be fully cooked, and the flavors will meld together. Once the chicken is cooked, fold in the spinach leaves. Let them wilt for about 1-2 minutes. If you want more depth, add fish sauce and lime juice at this point. Taste it and adjust seasoning with salt and pepper as needed. When done, remove from heat. Serve hot, and don’t forget to garnish with fresh cilantro. This adds a nice pop of color and fresh flavor. You now have a delicious Coconut Curry Chicken ready to enjoy! For a complete journey of this dish, check the Full Recipe. To make your coconut curry chicken shine, balance the spices and acidity. The warmth of curry powder and turmeric needs a bright note. Lime juice does this beautifully. A dash of fish sauce adds depth too. Toasting spices is key. It brings out their natural oils and heightens their taste. Heat the spices in oil for a minute. You’ll notice the aroma change. This step makes a big difference in flavor. Cooking chicken well is essential for tender bites. Start by searing in hot oil until lightly browned. This locks in juices and adds flavor. After searing, reduce the heat to simmer. This gentle cooking allows all the flavors to meld together. Keep the lid on to trap steam. It cooks the chicken evenly and makes it tender. Garnishing elevates your dish. Fresh cilantro adds color and flavor. Scatter it on top right before serving. You can also add lime wedges for a bright touch. Serve your curry with rice or bread. They soak up the sauce and complete the meal. A little extra coconut milk drizzled on top looks lovely too. For more ideas, check out the Full Recipe. {{image_2}} You can easily make this dish vegetarian. Just swap the chicken for vegetables. - Substitutions for chicken: Try using cauliflower, bell peppers, or zucchini. These veggies add great texture. - Using legumes or tofu: Chickpeas or firm tofu work well. They soak up the curry flavors nicely. Coconut curry is almost always gluten-free. Just watch for a few key ingredients. - Ingredients to avoid: Some sauces can have gluten. Check labels on fish sauce or broth. - Alternative thickening methods: Use cornstarch or arrowroot powder to thicken the curry. Mix it with water before adding to the pot. You can change the taste of your curry by adding different ingredients. - Adding sweetness with fruits: Pineapple or mango can add a sweet twist. Just chop them and toss them in. - Incorporating other cuisines: Try adding soy sauce for an Asian twist or lime zest for a fresh kick. Experiment with these ideas to find your favorite version of coconut curry chicken. For the full recipe, check out the main article. To store your coconut curry chicken, let it cool first. Once cooled, place it in an airtight container. This keeps it fresh. Store it in the fridge for up to three days. Make sure to label your container with the date. If you want to keep it longer, freeze it. Use a freezer-safe container or a heavy-duty freezer bag. Remove as much air as you can before sealing. You can freeze it for up to three months. When you’re ready to enjoy it again, just thaw it in the fridge overnight. Reheating coconut curry chicken is simple. You can use a stovetop, microwave, or oven. If using the stovetop, heat it on low. Stir often to keep it from sticking. Add a splash of coconut milk or water to keep it creamy. For the microwave, place it in a microwave-safe dish. Cover it with a lid or microwave-safe wrap. Heat in short bursts, stirring in between until it's warm. If you choose the oven, preheat it to 350°F (175°C). Place the curry in an oven-safe dish. Cover it with foil to keep moisture in. Bake for about 15-20 minutes, or until heated through. When serving reheated curry, add fresh cilantro on top. This boosts the flavor and looks great. Pair it with rice or naan for a complete meal. For the full recipe, see the beginning of the article. To make your Coconut Curry Chicken spicier, add fresh chilies or hot sauce. You can use red or green chilies, depending on your heat preference. Chop them finely and stir them in while cooking. If you prefer hot sauce, add it to taste after you mix in the coconut milk. This boosts the heat without changing the dish's flavor. Adjust the spice level based on your taste. Coconut Curry Chicken pairs well with several side dishes. Here are some tasty options: - Steamed jasmine rice - Fluffy basmati rice - Warm naan bread - Quinoa for a healthy twist - A fresh cucumber salad These sides enhance the meal and balance the rich flavors of the curry. Yes, you can make Coconut Curry Chicken in advance! Meal prepping is easy with this recipe. Cook the curry as directed and let it cool. Store it in an airtight container in the fridge for up to three days. You can also freeze it for up to two months. When you're ready to eat, simply reheat on the stove. Add a little water if needed to keep it moist. Coconut curry chicken offers great taste and easy steps. We covered essential ingredients, spices, and cooking methods. Remember, balancing flavors is key. Use fresh veggies and enjoy garnishes for a tasty touch. Try variations like vegetarian or gluten-free options for a twist. Store your leftovers properly for future meals. With these tips, you can make a dish that everyone loves. I hope you feel ready to create this delicious meal at home. Happy cooking!

Coconut Curry Chicken Flavorful and Simple Recipe

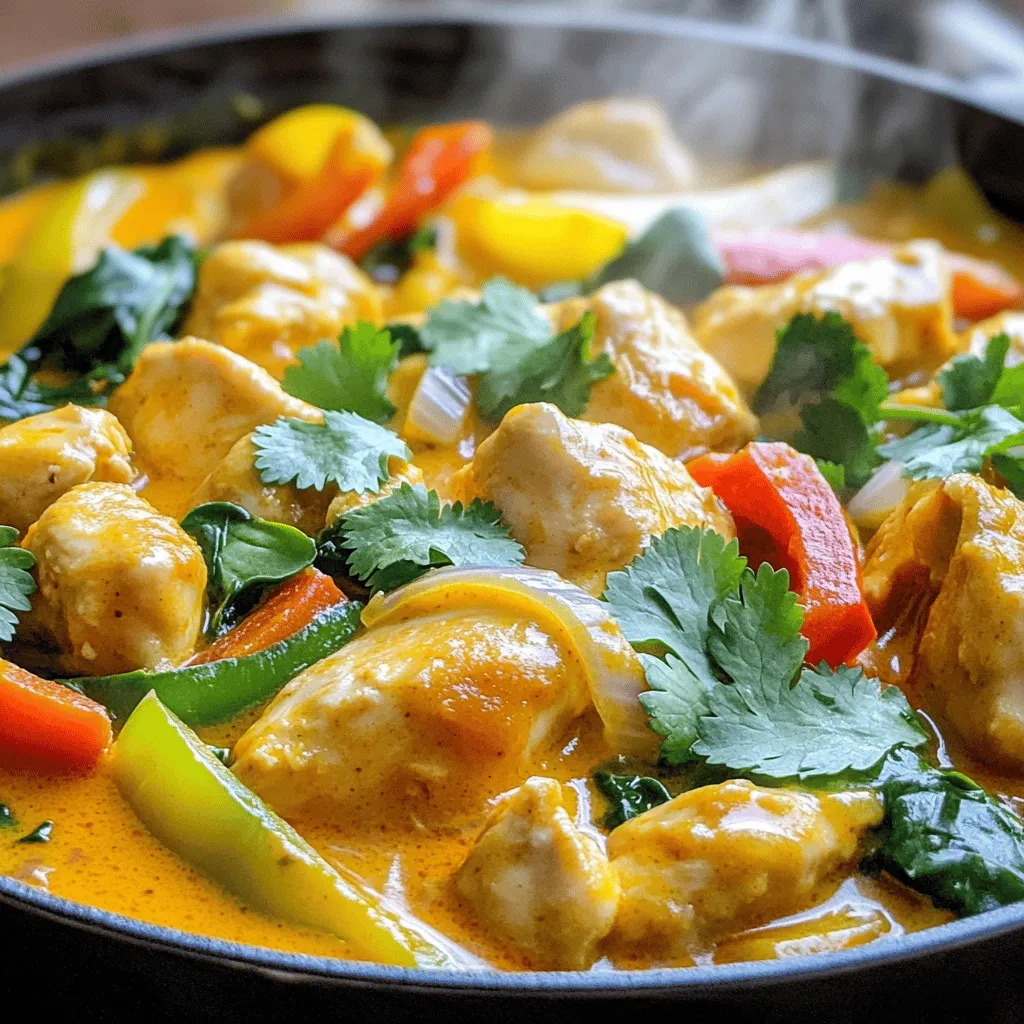
Are you ready to spice up your dinner routine? This Coconut Curry Chicken recipe is packed with flavor and super

To make Buffalo Cauliflower Bites, gather these simple ingredients: - 1 large head of cauliflower, cut into bite-sized florets - 1 cup all-purpose flour (or gluten-free flour) - 1 cup water - Seasonings: garlic powder, onion powder, smoked paprika, salt, black pepper - 1 cup buffalo sauce - 2 tablespoons olive oil - Serving accompaniments: celery sticks, ranch dressing When selecting your cauliflower, choose one that feels heavy for its size. Look for tight, white florets without brown spots. Fresh cauliflower gives the best taste and texture. For the flour, you can go with all-purpose or a gluten-free option based on your needs. The flour helps create a crispy coating. The seasonings are key. Garlic powder adds depth, while smoked paprika brings a rich, smoky flavor. Adjust the salt and pepper to match your taste. Buffalo sauce is where the magic happens. Pick a brand that you love. It can range from mild to super spicy. Finally, serve these bites with fresh celery sticks and ranch dressing for dipping. The coolness of the ranch balances the heat from the buffalo sauce. If you want to see how to combine these ingredients into a delightful snack, check out the Full Recipe. 1. Preheat your oven to 450°F (230°C). Line a baking sheet with parchment paper. 2. In a large bowl, whisk together: - 1 cup all-purpose flour (or gluten-free flour) - 1 cup water - 1 teaspoon garlic powder - 1 teaspoon onion powder - 1 teaspoon smoked paprika - 1/2 teaspoon salt - 1/4 teaspoon black pepper 3. Dip each cauliflower floret into the batter. Make sure each piece is fully coated. Place them on the baking sheet in a single layer. 4. Bake the cauliflower for 20 minutes. Flip the florets halfway through. They should turn golden brown and crispy. 5. While the cauliflower bakes, mix 1 cup of buffalo sauce with 2 tablespoons of olive oil in a separate bowl. 6. Once the cauliflower is done, remove it from the oven. Drizzle or toss the florets in the buffalo sauce mixture until well coated. 7. Return the cauliflower to the oven. Bake for another 10-15 minutes. Watch for the sauce to bubble and caramelize. 8. Let the cauliflower cool slightly before serving. These bites are best enjoyed warm! For a detailed recipe, check out the Full Recipe. Enjoy your tasty buffalo cauliflower bites! To get that perfect crunch, coat your cauliflower evenly with batter. This step is key. If you leave some parts dry, they won’t crisp up well. I like to dip each floret fully, ensuring every bite is tasty. Baking at the right temperature is also important. Preheat your oven to 450°F (230°C). This high heat helps the batter get crispy while the inside cooks perfectly. Keep an eye on them, and flip halfway for even cooking. Choosing the right buffalo sauce makes a big difference. I love using a bold, spicy sauce that packs flavor. Brands vary, so find one that suits your taste. You can even mix sauces for a unique twist. To enhance flavor, consider adding a splash of vinegar or a sprinkle of cayenne. These extras can bring out the heat and make your bites even more exciting. You don’t need fancy tools for this recipe. A large mixing bowl and whisk will do the trick for the batter. A baking sheet is essential, too. Using parchment paper is very important. It prevents sticking and makes cleanup easier. Plus, your bites will come out perfectly crisp without sticking to the pan. {{image_2}} If you need gluten-free options, you can swap all-purpose flour for gluten-free flour. I like using almond flour or chickpea flour. These flours add a nice nutty flavor. They also keep the bites crispy. Just follow the same steps in the Full Recipe. You can add spices to the batter for an extra kick. Try adding cayenne pepper for heat or smoked paprika for depth. You can also experiment with garlic powder or onion powder. Each spice brings its own twist. When it comes to sauces, buffalo sauce is classic. You can try honey mustard for sweetness. BBQ sauce also works well if you prefer a tangy taste. Don't be afraid to mix and match! For dipping sauces, ranch dressing is a favorite. You can also serve blue cheese dressing for a bold flavor. If you want something lighter, yogurt dip is a great choice. Pair the buffalo cauliflower bites with other appetizers. They go well with veggie platters or hummus. You can also serve them with pita chips or nachos for a fun spread. To keep your buffalo cauliflower bites fresh, store them in an airtight container. Place parchment paper between layers to prevent sticking. You can keep them in the fridge for up to three days. The sooner you eat them, the better they taste. To enjoy your bites again, reheat them in the oven at 350°F (175°C). This method helps keep them crispy. Avoid using the microwave, as it makes them soggy. Heat for about 10-15 minutes or until warmed through. Yes, you can freeze buffalo cauliflower bites! First, let them cool completely. Then, place them in a single layer on a baking sheet and freeze for two hours. After that, transfer them to a freezer-safe bag. They can last for up to three months. To reheat, bake from frozen at 400°F (200°C) for about 20-25 minutes until hot and crispy. Enjoy your snack whenever you want! For the full recipe, check the earlier section. Buffalo Cauliflower Bites are tasty snacks made from cauliflower. They have a crispy outside and a soft inside. This dish gets its flavor from buffalo sauce, which adds a spicy kick. I love how they can please both veggie lovers and meat-eaters alike. They are perfect for game day or as a fun appetizer. Plus, they are healthier than traditional buffalo wings. You still get that bold flavor but with fewer calories. If you want the full recipe, check out the earlier section. The heat level of Buffalo Cauliflower Bites can vary. It depends on the buffalo sauce you choose. Most store-bought sauces have a moderate spice level. If you want less heat, pick a milder sauce. You can also mix in some honey or butter to tone it down. For those who enjoy spice, use a hotter sauce or add extra hot sauce to the mix. Adjust it to your taste for the best experience. Yes, you can make Buffalo Cauliflower Bites ahead of time. You can prep the cauliflower and coat it in the batter. Then, store it in the fridge for a few hours before baking. If you want to bake them later, just keep them covered. Once baked, let them cool down before storing them in an airtight container. You can reheat them in the oven for a crispy texture. Just don’t microwave them, as that can make them soggy. Buffalo cauliflower bites offer a tasty, healthy twist on classic buffalo wings. This guide detailed the ingredients, preparation steps, baking instructions, and tips to create the crispiest bites. We explored ways to customize flavors and serve them with fun dips. Proper storage and reheating methods keep leftovers fresh and delicious. Enjoy experimenting with variations and sharing these bites with friends. They are sure to be a crowd-pleaser!

Buffalo Cauliflower Bites Flavorful Healthy Snack

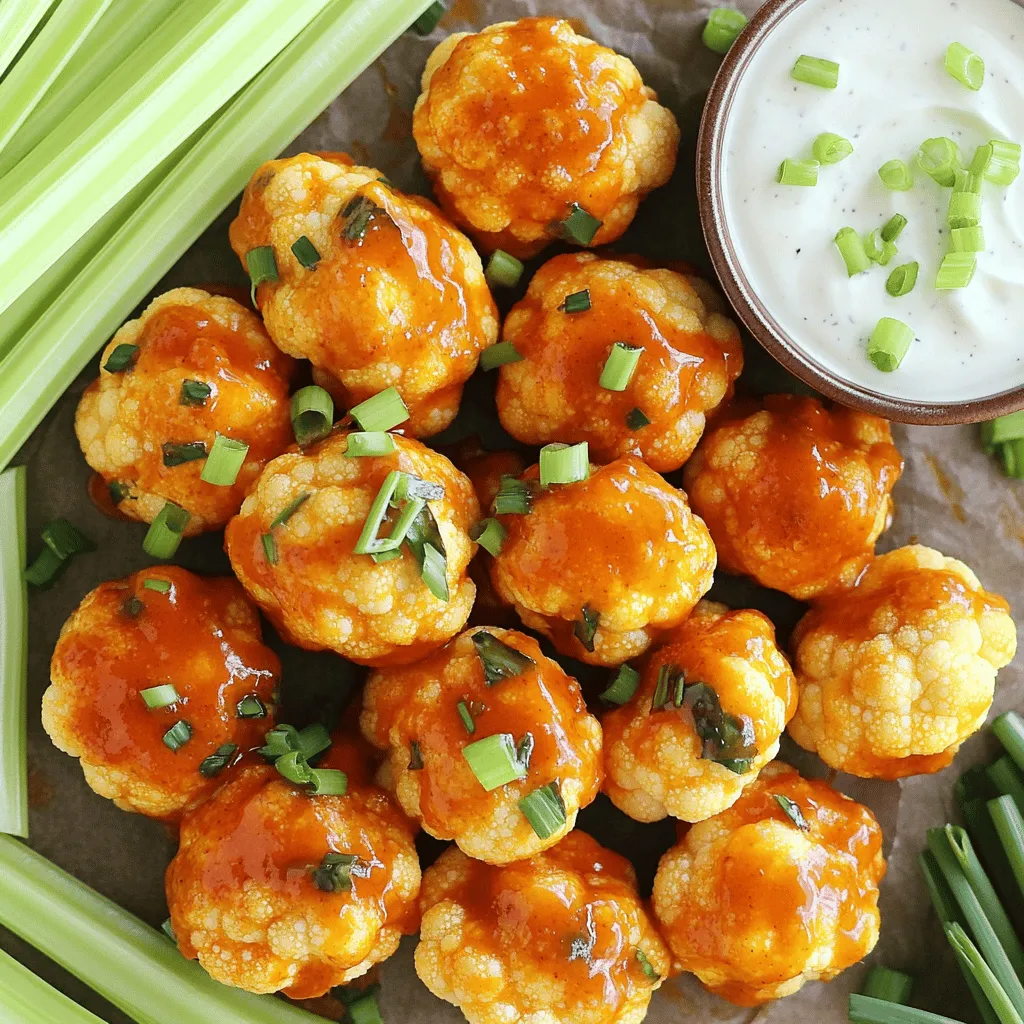
If you crave a snack that’s both tasty and healthy, Buffalo Cauliflower Bites are for you! These spicy, crunchy bites

Older posts
Newer posts
← Previous Page1 … Page39 Page40 Page41 … Page48 Next →

dsad

© 2025 savoryspiral • Built with GeneratePress

Our Policies

  • Copyright Policy
  • Cookie Policy
  • GDPR Policy
  • Privacy Policy
  • Disclaimer
  • Terms Of Use

More Information

  • Home
  • About
  • Contact
  • Appetizers
  • Dessert
  • Dinner
  • Drinks
©2025, savoryspiral About Back To Top