Skip to content
DisclaimerTerms Of UseGDPR PolicyCookie Policy

savoryspiral

  • Home
  • Drinks
  • Appetizers
  • Dinner
  • Dessert
  • About
  • Contact
  • Privacy Policy
DisclaimerTerms Of UseGDPR PolicyCookie Policy

Charlotte

- 1 cup rolled oats - 2 cups vegetable broth (or water) - 1 tablespoon olive oil The foundation of this dish is simple yet satisfying. I prefer rolled oats for their texture and heartiness. They cook up creamy and absorb flavors well. Using vegetable broth adds depth to the taste. If you’re in a pinch, water works just fine. A touch of olive oil adds richness. - 1 small onion, diced - 2 cloves garlic, minced - 1 cup fresh spinach, chopped - 1 medium tomato, diced - 1 teaspoon paprika - 1/2 teaspoon cumin To elevate your oatmeal, I love adding fresh veggies. Onions and garlic bring a savory base. Spinach adds color and nutrients, while tomatoes offer juiciness. Seasoning with paprika and cumin gives a warm, earthy flavor. Feel free to adjust these spices to suit your taste. - Crumbled feta cheese - Fresh herbs like parsley or cilantro Garnishes can take this dish to the next level. Crumbled feta adds a creamy, salty kick. Fresh herbs brighten the dish and add freshness. You can skip these if you want a lighter meal. However, I find they make every bite more special. For the full recipe, refer to the earlier section. 1. Start by boiling the vegetable broth in a medium saucepan over medium heat. It should take about 5 minutes. 2. Once it reaches a boil, add 1 cup of rolled oats. Lower the heat to let it simmer. Cook for about 5 to 7 minutes. The oats should be tender. Stir occasionally to prevent sticking. 1. In a separate skillet, heat 1 tablespoon of olive oil over medium heat. 2. Add 1 small diced onion. Sauté it until it becomes translucent, which takes about 3 minutes. 3. Next, add 2 cloves of minced garlic. Cook for 1 more minute until fragrant. 4. Toss in 1 cup of chopped spinach and 1 medium diced tomato. Cook for 3 to 4 minutes. You want the spinach to wilt and the tomato to soften. 1. Now, gently fold the cooked oatmeal into the sautéed vegetables. 2. Mix everything well until it’s heated through. 3. Use a spoon to create two small wells in the mixture. This is where you’ll crack the eggs. 1. Crack 2 large eggs into the wells you made. 2. Cover the skillet with a lid. This helps the eggs cook evenly. 3. Cook for about 4 to 5 minutes. This timing gives you runny yolks. If you want firmer yolks, cook longer. This dish is not just tasty; it is also a great start to your day. For the full recipe, check the detailed instructions earlier. To get great savory oatmeal, start with the right oats. I prefer rolled oats for their texture and flavor. They cook up creamy and hold their shape well. Steel-cut oats also work, but they take longer to cook. Using broth instead of water adds depth. Aim for a rich vegetable broth for the best taste. This will make your oatmeal feel hearty and satisfying. Adjust the amount of broth for a thicker or thinner oatmeal. Enhancing flavor is key to a great dish. I love adding spices like paprika and cumin. These spices bring warmth and a little earthiness. Fresh herbs like parsley or cilantro can brighten up the dish. You can also add extra nutrition with ingredients like avocado or nuts. These add creaminess and crunch, making the dish more exciting. Consider a sprinkle of chili flakes for a kick. How you serve your savory oatmeal matters. Use a deep bowl to help show off the layers. Highlight the eggs by placing them right on top. For a final touch, drizzle a bit of olive oil. This adds shine and richness. A sprinkle of chili flakes not only looks great but also adds flavor. For the full recipe, check out the Savory Oatmeal Surprise with Egg. {{image_2}} You can easily change this dish. Use different greens like kale or arugula. Both add unique flavors and nutrition. Try using avocado slices for creaminess. Nuts like walnuts or almonds bring crunch and healthy fats. Experiment with these swaps to make it your own. Want to switch things up? Go for a Western-style dish. Add cheese and crispy bacon for a rich taste. For something different, try an Asian twist. Soy sauce or sesame oil can deepen the flavor. Both options keep the dish exciting and fun. You can also change the eggs. Scrambled or poached eggs work great in this dish. They add a nice texture and protein boost. If you're looking for a plant-based option, try tofu. Chicken is another good choice for extra protein. Each option brings its own flair to savory oatmeal. To store your savory oatmeal with egg, let it cool first. Transfer the leftovers to an airtight container. This helps keep the dish fresh. You can use glass or BPA-free plastic containers. Make sure the lid seals tightly to prevent any air from getting in. Store it in the fridge for up to three days. When it's time to eat, you can easily reheat your oatmeal. The best method is to use a microwave. Place your oatmeal in a bowl and cover it with a damp paper towel. Heat it for one to two minutes on high. If you prefer, you can also reheat it on the stove. Just add a splash of water or broth. This helps keep the texture creamy. Stir often to prevent it from sticking to the pan. Enjoy your flavorful dish again! For the complete recipe, check out the Full Recipe section. Savory oatmeal stays fresh for about 3 to 5 days in the fridge. Store it in an airtight container. Always let it cool before sealing the container. Check for any off smells or changes in texture before eating. If you notice anything odd, it’s best to toss it out. Yes! You can prepare savory oatmeal ahead of time. Cook the oatmeal and let it cool. Place it in an airtight container and refrigerate. For best results, reheat only what you plan to eat. You can also freeze it for up to a month. Just thaw it in the fridge overnight before reheating. To make savory oatmeal more filling, consider adding protein and fiber-rich foods. Some great options are: - Cooked beans or lentils - Chopped nuts or seeds - Cooked chicken or turkey - Sautéed mushrooms or zucchini These additions boost nutrition and keep you satisfied longer. You can adjust the consistency of your savory oatmeal by changing the liquid-to-oat ratio. If you like it creamier, add more broth or water. For thicker oatmeal, use less liquid. Start with 2 cups of broth for 1 cup of oats. You can always add more liquid while cooking if needed. Savory oatmeal with egg is a great dish to make. We explored its essential ingredients, including rolled oats, vegetable broth, olive oil, and fresh add-ins like onion and spinach. I outlined simple steps to prepare this meal and included tips for texture and flavor. Finally, remember that oatmeal is highly customizable. Change up the ingredients based on your taste. Store any leftovers properly for later enjoyment. Use these ideas to make your meals healthy and delicious. Enjoy every bite!

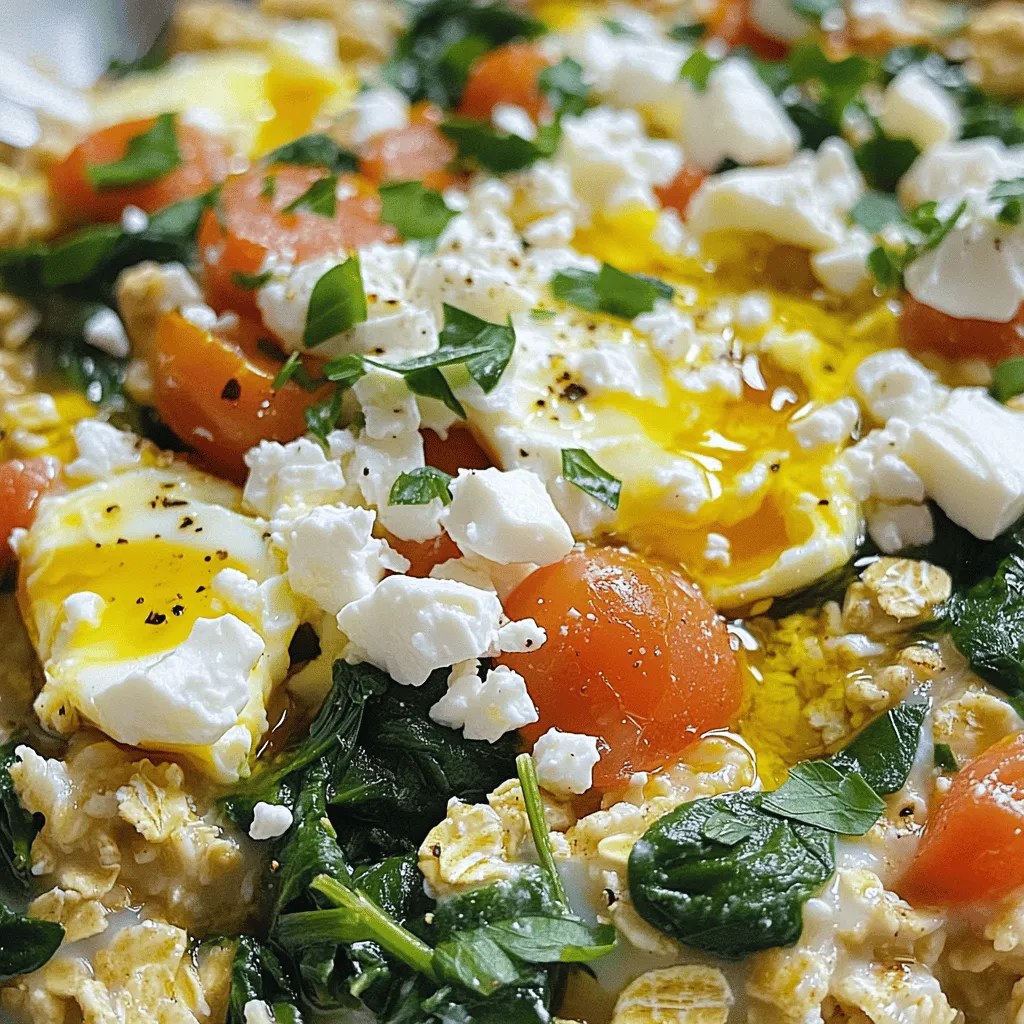
Savory Oatmeal with Egg Flavor-Packed Breakfast Dish

Start your day right with a bowl of savory oatmeal topped with a perfectly cooked egg. This flavor-packed breakfast dish

To make tasty Caprese salad skewers, you need fresh ingredients. Here’s what you need: - 1 cup cherry tomatoes, halved - 1 cup fresh mozzarella balls, drained - 1 cup fresh basil leaves - Skewers (6-inch or 12-inch) These main ingredients create a colorful and flavorful dish. The sweet tomatoes pair well with the creamy mozzarella and fragrant basil. For a fun twist, consider adding these ingredients: - 1/4 cup balsamic glaze - 1/4 cup extra virgin olive oil - Salt and freshly cracked black pepper to taste - 1 tablespoon chopped pistachios for garnish These extras elevate the flavor. The balsamic glaze adds sweetness, while the olive oil gives richness. The pistachios add a nice crunch too. You can enhance your skewers with simple dressings. Here are my favorites: - A mix of balsamic glaze and olive oil - A sprinkle of salt and pepper Drizzling this mix over your skewers brings all the flavors together. You can use the Full Recipe for guidance on the exact amounts. Enjoy experimenting with these ingredients! Start by getting your skewers ready. If you use wooden skewers, soak them in water for 15 minutes. This step helps stop them from burning. If you use metal skewers, you can skip this soaking step. Make sure your skewers are clean and dry for the best results. Now, let’s put the skewers together. Grab a skewer and slide on a cherry tomato half. Next, add a fresh basil leaf. After that, thread on a mozzarella ball. Repeat this process until your skewer looks colorful. You can fit 4-5 sets on each skewer. This mix of colors makes the dish look great! Once all your skewers are assembled, it’s time to drizzle. Pour the dressing made from balsamic glaze, olive oil, salt, and pepper over the skewers. This adds flavor and shine. If you want a little crunch, sprinkle chopped pistachios on top. Let the skewers sit for 10-15 minutes. This helps the flavors mix well. Serve on a nice platter for friends and family to enjoy! Check out the Full Recipe for more details. When making Caprese salad skewers, fresh ingredients are key. Choose bright red cherry tomatoes. They should feel firm and have smooth skins. Look for fresh mozzarella balls that are soft and moist. If you can find them in water, even better! Fresh basil leaves should be vibrant green and free of brown spots. When you pick your ingredients, trust your senses. Smell them and feel their texture. Assembling skewers is fun and easy. Start with a cherry tomato half. Slide it onto the skewer first. Next, add a basil leaf, then a mozzarella ball. This order keeps the flavors balanced. Repeat this process until the skewer is full. You can fit four to five sets on each skewer. Make sure to leave some space at the ends for easy handling. This method not only looks good but also tastes great. Presentation matters for these skewers. Arrange them in a circle or a straight line on a platter. Drizzle balsamic glaze over the top for a shiny finish. If you want a crunch, sprinkle chopped pistachios on them. This adds texture and flavor. Let the skewers sit for a bit before serving. This allows the flavors to blend. For a stunning display, serve them with extra basil and tomatoes around the platter. You can find the full recipe in the link above. {{image_2}} You can change the flavors of your Caprese salad skewers easily. Try using heirloom tomatoes instead of cherry tomatoes. They add color and taste. For cheese, consider goat cheese or feta. Both bring a tangy twist. You can also add olives or artichoke hearts for extra flavor. These simple swaps can make your skewers unique. Caprese salad skewers work for everyone! For a vegan option, swap mozzarella for vegan cheese. You can make cashew cheese at home too. Just soak cashews and blend with lemon juice, garlic, and herbs. You can also use marinated tofu cubes for a protein boost. This keeps the dish vibrant and tasty for all diets. Seasonal ingredients can make your skewers shine. In summer, use ripe peaches or nectarines for a sweet touch. In fall, try roasted butternut squash cubes. These add warmth and depth to your skewers. You can even use fresh herbs like mint or dill instead of basil. This makes the dish fresh and fun all year round. For the full recipe, check out the detailed steps above. After enjoying your delicious Caprese salad skewers, you may have leftovers. To keep them fresh, place the skewers in an airtight container. If you have a lot, you can separate them with parchment paper to avoid sticking. Store them in the fridge. They will stay good for about two days. Reheating these skewers can be tricky. I recommend eating them cold or at room temperature. If you really want to warm them up, do it gently. Use a microwave for about 10 seconds. Watch closely so they don’t overheat. Too much heat makes the cheese rubbery and the tomatoes mushy. Meal prep is a great way to enjoy Caprese skewers all week. Prepare the ingredients ahead of time. Keep the tomatoes, mozzarella, and basil separate. Assemble the skewers just before you eat. This way, they stay fresh and tasty. Add the dressing just before serving to prevent sogginess. You can find the full recipe for more details on how to make them. To keep your Caprese salad skewers fresh, store them in the fridge. Use an airtight container. You should keep them away from strong odors. They will stay fresh for up to two days. If you want to prevent sogginess, add the balsamic glaze just before serving. Yes, you can make Caprese salad skewers ahead of time. Assemble them a few hours before your meal. Store them in the fridge to keep them fresh. Just remember to add the dressing later. This will help keep the flavors bright and the ingredients crisp. Caprese salad skewers are healthy and tasty. They are low in calories and rich in nutrients. Cherry tomatoes are full of vitamins A and C. Mozzarella cheese provides protein and calcium. Fresh basil adds antioxidants and flavor. The olive oil offers healthy fats, which are good for your heart. Enjoy these skewers as a light snack or a side dish to boost your meal. For the full recipe, check out the details above! Caprese salad skewers are simple and fun to make. We covered key ingredients, from fresh tomatoes to mozzarella. I shared steps for assembly and tips for choosing the best produce. You can try variations for fun flavors or adapt the recipe to fit your diet. Remember to store leftovers properly to keep them fresh. Keep these tips in mind, and you’ll impress everyone. Enjoy making and sharing your skewers!

Caprese Salad Skewers Flavorful and Easy Recipe

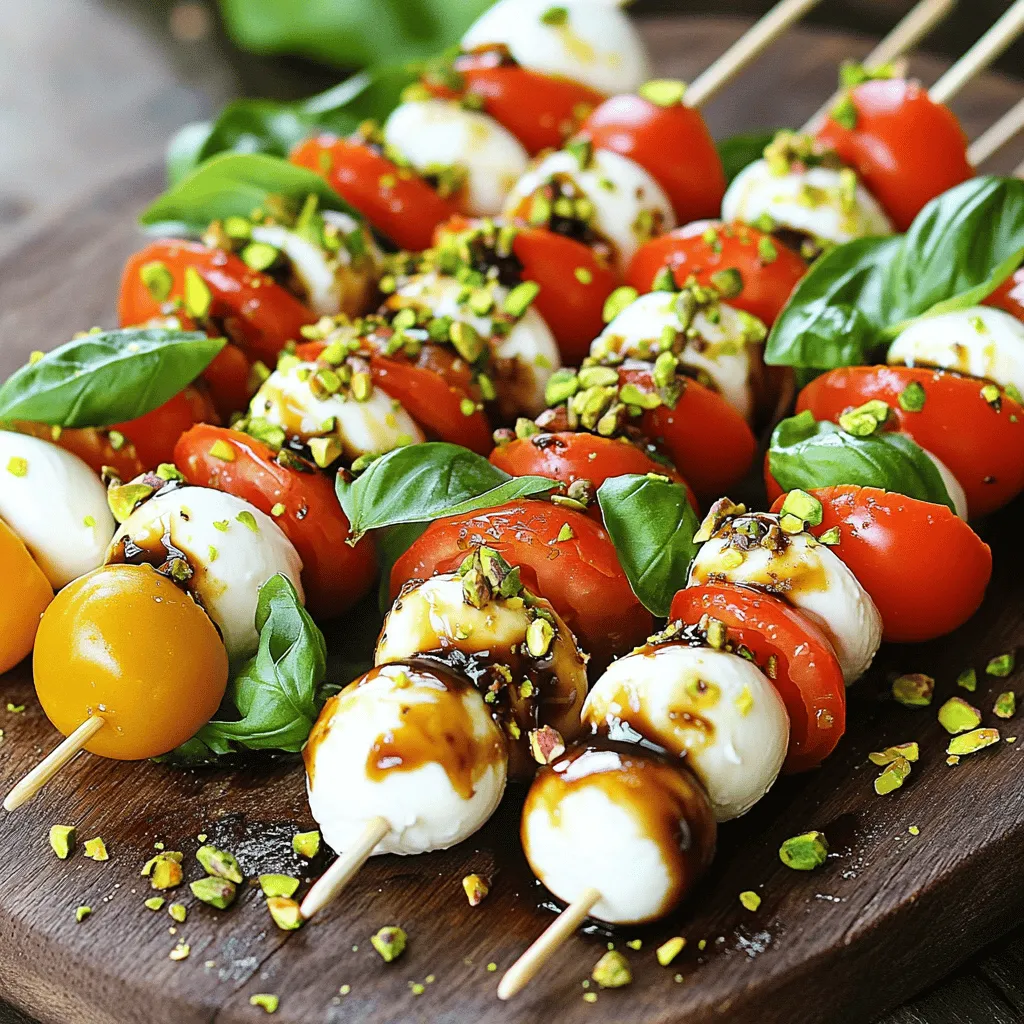
Looking for a fresh and fun appetizer that’s packed with flavor? You’ve come to the right place! My Caprese Salad

To make tasty pesto zoodles, you need fresh and simple ingredients. Here is what you will need: - 4 medium zucchinis, spiralized - 1 cup fresh basil leaves - 1/2 cup pine nuts (toasted) - 1/2 cup grated Parmesan cheese - 2 cloves garlic - 1/3 cup extra virgin olive oil - Juice of 1 lemon - Salt and pepper to taste - Cherry tomatoes, halved (for garnish) - Additional basil leaves for garnish These ingredients work together to create a fresh and flavorful dish. The zucchinis act like pasta but are much healthier. The pesto adds a zesty kick that makes it fun to eat. You can boost the taste of your zoodles with a few add-ins. Try these options: - Grilled chicken or shrimp for protein - Red pepper flakes for heat - Sun-dried tomatoes for sweetness - Spinach or arugula for extra greens These add-ins make the dish more exciting and filling. You can mix and match based on what you like or have at home. Pesto zoodles are not just tasty; they are also good for you. Here’s a quick look at their nutritional benefits: - Low in calories - High in vitamins A and C from zucchinis - Healthy fats from olive oil and pine nuts - Good source of calcium from Parmesan cheese This dish is perfect for those who want to eat well without sacrificing flavor. You can enjoy a gourmet meal while staying on track with your health goals. For the full recipe, check out the [Full Recipe]. To make pesto, gather your ingredients. You need fresh basil, toasted pine nuts, grated Parmesan cheese, and garlic. Place these in a food processor. Pulse the mix until it is finely chopped. With the processor running, slowly add extra virgin olive oil. This will help create a smooth sauce. Once blended, add lemon juice, salt, and pepper. Pulse again to combine. Taste and adjust the seasoning if needed. Next, let’s prepare the zoodles. Take your zucchinis and wash them well. Using a spiralizer, turn the zucchinis into long noodles. If you don’t have a spiralizer, a vegetable peeler works too. Just slice thin strips along the zucchini. Aim for even, thin noodles for best results. Once done, set the zoodles aside. Now it’s time to combine everything. In a large bowl, add the spiralized zoodles. Pour the fresh pesto over the zoodles. Use tongs or a spatula to toss gently. Make sure all the zoodles are coated with pesto. For a warm dish, you can sauté the zoodles in a pan for a few minutes. Keep them al dente to avoid sogginess. Serve the zoodles on plates and garnish with cherry tomatoes and extra basil leaves. Enjoy your fresh and flavorful dish! For the full recipe, check out the details above. To get the right pesto texture, you can tweak the olive oil. If your pesto is too thick, add a little more oil. If it’s too thin, add more nuts or cheese. This gives you control over how creamy or thick you want it. When cooking zoodles, aim for a quick sauté. Heat them for just 2-3 minutes. This keeps them crunchy and fresh. Overcooking makes them mushy, which is not what you want. If you prefer raw zoodles, skip cooking and enjoy them fresh. Pesto zoodles pair well with many flavors. Try adding cherry tomatoes for sweetness. You can also add grilled chicken for protein or olives for saltiness. If you like heat, sprinkle some red pepper flakes. Each option adds a unique twist to your dish. For more details, check out the Full Recipe. {{image_2}} You can switch up the greens in your pesto. Try arugula for a peppery taste. Spinach gives a mild flavor and bright color. Kale adds a hearty bite and extra nutrients. Each green brings a unique twist to your dish. Want to make your Pesto Zoodles more filling? Add chicken, shrimp, or chickpeas. Grilled chicken slices work great. Cooked shrimp adds a nice touch. For a plant-based option, toss in roasted chickpeas. These additions boost protein and taste. If you are looking for low-carb options, zoodles are perfect. You can also use spaghetti squash for a similar texture. Cauliflower rice is another great choice. It keeps the dish gluten-free and packed with flavor. Enjoy these alternatives to fit your diet needs! After you make Pesto Zoodles, you may have some leftovers. To store them, put the zoodles and pesto in a sealed container. Keep them in the fridge. Use them within two days for the best taste. Avoid mixing the pesto with the zoodles if you want them to stay fresh longer. If you want to save your pesto, it freezes well. Pour it into an ice cube tray. Once frozen, transfer the cubes into a freezer bag. This way, you can use small amounts later. For zoodles, freezing is not ideal. They become watery when thawed. It's best to eat them fresh. To reheat Pesto Zoodles, use a pan over medium heat. Add a splash of olive oil to prevent sticking. Cook for about two to three minutes. Stir gently to warm them up without cooking too long. You want the zoodles to stay crisp and not mushy. Enjoy your fresh and tasty meal! Yes, you can use store-bought pesto for Pesto Zoodles. It saves time and effort. Just make sure to choose a quality brand. Look for one with fresh ingredients. This option works well if you're in a hurry. However, making your own pesto adds freshness and flavor. You can easily follow the Full Recipe to create your own delicious blend. You can make zucchini noodles without a spiralizer by using a vegetable peeler. Simply peel the zucchini into long strips. Keep peeling until you reach the seeds in the center. Another option is using a box grater. Grate the zucchini lengthwise to create thin noodles. Both methods work great for Pesto Zoodles. Just remember to keep the strips thin for even cooking. Zucchini noodles are low in calories and carbs. They are a great alternative to regular pasta. This makes them perfect for weight loss or low-carb diets. Zoodles are rich in vitamins A and C. They also contain fiber, which aids digestion. Eating zucchini can help keep you full longer. This dish is a tasty way to enjoy a healthy meal. Pesto zoodles are a fresh, tasty dish that brings joy to your meals. We explored key ingredients, from the main pesto elements to nutritional perks. Step-by-step, you learned how to make pesto, prepare zoodles, and combine them for a delightful bite. Tips like adjusting pesto thickness help improve your dish. We also discussed variations to keep it exciting and storage advice for leftovers. Enjoy making this healthy, easy dish whenever you crave something light and delicious!

Pesto Zoodles Fresh and Flavorful Healthy Dish

If you’re looking for a fresh, healthy meal that’s packed with flavor, you’re in the right place! Pesto Zoodles blend

- Main ingredients for Garlic Butter Shrimp Pasta - 8 ounces spaghetti or linguine - 1 pound large shrimp, peeled and deveined - 4 tablespoons unsalted butter - 4 cloves garlic, minced - 1 teaspoon red pepper flakes (adjust for spice preference) - 1 cup cherry tomatoes, halved - 1/4 cup fresh parsley, chopped - Zest of 1 lemon - Juice of 1 lemon - Salt and pepper to taste - Grated Parmesan cheese for serving (optional) - Optional ingredients for enhanced flavor - Add spinach or bell peppers for more veggies. - Use fresh basil or thyme for more herbal notes. - Try lemon zest or juice for added brightness. - Substitute white wine for a richer sauce. When making Garlic Butter Shrimp Pasta, always choose fresh, high-quality ingredients. This choice helps to bring out the flavors in the dish. For the best shrimp, look for wild-caught, as they often taste sweeter. If you prefer pasta, choose a type that holds sauce well, like linguine. You can find the full recipe with detailed steps and tips to make this dish shine. To start, you need to cook your pasta. I suggest using spaghetti or linguine. Bring a large pot of salted water to a boil. Add the pasta and cook according to the package instructions. Aim for al dente, which means it should be firm when you bite it. This texture helps the pasta hold up to the sauce. Remember to save 1/2 cup of the pasta water before draining. This water helps adjust the sauce later. Next, it is time for the shrimp. Use large shrimp, peeled and deveined. Heat a large skillet over medium heat. Melt 2 tablespoons of butter in the skillet. Add the shrimp and season with salt, pepper, and red pepper flakes. Cook the shrimp for about 2-3 minutes per side. Look for them to turn pink and opaque. This shows they are done. Once cooked, set the shrimp aside on a plate. Now, let's make the garlic butter sauce. In the same skillet, add the remaining 2 tablespoons of butter. Then, add the minced garlic. Sauté for about 30 seconds until it smells great. The key is to not burn the garlic. If you choose a non-stick skillet, the sauce won’t stick and makes it easier to mix later. After the sauce is ready, it's time to combine. Add the halved cherry tomatoes to the skillet. Cook for 2-3 minutes until they start to soften. Then, return the shrimp to the skillet. Pour in the lemon juice and zest. Stir everything together. Finally, add in the drained pasta. Pour the reserved pasta water as needed. Toss it all until the pasta is well coated in the garlic butter sauce. To finish, stir in the chopped parsley. This adds freshness. Adjust the seasoning with salt and pepper to your taste. Now, serve the pasta on plates. You can top it with extra parsley and grated Parmesan cheese if you like. Want the full recipe? Check out the [Full Recipe]. To make sure your shrimp are not overcooked, cook them just until they turn pink and opaque. This usually takes 2-3 minutes on each side. Overcooked shrimp can become rubbery and tough. When blending pasta with sauce, use tongs or a pasta fork. This method helps coat the pasta evenly. Always save a bit of pasta water. If the dish looks dry, add some reserved water to loosen the sauce. For shrimp, use large, fresh shrimp for the best texture and taste. If fresh shrimp is not available, frozen shrimp works too. Just be sure to thaw it properly before cooking. When choosing pasta, spaghetti or linguine are great options. Both hold sauce well and provide a nice bite. Fresh herbs, like parsley, add a burst of flavor. Dried herbs work, but fresh will always taste better. Use a large skillet for cooking. This allows shrimp and pasta to mix well without crowding. Start with medium heat to melt the butter. If you notice the butter browning too fast, reduce the heat. When sautéing garlic, keep an eye on it. Garlic burns quickly, turning bitter. Cook it just until fragrant, about 30 seconds. This will add a rich flavor to your sauce. For a more robust taste, you can add the garlic after the shrimp have cooked. For the full recipe, check the section above. {{image_2}} You can change the flavor of Garlic Butter Shrimp Pasta easily. Adding vegetables boosts taste and nutrition. Try adding fresh spinach or colorful bell peppers. They cook fast and fit well in this dish. For spice, you can adjust the red pepper flakes. Use less for a milder dish or add more for heat. You control the spice level to suit your taste. If you need gluten-free options, use gluten-free pasta. It cooks just like regular pasta. You can find it in many stores. For a dairy-free meal, swap the butter with olive oil. There are also great dairy-free butter substitutes. Using these options keeps the dish tasty and safe for various diets. Pair your Garlic Butter Shrimp Pasta with a fresh side salad. A simple green salad complements the dish well. You could also serve garlic bread on the side. For a drink, a crisp white wine works best. A Sauvignon Blanc or Pinot Grigio enhances the flavors. Enjoy your meal with these easy serving ideas and full recipe. To store leftovers of Garlic Butter Shrimp Pasta, let the dish cool. Place it in an airtight container. This keeps the flavors fresh and prevents spills. You can keep it in the fridge for up to three days. The shelf life of Garlic Butter Shrimp Pasta is about three days in the fridge. After that, the shrimp may lose its texture. Always check for signs of spoilage before eating. If it smells off or looks different, toss it out. When reheating, use a skillet for the best results. Heat it over low to medium heat. Add a splash of water or broth to keep it moist. Stir often to avoid burning the shrimp. To avoid soggy pasta, do not microwave it directly. Instead, gently heat it in a pan. This method keeps the pasta firm and tasty. For even better results, add a little more garlic butter while reheating. Enjoy the flavors! I love using spaghetti or linguine for this dish. Both types hold the sauce well. They offer a nice, chewy texture that pairs perfectly with shrimp. You can also use fettuccine for a wider noodle if you prefer. If you're gluten-free, try using rice pasta or zucchini noodles. They work well and keep the dish light. Yes, frozen shrimp are a great option. They are often just as good as fresh shrimp. When using frozen shrimp, thaw them before cooking. You can do this by placing them in cold water for about 15-20 minutes. Alternatively, you can leave them in the refrigerator overnight. This way, they will be ready to cook without any ice. To add some heat, try using more red pepper flakes. You can also mix in diced jalapeños for an extra kick. If you want a different flavor, consider adding a dash of hot sauce or chili oil. These ingredients can elevate your dish and suit your spice preference. This dish pairs well with a simple green salad. A fresh Caesar salad or arugula salad can balance the richness of the pasta. You could also serve garlic bread on the side for a classic touch. For drinks, a crisp white wine like Sauvignon Blanc complements the meal beautifully. Enjoy experimenting with your side dishes! Garlic Butter Shrimp Pasta combines simple ingredients for a delicious meal. You learned how to cook pasta, sauté shrimp, and make a tasty garlic butter sauce. We also covered tips for perfect texture and flavor adjustments. Plus, variations and storage advice help you enjoy this dish later. Remember, cooking is fun. With these steps, you can impress anyone at your table. Keep experimenting with flavors and enjoy every bite!

Garlic Butter Shrimp Pasta Flavorful and Simple Dish

Looking for a quick and tasty meal? Garlic Butter Shrimp Pasta is the answer! In this guide, I’ll walk you

- 2 boneless, skinless chicken breasts, diced - 1 cup brown rice - 1 cup broccoli florets - 1 red bell pepper, thinly sliced - 1 carrot, julienned - 1 tablespoon ginger, minced - 2 cloves garlic, minced To create a tasty Teriyaki Chicken Bowl, you need fresh and vibrant ingredients. Chicken serves as the main protein. I often choose boneless, skinless breasts for their tenderness. Brown rice acts as a hearty base. It adds fiber and a nutty flavor. Fresh vegetables like broccoli, red bell pepper, and carrots bring color and crunch. Plus, ginger and garlic add a fragrant kick. - 1/3 cup soy sauce (reduced sodium) - 2 tablespoons honey - 1 tablespoon sesame oil - 1 teaspoon cornstarch mixed with 1 tablespoon cold water (for thickening) The Teriyaki sauce is key to this dish. Soy sauce gives it that salty depth. I choose reduced sodium soy sauce to keep it balanced. Honey brings sweetness and a hint of caramel. Sesame oil adds a nutty flavor. Mixing cornstarch with water helps thicken the sauce, making it stick to the chicken and veggies. - Sesame seeds for garnish - Green onions, chopped, for garnish To finish your Teriyaki Chicken Bowl, don't skip the garnishes. Sesame seeds add a delightful crunch and nutty taste. Chopped green onions provide a fresh, oniony bite. They make your bowl look beautiful and add flavor. You can find the full recipe in the earlier section. Cooking the rice To start, rinse 1 cup of brown rice under cold water. This step removes excess starch and helps your rice cook evenly. Add the rinsed rice to a medium saucepan with 2 cups of water. Bring it to a boil. Once boiling, reduce the heat to low, cover, and simmer for about 45 minutes. Check that the water absorbs completely. Fluff it with a fork before serving. Preparing the chicken Next, you’ll prepare the chicken. Heat 1 tablespoon of sesame oil in a large skillet over medium heat. Add 2 diced boneless, skinless chicken breasts to the skillet. Cook for about 5-7 minutes, stirring often. You want the chicken to turn golden brown and be cooked through. Combining soy sauce and honey In a small bowl, mix 1/3 cup of reduced-sodium soy sauce with 2 tablespoons of honey. Stir well to combine. Pour this mixture over the cooked chicken in the skillet. Stir to coat the chicken evenly. Let it simmer for a few minutes to let the flavors meld. Thickening the sauce with cornstarch To thicken the sauce, mix 1 teaspoon of cornstarch with 1 tablespoon of cold water in a small bowl. This creates a slurry. Stir the slurry into the chicken mixture. Cook for another 2-3 minutes until the sauce thickens to your liking. Adding vegetables Now, add your vegetables. Toss in 1 cup of broccoli florets, 1 thinly sliced red bell pepper, and 1 julienned carrot into the skillet. Stir everything together. Cook for an additional 4-5 minutes until the vegetables are tender-crisp. Serving suggestions and presentation For serving, grab a bowl. Place a scoop of brown rice at the bottom. Top it with the teriyaki chicken and a generous amount of cooked vegetables. Finally, sprinkle some sesame seeds and chopped green onions on top for a pop of flavor and color. This makes for a bright and tasty dish! Enjoy your Teriyaki Chicken Bowl! For the complete recipe, check out the [Full Recipe]. To cook rice well, start by rinsing it. Rinsing removes extra starch. This helps the rice stay fluffy. Use a fine mesh strainer for best results. After rinsing, use the right water-to-rice ratio. For brown rice, use 2 cups of water for every 1 cup of rice. This ratio ensures the rice cooks evenly and absorbs all the water. Cooking chicken can be tricky. To keep it juicy, do not overcook it. I cook diced chicken for about 5 to 7 minutes until it’s golden brown. Use medium heat for even cooking. Remember to stir it often. This helps avoid burning and ensures it cooks uniformly. The teriyaki sauce is key to flavor. You can enhance it by adding garlic or ginger. If you want more flavor, add a splash of rice vinegar. Adjust the sweetness by adding more honey or sugar. For saltiness, add a bit more soy sauce. Taste as you go to find your perfect balance. {{image_2}} You can swap chicken for tofu or tempeh. Tofu absorbs flavors well. This makes it a great option for a plant-based dish. Tempeh has a nutty taste and adds protein. You can also use beef or shrimp for a twist. Thinly slice beef and cook it quickly for a tender bite. Shrimp cooks fast and adds a sweet flavor. Feel free to use seasonal or frozen vegetables. Broccoli, bell peppers, and carrots are great, but you can mix it up. Snow peas, zucchini, or snap peas work well, too. Adding fresh herbs like cilantro or basil can boost the flavor. Just chop them and toss them in at the end. If you're looking for gluten-free options, use tamari instead of soy sauce. It has a similar taste and works well in this recipe. For a low-carb version, switch brown rice for cauliflower rice. It’s light and absorbs the sauce nicely. Adjusting your recipe to fit your diet makes cooking fun and creative! For the complete recipe, check out the Full Recipe section. To keep your Teriyaki Chicken Bowls fresh, store leftovers in an airtight container. Refrigerate them within two hours of cooking. Proper storage helps maintain flavor and texture. You can keep them in the fridge for up to four days. If you need to store them longer, consider freezing. For freezing, place the chicken and veggies in a freezer-safe bag or container. Remove as much air as possible to prevent freezer burn. These can last for up to three months in the freezer. When it's time to enjoy your leftovers, the best method to reheat is in the microwave. Place the chicken bowl on a microwave-safe plate, cover it with a damp paper towel, and heat for about two minutes. Stir halfway through for even heating. You can also reheat on the stovetop. Just add a splash of water to a skillet and heat over medium until warmed through. Always ensure your food reaches a safe temperature of 165°F (74°C) to enjoy it safely. Batch cooking Teriyaki Chicken Bowls is a smart way to save time. You can double or triple the recipe and store in separate containers for easy meals. For meal prep, cook the rice and chicken in advance. Keep the sauce separate until you are ready to eat. This will keep everything fresh. Serve with seasonal veggies for variety. Mix in some toppings like sliced avocado or chopped nuts for added flavor and crunch. To make Teriyaki sauce from scratch, you need simple ingredients. Here’s a quick recipe: - 1/3 cup soy sauce - 2 tablespoons honey - 1 tablespoon sesame oil - 1 tablespoon rice vinegar - 1 tablespoon minced ginger - 1 clove minced garlic - 1 teaspoon cornstarch mixed with 1 tablespoon cold water 1. In a small pot, mix the soy sauce, honey, sesame oil, rice vinegar, ginger, and garlic. 2. Heat over medium heat until warm. 3. Add the cornstarch mixture and stir. 4. Cook until the sauce thickens. This sauce is perfect for your Teriyaki Chicken Bowls. It adds a sweet and savory flavor that you will love. Yes, you can use other grains for your Teriyaki Chicken Bowls. Some great alternatives include: - Quinoa: It cooks fast and adds protein. - Cauliflower rice: This is low in carbs and great for a lighter meal. - White rice: A classic choice that is soft and fluffy. - Farro: This grain has a nice nutty flavor and chewy texture. Feel free to experiment with different grains. Each one will bring a unique taste to your bowl. Many restaurants serve tasty Teriyaki Chicken Bowls. Here are a few recommendations: - Local Asian bistro: Look for spots that focus on fresh ingredients. - Japanese restaurants: They often have authentic dishes and sauces. - Food trucks: Many food trucks offer quick and delicious Teriyaki options. - Chain restaurants: Some well-known chains have good Teriyaki bowls. Check online reviews to find the best spots in your area. You might discover a new favorite place! Teriyaki chicken bowls are simple and satisfying. You need the right ingredients, including chicken, brown rice, and a tasty sauce. Follow the steps to prepare the rice, cook the chicken, and make a homemade teriyaki sauce. Don’t forget the garnishes like sesame seeds and green onions for extra flair. With a few tips on cooking and variations to suit your taste, you can enjoy this dish again and again. Whether you follow the recipe or make adjustments, these bowls can be a hit at any meal. Enjoy your cooking!

Teriyaki Chicken Bowls Flavorful and Easy Recipe

If you’re craving a delicious meal that’s simple to make, try Teriyaki Chicken Bowls! I’ll walk you through each step,

For a tasty grilled vegetable sandwich, you need fresh veggies. Here’s what to gather: - 1 medium zucchini, sliced into thin rounds - 1 red bell pepper, sliced into strips - 1 yellow bell pepper, sliced into strips - 1 small eggplant, sliced into rounds - 1 small red onion, sliced into rings These vegetables offer great flavors and textures. Grilling brings out their natural sweetness, making each bite delicious. Next, let's add flavor. You need a few simple seasonings: - 2 tablespoons olive oil - 1 teaspoon garlic powder - 1 teaspoon smoked paprika - Salt and pepper to taste The olive oil helps the veggies grill evenly and adds richness. Garlic powder and smoked paprika give a nice kick. Adjust salt and pepper to your taste. The right bread and spread can elevate your sandwich. For this recipe, use: - 4 slices whole grain bread - 4 tablespoons hummus - Fresh basil leaves for garnish Whole grain bread adds fiber and nuttiness. Hummus serves as a creamy spread that complements the grilled veggies perfectly. Fresh basil leaves add a burst of freshness and color. These ingredients make a grilled vegetable sandwich fresh and flavorful. For the full recipe, check out the details in the recipe section. Start by gathering your fresh vegetables. You need zucchini, red and yellow bell peppers, eggplant, and red onion. Slice each vegetable into rounds or strips. This makes them easy to grill. In a large bowl, combine all the sliced veggies. Drizzle two tablespoons of olive oil over them. Add one teaspoon each of garlic powder and smoked paprika. Season with salt and pepper to taste. Toss well until each piece is coated. Preheat your grill to medium-high heat. Once hot, place the seasoned vegetables on the grill. Grill for about 5-7 minutes on each side. Look for nice grill marks and tenderness. Keep an eye on them to avoid burning. When done, remove the veggies from the grill and let them cool slightly. This step keeps them juicy and flavorful. Toast four slices of whole grain bread until golden brown. Spread hummus on one side of each slice. Layer the grilled vegetables generously on two slices. Top with fresh basil leaves for a burst of flavor. Place the remaining slices on top, hummus side down. If you want extra crispiness, grill the assembled sandwiches for 1-2 minutes. Finally, cut the sandwiches in half, plate them, and enjoy your delicious creation! For the full recipe, refer to the earlier section. To get those lovely grill marks, keep the grill clean. Start with a hot grill. Place the veggies on the grill at a 45-degree angle. Leave them alone for a few minutes. This helps to create those beautiful lines. Flip them only once. You want to keep the heat even. You can swap veggies based on your taste. Try mushrooms or asparagus if you like. For an extra kick, use jalapeños instead of bell peppers. If you want more protein, add grilled chicken or tofu. You can also use any bread you prefer, like ciabatta or sourdough. Serve your sandwich with a side salad for a fresh touch. A light vinaigrette makes it even better. You can also pair it with chips for crunch. For drinks, try iced tea or lemonade. They will balance the flavors nicely. Want the full recipe? You can find it above! {{image_2}} You can boost your grilled vegetable sandwich by adding protein. Cheese works well. Try mozzarella or feta for a creamy touch. Tofu is another great choice. Use firm tofu, and grill it with the veggies. This addition makes the sandwich hearty and filling. The bread you choose can change the whole sandwich. Whole grain bread is a great base. It adds fiber and flavor. You could also use ciabatta or sourdough for a crusty texture. Pita bread can turn your sandwich into a fun wrap. Each choice brings its own unique taste. Play with flavors from around the world. For a Mediterranean twist, add olives and sun-dried tomatoes. Use tzatziki sauce instead of hummus for a fresh zing. If you want a Mexican flair, add avocado and fresh cilantro. Swap the hummus for guacamole. These flavors can make your sandwich exciting and new. Store leftover grilled vegetable sandwiches in an airtight container. They stay fresh for up to three days in the fridge. Before storing, let them cool completely to avoid sogginess. You can also wrap them tightly in plastic wrap for extra freshness. You can freeze leftover grilled vegetables for later use. Let the veggies cool, then place them in a freezer-safe bag. Squeeze out as much air as possible before sealing. They can last up to three months in the freezer. When you're ready to use them, thaw them in the fridge overnight. To reheat your grilled vegetable sandwich, you have a few options. You can use a skillet over medium heat for about 3-4 minutes on each side. This brings back the crispiness. Alternatively, you can microwave it for about 1-2 minutes. However, this method may make the bread soft. For the best taste, I recommend the skillet method. Enjoy your delicious meal! You can easily make a vegan Grilled Vegetable Sandwich by skipping any dairy. Use hummus as your spread. It adds creaminess without animal products. Choose fresh vegetables, like zucchini, bell peppers, and eggplant. Season them with olive oil and spices. Grill the veggies just like in the Full Recipe. Assemble your sandwich on whole grain bread for a healthy meal. The best vegetables for grilling are those that hold up well to heat. Here are some great options: - Zucchini - Bell peppers - Eggplant - Red onions - Mushrooms - Asparagus These vegetables become sweet and smoky when grilled. They also bring a nice texture to your sandwich. Yes, you can use a stovetop for grilling. A grill pan works best for this. Heat the pan over medium-high heat. Add your seasoned vegetables and cook just like you would on a grill. Turn them every few minutes. You will still get those lovely grill marks and flavors. You can tell the vegetables are done when they are tender and have nice grill marks. For most vegetables, this takes about 5-7 minutes on each side. You can also poke them with a fork. If they feel soft but not mushy, they are ready to go. Enjoy your grilled veggies in the sandwich! This blog post focused on making a delicious grilled vegetable sandwich. We covered ingredients, from fresh veggies to flavorful oils and breads. I shared tips on prep, grilling, and assembly. We discussed variations like adding proteins and international flavors. Storage info included how to keep leftover sandwiches fresh. Overall, grilling can be fun and tasty. Try new flavors and share your creations! Enjoy your cooking journey and make it your own.

Grilled Vegetable Sandwich Fresh and Flavorful Delight

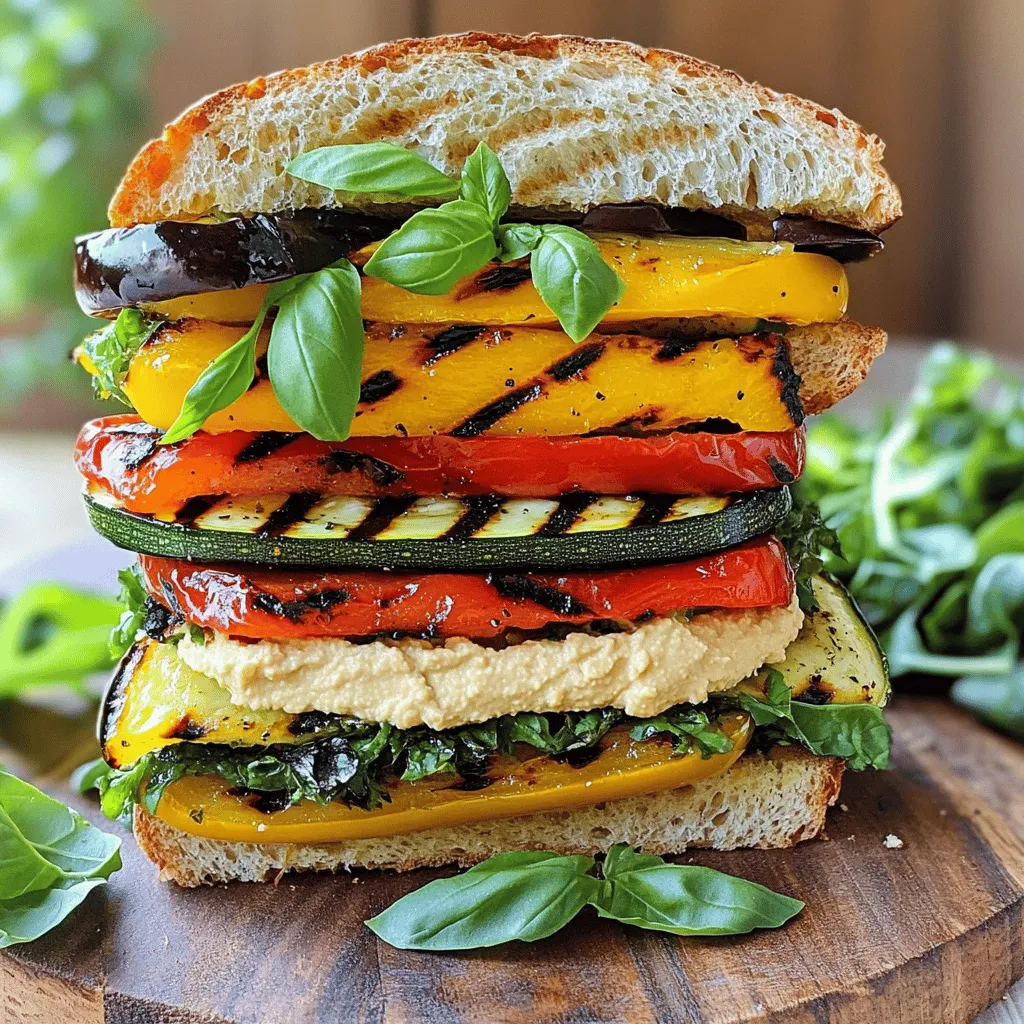
Get ready to sink your teeth into a fresh and flavorful grilled vegetable sandwich! This delicious recipe is packed with

To create your Fruit and Yogurt Parfait, gather these fresh and tasty ingredients. - Greek yogurt options (plain or vanilla) - Granola recommendations (nutty or honey-flavored) - Fresh fruits to use (mixed berries, mango, banana) Using Greek yogurt gives your parfait a rich base. You can choose plain for a tangy taste or vanilla for sweetness. Granola adds a delightful crunch. I suggest a nutty or honey-flavored option for extra flavor. For fruits, mixed berries bring vibrant color and taste. You can use strawberries, blueberries, and raspberries. Mango adds a tropical twist, while banana offers sweetness and creaminess. These ingredients create layers of flavor and texture. You can find the full recipe in the previous section. Enjoy making your parfait! To start, grab a medium bowl. Combine 2 cups of Greek yogurt with 2 tablespoons of honey or agave syrup. Add 1 teaspoon of vanilla extract for flavor. Stir everything well until it blends smoothly. If you want a creamier texture, mix longer. This step makes your yogurt rich and tasty. Now, choose your serving glasses. Start by adding a layer of the yogurt mix at the bottom. This base will hold everything together. Next, sprinkle a layer of granola on top. I like nutty or honey-flavored granola for a nice crunch. After that, add fresh fruits. Use a mix of berries, diced mango, and banana slices. Repeat the layers: yogurt, granola, and fruits. Keep layering until your glass is full, ending with yogurt on top. For the last step, drizzle any leftover honey over the top. If you like, sprinkle a bit of cinnamon or nutmeg for extra flavor. Finally, don’t forget to garnish with fresh mint leaves. They add a pop of color and freshness. For a refreshing treat, chill the parfaits for about 30 minutes before serving. You can enjoy your fruity oasis right away or let it cool for a bit. This brings all the flavors together beautifully. For the full recipe, refer back to the instructions above. To get the best flavor and texture, use full-fat Greek yogurt. It gives your parfait a creamy base. Mixing in honey or agave adds sweetness. Stir until smooth and well blended. Let your parfait chill in the fridge for at least 30 minutes. This makes it refreshing and allows flavors to blend well. If you want a dairy-free option, try coconut yogurt or almond yogurt. These can add a nice twist. For granola, you can use gluten-free options if needed. Homemade granola can be easy to make. Just bake oats with a bit of honey and nuts for a tasty mix. Choose clear glasses or bowls to show off those beautiful layers. Layering looks better in tall glasses. For garnishing, use fresh mint leaves or a sprinkle of cinnamon. You can also add a few extra berries on top. This will make your parfait look even more inviting. For the full recipe, check out the Fruity Oasis Yogurt Parfait section. {{image_2}} For a fresh twist, use seasonal fruits. In summer, I love berries. They add a burst of flavor. Strawberries, blueberries, and raspberries are perfect. They make your parfait colorful and fun. In winter, opt for fruits like apples and pears. They add crunch and sweetness. You can also try exotic fruits. Mango and kiwi bring a tropical vibe. They make your parfait unique and tasty. Looking for a healthy option? You can make a low-calorie parfait easily. Use fat-free Greek yogurt. This keeps the taste without extra calories. Choose fruits with low sugar, like berries. They are sweet and good for you. You can also add superfoods. Chia seeds or flaxseeds boost nutrition. They provide fiber and omega-3s. This makes your parfait not just tasty but also very healthy. Want to turn your parfait into a dessert? You can layer in some chocolate! Use dark chocolate or chocolate chips. They add a rich flavor. You can also drizzle chocolate sauce on top. This makes it feel like a treat. Add whipped cream for extra sweetness. You can even use flavored yogurts, like chocolate or caramel. This gives a new twist to your parfait. Enjoy your gourmet creation! For the full recipe, check out the Fruity Oasis Yogurt Parfait. To keep your parfait fresh, store it in the fridge. Use an airtight container. This helps prevent the yogurt from absorbing other smells. If you have layers, try not to mix them. The parfait stays pretty this way. You can enjoy it for about 2-3 days. After that, the fruits may lose their crunch. Preparing parfaits for the week is simple. You can make them on Sunday and enjoy all week long. Use clear containers so you can see the layers. Glass or BPA-free plastic works best. This makes it easy to grab a healthy snack. Just remember to layer the yogurt, granola, and fruit. For a detailed recipe to guide you, check the Full Recipe for the Fruity Oasis Yogurt Parfait! You can use coconut yogurt or almond yogurt instead of dairy yogurt. They are creamy and tasty. For granola, look for brands that do not use dairy. You can also make your own granola with rolled oats, nuts, and seeds. This way, you can control the ingredients and keep it dairy-free. The best fruits for a parfait include: - Strawberries: Sweet and juicy. - Blueberries: Small and burst with flavor. - Raspberries: Tart and vibrant. - Bananas: Creamy and filling. - Mango: Sweet and tropical. These fruits add flavor and color to your parfait. You can mix and match them for fun combinations. You can keep a parfait in the fridge for about two days. After that, the granola may get soggy. If you want to keep it fresh, store the granola separately. When ready to eat, layer it back in, so it stays crunchy. Yes, you can freeze a parfait, but it may change in texture. To freeze, use an airtight container. When ready to eat, thaw it in the fridge overnight. Avoid refreezing after thawing, as it may not taste as good. Enjoy it fresh for the best experience. In this post, we explored how to make a delicious Fruit and Yogurt Parfait. We covered ingredients like Greek yogurt, granola, and fresh fruits. I provided step-by-step instructions, storage tips, and variations to keep things exciting. Experiment with different fruits and flavors to create your own perfect parfait. Remember, presentation matters too! Enjoy making this easy treat and impress your friends or family. Your kitchen is now ready for a fun, tasty adventure!

Fruit and Yogurt Parfait Delightful and Healthy Treat

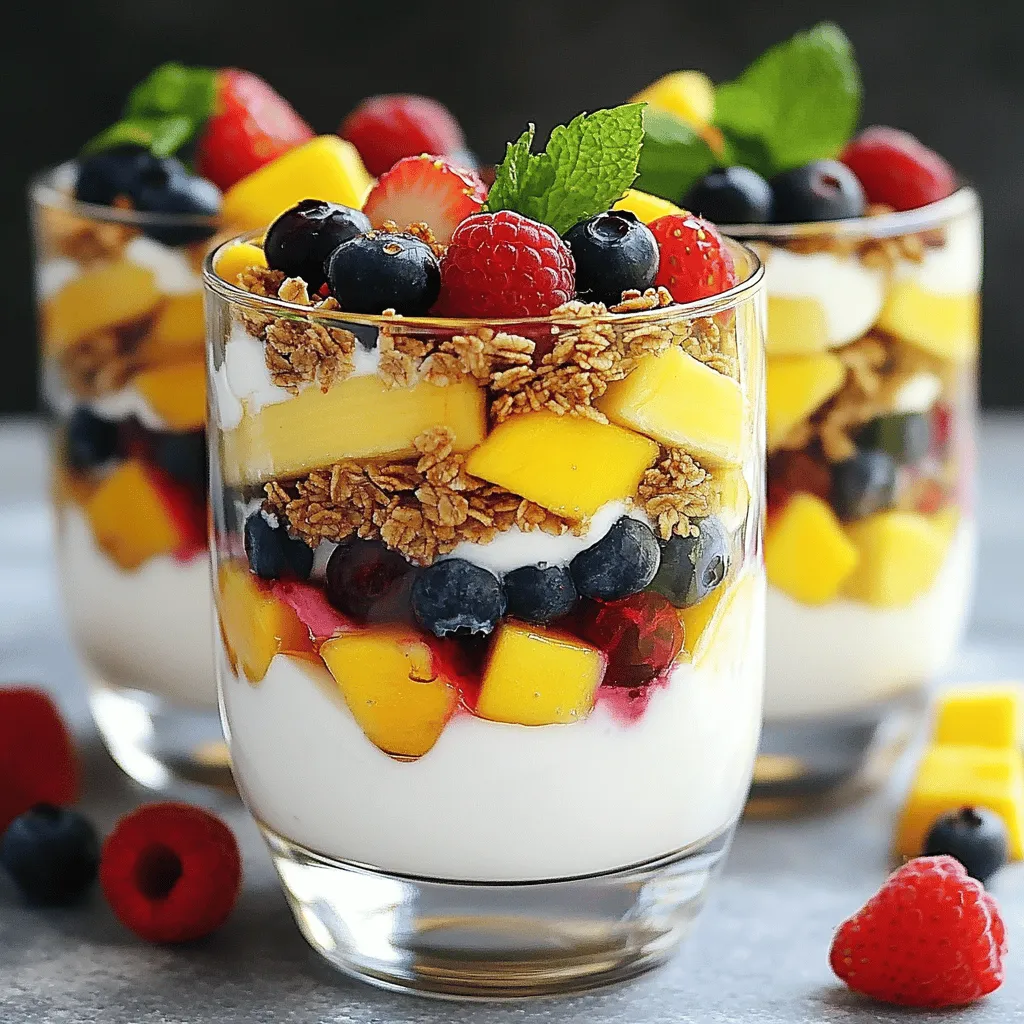
Are you ready to create a tasty and healthy treat? A Fruit and Yogurt Parfait is perfect for breakfast or

- 2 medium sweet potatoes, peeled and diced - 1 can (15 oz) black beans, rinsed and drained - 1 tablespoon olive oil - 1 teaspoon cumin - 1 teaspoon smoked paprika - 1/2 teaspoon chili powder - Salt and pepper to taste - 8 small corn or flour tortillas - 1 avocado, sliced The main ingredients create a hearty base. Sweet potatoes bring sweetness and fiber. Black beans add protein and richness. Tortillas hold everything together and make it easy to eat. - 1/2 cup crumbled feta or queso fresco - Fresh cilantro, chopped, for garnish - Lime wedges, for serving These optional ingredients can enhance your tacos. Cheese adds creaminess and flavor. Cilantro gives freshness, while lime adds zest. You can mix and match based on what you like. Feel free to try the full recipe for a delightful meal. 1. Preheat the oven and prepare ingredients First, set your oven to 425°F (220°C). This temperature helps the sweet potatoes get nice and crispy. 2. Toss sweet potatoes with oil and spices In a large bowl, combine the diced sweet potatoes, olive oil, cumin, smoked paprika, chili powder, salt, and pepper. Mix well so every piece is coated. This step adds great flavor to your tacos. 1. Roast sweet potatoes and heat black beans Spread the sweet potatoes on a baking sheet lined with parchment paper. Roast them for about 20-25 minutes. Stir them halfway through. They should be tender and caramelized. While they roast, heat the black beans in a small saucepan over medium heat. Add salt and pepper to taste. 2. Warm tortillas in a skillet In a dry skillet over medium heat, warm the tortillas for about 30 seconds on each side. This makes them soft and easy to fold. 1. Layering ingredients in tortillas Once the sweet potatoes are done, take a warm tortilla and add a generous spoonful of sweet potatoes. Then, add a good amount of black beans on top. 2. Adding garnishes Top your tacos with sliced avocado and feta or queso fresco if you like. Finish with fresh cilantro for a burst of flavor. Serve with lime wedges on the side for a zesty kick. For the complete instructions, check the Full Recipe. To make your sweet potato black bean tacos taste great, adjust the spices. You can add more cumin or smoked paprika for a stronger flavor. If you like heat, try different chili options. You can use fresh jalapeños or hot sauce to spice things up. Start with a little, and add more to find your perfect level of heat. When cooking sweet potatoes, roasting is best. It gives a nice caramelized flavor. Cut them into small, even pieces for quick cooking. If you boil sweet potatoes, they can become too soft. For black beans, ensure they heat evenly. Stir them often in the pan to keep them warm throughout. This way, every bite is tasty. Pair your tacos with salsa or sauces for added flavor. You can make a simple salsa with tomatoes, onion, and lime. This adds freshness to your meal. Think about creating a taco bar experience. Set out all the toppings like avocado, feta, and cilantro. Let everyone build their own tacos. It makes the meal fun and interactive. For the full recipe, check the earlier section. {{image_2}} You can change beans in this recipe. Pinto or kidney beans work well, too. They bring different tastes and textures to your tacos. Try mixing black beans with other beans for a unique twist. You can also explore other veggies. Bell peppers add a sweet crunch. Zucchini brings moisture and a mild flavor. Roast them alongside the sweet potatoes for an easy upgrade. You can make these tacos vegan. Simply skip the cheese or use a plant-based option. This way, everyone can enjoy them. If you need a gluten-free choice, use corn tortillas. They hold all the fillings well and taste great. For extra protein, add tempeh or tofu. Cook them with the spices. This makes the dish filling and adds a hearty bite. You can adjust the flavors to match your taste. Experiment with herbs like cilantro or parsley. Fresh herbs can brighten the dish and add depth. Adding fruit is a fun twist. Mango or pineapple chunks add sweetness. You can mix them in with the beans or use them as a topping. This can create a fresh and exciting flavor burst. For the full recipe, check out the detailed steps above. To keep your sweet potato black bean tacos fresh, refrigerate them right after serving. Place the tacos in an airtight container. This helps lock in flavor and moisture. Eat the leftovers within three days for the best taste. When reheating, use a skillet over medium heat. This method warms the tacos evenly. It also helps keep the tortillas soft. Avoid the microwave if you want to maintain texture. You want to enjoy every bite! You can freeze the cooked sweet potatoes and black beans. First, let them cool completely. Then, place them in freezer bags, removing as much air as possible. This keeps them fresh for up to three months. For tortillas, wrap them in foil or plastic wrap. You can also use freezer bags. Just make sure to separate them with parchment paper to prevent sticking. They can last about two months in the freezer. Understanding how long your ingredients last is key. Cooked sweet potatoes last about four days in the fridge. Black beans can stay fresh for about three to five days. When checking if your food is still good, look for signs. If the sweet potatoes smell sour or have dark spots, toss them. For black beans, if they look slimy or smell off, it's time to let them go. Keep your meals safe and tasty! For the full recipe, check out the details provided. Sweet potatoes and black beans offer great health benefits. Sweet potatoes are rich in vitamins A and C. They also have fiber, which helps digestion. Black beans are a good source of protein and iron. They help keep you full and support muscle health. Together, they create a balanced meal that is both tasty and good for you. This makes sweet potato black bean tacos a smart choice for any meal. Yes, you can prepare these tacos in advance. Cooked sweet potatoes and black beans store well in the fridge. Keep them in separate containers for freshness. You can make the filling one or two days ahead. Just warm them up before serving. To keep tortillas fresh, store them in a sealed bag. Warm them in a skillet when you’re ready to eat. This way, you can enjoy quick and easy tacos any time. To add heat, try adding jalapeños or red pepper flakes. You can mix these into the sweet potato filling. Another option is to use a spicy salsa as a topping. If you like hot sauce, drizzle some on top before serving. These tweaks will give your tacos a fun kick. Yes, you can use different tortillas for your tacos. Flour tortillas work well and are soft. You can also try whole wheat tortillas for a healthier option. If you want to go gluten-free, look for corn tortillas. Each type adds its own flavor and texture, so feel free to experiment. This blog post showed how to make tasty sweet potato and black bean tacos. We covered the key ingredients, preparation steps, and cooking methods. I shared tips to enhance flavor and ways to personalize your tacos. You can store leftovers properly to enjoy them later. Experiment with variations and spices for a taco you'll love. These tacos are simple, fun, and healthy. Enjoy the process of making them your own!

Sweet Potato Black Bean Tacos Flavorful and Easy Meal

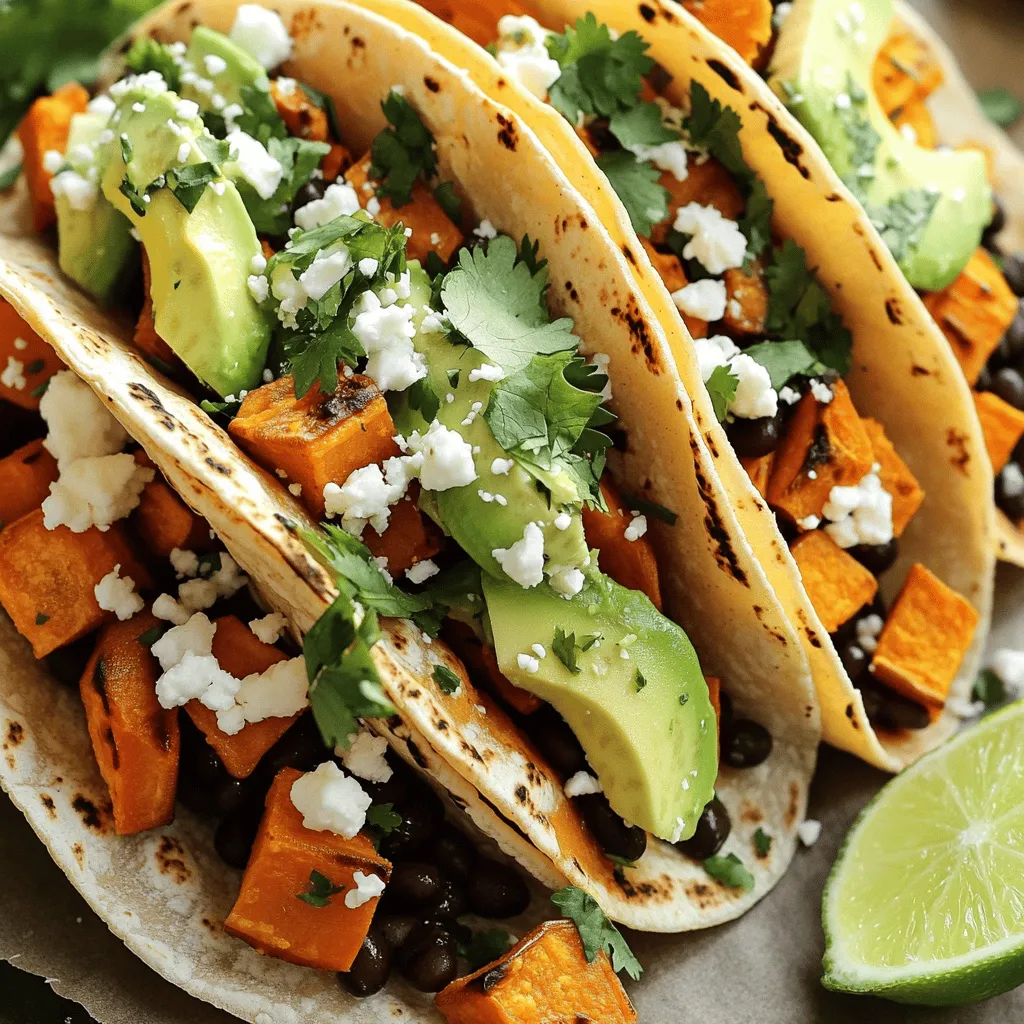
If you’re craving a meal that’s both tasty and easy, Sweet Potato Black Bean Tacos are the answer! With just

- 4 boneless, skinless chicken breasts - 3 tablespoons olive oil - 2 lemons (zest and juice) - 3 cloves of garlic, minced - 1 tablespoon fresh rosemary, chopped - 1 tablespoon fresh thyme, chopped - 1 teaspoon dried oregano - Salt and pepper to taste - Fresh parsley, for garnish Importance of fresh herbs: Fresh herbs make a big difference. They add bright flavors that dried herbs can’t match. For this recipe, use fresh rosemary and thyme. They give the chicken a lovely taste. Suggested oil alternatives: Olive oil is my go-to, but you can use canola or avocado oil. Both work well and have high smoke points. Chicken breast substitutes: If you want, you can swap chicken breasts for thighs. They stay moist and have great flavor. You could also try turkey cutlets for a leaner option. Start by making the marinade. In a bowl, whisk together these ingredients: - 3 tablespoons olive oil - Juice and zest of 2 lemons - 3 cloves of minced garlic - 1 tablespoon chopped fresh rosemary - 1 tablespoon chopped fresh thyme - 1 teaspoon dried oregano - Salt and pepper to taste Mix well until you see a uniform blend. This helps the flavors mix better. The acid from the lemon adds brightness and tenderizes the chicken. Place your chicken breasts in a resealable bag or shallow dish. Pour the marinade over the chicken. Seal the bag tightly or cover the dish. It’s key to ensure the chicken is well coated for even flavor. Let the chicken marinate in the fridge for at least 30 minutes. You can let it sit for up to 2 hours. The longer it marinates, the more flavor it absorbs. Preheat your grill to medium-high heat. This step is crucial for good cooking. A hot grill gives you nice grill marks and a flavorful sear. Remove the chicken from the marinade. Let any extra marinade drip off. Discard the leftover marinade to avoid contamination. Grill each breast for 6-8 minutes on each side. Use a meat thermometer to check the internal temperature. It should reach 165°F (75°C) for safe eating. When done, let the chicken rest for 5 minutes before slicing. This helps keep it juicy. For a nice finish, garnish with fresh parsley just before serving. You can find the full recipe for more details. Enjoy your delicious Lemon Herb Grilled Chicken! To get great grill marks on your chicken, start with a hot grill. Heat your grill to medium-high before adding the chicken. This helps with searing. Place the chicken on the grill and do not move it for a few minutes. This gives it time to sear and form those nice grill lines. Timing is important too. Grill each side for about 6-8 minutes. Flip the chicken only once. This helps keep the juices in and gives you those perfect marks. You can boost the flavor of your Lemon Herb Grilled Chicken with more herbs and spices. Consider basil or tarragon for a different taste. You can also add a pinch of paprika for a little kick. For more brightness, try adding a splash of vinegar or a bit more lemon juice. This can really lift the dish. To make your meal more complete, serve your grilled chicken with tasty side dishes. Roasted vegetables or a crisp salad go well. You can also pair it with rice or quinoa for extra filling. For a nice presentation, plate the chicken on a wooden board. Add lemon wedges and sprinkle fresh herbs on top. This makes your dish look as good as it tastes. For the full recipe, see the details above. {{image_2}} You can switch up the herbs in this recipe to change the flavor. For a fresh taste, try basil or cilantro. Both add a bright kick. If you want something more earthy, consider using sage or tarragon. You can mix and match these herbs to find what you like best. If you do not have fresh herbs, dried ones work too. Use about one-third the amount of dried herbs when compared to fresh. So, if the recipe calls for one tablespoon of fresh rosemary, use one teaspoon of dried rosemary. Grilling is great, but there are other ways to cook this chicken. You can use an oven for a more hands-off method. Preheat your oven to 400°F (200°C) and bake the chicken for around 20-25 minutes. You can also cook it on a stovetop. Just heat some oil in a pan and cook the chicken for about 6-8 minutes per side. If you want a fun twist, try using a grilling basket or skewers. This keeps the chicken pieces together and makes flipping easier. Just cut the chicken into chunks, marinate them, and thread them onto the skewers. Then grill as normal. You can adapt this recipe for different diets. For low-fat options, use skinless chicken thighs or even turkey breasts. These cuts are leaner but still tasty. If you're cutting carbs, skip any sugary marinades and stick to herbs and spices. For gluten-free needs, this recipe is already safe. All the ingredients are naturally gluten-free. Just double-check any store-bought items, like mustard or sauces, to ensure they fit your dietary needs. For more details on the full recipe, check the recipe section. To keep your Lemon Herb Grilled Chicken fresh, store it in the fridge. Place the chicken in an airtight container. This helps block air and keeps the chicken moist. Make sure to cool the chicken before sealing it. You can store it for up to four days. For the best taste, eat it within two days. If you want to maximize freshness, avoid adding sauces until you're ready to serve. You can freeze grilled chicken if you need to store it longer. Wrap each piece in plastic wrap. Then, place it in a freezer bag or container. This keeps the chicken safe from freezer burn. It will stay good for up to three months. When you’re ready to eat, thaw it in the fridge overnight. For quick thawing, place it in cold water for about an hour. Reheating your chicken correctly is key to keeping it juicy. You can use a microwave, oven, or stovetop. - Microwave: Place the chicken on a plate. Cover it with a damp paper towel. Heat it for 1-2 minutes, checking often. - Oven: Preheat the oven to 350°F (175°C). Place the chicken in a baking dish and cover it with foil. Heat for about 15-20 minutes. - Stovetop: Heat a skillet over medium heat. Add a splash of water or broth. Cover and heat for 5-7 minutes, turning once. No matter how you reheat it, check that it reaches 165°F (75°C) inside. This ensures it is safe to eat. To check if grilled chicken is done, use a meat thermometer. The safe internal temperature is 165°F (75°C). You can also look for clear juices when you cut into the chicken. If the juices run clear, your chicken is cooked well. The outside should be golden brown with nice grill marks. Yes, you can marinate the chicken overnight. This allows the flavors to soak in deeper. Just make sure to keep it in the fridge. If you marinate too long, the chicken may become too soft. A good time is 4 to 6 hours for the best flavor. Lemon Herb Grilled Chicken pairs well with many sides. Some popular choices are: - Roasted vegetables - Garlic mashed potatoes - Quinoa salad - Grilled corn on the cob - A fresh green salad with lemon vinaigrette These sides complement the bright flavors of the chicken. Leftover grilled chicken can last in the fridge for up to 4 days. Store it in an airtight container to keep it fresh. If you want to keep it longer, you can freeze it. Frozen chicken will stay good for about 3 months. Just make sure to thaw it in the fridge before reheating. We've covered how to make a delicious Lemon Herb Grilled Chicken, focusing on key ingredients and helpful tips. You learned the best ways to marinate, grill, and enhance flavors. Remember to use fresh herbs for the best taste and try different cooking techniques. Whether you're grilling or storing, these tips help maintain quality. Enjoy your tasty meal and share it with others. Happy cooking!

Lemon Herb Grilled Chicken Flavorful and Simple Recipe

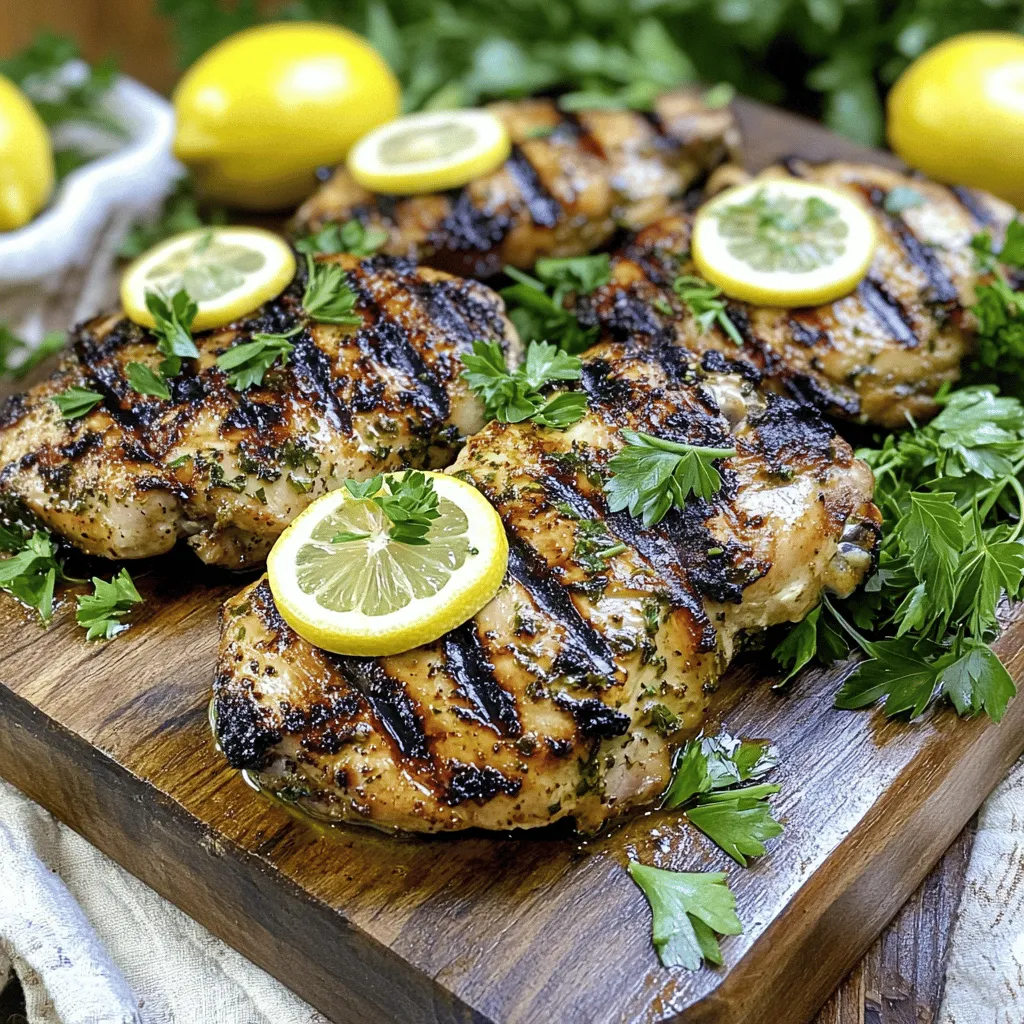
Looking for a delicious and simple dinner idea? My Lemon Herb Grilled Chicken recipe is just what you need! Juicy

To make a Classic Caesar Salad, you need: - Romaine lettuce - Croutons (store-bought or homemade) - Parmesan cheese Romaine lettuce gives the salad its crisp texture. The croutons add crunch and flavor. Freshly grated Parmesan cheese brings richness to the dish. The dressing is key to a great Caesar Salad. You will need: - Mayonnaise - Lemon juice - Dijon mustard Mayonnaise provides creaminess. Lemon juice adds brightness and tang. Dijon mustard gives depth and a slight kick to the dressing. You can customize your salad with these extras: - Anchovies - Grilled chicken - Worcestershire sauce Anchovies give a savory umami taste. Grilled chicken makes the salad heartier. Worcestershire sauce adds a unique flavor twist. For the full recipe, check the Full Recipe. Enjoy making your Classic Caesar Salad! To start, we need to mix the dressing. You will whisk together mayonnaise, lemon juice, Dijon mustard, minced garlic, and Worcestershire sauce in a large bowl. This creates a smooth and tasty dressing. Next, let's toss the salad. Add the chopped romaine lettuce to another bowl. Drizzle the dressing over the lettuce. Toss it so each leaf is coated well. For the next step, combine the ingredients. Gently fold in croutons and half of the grated Parmesan cheese. This adds a nice crunch and flavor. Now, it’s time to serve and garnish. Transfer the salad to a platter. Sprinkle the rest of the Parmesan cheese on top. Finish by adding freshly cracked black pepper. To make great homemade croutons, use stale bread. Cut it into cubes and toss with olive oil and spices. Bake until golden and crispy. For the dressing, ensure it has the right consistency. If it’s too thick, add a little lemon juice. This will help it coat the salad perfectly. For the full recipe, check the details above. Enjoy your fresh and flavorful Caesar salad! Freshness matters when picking romaine lettuce. Look for bright green leaves. They should be crisp and firm. Avoid any yellow or wilted leaves. Hold the head of lettuce; it should feel heavy. This weight indicates it is fresh and full of water. To select the best romaine, check the base. It should be clean and free of brown spots. If possible, buy organic to avoid pesticides. Organic romaine tastes better and is healthier. You can add more flavor with extra seasonings. Try a pinch of garlic powder or some crushed red pepper. These will give your salad a nice kick. A dash of lemon zest can also brighten the taste. If you want to change the dressing, use yogurt instead of mayonnaise. This makes it lighter and tangy. You can also try a vinaigrette made with olive oil and vinegar for a twist. Caesar salad pairs well with grilled chicken or shrimp. These proteins make it a full meal. You can also serve it with garlic bread for a tasty side. For plating, use a large bowl or platter. Arrange the salad in a mound for a nice look. Sprinkle extra Parmesan on top for a fancy touch. Freshly cracked black pepper adds flavor and beauty too. For the full recipe, check out the details above. {{image_2}} You can make your Caesar salad even better with protein. Grilled chicken Caesar salad is a popular choice. The juicy chicken adds a nice texture. It also makes the salad more filling. Simply slice grilled chicken and place it on top of the salad. Shrimp Caesar salad is another tasty option. Shrimp cooks quickly and has a light flavor. You can grill or sauté the shrimp before adding it to the salad. The seafood pairs well with the creamy dressing. Both options enhance the classic taste. Not everyone eats meat, and that's okay! You can make a vegetarian-friendly dressing. Use yogurt or silken tofu instead of mayonnaise. These swaps keep the creaminess while removing eggs. For a vegan twist, try a tahini-based dressing. It adds a nutty taste and is full of nutrients. You can also add plant-based proteins like chickpeas or lentils. They make your salad hearty without meat. Caesar salad has an interesting history. It started in Mexico but became popular in the U.S. Different regions put their spin on this classic. In Italy, you might find anchovies tossed in. They add a salty kick that some love. In some Asian countries, chefs add sesame oil for a unique twist. You might also see ingredients like avocado or spicy peppers. These variations show how versatile the Caesar salad can be. Each region brings its own flavor to this well-loved dish. If you want to try these ideas, check the Full Recipe for the basics. To keep your salad fresh, store it in the fridge right after serving. Put the salad in an airtight container. This way, it stays cool and fresh. You can keep it for about two days. After this time, the lettuce may get soggy. To maintain the crispness of your lettuce, wash it and dry it well before making the salad. Any water left on the leaves can make them wilt. For croutons, keep them in a sealed bag. This keeps them crunchy for longer. If they become soft, you can toast them in the oven to revive their crunch. You can easily repurpose leftover dressing. Use it as a dip for veggies or a spread on sandwiches. It adds great flavor! For extra croutons, try adding them to soup for a nice crunch. You could also blend croutons into breadcrumbs for coating chicken or fish. For the full recipe, check out the details for a Classic Caesar Salad. A Classic Caesar Salad has fresh and simple ingredients. Here’s what you need: - 1 large head of romaine lettuce, chopped - 1 cup croutons (store-bought or homemade) - 1/2 cup grated Parmesan cheese - 1/4 cup mayonnaise - 2 tablespoons lemon juice - 1 tablespoon Dijon mustard - 1 garlic clove, minced - 1 teaspoon Worcestershire sauce (optional) - Salt and pepper to taste - Freshly cracked black pepper for garnish These ingredients create a balance of textures and flavors. Making Caesar dressing at home is easy and fun. Here’s a simple recipe: 1. In a large mixing bowl, whisk together the mayonnaise, lemon juice, Dijon mustard, minced garlic, and Worcestershire sauce until smooth. 2. Season the dressing with salt and pepper to taste. Adjust according to your liking. This fresh dressing makes your salad shine. It’s quick to whip up and tastes great. Yes, you can prepare Caesar Salad ahead. Here are some tips for prep and storage: - Wash and chop the romaine lettuce a few hours in advance. Store it in the fridge in a sealed bag or container to keep it crisp. - Make the dressing and store it in a jar in the fridge. It stays fresh for up to a week. - Toss the salad just before serving to keep the lettuce crunchy. This way, you save time and still enjoy a fresh salad. The Caesar Salad has a rich history. It was created in the 1920s by an Italian chef named Caesar Cardini in Tijuana, Mexico. He made it for guests with simple ingredients he had on hand. Over time, many variations sprang up. Some add grilled chicken or shrimp for protein. Others switch out the dressing for different flavors. Despite the changes, the Classic Caesar Salad remains a beloved choice worldwide. Check out the Full Recipe for a delicious version! To summarize, a classic Caesar salad has key ingredients like romaine lettuce, croutons, and Parmesan cheese. The dressing blends mayonnaise, lemon juice, and Dijon mustard. Optional add-ins, like anchovies or grilled chicken, boost flavor. Follow the steps to prepare and serve it beautifully. Remember to choose fresh lettuce and try different dressings for variety. This salad’s history gives it even more depth. Prepare it right, and enjoy every bite.

Classic Caesar Salad Flavorful and Fresh Delight

If you love fresh flavors and crisp textures, a Classic Caesar Salad will delight your taste buds. With a mix

Older posts
Newer posts
← Previous Page1 … Page38 Page39 Page40 … Page48 Next →

dsad

© 2025 savoryspiral • Built with GeneratePress

Our Policies

  • Copyright Policy
  • Cookie Policy
  • GDPR Policy
  • Privacy Policy
  • Disclaimer
  • Terms Of Use

More Information

  • Home
  • About
  • Contact
  • Appetizers
  • Dessert
  • Dinner
  • Drinks
©2025, savoryspiral About Back To Top