Skip to content
DisclaimerTerms Of UseGDPR PolicyCookie Policy

savoryspiral

  • Home
  • Drinks
  • Appetizers
  • Dinner
  • Dessert
  • About
  • Contact
  • Privacy Policy
DisclaimerTerms Of UseGDPR PolicyCookie Policy

Charlotte

- 1 block (14 oz) firm tofu, pressed and drained - 3 tablespoons cornstarch - 2 tablespoons soy sauce - 1 tablespoon sesame oil - 1 tablespoon maple syrup - 1 teaspoon garlic powder - 1 teaspoon onion powder - ½ teaspoon red pepper flakes (optional for heat) - Salt and pepper to taste - 1 tablespoon olive oil (for greasing the baking sheet) - Fresh herbs (like cilantro or green onions) for garnish When you want to make crispy baked tofu, the right mix of ingredients matters. Firm tofu is key because it holds its shape well. Pressing it helps remove extra water, which is vital for crispiness. Cornstarch is your secret weapon. It creates that crunch we all love. Soy sauce adds saltiness and depth while sesame oil brings a nutty flavor. For sweetness, I like maple syrup. It balances the savory notes. Garlic and onion powders give a savory kick. If you want some heat, red pepper flakes are perfect. Adjust the amount to your spice level. Don’t forget the salt and pepper. They enhance all the flavors. A light coat of olive oil on the baking sheet helps prevent sticking. Finally, fresh herbs like cilantro or green onions add a fresh touch when serving. For the full recipe, check out Crispy Baked Tofu Delight . - Preheat the oven to 400°F (200°C). - Cut the pressed tofu into bite-sized cubes or triangles. To start, make sure your oven is hot. This helps the tofu get crispy. While the oven warms, grab your pressed tofu. Use a sharp knife to cut it into cubes or triangles. Smaller pieces cook faster and get crispier. - Combine soy sauce, sesame oil, maple syrup, garlic powder, onion powder, red pepper flakes, and season with salt and pepper. Next, we need a tasty marinade. In a mixing bowl, add soy sauce, sesame oil, and maple syrup. Then, toss in garlic powder, onion powder, and red pepper flakes. Don’t forget a pinch of salt and pepper. Mix it all well. - Add tofu to the marinade, gently toss, and let it marinate for 15-20 minutes. - Sprinkle cornstarch over the marinated tofu and toss until evenly coated. Now, take your tofu and add it to the marinade. Gently toss it to coat. Let it soak for 15-20 minutes. This step adds flavor. After marinating, sprinkle cornstarch over the tofu. Toss it again until each piece is coated. This will give you that crunch you crave. - Prepare a baking sheet with parchment paper and grease it with olive oil. - Spread tofu in a single layer and bake for 25-30 minutes, flipping halfway through. While the tofu marinates, prepare a baking sheet. Line it with parchment paper and grease it lightly with olive oil. Once ready, spread the tofu evenly on the sheet. Bake in your preheated oven for 25-30 minutes. Flip the tofu halfway through to ensure even crispiness. Keep an eye on it; you want it golden brown and crispy. For the full recipe, check out the detailed instructions above. To get crispy baked tofu, start by pressing the tofu. This step removes extra water. With less water, the tofu becomes firmer. A firmer tofu creates a better texture when cooked. Next, cornstarch plays a key role. It adds a crunchy layer outside the tofu. When you coat the marinated tofu with cornstarch, it helps absorb moisture during baking. This helps produce a golden, crispy finish that is hard to resist. To boost flavor, you can add spices or herbs. Consider adding smoked paprika for a smoky taste. Or, try a pinch of cumin for warmth. Fresh herbs like thyme or rosemary can also brighten the dish. Adjusting sweetness or spice is easy too. If you like it sweeter, add more maple syrup. For extra heat, add more red pepper flakes. Taste as you go, and make it your own! Crispy baked tofu pairs well with many side dishes. Serve it with steamed rice or a fresh salad. You can also enjoy it with stir-fried veggies for a colorful plate. To turn it into a full meal, add some grains. Quinoa or farro makes a great base. Top it with the crispy tofu for a delicious and healthy dinner. For the full recipe, check the section above! {{image_2}} You can easily change the taste of crispy baked tofu. For an Asian-inspired dish, add ginger and sriracha to your marinade. This mix gives a nice kick and warmth. If you want a Mediterranean twist, use herbs like oregano and lemon juice. These flavors make the tofu bright and fresh. Try different ways to cook your tofu. For a crispier texture, use an air fryer. Preheat your air fryer to 400°F (200°C) and cook the marinated tofu for about 15-20 minutes. Flip halfway for even cooking. If you’re in a hurry, pan-sear the tofu on the stovetop. Heat some oil in a pan and cook the tofu until golden brown. This method is fast and gives a nice crust. You can swap ingredients to fit your needs. Use tamari instead of soy sauce for a gluten-free option. This swap keeps the flavor strong without gluten. Also, try different types of tofu. Silken tofu is soft and creamy, while extra firm tofu holds its shape better. Each type gives a unique taste and texture. For the full recipe, check out the Crispy Baked Tofu Delight. To store leftover crispy baked tofu, cool it to room temperature. Place the tofu in an airtight container. This helps keep it fresh and prevents it from drying out. If you have a lot, you can layer pieces with parchment paper between them. This keeps them from sticking together. To reheat crispy baked tofu, use the oven or air fryer. Preheat your oven to 375°F (190°C). Spread the tofu on a baking sheet, and bake for about 10 minutes. This will restore its crispiness. If using an air fryer, set it to 350°F (175°C) and cook for about 5 minutes. Both methods work well for keeping the texture. Yes, you can freeze crispy baked tofu! To freeze, let the tofu cool completely. Place it in a single layer on a baking sheet first, then freeze for a couple of hours. After that, transfer the tofu to a freezer-safe bag or container. To thaw, leave it in the fridge overnight or at room temperature for a few hours. Reheat it as mentioned above for best results. Tofu gets crispy due to cornstarch and the right baking temp. Cornstarch coats the tofu, creating a crunchy layer. I always use a hot oven, around 400°F. This temperature helps the moisture escape quickly, making the tofu crispy. When you bake, flip the tofu halfway through. This step ensures even browning and crispiness on all sides. So, don't skip it! Yes, marinating tofu overnight adds great flavor. The longer you let it sit, the more the tofu absorbs the taste of the marinade. I love using a mix of soy sauce, sesame oil, and spices for a rich flavor. This method also makes tofu tender and juicy. Try it once, and you’ll see how much better it tastes! Crispy baked tofu pairs well with many sides. You could serve it over rice or quinoa for a filling meal. Add steamed veggies like broccoli or snap peas for color and crunch. You can also toss it in a salad with fresh greens and a tangy dressing. The options are endless and delicious! Absolutely! Crispy baked tofu is great for meal prep. You can store it in an airtight container in the fridge for up to five days. When you’re ready to eat, just reheat it in the oven or air fryer to restore its crispiness. This dish makes busy weekdays easier and tastier! Yes, baked tofu is a healthy choice. It has less fat than fried tofu, making it a lighter option. Tofu is a good source of protein and contains essential amino acids. It’s also rich in iron and calcium, which are great for your bones. Choosing baked tofu over fried means you can enjoy all the flavor without the extra grease. In this blog post, we explored how to make crispy baked tofu using simple ingredients. We discussed the importance of pressing tofu and using cornstarch for that perfect crunch. You learned how to marinate and bake tofu, as well as tips for flavor and presentation. Crispy baked tofu is a versatile dish that can suit many meals. With a few variations and proper storage techniques, you can enjoy this dish time and time again. Embrace your creativity and make this recipe your own!

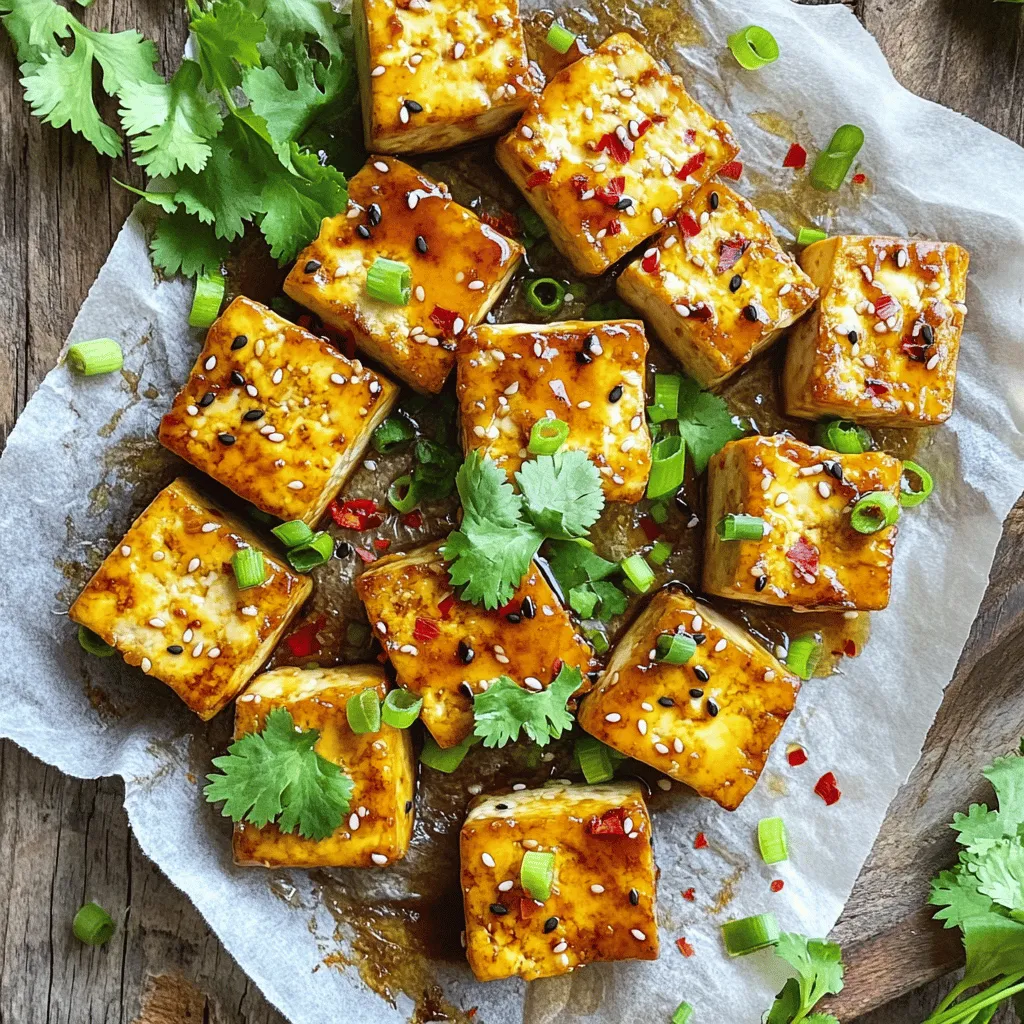
Crispy Baked Tofu Easy and Flavorful Plant-Based Dish

Are you ready to transform your meals with a crispy, mouth-watering delight? In this article, I’ll show you how to

- 500g boneless chicken thighs, cubed - 2 tablespoons olive oil - 1 cup jasmine rice - 2 cups water - 1 cup broccoli florets - 1 red bell pepper, sliced - 1 carrot, julienned - 3 green onions, chopped - 4 tablespoons soy sauce - 2 tablespoons honey - 1 tablespoon ginger, minced - 1 tablespoon garlic, minced - 1 teaspoon sesame oil - Sesame seeds for garnish In this recipe, chicken thighs bring rich flavor and juiciness. Jasmine rice provides a light and fluffy base. Fresh vegetables add color and crunch. This mix creates a balanced meal. - Additional vegetables like snap peas or zucchini - Spices and seasonings such as crushed red pepper or black pepper You can customize your teriyaki chicken bowls. Adding more veggies boosts nutrients and flavor. Spices can add a kick if you like heat. - Large pan for cooking - Medium saucepan for rice - Cooking utensils like spatula and knife - Measuring cups and spoons Having the right tools makes cooking easy. A large pan helps to cook the chicken and veggies evenly. Be sure to measure your ingredients for best results. For the full recipe, check out the instructions to create your delicious teriyaki chicken bowls! To start, you need to marinate the chicken. In a bowl, mix cubed chicken thighs with soy sauce, honey, minced ginger, minced garlic, and sesame oil. This blend adds great flavor. I suggest marinating for at least 15 minutes. The longer you wait, the more flavor the chicken absorbs. Timing is key here; don’t skip this step, as it makes a big difference. Next, let's cook the rice. Rinse jasmine rice under cold water until the water runs clear. This helps remove excess starch. In a medium saucepan, bring 2 cups of water to a boil. Add the rinsed rice, cover, and lower the heat. Cook for about 15 minutes. This method gives you fluffy rice. After cooking, let it sit covered for 5 minutes. This helps the grains relax. While the rice cooks, heat olive oil in a large pan over medium heat. Add broccoli, red bell pepper, and carrot. Stir-fry these veggies for about 5-7 minutes. You want them tender but still crunchy. Remove them from the pan to keep their bright colors and crisp texture. Now, it’s time to cook the chicken. In the same pan, add the marinated chicken. Use a medium-high heat for even cooking. Cook it for 6-8 minutes until it turns golden brown. Pour in the reserved marinade and cook for another 2-3 minutes. This thickens the sauce and coats the chicken beautifully. Check that the chicken is fully cooked. Let’s put everything together! Fluff the cooked rice with a fork. Take a serving of rice and place it in a bowl. Top it with your sautéed vegetables and the teriyaki chicken. Layering adds visual appeal and makes each bite delicious. For the finishing touch, sprinkle sesame seeds and chopped green onions on top. These toppings add flavor and a nice crunch. They also make your teriyaki chicken bowls look extra inviting. Enjoy your meal! For the full recipe, check out the detailed steps above. To make the best teriyaki chicken, marinating is key. You should marinate the chicken for at least 15 minutes. This time allows the flavors to soak in. If you can, let it sit longer. A few hours or overnight makes a huge difference. To avoid dryness, cook the chicken over medium heat. This keeps the chicken juicy. Use a meat thermometer to check for doneness. Chicken should reach 165°F (75°C). Avoid overcooking, as this can lead to a tough texture. When cooking for meal prep, store portions in airtight containers. This keeps the chicken fresh and tasty. You can separate the rice and veggies from the chicken. This way, the flavors stay vibrant. For reheating, use the microwave for quick results. Heat in short bursts to avoid overcooking. You can also use a skillet on low heat. This method keeps the chicken from drying out. Just add a splash of water to create steam. Pair your teriyaki chicken bowls with sides like steamed edamame or a fresh salad. These sides add crunch and balance the meal. For beverages, green tea works well with teriyaki flavors. It adds a refreshing touch. You can also enjoy a light beer or a fruity soda. These drinks complement the sweet and savory notes of the dish. {{image_2}} You can easily change the protein in your teriyaki chicken bowls. Tofu is a great choice for a vegetarian meal. It soaks up flavor and adds a nice texture. Just press it to remove excess water and cut it into cubes. Marinate it just like you would the chicken. Seafood can also work well. Shrimp or salmon brings a different taste and cooks quickly. Remember to adjust your cooking time. Cook shrimp for just a few minutes until they turn pink. For salmon, aim for 5-7 minutes until it flakes easily. You can use both homemade and store-bought teriyaki sauce. Homemade sauce lets you control the flavors. It typically includes soy sauce, honey, and ginger. If you use a store-bought sauce, look for one with less sugar and no added preservatives. Want to mix it up? Try different sauces! Hoisin sauce adds sweetness, while sriracha can bring heat. Each sauce gives a unique twist to your bowls. Switching your grains is an easy way to change the dish. Brown rice is a healthier option. It has more fiber and a nutty taste. Quinoa is another choice; it’s protein-rich and gluten-free. Seasonal vegetables can also change your bowls. In summer, add zucchini and corn. In fall, try roasted sweet potatoes or Brussels sprouts. Mixing in seasonal veggies keeps your dish fresh and exciting. Check out the full recipe for more ideas! To store leftover teriyaki chicken bowls, let them cool first. Place them in an airtight container. This keeps the flavors fresh and safe. You can store them in the fridge for up to 3 days. Always check for any signs of spoilage before eating. You can freeze teriyaki chicken bowls for later use. Place cooled servings in freezer-safe bags or containers. Remove as much air as possible to prevent freezer burn. You can freeze them for up to 2 months. When ready to eat, thaw in the fridge overnight. To reheat, warm them in the microwave or on the stove until hot. Leftover teriyaki chicken can be fun! You can turn them into a stir-fry with rice or noodles. Add some extra veggies for a new twist. Always check that leftovers are heated to 165°F for safety. If you see any strange odors or colors, it’s best to toss them. Enjoy your meals safely! To make teriyaki sauce, you need just a few items. Combine 4 tablespoons of soy sauce, 2 tablespoons of honey, 1 tablespoon of ginger, and 1 tablespoon of garlic in a bowl. Mix them well. This simple homemade recipe gives your chicken a rich flavor, perfect for your teriyaki chicken bowls. Yes, you can use chicken breasts. However, chicken thighs provide more flavor and moisture. Thighs are also more forgiving if slightly overcooked. Chicken breasts can dry out faster. If you prefer breasts, marinate them well to boost flavor and keep them juicy. Many vegetables work well with teriyaki chicken. I recommend broccoli, bell peppers, and carrots. These add color, crunch, and nutrition. You can also add snap peas or zucchini for extra flavor. Choose veggies you love to make the dish your own. Marinate the chicken for at least 15 minutes. This time helps the chicken absorb the flavors. For even better results, marinate for 30 minutes or more. Just keep it in the fridge. This process maximizes flavor absorption and makes each bite delicious. Teriyaki chicken bowls can be healthy! They offer protein from chicken and vitamins from vegetables. To make them even healthier, use brown rice instead of white. Add more veggies and reduce the amount of sauce. This way, you keep the great taste while making a nutritious meal. You now know how to make delicious teriyaki chicken bowls at home. We covered key ingredients, useful equipment, and step-by-step cooking methods. You learned important tips to avoid dryness and how to store leftovers properly. Feel free to experiment with variations, like protein swaps and different sauces. With practice, you can perfect this dish to suit your taste. Enjoy your cooking journey and share your creations with friends!

Teriyaki Chicken Bowls Delicious and Easy Recipe

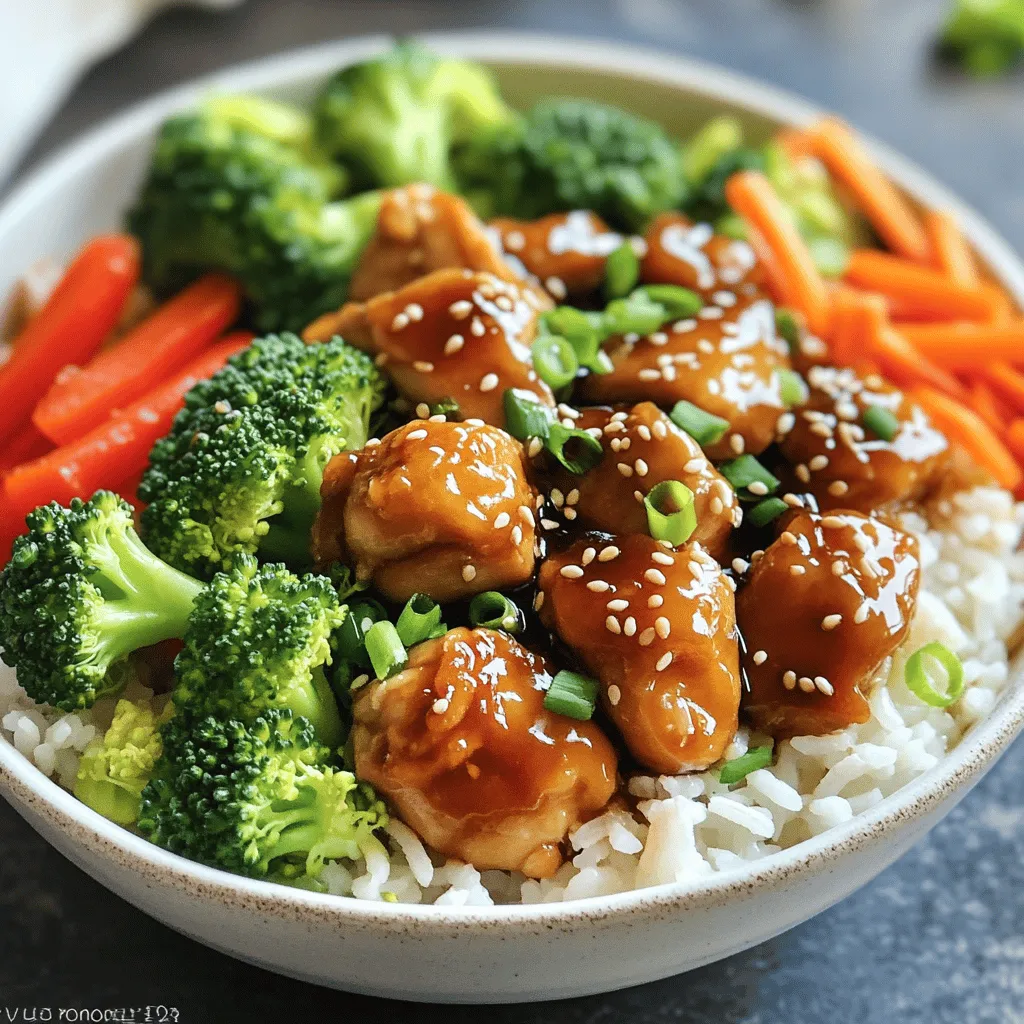
Craving a quick, tasty meal? Look no further! My Teriyaki Chicken Bowls are simple to make and packed with flavor.

To make a great Spaghetti Aglio e Olio, you need: - 400g spaghetti - 6 cloves garlic, thinly sliced - 1/2 cup extra virgin olive oil These are the three key players in this dish. The spaghetti gives the meal its base. The garlic brings a strong flavor, and the olive oil adds richness. To make your dish even better, consider these garnishes: - 1 teaspoon red pepper flakes (adjust to taste) - 1/4 cup fresh parsley, finely chopped - Freshly grated Parmesan cheese (optional, for serving) Red pepper flakes add heat, parsley gives freshness, and Parmesan adds a nice salty touch. You can elevate your dish with these flavor enhancers: - Zest of 1 lemon (for a fresh twist) - Salt, to taste Lemon zest brightens the dish, while salt brings out all the flavors. Remember, these small additions make a big difference! For the full recipe, check out the Garlic Lover's Spaghetti Aglio e Olio 🧄. 1. Boiling the spaghetti: Fill a large pot with water and add salt. Bring it to a boil. Once boiling, add 400g of spaghetti. Cook until it is al dente, usually about 8 to 10 minutes. Stir it occasionally to prevent sticking. 2. Reserving pasta cooking water: Before you drain the spaghetti, save about 1 cup of the cooking water. This water is starchy and helps the sauce stick to the pasta. 1. Sautéing garlic: In a large skillet, pour 1/2 cup of extra virgin olive oil. Heat it over medium heat. Add 6 cloves of thinly sliced garlic. Sauté the garlic until it turns golden brown, which takes about 2 minutes. Watch it closely to avoid burning. 2. Adding red pepper flakes: Once the garlic is golden, sprinkle in 1 teaspoon of red pepper flakes. Stir them for about 30 seconds. This step releases their flavor into the oil. 1. Tossing spaghetti with sauce: Carefully add the drained spaghetti to the skillet. Use tongs to mix the pasta with the garlic oil. If the sauce seems dry, add the reserved pasta water a little at a time until the pasta is well coated. 2. Adding parsley and lemon zest: Remove the skillet from heat. Stir in 1/4 cup of finely chopped fresh parsley and the zest of 1 lemon. Add salt to taste. This gives the dish a fresh, bright flavor. Remember to enjoy your meal right away! To make great spaghetti aglio e olio, cook your spaghetti to al dente. This means it should be firm but not hard. Check the package for cooking time. Taste a strand a minute or two before the timer goes off. Avoiding burnt garlic is key. Slice the garlic thinly and watch it closely. Cook it over medium heat. Stir it gently until it turns golden brown. If the garlic burns, it will taste bitter and ruin your dish. Adjusting heat with red pepper flakes adds a nice kick. Start with one teaspoon. You can always add more if you like it spicier. Mix the flakes in with the garlic for a minute to release their flavor. The importance of fresh ingredients cannot be overstated. Use fresh parsley and good quality olive oil. These will make your dish pop with flavor. Fresh lemon zest also adds brightness. Just a small amount can change everything. Serve your spaghetti in warm bowls. This keeps it hot and makes a great first impression. Top each serving with extra parsley for color. A light drizzle of olive oil adds shine and flavor. For a special touch, sprinkle fresh Parmesan cheese on top. It melts slightly and adds a rich taste. Serve your dish right away for the best experience. If you want to try this recipe, check out the Full Recipe for Garlic Lover's Spaghetti Aglio e Olio. {{image_2}} You can change your pasta type for Spaghetti Aglio e Olio. Try linguine or fettuccine. These shapes hold the sauce well. You can also use whole wheat or chickpea pasta for a twist. Herbs and spices can also add fun flavors. Swap parsley with basil for a fresh taste. You could try oregano, thyme, or even dill. Each gives a unique touch. If you need gluten-free options, use gluten-free spaghetti. Many brands offer great taste and texture. You won’t miss the gluten! For a vegan version, skip the Parmesan cheese. You can use nutritional yeast instead. It adds a cheesy flavor without dairy. You can make this dish even more exciting. Add veggies like zucchini or cherry tomatoes. They bring color and extra nutrients. Want some protein? Toss in cooked shrimp or grilled chicken. Both pair well with garlic and olive oil. They make the dish heartier and filling. To keep your spaghetti aglio e olio fresh, store it properly. Place leftovers in an airtight container. Make sure to cool it to room temperature first. Refrigerate it for up to three days. If you want to save it longer, freeze it. Use freezer-safe bags or containers. Squeeze out the air before sealing. This helps prevent freezer burn. You can freeze it for up to two months. For reheating, I recommend using a skillet. Heat it over medium-low heat. Add a splash of olive oil or reserved pasta water. This keeps the pasta moist. Stir gently until warmed through. You can also use the microwave. Place the pasta in a microwave-safe bowl. Add a little water for moisture. Cover the bowl with a damp paper towel. Heat in short bursts, stirring in between. This keeps the flavor and texture just right. What is Spaghetti Aglio e Olio? Spaghetti Aglio e Olio is a simple Italian pasta dish. It uses spaghetti, garlic, olive oil, and red pepper flakes. The dish is quick to make and full of flavor. It highlights the beauty of few fresh ingredients. How long does it take to prepare? You can make Spaghetti Aglio e Olio in about 20 minutes. It takes just 10 minutes to prep and another 10 to cook. This makes it a great choice for busy nights. Can I use garlic powder instead of fresh garlic? You can use garlic powder, but fresh garlic gives better flavor. If you use powder, use about 1/4 teaspoon per clove. Fresh garlic has a stronger taste and aroma. What can I substitute for olive oil? If you don't have olive oil, you can use other oils. Avocado oil or canola oil can work. However, olive oil adds a unique flavor that is hard to match. What to serve with Spaghetti Aglio e Olio? You can serve this dish with a fresh salad or garlic bread. A light salad adds a nice crunch. Garlic bread complements the flavors well. Is it okay to add protein to the dish? Yes, you can add protein like shrimp or grilled chicken. This makes the dish more filling. Just remember to adjust cooking times for the protein you choose. Access the full recipe for Garlic Lover's Spaghetti Aglio e Olio 🧄 to enjoy this quick and savory meal. In this post, we explored the ingredients and steps for making Spaghetti Aglio e Olio. We covered the main ingredients like spaghetti, garlic, and olive oil, plus tips for making the dish shine. Options for garnishes, variations, and storage tips helped complete the picture. I hope you feel inspired to try this simple yet tasty dish. With a few fresh ingredients and careful steps, you can create a meal you'll love. Enjoy your cooking journey!

Spaghetti Aglio e Olio Quick and Savory Recipe

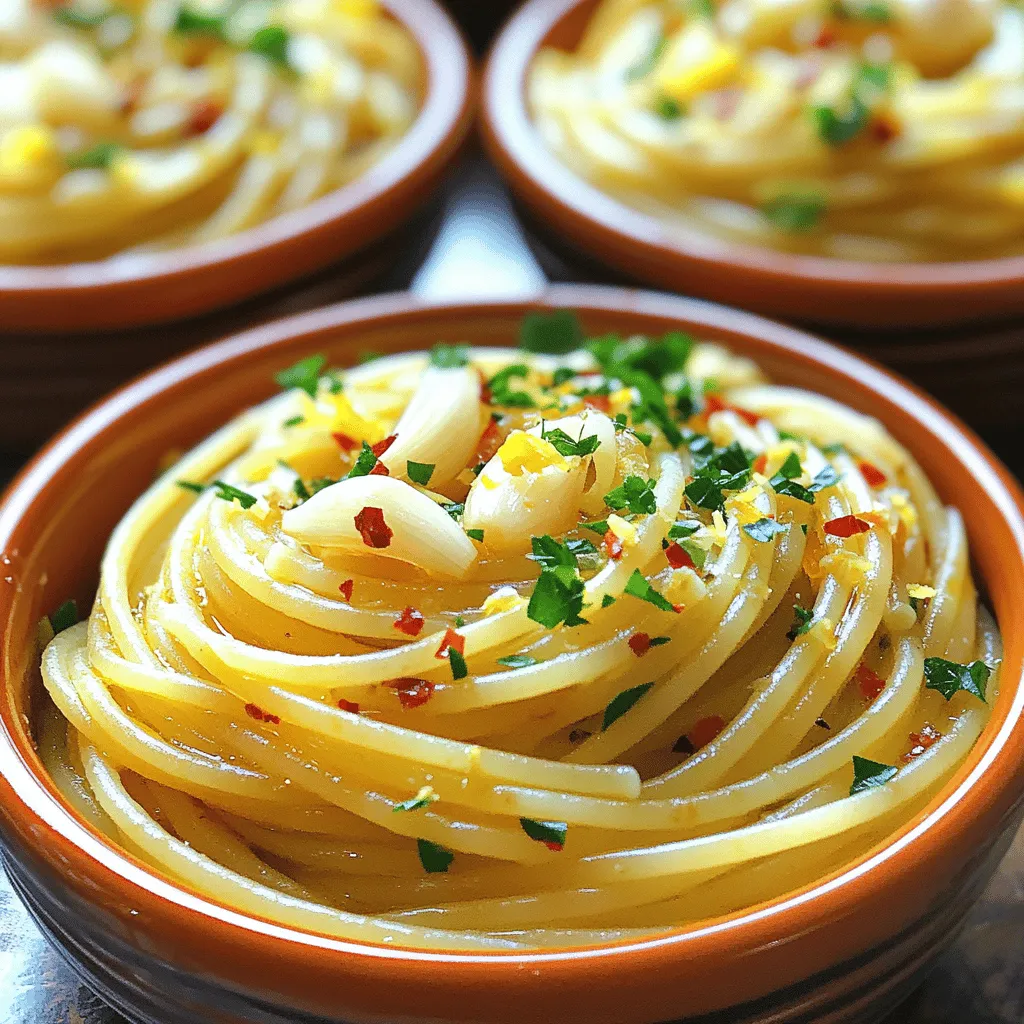
Looking for a quick and tasty pasta dish? Spaghetti Aglio e Olio packs big flavor in just minutes! With simple

- 1 medium head of cauliflower, cut into bite-sized florets - 1 cup all-purpose flour - 1 teaspoon garlic powder - 1 teaspoon onion powder - 1 teaspoon paprika - ½ teaspoon salt - ½ teaspoon black pepper - 1 cup water - 1 cup buffalo sauce (store-bought or homemade) - 2 tablespoons olive oil To make Buffalo Cauliflower Bites, you need fresh cauliflower florets. They serve as the main ingredient. Look for a medium head of cauliflower. Cut it into bite-sized florets. This helps them cook evenly and makes them easy to eat. Next, you need to create the batter. The batter consists of flour, garlic powder, onion powder, paprika, salt, and black pepper. These spices add great flavor. You will also need water to mix the dry ingredients into a smooth batter. The buffalo sauce gives these bites their signature kick. You can use store-bought sauce or make your own. Adding olive oil to the sauce enhances its richness. - Fresh celery sticks, for serving - Ranch or blue cheese dressing, for dipping When serving these bites, consider adding fresh celery sticks. They add a nice crunch and balance the heat. Dipping sauces are also great. Ranch or blue cheese dressing complements the flavors well. You can serve this dish as an appetizer or a tasty snack. For the full recipe, check out the complete details on how to prepare these delicious bites. 1. Start by preheating your oven to 450°F (230°C). This heat will help make your bites crispy. 2. Line a baking sheet with parchment paper. This step keeps the bites from sticking. 3. In a large bowl, mix 1 cup of all-purpose flour, 1 teaspoon of garlic powder, 1 teaspoon of onion powder, 1 teaspoon of paprika, ½ teaspoon of salt, and ½ teaspoon of black pepper. This mix creates a tasty batter. 4. Slowly add 1 cup of water to the flour mix. Whisk until you see a smooth batter. 1. Cut a medium head of cauliflower into bite-sized florets. Each piece should be similar in size for even cooking. 2. Dip each cauliflower floret into the batter. Let the extra batter drip off before placing them on the baking sheet. 3. Bake the cauliflower for 20-25 minutes. Turn them halfway through for even browning. They should look golden and crispy when done. 4. While the cauliflower bakes, mix 1 cup of buffalo sauce with 2 tablespoons of olive oil in a bowl. This sauce adds flavor and moisture. 5. Once baked, take the cauliflower out and toss it in the buffalo sauce. Make sure each piece gets coated well. 1. Return the sauced cauliflower to the baking sheet. Bake again for 10-15 minutes. This extra baking helps the sauce stick and adds more crispiness. 2. After baking, remove them from the oven and let cool for a few minutes. 3. Serve with fresh celery sticks and your choice of ranch or blue cheese dressing for dipping. Enjoy your flavorful buffalo cauliflower bites! For a complete guide, check out the Full Recipe. For the best crispy buffalo cauliflower bites, follow these tips: - Use a high oven temperature: Preheat your oven to 450°F (230°C). This helps achieve a golden crust. - Space them out: Arrange the cauliflower bites on the baking sheet so they are not touching. This allows hot air to circulate. - Try a wire rack: Place the baking sheet on a wire rack. This helps air flow around the bites for extra crispiness. If you want to avoid baking, you can also use an air fryer. It cooks the bites quickly and makes them very crispy without the extra oil. Watch out for these errors to ensure perfect bites: - Overbattering the cauliflower: Dip the florets in batter but do not drown them. A light coat gives a nice crunch. - Not pre-heating the oven correctly: Always preheat your oven. If it’s not hot enough, the bites will turn out soggy. To kick up the taste, consider these ideas: - Add spices: Mix in cayenne pepper or smoked paprika for a stronger flavor. You can also try cumin or chili powder for a twist. - Use homemade buffalo sauce: Making your sauce at home gives you control over the heat and flavor. Combine butter, hot sauce, and a splash of vinegar for a simple recipe. By using these tips, your buffalo cauliflower bites will be both crispy and full of flavor. For the complete guide, check out the Full Recipe. {{image_2}} You can make vegan buffalo cauliflower bites easily. Instead of all-purpose flour, use chickpea flour or almond flour. These flours add a unique taste and keep the bites crispy. For the batter, blend the flour with water, garlic powder, and spices. This mix makes a great coating without eggs or dairy. You can switch up the flavors by using different sauces. Try teriyaki or barbecue sauce instead of buffalo sauce for a new twist. For extra heat, add cayenne pepper or hot sauce to the batter. If you prefer a milder flavor, reduce the buffalo sauce or use a sweet chili sauce. It’s all about your taste! Buffalo cauliflower bites work well as appetizers. Serve them with ranch or blue cheese dressing for dipping. They also shine as a main dish. Add them to salads or grain bowls for a healthy, filling meal. Mix them with greens, quinoa, or brown rice for a delicious combo. You can find the full recipe to try these variations yourself! To store your buffalo cauliflower bites, place them in an airtight container. Make sure to cool them completely first. This keeps them fresh and prevents sogginess. Store them in the fridge for up to three days for the best flavor. After three days, they may lose some crispiness and taste. If you want to keep them longer, consider freezing them. Just remember to separate layers with parchment paper to avoid sticking. When it comes to reheating, the oven is your best friend. Preheat it to 350°F (175°C). Place the bites on a baking sheet and heat them for about 10 minutes. This helps them regain their crispiness. If you use a microwave, the bites may turn soft. Heat them in short bursts, but expect less crunch. Using the oven will give you better results. Enjoy your buffalo cauliflower bites just like when they were fresh! For the full recipe, check out the Buffalo Cauliflower Bites section above. To make great buffalo cauliflower bites, cut the cauliflower into small, even florets. This helps them cook evenly. Aim for pieces that are about 1 to 1.5 inches in size. When they are uniform, they will bake nicely. You want them to be crispy on the outside and tender on the inside. Yes, you can easily make these bites gluten-free. Instead of all-purpose flour, use almond flour or a gluten-free flour blend. Both options work well and will give you a nice coating. Just remember to check the labels to ensure they are certified gluten-free. Buffalo cauliflower bites can be as spicy or mild as you like. If you want more heat, use more buffalo sauce. For less spice, try a milder sauce or mix the buffalo sauce with a bit of yogurt. This way, you can adjust it to fit your taste. These buffalo cauliflower bites can last about 3 to 4 days in the fridge. Store them in an airtight container to keep them fresh. For the best quality, eat them within the first two days. The longer they sit, the less crispy they will become. Buffalo cauliflower bites are a tasty mix of fresh cauliflower, a crunchy batter, and spicy buffalo sauce. I covered how to prepare, bake, and store these bites for the best flavor. Remember to avoid common mistakes like overbattering and not preheating your oven. Enjoy experimenting with flavors and serving styles. You can easily make these bites fit your taste or dietary needs. Make them as a snack or a meal. No matter the choice, they sure are a hit!

Buffalo Cauliflower Bites Flavorful and Crispy Delight

Are you ready to savor a crunchy, spicy treat? Buffalo Cauliflower Bites are simple, delicious, and perfect for any gathering.

- 2 cans chickpeas, drained and rinsed - 1 can coconut milk - 1 onion, diced - 3 cloves garlic, minced - 1 tablespoon fresh ginger, grated Canned chickpeas make this dish quick and easy. They add protein and fiber. Coconut milk gives it a creamy texture and rich flavor. The onion, garlic, and ginger create a savory base. You can use fresh ginger for the best taste. - 2 tablespoons red curry paste - 1 teaspoon turmeric - 1 teaspoon cumin - 1 tablespoon soy sauce Red curry paste brings heat and depth. Turmeric adds a warm color and earthy taste. Cumin gives a nutty flavor that pairs well with the spices. Soy sauce enhances the dish with a salty kick. - 1 cup spinach, fresh - 1 lime, juiced - Fresh cilantro, for garnish Fresh spinach adds color and nutrients. Lime juice brightens the dish with a tangy zing. Cilantro adds freshness and a pop of flavor. For the full recipe, check out the details above. Start by heating the coconut oil in a large pot over medium heat. Once hot, add the diced onion. Sauté it for about 5 minutes, until it turns translucent. This step builds a strong flavor base. Next, stir in the minced garlic and grated ginger. Cook these for 1-2 minutes until you can smell their aroma. This is where the magic begins. Now, add the red curry paste, turmeric, and cumin. Stir them together and let them cook for 2-3 minutes. This helps the spices release their full flavor. It’s time to incorporate the main ingredients. Pour in the vegetable broth and coconut milk, stirring to mix everything well. The coconut milk makes the dish creamy and rich. Add the drained and rinsed chickpeas along with the soy sauce. Bring the mixture to a gentle simmer. Let it cook for about 15 minutes. This allows all the flavors to meld beautifully. To complete your dish, stir in the fresh spinach and lime juice. Cook for an additional 2 minutes until the spinach wilts. The bright green color adds freshness. Finally, season with salt and pepper to taste. Serve the coconut curry chickpeas over warm rice or quinoa. Garnish with fresh cilantro and a wedge of lime. This dish is not only tasty but also vibrant and inviting. For the complete recipe, check the Full Recipe section. Customizing Spice Levels You can control the heat in your coconut curry chickpeas. If you like it mild, use less red curry paste. For more heat, add extra paste or some chili flakes. Taste as you go. This lets you adjust the spice to your liking. Balancing Coconut Milk Creaminess Coconut milk adds a rich, creamy feel to your dish. If it feels too thick, add more vegetable broth. If you want it thicker, simmer it longer. This balance creates a lovely texture that pairs well with chickpeas. Using Fresh vs. Canned Ingredients Using canned chickpeas makes this dish quick to prepare. They are already cooked, saving time. Fresh chickpeas take longer but offer a different texture. If you choose fresh, soak and cook them beforehand. Best Tools for Cooking A heavy pot or Dutch oven works well for this dish. It holds heat evenly. A good wooden spoon is perfect for stirring. A zester or grater helps with ginger and lime. These tools make your cooking easier and more fun. Garnishes and Serving Options Garnish your dish with fresh cilantro and a lime wedge. This adds color and flavor. Serve it over warm rice or quinoa. These sides soak up the sauce and make each bite tasty. Plate Suggestions for Visual Appeal Use a shallow bowl for serving. This allows the vibrant colors to shine. Arrange the chickpeas and sauce artfully. A sprinkle of cilantro on top makes it look fresh and inviting. {{image_2}} Mild Version If you want a milder taste, use less red curry paste. Start with one tablespoon. You can also add more coconut milk to lessen the heat. This keeps the dish creamy and delicious. Spicy Version with Extras For those who love heat, add more red curry paste. You can also mix in some chopped fresh chili peppers. A sprinkle of cayenne pepper can kick it up a notch, too. Adding Vegetables like Bell Peppers or Carrots Feel free to add veggies for more flavor and nutrition. Bell peppers add a sweet crunch. Carrots bring a nice earthiness. Simply chop them and sauté them with the onion. Protein-Rich Alternatives like Tofu To make this dish heartier, toss in some tofu. Press and cube it, then sauté it until golden. Tofu soaks up the curry flavors well. You get a protein boost without losing taste. Gluten-Free Options This dish is already gluten-free! Just use gluten-free soy sauce. Always check the labels to be safe. Nut-Free Versions To keep this recipe nut-free, ensure your curry paste is nut-free. Most brands are safe, but it’s good to check. Enjoy the creamy coconut flavor without any worries. For the full experience, check out the Full Recipe for Coconut Curry Chickpeas. After making coconut curry chickpeas, you will want to store any leftovers. Place them in a clean, airtight container. This helps keep the dish fresh. Always cool the curry to room temperature before sealing it. This step prevents moisture buildup and keeps it safe to eat later. You can freeze coconut curry chickpeas for later use. First, let the dish cool completely. Then, transfer it to a freezer-safe container. Leave some space at the top for expansion. When you're ready to enjoy it again, take the curry out of the freezer. Thaw it in the fridge overnight or use the microwave on a low setting. Reheat on the stove until warm. Stir well to ensure even heating. Coconut curry chickpeas last about three to four days in the fridge. If you notice any off smells or colors, it's time to discard the dish. Look for changes in texture, too. If it becomes too thick or separates, it may no longer be good. Always trust your senses when checking for spoilage. Making Coconut Curry Chickpeas takes about 30 minutes total. You will need 10 minutes to prep the ingredients. This time includes chopping onions, mincing garlic, and grating ginger. The cooking process takes about 20 minutes. You can have a delicious meal ready in no time. Yes, this recipe is completely vegan. All the ingredients are plant-based. The chickpeas provide protein, while coconut milk adds creaminess. You can enjoy this dish without worrying about animal products. It fits well in a vegan diet. You can make Coconut Curry Chickpeas ahead of time. Store leftovers in an airtight container in the fridge. They will stay fresh for up to four days. If you want to prepare it even earlier, you can freeze it. Just thaw it in the fridge before reheating. This makes it easy to enjoy later. Coconut curry chickpeas are tasty and easy to make. We covered the main ingredients, cooking steps, and tips for perfect flavor. You can adjust spice levels and swap in your favorite veggies. Remember to store your leftovers properly to keep them fresh. With all these ideas, you can create your perfect dish. Embrace the versatility of this recipe and enjoy every bite!

Coconut Curry Chickpeas Flavorful and Simple Dish

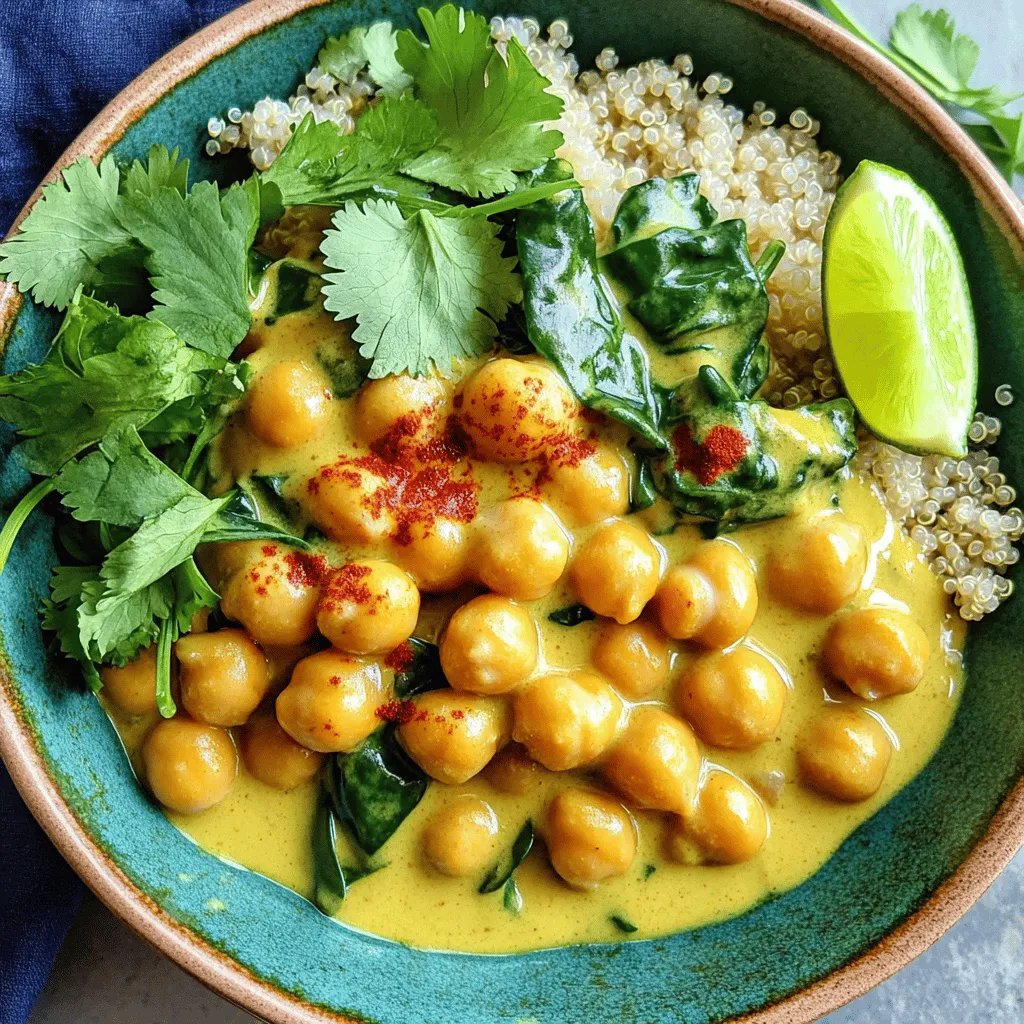
Are you ready to spice up your dinner plans? My Coconut Curry Chickpeas recipe is the perfect blend of vibrant

- 1 lb (450g) baby carrots, peeled - 2 tablespoons olive oil - 3 tablespoons honey - 2 tablespoons Dijon mustard - 1 teaspoon garlic powder - 1 teaspoon salt - ½ teaspoon black pepper - Fresh parsley, chopped (for garnish) - Mixing bowl - Whisk - Baking sheet - Parchment paper The key to great honey mustard roasted carrots lies in the ingredients. I always choose fresh baby carrots because they are sweet and tender. You can find these at most grocery stores. If you prefer, you can use regular carrots cut into sticks. For the sauce, I mix olive oil, honey, and Dijon mustard. This blend gives the carrots a sweet and tangy flavor. Garlic powder adds depth, while salt and black pepper enhance the taste. Fresh parsley brings a pop of color and freshness at the end. In terms of tools, a mixing bowl and whisk help you mix the sauce well. A baking sheet lined with parchment paper makes clean-up easy. Using parchment prevents sticking and helps the carrots caramelize nicely. These ingredients and tools create a simple, yet flavorful dish. For the full recipe, check out the section above. - Preheat your oven to 400°F (200°C). - In a large mixing bowl, combine: - 2 tablespoons olive oil - 3 tablespoons honey - 2 tablespoons Dijon mustard - 1 teaspoon garlic powder - 1 teaspoon salt - ½ teaspoon black pepper Whisk these ingredients together until smooth. This mixture gives the carrots their sweet and tangy flavor. - Add 1 lb (450g) of peeled baby carrots to the bowl. - Toss the carrots in the honey mustard mixture until fully coated. - Spread the carrots out in a single layer on a baking sheet lined with parchment paper. Roast the carrots in the preheated oven for about 25-30 minutes. Check them halfway through and toss for even cooking. The goal is to make them tender and slightly caramelized. - Once done, take the carrots out of the oven and let them cool for a couple of minutes. - Transfer the roasted carrots to a serving dish. - Garnish with freshly chopped parsley before serving. For the best look, arrange the carrots neatly. A little sprinkle of parsley adds color and freshness. This dish is sure to impress at any meal. To roast carrots well, start by setting your oven to 400°F (200°C). This temperature helps the carrots cook evenly and caramelize nicely. Roast them for about 25 to 30 minutes. This timing works for baby carrots. Toss them halfway through cooking. This step ensures each carrot gets that perfect roast. Want to add some zing? Try adding spices! A pinch of cayenne pepper can bring heat. Smoked paprika adds a lovely depth as well. Fresh herbs can also boost the flavor. Chopped parsley or thyme is great for garnishing. These herbs will brighten the dish and make it look fresh. If your carrots turn out too soft, they may have cooked too long. Next time, check them a bit sooner. For burnt edges, keep an eye on your oven. If they burn, you can trim off the charred parts. This way, you still enjoy the sweet and tangy taste. Follow these tips, and you will have perfect honey mustard roasted carrots every time. For the complete recipe, check out the [Full Recipe]. {{image_2}} You can use many types of carrots in this dish. Regular carrots are easy to find and tasty. They have a sweet flavor and a nice crunch. Baby carrots are smaller and cook faster. They are perfect for quick meals. If you want color, try a mix of carrots. Purple, yellow, and orange carrots make the dish bright. They also add different tastes. Using a colorful carrot mix makes the meal more fun and appealing. If you want to change the flavor, try using agave syrup instead of honey. Agave gives a similar sweetness and works well in this recipe. You can also switch mustards. Try yellow mustard for a tangy taste or whole grain mustard for texture. Each mustard adds a unique twist to the dish. Mixing flavors can create a new favorite version of honey mustard roasted carrots. This recipe can easily fit different diets. To make it vegan, swap honey for maple syrup or agave syrup. Both options keep the sweetness without honey. For those who need gluten-free meals, this recipe is safe as is. Just check the mustard to ensure it’s gluten-free. These simple changes let everyone enjoy this tasty dish. For the full recipe, check the earlier section! To keep your honey mustard roasted carrots fresh, place them in an airtight container. Let them cool first before sealing. Store the container in the refrigerator. They will stay good for about 3 to 5 days. If you want to save space, you can use a glass container with a tight lid. When it's time to enjoy leftovers, reheating is key. The best way is to use an oven. Preheat the oven to 350°F (175°C). Spread the carrots on a baking sheet. Heat for about 10-15 minutes until warm. This method helps keep the carrots crispy. If you're in a hurry, you can use a microwave. Just heat them in short bursts of 30 seconds, stirring in between. You can keep roasted carrots in the fridge for up to 5 days. If you freeze them, they will last about 2 to 3 months. Watch for signs of spoilage. If the carrots look mushy or have an off smell, it’s best to throw them away. Always trust your senses for food safety! Yes, you can use pre-cut carrots. They save time and effort. However, they might not taste as fresh as whole carrots. Pre-cut carrots may also be uneven in size, leading to uneven cooking. If you choose pre-cut carrots, check for quality. Freshness matters for great flavor. You can prep this dish ahead of time. Peel and cut the carrots a day before. Store them in water in the fridge. This keeps them fresh and crisp. You can also mix the honey mustard sauce in advance. Just toss everything together before roasting. These carrots pair well with many dishes. Try serving them with roasted chicken or grilled fish. They also go great with quinoa or a fresh salad. For a full meal, add some rice or potatoes. Feel free to mix and match! For the complete guide to making these tasty carrots, check out the Full Recipe. In this blog post, we explored how to make delicious honey mustard roasted carrots. We covered the ingredients and the recommended tools you need. The step-by-step instructions help you prepare, cook, and serve. We also shared tips to perfect your dish, fun variations, and proper storage methods. Remember, with simple adjustments, you can personalize this recipe. Whether you stick to the classic or try new flavors, these carrots will shine on your table. Enjoy the crunch and sweetness of this tasty side!

Honey Mustard Roasted Carrots Flavorful and Easy Recipe

Looking for a side dish that’s both tasty and easy to make? Honey Mustard Roasted Carrots are the answer! With

For this Chickpea Salad with Feta, you will need the following ingredients: - 1 can (15 oz) chickpeas, drained and rinsed - 1 cup cherry tomatoes, halved - 1 cucumber, diced - 1/2 red onion, finely chopped - 1 bell pepper (any color), diced - 1/2 cup feta cheese, crumbled - 2 tablespoons fresh parsley, chopped - 3 tablespoons olive oil - 1 tablespoon lemon juice - 1 teaspoon dried oregano - Salt and pepper to taste These ingredients blend well together, creating a fresh and tasty salad. If you don’t have some fresh ingredients, don’t worry! You can swap them out easily. - Chickpeas: Use dried chickpeas if you prefer. Just remember to soak and cook them first. - Tomatoes: If cherry tomatoes aren’t available, use diced regular tomatoes. - Cucumber: You can switch cucumber for zucchini or bell peppers. - Red onion: Try green onions or shallots if you need a milder taste. - Feta cheese: Goat cheese or a vegan feta can work too. - Fresh parsley: If you lack fresh parsley, try dried or use basil. Want to spice up your salad? Here are some fun add-ins to consider: - Olives: Add sliced black or green olives for a briny taste. - Avocado: Diced avocado brings creaminess and healthy fats. - Nuts or seeds: Throw in some sunflower seeds or walnuts for crunch. - Spices: A pinch of cumin or smoked paprika can add a nice kick. - Cilantro: If you enjoy its taste, chopped cilantro adds freshness. Feel free to mix and match these ingredients! You can find the full recipe [here]. To make the chickpea salad, gather all ingredients first. You will use one can of chickpeas, cherry tomatoes, cucumber, red onion, bell pepper, feta cheese, and parsley. The dressing needs olive oil, lemon juice, oregano, salt, and pepper. Rinse the chickpeas under cold water to remove any canning liquid. Cut the cherry tomatoes in half and dice the cucumber and bell pepper. Chop the red onion finely. This helps all flavors mix well. In a large bowl, combine the chickpeas, cherry tomatoes, cucumber, red onion, and bell pepper. This makes a colorful base for your salad. Next, add the crumbled feta cheese and chopped parsley. They bring creaminess and freshness. In a small bowl, whisk the olive oil, lemon juice, oregano, salt, and pepper together. Pour this dressing over the salad. Toss gently to coat all ingredients evenly. This step makes sure every bite is tasty. Let your salad sit in the fridge for 10 to 15 minutes before serving. This helps the flavors blend well. You can taste the salad before serving and adjust the salt and pepper. If you want a crunch, add nuts or seeds. For a kick, try a bit of red pepper flakes. Follow the Full Recipe to make this dish shine! To make your chickpea salad shine, balance is key. Use fresh ingredients for the best taste. Combine salty feta with sweet tomatoes. This mix creates a delicious contrast. Add herbs like parsley for freshness. A touch of lemon juice brightens every bite. Experiment with spices like cumin or paprika for depth. Remember, taste as you go. Adjust seasoning to suit your palate. Keeping your salad fresh is simple. Store it in an airtight container in the fridge. This keeps moisture in and air out. If you make it ahead, add the dressing just before serving. This prevents soggy chickpeas and wilted veggies. You can also keep each ingredient separate until serving time. This way, everything stays crisp and vibrant. Chickpea salad pairs well with many dishes. Serve it alongside grilled chicken or fish for protein. You can also enjoy it with pita bread or on a bed of greens. It makes a great lunch on its own. For a special touch, add olives or avocado slices on top. This adds creaminess and extra flavor. For more ideas, check out the Full Recipe for variations. {{image_2}} For a tasty Mediterranean twist, add some olives and artichokes. You can use black or green olives, whichever you prefer. Artichokes add a nice touch. Toss in some capers for a briny flavor. This mix makes your salad even more vibrant. You can also swap feta cheese for goat cheese if you like. The creaminess of goat cheese pairs well with the other ingredients. This Mediterranean chickpea salad idea is light yet filling. If you want some heat, try adding jalapeños or red pepper flakes. Start with a small amount and taste it. You can always add more spice if you want. For an extra kick, mix in diced avocado. The creaminess will balance out the heat. This spicy chickpea salad variation is perfect for those who love bold flavors. Serve it chilled for a refreshing meal on hot days. To make this salad vegan, skip the feta cheese. You can use tofu instead, or just leave it out. For a creamy texture, add ripe avocado. Use a splash of apple cider vinegar for a tangy touch. This vegan option for chickpea salad still tastes amazing. It keeps all the fresh flavors and textures while being plant-based. You won't miss the cheese at all! For the full recipe, check out the Chickpea Fiesta Salad. To store leftover chickpea salad, place it in an airtight container. Make sure to cover it well. This keeps the salad fresh and tasty. Store it in the fridge for up to three days. If you want to keep it longer, it’s best to freeze the salad without the feta. Add the feta when you’re ready to eat it. When prepping this salad for the week, keep the dressing separate. This way, the salad stays crisp and fresh. You can chop the veggies ahead of time. Just store them in separate containers. Mix everything together when you're ready to eat. This method ensures great taste every time. The chickpeas last about three to five years in the pantry. Fresh veggies like tomatoes and cucumbers stay good for about a week in the fridge. Feta cheese lasts around five days once opened. Always check for signs of spoilage, like changes in smell or texture. For more details, you can refer to the Full Recipe. If you can’t find feta cheese, try using goat cheese. It has a similar tangy flavor. You can also use ricotta for a creamy touch. If you want a dairy-free option, try vegan feta. It mimics the taste of feta well. Yes, you can make this salad ahead of time. Just keep the dressing separate until you are ready to serve. This helps the salad stay fresh and crisp. You can store the salad in the fridge for up to two days. To boost the protein in your salad, add grilled chicken or shrimp. Tofu is a great plant-based option. You can also use canned tuna or chickpeas for extra protein. Adding nuts or seeds can give a nice crunch too. For the full recipe, check the details above. This article covered the key ingredients for your chickpea salad, including options for substitutions and add-ins. We walked through step-by-step instructions for preparing and mixing, plus tips for a perfect toss. You learned best practices for flavor pairings and keeping your salad fresh. We explored tasty variations and storage methods to maintain freshness. Lastly, the FAQs addressed common concerns, making it easy for you to customize and enjoy your salad. Remember, your creativity can turn this basic recipe into your own tasty dish!

Chickpea Salad with Feta Fresh and Flavorful Dish

Are you ready to enjoy a fresh and flavorful dish? Chickpea salad with feta is a great choice! It’s packed

- 1 medium sweet potato, cooked and mashed - 1 cup all-purpose flour - 1 teaspoon baking powder - ½ teaspoon baking soda - ½ teaspoon salt - 1 teaspoon garlic powder - ½ teaspoon smoked paprika - 1 large egg - 1 cup buttermilk (or milk of choice) - 2 tablespoons olive oil - 1 cup shredded cheese (cheddar or gouda work great) - Chopped green onions for garnish To create these tasty savory sweet potato waffles, you need a few simple ingredients. The main star is the sweet potato, which adds a nice flavor and color. The all-purpose flour helps hold everything together, while baking powder and baking soda make the waffles fluffy. Salt, garlic powder, and smoked paprika give your waffles a savory twist. You’ll also need an egg and buttermilk, which add richness and moisture. Olive oil helps with texture and flavor. Finally, cheese like cheddar or gouda adds a creamy, melty touch. Don't forget the green onions for a fresh garnish! You can find the full list of ingredients in the Full Recipe. First, you need to cook the sweet potato. You can boil, steam, or bake it. Each method works well. When it is soft, let it cool. Then, mash the sweet potato in a bowl until smooth. Set it aside. In a clean bowl, combine the dry ingredients. Mix together 1 cup of all-purpose flour, 1 teaspoon of baking powder, and ½ teaspoon of baking soda. Add ½ teaspoon of salt, 1 teaspoon of garlic powder, and ½ teaspoon of smoked paprika. Whisk until everything is blended well. Now, take another bowl. Beat one large egg in it. Then, add 1 cup of buttermilk and 2 tablespoons of olive oil. Whisk these together until they are smooth and combined. Next, take your wet mixture and pour it into the bowl with the dry ingredients. Fold them together gently. Be careful not to overmix. Then, add the mashed sweet potato and 1 cup of shredded cheese. Stir until everything is mixed well. Preheat your waffle iron according to the instructions. Lightly grease it with non-stick spray or oil. Pour about ½ cup of batter into the iron. Close the lid and cook until the waffles turn golden brown. This usually takes about 5-7 minutes. Repeat with the rest of the batter, greasing the iron again if needed. Serve the waffles warm, garnished with chopped green onions and enjoy! To get the best texture, your batter needs to be just right. It should be thick but pourable. If it’s too runny, your waffles will be flat. If it’s too thick, they will not cook well. A good tip is to let the batter rest for a few minutes. This helps it to thicken slightly and improves the texture. For crispy waffles, use a little extra oil in the batter and grease the waffle iron well. Cook the waffles until they are golden brown. This means they are cooked through and crispy. Don’t be afraid to adjust the cooking time based on your waffle iron. Adding spices can elevate your savory sweet potato waffles. Garlic powder and smoked paprika are great choices. Try adding a pinch of cayenne for heat. Fresh herbs like thyme or rosemary also work well for added flavor. When it comes to cheese, cheddar and gouda are fantastic. They melt well and add richness. You can also try feta or pepper jack for a fun twist. Just make sure to shred the cheese finely so it mixes well in the batter. Toppings can make your waffles even more delightful. Sour cream or Greek yogurt adds creaminess. A sprinkle of fresh herbs like chives or parsley brightens the dish. You can also drizzle a bit of hot sauce for a kick. For sides, serve these waffles with a simple salad. A mix of greens with lemon dressing pairs nicely. You can also enjoy them with eggs, either scrambled or poached. This adds protein and makes a filling breakfast. {{image_2}} You can easily swap out flour for gluten-free options. Try almond flour or coconut flour. Both will work well in this recipe. For dairy-free needs, use plant-based milk instead of buttermilk. You can also choose a dairy-free cheese. Look for brands that melt well. For a twist, add sweet elements like maple syrup or cinnamon. These can enhance the flavor of the sweet potato. You can also mix in savory items like cooked bacon or sautéed spinach. They add depth and richness to the waffles. You can make these waffles in an air fryer for a quicker option. Set your air fryer to 350°F and cook for about 10 minutes. If you prefer pancakes, simply pour the batter onto a hot skillet. Cook for about 3-4 minutes on each side until golden brown. This gives you two tasty options! After cooking, let the waffles cool completely. This helps keep them fresh. Once cool, place them in an airtight container. They stay good in the fridge for about 3 to 5 days. Make sure to separate each waffle with parchment paper. This prevents them from sticking together. To freeze your waffles, first cool them as you would for refrigerating. Place the waffles in a single layer on a baking sheet. Freeze them for about 1 hour. After that, transfer them into a freezer bag. Push out as much air as you can. Frozen waffles last for up to 3 months. To reheat, pop them in a toaster or oven. Bake at 350°F for about 10 to 15 minutes. You can make a big batch of waffles in advance. This is great for busy mornings. Store them in the fridge or freezer as mentioned. For quick breakfasts, simply reheat in a toaster or microwave. If using a microwave, warm for 30 seconds at a time. Check them to avoid sogginess. Enjoy your savory sweet potato waffles any day of the week! To make vegan savory sweet potato waffles, replace the egg with a flax egg. Mix 1 tablespoon of ground flaxseed with 2.5 tablespoons of water. Let it sit for a few minutes until it thickens. Use a plant-based milk, like almond or soy, in place of buttermilk. You can also use vegan cheese or skip the cheese for a lighter option. These changes keep the flavor and texture delicious. Yes, you can use sweet potato puree instead of fresh sweet potatoes. This option saves time and works well. Measure out 1 cup of puree to replace the mashed sweet potato in the recipe. Ensure there are no added spices or sugars in the puree for the best flavor. The best way to reheat leftover waffles is in a toaster. This method keeps them crispy. You can also use an oven. Preheat it to 350°F (175°C) and bake the waffles for about 5-10 minutes. Microwaving can make them soggy, so I don’t recommend that. Yes, you can make these waffles ahead of time. Prepare them and let them cool completely. Store them in an airtight container in the fridge for up to 3 days. You can also freeze them if you want to keep them longer. Just follow the freezing instructions for best results. Savory sweet potato waffles are great with many toppings. I love using chopped green onions for a fresh kick. You can also try sour cream or Greek yogurt for creaminess. Hot sauce adds spice, while avocado slices bring a rich flavor. Experiment with your favorites for a fun twist. For the full recipe, check out the section above. Savory sweet potato waffles are easy and fun to make. We covered the key ingredients, from sweet potatoes to cheese. I shared step-by-step instructions to ensure you succeed. We also explored tips for perfecting texture and flavor, plus tasty serving ideas. You can even try variations with different ingredients or cooking methods. These waffles are not just delicious but also versatile for any meal. Enjoy the process, and share them with others. You'll impress everyone with these yummy waffles!

Savory Sweet Potato Waffles Flavorful Breakfast Dish

Start your day with a twist! Savory Sweet Potato Waffles are not only flavorful but also nutritious. These waffles combine

- 1 ½ cups all-purpose flour - ½ cup granulated sugar - 2 teaspoons baking powder - ½ teaspoon baking soda - ½ teaspoon salt - 1 teaspoon ground cinnamon - ¾ cup buttermilk (or milk + 1 tablespoon vinegar) - 1 large egg - 2 tablespoons melted butter - 1 teaspoon vanilla extract - ½ cup granulated sugar - 2 teaspoons ground cinnamon - 4 tablespoons butter, melted Gathering these ingredients is your first step to making delicious cinnamon sugar donuts. The dry ingredients create the base of the donuts, giving them structure and flavor. The all-purpose flour acts as the main ingredient, while sugar adds sweetness. Baking powder and baking soda help the donuts rise, creating a fluffy texture. Salt enhances all the flavors, and cinnamon gives that warm, cozy taste we love. Next, the wet ingredients bring moisture and richness. Buttermilk adds a slight tang, which balances the sweetness. The egg binds everything together, while melted butter adds a rich flavor and moistness. Vanilla extract rounds it all out with a lovely aroma. Finally, the topping ingredients are what make these donuts truly irresistible. The combination of sugar and cinnamon creates a sweet and spicy coating. Melted butter helps the topping stick, ensuring every bite is packed with flavor. For the full recipe, follow the steps to mix these ingredients and create your delightful treats. Enjoy the process as much as the end result! - Preheat your oven to 375°F (190°C). - Lightly grease a donut pan. This helps the donuts come out easily. - In a large mixing bowl, whisk together: - 1 ½ cups all-purpose flour - ½ cup granulated sugar - 2 teaspoons baking powder - ½ teaspoon baking soda - ½ teaspoon salt - 1 teaspoon ground cinnamon This step makes sure everything mixes well and tastes great. - In a separate bowl, whisk together: - ¾ cup buttermilk (or milk + 1 tablespoon vinegar) - 1 large egg - 2 tablespoons melted butter - 1 teaspoon vanilla extract - Pour the wet mix into the dry mix. Stir gently until just combined. A few lumps are okay! - Spoon the batter into the prepared donut pan. Fill each cavity about ¾ full. - Bake in the preheated oven for 10-12 minutes. They should be lightly golden. - Allow cooling for 5 minutes in the pan before transferring to a wire rack. - While the donuts cool, prepare the topping. In a shallow bowl, mix: - ½ cup granulated sugar - 2 teaspoons ground cinnamon - While still warm, dip each donut in 4 tablespoons of melted butter. Then roll in the cinnamon sugar mix until coated. Enjoy your warm, sweet treats! For the complete process, check out the Full Recipe. To create the best doughnut, avoid overmixing. When you mix too much, the doughnuts can turn out tough. Mix until just combined. A few lumps are okay! Another tip is to use room temperature ingredients. This helps the batter mix better and rise nicely. For instance, take your egg and buttermilk out of the fridge before you start. Before baking, make sure your oven is fully preheated. A hot oven ensures even baking. If your oven is not hot enough, your doughnuts may not rise well. To check if your doughnuts are done, use a toothpick. Insert it into the center of a doughnut. If it comes out clean, they are ready. If it has wet batter, bake a bit longer. These doughnuts are best served warm. Pair them with coffee or tea for a delightful treat. The warmth enhances their flavor and texture. For added flavor, consider garnishing. You can drizzle a simple glaze on top or sprinkle some extra cinnamon sugar. Chopped nuts or a dusting of cocoa powder are also great options to try! {{image_2}} You can make your cinnamon sugar donuts even more fun by mixing in chocolate chips or nuts. These ingredients add a nice crunch and flavor twist. Try walnuts or pecans for a nutty taste. You can also use different spices like nutmeg or allspice. They can give your donuts a warm, rich flavor that pairs well with cinnamon. If you want a sweeter finish, consider a milk glaze. This glaze is simple to make. Just mix powdered sugar with milk until you get a smooth texture. Drizzle it over your donuts for extra sweetness. For a unique twist, use maple syrup. It adds a lovely flavor that complements the cinnamon. Want to make your donuts vegan? Use a flax egg instead of a regular egg. To make a flax egg, mix one tablespoon of flaxseed meal with three tablespoons of water. Let it sit for five minutes until it thickens. You can also substitute buttermilk with plant-based milk and vinegar. This keeps the donuts moist and fluffy while staying vegan-friendly. Feel free to check out the Full Recipe for step-by-step instructions! To keep your cinnamon sugar donuts fresh, store them in an airtight container at room temperature. This method keeps the donuts soft for a few days. If you want them to last longer, you can refrigerate them. Just be sure to seal them well to avoid moisture loss. You can freeze these delicious donuts for up to three months. To freeze, place them in a single layer on a baking sheet until solid. Then, transfer them to a freezer bag or container. When you're ready to enjoy, just reheat them in the oven at 350°F (175°C) for about 10 minutes. This warms them up and revives their soft texture. For extra fun, consider adding a drizzle of melted chocolate or a sprinkle of nuts when you reheat. You can find the full recipe for these delightful treats in the earlier sections. Enjoy your baking! To make donuts light and fluffy, you need to follow a few key steps. Use room temperature ingredients like eggs and buttermilk. This helps the batter mix better. Avoid overmixing when you combine wet and dry ingredients. A few lumps are okay! Overmixing can make the donuts tough. Also, ensure your baking powder is fresh. Old baking powder won’t give your donuts the lift they need. Lastly, bake until they are just golden. This keeps them soft inside. Yes, you can bake donuts without a donut pan! Use a muffin tin instead. Just grease the tin well or use paper liners. Fill each cup about halfway with batter. This will give you donut-shaped muffins. You can also make a free-form shape on a baking sheet. Just pipe the batter into rings or use a round cutter to shape. They won’t look like classic donuts, but they will taste great! Cake donuts and yeast donuts differ in texture and method. Cake donuts use a batter made with baking powder or baking soda. They are denser and have a crumbly texture. Yeast donuts use yeast as a leavening agent, making them light and airy. Yeast donuts rise before baking, which adds to their fluffiness. Both types are delicious, but they give you a different eating experience. You can easily make your cinnamon sugar coating unique! Start with the basic mix of sugar and cinnamon. Then, try adding nutmeg for a warm flavor twist. For a crunchier texture, add a bit of finely chopped nuts. If you want a touch of sweetness, mix in some brown sugar. You can also experiment with flavored sugars, like vanilla or orange zest. This will add an extra layer of taste to your cinnamon sugar donuts. You learned how to make delicious donuts step by step. Start with dry and wet ingredients. Follow the mixing and baking instructions carefully. Use tips for the best texture and flavor. Try variations for fun twists, and know how to store them well. Homemade donuts are a tasty treat. Enjoy them fresh or try new flavors. With this guide, you can impress friends and family. Create your own special version next time!

Cinnamon Sugar Donuts Irresistible Baked Delight

Craving a treat that’s sweet, soft, and full of flavor? Look no further than these Cinnamon Sugar Donuts! In this

- 12 jumbo pasta shells - 1 cup ricotta cheese - 1 cup shredded mozzarella cheese, divided - 1 cup fresh spinach, chopped - 1/2 cup grated Parmesan cheese - 1 egg - 1/2 teaspoon garlic powder - 1/2 teaspoon onion powder - 1/2 teaspoon salt - 1/4 teaspoon black pepper - 2 cups marinara sauce - Fresh basil leaves for garnish These ingredients create a hearty and rich flavor. The jumbo shells hold all the goodness inside. Ricotta cheese adds creaminess, while mozzarella gives a nice stretch when melted. Fresh spinach boosts the dish with color and nutrients. Parmesan cheese brings a salty kick, making every bite savory. I love using fresh herbs like basil for garnish. They add a pop of color and fresh taste. The blend of spices, like garlic and onion powder, enhances the filling's flavor. Plus, marinara sauce ties everything together with its rich tomato taste. This dish is perfect for a family meal. It is simple but so satisfying. You can find the full recipe for Cheesy Spinach Stuffed Shells to enjoy this comforting meal. 1. Preheating the Oven Start by preheating your oven to 375°F (190°C). This step is key for even cooking. 2. Cooking the Pasta Shells Boil water in a large pot. Add the jumbo pasta shells. Cook until they are al dente, according to the package instructions. Drain the shells and lay them on a baking sheet to cool. This helps them keep their shape. 3. Making the Cheese and Spinach Filling In a mixing bowl, combine 1 cup of ricotta cheese, 1/2 cup of mozzarella cheese, chopped spinach, 1/2 cup of Parmesan cheese, 1 egg, 1/2 teaspoon of garlic powder, 1/2 teaspoon of onion powder, 1/2 teaspoon of salt, and 1/4 teaspoon of black pepper. Mix until everything is blended well. This filling is creamy and packed with flavor. 1. Stuffing the Pasta Shells Take each shell and fill it with the cheese and spinach mixture. Use a spoon or your fingers to pack it in nicely. 2. Layering with Marinara Sauce Pour 1 cup of marinara sauce into the bottom of a baking dish. Place the stuffed shells on top, with the open side facing up. This allows the sauce to soak in. 3. Baking Instructions Pour the rest of the marinara sauce over the shells. Make sure each shell is covered. Sprinkle the remaining mozzarella cheese on top. Cover the dish with aluminum foil. Bake for 25 minutes, then remove the foil. Bake for another 10-15 minutes until the cheese bubbles and turns golden. 1. Cooling and Garnishing Once done, take the dish out and let it cool for a few minutes. This helps the cheese set a bit. Before serving, add fresh basil leaves on top for a nice touch. For the full recipe, check out the complete details above. Enjoy your cheesy spinach stuffed shells! - Ensuring Al Dente Pasta: Cook the jumbo shells until they are firm but not hard. This keeps them from breaking when you stuff them. Follow the package time, but check a minute early. Drain and let them cool on a baking sheet. - Best Techniques for Stuffing: Use a spoon or your fingers to fill each shell. Pack the cheese and spinach mix generously, but don’t overstuff. This keeps them neat and makes baking easier. - Additional Cheese Options: You can try adding feta or goat cheese for a tangy twist. Mixing in some cream cheese makes the filling even creamier. - Herbs and Spices to Experiment With: Fresh herbs, like parsley or thyme, add a nice touch. A pinch of red pepper flakes gives some heat. Play around with spices to find your perfect blend. - Pairing with Sides: These stuffed shells go well with a simple salad. Garlic bread also makes a great side. The bread helps soak up the extra sauce. - Plating for Presentation: Place the shells on a plate and drizzle with marinara. Sprinkle fresh basil on top for a pop of color. This makes your meal look fancy and inviting. You can find the full recipe [here](#). {{image_2}} To make Cheesy Spinach Stuffed Shells a bit healthier, you can try two great options: - Using Whole Wheat Pasta: Whole wheat pasta gives you more fiber. It keeps you full longer and adds a nutty flavor. - Adding More Vegetables: You can mix in veggies like zucchini, bell peppers, or mushrooms. This boosts nutrients and adds great taste. You can personalize the stuffing to match your taste: - Different Cheese Combinations: Try adding goat cheese, feta, or even a spicy pepper jack. Each cheese brings a unique flavor. - Meat Inclusion Options: For a heartier meal, mix in cooked ground beef, turkey, or sausage. This adds protein and makes it more filling. If you want a vegan option, here are some simple swaps: - Substitute Ingredients for Vegan Diets: Use tofu or a dairy-free ricotta instead of regular cheese. For the egg, try a flaxseed meal or a chia seed mix. This keeps the creamy texture without any animal products. Feel free to explore these variations to create a version of Cheesy Spinach Stuffed Shells that you love! Check out the Full Recipe for detailed steps. Refrigeration Tips After enjoying your cheesy spinach stuffed shells, you may have some leftovers. To store them properly, place the shells in an airtight container. This keeps them fresh. Store them in the fridge for up to three days. When you are ready to eat, check for any signs of spoilage before reheating. Freezing Guidelines If you want to save them for longer, freezing is a great option. First, let the shells cool completely. Then, place them in a freezer-safe container or bag. You can freeze them for up to three months. Label the container with the date so you know when to use them. Best Methods to Reheat for Quality For the best taste, I recommend reheating in the oven. Preheat your oven to 350°F (175°C). Place the stuffed shells in a baking dish. Cover them with foil to keep moisture in. Heat for about 20 minutes or until hot. This method keeps the cheese melty and delicious. Using the Oven vs. Microwave While the microwave is quick, it can make the shells rubbery. If you must use it, place the shells in a microwave-safe dish. Add a splash of marinara sauce to keep them moist. Heat for 2-3 minutes, checking on them often. Remember, the oven gives better results. Enjoy your cheesy spinach stuffed shells again just like the first time! How long do Cheesy Spinach Stuffed Shells last in the fridge? Cheesy Spinach Stuffed Shells last about three to five days in the fridge. Store them in an airtight container to keep them fresh. Can I prepare the dish in advance? Yes, you can prepare these stuffed shells in advance. You can assemble them a day ahead and store them in the fridge. Just bake them when you’re ready to eat. What can I use instead of ricotta cheese? If you don’t have ricotta, try cottage cheese or cream cheese. Both options give a rich and creamy texture. Why are my stuffed shells falling apart? Stuffed shells may fall apart if they are overcooked. Make sure to cook them al dente. Also, be gentle when handling them. How do I fix dry stuffed shells? If your stuffed shells are dry, try adding more marinara sauce. Cover them well before baking. This helps keep them moist and tasty. Are Cheesy Spinach Stuffed Shells healthy? Cheesy Spinach Stuffed Shells can be a healthy meal. They offer protein from cheese and spinach for added nutrients. Calories and Macronutrients Breakdown One serving has about 400 calories. It contains roughly 20 grams of protein, 15 grams of fat, and 50 grams of carbs. For a complete meal, pair it with a fresh salad or some veggies. For the full recipe, check out the [Full Recipe]. Cheesy Spinach Stuffed Shells offer a tasty, comforting dish that's easy to make. You learned about essential ingredients, step-by-step instructions, and useful tips. We also explored variations and storage options for your leftovers. In the end, these stuffed shells are fun to prepare and share. So, whether you enjoy a classic recipe or try a twist, enjoy every bite of cheesy goodness. Happy cooking!

Cheesy Spinach Stuffed Shells Flavorful Comfort Meal

Are you ready for a warm and cheesy delight? Cheesy Spinach Stuffed Shells are your answer! This dish combines creamy

Older posts
Newer posts
← Previous Page1 … Page37 Page38 Page39 … Page48 Next →

dsad

© 2025 savoryspiral • Built with GeneratePress

Our Policies

  • Copyright Policy
  • Cookie Policy
  • GDPR Policy
  • Privacy Policy
  • Disclaimer
  • Terms Of Use

More Information

  • Home
  • About
  • Contact
  • Appetizers
  • Dessert
  • Dinner
  • Drinks
©2025, savoryspiral About Back To Top