Skip to content
DisclaimerTerms Of UseGDPR PolicyCookie Policy

savoryspiral

  • Home
  • Drinks
  • Appetizers
  • Dinner
  • Dessert
  • About
  • Contact
  • Privacy Policy
DisclaimerTerms Of UseGDPR PolicyCookie Policy

Charlotte

- Proportions for Chicken - 4 boneless, skinless chicken thighs (or breasts) - Condiments and Seasonings - ½ cup soy sauce - ¼ cup honey - 2 tablespoons rice vinegar - 2 tablespoons sesame oil - 2 cloves garlic, minced - 1 tablespoon fresh ginger, grated - 1 tablespoon cornstarch mixed with 2 tablespoons water (to thicken sauce) - Vegetables and Toppings - 1 cup broccoli florets - 1 carrot, julienned - 2 green onions, sliced - Sesame seeds for garnish - Salt and pepper to taste When I make Teriyaki Chicken Rice Bowls, I love getting fresh ingredients. They really boost the flavor. For the chicken, I use thighs or breasts. Both work well, but thighs are juicier. Next, I prepare the sauce using soy sauce, honey, rice vinegar, and sesame oil. This mix gives a sweet and salty taste. Garlic and ginger add a nice kick. Don't forget the cornstarch; it helps thicken the sauce for a great finish. For veggies, I always include broccoli and carrots. They add color and crunch. Green onions and sesame seeds are my go-to toppings. They make the dish look pretty and taste fresh. If you follow this Full Recipe, you’ll have a plate full of deliciousness! Cooking Jasmine Rice To start, measure 2 cups of jasmine rice. Rinse it under cold water until the water runs clear. This step removes excess starch and helps the rice become fluffy. In a medium saucepan, add the rinsed rice and 4 cups of water. Bring the water to a boil over high heat. Once boiling, reduce the heat to low. Cover the pot and let it simmer for about 15 minutes. The rice will absorb the water during this time. Fluffing and Setting Aside After 15 minutes, remove the pot from heat. Let it sit covered for another 5 minutes. This helps the rice steam and become soft. Use a fork to fluff the rice gently. Set it aside while you prepare the chicken and veggies. Preparing the Marinade In a mixing bowl, whisk together ½ cup soy sauce, ¼ cup honey, 2 tablespoons rice vinegar, and 2 tablespoons sesame oil. Add 2 cloves minced garlic and 1 tablespoon grated ginger. This mixture creates a sweet and salty sauce. It will soak into the chicken and give it great flavor. Time Considerations for Marinating Add the chicken to the marinade, making sure it coats each piece well. Let it marinate for at least 30 minutes. For the best taste, marinate it overnight in the fridge. This allows the flavors to develop. Searing Chicken to Perfection Heat a large skillet over medium heat. Add the marinated chicken, saving the marinade for later. Cook the chicken for about 5-7 minutes on each side. You want it to be golden brown and cooked fully. Check that it reaches an internal temperature of 165°F. Remove the chicken from the skillet and let it rest. Slice it into strips once it cools down. Stir-Frying Veggies In the same skillet, add 1 cup broccoli florets and 1 julienned carrot. Stir-fry them for about 3-4 minutes. Cook just until they are tender-crisp. This keeps them colorful and healthy. They will add nice texture to your bowls. You can find the Full Recipe to ensure every step is clear and easy to follow. To make the marinade shine, add more garlic or ginger. You can also try adding red pepper flakes for a kick. Fresh ingredients matter! They bring life to your dish. Use fresh garlic, ginger, and crisp veggies. They make a big difference in taste. For chicken, grilling or pan-searing works well. These methods give a nice brown crust. It adds flavor and texture. Always check the chicken's internal temperature. It should reach 165°F for safety and juiciness. For veggies, stir-fry them quickly. Keep them tender but crisp. This way, you preserve their color and nutrients. Just a few minutes on high heat will do wonders. Presentation matters! Layer rice, chicken, and veggies in a bowl. Drizzle with teriyaki sauce for a glossy look. Finish with green onions and sesame seeds on top. It makes the dish pop! As for sides, try a simple salad or edamame. These pair well and add freshness. You can also serve with miso soup for a complete meal. Explore these options to elevate your dining experience! For the full recipe, check the details above. {{image_2}} You can easily swap chicken for tofu or beef. Tofu brings a soft texture and absorbs sauce well. Use firm or extra-firm tofu for the best results. To prepare, press the tofu to remove moisture, then cut it into cubes. Marinate it just like chicken. For beef, thinly slice flank steak or sirloin. Cook it quickly in the skillet to keep it tender. This gives your rice bowl a new twist without losing the teriyaki flavor. If you want a gluten-free teriyaki chicken rice bowl, use tamari or coconut aminos. Tamari is a gluten-free soy sauce that tastes similar. Coconut aminos is a great option if you want a sweeter sauce. Both alternatives work well in the marinade. Just substitute them in equal amounts. This way, you can enjoy the dish without worries about gluten. Adding more veggies boosts nutrition and flavor. Think about bell peppers, snap peas, or bok choy. Slice them thinly and add them to your stir-fry. They cook quickly and stay crisp. You can also add spinach or kale near the end of cooking for extra greens. Feel free to mix and match your favorite veggies to make the dish colorful and healthy. To keep your Teriyaki Chicken Rice Bowls fresh, store them properly. First, let the bowls cool to room temperature. Then, transfer them to airtight containers. This will prevent moisture loss and keep the flavors intact. Store the bowls in the fridge. They can last up to four days when stored this way. When you want to enjoy your leftovers, reheating is key. You can use a microwave or a skillet. If using a microwave, cover the bowl with a damp paper towel. Heat in short bursts, stirring in between. This method keeps the chicken tender and moist. If you prefer the skillet, add a splash of water. Heat on medium-low, stirring until warmed through. This ensures the rice doesn’t dry out. If you want to save some for later, freezing is a great option. Pack the chicken and veggies in separate containers. This helps maintain texture. Use freezer-safe bags or containers. Label them with the date. Teriyaki Chicken Rice Bowls can last up to three months in the freezer. When ready to eat, thaw overnight in the fridge before reheating. You’ll still enjoy that delicious flavor! For the full recipe, check the main article. To boost the flavor of your Teriyaki Chicken Rice Bowls, focus on the marinade. Use fresh garlic and ginger for a strong taste. Try adding a splash of citrus juice, like lime or orange, to brighten the dish. You can also mix in sriracha for some spice. Top with fresh herbs like cilantro or basil for extra flavor. Don’t forget to let your chicken marinate longer. The longer it sits, the more it soaks up the flavors. Yes, you can prepare Teriyaki Chicken Rice Bowls in advance. Cook the rice and chicken ahead of time. Store them in separate containers in the fridge. You can also chop the vegetables and keep them ready. Just remember to make the teriyaki sauce fresh for the best taste. When you are ready to eat, you can heat everything up quickly. This makes meal prep easy and saves time during busy days. You can serve a simple salad with your Teriyaki Chicken Rice Bowls. A cucumber salad with rice vinegar works well. You might also enjoy edamame or pickled vegetables. These sides add freshness and crunch. For a fun twist, try pairing with sushi rolls or gyoza. If you want a restaurant experience, look for local spots that specialize in Asian cuisine. Check your area for a great Japanese or Asian fusion restaurant. They may offer tasty sides that complement your meal perfectly. In this blog post, I covered the essential ingredients and steps for making Teriyaki Chicken Rice Bowls. We looked at preparing jasmine rice, marinating chicken, and cooking colorful veggies. I shared tips to enhance flavor and cooking techniques to perfect your dish. Variations allow for alternative proteins and gluten-free options. Finally, we discussed proper storage and reheating methods. Now you have all you need to create delicious Teriyaki Chicken Rice Bowls. Enjoy making this meal as much as I do!

Teriyaki Chicken Rice Bowls Flavorful and Easy Recipe

If you’re craving a quick, tasty meal that feels like a warm hug, you’re in the right place! Teriyaki Chicken

- 1 cup rolled oats - ½ cup natural peanut butter - ¼ cup honey or maple syrup - ¼ cup mini chocolate chips - ¼ cup chopped nuts (almonds, walnuts, or pecans) - 2 tablespoons chia seeds - 1 teaspoon vanilla extract - A pinch of salt These ingredients come together to create a tasty and healthy snack. The rolled oats provide fiber and help you feel full. Natural peanut butter adds protein and healthy fats. You can choose honey or maple syrup for sweetness. Mini chocolate chips give a fun twist, while chopped nuts add crunch. Chia seeds bring extra nutrition, and a bit of vanilla extract enhances flavor. Don’t forget the salt; it balances the sweetness. - Calories per serving: About 100 calories - Macronutrient breakdown: Each bite has around 3 grams of protein, 12 grams of carbs, and 5 grams of fat. - Dietary fiber content: Each serving offers about 2 grams of fiber. Knowing the nutritional info helps you make smart choices. These energy bites are not just delicious; they also pack a good punch of nutrients. You can feel good about enjoying them any time. For the full recipe, check out Nutty Bliss Peanut Butter Energy Bites. Mixing the base ingredients Start by grabbing a large bowl. Add 1 cup of rolled oats, ½ cup of natural peanut butter, ¼ cup of honey or maple syrup, and 1 teaspoon of vanilla extract. Mix these ingredients well. You want them to blend together nicely. Adding mix-ins for flavor and texture Once the base is mixed, it’s time to add some fun. Stir in ¼ cup of mini chocolate chips, ¼ cup of chopped nuts, and 2 tablespoons of chia seeds. Add a small pinch of salt for flavor. Mix everything until it’s evenly spread. This step adds great texture and taste. Forming the energy bites Now, use your hands to shape the mixture into small balls. Aim for about 1 inch in diameter. If the mix is too sticky, wet your hands slightly. This trick helps you roll them easily. Place the formed bites on a baking sheet lined with parchment paper. Importance of refrigeration Refrigeration is key! Chill the energy bites for at least 30 minutes. This helps them firm up and hold their shape. How to serve or store You can enjoy the bites right away after chilling. They’re great as a quick snack! If you want to save some, store them in an airtight container in your fridge. They stay fresh for up to a week. For the full recipe, check out the details above. To make great peanut butter energy bites, you want to avoid stickiness. If your mixture feels too sticky, wet your hands slightly before rolling. This small trick helps you form nice, round balls without mess. For storage, use an airtight container. This keeps your bites fresh and tasty. You can store them in the fridge for up to a week. If you want them longer, try freezing them. They freeze well and can last for months. You can change the flavor by using different nut butters. Almond butter or cashew butter can add unique tastes. This allows you to explore various flavors while keeping the recipe simple. You can also adjust sweetness. If you prefer a less sweet snack, cut back on honey or maple syrup. You can even try adding a bit of cocoa powder for a chocolate twist. These small changes let you customize your bites to match your taste. {{image_2}} You can make peanut butter energy bites even more fun by adding flavors. One easy way is to mix in dried fruits. Raisins and cranberries add sweetness and chewiness. They make each bite more exciting! Another way to boost flavor is by trying spices. Cinnamon adds warmth, while nutmeg gives a cozy touch. Just a little can change the whole taste. Feel free to experiment. You might find your new favorite blend! If you follow a special diet, you can still enjoy these energy bites. For a gluten-free option, use certified gluten-free oats. They work just as well and keep the bites tasty. If you want a vegan alternative, swap honey for maple syrup. This simple change keeps your energy bites sweet and plant-based. You can enjoy these snacks no matter your diet! Try the Full Recipe to explore all the variations and find your favorite mix! To keep your peanut butter energy bites fresh, use airtight containers. These containers keep out air and moisture. I recommend glass or BPA-free plastic containers. This way, your snacks stay tasty and safe. If you want to store them for a longer time, consider freezing. Just place the energy bites in a freezer-safe bag. Remove as much air as you can before sealing. They can last for months in the freezer. When stored in the fridge, these bites last up to a week. They stay firm and delicious. If you freeze them, they can last for about three months. Just remember to thaw them in the fridge before eating. This helps maintain their texture and taste. Enjoy these bites at their best by paying attention to storage! How to make peanut butter energy bites without honey? You can use maple syrup instead. It adds sweetness and flavor. You could also try agave syrup or date syrup. Each option gives a unique taste. Can I substitute ingredients in this recipe? Yes, you can! Use almond butter instead of peanut butter for a nut-free option. Swap chocolate chips for dried fruit or seeds. Just keep the base ingredients the same for the best results. How long do peanut butter energy bites last? These bites last about one week in the fridge. Store them in an airtight container. You can also freeze them for up to three months. Just thaw before eating. Are peanut butter energy bites healthy? Yes, they are healthy! They contain good fats, fiber, and protein. The oats and nuts provide energy and keep you full. They make a great snack for kids and adults. Can kids help make these snacks? Absolutely! Kids can mix the ingredients and roll the bites. It's a fun way for them to learn about cooking. Plus, they will enjoy eating the snacks they helped make! These peanut butter energy bites are simple and fun to make. We covered the key ingredients, mixing methods, and tips for the best results. You learned how to customize flavors and store these snacks properly. Enjoy making these bites your way. Remember to try new flavors and options. They are a healthy snack you can share with anyone. Cooking together makes snack time more fun!

Peanut Butter Energy Bites Easy and Healthy Snack

Looking for a quick snack that’s tasty and good for you? Peanut Butter Energy Bites are the answer! You can

For a rich and tasty soup, you need fresh ingredients. Here’s what you’ll use: - 1 medium onion, chopped - 3 cloves garlic, minced - Fresh basil leaves for garnish These fresh items bring life to your soup. The onion adds sweetness, while garlic gives a nice kick. Basil, of course, is the star herb. It gives that lovely aroma and flavor. You might have some of these items at home. Here’s a quick list: - 2 tablespoons olive oil - 2 cans (14 oz each) diced tomatoes, undrained - 3 cups vegetable broth - 1 teaspoon sugar - 1 teaspoon dried basil (or 1 tablespoon fresh basil, chopped) - Salt and pepper to taste These pantry staples work together to create a base for your soup. The diced tomatoes add acidity, while vegetable broth gives it depth. Sugar balances the flavors perfectly. Want to make your soup even better? Try these optional garnishes and add-ins: - 1 cup heavy cream or coconut cream for a dairy-free option Heavy cream makes the soup creamy and rich. Coconut cream is a great choice for a dairy-free option. You can also sprinkle more fresh basil on top for added flavor. Start by gathering your ingredients. You will need: - 2 tablespoons olive oil - 1 medium onion, chopped - 3 cloves garlic, minced - 2 cans (14 oz each) diced tomatoes, undrained - 3 cups vegetable broth - 1 teaspoon sugar - 1 teaspoon dried basil (or 1 tablespoon fresh basil, chopped) - 1 cup heavy cream or coconut cream for a dairy-free option - Salt and pepper to taste - Fresh basil leaves for garnish Next, chop the onion and mince the garlic. This helps build the soup’s flavor. In a large pot, heat olive oil over medium heat. Add the chopped onion and sauté for about 5 minutes. You want the onion to turn soft and clear. Then, add the minced garlic and cook for 1-2 minutes. You’ll know it’s ready when you smell the garlic. Now, stir in the diced tomatoes, vegetable broth, sugar, and dried basil. This mix is where the magic happens. Bring it to a gentle boil. Once boiling, reduce the heat and let it simmer for 15-20 minutes. This allows the flavors to blend well. After simmering, it’s time to blend. Use an immersion blender to blend the soup until it’s smooth. If you don’t have one, you can carefully transfer the soup in batches to a countertop blender. Blend until it’s nice and creamy. Return the blended soup to the pot. Now, stir in the heavy cream or coconut cream. Heat it through, then taste. Add salt and pepper to your liking. Your creamy tomato basil soup is almost ready! To get the best flavor in your creamy tomato basil soup, start with fresh ingredients. Use ripe tomatoes if you can. Fresh basil adds a bright touch. Do not skip the sugar; it balances the acidity of the tomatoes. Olive oil is key for a rich taste. Sauté the onions and garlic until soft. This step builds a great base. One common mistake is overcooking the garlic. It should be fragrant but not brown. This can make your soup bitter. Another mistake is not blending long enough. You want a smooth, creamy texture. Don't forget to taste as you cook. This way, you can adjust the salt and pepper. If you want a thicker soup, there are a few tricks. First, add more heavy cream. This makes it richer and creamier. Another option is to blend in some cooked potatoes. They add body without changing the flavor. You can also simmer the soup longer. This reduces liquid and thickens it naturally. For even more creaminess, try adding a little cornstarch mixed with water. For the full recipe, you can check out the complete guide. {{image_2}} You can easily make this soup vegan. Simply swap heavy cream for coconut cream. Coconut cream adds a rich taste and texture. It blends well with the tomatoes and basil. You can also use almond milk or cashew cream for a lighter option. Both options keep the soup creamy and delicious. This creamy tomato basil soup is naturally gluten-free. Use canned tomatoes and vegetable broth that are labeled gluten-free. Check the labels to avoid hidden gluten in processed foods. You can enjoy this soup without any worries about gluten. You can add more flavor to your soup with spices and veggies. Try adding red pepper flakes for heat. A pinch of smoked paprika gives a nice depth. You can also add chopped carrots or bell peppers while cooking the onions. These veggies add sweetness and texture. Fresh herbs like thyme or oregano can also boost the flavor. Feel free to experiment and find what you love! To keep your creamy tomato basil soup fresh, let it cool first. Once cool, transfer it to an airtight container. This method helps to keep the flavors intact. Store the container in your fridge. It will stay good for about 3 to 4 days. Make sure to label it with the date. This way, you won’t forget when you made it! If you want to save some soup for later, freezing works great. Use the same airtight container or freezer-safe bags. Pour the soup into the bag, leaving some space for expansion. Seal it tightly and label it with the date. You can freeze the soup for up to 3 months. When you're ready to eat, just thaw it in the fridge overnight. When it's time to enjoy your soup again, heat it gently. Pour the soup into a pot and warm it over low heat. Stir it often to prevent sticking. If the soup seems thick after freezing, add a splash of broth or water. This will restore its creamy texture. You can also microwave it, but do so in short bursts. Stir in between to heat it evenly. Enjoy your delicious soup again! You can use coconut cream as a great alternative. It adds silkiness to the soup. You can also try half-and-half for a lighter option. If you need a dairy-free choice, almond milk can work too, but it may change the flavor slightly. Yes, you can use fresh tomatoes! For the best taste, use ripe tomatoes. Peel and chop about 6 cups of fresh tomatoes. You may need to adjust cooking time since fresh tomatoes have more water than canned ones. The soup lasts about 4 to 5 days in the fridge. Store it in an airtight container. Make sure it cools down before you put it in the fridge. Yes, this soup freezes well. Pour it into freezer-safe containers. It can last up to 3 months in the freezer. To reheat, thaw overnight in the fridge and warm it on the stove. You can add a pinch of red pepper flakes for some heat. A splash of balsamic vinegar helps brighten the flavors. Fresh herbs like thyme or oregano can also enhance the taste. Yes! You can sauté the onion and garlic in vegetable broth instead of oil. This method is perfect for a lighter soup. Just be sure to stir often to avoid sticking. Absolutely! Just add all the ingredients to the slow cooker. Cook on low for about 6 hours or on high for 3 hours. Blend the soup before adding the cream at the end. The soup is ready when the onions are soft and flavors combine well. It should smell amazing! The tomatoes break down, and the mixture thickens slightly. Yes, you can prepare the soup a day ahead. Simply reheat it before serving. This allows all the flavors to blend even more. Enjoy the convenience of a make-ahead meal! You can check the full recipe for a detailed list of ingredients and instructions. In this post, we explored how to make delicious creamy tomato basil soup. We covered fresh ingredients, pantry staples, and fun garnishes. You learned step-by-step how to prepare, cook, and blend the soup. Tips and tricks helped you avoid common mistakes and achieve better flavor. We even discussed variations, storage, and answered key FAQs. With these insights, you can create a perfect bowl of soup that suits your taste! Enjoy every spoonful!

Creamy Tomato Basil Soup Simple Flavorful Recipe

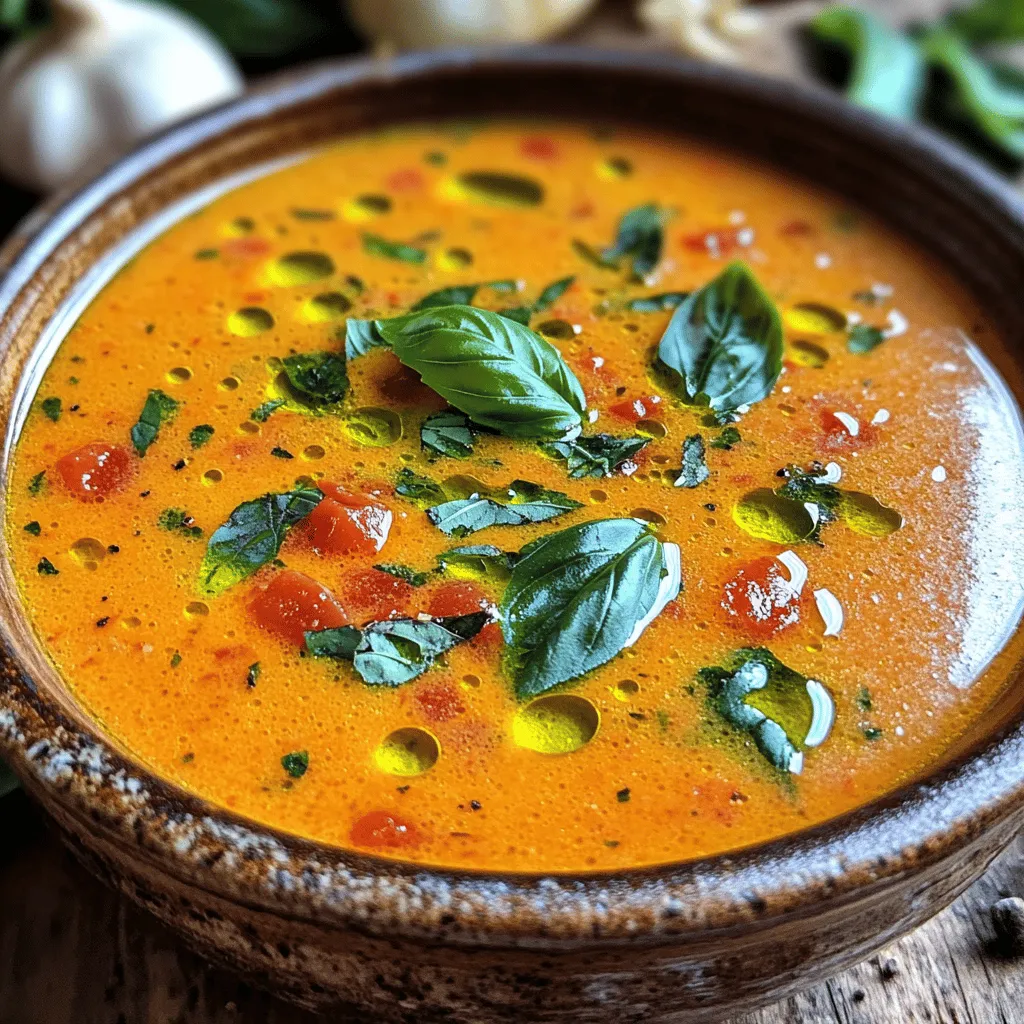
If you crave a warm, comforting bowl of soup, you’re in the right place! My creamy tomato basil soup is

To make Garlic Parmesan Roasted Brussels Sprouts, gather these main ingredients: - 1 lb Brussels sprouts, trimmed and halved - 4 cloves garlic, minced - 3 tablespoons olive oil - ½ cup grated Parmesan cheese - Salt and pepper to taste These ingredients create a tasty base. The Brussels sprouts offer a nice crunch. Garlic adds a strong flavor, and Parmesan gives it a salty bite. You can boost the flavor with a few optional ingredients: - ½ teaspoon red pepper flakes (for heat) - 2 tablespoons balsamic glaze (for drizzling) - Fresh parsley, chopped (for garnish) Red pepper flakes add a spicy kick. Balsamic glaze gives a sweet touch. The parsley makes it look fresh and bright. If you lack some ingredients, here are good substitutions: - Use butter instead of olive oil for a rich taste. - Try nutritional yeast instead of Parmesan for a vegan option. - Swap balsamic glaze with lemon juice for a zesty twist. These substitutions keep the recipe tasty and fun. You can mix and match to fit your needs. Enjoy experimenting with flavors! For the full recipe, check out the details above. First, gather your ingredients. You will need: - 1 lb Brussels sprouts, trimmed and halved - 4 cloves garlic, minced - 3 tablespoons olive oil - ½ cup grated Parmesan cheese - ½ teaspoon red pepper flakes (optional) - Salt and pepper to taste - 2 tablespoons balsamic glaze (for drizzling) - Fresh parsley, chopped (for garnish) Next, preheat your oven to 425°F (220°C). This high heat helps create that perfect roast. In a large mixing bowl, combine the halved Brussels sprouts, minced garlic, olive oil, red pepper flakes (if using), salt, and pepper. Toss the mixture well. Each sprout should be coated evenly in the oil and spices. Now, spread the Brussels sprouts on a large baking sheet. Make sure they are in a single layer. This helps them roast evenly. Place the baking sheet in the oven and roast for 20 minutes. Halfway through, stir the sprouts. This action ensures every side gets that lovely golden color. After 20 minutes, take the baking sheet out of the oven. Sprinkle the grated Parmesan cheese over the hot Brussels sprouts. The cheese will melt beautifully. Return the baking sheet to the oven for another 5-10 minutes. Watch closely until the cheese is melted and slightly golden brown. Once roasted, drizzle the Brussels sprouts with balsamic glaze for a sweet finish. Garnish with chopped fresh parsley to add a pop of color. Serve these Garlic Parmesan Roasted Brussels Sprouts as a side dish, and watch everyone enjoy them. They pair well with chicken, steak, or even pasta. For the full recipe, refer to the section above. Choosing fresh Brussels sprouts is key to a great dish. Look for bright green sprouts with tight leaves. They should feel firm and heavy for their size. Avoid any that are yellow or have brown spots. Fresh sprouts will have a nice, earthy smell. If they smell strong, they are not fresh. Roasting Brussels sprouts brings out their best flavor. Always preheat your oven to 425°F (220°C). Spread the sprouts out in a single layer. This helps them roast evenly. Stir them halfway through to ensure all sides get nice and crispy. If you want extra crunch, roast them a bit longer. Just watch them closely to avoid burning. You can boost the flavor of your Garlic Parmesan Roasted Brussels Sprouts. Try adding lemon zest for a bright kick. A sprinkle of smoked paprika gives a warm, smoky taste. Adding a splash of balsamic glaze at the end adds sweetness and depth. For a kick, mix in red pepper flakes. These additions can make your dish truly special. Check out the Full Recipe for more inspiration! {{image_2}} Adding bacon brings a new flavor to the dish. The salty, smoky taste pairs well with the sprouts. Start by cooking the bacon until it's crispy. Chop it into small pieces and mix it in with the Brussels sprouts before roasting. This gives each bite a savory crunch. You won't regret this addition! You can enjoy this dish without dairy. Use nutritional yeast instead of Parmesan cheese. It gives a cheesy flavor while keeping it vegan. Toss the sprouts with olive oil, garlic, and nutritional yeast. You can also add a squeeze of lemon for brightness. This version is just as tasty! If you like heat, add more red pepper flakes. You can also include diced jalapeños for a kick. Mix them in with the Brussels sprouts before roasting. This spicy twist pairs well with the garlic and Parmesan. Each bite will have you reaching for more. For more ideas, check out the Full Recipe. Each variation is unique and fun to try! After enjoying your Garlic Parmesan Roasted Brussels Sprouts, let them cool down. Place any leftovers in an airtight container. This keeps them fresh. Store the container in the fridge for up to three days. If you want to keep them longer, consider freezing. To reheat, use your oven for the best results. Preheat the oven to 350°F (175°C). Spread the Brussels sprouts on a baking sheet. Heat for about 10-15 minutes until warm. You can also use a microwave. Just heat in short bursts to avoid sogginess. If you have lots of leftovers, freezing works great. First, let the Brussels sprouts cool completely. Then, place them in a freezer-safe bag. Remove as much air as possible. Store in the freezer for up to two months. When ready to eat, thaw in the fridge overnight before reheating. Enjoy the flavor burst again! For the full recipe, check the earlier section. Yes, you can prep Garlic Parmesan Roasted Brussels Sprouts ahead of time. Trim and halve the Brussels sprouts and toss them with garlic, olive oil, salt, and pepper. Store this mix in an airtight container in the fridge for up to two days. When you are ready to cook, just add the Parmesan and roast. This saves time and makes dinner easy! These Brussels sprouts pair well with many dishes. They work great as a side to roasted chicken or grilled steak. You can also serve them with a hearty grain like quinoa or rice. For a vegetarian meal, serve them with a creamy pasta. The flavors of garlic and cheese complement many meals. To make your Brussels sprouts crispy, start with fresh sprouts. Make sure to coat them well in olive oil. Spread them out on the baking sheet without crowding. Roasting at 425°F helps them get that nice crunch. Stir them halfway through cooking for even crispiness. Adding Parmesan in the last few minutes of roasting gives a tasty, crispy top. In this blog post, I outlined how to prepare delicious Garlic Parmesan Roasted Brussels Sprouts. We covered essential ingredients, helpful tips, and various tasty variations. Remember, selecting fresh sprouts makes a big difference. Roasting them properly will give you that perfect crisp. These sprouts are easy to store and reheat, so you can enjoy them later. With this guide, you can impress your friends and family at any meal. Happy cooking!

Garlic Parmesan Roasted Brussels Sprouts Flavor Burst

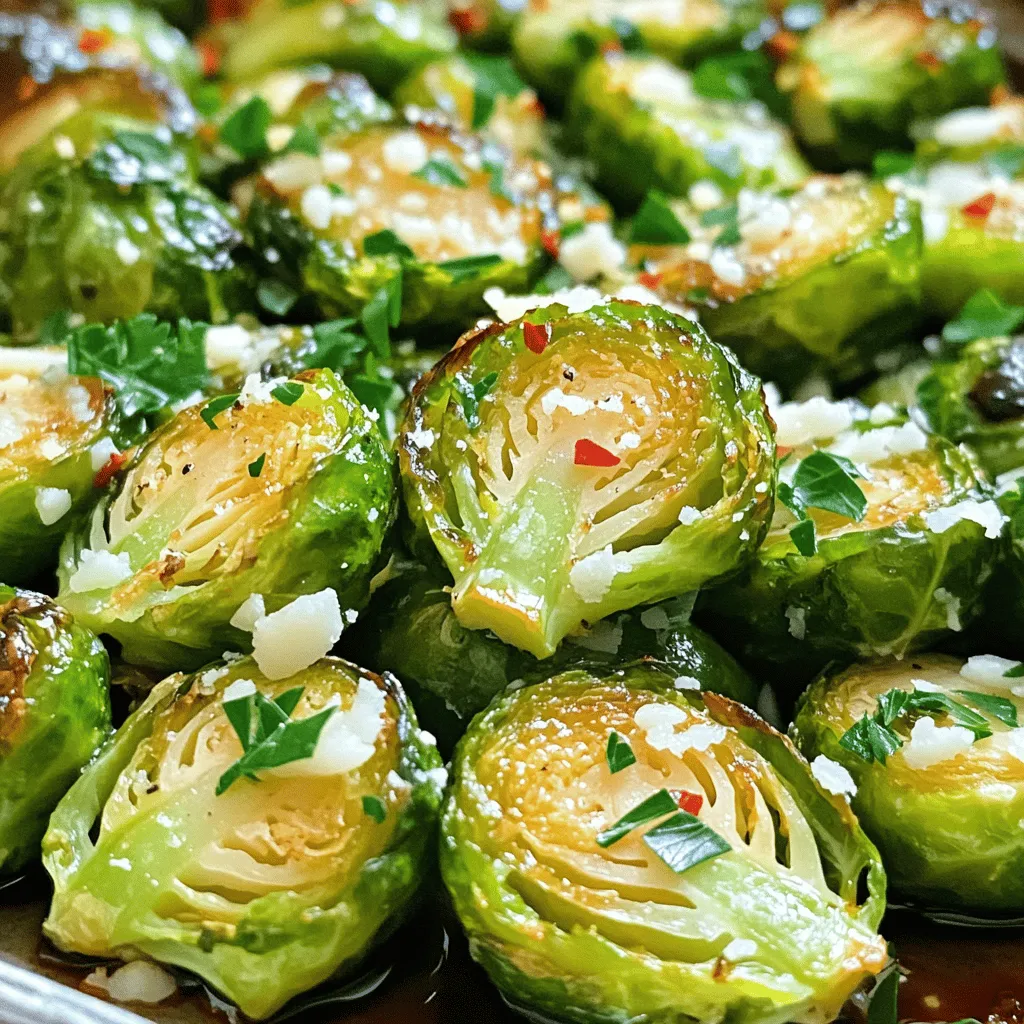
Welcome to the world of flavor with Garlic Parmesan Roasted Brussels Sprouts! If you’re looking for a tasty side dish

- 1 pound large shrimp, peeled and deveined - 4 tablespoons honey - 3 cloves garlic, minced - 2 tablespoons soy sauce - 1 tablespoon sesame oil - 1 cup broccoli florets - 1 red bell pepper, sliced - 1 carrot, julienned - 2 green onions, chopped - Sesame seeds for garnish - 1 tablespoon olive oil - 1 tablespoon fresh ginger, grated - Salt and pepper to taste - 2 cups cooked jasmine rice To make honey garlic shrimp bowls, you'll need fresh shrimp as the main star. I love using large shrimp because they are tender and soak up all the flavors well. Honey adds a sweet touch, while garlic gives it a nice kick. Soy sauce brings saltiness that balances the sweetness. Don't forget sesame oil; it adds a nutty flavor. For veggies, I like to use broccoli, red bell peppers, and carrots. They add color and crunch, making the dish more fun. Green onions and sesame seeds are perfect for garnishing. They make the meal look pretty and add extra flavor. For the pantry essentials, olive oil helps in cooking the shrimp and veggies. Fresh ginger adds a zesty touch, while salt and pepper boost the overall taste. Finally, jasmine rice serves as a soft base for all the delicious toppings. You can find the complete recipe for this tasty dish in the full recipe section. First, gather your ingredients. You need honey, minced garlic, soy sauce, sesame oil, grated ginger, salt, and pepper. Combine these in a bowl and whisk well. This mix gives the shrimp great flavor. Next, add your peeled and deveined shrimp to this bowl. Make sure they are well coated. Let them marinate for 15 minutes. This step is key for tasty shrimp. While the shrimp marinates, you can prepare your veggies. Heat olive oil in a skillet over medium heat. Once hot, add the broccoli florets, sliced red bell pepper, and julienned carrot. Stir-fry these for about 5 minutes. You want them tender-crisp, bright, and colorful. Once done, remove them from the skillet and set aside. This keeps them fresh and crunchy. Now it's time to cook the shrimp. Take the marinated shrimp and add them to the same skillet. Pour in the remaining marinade too. Cook the shrimp for 3-4 minutes on each side. They will turn pink and should be fully cooked. This quick cooking keeps them juicy and tender. Let's put it all together! Start with a generous scoop of cooked jasmine rice at the bottom of each bowl. This serves as the base. Next, top the rice with the stir-fried vegetables. Finally, add the cooked honey garlic shrimp on top. Make it look nice by arranging everything well. This dish is not just tasty; it’s also beautiful! For more details, check the Full Recipe. When picking shrimp, fresh is often best. Fresh shrimp has a sweet flavor and a firm texture. If you can't find fresh shrimp, frozen works just fine. Always check for a clean smell and firm bodies. To clean shrimp, you need to devein them. Start by rinsing the shrimp under cold water. Use a sharp knife to make a shallow cut along the back. Remove the dark vein with the knife or your fingers. Rinse again, and they are ready to cook. If you want to change up the sweetness, try maple syrup or agave. These sweeteners work well and add a unique taste. You can also mix in spices like cayenne for heat or smoked paprika for depth. Fresh herbs like cilantro or basil can brighten the dish. To make your bowl pop, use colorful veggies. Bright red bell peppers, green broccoli, and orange carrots create a feast for the eyes. Arrange your shrimp and veggies neatly on top of the rice. This makes each bowl look like a work of art. Add a sprinkle of sesame seeds for a final touch. The visual appeal makes eating more fun! You can find the full recipe for Honey Garlic Shrimp Bowls to get started. {{image_2}} You can swap shrimp for other proteins. Chicken works well and adds a nice flavor. Tofu is great for a vegetarian option. Scallops give a rich taste and cook quickly. When changing proteins, adjust cooking times. For chicken, cook until it reaches 165°F. Tofu needs about 5-7 minutes to brown. Scallops only need 2-3 minutes per side. Feel free to change the veggies based on what you like. Seasonal vegetables like asparagus or zucchini work nicely. You can also use leafy greens such as spinach or kale. These greens add nutrients and a fresh taste. Other stir-fry options include snap peas or bell peppers. Mix and match to keep things exciting! For a kick, make a spicy honey garlic sauce. Just add some red pepper flakes or sriracha to the mix. This adds heat without losing the sweet flavor. You can also try different sauces like teriyaki for a sweet umami taste. Lemon sauce gives a zesty twist and brightens the dish. Each sauce option brings its own unique flavor profile! Store your honey garlic shrimp bowls in airtight containers. This keeps flavors fresh. Make sure to refrigerate them within two hours of cooking. For best results, use the following tips: - Shrimp Bowls: Place shrimp on top of rice and veggies. This keeps the shrimp from getting mushy. - Jasmine Rice: Store rice separately, if possible. It helps maintain its texture. - Vegetables: Keep vegetables in a different container to avoid sogginess. To enjoy your leftovers, reheat them carefully. You want to keep the shrimp juicy. Here’s how: - Microwave: Use a microwave-safe dish. Add a splash of water. Cover with a damp paper towel. Heat in short intervals, stirring in between. - Stovetop: Heat a pan over medium heat. Add a little oil and shrimp. Stir gently until warmed through. To keep vegetables crisp, add them later in the reheating process. Heat them just until warm. Yes, you can freeze honey garlic shrimp bowls! Here’s how to do it right: - Freezing: Pack shrimp, rice, and veggies in separate bags. This helps each item freeze well. - Thawing: Move the bags to the fridge overnight. This allows them to thaw slowly. - Reheating: Once thawed, use the stovetop method to reheat. This keeps your meal tasty and fresh. For the full recipe and more details, don't forget to check out the Honey Garlic Shrimp Bowls! Shrimp need to marinate for at least 15 minutes. This time allows the shrimp to soak up the honey and garlic flavors. For even better taste, you can marinate them for up to 30 minutes. Just don’t go too long, or the shrimp might become mushy. Yes, you can prepare honey garlic shrimp bowls in advance. Cook the shrimp and vegetables, then store them separately. Keep the rice in a different container. This way, everything stays fresh. When you’re ready to eat, just heat and combine. It’s perfect for meal prep. You can serve honey garlic shrimp bowls with various sides. Steamed vegetables like green beans or snap peas add crunch. A simple salad with a light dressing works well too. You can also add a squeeze of lime for extra zest or top with crushed nuts for texture. Yes, the recipe can be gluten-free. Simply use gluten-free soy sauce or tamari in place of regular soy sauce. This swap makes the dish safe for anyone with gluten sensitivities. Always check labels to be sure that all ingredients are gluten-free. To add heat to your honey garlic shrimp, try these ideas: - Add a pinch of red pepper flakes to the marinade. - Mix in some sriracha or chili paste for a kick. - Top the finished dish with sliced fresh jalapeños. These tweaks will give your meal a spicy twist. For the complete instructions and ingredient list, check out the Honey Garlic Shrimp Bowls recipe. This blog post covers everything you need for delicious honey garlic shrimp bowls. I shared the key ingredients, step-by-step cooking guide, and tips for presentation and storage. You can customize this dish with various proteins and vegetables. Remember, meal prep works well with this recipe too. So go ahead, give it a try and make it your own! You’ll enjoy a tasty meal that is easy to prepare. Your family and friends will love it.

Honey Garlic Shrimp Bowls Flavorful Meal Prep Idea

Looking for a delicious meal prep idea? Honey Garlic Shrimp Bowls are your answer! Packed with flavor, fresh veggies, and

To make crispy chickpeas, you need simple items. Here’s what you will need: - 1 can (15 oz) chickpeas, drained and rinsed - 2 tablespoons olive oil - 1 teaspoon smoked paprika - 1 teaspoon garlic powder - 1 teaspoon ground cumin - Salt and pepper to taste These ingredients work together to create a tasty snack that's crunchy and full of flavor. The chickpeas are the star. They provide protein and fiber, making them a healthy choice. You can add more flavor with these optional items: - 1 tablespoon nutritional yeast (for a cheesy flavor) - Fresh parsley, chopped (for garnish) Adding nutritional yeast gives your chickpeas a cheesy taste without dairy. Fresh parsley adds color and freshness. Feel free to experiment and adjust to your taste! Chickpeas are not just tasty; they offer many health benefits. Here are some key points: - Rich in Protein: Chickpeas help build and repair tissues. - High in Fiber: They support digestion and keep you full longer. - Healthy Fats: Olive oil provides good fats that help heart health. - Vitamins and Minerals: Spices like cumin and paprika add more nutrients. Including these ingredients in your diet helps you stay healthy while enjoying delicious snacks. For the full recipe, check out Crispy Chickpeas Delight . To start, gather your ingredients. You will need one can of chickpeas, olive oil, and spices. Rinse the chickpeas in a colander. This step is key for removing any cans’ liquid. After rinsing, pat the chickpeas dry with a paper towel. The drier they are, the crispier they will get. Next, toss the chickpeas in a bowl with olive oil. Make sure each chickpea is coated well. This oil helps them crisp up in the oven. Then, mix your spices in a small bowl. Use smoked paprika, garlic powder, and cumin for a tasty blend. If you like cheese, add nutritional yeast to the mix. Sprinkle this spice mix over the chickpeas. Toss them again until they are fully coated. You can cook crispy chickpeas in different ways. The oven is a popular choice. Preheat it to 400°F (200°C). Spread the chickpeas on a baking sheet in a single layer. Bake them for 25-30 minutes. Shake the pan halfway through. This step ensures even cooking. The air fryer is another great option. It cooks faster and can be crispier. Set it to 400°F (200°C) and cook for about 15-20 minutes. Shake the basket halfway through for best results. You can also use the stovetop, but it needs more attention. Heat a skillet over medium heat. Add the chickpeas and cook, stirring often. This method takes about 10-15 minutes. Timing is crucial for crispy chickpeas. In the oven, bake for at least 25 minutes. Check them about five minutes before they finish. If they look golden, they are almost done. When using the air fryer, start with 15 minutes. Check them and add more time if needed. For stovetop cooking, watch closely. Stir them often to prevent burning. The chickpeas should be crunchy and golden when done. Let them cool slightly before serving. This cooling period helps them become extra crispy. Enjoy your crispy chickpeas as a snack or a topping. They are great with salads or on their own. For the full recipe, check out the details above. To make crispy chickpeas, start by drying them well. After rinsing, use a paper towel. Moisture will make them soggy. Preheating your oven is also key. Set it to 400°F (200°C). This high heat helps them crisp up nicely. Spread the chickpeas in a single layer on your baking sheet. More space means better airflow. Shake the pan halfway through cooking for even crispness. One big mistake is not drying the chickpeas enough. Even a little moisture can ruin the crunch. Another mistake is overcrowding the baking sheet. If they touch, they won’t crisp. Avoid using too much oil. A little goes a long way. Too much will make them greasy instead of crispy. Lastly, don't skip the spices. They add flavor and enhance the snack. Seasoning is where you can get creative! Start with the basics: salt, pepper, and garlic powder. For a smoky taste, add smoked paprika. You can also experiment with other spices like chili powder or curry powder. If you want a cheesy flavor, sprinkle some nutritional yeast. Toss the chickpeas well to coat them evenly. This step ensures every bite is bursting with flavor. {{image_2}} You can change the flavor of crispy chickpeas easily. For a sweet twist, add cinnamon and a touch of brown sugar. This mix gives a nice crunch and warmth. If you like spice, try cayenne pepper or chili powder. These spices pack a punch and wake up your taste buds. For a savory option, use Italian herbs like oregano or basil. You can even mix in some grated cheese for a cheesy flavor. The options are endless! You don’t have to bake crispy chickpeas only. An air fryer works great too! It cooks them faster and keeps them crisp. Just toss the chickpeas with oil and spices, then air fry at 400°F for about 15-20 minutes. Shake the basket halfway for even cooking. You can also try the stovetop method. Heat a pan over medium heat, add oil, and cook chickpeas until crispy. This method requires more attention but gives a lovely roasted flavor. Crispy chickpeas make a fun snack anytime. Serve them at parties in a big bowl for guests. They also work great as salad toppings. The crunch adds nice texture to fresh greens. If you’re hosting a movie night, use them instead of chips. They are healthier and just as tasty. For a quick lunch, mix them into a wrap with veggies. No matter the occasion, crispy chickpeas are a hit! For the complete recipe, check out the Full Recipe section. To store leftover crispy chickpeas, let them cool completely first. Use an airtight container. Keep them at room temperature. They stay crunchy this way. If you place them in the fridge, they may lose their crispiness. To reheat your chickpeas, use an oven or air fryer. Preheat the oven to 350°F (175°C). Spread the chickpeas on a baking sheet. Heat them for about 10 minutes. This will help them regain their crunch. Avoid microwaving. Microwaving makes them soggy. Homemade crispy chickpeas last about 3-5 days at room temperature. Store-bought versions often last longer due to preservatives. Check the package for specific dates. Always store them properly to keep them fresh. To make crispy chickpeas in an air fryer, first, drain and rinse your canned chickpeas. Pat them dry with a towel to remove moisture. Toss the chickpeas with olive oil and your favorite spices. Place them in the air fryer basket in a single layer. Cook at 400°F for about 15-20 minutes, shaking the basket halfway through. This method gives you a quick, crispy snack. Yes, you can use dried chickpeas. First, soak them overnight in water. Then, cook them until soft. Drain and dry them well before adding oil and spices. Using dried chickpeas takes more time but can enhance the flavor and texture. You can find pre-made crispy chickpeas at most grocery stores. Look in the snack aisle or the health food section. Many brands offer flavored options, so check the labels for your favorite seasonings. Chickpeas are packed with protein and fiber, making them great for snacks. They help with digestion and keep you full longer. They also contain vitamins and minerals like iron and magnesium. Eating chickpeas can support heart health and help manage blood sugar levels. For the full recipe, you can check the ingredients and steps above. Enjoy making this healthy snack! Crispy chickpeas are easy to make and delicious. We covered key ingredients, cooking methods, and tips for great texture. You learned how to add different flavors and store them. Remember, avoiding common mistakes can help you reach crispy perfection. These nuggets are healthy and fun for any snack time. Explore new ways to enjoy crispy chickpeas and make them your own. Treat yourself to this crunchy delight!

Crispy Chickpeas Perfectly Seasoned Snack Treat

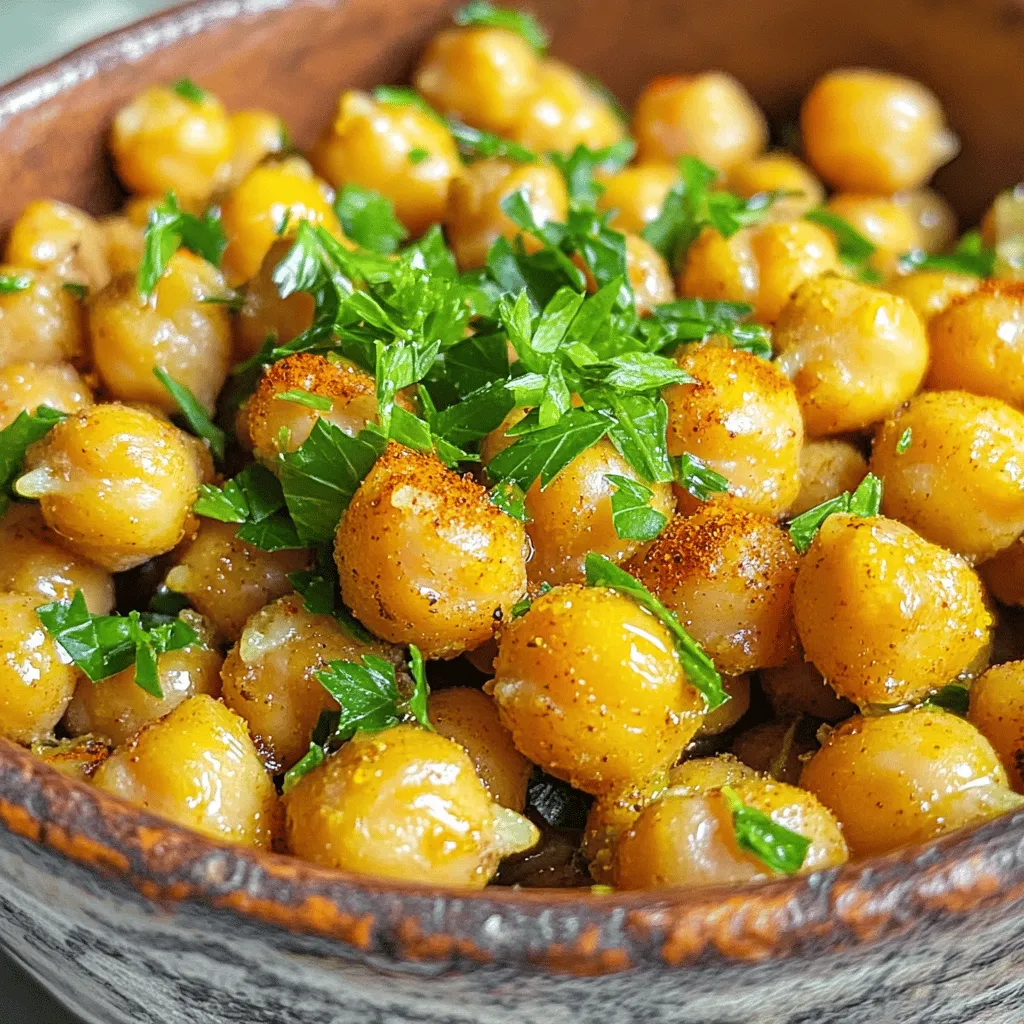
Are you ready to crunch into a delicious, healthy snack? Crispy chickpeas are a game-changer! They are easy to make

To make creamy garlic mashed potatoes, you will need the following simple ingredients: - 2 lbs Yukon Gold potatoes, peeled and quartered - 4 cloves garlic, minced - 1/2 cup cream cheese, softened - 1/2 cup milk (or plant-based milk) - 1/4 cup unsalted butter - Salt and pepper to taste - Fresh chives or parsley, for garnish These ingredients blend together to create a rich and flavorful side dish. Yukon Gold potatoes give a nice buttery taste. The garlic adds a warm, savory note that elevates the dish. Cream cheese and butter provide a smooth, creamy texture. You can easily adjust this recipe to fit various dietary needs: - Dairy-Free: Use plant-based cream cheese and milk. - Vegan: Swap out butter for a vegan version and use plant-based products. - Low-Carb: Substitute potatoes with cauliflower for a lighter option. These changes let you enjoy creamy garlic mashed potatoes, no matter your diet. Using fresh herbs brings brightness to your dish. Fresh chives or parsley add color and taste. They make the dish look beautiful and fresh. If you don’t have fresh herbs, dried herbs can work too. Just use about one-third of the amount. Dried herbs can lose some flavor, so adjust to your taste. For the best flavor, try to use fresh herbs when you can. They make creamy garlic mashed potatoes truly shine. For the full recipe, check out the details above. Start by peeling and quartering 2 lbs of Yukon Gold potatoes. These potatoes work best for a creamy texture. Place the quartered potatoes in a large pot. Cover them with water and add a pinch of salt. Bring the water to a boil over high heat. You want to cook the potatoes for about 15-20 minutes. They should be tender when pierced with a fork. Drain the potatoes well and return them to the pot. While the potatoes cook, it’s time to make the garlic butter. In a small saucepan, melt 1/4 cup of unsalted butter over medium heat. Add 4 cloves of minced garlic to the melted butter. Sauté the garlic for 1-2 minutes. You want it fragrant but not browned. Remove the pan from heat and set it aside. This step adds rich flavor to your mashed potatoes. Now, it’s time to mash the potatoes. Add 1/2 cup of softened cream cheese and 1/2 cup of milk to the drained potatoes. Pour in the garlic butter as well. Use a potato masher or a hand mixer to mash everything together. Mash until you reach your desired creaminess. If your mixture seems too thick, pour in a bit more milk. Taste your mashed potatoes and adjust the salt and pepper if needed. For a nice finish, transfer them to a serving bowl. Garnish with fresh chives or parsley. For the complete recipe, check the Full Recipe section. To make creamy garlic mashed potatoes taste great, balance is key. Use enough salt to enhance flavors, but don’t overdo it. Fresh garlic adds bright flavor, while butter brings richness. Mix cream cheese for creaminess without making them too heavy. Taste as you go, adjusting salt and pepper to match your liking. Want to change things up? Try adding cheese for a richer flavor. Sharp cheddar or creamy goat cheese works well. For a twist, stir in herbs like rosemary or thyme. If you want a kick, add a pinch of cayenne or smoked paprika. These variations will keep your mashed potatoes exciting and fun. Using the right tools can make cooking easier. A large pot helps cook potatoes evenly. A potato masher gives you control over the creaminess. If you prefer a silkier texture, use a hand mixer. Make sure to have a good knife for chopping garlic and herbs. This simple gear makes the process smooth and enjoyable. For the full recipe, check the section above. {{image_2}} If you love cheese, add it to your mashed potatoes! Cheese makes them rich and tasty. You can use cream cheese, cheddar, or even goat cheese. Just mix it in when you mash the potatoes. This will give a nice, creamy texture. Cheese also adds a savory flavor, which makes every bite exciting. Herbs can change the taste of your mashed potatoes. Fresh herbs like rosemary, thyme, or parsley add a bright touch. You can mix these herbs in while mashing. Dried herbs also work well if fresh ones are not available. Try adding garlic powder or onion powder for an extra kick. This will enhance the garlic flavor and make your dish stand out. You can easily make this dish vegan. Simply swap the cream cheese and butter for plant-based options. Use vegan cream cheese and olive oil instead of butter. Almond, oat, or soy milk works as a great substitute for regular milk. This way, you can enjoy creamy garlic mashed potatoes without dairy. The flavor remains rich and satisfying. For the full recipe, check out the [Full Recipe]. You can store your creamy garlic mashed potatoes in the fridge. Place them in an airtight container. They will stay fresh for up to three days. Before serving, check for any signs of spoilage. If they look good, just give them a stir before reheating. If you want to keep them longer, freezing is a great option. Use a freezer-safe container or a zip-top bag. Make sure to remove as much air as possible. Label it with the date. They can last up to three months in the freezer. When you’re ready to use them, thaw them overnight in the fridge. To reheat, place the potatoes in a pot over low heat. Add a splash of milk or cream to help regain creaminess. Stir gently to avoid lumps. Heat until warm, but don’t boil. You can also use the microwave. Heat in short bursts, stirring in between. This keeps them soft and creamy. For more tips, check the Full Recipe. Yes, you can use other types of potatoes. I often use Yukon Gold for their creaminess. Russet potatoes are also a good choice. They create a light and fluffy texture. If you prefer a richer taste, try red potatoes. Each type offers a unique flavor and texture. Making these mashed potatoes gluten-free is easy! All the ingredients I listed are naturally gluten-free. Just make sure to check labels on any processed items, like cream cheese or butter. If you use plant-based milk, choose one that is certified gluten-free to stay safe. Creamy garlic mashed potatoes pair well with many dishes. They suit meats like roasted chicken, beef, or pork. You can also enjoy them with vegetables like steamed broccoli or green beans. For a cozy meal, serve them with a rich gravy or a mushroom sauce. You can find the full recipe above to make this delicious side dish! You learned about making creamy garlic mashed potatoes from scratch. We discussed key ingredients, cooking steps, and helpful tips. Remember, using fresh herbs can boost flavor, while dairy-free options suit different diets. Don't forget about variations like adding cheese or herbs for a twist. Also, store leftovers properly for future enjoyment. By trying these ideas, you can create a dish that impresses everyone at your table. Enjoy delicious, creamy garlic mashed potatoes any time!

Creamy Garlic Mashed Potatoes Simple and Flavorful Dish

Get ready to elevate your dinner with my Creamy Garlic Mashed Potatoes! This simple and flavorful dish brings comfort to

- 1 lb sirloin steak, cut into bite-sized cubes - 4 tablespoons unsalted butter - 4 cloves garlic, minced - 1 teaspoon fresh rosemary, chopped - 1 teaspoon fresh thyme, chopped For this dish, I love using sirloin steak. It has great flavor and cooks well. The unsalted butter adds richness, while minced garlic brings a bold taste. Fresh rosemary and thyme elevate the dish with their wonderful aroma. Using fresh herbs makes a big difference in flavor. - Salt and pepper - 1 tablespoon olive oil - Fresh parsley, chopped (for garnish) Seasoning is key. Salt and pepper help bring out the taste of the steak. I recommend using good olive oil for cooking. It adds healthy fats and flavor. Finally, fresh parsley not only looks nice but also adds a fresh touch. For the full recipe, check out the detailed steps. To start, you need to dry and season the steak. Use paper towels to pat the steak cubes dry. This step is key to help them sear well and get a nice crust. After that, season the cubes with salt and pepper. Make sure to coat all sides for great flavor. Next, preheat your skillet. Heat a large skillet over medium-high heat and add olive oil. You want the oil hot before adding the steak bites. This way, they will sear nicely. Now, it’s time to cook the steak bites. Add the seasoned cubes to the skillet in a single layer. Let them cook for 2-3 minutes without stirring. This helps to form that beautiful crust. After the first side is seared, flip the steak bites. Cook for another 2-3 minutes. This will give you a medium-rare finish, but feel free to adjust the time if you prefer them more or less cooked. Once done, take the steak bites out and set them aside on a plate. Now for the garlic butter sauce. In the same skillet, lower the heat to medium and add the butter. Let it melt completely. Once melted, toss in the minced garlic, fresh rosemary, and thyme. Sauté for about 1-2 minutes until the garlic smells amazing. Just be careful not to burn it. After the garlic is fragrant, return the steak bites to the skillet. Toss them in the garlic butter mixture. Cook for an extra minute to coat the bites well in the sauce. Finally, take everything off the heat. If you like, garnish with fresh parsley for extra flavor and a pop of color. These garlic butter steak bites are ready to serve! For the full recipe, check out the detailed instructions above. To get the best sear on your steak bites, start with dry cubes. Pat them dry with paper towels before cooking. This helps the meat brown nicely. Heat your skillet well, then add olive oil. A hot pan creates a great crust. For the perfect doneness, timing is key. Cook your steak bites for 2-3 minutes on one side without moving them. Then flip and cook for another 2-3 minutes. Here’s a quick guide: - Rare: 2-3 minutes total - Medium-rare: 4-5 minutes total - Medium: 5-6 minutes total To elevate the flavor, add more herbs or spices. Fresh thyme and rosemary work well here. You can also try adding crushed red pepper for some heat. Using different sauces can change up the taste too. A splash of soy sauce adds depth, or try a drizzle of balsamic glaze for sweetness. These small changes keep the dish exciting. Explore your options and find what you love! Check out the [Full Recipe] for all the details on how to make this dish shine! {{image_2}} If you want to switch up the meat, try different cuts. Ribeye or tenderloin can work well. Each cut gives a unique taste and texture. You might also experiment with chicken or shrimp for a lighter dish. Looking for a dairy-free option? Use olive oil instead of butter. Coconut oil is another great choice. It adds a different but tasty flavor to the steak bites. These garlic butter steak bites pair well with many sides. Serve them with mashed potatoes or rice for a filling meal. You can also try them with roasted vegetables for a healthy balance. For a fun twist, serve the bites on skewers. This makes them easy to grab and eat. You could also set up a dipping station with sauces like chimichurri or garlic aioli. People love to customize their bites! Explore the [Full Recipe] for more ideas and tips. You can keep cooked garlic butter steak bites in the fridge. Use an airtight container. They should last up to three days. Make sure to cool them before sealing. This helps prevent moisture build-up. If you want to keep them longer, freeze them. They can last up to three months in the freezer. Just wrap them well in plastic wrap and foil. This keeps them safe from freezer burn. To reheat steak bites, use a skillet. Heat it over medium-low heat. Add a bit of butter to bring back flavor. Place the steak bites in the skillet. Stir often for about 5 minutes. They should be warm and tasty again. You can also microwave them. Use a microwave-safe dish and cover it. Heat them in short bursts, checking often. This way, they stay juicy and don’t dry out. For more detailed instructions, you can refer to the Full Recipe. How long do garlic butter steak bites keep? Garlic butter steak bites can stay fresh in the fridge for about 3 days. Store them in an airtight container. This keeps them tasty. They also freeze well for up to 3 months. Just remember to thaw them in the fridge before reheating. Can I use a different type of steak? Yes, you can use other steak cuts. Ribeye or filet mignon works well too. Each cut has its own flavor and tenderness. Just adjust your cooking time based on the thickness of the pieces. Make sure to taste for the best results! Can I cook steak bites in the oven or air fryer? Absolutely! You can cook steak bites in the oven. Preheat it to 425°F (220°C) and cook for about 10-12 minutes. For an air fryer, cook at 400°F (200°C) for around 8-10 minutes. Both methods give a great sear and keep the bites juicy. What are the signs of properly cooked steak bites? Perfectly cooked steak bites are brown on the outside. They should feel firm but still have a slight give when pressed. For medium-rare, aim for an internal temp of 130°F (54°C). Use a meat thermometer for the best accuracy. Enjoying steak bites at the right doneness makes all the difference! In this blog post, I shared how to make delicious garlic butter steak bites. We covered key ingredients, preparation steps, and cooking methods. You learned tips for perfecting your cooking, variations to enhance flavor, and how to store leftovers properly. Cooking can be simple and fun. Try these ideas to impress your family and friends with tasty steak bites. Enjoy exploring different flavors and enjoy your cooking adventures!

Garlic Butter Steak Bites Flavorful and Easy Recipe

Get ready to savor one of the easiest and most delicious meals you’ll ever make! Garlic Butter Steak Bites are

- 200g penne pasta - 200g feta cheese block - 300g cherry tomatoes, halved - 3 cloves garlic, minced - 1/4 cup extra-virgin olive oil - 1 teaspoon dried oregano - Salt and pepper to taste - 1/4 teaspoon red pepper flakes (optional for heat) In this dish, the main ingredients create a wonderful base. The penne pasta serves as a hearty choice. The feta cheese adds a creamy texture that melts beautifully. Cherry tomatoes burst with flavor and sweetness. For seasonings, garlic brings a punch that pairs well with the feta. Extra-virgin olive oil enhances the dish's richness. Dried oregano adds warmth and depth to the flavors. I suggest tasting and adjusting your salt and pepper. If you like a bit of heat, add red pepper flakes. This choice brings a delightful kick to the dish. You can find the Full Recipe for Baked Feta Pasta Delight to guide you step by step. Enjoy crafting this easy and flavorful dish! - Preheat your oven to 400°F (200°C). - In a large baking dish, combine the halved cherry tomatoes, minced garlic, olive oil, oregano, salt, pepper, and red pepper flakes. Toss well to coat. The key to a great baked feta pasta starts with fresh ingredients. Using ripe cherry tomatoes and good-quality feta makes a big difference. The garlic adds flavor and aroma, while the olive oil helps everything roast nicely. - Place the feta cheese block in the center of the mixture. - Drizzle olive oil over the feta and bake for 30 minutes. Baking the feta and tomatoes together transforms the dish. The cheese softens and becomes creamy, while the tomatoes burst and release their juices. This creates a rich sauce that coats the pasta beautifully. - Cook penne pasta, mix with baked feta and tomatoes, and garnish with fresh basil and lemon zest. While the feta bakes, cook your penne pasta until it’s al dente. Once it's done, drain it and set it aside. After baking, mash the feta and tomatoes together with a fork. Toss in the pasta and mix until everything is well coated. Adding lemon zest gives a bright flavor. Finish with fresh basil for a pop of color and taste. For the complete experience, check out the Full Recipe. You’ll love how simple and tasty this dish is! To make the best baked feta pasta, you need to start with the right feta cheese. Look for a block of creamy, high-quality feta. It should be rich and tangy. Avoid crumbled feta, as it won’t melt the same way. Fresh ingredients are key too. Use ripe cherry tomatoes, as their sweetness really shines when baked. Fresh garlic will add depth to the dish, making every bite taste amazing. One common mistake is overbaking the feta cheese. Bake it just until soft and golden. If you leave it too long, it will become dry and crumbly. Another mistake is not adjusting the seasoning to taste. After mixing the pasta with the sauce, taste it! You might need a pinch of salt or more pepper to bring out all the flavors. To amp up the flavor, consider adding herbs. Fresh basil is a classic choice. You can also use thyme or parsley. They add freshness and brightness to the dish. If you want to mix things up, try adding olives or sun-dried tomatoes. These add a nice briny flavor that pairs well with the creamy feta. For a little kick, add red pepper flakes or a sprinkle of lemon zest, which gives a lovely zing. For a full guide on creating this dish, check out the Full Recipe. {{image_2}} You can switch up the pasta for a new twist. Try gluten-free pasta if you need it. I love using whole wheat or even zoodles for a lighter dish. These swaps keep it fun and fresh! Cheese can also change the dish's flavor. Instead of feta, try goat cheese for a tangy kick. Cream cheese can work if you want a super creamy sauce. Mozzarella adds a nice stretch if you crave cheesiness. Want to boost the veggie count? Toss in spinach or bell peppers. They add color and nutrients. Roasted zucchini or mushrooms can also work well, making it hearty. If you prefer vegetarian options, skip the meat and load up on vegetables. For a vegan version, use plant-based feta. Swap the pasta for a gluten-free type, and you’re all set! Adding protein can make this dish even better. Try cooked chicken or shrimp for a filling meal. They pair nicely with the creamy feta and tomatoes. Don’t be afraid to experiment with spices! A pinch of chili powder or smoked paprika can add depth. Fresh herbs like parsley or thyme can brighten the flavors. Get creative and find what you love! To store leftovers of Baked Feta Pasta, place it in an airtight container. Make sure the dish is cool before sealing it. Store it in the fridge for up to three days. When you are ready to eat, reheat it in the microwave. Stir it halfway through to heat evenly. You can also use the oven to reheat it at 350°F (175°C) for about 15 minutes. For long-term storage, you can freeze Baked Feta Pasta. First, let it cool completely. Then, place it in a freezer-safe container. It can last in the freezer for up to three months. When you want to enjoy it again, take it out and let it thaw in the fridge overnight. Reheat it in the oven until it is hot throughout. Baked Feta Pasta tastes best when fresh, but you can store it. Keep your leftovers in the fridge for up to three days. If frozen, aim to eat it within three months for the best flavor. After that, the taste may change. Enjoy this dish while it's still delicious! Baked Feta Pasta is a simple and tasty dish that became popular on social media. It comes from Finland, where cooks made it with feta cheese, pasta, and fresh tomatoes. The dish gained fame for its creamy texture and rich flavor. The warm feta mixes with the juicy tomatoes, creating a sauce that coats the pasta perfectly. It’s a great meal for busy weeknights or any occasion. Yes, you can prepare Baked Feta Pasta ahead of time. Cook the pasta and mix the tomatoes, garlic, and feta cheese in the baking dish. Cover it and store it in the fridge. When you are ready to cook, just pop it in the oven. You may need to add a few extra minutes to the baking time if it’s cold from the fridge. Baked Feta Pasta can be a healthy meal. It has protein from the feta cheese and carbs from the pasta. Here are some points to consider: - Feta cheese offers calcium and healthy fats. - Cherry tomatoes are rich in vitamins and antioxidants. - You can use whole grain or gluten-free pasta for more fiber. You can easily make Baked Feta Pasta your own. Here are some fun ideas: - Add vegetables like spinach or bell peppers for more color and nutrients. - Swap feta for goat cheese or ricotta for a different taste. - Sprinkle in some herbs like thyme or basil for extra flavor. Baked Feta Pasta pairs well with many sides. Here are a few suggestions: - A simple green salad with lemon vinaigrette. - Garlic bread to soak up the sauce. - Grilled chicken or shrimp for added protein. You can find the Full Recipe for Baked Feta Pasta Delight in this article. It guides you through each step to make this dish at home. This blog post covered all you need for delicious baked feta pasta. We highlighted the ingredients, from pasta to feta, and shared easy steps for baking. I included tips to perfect the dish and various ways to customize it. Explore ingredient swaps and flavor options to make it your own. Remember, fresh ingredients make a big difference. Enjoy every bite of this fun dish, whether alone or with friends.

Baked Feta Pasta Delight Easy and Flavorful Dish

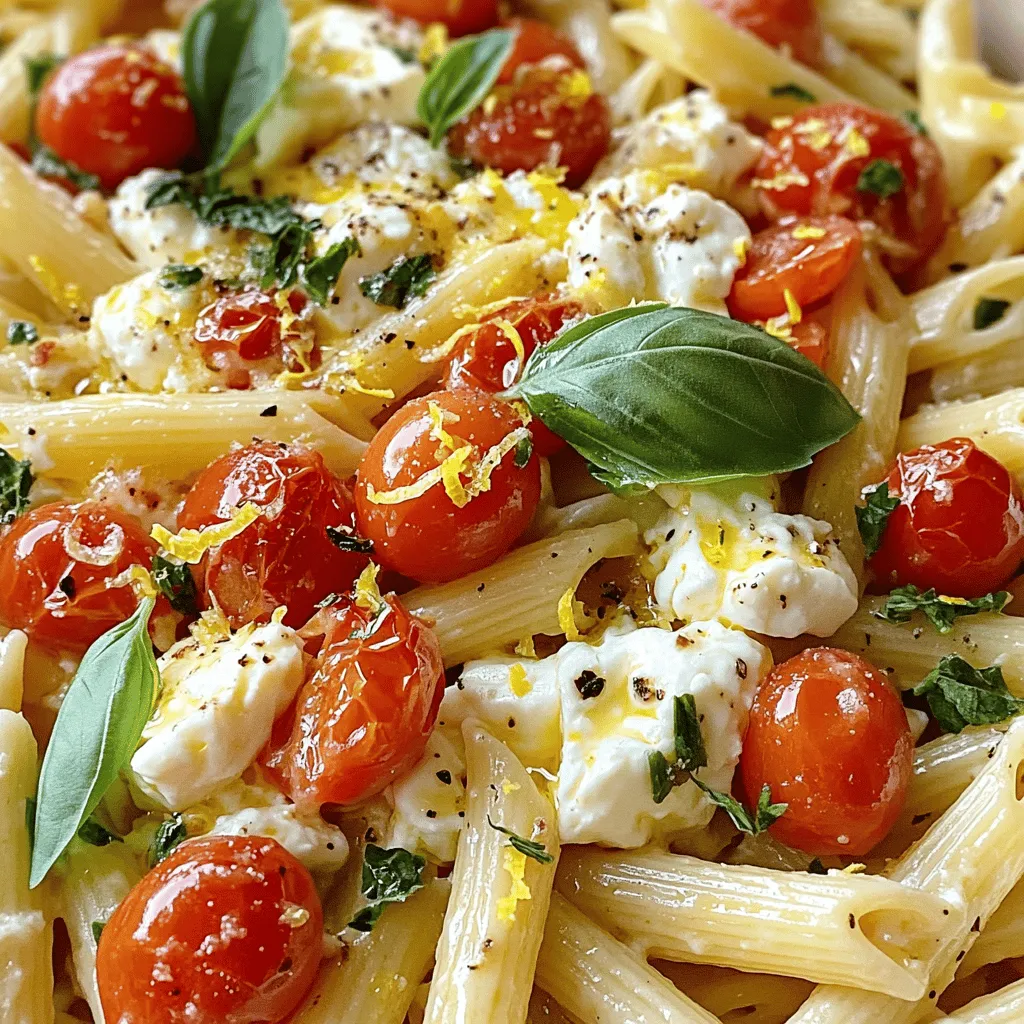
Looking for a simple yet delicious dish to impress your loved ones? Baked Feta Pasta is your answer! This easy

- 2 cups mixed nuts (almonds, cashews, pecans, walnuts) - 1/4 cup maple syrup - 1 tablespoon olive oil - 1 teaspoon sea salt - 1 teaspoon cayenne pepper (adjust to taste) - 1 teaspoon smoked paprika - 1/2 teaspoon cinnamon - 1/4 teaspoon black pepper - 1 tablespoon brown sugar (optional) - 1/2 cup dried cranberries (optional) The right mix of ingredients matters. I love using a blend of nuts for texture. Almonds, cashews, pecans, and walnuts work well together. They all add unique flavors. Maple syrup brings sweetness. It pairs perfectly with the spices. Olive oil helps the nuts crisp up nicely. Salt enhances all the flavors. Cayenne pepper adds heat. You can adjust it based on your taste. Smoked paprika gives a nice smokiness. A hint of cinnamon adds warmth. Black pepper rounds out the spice mix. Brown sugar is optional. It adds extra sweetness if you like. Dried cranberries add a burst of color and flavor. They also make the mix more festive. For the full recipe, check out the Sweet and Spicy Roasted Nuts 🥜. 1. Preheat your oven to 350°F (175°C). This step is key for even roasting. 2. Line a baking sheet with parchment paper. This helps prevent sticking. 3. In a large bowl, combine 2 cups of mixed nuts, 1 tablespoon of olive oil, and 1/4 cup of maple syrup. Toss well to coat the nuts. 4. Add the spices: 1 teaspoon of sea salt, 1 teaspoon of cayenne pepper, 1 teaspoon of smoked paprika, 1/2 teaspoon of cinnamon, and 1/4 teaspoon of black pepper. If you want it sweeter, add 1 tablespoon of brown sugar. Mix until the nuts are evenly coated. 1. Spread the seasoned nuts evenly on the prepared baking sheet. This allows for good air circulation. 2. Roast in your preheated oven for 15-20 minutes. Stir the nuts halfway through. This helps them roast evenly and prevents burning. Keep an eye on them as they roast. You want them golden brown and fragrant. 1. Once roasted, remove the nuts from the oven. Transfer them to a bowl right away. This stops the cooking process and keeps them from sticking. 2. If you like, mix in 1/2 cup of dried cranberries for an added burst of sweetness. This is optional but highly recommended. 3. Serve the nuts in a decorative bowl or jars if you plan to gift them. For the complete recipe, visit the [Full Recipe] section. Enjoy your sweet and spicy roasted nuts! - To adjust spice levels, start with less cayenne. You can always add more later. - Stir the nuts halfway through roasting. This helps them roast evenly and enhances flavor. - Watch your nuts closely. Over-roasting can burn them quickly. - Mix the nuts well with the spice blend. This ensures that every nut is coated with flavor. - Try adding a pinch of nutmeg or ginger for a new twist. - Fresh spices make a big difference. Always check the freshness of your ingredients for the best taste. These tips will help you make the most delicious sweet and spicy roasted nuts. For the complete recipe, refer to the Full Recipe section. Enjoy roasting! {{image_2}} You can switch up the nuts for your roasted mix. While mixed nuts are great, consider using just almonds, cashews, or pecans. Each nut brings a unique taste and texture. Almonds give a nice crunch, while cashews offer creaminess. Pecans have a rich, buttery flavor. Experiment with your favorites for a custom blend that suits your palate. Want your nuts sweeter? Add more maple syrup or brown sugar. For extra heat, increase the cayenne pepper. You can even try adding a dash of chili powder for a different spice kick. Don’t forget, you can mix in other flavors like vanilla or even a touch of citrus zest. These small changes can make a big impact. If you're looking for healthier options, swap olive oil for avocado oil. It has a mild flavor and is great for roasting. For sweeteners, consider agave syrup or honey. They can add a nice touch without extra refined sugars. If you need a nut-free version, try using seeds like pumpkin or sunflower. They can hold the same flavors and textures, making them a great alternative. For the full recipe, check the details above. To keep your sweet and spicy roasted nuts fresh, store them in an airtight container. This helps prevent moisture and air from getting in. Glass jars or plastic containers with tight lids work well. Avoid using paper bags, as they let air in and can cause the nuts to go stale. These tasty nuts can last for about two weeks at room temperature. If you keep them in the fridge, they can last up to a month. Always check for signs of spoilage. If they smell off or taste bitter, it’s time to toss them. To restore crispness after storage, spread the nuts on a baking sheet. Preheat your oven to 350°F (175°C) and heat them for about 5 to 10 minutes. This will bring back their crunch. When serving again, consider adding a sprinkle of fresh spices or sea salt to enhance the flavor. You can also serve them warm for a cozy treat. For the full recipe, check out the Sweet and Spicy Roasted Nuts section above! You can use many nuts for roasting. I like a mix for the best flavor. Here are some good choices: - Almonds - Cashews - Pecans - Walnuts These nuts give a nice crunch and pair well with sweet and spicy flavors. Roasting brings out their natural oils and enhances their taste. Yes, you can swap out the sweeteners based on your taste. Maple syrup adds a rich flavor, but here are other options you might like: - Honey - Agave nectar - Coconut sugar Each sweetener changes the flavor just a bit. Try what you have at home and see what you love best. Adjusting spiciness is easy! Start with cayenne pepper as the recipe states. If you want it milder, use less. To make it hotter, add more to the mix. Here’s how to find your perfect heat: - Taste the mixture before roasting. - Add spices gradually. - Remember, you can always add more, but you can't take it out. Yes, these nuts are vegan! All the ingredients are plant-based. The nuts, maple syrup, and spices are great for anyone following a vegan diet. Just make sure to check your sweeteners. Some may not be vegan, like honey. For the complete recipe, check the [Full Recipe]. In this blog post, we explored how to make delicious roasted mixed nuts. We covered the essential ingredients, preparation steps, and the roasting process. Key tips helped avoid common mistakes, ensuring even flavor and texture. We also mentioned fun variations and storage tips to keep your nuts fresh. Enjoy crafting your unique nut mix, adjusting flavors to match your taste. With these methods, you’ll always have a tasty snack on hand.

Sweet and Spicy Roasted Nuts Irresistible Flavor Boost

Do you crave a snack that combines crunch, sweetness, and heat? Look no further! My Sweet and Spicy Roasted Nuts

Older posts
Newer posts
← Previous Page1 … Page36 Page37 Page38 … Page49 Next →

dsad

© 2025 savoryspiral • Built with GeneratePress

Our Policies

  • Copyright Policy
  • Cookie Policy
  • GDPR Policy
  • Privacy Policy
  • Disclaimer
  • Terms Of Use

More Information

  • Home
  • About
  • Contact
  • Appetizers
  • Dessert
  • Dinner
  • Drinks
©2025, savoryspiral About Back To Top