Skip to content
DisclaimerTerms Of UseGDPR PolicyCookie Policy

savoryspiral

  • Home
  • Drinks
  • Appetizers
  • Dinner
  • Dessert
  • About
  • Contact
  • Privacy Policy
DisclaimerTerms Of UseGDPR PolicyCookie Policy

Charlotte

To make Baked Lemon Herb Cod, you need a few simple items. These ingredients come together to create a tasty dish. - 4 cod fillets (about 6 oz each) - 2 tablespoons olive oil - 3 cloves garlic, minced - Zest and juice of 1 lemon - 1 teaspoon dried oregano - 1 teaspoon dried thyme - 1 teaspoon paprika - Salt and pepper to taste - Fresh parsley, chopped (for garnish) - Lemon slices (for serving) Each ingredient plays a key role. The cod fillets are the star. They are mild and flaky. Olive oil adds richness and helps the spices stick. Garlic gives the dish a nice kick. Lemon brings brightness and freshness. Dried oregano and thyme add earthy notes. Paprika gives a hint of warmth. Salt and pepper enhance all the flavors. Fresh parsley makes it look pretty. Lemon slices on the side add a nice touch. You can find the full recipe [here](#). - Preheating the oven: Start by setting your oven to 400°F (200°C). This high heat helps cook the cod quickly and evenly. - Mixing the marinade: In a small bowl, whisk together: - 2 tablespoons olive oil - 3 cloves garlic, minced - Zest and juice of 1 lemon - 1 teaspoon dried oregano - 1 teaspoon dried thyme - 1 teaspoon paprika - Salt and pepper to taste This blend of flavors brings life to the cod. Make sure it mixes well. - Preparing the cod fillets: Place 4 cod fillets in a baking dish. Pour the lemon herb mixture over the fillets. Make sure the cod is well coated. This step is key for flavor. - Marinating time: Let the cod sit for at least 15 minutes. This allows the fish to soak up the tasty marinade. - Baking the cod: Place the dish in your preheated oven. Bake for 12-15 minutes. The cod is done when it flakes easily with a fork and looks opaque. - Serving suggestions: Once baked, remove the dish from the oven. Let it rest for a few minutes. Garnish with freshly chopped parsley and serve with lemon slices on the side. This adds a fresh touch and brightens up the dish. For the complete details, check out the Full Recipe. To make your baked lemon herb cod shine, pay attention to the marination time. I find that letting the cod sit in the marinade for at least 15 minutes works wonders. This time allows the fish to absorb all the bright flavors of lemon and herbs. You can also boost the flavor by adding more herbs and spices. Try fresh dill or basil for a new twist. Experimenting with spices like cumin or coriander can give your dish an exciting kick. Always taste the marinade before you pour it on the fish. Adjust the seasoning to match your preference. To ensure your cod is flaky and tender, it’s key to bake it just right. Cod cooks quickly, so keep an eye on it. Aim for a baking time of 12 to 15 minutes at 400°F (200°C). The fish is ready when it flakes easily with a fork. For perfect results, use a baking dish that allows for even heat. A glass or ceramic dish works well. Make sure to coat the cod evenly with the marinade. This helps keep the fish moist and enhances its flavor. For a beautifully presented dish, garnish with fresh parsley and lemon slices. It adds color and a hint of freshness to every bite. For the full recipe, refer to the earlier section. {{image_2}} To make your Baked Lemon Herb Cod even more fun, try different fish. Some great swaps include: - Salmon: Rich and flavorful, it pairs well with lemon. - Tilapia: Mild and flaky, it absorbs the marinade nicely. - Halibut: A firm texture that holds up well to baking. You can also switch up the herbs! Instead of oregano and thyme, consider: - Dill: A fresh twist that brightens the dish. - Basil: Adds a sweet, aromatic flavor. - Cilantro: Perfect for a zesty, vibrant touch. Now that your cod is ready, think about sides that go well with it. Here are some ideas: - Roasted vegetables: Carrots, asparagus, or broccoli add color and nutrition. - Quinoa or rice: These grains soak up the lemon flavors nicely. - A fresh salad: Mixed greens with a light vinaigrette balance the meal. For plating, get creative! Place the cod on a bed of greens or grains. Add a slice of lemon on top for a pop of color. Sprinkle fresh parsley for a beautiful finish. This makes your dish not just tasty but also a feast for the eyes! For the full recipe, see the section above. To keep your Baked Lemon Herb Cod fresh, store it in an airtight container. Place it in the fridge for up to three days. Make sure it cools before sealing. If you want to keep it longer, freeze the cod. Wrap each piece in plastic wrap, then place it in a freezer bag. This keeps the fish safe for up to three months. When reheating, you have two main options: the microwave or the oven. The oven is best for keeping the cod's texture. Preheat it to 350°F (175°C). Place the cod in a dish, cover it with foil, and heat for about 10 minutes. If you're in a hurry, the microwave works too. Place the cod on a microwave-safe plate. Cover it with a damp paper towel to keep moisture. Heat on medium power for about 1-2 minutes, checking often. This way, you maintain flavor and keep the fish tender. For more details, check the Full Recipe. How do I know when cod is done? Cod is done when it flakes easily with a fork. You should also check if the fish looks opaque. This usually takes around 12 to 15 minutes at 400°F (200°C). Using a food thermometer is helpful too; it should reach 145°F (63°C) internally. Can I use frozen cod for this recipe? Yes, you can use frozen cod. Just make sure to thaw it first. You can thaw it overnight in the fridge or use the quick method in cold water. Once thawed, follow the same steps in the Full Recipe. What can I substitute for lemon? If you don't have lemon, try lime or orange juice. Both will add a nice citrus flavor. You can also use vinegar, like white wine or apple cider vinegar, for a tangy taste. Caloric content per serving Each serving of Baked Lemon Herb Cod has about 250 calories. This meal is light yet filling, making it great for dinner. Health benefits of cod and herbs Cod is a lean protein packed with omega-3 fatty acids. These fats are good for your heart and brain. Herbs like oregano and thyme add flavor without extra calories. They also have antioxidant properties that can help your immune system. This post showed you how to prepare a tasty cod dish. You learned about ingredients, including cod and herbs. We covered step-by-step instructions for cooking, tips for flavor, and cooking tricks to keep cod flaky. I also shared variations for different tastes and storage tips for leftovers. Remember, this recipe is flexible and can fit your style. With these guidelines, you can make healthy and delicious meals easily. Enjoy your cooking journey with cod!

Baked Lemon Herb Cod Simple and Flavorful Dinner

Looking for a quick and tasty dinner? Baked Lemon Herb Cod is your answer. This dish is simple, flavorful, and

- 2 ripe bananas, frozen - 2 tablespoons creamy peanut butter - 1 cup almond milk (or milk of choice) - 1 tablespoon honey or maple syrup (optional) - 1 tablespoon chia seeds - ½ teaspoon vanilla extract - A pinch of cinnamon (optional) - Handful of ice cubes When making a Peanut Butter Banana Smoothie, start with ripe bananas. Frozen bananas give the smoothie a thick and creamy texture. You can use almond milk or any other milk you like, such as cow's milk or oat milk. Chia seeds add fiber and healthy fats. If you want sweetness, add honey or maple syrup. A dash of vanilla extract boosts flavor, while cinnamon adds warmth. Ice cubes make it chilled and refreshing. - Alternatives to bananas: You can use mango or avocado for creaminess. - Milk options: Any milk works well, like soy or coconut milk. - Sweetener alternatives: Agave syrup or stevia can replace honey or maple syrup. Feel free to mix and match ingredients to suit your tastes or dietary needs. - Caloric breakdown: This smoothie is about 350 calories per serving. - Health benefits of key ingredients: Bananas provide potassium, while peanut butter offers protein and healthy fats. Chia seeds add omega-3s and fiber. This smoothie is not just tasty; it also fuels your body with nutrition. You can find the Full Recipe to make this delicious drink. Enjoy your smoothie adventure! To make a peanut butter banana smoothie, start by preparing the bananas. - Preparing the bananas for blending: Peel two ripe bananas. If you froze them, let them sit for a minute. Break the bananas into smaller chunks. This helps them blend easier. - Measuring out the ingredients: Gather all your ingredients. You need 2 tablespoons of creamy peanut butter, 1 cup of almond milk, and 1 tablespoon of honey or maple syrup. Don’t forget the chia seeds, vanilla extract, and a pinch of cinnamon if you like. Now, it’s time to blend everything together. - Combining the ingredients in the blender: Place the banana chunks into your blender. Add the peanut butter, almond milk, and any sweeteners. Toss in your chia seeds and vanilla extract too. - Achieving the perfect texture: Blend on high speed until smooth and creamy. Stop the blender and scrape down the sides as needed. If you want it thicker, add a handful of ice cubes. Blend again until everything is well mixed. Pouring and garnishing your smoothie adds a nice touch. - Tips for pouring and garnishing: Once blended, pour the smoothie into tall glasses. For a fun look, garnish each glass with a banana slice on the rim. Sprinkle some chia seeds on top for extra flair. - Glassware options: Use clear glasses to show off the creamy blend. Colorful straws can make it even more fun to drink. Enjoy your tasty creation right away! To get the right thickness for your smoothie, start with frozen bananas. They make the drink creamy and cold. If you want it thicker, add ice cubes. If it’s too thick, pour in more almond milk. Adjust to your taste. You can also use fresh bananas, but your smoothie may not be as thick. Frozen bananas work best for that rich, creamy texture. Spices can make a big difference. A pinch of cinnamon adds warmth. Vanilla extract gives a sweet aroma. You can also mix in other fruits like strawberries or spinach. This adds color and nutrition. Each fruit brings its own taste. Experiment with what you like best! One common mistake is over-blending. Blend just enough to mix well. Too much blending can make your smoothie too thin. Another mistake is using the wrong ratio of ingredients. Stick to the recipe for the best results. If you change something, balance it out. This way, you keep the flavor and texture just right. {{image_2}} You can easily change the flavor of your smoothie. One great idea is to add cocoa powder. Just one tablespoon gives your drink a rich, chocolate taste. It pairs well with bananas and peanut butter. You can also try different nut butters. Almond butter or cashew butter gives a nice twist. Each choice changes the flavor while keeping it tasty. If you have dietary needs, this smoothie can fit right in. To make it vegan, skip the honey and use maple syrup instead. For gluten-free options, check your nut butter and milk. Most are already gluten-free. You can also boost the protein. Add a scoop of your favorite protein powder. It makes the smoothie filling and great for breakfast. Serving your smoothie can be fun! You can make a smoothie bowl instead of a drink. Pour it into a bowl and top it with fruits, nuts, or seeds. This makes it look pretty and adds texture. If you want a more filling breakfast, add oats or yogurt to the blend. This gives you energy and keeps you satisfied longer. Enjoy your creamy peanut butter banana bliss! To store leftover smoothie, pour it into a clean container. Use a glass jar or a BPA-free plastic bottle. Seal the container tightly to keep air out. This helps keep the flavors fresh. You can freeze smoothies for later use. Pour the smoothie into ice cube trays for easy portioning. Once frozen, pop the cubes into a freezer bag. To thaw, leave them in the fridge overnight or blend them again with a bit of milk. You can store your smoothie in the fridge for up to 24 hours. After that, it may lose some taste and texture. Signs of spoilage include a sour smell or a change in color. If it looks or smells off, it’s best to toss it. To make a Peanut Butter Banana Smoothie, follow these simple steps: 1. Peel 2 ripe bananas and break them into chunks. 2. Add the banana chunks to your blender. 3. Include 2 tablespoons of creamy peanut butter. 4. Pour in 1 cup of almond milk or your preferred milk. 5. If you want extra sweetness, add 1 tablespoon of honey or maple syrup. 6. Add 1 tablespoon of chia seeds for nutrition. 7. Include ½ teaspoon of vanilla extract and a pinch of cinnamon if you like. 8. Blend on high speed until smooth. 9. Add a handful of ice cubes for a thicker texture, then blend again. 10. Taste and adjust sweetness if needed. 11. Pour into glasses and enjoy! Check out the Full Recipe for more details. Yes, you can make this smoothie without a blender! Here are some ideas: - Use a fork to mash the bananas in a bowl. - Mix in the peanut butter, honey, and chia seeds by hand. - Stir in the almond milk and vanilla extract until smooth. - Add ice cubes into your mixture and crush them with a rolling pin. - This method takes longer but can work well in a pinch! You can boost the nutrition of your Peanut Butter Banana Smoothie with these popular add-ins: - Protein powder: This adds extra protein for muscle repair. - Spinach: A handful of fresh spinach adds vitamins without changing the taste. - Greek yogurt: This thickens the smoothie and adds probiotics. - Oats: Rolled oats provide fiber and keep you full longer. - Flaxseed: Ground flaxseed gives omega-3 fatty acids. Feel free to mix and match to find what you love! In this post, we explored how to make a delicious peanut butter banana smoothie. We covered the ingredients you need, how to prepare and blend them, and tips for perfect texture. I shared ingredient substitutes and discussed nutritional information to help you make smart choices. Remember, this smoothie is versatile and easy to personalize. Try different ingredients and flavors. Enjoy creating your own unique blend!

Peanut Butter Banana Smoothie Simple and Tasty Recipe

Craving a quick, delicious boost? The Peanut Butter Banana Smoothie is your answer! Packed with nutrients and flavor, this recipe

To make a great Eggplant Parmesan, you need the following ingredients: - 2 medium eggplants, sliced into 1/4-inch rounds - 1 teaspoon salt - 1 cup all-purpose flour - 3 large eggs, beaten - 2 cups breadcrumbs (preferably whole wheat) - 3 cups marinara sauce (store-bought or homemade) - 2 cups shredded mozzarella cheese - 1 cup grated Parmesan cheese - 1 tablespoon dried oregano - 1 tablespoon fresh basil, chopped (plus extra for garnish) - Olive oil for frying - Freshly ground black pepper, to taste You can swap some ingredients if needed. For the eggplant, zucchini works well. If you want a gluten-free option, use almond flour instead of all-purpose flour. For the breadcrumbs, try crushed cornflakes or gluten-free breadcrumbs. If you don't have mozzarella, use provolone or a dairy-free cheese. Use fresh herbs if you can find them, as they add bright flavors. Eggplant Parmesan pairs nicely with many sides. A simple green salad with lemon vinaigrette works great. Garlic bread is a classic choice too. For beverages, a light red wine, like Chianti, complements the dish well. If you prefer a non-alcoholic option, try sparkling water with a slice of lemon. You can find the full recipe in the recipe section. Enjoy your cooking! To prepare the eggplants, start by slicing them into 1/4-inch rounds. This helps them cook evenly. Place the slices in a colander, and sprinkle them with salt. The salt draws out moisture and bitterness. Let them sit for about 30 minutes. After this time, rinse the slices under cold water. Pat them dry with paper towels. This step is key to getting that perfect texture. Next, set up your breading station. Use three shallow bowls. Put all-purpose flour in the first bowl. In the second bowl, add the beaten eggs. In the third bowl, mix breadcrumbs with dried oregano and black pepper. Take each eggplant slice, and first coat it in flour. Shake off any extra flour. Then, dip it in the egg. Finally, coat it with the breadcrumb mixture. Make sure each slice is well-covered. This creates a nice crust when you fry them. Now it's time to cook! Heat olive oil in a large skillet over medium-high heat. You want enough oil to cover the bottom of the skillet. Fry the breaded eggplant slices in batches. Cook them for about 3-4 minutes on each side until they turn golden brown. After frying, place them on a paper towel-lined plate to drain excess oil. Preheat your oven to 375°F (190°C). Grab a 9x13 inch baking dish. Spread a layer of marinara sauce on the bottom. Layer half of the fried eggplant slices over the sauce. Sprinkle a layer of mozzarella and Parmesan cheeses on top. Repeat with the remaining eggplant, sauce, and cheeses. Cover the dish with foil and bake for 25 minutes. Remove the foil and bake for another 15-20 minutes. You want the cheese to be bubbly and golden. Once done, let the dish rest for 10 minutes before serving. Garnish with fresh basil for a beautiful finish. For the full recipe, check out the details mentioned earlier. To get crispy eggplant, first, salt the slices. This helps draw out moisture and bitterness. Let them sit for thirty minutes. Rinse and dry them well. After drying, coat them in flour, eggs, and breadcrumbs. Fry them in hot oil. This creates a golden, crunchy crust. Avoid skipping the salting step. This makes the eggplant soggy. Don’t overcrowd the pan while frying. This lowers the oil's temperature and makes them soft. Also, don’t skip resting them on paper towels. This removes extra oil and keeps them crispy. For a great look, slice the Eggplant Parmesan neatly. Place it on a colorful plate. Drizzle some extra marinara around the edges. Add fresh basil leaves on top for color. You can also serve it with a side salad or garlic bread for a complete meal. For the full recipe, check out the Cheesy Eggplant Delight section. {{image_2}} You can make Eggplant Parmesan vegetarian by skipping meat and using more veggies. To make it vegan, replace the cheese with cashew cheese or vegan mozzarella. You can also use nutritional yeast for a cheesy flavor. This way, everyone can enjoy a tasty dish! If you want to swap cheese, use a mix of almond cheese or soy cheese. These options melt nicely and give a good flavor. Another great choice is to use a blend of ricotta made from nuts. This change keeps the dish creamy and satisfying. Adding seasonal veggies can change your dish. Try adding spinach for a pop of color and nutrition. Mushrooms add a rich, earthy flavor. You can also mix in zucchini or bell peppers. These additions make your Eggplant Parmesan even more delightful and fun. For the full recipe, check the original guide! After enjoying your Eggplant Parmesan, store leftovers in an airtight container. Place the dish in the fridge within two hours. This keeps it fresh and safe. Use it within three to four days for the best taste. If you see any changes in smell or texture, it's time to toss it. Want to save some for later? You can freeze Eggplant Parmesan! Cut it into portions and wrap each piece tightly in plastic wrap. Then, place the wrapped pieces in a freezer bag. Label the bag with the date. It will stay good for about three months in the freezer. Just remember to let it cool completely before you freeze it. To reheat, you can use the oven or microwave. For the oven, preheat it to 350°F (175°C). Place the Eggplant Parmesan in a baking dish, cover it with foil, and heat for about 20 minutes. This helps it heat evenly. If using the microwave, heat it in short bursts, checking after each minute. Enjoy it warm and melty, just like when you first made it! For the best taste, avoid reheating more than once. Eggplant Parmesan comes from Italy. It is known as "Melanzane alla Parmigiana." This dish has roots in Southern Italy. Many believe it started in Sicily, where eggplants grow well. The dish highlights eggplants with rich tomato sauce and cheese. It reflects the simple yet bold flavors of Italian cooking. Yes, you can prepare Eggplant Parmesan in advance. You can keep it in the fridge for a day or two. Just assemble the layers without baking. Cover the dish with plastic wrap or foil. When you are ready to cook, bake it as directed. This saves time on busy days while keeping the flavors intact. To make Eggplant Parmesan gluten-free, swap out the flour and breadcrumbs. Use gluten-free flour and gluten-free breadcrumbs instead. Many stores offer these options now. You can also make your own breadcrumbs from gluten-free bread. This simple change lets everyone enjoy this tasty dish! This blog post explored how to make delicious Eggplant Parmesan. We covered ingredients and great alternatives for each one. I shared step-by-step instructions, so you can follow along easily. Tips helped you achieve crispy eggplant while avoiding common mistakes. I also provided variations for different diets and storage tips for leftovers. In closing, making Eggplant Parmesan can be simple and fun. With these tips, you’ll impress your friends and family! Enjoy the journey of cooking this classic dish.

Eggplant Parmesan Delightful and Easy Recipe Guide

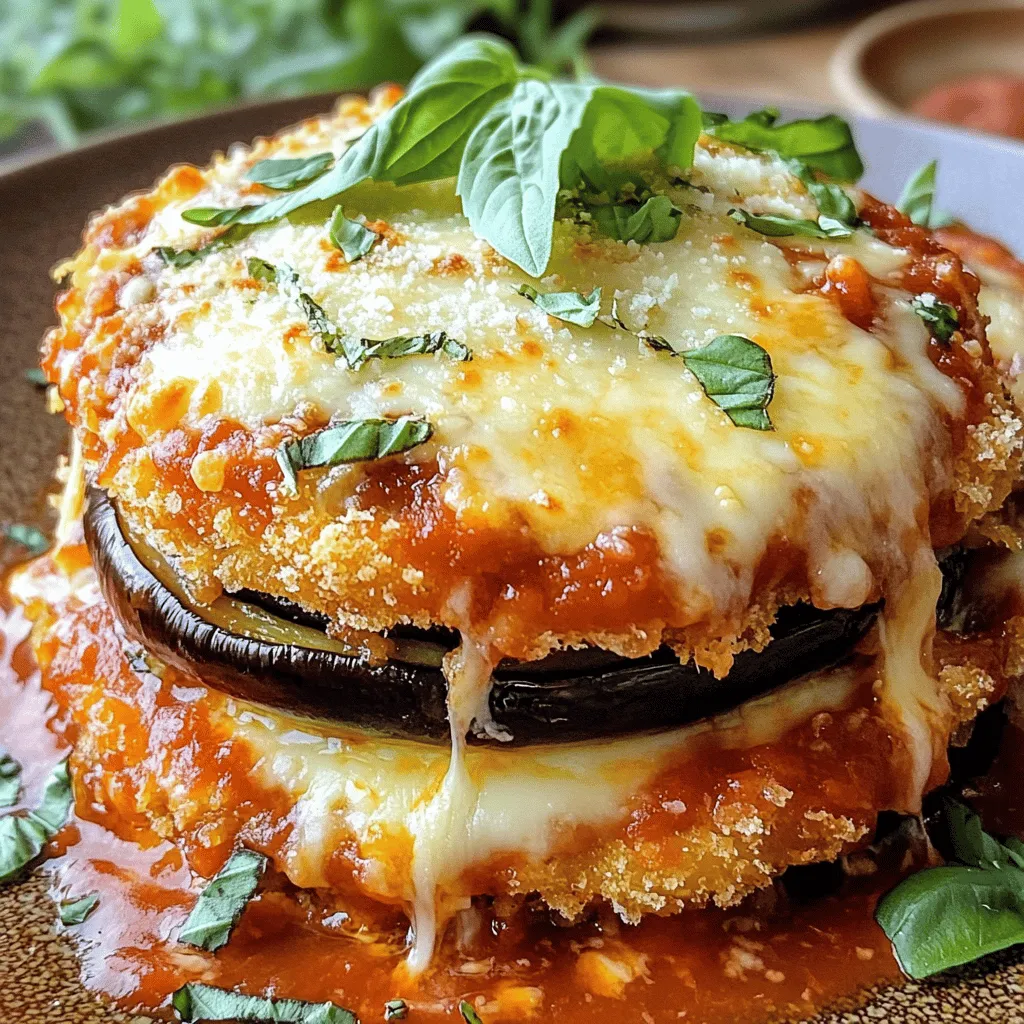
Are you ready to dive into the delicious world of Eggplant Parmesan? This easy recipe guide will help you create

- 1 lb (450g) beef sirloin, thinly sliced - 2 tablespoons olive oil - 1 medium onion, diced - 3 cloves garlic, minced - 8 oz (225g) cremini mushrooms, sliced - 1 tablespoon all-purpose flour - 1 cup beef broth - 1 cup sour cream - 1 tablespoon Dijon mustard - 1 teaspoon paprika - Salt and pepper to taste - Fresh parsley, chopped (for garnish) - 8 oz (225g) egg noodles (or your choice of pasta) Choosing the right cut of beef: I recommend beef sirloin for its tenderness. It cooks well in this dish. Look for cuts with a nice red color and some marbling. This helps keep the meat juicy and full of flavor. Alternatives to sour cream: If you want a lighter option, try Greek yogurt. It offers a similar taste and creamy texture. For a dairy-free version, use coconut cream. It adds a unique flavor twist. How to select fresh mushrooms: Choose firm, dry mushrooms. They should have a nice color, free of dark spots. Smell them too; they should have a fresh, earthy scent. Avoid slimy or shriveled ones, as they are past their prime. For the full recipe, check the recipe above. Enjoy cooking this classic dish that warms the heart! To cook egg noodles, boil water in a large pot. Add a pinch of salt for flavor. Once the water is boiling, add the noodles. Cook them for about 7-9 minutes. Stir occasionally to prevent sticking. Check for doneness when they are tender yet slightly firm. This is called al dente. Drain the noodles in a colander and set them aside. They will soak up the sauce later. Use a large skillet for searing the beef. Heat olive oil over medium-high heat. This high heat is key to browning the beef well. Add the thinly sliced beef in a single layer. Don’t overcrowd the pan. Let it cook for about 3-4 minutes without stirring. This forms a nice brown crust. Once browned, remove the beef and set it aside. This step adds great flavor to the dish. In the same skillet, add diced onion and sauté until translucent, about 3 minutes. Next, add minced garlic and cook for one more minute. Then, toss in the sliced mushrooms and cook until tender, about 5-7 minutes. Sprinkle flour over this mix and stir it in. This helps to thicken the sauce. Gradually pour in beef broth while stirring. Let this simmer for 3-4 minutes until it thickens nicely. Reduce the heat to low before adding sour cream and Dijon mustard. Stir these in gently to avoid lumps. Finally, return the browned beef to the skillet. Mix well and let everything warm through for about 2-3 minutes. Season with salt and pepper to your taste. This will blend all the rich flavors together. Serve the beef stroganoff over your cooked noodles, and enjoy this savory delight! For the full recipe, check out the details above. To make your beef stroganoff perfect, avoid common mistakes. First, don’t overcook the beef. Sear it just until brown, then set it aside. This keeps it tender. Also, when adding sour cream, do it off the heat. This stops it from curdling. You can adjust flavors easily. If you like it tangy, add more Dijon mustard. If you prefer it creamier, add extra sour cream. Taste as you go! Pair your beef stroganoff with egg noodles, rice, or mashed potatoes. These sides soak up the sauce well. For a fresh touch, serve with a side salad. A simple green salad with vinaigrette works great. For garnish, sprinkle chopped parsley on top. It adds color and freshness, making your dish look even better. For busy weeknights, meal prep helps a lot. Chop onions and mushrooms ahead of time. You can also slice the beef. Store them in the fridge for quick use. If you want to save even more time, use a slow cooker or an Instant Pot. You can cook the beef with the sauce in one pot. This cuts down on dishes and makes cooking easier. Just follow the same steps but adjust the cooking time to fit your device. Check the [Full Recipe] for more details. {{image_2}} You can easily make beef stroganoff healthier. For a gluten-free dish, use gluten-free pasta. Many brands offer great options that taste good. You can also swap the all-purpose flour for a gluten-free blend. For leaner meat, use chicken or turkey breast instead of beef. These meats are lower in fat and calories. You can also try using lean cuts like flank or tenderloin. This way, you keep the flavor without the extra fat. To change the flavor, add your favorite spices. A pinch of cayenne can add heat. You might also try thyme or rosemary for a fresh twist. Incorporating vegetables can add color and nutrients. Spinach adds a nice green touch and cooks down well. Bell peppers add crunch and sweetness, making the dish even more interesting. You can explore many international takes on beef stroganoff. In Eastern Europe, they may use different mushrooms or even add pickles. Each country has its own twist, so feel free to experiment. For a fusion idea, try adding soy sauce for an Asian flair. You can also mix in salsa for a Mexican twist. These ideas can bring new life to a classic dish. For the full recipe, check out Savory Beef Stroganoff Delight. To store leftover beef stroganoff, let it cool first. Place it in an airtight container. This keeps the dish fresh and safe to eat. I prefer glass containers, as they don’t stain and are easy to clean. You can store it in the fridge for up to three days. Make sure to label the container with the date. If you want to keep beef stroganoff longer, freezing works well. Divide it into portions for easy meals later. Use freezer-safe containers or heavy-duty freezer bags. Remove as much air as possible to prevent freezer burn. To maintain flavor and texture, avoid freezing the dish with pasta. Instead, store the sauce separately. When ready to eat, thaw it overnight in the fridge. Reheat in a saucepan over low heat, stirring often. Beef stroganoff lasts about three days in the fridge. In the freezer, it can last for up to three months. Always check for signs of spoilage. If it smells off or has changed color, it’s best to toss it out. Proper storage helps you enjoy this savory meal later without losing taste! For beef stroganoff, I recommend using beef sirloin. It has great flavor and cooks well. You could also use tenderloin or flank steak. Both cuts are tender and easy to slice. Avoid tougher cuts like chuck, as they need longer cooking times. Yes, you can make beef stroganoff ahead of time. Cook it, then store it in the fridge for up to three days. To reheat, warm it gently on the stove. Add a bit of beef broth if it gets too thick. This helps keep it creamy. Beef stroganoff pairs well with egg noodles, rice, or mashed potatoes. A side of green beans or steamed broccoli adds color and crunch. You could also serve a simple salad for freshness. These sides balance the rich flavors of the stroganoff. Absolutely! While egg noodles are classic, you can use any pasta you like. Fettuccine or pappardelle works well too. For a gluten-free option, try rice noodles or gluten-free pasta. Just adjust cooking times as needed to ensure it’s tender. Yes, beef stroganoff can be frozen. Let it cool completely, then place it in an airtight container. It can last for up to three months in the freezer. To thaw, move it to the fridge overnight. Reheat on the stovetop for the best texture. Check for any signs of freezer burn before using. For the complete recipe, refer to the [Full Recipe]. Beef stroganoff is a rich and comforting dish made with simple ingredients. We explored key steps, from cooking the noodles to creating a creamy sauce that brings flavors together. Helpful tips helped you avoid common mistakes and mix in variations. Remember, each tweak you make can make the dish your own. Whether serving it on busy nights or special occasions, this meal can fit any scenario. With smart storage and prep ideas, you can enjoy beef stroganoff at its best. Dive in and get cooking!

Classic Beef Stroganoff Savory and Comforting Meal

Craving a warm, satisfying meal? Classic Beef Stroganoff is your answer! This dish blends tender beef, creamy sauce, and savory

- 400g spaghetti - 6 cloves garlic, thinly sliced - 1/2 cup extra virgin olive oil - 1 teaspoon red pepper flakes (adjust to taste) - 1 lemon (zested and juiced) - Salt to taste - Fresh parsley, chopped (for garnish) - Grated Parmesan cheese (optional, for serving) To make Spaghetti Aglio e Olio, you need simple, fresh ingredients. The beauty of this dish lies in its simplicity. The garlic and olive oil create a rich sauce that coats the spaghetti perfectly. The red pepper flakes add just the right amount of heat. You can adjust them based on your taste. Adding lemon zest and juice brings a refreshing brightness that balances the flavors. For a pop of color and flavor, I suggest using fresh parsley as a garnish. Grated Parmesan cheese is optional but adds a creamy touch if you choose to use it. This recipe is quick, making it perfect for busy weeknights. You can find the Full Recipe with all the steps to guide you in preparing this delightful dish. Enjoy crafting this flavorful meal! To start, you need a large pot. Fill it with water and add salt. Bring the water to a boil. Once boiling, add 400g of spaghetti. Cook the spaghetti until it is al dente, which usually takes about 8-10 minutes. Don’t forget to reserve 1 cup of pasta water before draining. Next, grab a large skillet and pour in 1/2 cup of extra virgin olive oil. Heat the oil over medium heat. Once it’s warm, add 6 cloves of thinly sliced garlic and 1 teaspoon of red pepper flakes. Sauté this mixture for about 1-2 minutes. Keep a close eye on the garlic. You want it golden but not burnt. Now it’s time to combine everything. Add the drained spaghetti into the skillet with the garlic oil. Toss it well to coat every strand. Gradually add the reserved pasta water, about 1/4 cup at a time. This will help create a creamy sauce. Then, mix in the lemon juice and zest for a bright flavor. Toss everything together and season with salt to taste. Now, you can enjoy your Spaghetti Aglio e Olio with a zesty twist! For more details, check the Full Recipe. To get the best garlic flavor, slice the garlic thinly. Thin slices cook evenly and release great flavor. I recommend using a sharp knife. This helps you control the size and ensures even cooking. To prevent burning, keep a close eye on the garlic as it cooks. Sauté it on medium heat. If it starts to brown too fast, lower the heat. Remove it from the pan as soon as it turns golden. This way, you avoid a bitter taste. Red pepper flakes add heat to your dish. Start with one teaspoon, then taste. You can always add more if you like it spicy. If you want a milder flavor, try using less. For a gentle kick, consider using sweet paprika or smoked paprika instead. These alternatives add flavor without too much heat. Pair your Spaghetti Aglio e Olio with a fresh green salad or crusty bread. Both complement the garlic and olive oil nicely. For drinks, a crisp white wine or sparkling water works well. When plating your dish, twirl the spaghetti into neat nests on each plate. Garnish with fresh parsley for color. A sprinkle of grated Parmesan cheese can add a nice touch too, if you like. Enjoy your beautiful meal! {{image_2}} The classic Spaghetti Aglio e Olio is simple and savory. It uses garlic, olive oil, and red pepper flakes. The zesty twist adds lemon for brightness. This change gives the dish a fresh taste. The lemon zest and juice enhance the flavors. You can adjust the spice level too. This way, you can make it just right for your taste. You can add more to your Spaghetti Aglio e Olio. Vegetables like spinach or cherry tomatoes work well. They add color and nutrition. You might also like to add protein. Shrimp or chicken can turn this dish into a main course. They pair well with the garlic flavor and make the meal heartier. If you're gluten-free, try using gluten-free spaghetti. Many brands offer great options that taste good. For those who want a vegan meal, simply leave out the cheese. You can still enjoy a rich flavor with olive oil and garlic. These swaps keep the dish delicious and suitable for everyone. To store leftovers, let the spaghetti cool first. Place it in an airtight container. This keeps it fresh and tasty. Spaghetti Aglio e Olio will last up to three days in the fridge. Remember to keep it away from strong-smelling foods. For reheating, use a skillet over medium heat. Add a splash of olive oil to keep it moist. Stir gently to warm it up evenly. If the flavors seem flat, add a squeeze of lemon juice. This brightens the dish and brings back its zest. Yes, you can freeze Spaghetti Aglio e Olio. Portion it into freezer-safe bags or containers. Make sure to remove as much air as possible. It can last up to three months in the freezer. To reheat, thaw in the fridge overnight, then follow the reheating tips above. Enjoy your pasta any day! "Aglio e Olio" is Italian for "garlic and oil." It describes the main ingredients in this dish. The name tells you exactly what to expect. Garlic adds strong flavor, while oil gives it richness. This simple mix creates a tasty sauce that you can enjoy with pasta. Yes, you can use boxed spaghetti. Most box spaghetti works well for this recipe. Check the cooking time on the box. Cook it until it is al dente, which means it is firm but not hard. This texture is key for the best flavor and feel. Make sure to reserve some pasta water to help create a smooth sauce. If you can't use garlic, there are a few options. You can try shallots for a milder taste. Onion is another choice, but it is stronger. For a unique twist, use garlic-infused oil instead of fresh garlic. This gives you a similar flavor without the garlic itself. Spaghetti Aglio e Olio is simple yet full of flavor. You learned about key ingredients, cooking steps, and tips to enhance taste. Explore variations to make it your own. Remember, you can adjust flavors to suit your taste and enjoy it with sides. Storing leftovers properly keeps your meal fresh. This dish is versatile and perfect for any occasion. Enjoy cooking and sharing this classic Italian dish!

Spaghetti Aglio e Olio Simple and Flavorful Recipe

Ready to whip up something fast and tasty? Spaghetti Aglio e Olio is your answer! This Italian classic blends just

- 1 lb ground chicken - 2 tablespoons sesame oil - 2 cloves garlic, minced - 1 tablespoon fresh ginger, minced - 1 cup bell pepper, finely diced - 1 cup shredded carrots - 1/4 cup green onions, sliced - 1/4 cup soy sauce (or tamari for gluten-free) - 1 tablespoon rice vinegar - 1 tablespoon honey - 1 tablespoon cornstarch - 1 tablespoon water - Optional garnishes: Sesame seeds, chopped cilantro When I make these sesame chicken lettuce wraps, I focus on fresh, vibrant ingredients. The ground chicken acts as a blank canvas, soaking up all the flavors. Using sesame oil adds a nutty taste that really shines. I love the mix of garlic and ginger. They bring warmth and depth to the dish. The bell peppers and carrots add great color and crunch. I use red or yellow bell peppers for a brighter look. For the sauce, I mix soy sauce, rice vinegar, and honey. This sweet and savory combo makes the chicken sing. Cornstarch helps thicken the sauce, binding it to the chicken and veggies. Don't forget the green onions for a fresh finish! You can also top the wraps with sesame seeds and cilantro. They add extra flavor and make the wraps look pretty. Try this full recipe to create your own delicious meal! - Heat the sesame oil in a skillet. This adds a nice nutty flavor. - Sauté garlic and ginger until fragrant. This step wakes up the dish. - Cook ground chicken until browned and crumbly. This should take about 5-7 minutes. - Stir in bell pepper and carrots. These add crunch and color. - Cook until tender, blending flavors. This usually takes 3-4 minutes. - Combine sauces and thicken with cornstarch mixture. This helps bind the sauce. - Pour sauce over the chicken and vegetables. Stir well to coat everything. - Simmer until the sauce thickens. This should take around 2-3 minutes. - Spoon the mixture into lettuce leaves. This is where the fun starts! - Garnish with sesame seeds and cilantro if desired. This adds a fresh touch. For the full recipe, check the details above. Enjoy your tasty creation! - Use high heat for better browning of chicken. This step adds flavor and texture. - Don’t overcrowd the skillet to ensure even cooking. This keeps everything juicy and tender. - Serve with a side of soy sauce for extra flavor. This adds a nice touch to each bite. - Arrange wraps on a platter for an inviting look. A well-presented dish makes it more enjoyable. - Avoid overcooking vegetables to retain crunchiness. This keeps your wraps fresh and vibrant. - Measure sauce accurately to prevent overpowering flavors. Too much sauce can mask the dish’s taste. Making these small adjustments can elevate your wraps. Follow these tips to impress your family and friends. For more detailed steps, check out the Full Recipe. {{image_2}} You can easily change the protein in these wraps. Swap ground chicken for ground turkey for a leaner option. You can also use tofu if you want a vegetarian dish. For seafood lovers, shrimp adds a nice twist. If you prefer beef, it brings a rich flavor to the mix. Feel free to add more veggies to your wraps. Diced mushrooms or water chestnuts give a nice crunch and flavor. You can also use shredded cabbage instead of lettuce. This adds more texture and makes your wraps even heartier. If you like heat, add chili paste or sriracha to your chicken mix. These spices boost the flavor and give it a kick. You can also try fresh herbs like basil or mint. These herbs will brighten the dish and add freshness. For the Full Recipe, check the section above to make these tasty wraps! Store leftovers in an airtight container for up to 3 days. This keeps the chicken fresh and tasty. Keep the sauce separate to maintain the lettuce's crispness. If you mix the sauce, the lettuce will get soggy. You can freeze the filling mixture for up to 2 months. Just place it in a freezer-safe bag or container. When you are ready to eat, thaw it overnight in the fridge. Reheat thoroughly before serving. This method works well for busy days. Heat the leftovers gently on the stove or in the microwave. Stir often to ensure even heating. Avoid overcooking to prevent a dry texture. The goal is to warm it up, not to cook it again. Enjoy your meal with fresh, crunchy lettuce! You can use several tasty options instead of lettuce. Here are some great choices: - Cabbage leaves - Collard greens - Rice paper These options give a nice crunch and hold the filling well. To make this recipe gluten-free, simply swap the soy sauce for tamari or coconut aminos. Both options provide a similar taste without gluten. Absolutely! You can prepare the chicken filling ahead of time. Just cook the filling and store it in the fridge. When you're ready to eat, simply assemble the wraps. The spice level of these wraps can vary. If you like heat, add sriracha or chili paste to the sauce. You control the spice! These wraps pair well with: - Steamed rice - Quinoa - A light salad These sides complete your meal nicely. For the full recipe, click [here](#). This blog post detailed how to create tasty sesame chicken lettuce wraps. We covered key ingredients, from the flavorful chicken to fresh veggies and sauces. The step-by-step instructions made the cooking process simple and enjoyable, with tips to enhance your dish. You can even mix in your favorite proteins or veggies for fun variations. These wraps make a great meal or snack. They are easy to store and reheat, ensuring you can enjoy them later. Now, you’re all set to impress with your new cooking skills! Enjoy your delicious creation!

Savory Sesame Chicken Lettuce Wraps Easy and Tasty

Looking for a quick and tasty meal that impresses? My Savory Sesame Chicken Lettuce Wraps are the answer! Made with

- 2 cups rolled oats - 1/2 cup almond butter or peanut butter - 1/3 cup honey or maple syrup The main ingredients form the base of your granola bars. Rolled oats give structure and fiber. Nut butter adds healthy fats and protein. Honey or maple syrup provides sweetness and binds everything together. - 1/2 cup mixed nuts (almonds, walnuts, and cashews), chopped - 1/4 cup seeds (pumpkin seeds and sunflower seeds) - 1/2 cup dried fruits (cranberries, apricots, or raisins), chopped - 1/4 teaspoon sea salt - 1 teaspoon vanilla extract - 1/2 teaspoon cinnamon (optional) Adding mixed nuts and seeds boosts crunch and nutrients. Dried fruits add natural sweetness and chewiness. Sea salt enhances flavors, while vanilla and cinnamon bring warmth and depth to your bars. Each serving of granola bars has about 150-200 calories. You get around 7-10 grams of fat and 20-25 grams of carbohydrates. These bars offer a good balance of energy, making them perfect for snacks or breakfast. You can find the full recipe [here](#). 1. First, preheat your oven to 350°F (175°C). This step is key for even baking. 2. Next, line an 8x8 inch baking pan with parchment paper. Leave some paper hanging over the sides. This makes removal easy later. 3. In a large bowl, mix the dry ingredients. Combine the rolled oats, chopped nuts, seeds, dried fruits, sea salt, and optional cinnamon. Stir until everything blends well. 1. In a small saucepan, melt the nut butter and sweetener together over low heat. Stir often to combine. 2. Once melted, take the pan off the heat and add the vanilla extract. This adds flavor and aroma. 3. Pour this mixture over your dry ingredients. Use a spatula to mix everything together. Make sure all the dry ingredients get coated. 1. Transfer the mixture to your prepared baking pan. Press it down firmly to form an even layer. This helps the bars hold together. 2. Bake in your preheated oven for 15 to 18 minutes. Look for the edges to turn golden brown. 3. After baking, take the pan out and let it cool for at least 30 minutes. Once cooled, use the parchment paper to lift the granola out. 4. Place it on a cutting board and cut it into bars or squares. Store your delicious creation in an airtight container for up to a week. For a full recipe, check the Crunchy Nutty Granola Bars section. Enjoy your homemade treats! To make the best granola bars, focus on texture and balance. Here are some key tips: - Use fresh ingredients: Fresh oats and nuts taste better. - Press firmly: When you pack the mixture in the pan, press it down hard. This helps the bars hold together. - Don’t overbake: Keep an eye on the edges. They should be golden but not too dark. Common pitfalls include: - Not measuring ingredients: Accurate measurements ensure the right texture. - Skipping the cool time: Allow bars to cool fully before cutting to avoid crumbling. Adding flavors can take your granola bars to the next level. Here are some ideas: - Spices: Try adding nutmeg or ginger for warmth. - Cocoa powder: This can give a chocolatey twist without adding chips. The right ingredient proportions matter. Too much nut butter can make bars greasy. Too little sweetener makes them dry. Make your granola bars visually appealing. Here are some fun ways to serve them: - Wooden board display: Lay the bars out on a wooden board and sprinkle extra nuts and dried fruits around them for a pop of color. - Gift wrapping: Wrap each bar in parchment paper and tie it with twine. This adds a homemade touch. These presentation ideas make your homemade granola bars even more special! For the full recipe, check out the Crunchy Nutty Granola Bars. {{image_2}} You can easily make vegan granola bars. Just swap honey for maple syrup. Use a nut butter that fits your diet, like almond or sunflower butter. These changes keep your bars tasty and plant-based. For gluten-free options, choose oats labeled gluten-free. Check all other ingredients too. Some nut butters and sweeteners may include gluten. Always read labels to ensure your granola bars are safe to eat. Get creative with flavor! You can add chocolate chips or coconut flakes for a twist. Both options add a fun taste that kids and adults love. Seasonal flavors are a hit as well. Try pumpkin spice in the fall or peppermint for winter treats. These flavors make your granola bars festive and exciting. Do you prefer chewy or crunchy bars? To make chewy bars, add more nut butter and sweetener. This makes the bars softer and stickier. For crunchy bars, increase the oats and nuts. Less sticky ingredients will give you that satisfying crunch. Adjust the ratios to find your perfect texture. To keep your granola bars fresh, use airtight containers. A glass jar or a plastic container works well. Store them in a cool, dry place. They last about one week at room temperature. If you see any signs of moisture, it’s best to toss them. Freezing granola bars is easy. First, wrap each bar in plastic wrap. Then place them in a freezer-safe bag. You can store them for up to three months. When you want to eat one, take it out and let it thaw at room temperature. For quicker thawing, you can microwave it for about 15 seconds. Check for a change in smell or texture. If they smell off or feel sticky, they may be bad. You can also look for mold or discoloration. If you see any signs of spoilage, throw them away. Always prioritize your health. You can customize granola bars easily. Start by adding your favorite nuts, seeds, or dried fruits. If you're allergic to certain ingredients, swap them out. For a sweet touch, consider adding dark chocolate chips. You can also try different nut butters, like peanut butter or sunbutter, for varied flavors. Yes, you can make nut-free granola bars. Use seeds like sunflower or pumpkin instead. You can also use puffed rice or oats to add crunch. These alternatives still give your bars great flavor and texture. To cut your granola bars neatly, let them cool completely. Use a sharp knife for clean edges. You can also grease the knife to prevent sticking. For small pieces, cut them into squares. For larger snacks, cut them into rectangles. Quick oats can work, but they change the texture. Rolled oats provide a chewier bite, while quick oats create a softer bar. If using quick oats, reduce the baking time slightly. This ensures your bars stay moist and tasty. Homemade granola bars last about a week when stored in an airtight container. To keep them fresh longer, refrigerate them. If you want to save them for later, consider freezing. Just wrap each bar well to avoid freezer burn. Using unsweetened nut butter is a good choice. It allows you to control the sweetness. If you prefer a sweeter taste, add more honey or maple syrup. This way, you can make the bars just how you like them. Making homemade granola bars is simple and fun. We covered the main ingredients like rolled oats and nut butter. You learned how to prepare, bake, and store your bars. Remember to customize flavors to your taste and avoid common mistakes for the perfect texture. Keep an eye on storage to maintain freshness. Now, you can enjoy healthy, tasty snacks or share them as gifts. With these tips, your homemade granola bars will be a hit!

Homemade Granola Bars Simple and Tasty Recipe

Are you tired of store-bought snacks filled with mystery ingredients? Let’s change that! Making your own homemade granola bars is

- 1 lb ground beef (or turkey) - 1/2 cup breadcrumbs - 1/4 cup grated Parmesan cheese - 1 large egg - 2 cloves garlic, minced - 1 teaspoon onion powder - 1 teaspoon salt - 1/2 teaspoon black pepper - 1/4 teaspoon red pepper flakes (adjust for spice level) The main ingredients form the base of your meatballs. Ground beef or turkey gives a nice protein punch. Breadcrumbs help keep the meatballs light and airy. Parmesan adds a rich, cheesy flavor. One egg binds everything together. Garlic and onion powder boost the taste, while salt and pepper add balance. Red pepper flakes offer a kick, so adjust as needed. - 1/2 cup sweet chili sauce - 2 tablespoons sriracha (or to taste) - 1 tablespoon soy sauce - 1 tablespoon sesame oil The sauce brings sweet and spicy flavors together. Sweet chili sauce adds a nice sweetness. Sriracha gives it heat, but you can adjust the amount. Soy sauce adds depth, while sesame oil enhances the flavor with a nutty note. This sauce coats the meatballs perfectly. - 1 tablespoon chopped green onions - Additional spices Garnishes add a fresh touch. Chopped green onions provide brightness and crunch. You can also sprinkle on extra spices for added flavor. This final touch makes your dish visually appealing and enhances the taste. For the complete preparation details, check the Full Recipe. First, grab a large mixing bowl. Add these ingredients: - 1 lb ground beef (or turkey) - 1/2 cup breadcrumbs - 1/4 cup grated Parmesan cheese - 1 large egg - 2 cloves garlic, minced - 1 teaspoon onion powder - 1 teaspoon salt - 1/2 teaspoon black pepper - 1/4 teaspoon red pepper flakes Mix everything together gently. You want to blend the flavors, not overwork the meat. Once mixed, form the mixture into meatballs. Aim for about 1 inch in size. This size helps them cook evenly. Next, preheat your oven to 400°F (200°C). Make sure it gets nice and hot. Place the meatballs on a baking sheet lined with parchment paper. This keeps them from sticking. Bake the meatballs for 20-25 minutes. They should be browned and fully cooked. While the meatballs bake, it’s time for the sauce. In a small saucepan, combine: - 1/2 cup sweet chili sauce - 2 tablespoons sriracha (or to taste) - 1 tablespoon soy sauce - 1 tablespoon sesame oil Heat the sauce over medium-low. Stir often until it warms up and blends well. When the meatballs are done, carefully transfer them to a large bowl. Pour the warm sauce over them. Gently toss the meatballs to coat them evenly. Serve warm and enjoy this flavorful delight! To make great meatballs, do not overmix the meat. Overmixing makes them tough. Mix just until the ingredients come together. This keeps them tender and juicy. Aim for meatballs that are about one inch in size. This helps them cook evenly in the oven. If they are too big, they may be undercooked inside. If they are too small, they can dry out. You can change the sweetness in the sauce. If you want it sweeter, add more sweet chili sauce. For less sweetness, cut back on it. You can also play with the spice. If you like heat, add more sriracha and red pepper flakes. Start small, then taste. Adjust until your taste buds are happy. Sweet and spicy meatballs pair well with many sides. Rice is a great choice, as it soaks up the sauce. You can also serve them with noodles or mashed potatoes. For dipping sauces, try extra sriracha or a tangy soy sauce mix. These will enhance the flavors and add fun to your meal. Ready to make these delicious meatballs? Check out the [Full Recipe]. {{image_2}} You can use turkey or chicken to make lighter meatballs. They taste great, too! Just swap the ground beef for an equal amount of turkey or chicken. This change keeps the flavor but cuts some fat. You can also try vegetarian options. Use lentils or chickpeas as your base. Add breadcrumbs and spices to match the meatball taste. They will be delicious and healthy! You can switch up the sauce for fun. For a honey BBQ twist, mix honey with BBQ sauce. This will give a sweet and smoky flavor. Another option is teriyaki sauce. It adds a savory and sweet taste that works well with meatballs. Try these variations to find your favorite! You can serve meatballs in many fun ways. Meatball subs are a tasty option. Just place the meatballs in a soft roll and add sauce. Top with cheese for extra flavor! Another idea is to serve them over rice or pasta. This makes a filling and hearty meal. You can also add veggies for a complete dish. Get creative and enjoy your sweet and spicy meatballs! For a detailed guide, check the Full Recipe. After enjoying your sweet and spicy meatballs, let them cool down. Store them in an airtight container. Keep the meatballs in the fridge for up to three days. To reheat, place them in the microwave for about one to two minutes. Stir halfway through to ensure even heating. You can also warm them on the stove over low heat. Add a splash of water to keep them moist. For longer storage, freezing is a great option. First, let the meatballs cool completely. Then, place them in a single layer on a baking sheet. Freeze them for about one hour until firm. Transfer the meatballs to a freezer bag or container. They can last for up to three months in the freezer. To thaw, simply move them to the fridge overnight. You can also use the microwave for a quick defrost. In the fridge, sweet and spicy meatballs last about three days. If they smell off or look strange, it is best to discard them. Always trust your senses. When in doubt, throw them out. Enjoy your tasty meatballs safely! You should cook meatballs for about 20 to 25 minutes at 400°F (200°C). This temperature works well to ensure they are cooked through and browned nicely. Always check the internal temperature. It should reach 160°F (71°C) for beef and 165°F (74°C) for turkey. Yes, you can use different ground meats! Ground turkey or chicken works great. You can also try ground pork for a richer flavor. If you prefer a meatless option, consider using lentils or plant-based ground meat. Each choice will give the meatballs a unique taste. You can serve these meatballs with a variety of sides. Here are some popular options: - Steamed rice - Noodles or spaghetti - Fresh salad - Roasted vegetables - Garlic bread Pairing these sides will create a balanced meal. You can also add dipping sauces, like extra sweet chili sauce or soy sauce, for added flavor. For detailed instructions on making sweet and spicy meatballs, check out the Full Recipe. This blog post explored making sweet and spicy meatballs. We discussed key ingredients like ground meat, sauce components, and optional garnishes. I shared step-by-step instructions on mixing, baking, and saucing. Tips ensured great texture and flavor. Variations allowed for creativity with herbs, meat, and sauces. Lastly, proper storage methods keep leftovers fresh. Great meatballs are easy and fun to make. Enjoy trying this recipe and adding your unique twist. Happy cooking!

Sweet and Spicy Meatballs Flavorful Dinner Delight

Are you ready to make dinner exciting? These Sweet and Spicy Meatballs are the tasty delight you need. With juicy

To make Almond Joy Energy Bites, gather these simple ingredients: - 1 cup almond butter - 1/2 cup honey or maple syrup - 1 1/2 cups rolled oats - 1/2 cup shredded coconut - 1/4 cup chopped almonds - 1/4 cup dark chocolate chips - 1 tsp vanilla extract - Pinch of salt These ingredients come together to create a tasty and healthy snack. Each ingredient adds unique benefits: - Almond butter: Full of healthy fats and protein. It helps keep you full. - Honey or maple syrup: Natural sweeteners that provide quick energy. - Rolled oats: High in fiber, they support digestion and provide lasting energy. - Shredded coconut: Adds healthy fat and a tropical flavor. - Chopped almonds: Packed with nutrients and crunch, they enhance texture. - Dark chocolate chips: A delicious treat with antioxidants for heart health. - Vanilla extract: Brings a warm flavor to the mix. - Salt: Balances sweetness and enhances all the flavors. If you have allergies, here are easy swaps: - Nut allergy: Use sunflower seed butter instead of almond butter. - Honey: Replace it with agave syrup or brown rice syrup for a vegan option. - Gluten-free: Ensure the oats are labeled gluten-free. - Coconut: Substitute with chopped dried fruit for sweetness and texture. These substitutions let everyone enjoy Almond Joy Energy Bites without worry. For the complete recipe, check out the Full Recipe section. To make Almond Joy Energy Bites, start with a large bowl. Add 1 cup of almond butter and 1/2 cup of honey or maple syrup. Mix them well until smooth. Next, stir in 1 1/2 cups of rolled oats, 1/2 cup of shredded coconut, and 1/4 cup of chopped almonds. Don’t forget to add 1/4 cup of dark chocolate chips, 1 tsp of vanilla extract, and a pinch of salt. Use a spatula or your hands to mix everything together. The blend should feel sticky but firm. After mixing, cover the bowl with plastic wrap. Place it in the fridge for about 30 minutes. Chilling makes the mixture easier to handle. It helps the bites hold their shape when you roll them. Once the mixture is chilled, wet your hands lightly. This step helps prevent sticking. Roll the mixture into small balls, about 1 inch wide. Place each ball on a baking sheet lined with parchment paper. If you want, sprinkle some extra shredded coconut or chopped almonds on top for added flavor. After rolling all the bites, refrigerate them again for 30 minutes. This sets them, making them ready to enjoy. You can find the Full Recipe for these tasty snacks in the earlier sections. Mixing is key for Almond Joy Energy Bites. Start with soft almond butter and warm honey. This helps them combine well. Use a large bowl to give yourself space. First, mix the almond butter and honey until smooth. Then, add the oats, coconut, almonds, chocolate chips, vanilla, and salt. Stir everything together. You want a sticky but firm mix. If it feels too dry, add a bit more honey or nut butter. To make these bites even tastier, try adding spices. A pinch of cinnamon or nutmeg can make a big difference. You can also use different nuts like walnuts or pecans for variety. A touch of sea salt on top gives a nice contrast to the sweetness. Experiment with different chocolate types too. Dark chocolate adds richness, while milk chocolate is sweeter. Using the right tools can make a big difference. A sturdy mixing bowl and a spatula are essential. You might want to use a cookie scoop for even portions. This helps in rolling them into perfect bite-sized balls. A baking sheet lined with parchment paper makes clean-up easy. Lastly, have some plastic wrap on hand to cover the mixture while it chills. This method keeps everything fresh and ready for you to roll into bites later. {{image_2}} You can change the flavor of Almond Joy Energy Bites. Try using different nuts. Walnuts or pecans add great taste. You can also swap honey with agave syrup. This gives a lighter sweetness. If you want more chocolate, add cocoa powder. You can mix in some dried fruit too, like cranberries or raisins. Each change makes a new snack! If you need a vegan option, use maple syrup instead of honey. Almond butter is usually vegan, but check the label to be sure. For a gluten-free snack, stick to certified gluten-free oats. You can also replace the dark chocolate with dairy-free chocolate chips. These swaps keep your bites yummy and friendly for dietary needs. Serving Almond Joy Energy Bites can be fun! Place them in a cute bowl or mason jar. You can stack them in layers for a nice look. Add fresh fruit like strawberries or banana slices on the side. This makes your snack colorful and appealing. You can also wrap them in fun paper for gifts. Sharing these bites is a great way to spread joy! To keep your Almond Joy Energy Bites fresh, store them in an airtight container. This helps prevent moisture from getting in and keeps them tasty. You can place a piece of parchment paper between layers to avoid sticking. Always keep the container in the fridge. This will help maintain their firmness. When stored properly in the fridge, these bites can last up to one week. If you want to enjoy them longer, consider freezing. However, they are best eaten fresh for flavor and texture. Freezing is a great way to store Almond Joy Energy Bites. To freeze, place them in a single layer on a tray and freeze until firm. Then, transfer them to a freezer-safe bag or container. They can last for up to three months in the freezer. When ready to eat, thaw them in the fridge overnight or at room temperature for a quick snack. Almond Joy Energy Bites are tasty snacks inspired by the famous candy. They mix almond butter, oats, coconut, and chocolate. Each bite is sweet and nutty. They offer a quick energy boost. These bites are also easy to make at home. You can enjoy Almond Joy Energy Bites often, but moderation is key. They are healthy, but they still contain sugar and calories. A few bites a day can fit well into your diet. Listen to your body and adjust as needed. Yes, you can use different nut butters! Peanut butter or cashew butter works well too. Each nut butter brings its own flavor. Experiment to find your favorite taste. Just keep the same amount for the best results. You can find the Full Recipe for Almond Joy Energy Bites within this article. It guides you step by step to make these yummy snacks. Enjoy making them in your own kitchen! Almond Joy Energy Bites are simple to make and pack a tasty punch. You learned about the key ingredients, their nutrition, and how to make these bites at home. Remember to chill the mixture well and roll them evenly for the best results. You can easily adapt the recipe to fit your diet and flavor likes. Store your energy bites for lasting enjoyment or freeze them for later. Enjoy a healthy snack that satisfies your sweet tooth without the guilt.

Almond Joy Energy Bites Flavorful and Nutritious Snack

Looking for a snack that packs flavor and nutrition? Almond Joy Energy Bites are your answer! These tasty bites combine

To make this tasty dish, you need a few key items: - 2 slices of whole grain bread - 1 ripe avocado - 1 large egg - 1 tablespoon butter or olive oil - 1 tablespoon lemon juice - Salt and pepper to taste These ingredients blend well to create a creamy and satisfying meal. Whole grain bread adds fiber, while avocado gives healthy fats. The egg brings protein, making this toast filling and nutritious. You can enhance your avocado toast with some fun toppings: - 1/4 teaspoon red pepper flakes (for heat) - Fresh herbs like cilantro or chives (for freshness) These extras can add a nice kick or a burst of color. Try mixing and matching to find your favorite combo! If you're looking for swaps, consider these options: - Swap whole grain bread for sprouted grain bread for more nutrients. - Use a poached egg instead of a fried egg for less fat. - Try lime juice instead of lemon juice for a different zest. These changes can keep your meal fresh and exciting while still being healthy. Explore these options to fit your taste and dietary needs! For the full recipe, check out Avocado Toast Delight with Egg. Toasting bread right makes your avocado toast shine. Start by using whole grain bread. This bread has a nice texture and flavor. Place the slices in a toaster or on a pan. If using a pan, heat it on medium heat. Toast until the bread is golden brown and crispy. This should take about 3 to 5 minutes. Keep an eye on it to avoid burning. Crispy bread gives the best base for your toppings. Mashing the avocado is easy and fun. First, cut the ripe avocado in half and remove the pit. Use a spoon to scoop the green flesh into a bowl. Use a fork to mash it up. You want it smooth but still a bit chunky. Add a tablespoon of lemon juice to keep it fresh. Sprinkle in salt and pepper to taste. Mix well until everything is combined. The lemon juice adds flavor and helps the color stay bright. Cooking the egg is where you decide how runny you want it. For a sunny-side up egg, crack the egg into a hot skillet with butter or oil. Cook it without flipping until the white is set, about 2 to 3 minutes. If you like it over-easy, gently flip the egg after 2 minutes. Cook for an additional minute for a runny yolk. Season with salt and pepper as it cooks. Both styles add a nice touch to your toast. To ripen an avocado fast, place it in a brown paper bag. The bag traps the gases that help speed up the ripening. You can also add an apple or banana to the bag for extra help. Check the avocado every day. When it feels soft, it's ready to use. For tasty eggs, use fresh ingredients. Start by seasoning your eggs with salt and pepper while they cook. This brings out the flavor. If you want more, try adding spices like garlic powder or smoked paprika. These add depth and warmth to your dish. For the best avocado toast, choose hearty bread. Whole grain bread adds a nutty taste and crunch. Sourdough is another great option for its tangy flavor. You can also use rye or multigrain bread for a unique twist. Toast it until it’s golden brown for the best texture. For the full recipe, check out Avocado Toast Delight with Egg 🥑. {{image_2}} If you love heat, try adding some spice to your toast. Mix in a splash of hot sauce with the avocado. You can also sprinkle on cayenne pepper or chili powder. For a fresh kick, add sliced jalapeños on top. This will elevate your dish and make it exciting! Want to boost flavor? Consider adding some fun stir-ins. Diced tomatoes give a fresh taste. Feta cheese adds creaminess and a salty bite. For a burst of flavor, mix in chopped garlic or onion. You can even add a spoonful of hummus for a unique twist. These small changes can make your toast stand out. For a vegan version, skip the egg and try these alternatives. You can use sliced tofu, which packs protein and holds flavor well. Another option is chickpeas. Mash them with the avocado for a protein boost. You can also try a sprinkle of nutritional yeast for a cheesy flavor. These swaps keep your meal satisfying and plant-based. For the full recipe, check out the Avocado Toast Delight with Egg. If you have leftover avocado mixture, store it in an airtight container. Press plastic wrap directly onto the surface to limit air exposure. This helps keep the avocado vibrant and fresh. You can add a little extra lemon juice to slow down browning. Use it within one day for the best taste. Once you make the avocado toast, it tastes best fresh. However, if you have leftovers, wrap the toast tightly in foil or plastic wrap. Store it in the fridge. It can last for up to two days, but the bread may get soggy. Enjoy it soon for the best experience. To reheat cold avocado toast, use a toaster or oven. Place the toast in the toaster for a couple of minutes. If using an oven, set it to 350°F (175°C). Heat for about 5 minutes. Avoid the microwave, as it can make the bread chewy. Once warm, add fresh toppings to restore flavor. To cut an avocado, start by placing it on a cutting board. Use a sharp knife to slice down the middle, avoiding the pit. Carefully twist the two halves to separate them. Then, use a spoon to scoop out the pit. You can slice the avocado while it is still in the skin. This method helps prevent mess and makes it easy to remove the flesh. You can prepare parts of avocado toast ahead of time. Toast the bread and mash the avocado separately. Store the avocado in an airtight container with lemon juice to slow browning. When ready to eat, assemble the toast and add the egg. The texture and taste are best when made fresh. Avocado toast with egg is packed with nutrients. Avocados are rich in healthy fats, fiber, and vitamins. They support heart health and improve digestion. Eggs add protein and essential amino acids, which help build muscles. Together, this meal offers a balance of healthy fats, protein, and carbs for lasting energy. Enjoy the full recipe for a tasty meal! Avocado toast with egg is simple and tasty. We explored key ingredients like ripe avocados, eggs, and optional toppings. Perfect your toast with clear steps for a delightful meal. Consider variations like spicy mixes or vegan swaps. Remember to store leftovers properly to enjoy later. In the end, avocado toast is both fun and healthy. With these tips, you can craft a great dish and impress yourself!

Savory Avocado Toast with Egg Simple and Tasty Recipe

Craving a delicious breakfast that packs a punch? You’re in the right place! This Savory Avocado Toast with Egg recipe

Older posts
Newer posts
← Previous Page1 … Page35 Page36 Page37 … Page49 Next →

dsad

© 2025 savoryspiral • Built with GeneratePress

Our Policies

  • Copyright Policy
  • Cookie Policy
  • GDPR Policy
  • Privacy Policy
  • Disclaimer
  • Terms Of Use

More Information

  • Home
  • About
  • Contact
  • Appetizers
  • Dessert
  • Dinner
  • Drinks
©2025, savoryspiral About Back To Top