, check the main article. {{image_2}} You can swap semi-sweet chocolate for dark or white chocolate. Dark chocolate gives a rich taste. White chocolate adds a sweet touch. Both options work well in these bars. You can also try nut-free chocolate. This is great for those with allergies. Look for brands labeled nut-free to ensure safety. Want to make gluten-free S'mores cookie bars? Use gluten-free flour instead of regular flour. Almond flour or coconut flour are good choices. They help keep the bars soft and chewy. To maintain flavor and texture, mix with a bit of cornstarch. This keeps the bars from being too dense. For fun twists, add nuts like walnuts or pecans. They give a nice crunch to each bite. You can also mix in dried fruits like cranberries or cherries. This adds sweetness and a chew. If you want more flavor, consider flavored extracts. A splash of almond or orange extract can enhance the taste. For the full recipe, check the link provided. Enjoy customizing your S'mores cookie bars! To keep your s'mores cookie bars fresh, store them in an airtight container. This helps to keep them soft and chewy. I recommend using a glass or plastic container. If you don’t have one, wrap them tightly in plastic wrap. Make sure to layer parchment paper between bars if you stack them. This prevents sticking. You can freeze s'mores cookie bars for longer storage. First, let them cool completely. Then, wrap each bar in plastic wrap. Place the wrapped bars in a freezer-safe bag. This keeps them fresh for about three months. When you want to enjoy them, thaw in the fridge overnight or on the counter for a few hours. To enjoy your s'mores cookie bars warm, preheat your oven to 350°F (175°C). Place the bars on a baking sheet and cover them with foil. Heat for about 10 minutes. This keeps them soft. If you prefer them cold, just grab one from the container and enjoy! Warm bars offer gooey chocolate and melted marshmallows, while cold bars give a nice crunch. S'mores Cookie Bars are a sweet treat inspired by the classic campfire snack. They have a soft, chewy texture with layers of cookie dough, chocolate, and gooey marshmallows. The blend of graham cracker crumbs, chocolate chips, and mini marshmallows gives them that signature s'mores flavor. When you bite into one, you get a warm, melty experience that feels just like summer. Yes, you can make S'mores Cookie Bars ahead of time. After baking, let them cool completely. Then, wrap them tightly in plastic wrap or store them in an airtight container. They can stay fresh in the fridge for up to a week. If you want to serve them warm, just reheat individual pieces in the microwave for a few seconds. If you don't have mini marshmallows, you can cut regular marshmallows into smaller pieces. You can also use marshmallow fluff spread instead. Just be careful with the amount, as it can be stickier than mini marshmallows. Both options work well and still deliver that gooey texture. S'mores Cookie Bars last about one week when stored in the fridge. Keep them in an airtight container to prevent them from drying out. You can also freeze them for up to three months. Just wrap each bar in plastic wrap, then place them in a freezer bag. Thaw at room temperature when you're ready to enjoy them again. You can make S'mores Cookie Bars vegan by replacing the egg with a flax egg or applesauce. Use dairy-free butter and chocolate chips as well. This way, you can enjoy the same great taste without any animal products. You can find the full recipe for S'mores Cookie Bars in the recipe section of this article. It includes all the steps to create this delicious dessert. S'mores cookie bars combine key ingredients for a sweet treat. We covered the recipe's steps, tips for perfect texture, and fun variations. Remember to avoid overmixing and let them cool well. With these bars, you can impress family and friends. You can also explore alternatives and storage methods for best results. Enjoy making this easy and tasty dessert at home. Grab the full recipe to get started and satisfy your sweet tooth!](https://savoryspiral.com/wp-content/uploads/2025/06/d833caa8-b028-4786-891d-72453f3c1e49.webp)
S’mores Cookie Bars Irresistible Treat for Everyone
Who can resist the gooey goodness of S’mores Cookie Bars? These treats pack all the classic flavors of s’mores into
Who can resist the gooey goodness of S’mores Cookie Bars? These treats pack all the classic flavors of s’mores into
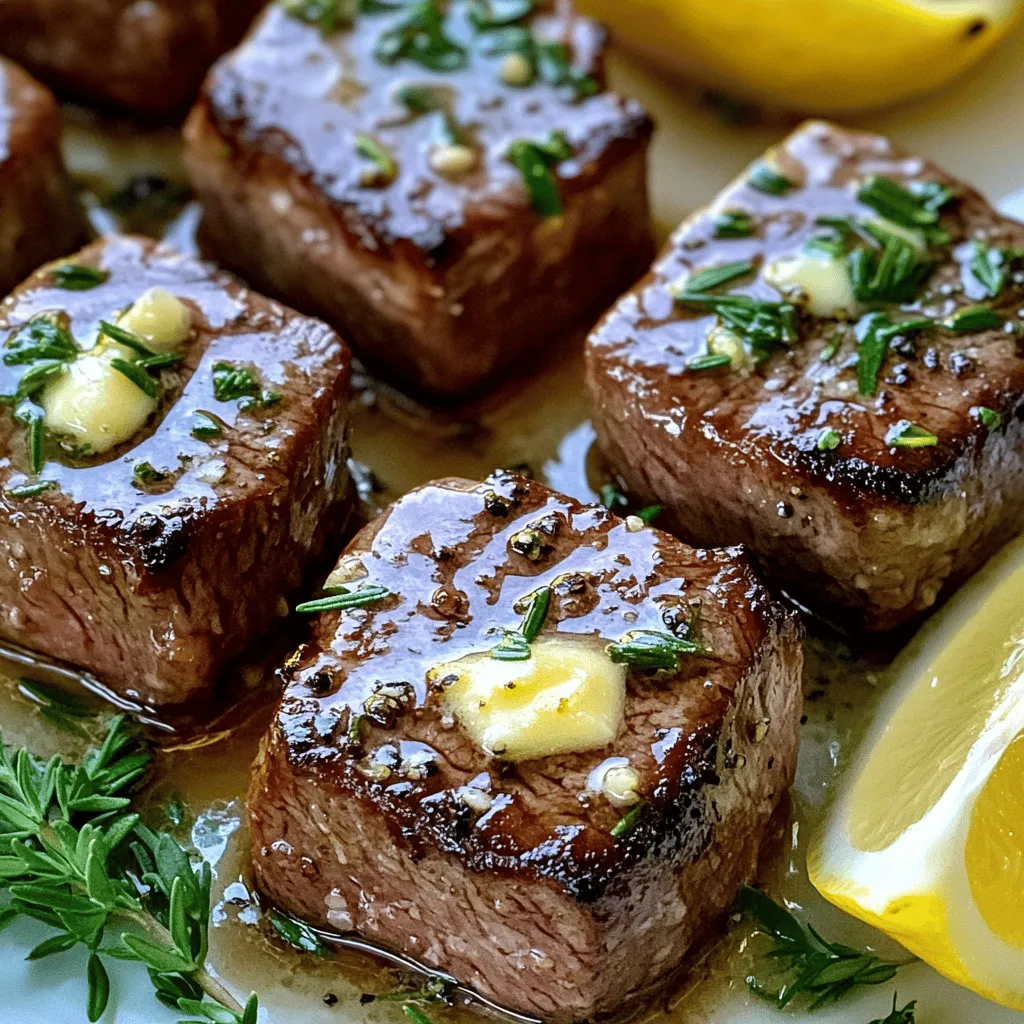
If you’re craving something savory and juicy, look no further than garlic butter steak bites. These tender morsels of sirloin,
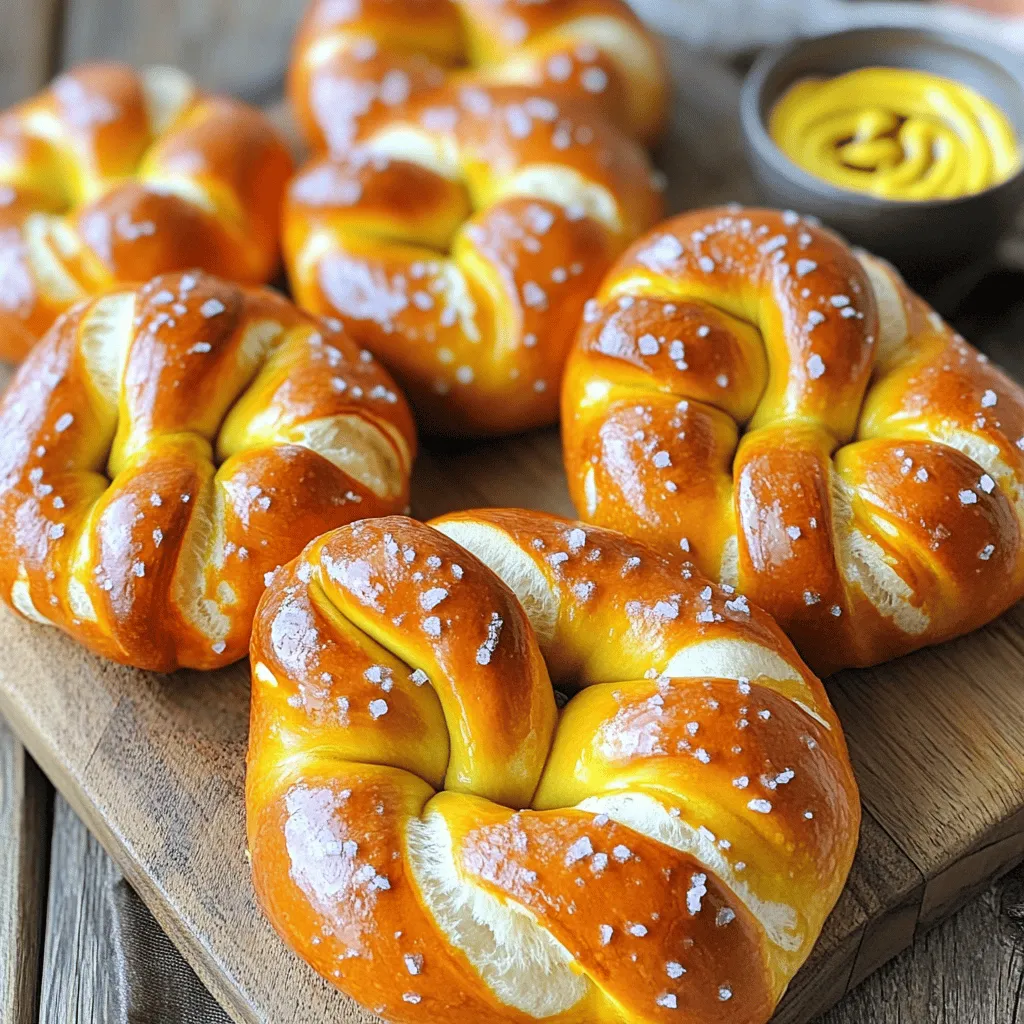
Craving a warm, salty snack? You’re in the right place! This simple recipe for homemade soft pretzels will have your

Craving a sweet, warm treat that’s quick and easy? You’re in the right place! I’m excited to share my delicious
![For Korean Beef Bulgogi Bowls, you will need: - 1 lb beef sirloin, thinly sliced - 1/4 cup soy sauce - 2 tablespoons brown sugar - 1 tablespoon sesame oil - 1 tablespoon grated ginger - 3 cloves garlic, minced - 1 small onion, thinly sliced - 1 red bell pepper, thinly sliced - 2 green onions, chopped - 1 cup cooked jasmine rice - Sesame seeds for garnish - Salt and pepper, to taste - Sriracha or gochujang (for serving) - Optional: 1 cup of fresh spinach or bok choy To make these bowls, gather these tools: - Large mixing bowl - Whisk - Skillet or wok - Cooking spoon - Knife and cutting board - Measuring cups and spoons Using fresh ingredients makes a big difference. Choose high-quality beef sirloin for tenderness. Fresh vegetables add crunch and color. For the best flavor, use natural soy sauce without additives. If you can, buy organic ginger and garlic. They will enhance the taste and aroma. Fresh herbs like green onions should look vibrant. They add brightness to your dish. Make sure all your ingredients are ready before you start cooking. This helps you stay organized and enjoy the cooking process. For the full recipe, check out the provided link. To start, grab a large bowl. In this bowl, whisk together the soy sauce, brown sugar, sesame oil, grated ginger, and minced garlic. Mix until everything is well combined. This sweet and savory mix is key to great flavor. Next, add the thinly sliced beef sirloin. Make sure each piece gets coated with the marinade. Cover the bowl with plastic wrap and put it in the fridge. Let it marinate for at least 30 minutes. If you have extra time, let it sit for up to 2 hours. This makes the beef really tasty. Now, let’s cook the veggies. Heat a little oil in a large skillet or wok over medium-high heat. Once the oil is hot, add the sliced onions and red bell peppers. Sauté them for about 3 to 5 minutes. You want them to become tender but not mushy. If you like, toss in fresh spinach or bok choy. Cook them just until they wilt. After that, remove the veggies from the skillet and set them aside. This step adds color and crunch to your bowls. In the same skillet, add the marinated beef along with all the marinade. Cook it for about 5 to 7 minutes. Stir often to keep the beef from sticking. You'll know it's done when the beef is browned and cooked through. Season it with salt and pepper to taste. The marinade helps to create a rich flavor that you will love. It’s time to make the bowls! Start by dividing the cooked jasmine rice among your serving bowls. Top each bowl with the beef bulgogi and the sautéed vegetables. For a finishing touch, sprinkle chopped green onions and sesame seeds on top. If you like some heat, serve with Sriracha or gochujang on the side. Enjoy your flavorful Korean Beef Bulgogi Bowls! For the complete recipe, check [Full Recipe]. To get the best flavor, marinate your beef right. Use a large bowl. Mix soy sauce, brown sugar, sesame oil, ginger, and garlic. Make sure to coat every piece of beef. Cover the bowl tightly. Let it sit in the fridge for at least 30 minutes. For deeper flavor, marinate for up to 2 hours. This allows the beef to soak up all those tasty juices. Cooking beef bulgogi needs some care. First, use thin slices of beef sirloin. This cut cooks quickly and stays tender. Heat your skillet or wok over medium-high heat. Add a little oil to avoid sticking. Once hot, add the marinated beef. Cook for about 5-7 minutes. Stir often to make sure it cooks evenly. If you see the beef browning, you are doing it right. Make your bulgogi bowls look great. Start with a base of jasmine rice. Then, add the beef and veggies on top. Sprinkle chopped green onions and sesame seeds for color. For a pop of flavor, serve with a side of kimchi. This adds a traditional touch. Use a colorful dish to make the bright ingredients stand out. You want each bowl to look as good as it tastes! Check out the Full Recipe to get all the details. {{image_2}} You can switch beef for other proteins. Chicken or pork works well in this dish. Tofu is great too. It absorbs the tasty marinade. For a seafood twist, try shrimp. Just remember to adjust cooking times. Shrimp cooks quickly and needs less time than beef. To make this recipe vegetarian or vegan, use plant-based protein. Firm tofu or tempeh can replace beef. Marinate them just like the beef. Use soy sauce and sesame oil for flavor. Add extra veggies like mushrooms or zucchini. They add depth and texture. You can still enjoy that savory taste. Serving your bulgogi bowls can be fun and creative. Try different grains like quinoa or brown rice. They add a nutty flavor. You can also serve it in lettuce wraps. This makes a fresh, crunchy dish. For a twist, add kimchi or pickled veggies on top. They bring brightness and tang to every bite. To store your leftover Korean Beef Bulgogi Bowls, let them cool first. Place the beef and veggies in an airtight container. Separate the rice to keep it fresh. Store everything in the fridge for up to three days. This keeps the flavors intact and helps prevent spoilage. When it's time to eat leftovers, reheat gently. Use the microwave for quick warming. Place the rice on one side and the beef and veggies on the other. Heat in 30-second intervals until hot. You can also use a skillet. Heat over medium heat for about 5 minutes. Stir often to warm evenly and avoid burning. You can freeze the beef bulgogi bowls, but do it right. Let the food cool completely before freezing. Place the beef and veggies in a freezer-safe bag or container. Squeeze out the air to prevent freezer burn. You can freeze the rice too, but it may change texture. Store for up to three months. When ready to eat, thaw overnight in the fridge. Reheat as mentioned above. For the full recipe, check the detailed instructions to make this tasty meal again! Bulgogi is a popular Korean dish made from marinated beef. The name means "fire meat." This dish dates back to the Goguryeo era, over 2,000 years ago. Originally, people grilled the beef over an open flame, giving it a smoky flavor. Today, you can find bulgogi in many forms, like grilled or stir-fried. The marinade often includes soy sauce, sugar, sesame oil, and garlic. This blend creates a sweet and savory taste that is simply irresistible. Yes, you can use different cuts of beef for bulgogi. While sirloin is common, you can try ribeye, flank steak, or even tenderloin. The key is to slice the beef thinly against the grain. This helps ensure the meat stays tender and easy to chew. You can also experiment with marinating chicken or pork if you want to switch things up. Korean Beef Bulgogi is typically not very spicy. The flavor comes from the marinade, which is sweet and savory. However, you can adjust the spice level to your liking. If you want heat, add sriracha or gochujang on the side. You can also mix some into the marinade for a kick. Just remember to start with a little and taste as you go! You can serve bulgogi bowls with many sides. Cooked jasmine rice is a must, as it soaks up the delicious sauce. A side of kimchi adds tang and crunch. You can also add pickled vegetables for extra flavor. If you like greens, add spinach or bok choy to the bowl. These toppings make the meal colorful and nutritious. For a fun twist, try serving your bulgogi in lettuce wraps! You can find the complete recipe for savory Korean Beef Bulgogi Bowls [here](#). This recipe guides you step-by-step to create a satisfying meal. Each serving of Korean Beef Bulgogi Bowls is packed with flavor and nutrition. Here’s a quick look at the nutritional values per serving: - Calories: Approximately 450 - Protein: 30g - Carbohydrates: 50g - Fat: 15g - Fiber: 2g - Sugar: 5g These bowls offer a good balance of protein and carbs. You also get healthy fats from sesame oil and nutrients from fresh veggies. If you love Korean cuisine, you might want to explore more. Here are some great resources: - Korean Cookbooks: Look for books that focus on authentic recipes. - Online Cooking Classes: Many chefs offer classes on Korean cooking. - YouTube Channels: Channels dedicated to Korean food can provide visual guidance. - Food Blogs: Search for blogs that share tips and recipes for Korean dishes. These resources will help expand your knowledge and skills in Korean cooking. Enjoy your culinary journey! In this blog post, we explored the essentials for creating delicious Korean Beef Bulgogi Bowls. We covered the complete ingredient list, necessary tools, and tips for quality. Then, we provided step-by-step instructions for each part of the bowl, from marinating to assembly. I shared handy tips for marinating, cooking beef, and serving. We even discussed variations, storage, and common questions. Remember, with these steps, you can make flavorful bowls that impress friends and family. Enjoy your cooking journey and savor the taste!](https://savoryspiral.com/wp-content/uploads/2025/06/94bb96c1-4d06-488d-85c5-4e4045e9d7fc.webp)
Craving a meal that’s both tasty and easy to make? Look no further than Korean Beef Bulgogi Bowls. This dish
![- 4 large bell peppers (red, yellow, or green) - 2 cups cooked chicken, shredded - 1/2 cup basil pesto - 1 cup cooked quinoa (or rice) - 1/2 cup cherry tomatoes, halved - 1/2 cup mozzarella cheese, shredded - 1/4 cup grated Parmesan cheese - Fresh basil leaves for garnish - Salt and pepper to taste Each ingredient plays a key role in creating the perfect flavor for your pesto chicken stuffed peppers. The bell peppers provide a sweet and crunchy base. Shredded chicken gives protein and heartiness. Basil pesto adds rich and herbal notes. Quinoa or rice brings texture and fullness. Cherry tomatoes add a burst of freshness while mozzarella and Parmesan cheeses bring creaminess. Finally, fresh basil leaves on top enhance the dish visually and flavor-wise. Seasoning with salt and pepper rounds out the flavors, making each bite delightful. For the full recipe, check the provided link. - Preheat oven to 375°F (190°C). - Cut the tops off the bell peppers and remove the seeds. Place them upright in a baking dish. - In a large bowl, combine 2 cups of shredded chicken, 1/2 cup of basil pesto, 1 cup of cooked quinoa, 1/2 cup of halved cherry tomatoes, and 1/2 cup of shredded mozzarella cheese. - Mix all ingredients well until they blend together. - Season with salt and pepper to taste. - Stuff each pepper with the chicken and quinoa mixture. Pack it down gently. - Sprinkle the remaining mozzarella and 1/4 cup of grated Parmesan cheese on top. - Cover the baking dish with aluminum foil. Bake in the preheated oven for 25 minutes. - Remove the foil and bake for an additional 10-15 minutes. The peppers should be tender, and the cheese should be bubbly and golden. - Once done, take them out of the oven and let them cool for a few minutes before serving. - Garnish with fresh basil leaves for extra flavor and color. You can find the complete recipe with all the details [Full Recipe]. Enjoy your meal! - Choosing the right bell peppers: Select large bell peppers. Red, yellow, or green work well. Pick ones that feel firm and heavy. This ensures they hold the filling well. - Ensuring chicken is well-seasoned: Use shredded chicken for the filling. Mix it well with basil pesto. This adds rich flavor to your dish. Don’t forget to add salt and pepper to taste. Taste the mixture before stuffing the peppers. This helps you get the seasoning just right. - How to achieve perfect cheese melt: For a lovely cheese top, sprinkle mozzarella and Parmesan on the stuffed peppers. Bake them covered with foil first. This keeps the moisture in. After 25 minutes, uncover and let the cheese melt for another 10-15 minutes. This gives you a nice, bubbly, golden crust. - Covering and uncovering during baking: Covering the dish helps cook the peppers evenly. Uncovering lets the cheese brown. This two-step process gives you the best results. - Pairing with salad or bread: Serve your stuffed peppers with a fresh salad. A light green salad adds freshness. You can also serve with crusty bread. This makes your meal more satisfying. - Presentation tips for garnish: For a beautiful plate, add fresh basil leaves on top. This adds color and enhances flavor. You can also drizzle a bit of olive oil over the stuffed peppers. This gives them a nice shine and extra taste. For the full recipe, check out the recipe section. {{image_2}} You can mix up the proteins in this recipe. Try using tofu or beans instead of chicken. Tofu offers a great texture and absorbs flavors well. Beans add fiber and protein, making your meal hearty. For cheese, consider different options. Feta cheese works nicely for a tangy kick. You can also use cheddar for a sharper taste. Each cheese brings a unique flavor to the dish. To boost flavor, add spices or herbs to your filling. A dash of garlic powder can enhance the taste. Dried oregano or thyme can also give your dish extra depth. Experiment with what you love! You might swap quinoa for other grains too. Couscous cooks quickly and adds a lovely texture. Brown rice or farro are also good choices for a different twist. If you want a low-carb meal, use cauliflower rice instead of quinoa. This swap keeps all the flavors while cutting carbs. You can still enjoy the great taste without the extra carbs. For vegan options, replace chicken with chickpeas or lentils. Use vegan cheese instead of dairy cheese. This way, everyone can enjoy these tasty stuffed peppers. The flavors and freshness remain intact! Feel free to check the Full Recipe for more ideas on how to make this dish your own. To store leftover pesto chicken stuffed peppers, let them cool first. Place them in an airtight container. This keeps them fresh and prevents drying out. You can use glass or plastic containers. They help keep the flavors intact. Make sure to seal them tightly. This will last for up to four days in the fridge. To freeze stuffed peppers, wrap each pepper in plastic wrap. Then place them in a freezer-safe bag or container. This protects them from freezer burn. When ready to eat, thaw them overnight in the fridge. Reheat in the oven at 375°F (190°C) until warm. This usually takes about 20-30 minutes. You can also microwave them if you're short on time. Stuffed peppers can last in the fridge for about four days. In the freezer, they can stay good for up to three months. Always check for any signs of spoilage. If they smell off or look strange, it's best to toss them out. Proper storage helps maintain their taste and texture. Enjoy your meal even days later! You bake the stuffed peppers for about 35 to 40 minutes. First, cover the dish with foil and bake for 25 minutes. After that, remove the foil and bake for an extra 10 to 15 minutes. This helps the peppers get tender and the cheese to melt perfectly. Yes, you can prepare them ahead of time. Stuff the peppers and store them in the fridge. You can bake them later. This makes dinner easy, especially on busy nights. Just remember that they may need a few extra minutes in the oven. You can use rice if you prefer. Brown rice, white rice, or even cauliflower rice work well. Each option brings a different flavor and texture. You can also try couscous or barley for a fun twist. Stuffed peppers are usually not spicy. The flavors come from the pesto and cheese. If you want heat, add some red pepper flakes or jalapeños to the filling. This way, you can adjust the spice level to your taste. Many sides complement these stuffed peppers. A fresh salad adds a nice crunch. Garlic bread or crusty rolls are great for dipping. Roasted vegetables also work well, adding more color and nutrients to your meal. For more ideas, check out the Full Recipe. We explored how to make tasty Pesto Chicken Stuffed Peppers using simple ingredients. You learned to prepare the filling with chicken, pesto, and quinoa. We covered tips for baking and serving, plus variations for different diets. Now, you can make a healthy, satisfying meal that’s easy to customize. Enjoy your cooking and share your tasty peppers with friends and family.](https://savoryspiral.com/wp-content/uploads/2025/06/f94c45f8-e983-4180-9757-2f3b2bd54195.webp)
Looking for a meal that’s both tasty and easy to make? Pesto Chicken Stuffed Peppers are just the thing! They
![- 2 cups shredded cooked chicken - 1 package (8 oz) cream cheese, softened - 1 cup sharp cheddar cheese, shredded These main ingredients create the base of the dip. The shredded chicken adds protein and flavor. Cream cheese gives it a creamy texture. Sharp cheddar cheese adds a rich, cheesy taste. - 1/2 cup blue cheese dressing - 1/2 cup buffalo sauce - 1/4 cup green onions, sliced The blue cheese dressing adds tanginess. Buffalo sauce brings the heat. Green onions provide a fresh touch on top. Together, they enhance the flavor profile of the dip. - Tortilla chips - Celery sticks Tortilla chips offer a crunchy bite. Celery sticks give a refreshing crunch. Both dippers pair well with the creamy dip. You can even mix and match for more fun. For the full recipe, check the section above. To make Buffalo Chicken Dip, follow these easy steps. 1. Preheat your oven to 350°F (175°C). 2. In a large mixing bowl, mix the softened cream cheese with buffalo sauce until smooth. 3. Add the shredded chicken, sharp cheddar cheese, and blue cheese dressing into the bowl. 4. Stir well to ensure all components mix evenly. 5. Transfer the mixture to a baking dish and spread it out evenly. 6. Bake for 20-25 minutes until hot and bubbly. Now you're ready to enjoy this tasty dip! For the full recipe, check out the details above. To make your buffalo chicken dip shine, consider using different ingredients. Try adding a bit of ranch seasoning for extra flavor. You can also mix in some diced celery for crunch. Adjust the buffalo sauce to fit your heat level. If you like it spicy, go for more sauce. If you prefer it milder, use less. Buffalo chicken dip is best served warm. If it cools down, just reheat it in the oven. Pair it with a variety of dippers. Tortilla chips are a classic choice. You can also use crunchy veggies like celery sticks or carrots. They add a fresh taste that balances the dip's richness. One mistake is overbaking the dip. This can dry it out and ruin the creamy texture. Keep an eye on it while it bakes. Another mistake is not softening the cream cheese. If it's not soft, it won't mix well. Make sure to leave it out at room temperature for a bit. This ensures a smooth mix and a creamy dip. Check out the Full Recipe for complete details! {{image_2}} Buffalo chicken dip is great, but you can make it even better. Here are some fun and easy variations to try. - Add extra hot sauce for a kick. - Incorporate jalapeños for added heat. If you love heat, this spicy twist is for you. Just mix in some extra hot sauce. It boosts the flavor and gives it a nice kick. For an extra spicy treat, chop up some jalapeños. They add both heat and crunch. Try this if you want a dip that wakes up your taste buds! - Use sour cream or ranch dressing as substitutes. - Experiment with cream cheese blends (like garlic herb). If you prefer a creamier dip, switch out the cream cheese. Sour cream or ranch dressing works well. This change makes the dip smoother and richer. You can even try garlic herb cream cheese for more flavor. This creamy version is sure to please everyone at your table. - Substitute chicken with shredded rotisserie chicken. - Use Greek yogurt instead of cream cheese for lighter option. Want a healthier dip? Use shredded rotisserie chicken. It’s quick and adds great flavor. For a lighter option, swap cream cheese for Greek yogurt. This keeps it creamy but cuts down on fat. These healthy changes let you enjoy the dip without the guilt. You can explore these variations to find your favorite. For the complete recipe, check the Full Recipe section. After enjoying your Buffalo Chicken Dip, store any leftovers in an airtight container in the fridge. This keeps the dip fresh and tasty. Aim to consume it within 3-4 days for the best flavor. The longer it sits, the more the flavors may change. If you want to save some for later, you can freeze Buffalo Chicken Dip. It lasts well for up to 3 months in the freezer. Make sure to pack it in a suitable container. When you're ready to enjoy it again, thaw the dip overnight in the refrigerator before reheating. To reheat, I recommend using the oven. Set it to 350°F and heat the dip until it's warmed through. If you prefer the stovetop, stir it frequently. You might want to add a splash of buffalo sauce to boost the flavor while reheating. Enjoy your dip as if it was fresh out of the oven! Yes, prepare the dip, store it in the fridge, and bake when ready to serve. Making it ahead saves time on game day. Just remember to cover it tightly. Serve warm with tortilla chips or vegetable sticks for dipping. This dip shines when it's hot and bubbly. Chips add crunch, while veggies offer freshness. Absolutely, rotisserie chicken is a great time-saver and adds flavor. It cuts down on prep time and keeps the dip tasty. Just shred the chicken and mix it in. You can use jackfruit or soy-based chicken alternatives for a vegetarian option. This keeps the texture while offering a different flavor. Both options work well in the [Full Recipe]. Buffalo chicken dip is a tasty treat you can easily make at home. We covered the main and additional ingredients, preparation steps, and variations to suit your taste. Remember to store any leftovers properly and enjoy your dip warm. With simple tweaks, you can customize it to your liking. Whether you're hosting a gathering or enjoying a quiet night, this dip is sure to be a hit. Dive in and savor the fun flavors of this classic dish!](https://savoryspiral.com/wp-content/uploads/2025/06/587a0810-a9b2-45da-b647-1c4cc1b78460.webp)
Looking for the perfect game day snack? Buffalo Chicken Dip is a cheesy, spicy delight that everyone loves. With just
![To make Glazed Apple Fritter Bread, you will need the following ingredients: - 2 cups all-purpose flour - 1 tablespoon baking powder - 1/2 teaspoon salt - 1 teaspoon ground cinnamon - 1 tablespoon sugar - 1/2 cup unsalted butter, melted - 3/4 cup brown sugar - 1 large egg - 1 teaspoon vanilla extract - 1/2 cup milk - 2 medium apples, peeled and diced (preferably Granny Smith) - 1/2 cup chopped walnuts (optional) - 1 cup powdered sugar (for glaze) - 3 tablespoons milk (for glaze) These ingredients combine to create a sweet, moist bread that is packed with apple flavor. The apples add a lovely texture, while the cinnamon gives it warmth. The optional walnuts add a nice crunch and nutty taste. When you gather your ingredients, ensure they are fresh. This will enhance the overall flavor of your bread. You can find all the details in the Full Recipe. Are you ready to bake? Let's get started! - Preheat your oven to 350°F (175°C) and grease a 9x5-inch loaf pan. - In a large bowl, whisk together the flour, baking powder, salt, cinnamon, and sugar. - Combine the wet ingredients in a separate bowl. This includes melted butter, brown sugar, egg, vanilla extract, and milk. - Mix wet ingredients with dry ingredients until just combined. - Fold in the diced apples and chopped walnuts, if you choose. - Pour the batter into the prepared loaf pan. Smooth the top to help it bake evenly. - Bake in the preheated oven for 50-60 minutes. Check doneness with a toothpick; it should come out clean. - While the bread bakes, prepare the glaze. Whisk together powdered sugar and milk until smooth. - After baking, let the bread cool in the pan for about 10 minutes. - Transfer it to a wire rack and drizzle the glaze over the warm bread. Let it soak in for extra flavor. For the full recipe, check the section above. Enjoy your baking! - Mix your dry ingredients well. This helps the flavors blend. - Combine wet ingredients separately. This keeps the batter smooth. - Do not overmix the batter. A few lumps are okay. - Use a toothpick to check if it’s done. Insert it in the center; it should come out clean. - To adjust your glaze, add more milk for a thinner mix. Less milk makes it thicker. - Apply the glaze while the bread is still warm. This lets it soak in and adds flavor. - Slice the bread thick for a nice presentation. Arrange it on a platter. - Garnish with thin apple slices and a sprinkle of cinnamon for color. - Pair it with coffee or tea for a cozy treat. Hot cider is also a great choice. {{image_2}} You can change the fruit in this bread. Try using pears or blueberries instead of apples. These fruits add a different taste and texture. If you want a gluten-free option, use almond flour or a gluten-free blend. This keeps the recipe delicious for everyone. Spices can bring new life to your bread. Nutmeg and allspice can enhance the flavor. You may also add chocolate chips or raisins for a sweet twist. These little extras can make each bite more exciting. You can switch up the glaze, too. Maple syrup or caramel can make a tasty topping. If you're feeling creative, try crushed nuts or shredded coconut on top. These toppings add both crunch and flavor, making your bread even more special. For the full recipe, check out the details above! To keep your Glazed Apple Fritter Bread fresh, store it in an airtight container. This helps protect it from air and moisture. Place the bread in the container once it's completely cool. It will stay good for about 2 to 3 days at room temperature. If you notice any signs of mold or spoilage, discard it right away. If you want to keep the bread longer, refrigeration is a great option. Wrap the bread tightly in plastic wrap or aluminum foil. Then, place it in an airtight container. This method can help it last up to a week. Just remember to let it come to room temperature before serving. It tastes best when enjoyed fresh! Freezing Glazed Apple Fritter Bread is simple and effective. First, slice the bread into individual pieces. Wrap each slice in plastic wrap, then place them in a freezer bag. This helps prevent freezer burn. You can freeze the bread for up to 3 months. To enjoy, take out a slice and let it thaw at room temperature. You can also warm it up in the oven for a few minutes. This makes it taste freshly baked! For the full recipe, check out the Glazed Apple Fritter Bread instructions. Yes, you can use different apples! While Granny Smith apples work best for their tartness, you can try Honeycrisp or Fuji. Each type adds a unique flavor. Just keep in mind that sweeter apples will make your bread sweeter. To make a gluten-free version, use a gluten-free flour blend. Look for blends that mimic all-purpose flour. You might also need to add a binder like xanthan gum. This will help the bread hold its shape. Absolutely! You can make this bread a day in advance. Just let it cool completely, then wrap it tightly. Store it at room temperature. The flavors will meld overnight, making it even more delicious. This bread pairs well with coffee or tea. You could also serve it with a scoop of vanilla ice cream. Some people love adding a dollop of whipped cream. Fresh fruit on the side works great too! For the complete recipe, check out the [Full Recipe]. This article covered the key ingredients and steps for making Glazed Apple Fritter Bread. We discussed tips for perfect baking and glazing, along with fun variations to try. Storing methods ensure your bread stays fresh. You have the tools to create a delicious treat that impresses everyone. Enjoy your baking journey and share this delightful recipe with friends and family!](https://savoryspiral.com/wp-content/uploads/2025/06/99243f63-108d-490a-be3b-df4ac811e569.webp)
If you love sweet, warm treats, then you’re in for a real delight! This Glazed Apple Fritter Bread combines the
![To make Lemon Parmesan Roasted Asparagus, you need a few simple items. Here’s the list: - 1 pound fresh asparagus, trimmed - 2 tablespoons olive oil - Zest of 1 lemon - 2 tablespoons fresh lemon juice - 1/2 cup freshly grated Parmesan cheese - 1 teaspoon garlic powder - 1/2 teaspoon salt - 1/4 teaspoon black pepper You can add extra flavor with these optional items: - 1/4 teaspoon red pepper flakes (for a little heat) - Fresh parsley, chopped (for garnish) Asparagus is not just tasty; it’s also good for you. Here are some benefits: - Rich in vitamins: Asparagus is high in vitamins A, C, E, and K. - High in fiber: It helps with digestion and keeps you full. - Low in calories: This makes it a great choice for healthy eating. - Antioxidants: Asparagus contains antioxidants, which can help fight disease. Using fresh asparagus in your meals adds flavor and nutrition. This recipe combines these benefits with the zesty taste of lemon and the richness of cheese. You can find the [Full Recipe] above for details on how to prepare this dish. Start with fresh asparagus. Look for bright green stalks with tight tips. Trim the tough ends, about one inch off. This helps make each bite tender. Rinse the asparagus under cold water to clean it. Pat them dry with a towel. This step is key to getting a nice roast. In a large bowl, combine the olive oil, lemon zest, and lemon juice. Add garlic powder, salt, black pepper, and red pepper flakes if you like some heat. Whisk these ingredients together until they blend well. This mixture gives the asparagus a bright flavor. Toss the asparagus in the bowl until each piece is coated evenly. The lemon and oil mix clings well to the stalks. Preheat your oven to 425°F (220°C). Line a baking sheet with parchment paper for easy cleanup. Spread the coated asparagus in a single layer on the sheet. This helps them roast evenly. Bake for 12 minutes. After this time, take them out and sprinkle the Parmesan cheese over the top. Return to the oven for another 3-5 minutes, until the cheese is melted and golden. Watch them closely. Oven times can vary. When done, let the asparagus cool for a minute. Serve warm, garnished with fresh parsley. For the full recipe, check the complete instructions above. Enjoy this bright and tasty side dish! To get the best flavor from your asparagus, choose fresh, bright green stalks. They should be firm and not limp. Trim the tough ends, about one inch, to ensure they cook well. Spread the asparagus in a single layer on your baking sheet. This helps them roast evenly. Leave space between each stalk for air to flow. You can boost the taste of your Lemon Parmesan Roasted Asparagus. Add lemon zest for a bright kick. Fresh herbs like thyme or rosemary also work well. For heat, sprinkle on more red pepper flakes. If you love garlic, use fresh minced garlic instead of powder. This gives a more robust flavor. Lemon Parmesan Roasted Asparagus pairs well with many dishes. It complements grilled chicken or fish perfectly. Serve it next to rice or quinoa for a complete meal. You can also add it to salads for extra crunch. Don't forget to drizzle a bit of extra lemon juice on top before serving. Check out the Full Recipe for more ideas! {{image_2}} You can switch up the cheese if you want. Try using feta or goat cheese. Both add a tangy kick. A sharp cheddar can also work well, giving a different taste. Each cheese brings its own flavor, so feel free to experiment. If you need to avoid dairy, use nutritional yeast instead of Parmesan. It adds a cheesy taste without the milk. For a vegan option, use olive oil with a mix of herbs. This will keep your dish flavorful while meeting dietary needs. In spring and summer, add fresh herbs like basil or thyme. These herbs enhance the lemon flavor. In fall, try adding roasted nuts for crunch. They add texture and a nutty taste. During winter, pair with a sprinkle of pomegranate seeds for color and sweetness. Each season offers unique flavors to try. For the full recipe, check out the Lemon Parmesan Roasted Asparagus section above. To store leftovers, let the asparagus cool down first. Place it in an airtight container. You can keep it in the fridge for up to three days. This keeps the flavors fresh. Make sure to seal it tightly to avoid moisture. When you're ready to enjoy the leftovers, preheat your oven to 350°F (175°C). Spread the asparagus on a baking sheet. Heat for about 10 minutes or until warm. This helps keep the cheese nice and melty. You can also use a microwave, but the oven is best. If you want to freeze the asparagus, it's best to do so before cooking. Blanch the asparagus in boiling water for two minutes. Then, place it in an ice bath to stop cooking. Drain and pack it in freezer bags. Remove as much air as possible. You can freeze it for up to three months. When ready to use, thaw in the fridge overnight. For cooking, roast straight from frozen, adding a few extra minutes to cooking time. You can find the full recipe [here](#). To make your asparagus crispy, start by using fresh asparagus. Trim the ends to keep them tender. Next, toss the asparagus in olive oil and seasonings well. Spread them out on a baking sheet. Avoid crowding the pan. This helps the heat circulate. Roast at 425°F for 12 minutes first. Then add the Parmesan and roast for 3-5 more minutes. You want the cheese to melt and turn golden. Crispiness comes from high heat and less moisture. You can use frozen asparagus, but fresh is best. Frozen asparagus has more water. This might make it less crispy. If you use frozen, thaw and dry them well. Roast them for a longer time to help remove moisture. You might need to adjust the cooking time. Keep an eye on them to avoid overcooking. The flavor will still be good, but the texture may differ. Lemon Parmesan roasted asparagus pairs well with many dishes. Here are a few great ideas: - Grilled chicken or fish for a light, healthy meal. - Quinoa or rice for a hearty side. - Mashed potatoes for a comforting touch. - A fresh salad to add crunch. These pairings balance the flavors and make a complete meal. Enjoy your delicious asparagus with any of these sides! For the complete cooking process, check out the Full Recipe. This blog post covered how to make delicious lemon parmesan roasted asparagus. We discussed the key ingredients and their benefits. You learned the steps for prepping and roasting the asparagus perfectly. I shared tips to enhance flavor and suggested ways to serve it. We explored variations, storage methods, and answered common questions. In summary, enjoy experimenting with this simple dish. It can fit many tastes and diets. You’ll love how easy it is to make and share.](https://savoryspiral.com/wp-content/uploads/2025/06/29f9aefb-7468-4868-baf3-bb5c8e7f9961.webp)
Are you ready to elevate your vegetable game? Lemon Parmesan Roasted Asparagus is a vibrant, flavorful side dish that can
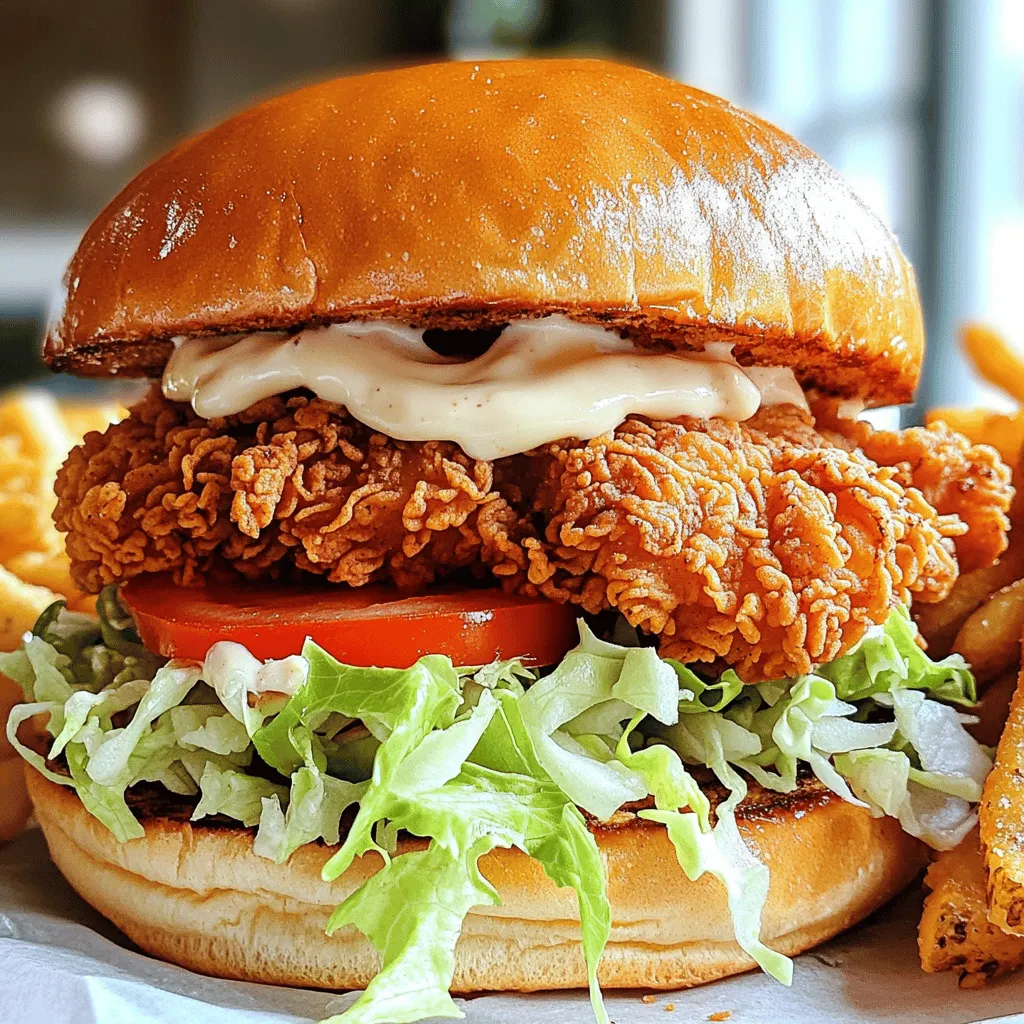
If you crave a juicy, crispy chicken sandwich that’s bursting with flavor, you’re in the right place! In this simple
