Skip to content
DisclaimerTerms Of UseGDPR PolicyCookie Policy

savoryspiral

  • Home
  • Drinks
  • Appetizers
  • Dinner
  • Dessert
  • About
  • Contact
  • Privacy Policy
DisclaimerTerms Of UseGDPR PolicyCookie Policy

Charlotte

For a tasty Chicken Caesar Pasta Salad, you need: - 2 cups rotini or penne pasta - 2 cups cooked chicken breast, diced - 1 cup romaine lettuce, chopped - 1/2 cup cherry tomatoes, halved - 1/4 cup Parmesan cheese, grated - 1/4 cup Caesar dressing - 1/4 teaspoon black pepper - 1/4 teaspoon garlic powder - 1/4 teaspoon lemon zest - Optional: croutons for topping You can use any rotini or penne pasta you like. Barilla and Ronzoni are good choices. For chicken, use leftover roast chicken or grill your own. I often use brands like Perdue or Tyson for convenience. For dressing, try Ken's Steakhouse or Annie's for a rich flavor. Freshly grated Parmesan adds a nice touch, but pre-grated works too. If you want crunch, add croutons. You can make these at home or buy them pre-made. Each ingredient plays a role in flavor and texture. The pasta holds the dressing and the chicken adds protein. The romaine gives a nice crunch, while the cherry tomatoes add sweetness. Garlic powder and lemon zest brighten up the whole dish. 1. Cooking the pasta and cooling it Start by boiling 2 cups of rotini or penne pasta in salted water. Cook it according to the package directions. Once the pasta is tender, drain it well. Rinse the pasta under cold water. This step cools the pasta and stops the cooking process. Set it aside to let it dry a bit. 2. Chopping and preparing chicken and vegetables While the pasta cools, chop 2 cups of cooked chicken breast into small pieces. Take 1 cup of fresh romaine lettuce and chop it into bite-sized pieces. Slice 1/2 cup of cherry tomatoes in half. The chicken and veggies add flavor and crunch to your salad. 3. Mixing the dressing ingredients In a small bowl, mix together 1/4 cup of Caesar dressing, 1/4 teaspoon of black pepper, 1/4 teaspoon of garlic powder, and 1/4 teaspoon of lemon zest. This simple dressing gives the pasta salad a rich taste. Whisk it well until everything blends together. 1. Combining all ingredients in a bowl In a large mixing bowl, combine the diced chicken, chopped lettuce, halved cherry tomatoes, and cooled pasta. This mix of ingredients makes the salad colorful and tasty. 2. Tossing salad with dressing Pour the dressing over the salad mix. Gently toss everything until it’s well coated. Make sure the dressing covers all the ingredients. This step is key for a flavorful Chicken Caesar Pasta Salad. - Recommended garnishes and accompaniments Top your salad with 1/4 cup of grated Parmesan cheese for a cheesy kick. If you like crunch, add some croutons on top. Serve this salad fresh for the best taste. It's perfect as a light meal or side dish. Enjoy! How do you cook pasta perfectly? Cook your pasta in a large pot of boiling water. Use a good amount of salt. This helps flavor the pasta. Stir the pasta often to prevent it from sticking. Check the pasta a minute before the package time ends. It should be al dente, which means firm but cooked. Drain the pasta and rinse it with cold water. This stops the cooking and cools it down quickly. How can you shred or dice chicken? To shred chicken, use two forks. Hold one piece of chicken with a fork and pull it apart with the other. This gives you nice, even shreds. For dicing, place the cooked chicken on a cutting board. Use a sharp knife to cut it into bite-sized cubes. Make sure the chicken is cool for easier handling. What extra ingredients can you add for taste? You can enhance the flavor of your Chicken Caesar Pasta Salad with a few simple additions. Try adding diced cucumbers for crunch or sliced olives for a briny kick. Sun-dried tomatoes can add a sweet and tangy flavor. You could also toss in some avocado for creaminess. What are some suggestions for seasoning or dressing substitutes? If you want to change the dressing, try using Greek yogurt instead of Caesar dressing. This adds creaminess but cuts calories. You can also add lemon juice to brighten the flavor. A sprinkle of Italian herbs can give your salad a fresh twist. If you like spice, add a pinch of red pepper flakes for heat. This Chicken Caesar Pasta Salad is versatile. You can adjust it to your taste. Try these tips to make it even better! Don't forget to check the Full Recipe for more details. {{image_2}} You can switch up the protein in this salad. Shrimp works well for a seafood twist. Tofu is great for a vegetarian or vegan option. Just make sure to prepare it well. For shrimp, sauté it lightly and season. For tofu, press it to remove water, then cube and pan-fry. Both options add unique flavors. Adjust your ingredients based on the season. In summer, add fresh cucumbers or sweet corn. In fall, try roasted squash or apples for extra sweetness. Special dressings can enhance the flavor too. Consider a lemon or basil vinaigrette in spring. In winter, a creamy ranch can warm up the salad. Each option brings a new taste to the dish. To keep your Chicken Caesar Pasta Salad fresh, store it in an airtight container. This helps prevent any odors from your fridge seeping in. It's best to refrigerate the salad right after you finish eating. You can enjoy it for up to three days in the fridge. After that, the ingredients may start to lose their crunch and flavor. You can freeze Chicken Caesar Pasta Salad, but it might change the texture. The lettuce and dressing do not freeze well. If you want to freeze it, consider leaving out the lettuce and dressing. Instead, freeze just the pasta and chicken mixture. When you're ready to eat, thaw it in the fridge overnight. Add fresh lettuce and dressing right before serving. This keeps the salad crisp and tasty. What to serve with Chicken Caesar Pasta Salad? You can serve this salad with garlic bread or a light soup. A fruit salad adds a sweet touch. Pairing with grilled veggies also works well. These sides balance the meal and add variety. Can I make this salad ahead of time? Yes, you can make this salad ahead of time. Prepare the pasta and chicken, then mix them with other ingredients. Keep the dressing separate until you are ready to serve. This keeps the salad fresh and crunchy. How can I make it gluten-free? To make this salad gluten-free, use gluten-free pasta. Many brands offer great options. Check labels for hidden gluten in the dressing. You can also make your own Caesar dressing with safe ingredients. Is Chicken Caesar Pasta Salad healthy? Yes, Chicken Caesar Pasta Salad can be healthy. It has protein from chicken and vitamins from veggies. The pasta provides energy. Use light dressing to cut calories if needed. Fresh ingredients boost the meal's health. Caloric content breakdown of the dish A serving of Chicken Caesar Pasta Salad has around 350 calories. The chicken adds protein, while pasta gives carbs. The dressing and cheese add fat and flavor. This balance makes it a satisfying meal. To wrap up, we explored all you need to know for Chicken Caesar Pasta Salad. We discussed the key ingredients, cooking tips, and tasty variations to try. You can even store the salad for later enjoyment. This dish is versatile and easy to customize. It's perfect for any meal or gathering. Remember, cooking should be fun! Enjoy your time in the kitchen, and create a salad that suits your taste. Happy cooking!

Chicken Caesar Pasta Salad Easy and Flavorful Meal

Craving a quick and tasty meal? Chicken Caesar Pasta Salad is your answer! This dish packs all the flavor of

For the perfect shrimp tacos, you need some simple ingredients. Here’s what you should gather: - 1 lb shrimp, peeled and deveined - 1 tablespoon olive oil - 1 teaspoon smoked paprika - 1 teaspoon garlic powder - 1 teaspoon cumin - 1/2 teaspoon salt - 1/4 teaspoon black pepper - 1 cup red cabbage, shredded - 1 lime, juiced - 8 small corn tortillas These ingredients combine to create a flavorful shrimp filling. The spices add warmth and depth, while the lime juice brings brightness. To kick up the flavor, consider adding a few optional ingredients: - 1 jalapeño, thinly sliced (for heat) - 1/4 cup fresh cilantro, chopped - 1 avocado, sliced Adding jalapeño gives the tacos a spicy kick. Fresh cilantro adds a pop of color and freshness. Sliced avocado provides a creamy texture that complements the shrimp. Toppings can transform your shrimp tacos into a feast. Here are some great options: - 1/2 cup creamy avocado dressing or sour cream - Lime wedges for serving The creamy dressing makes the tacos rich and indulgent. Lime wedges let you add a burst of freshness right before you take a bite. Serve your tacos with a side of rice or beans for a complete meal. For the full recipe, check the details above. Enjoy making your easy shrimp tacos! First, gather your shrimp and ingredients. I prefer fresh shrimp, but frozen works too. Start by peeling and deveining the shrimp if needed. Next, in a bowl, mix the shrimp with olive oil, smoked paprika, garlic powder, cumin, salt, and black pepper. Toss them well to coat. Let this sit for about 15 minutes to absorb the flavors. This step is key to making your shrimp tasty. Heat a skillet over medium-high heat. Once hot, add the marinated shrimp. Cook them for 2-3 minutes on each side. You want them pink and opaque. This tells you they are done. Remove them from the heat. The smell will be amazing as they cook. While the shrimp cooks, you can warm your corn tortillas. Just put them in a separate pan for about 30 seconds on each side. This makes the tortillas soft and easy to fold. Now it's time to make your tacos. Take a warm tortilla and place a few shrimp in the center. Top with shredded red cabbage for crunch. If you like heat, add some sliced jalapeño. Sprinkle chopped cilantro on top for a fresh taste. Squeeze fresh lime juice over everything. Finally, add sliced avocado and a drizzle of creamy avocado dressing or sour cream. Fold the tortilla and your tasty shrimp taco is ready to eat! Enjoy the bold flavors and textures of this quick meal. You can find the full recipe for more details. When picking shrimp, look for fresh shrimp. Fresh shrimp should smell like the sea, not fishy. The shells should be shiny and firm. If you can, choose shrimp that are wild-caught. Wild shrimp often taste better than farmed ones. You want shrimp that are large and plump. Count on 21 to 25 shrimp per pound for the best size. If you buy frozen shrimp, make sure they are peeled and deveined. Cooking shrimp is easy and quick. First, always thaw frozen shrimp before cooking. You can do this by placing them in cold water for about 15 minutes. Once thawed, pat them dry with a paper towel. This step helps your shrimp sear better. When cooking shrimp, use medium-high heat. This gives the shrimp a nice brown color. Cook them for 2-3 minutes on each side. The shrimp are done when they turn pink and opaque. To boost flavor, marinate your shrimp. A mix of olive oil, spices, and lime juice works great. I love using smoked paprika and cumin for a nice touch. Let your shrimp marinate for at least 15 minutes. This step adds depth to the taste. You can also add minced garlic or fresh herbs in the marinade. These ingredients bring out the best in your shrimp tacos. For extra zing, squeeze fresh lime juice over your tacos just before serving. For the complete recipe, check out the [Full Recipe]. {{image_2}} If you want to mix things up, try different proteins. Fish works great in tacos. You can use white fish like cod or tilapia. Chicken is another tasty option. Just grill or sauté it with similar spices. For a plant-based choice, use black beans or lentils. These options keep your meal fun and fresh. Toppings can change your taco game. Try mango salsa for a sweet twist. It adds a bright flavor. Pickled onions give a tangy bite. You can also add fresh corn or radishes for crunch. Don’t forget about different cheeses! Feta or queso fresco both taste amazing. These toppings take your tacos from good to great. Tortillas are not one-size-fits-all. Corn tortillas are classic and gluten-free. They have a rich flavor that pairs well with shrimp. Flour tortillas are soft and easy to wrap. If you want a twist, try lettuce wraps. They are great for a low-carb option. Experiment with different tortillas to find your favorite! For the full recipe, check [Full Recipe]. After enjoying your tasty shrimp tacos, store any leftovers in an airtight container. This keeps them fresh. Be sure to separate the shrimp from the tortillas. The tortillas can become soggy if they sit with the shrimp. They last in the fridge for up to two days. When it's time to enjoy your leftovers, you want to reheat them right. Heat the shrimp in a skillet over medium heat. This helps keep their flavor. Warm the tortillas in a pan for a few seconds. This makes them soft again. Avoid the microwave, as it can make them chewy. If you want to save shrimp for later, freezing is a great option. Place the uncooked, seasoned shrimp in a freezer bag. Remove as much air as you can before sealing. They can stay fresh in the freezer for up to three months. When you're ready to use them, thaw the shrimp in the fridge overnight. Then, follow the full recipe to make delicious shrimp tacos. You can make shrimp tacos from scratch easily. Start by marinating shrimp with olive oil and spices. Use smoked paprika, garlic powder, cumin, salt, and black pepper. Let them sit for 15 minutes. Cook the shrimp in a hot skillet until they turn pink. Warm corn tortillas in a separate pan. Fill each tortilla with shrimp, shredded cabbage, and cilantro. Add lime juice and avocado. Now, your tacos are ready to enjoy! For a detailed guide, check the Full Recipe. Yes, frozen shrimp work great for these tacos. Just thaw them first. You can do this by placing them in cold water for about 10-15 minutes. Once thawed, peel and devein if needed. Then, you can season and cook them as you would fresh shrimp. Using frozen shrimp saves time and still gives you tasty results. There are many fillings you can add to your tacos. You can try these options: - Chopped tomatoes for freshness - Sliced radishes for crunch - Shredded cheese for creamy flavor - Black beans for protein - Corn for sweetness - Diced mango for a fruity twist Feel free to mix and match based on your taste! Making shrimp tacos is easy and fun. You learned about key ingredients, cooking tips, and tasty variations. Remember to pick fresh shrimp and try different toppings. Store leftovers properly for the next meal. With these steps, you can craft delicious tacos again and again. Enjoy the flavors and make shrimp tacos your new favorite dish!

Easy Shrimp Tacos Flavorful and Simple Meal Idea

Craving a quick and tasty meal? You’re in the right spot! Easy shrimp tacos are an exciting way to please

To make a delicious cheesy mashed potato casserole, you will need: - 4 large russet potatoes, peeled and cubed - 1/2 cup unsalted butter - 1 cup sour cream - 1 cup shredded sharp cheddar cheese - 1/2 cup milk - 1/4 cup chives, chopped - 1 teaspoon garlic powder - 1 teaspoon onion powder - Salt and pepper to taste - 1/2 cup breadcrumbs (optional for topping) - Extra cheese for topping (optional, e.g., mozzarella or more cheddar) These ingredients create a creamy and cheesy dish. Each item plays a role in making the casserole rich and satisfying. You will need some basic kitchen tools to prepare this dish: - A large pot for boiling potatoes - A colander for draining water - A potato masher or mixer for mashing - A mixing bowl for combining ingredients - A 9x13 inch casserole dish for baking - Measuring cups and spoons for accurate amounts Having these tools ready will help you cook smoothly and enjoy the process. You can make simple swaps if you need to. Here are some ideas: - Potatoes: You can use Yukon gold potatoes for a creamier texture. - Butter: Substitute with olive oil for a lighter option. - Sour Cream: Greek yogurt works well as a tangy alternative. - Cheese: Feel free to use any cheese you love, like Monterey Jack or gouda. - Breadcrumbs: Crushed crackers or panko can give a nice crunch. These substitutions allow you to customize the casserole to your taste. Enjoy experimenting! Start by peeling and cubing four large russet potatoes. Place the cubed potatoes in a big pot. Fill the pot with salted water until the potatoes are covered. Bring the water to a boil. Cook the potatoes for about 15 to 20 minutes. They should be fork-tender when done. This means a fork can easily pierce through them. Once cooked, drain the potatoes and return them to the pot. This helps keep all the heat in. Add 1/2 cup of unsalted butter to the hot potatoes. Next, pour in 1 cup of sour cream and 1/2 cup of milk. Sprinkle in 1 teaspoon of garlic powder and 1 teaspoon of onion powder. Don’t forget to add salt and pepper to taste. Now, mash everything together until smooth and creamy. This is where the magic begins! Once you have the base ready, gently fold in 1 cup of shredded sharp cheddar cheese and 1/4 cup of chopped chives. Mix until the cheese is evenly spread throughout. Preheat your oven to 375°F (190°C). Grease a 9x13 inch casserole dish. Transfer the cheesy mashed potatoes into this dish. If you want a crunchy top, sprinkle 1/2 cup of breadcrumbs over the mashed potatoes. You can also add extra cheese on top for a cheesy finish. Bake the casserole in the oven for about 25 to 30 minutes. Look for a golden brown and bubbly top when it’s ready. After baking, let it cool for a few minutes before serving. You can garnish with extra chives for color and flavor. For the complete recipe, check the Full Recipe section. To get the best texture for your cheesy mashed potato casserole, start with the right potatoes. I recommend using russet potatoes. They are fluffy and create a light mash. When you boil the potatoes, make sure they are fork-tender. This takes about 15-20 minutes. After draining, return them to the pot. This helps release steam, keeping your mash light. Seasoning is key to great flavor. I suggest using garlic powder and onion powder. These add a nice depth to the dish. Always taste as you go. Add salt and pepper to enhance the flavors. Don’t forget the chives! They give a fresh touch and a pop of color. For a creamier casserole, use both sour cream and milk. This combination works wonders. You can also add more butter for richness. If you want even more creaminess, consider mixing in extra cheese like mozzarella. This will create a gooey, delicious topping. For the ultimate comfort food, layer the cheese on top before baking. For the full recipe, check the details above! {{image_2}} Bacon adds a tasty crunch to your casserole. You can use cooked bacon bits or crispy lardons. Each bite becomes savory and smoky. To add bacon, cook it in a pan until crispy. Drain the fat and chop the bacon into small pieces. Mix the bacon into the cheesy mashed potatoes before baking. You can also sprinkle some on top for extra flair. This simple addition makes a big difference in flavor. Cheddar is great, but you can try other cheeses too. For a creamier texture, use cream cheese. It makes the casserole rich and smooth. You can also mix in mozzarella for a gooey stretch. Parmesan adds a sharp bite, while pepper jack gives a spicy kick. Feel free to blend different cheeses for unique flavors. The cheese you choose can change the whole dish. So, be bold and experiment! If you want to keep it vegetarian, there are many options. Adding spinach or kale boosts nutrition and flavor. Sauté them in olive oil before mixing them in. Mushrooms also add a wonderful earthy taste. Just chop them up and cook until soft. You can even throw in some roasted garlic for extra depth. These additions keep the dish exciting while making it filling. It’s all about finding the balance of flavors and textures. For the full recipe, click [here](#). After you enjoy your cheesy mashed potato casserole, store it properly. Let it cool down first. Then, place the leftovers in an airtight container. This helps keep it fresh longer. You can store it in the fridge for up to four days. Make sure to label the container with the date. When you are ready to enjoy the leftovers, reheating is simple. You can use the oven or microwave. If using the oven, preheat it to 350°F (175°C). Place the casserole in an oven-safe dish. Cover it with foil to keep moisture in. Heat for about 20-25 minutes. If using the microwave, place a portion on a microwave-safe plate. Heat for 1-2 minutes, or until warm. Stir halfway through for even heating. If you want to save the casserole for later, freezing works great. First, let it cool completely. Then, put it in a freezer-safe container. You can also wrap it tightly in foil or plastic wrap. This helps prevent freezer burn. It can last up to three months in the freezer. When you are ready to eat it, thaw it in the fridge overnight. Reheat it using the instructions above to bring back its creamy goodness. For the full recipe, check the section above. You can prepare Cheesy Mashed Potato Casserole a day in advance. Just follow these steps. First, boil and mash the potatoes as usual. Then, mix in the other ingredients, like cheese and butter. Instead of baking, cover the dish with plastic wrap and place it in the fridge. When you're ready to serve, remove the wrap and bake it. This will save you time on busy days. Yes, you can use other types of potatoes. While russet potatoes give a creamy texture, you can try Yukon Gold or red potatoes. Yukon Golds add a buttery flavor, while red potatoes keep more texture. Just peel and cube them like russets. The cooking times may vary slightly, but you want them fork-tender for mashing. Cheesy Mashed Potato Casserole pairs well with many dishes. Here are some great options: - Roasted Chicken: The rich flavors complement each other nicely. - Grilled Steak: A hearty meal that satisfies. - Steamed Vegetables: Broccoli or green beans add color and nutrition. - Salad: A fresh salad can balance the creaminess of the casserole. For more ideas, check the full recipe. In this blog post, we covered how to make a delicious Cheesy Mashed Potato Casserole. You learned the key ingredients and tools, plus tips for the best texture and flavor. I shared variations for adding bacon or veggies and provided storage tips for leftovers. Cooking should be fun and tasty. Experiment with your favorite ingredients to make this dish your own! Enjoy every bite of your creation.

Cheesy Mashed Potato Casserole Comforting and Creamy

If you’re craving a dish that’s warm, creamy, and downright comforting, you’ll love my Cheesy Mashed Potato Casserole! This recipe

To make a delicious Margherita pizza, you need a few key items. These ingredients create the classic flavor everyone loves. Here’s what you need: - 2 cups all-purpose flour - 1 teaspoon active dry yeast - 1 teaspoon sugar - 1 teaspoon salt - ¾ cup warm water - 1 tablespoon olive oil (plus extra for brushing) - 1 cup crushed San Marzano tomatoes (or any quality canned tomatoes) - 1 cup fresh mozzarella cheese, diced - ½ cup fresh basil leaves - Salt and pepper to taste These ingredients work together to give your pizza a crisp crust and rich topping. While the essential items are great, you can add more for a unique taste. Consider these options: - Fresh garlic, minced - Red pepper flakes for heat - Extra virgin olive oil for drizzling - Balsamic glaze for sweetness These extras let you customize your pizza to fit your taste. The best pizza starts with quality ingredients. Here are some tips: - Flour: Choose high-protein flour for a chewy crust. - Tomatoes: Use San Marzano tomatoes for rich flavor. - Cheese: Fresh mozzarella gives the best melt and taste. - Herbs: Look for vibrant, fresh basil to enhance the dish. Investing in good ingredients elevates your pizza from good to great. Explore the Full Recipe for more details! To start, you need to wake up the yeast. In a small bowl, mix warm water, sugar, and yeast. Stir gently and let it sit for about 5-10 minutes. You want it to get frothy. This means your yeast is alive and ready to help your dough rise. In a large bowl, combine 2 cups of all-purpose flour and 1 teaspoon of salt. Make a well in the center. Pour in the frothy yeast mixture and 1 tablespoon of olive oil. Mix until the dough starts to form. Then, transfer it to a floured surface. Knead the dough for about 5-7 minutes until it feels smooth and elastic. Place the dough in a lightly oiled bowl. Cover it with a damp kitchen towel. Let it rise in a warm spot for about 1 hour, or until it doubles in size. While the dough rises, prepare the toppings. Grab 1 cup of crushed San Marzano tomatoes. You can use any quality canned tomatoes if needed. Add a pinch of salt and pepper to taste. Set this aside. Then, dice 1 cup of fresh mozzarella cheese. When the dough has risen, you can roll it out. It should be about 12 inches in diameter. Transfer the rolled dough onto a piece of parchment paper. Spread the crushed tomatoes over the base, leaving a small border. Scatter the diced mozzarella evenly over the sauce and drizzle with a bit of olive oil. Preheat your oven to its highest setting, about 475°F (245°C). Place a pizza stone or baking sheet inside to heat up. Once the oven is ready and your dough is topped, carefully transfer the pizza (with the parchment paper) onto the hot stone or baking sheet. Bake for 10-12 minutes. Look for a golden brown crust and bubbling cheese. When it’s done, remove it from the oven. Immediately top with fresh basil leaves. Let it cool for a minute before slicing. For more details, check the Full Recipe. Enjoy your delicious homemade Margherita pizza! To make great pizza dough, start with the right flour. Use all-purpose flour for a chewy crust. Mix warm water, sugar, and yeast. Let it sit until frothy; this wakes up the yeast. Combine the flour and salt in a bowl. Make a well in the center, then add the yeast mix and olive oil. Knead it for about 5-7 minutes. Your dough should feel smooth and elastic. Let it rise in a warm spot for an hour. This helps create a light, airy crust. To get that classic Margherita taste, use San Marzano tomatoes. They have a sweet flavor that shines through. Crush the tomatoes by hand for a rustic texture. Season the sauce with salt and pepper. Use fresh mozzarella for a creamy melt. Dicing it helps it spread evenly. Don’t forget fresh basil; add it right after baking. This gives a fragrant touch that makes your pizza pop. Preheat your oven to its highest setting. A hot oven is key for a crispy crust. If you have a pizza stone, place it inside while preheating. It helps to cook the bottom evenly. When baking, use parchment paper to transfer your pizza. This makes it easier to handle. Bake for 10-12 minutes until the crust is golden. Keep an eye on it, as ovens can vary. Enjoy the smell of fresh pizza filling your kitchen! {{image_2}} You can make your Margherita pizza special by adding unique toppings. Try thin slices of prosciutto or spicy pepperoni for a savory kick. You can also add arugula for a peppery taste. If you want a burst of flavor, add some sun-dried tomatoes or olives. Each choice can change the whole pizza experience! If you need a gluten-free option, you can use almond flour or gluten-free all-purpose flour. Mix this with a binding agent, like xanthan gum, to help hold the dough together. Be sure to follow the instructions on the package for the best results. This way, you can enjoy pizza without gluten! While mozzarella is classic, you can try other cheeses too. Burrata adds creaminess, while goat cheese gives a tangy taste. For a sharper flavor, use aged provolone or even feta. Mix and match to find your favorite cheese combination. Each cheese will give your pizza a new taste! For the full recipe, check out the detailed steps provided earlier. To store your leftover pizza, let it cool down first. Place it in an airtight container. You can also wrap it in plastic wrap or foil. Store it in the fridge for up to three days. If you have more pizza, consider freezing it for later. When reheating pizza, the oven works best. Preheat your oven to 375°F (190°C). Place the pizza on a baking sheet. Heat for about 10-15 minutes. This keeps the crust crispy and the cheese melty. You can also use a skillet. Heat on medium for about 5-7 minutes. Cover it with a lid to help warm it evenly. To freeze homemade pizza, let it cool completely. Wrap each piece tightly in plastic wrap. Then, place them in a freezer bag or container. You can freeze pizza for up to two months. When you're ready to eat, thaw it in the fridge overnight. Reheat it as mentioned above for the best taste. For the full recipe, check out the earlier sections. Making Homemade Margherita Pizza takes about 1 hour 20 minutes total. This includes 20 minutes of prep time and 1 hour for the dough to rise. You will enjoy fresh pizza in no time! Yes, you can use store-bought dough. It saves time and is very convenient. Just roll it out and follow the rest of the steps in the Full Recipe. Your pizza will still taste great! Fresh mozzarella cheese is best for Margherita Pizza. It melts nicely and brings a creamy texture. Look for high-quality cheese for the best flavor. You can also try burrata for a fun twist. A pizza stone is not strictly necessary, but it helps. It keeps the heat even and gives your crust a nice crunch. If you don’t have one, a baking sheet works too. Just preheat it well before baking. To prevent a soggy crust, use less sauce. Make sure to spread it evenly. Drain any excess liquid from tomatoes. Pre-baking the crust for a few minutes also helps firm it up before adding toppings. Making homemade Margherita pizza is simple and fun. You learned key ingredients and step-by-step instructions. I shared tips for great dough and baking methods. Plus, unique variations can make your pizza special. Storing leftovers and reheating them correctly keeps the taste alive. By following these guidelines, you can create delicious pizza at home. Embrace your creativity and enjoy the process!

Homemade Margherita Pizza Easy and Flavorful Recipe

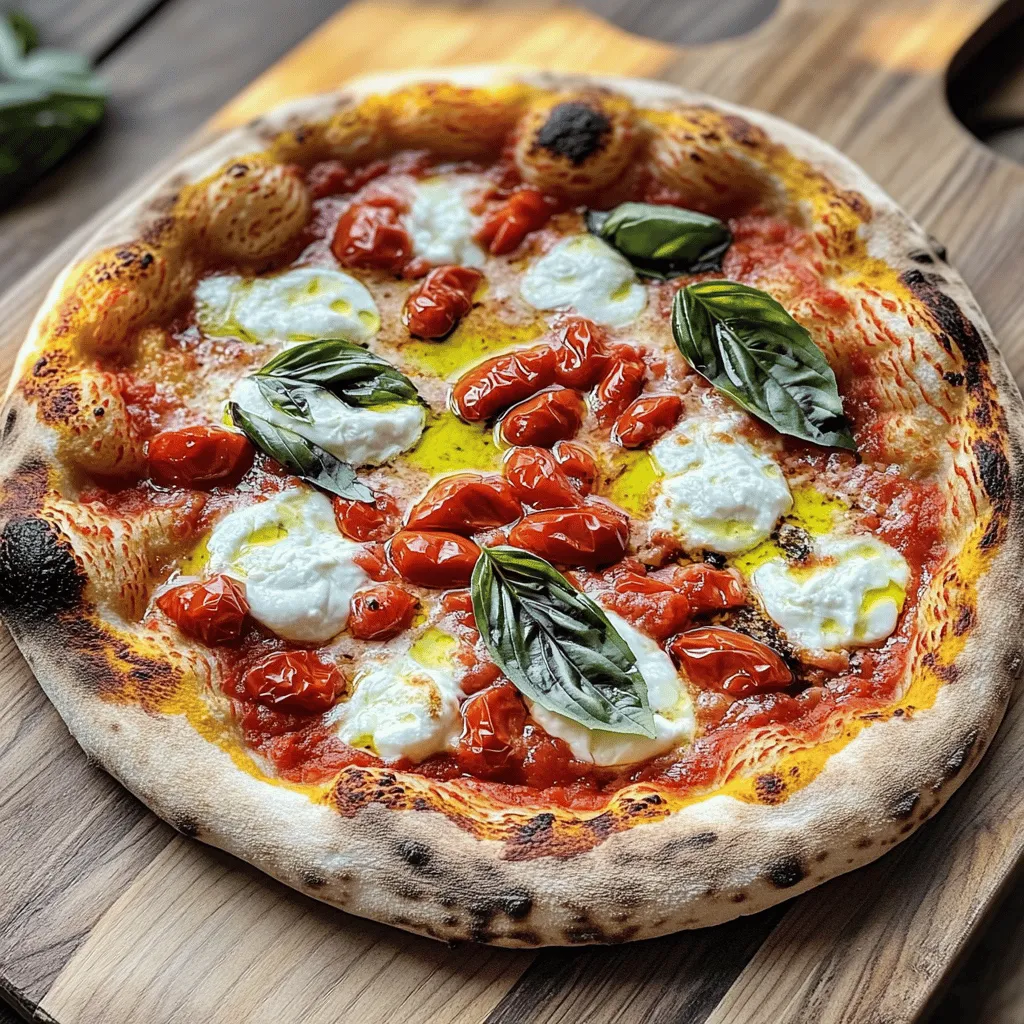
Do you dream of making your own Margherita pizza at home? You’re in the right place! This easy and flavorful

To make my Sheet Pan Sausage and Veggies, you need fresh and simple ingredients. Here’s the list: - 1 pound smoked chicken sausage, sliced - 1 bell pepper (red or yellow), chopped - 1 zucchini, sliced - 1 yellow squash, sliced - 1 red onion, cut into wedges - 2 cups cherry tomatoes, halved - 3 tablespoons olive oil - 2 teaspoons smoked paprika - 1 teaspoon garlic powder - 1 teaspoon dried oregano - Salt and pepper to taste - Fresh parsley, chopped (for garnish) Each ingredient adds flavor and color. The smoked chicken sausage gives a hearty base. Bell pepper and onions bring sweetness. Zucchini and yellow squash add a nice crunch. Cherry tomatoes burst with juice when roasted. Olive oil helps everything cook evenly. Spices like smoked paprika and garlic powder elevate the taste. You can find the full recipe in the main article for a complete guide on making this dish. Enjoy the vibrant mix of flavors! - Preheat your oven to 425°F (220°C). - Line a large baking sheet with parchment paper. This helps with easy cleanup. - In a large bowl, combine the sliced chicken sausage, chopped bell pepper, sliced zucchini, sliced yellow squash, red onion wedges, and halved cherry tomatoes. - Toss the sausage and veggies together. Coat them well with olive oil and spices. - Spread this mixture evenly on the baking sheet. Make sure they lie in a single layer for the best cooking. - Roast in the oven for 20-25 minutes. Stir halfway through to ensure even cooking. - Once done, remove the pan from the oven. Let the dish cool slightly before serving. - Garnish with fresh parsley to add a pop of color and flavor. Enjoy this hearty one-pan meal! For more detailed steps, check the Full Recipe for Sheet Pan Sausage and Veggies. To ensure even cooking, spread the sausage and veggies in a single layer on the baking sheet. If they sit on top of each other, some will cook faster than others. Adjust the roasting time based on the size of the veggies. Smaller pieces cook quicker. For example, cut your zucchini into thicker slices if you want them to match the cooking time of the sausage. Balsamic glaze adds a sweet and tangy flavor to the dish. Drizzle it over the sausage and veggies right before serving for a burst of taste. You can also switch up the sausage type. Try sweet Italian, spicy chorizo, or turkey sausage. Each option brings its own unique flavor to the meal. For a beautiful presentation, serve the dish directly from the sheet pan. You can also transfer it to a colorful platter. Pair your meal with a fresh salad or crusty bread. These sides balance the hearty sausage and veggies perfectly. {{image_2}} You can swap out the veggies in this dish. Try using broccoli, asparagus, or carrots. These choices add different colors and flavors. Seasonal veggies also work well. In the fall, use Brussels sprouts or sweet potatoes. In the summer, zucchini or corn shine bright. Each veggie brings its own taste, making your meal unique. Change up the protein for fun! If you prefer turkey sausage, it works great here. Vegan sausage is another tasty choice. You can also add chicken or shrimp for a twist. Chicken thighs roast nicely and stay juicy. Shrimp cooks fast and adds a seafood flair. Experiment with what you like best! Want a quicker option? Try air frying. It cooks faster and still gives great flavor. Set your air fryer to 400°F (200°C) and check after 15 minutes. For an outdoor vibe, grill your meal. Just toss everything in a grill basket. Cooking on the grill adds a smoky flavor, perfect for summer nights. To store leftovers, let your dish cool first. Place it in an airtight container. This keeps the dish fresh. You can store it in the fridge for up to four days. After that, the taste may change. You can freeze this meal for later use. Make sure it is completely cool before freezing. Use a freezer-safe container or bag. Label the container with the date. When ready to eat, thaw in the fridge overnight. Reheat in the oven or microwave until hot. Airtight containers work best for storage. Glass or BPA-free plastic containers are great choices. Always label and date your containers. This helps you keep track of how long food has been stored. Proper food safety keeps your meals tasty and safe. For the full recipe, check out the instructions above! How long does it take to make Sheet Pan Sausage and Veggies? It takes about 35 minutes to make this dish. You will spend 10 minutes prepping. Roasting takes another 20 to 25 minutes. Can I omit certain vegetables from the recipe? Yes, you can leave out any vegetable you do not like. This dish is flexible. You can use any favorite veggie instead. What can I serve with Sheet Pan Sausage and Veggies? You can serve this meal with rice or a side salad. A crusty bread pairs well too. Can I use raw sausage instead of smoked? You can use raw sausage, but you must cook it longer. Make sure it reaches a safe temperature of 165°F (74°C). What are the best substitutes for olive oil? You can use vegetable oil or avocado oil. Both will work well in this recipe. Is this recipe gluten-free? Yes, this recipe is gluten-free. Just check the sausage label to ensure it contains no gluten. How to make it dairy-free or vegan? To make it dairy-free, just skip any dairy-based toppings. For a vegan version, use plant-based sausage. This blog post shared a simple sheet pan recipe featuring smoked sausage and fresh veggies. You learned about the key ingredients, preparation steps, and baking tips. Remember to use seasonal veggies and adapt the recipe to your taste. With these easy instructions and options, you can make a delicious meal for any day. Enjoy experimenting and happy cooking!

Sheet Pan Sausage and Veggies Flavorful One-Pan Meal

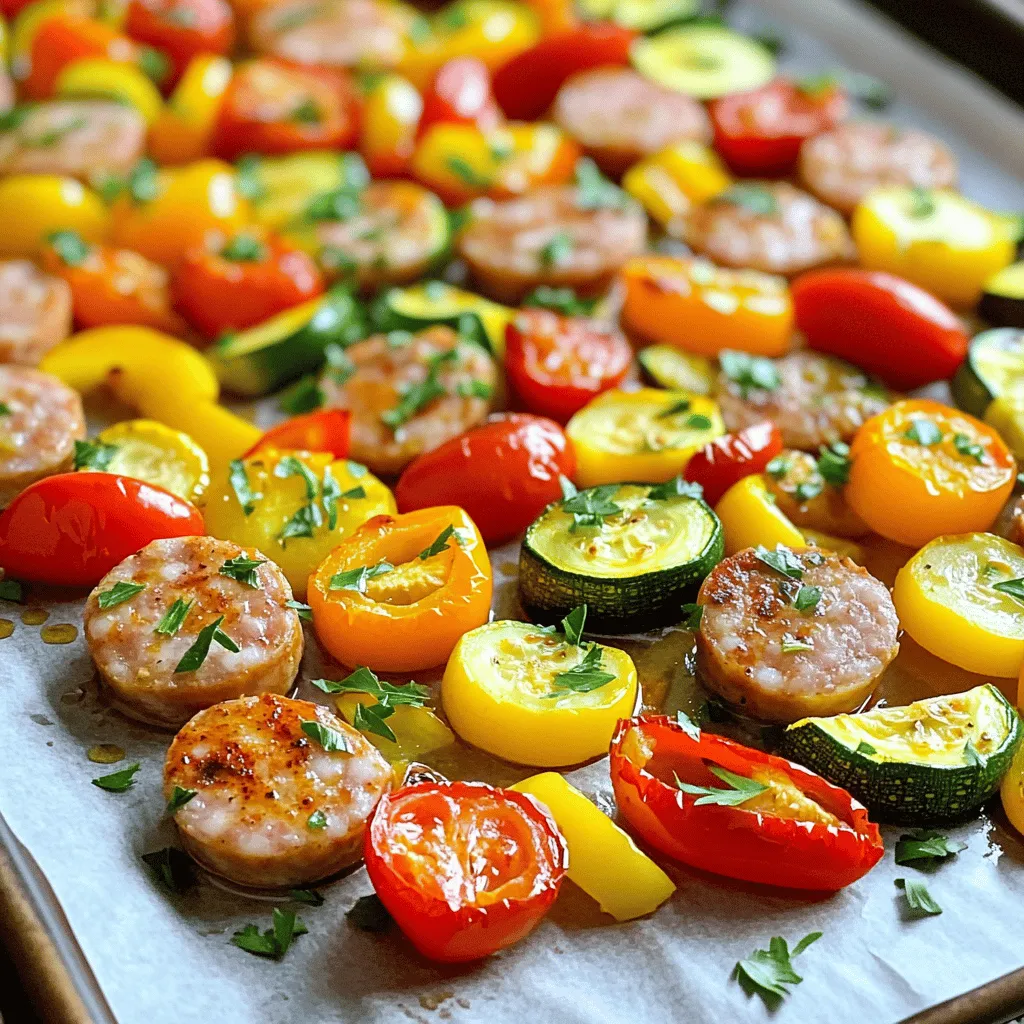
Looking for a quick and tasty meal? Try my Sheet Pan Sausage and Veggies! This dish combines savory sausage with

To make a delicious Chocolate Peanut Butter Mug Cake, you will need: - 4 tablespoons all-purpose flour - 2 tablespoons unsweetened cocoa powder - 3 tablespoons peanut butter (creamy or chunky) - 3 tablespoons granulated sugar - 1/8 teaspoon baking powder - 1/4 teaspoon vanilla extract - 1/4 cup milk (dairy or non-dairy) - 1 tablespoon vegetable oil - A pinch of salt - Optional toppings: Chocolate chips or chopped peanuts Each ingredient plays a key role in your mug cake. The flour gives it structure, while cocoa powder adds rich chocolate flavor. Peanut butter brings creaminess and a nutty taste. Sugar adds sweetness, and baking powder helps the cake rise. Vanilla extract gives a lovely aroma. Milk keeps everything moist, and vegetable oil adds tenderness. The salt balances the flavors perfectly. You can top your cake with extra chocolate chips or peanuts for a fun crunch. I recommend using high-quality peanut butter for the best taste. You can choose creamy or chunky based on your preference. If you want to try different flavors, feel free to experiment with different nut butters. Check out the Full Recipe for detailed steps to create this treat! - Mixing dry ingredients Start by taking a microwave-safe mug. Add 4 tablespoons of all-purpose flour, 2 tablespoons of unsweetened cocoa powder, 3 tablespoons of granulated sugar, 1/8 teaspoon of baking powder, and a pinch of salt. Stir these dry ingredients well until they are fully mixed. This ensures your cake will rise and taste great. - Adding wet ingredients Next, pour in 1/4 cup of milk, 1 tablespoon of vegetable oil, and 1/4 teaspoon of vanilla extract. Mix everything together until it becomes smooth. You want to get rid of any lumps for a nice cake texture. - Incorporating peanut butter Now, add 3 tablespoons of peanut butter to the mug. You can use creamy or chunky peanut butter, depending on your taste. Stir until the peanut butter is well mixed in. This is where the rich flavor comes from. - Microwave timing and power variations Place your mug in the microwave. Cook it on high for about 1 minute and 30 seconds. Every microwave is different, so your time may need to change. Keep an eye on it. - Checking for doneness After the time is up, check if the cake is set in the middle. It should look puffed up and firm. If it’s still wet, microwave it for an extra 10 seconds. - Cooling down before serving Let the mug cake cool for about a minute before you dig in. This helps prevent burns and makes it easier to eat. - Optional toppings and enhancements You can top your cake with extra chocolate chips, a drizzle of peanut butter, or even a scoop of vanilla ice cream. These extras really make the cake special. For the full recipe, check the earlier section. Enjoy your delicious treat! To make the best mug cake, avoid common mistakes. Use a microwave-safe mug. If your mug is too small, the cake may overflow. Always mix dry ingredients first. This helps avoid lumps. When adding wet ingredients, mix well. Ensure everything is smooth before microwaving. For the perfect texture, don’t overcook. Check the cake at 1 minute and 30 seconds. Every microwave is different. You may need to test and adjust cooking time. Start with the recommended time. If your cake isn’t set, add 10-15 seconds. If it overflows, stop the microwave quickly. Clean the mess and try again. Adjust the time next time. You can add different toppings to boost flavor. Try chocolate chips or chopped peanuts on top. For extra fun, add a scoop of ice cream. You can also mix in flavors. A spoonful of Nutella or crushed cookies works well. These simple changes can make your mug cake even better. {{image_2}} For a gluten-free mug cake, swap all-purpose flour with almond or coconut flour. Both options work well and give a nice flavor. If you want to go vegan, use a plant-based milk like almond or oat milk. You can also replace the egg with a flaxseed meal or chia seeds mixed with water. This keeps the cake moist and tasty without any eggs. You can easily change the flavor of your mug cake. Adding spices like cinnamon or nutmeg gives it a warm taste. A splash of almond or peppermint extract can also make a fun twist. Want something fruity? Mix in some mashed banana or berries. They add a burst of flavor and moisture to your cake. Feeling adventurous? Try swapping peanut butter for other nut butters like almond or cashew. Each nut butter brings its own unique taste. If you love coffee, add a teaspoon of instant coffee for a rich flavor. You can also drizzle caramel on top for a sweet finish. These twists will make your mug cake even more special. For the full recipe, check out the section above. If you have some mug cake left, store it in an airtight container. This keeps it moist and fresh. Place it in the fridge if you want to save it for later. The cool air helps maintain its taste and texture. It’s best to eat it within two days for the best flavor. When you want to enjoy your mug cake again, the microwave is your best friend. Heat it for about 10 to 15 seconds. Check to see if it's warm enough. If it needs more time, add a few more seconds. You can also try using the oven. Preheat it to 350°F (175°C). Place the mug cake on a baking sheet and warm it for about 5 minutes. This method helps keep the cake soft and fluffy. For more delicious ideas, check out the Full Recipe for making this easy treat! To make a chocolate peanut butter mug cake, you start with simple ingredients. First, mix flour, cocoa powder, sugar, baking powder, and salt in a microwave-safe mug. Then, add peanut butter, milk, vegetable oil, and vanilla extract. Stir until smooth, and make sure there are no lumps. If you want, you can add chocolate chips for extra flavor. Microwave the mug for about 1 minute and 30 seconds. Check to see if the cake is set. Let it cool for a minute, and enjoy your quick treat! Check the [Full Recipe] for more details. Yes, you can double the recipe! If you want to make two cakes, simply use two mugs and double the ingredients. For example, use 8 tablespoons of flour and so on for each ingredient. Keep the same cooking time, but check both cakes after 1 minute and 30 seconds. If they need more time, give them 10 to 20 extra seconds. Just be sure to check for doneness before serving. If you have a nut allergy, there are great substitutes for peanut butter. You can use sunflower seed butter or soy nut butter instead. Both options provide a similar creamy texture. For different flavors, try almond butter or cashew butter. These will change the taste but still keep it delicious. You can also use chocolate hazelnut spread for a sweet twist! In this blog post, we explored how to make a delicious chocolate peanut butter mug cake. We covered ingredients, preparation steps, and tips to ensure success. You learned how to adjust for different microwaves and enhance flavors. With variations for dietary needs and creative twists, this dessert is versatile and easy. Whether you enjoy it for a snack or a treat, mug cakes are quick and fun. Keep these tips in mind, and enjoy making your own mug cake masterpiece!

Chocolate Peanut Butter Mug Cake Simple and Quick Treat

Craving something sweet but short on time? Let me introduce you to your new favorite dessert: the Chocolate Peanut Butter

- 1 lb ground beef - 1 small onion, finely chopped - 2 cloves garlic, minced - 1 can (15 oz) black beans, drained and rinsed - 1 can (10 oz) enchilada sauce (red or green) - 8 small flour tortillas - 2 cups shredded cheese (cheddar and Monterey Jack blend) - 1 teaspoon cumin - 1 teaspoon chili powder - Salt and pepper to taste - Fresh cilantro, for garnish (optional) - Sour cream, for serving (optional) When I make beef enchiladas, I start with these main ingredients. The ground beef is the star. I like to use lean beef, as it keeps the dish light. Next, I chop a small onion and mince garlic. The onion adds sweetness. The garlic gives great flavor. I always include black beans. They add protein and fiber. Don't forget the enchilada sauce. You can choose red or green. Either works great. The tortillas need to be small. They hold the filling well. The cheese blend is key. Cheddar and Monterey Jack melt nicely together. For seasoning, I use cumin and chili powder. They give the enchiladas warmth. Salt and pepper balance the flavors. You can add more if you like. Finally, I love to garnish my enchiladas. Fresh cilantro adds a pop of color. Sour cream is a tasty addition too. It cools down the spice. You can find the full recipe for the beef enchiladas above. Enjoy cooking! 1. Start by cooking the ground beef in a large skillet. It takes about 5-7 minutes for it to brown. This step is key for flavor. 2. Next, add the finely chopped onion and minced garlic. Cook them for 3-4 minutes until the onion turns translucent. This adds a sweet touch. 3. Now, stir in the black beans, cumin, and chili powder. Cook this mixture briefly for about 2 minutes. This step brings all the flavors together. 1. Preheat your oven to 375°F (190°C) while you prepare the dish. This ensures your enchiladas cook evenly. 2. Spread half a cup of enchilada sauce on the bottom of a 9x13 inch baking dish. This keeps the tortillas from sticking. 3. Take a flour tortilla and place about 1/3 cup of the beef mixture in its center. Sprinkle a bit of cheese on top. Roll the tortilla tightly and place it seam-side down in the dish. Repeat this step until all tortillas are in the dish. 1. Pour the remaining enchilada sauce over the rolled tortillas. Make sure to cover them well. 2. Top with the leftover cheese. This will create a nice, bubbly topping. 3. Cover the baking dish with aluminum foil. Bake it for 20 minutes. After that, remove the foil and bake for another 10 minutes. This creates a golden, melted cheese crust. For the full recipe, check out the details above. Enjoy your easy beef enchiladas! When making easy beef enchiladas, cheese plays a big role. I suggest a blend of sharp cheddar and Monterey Jack. This mix melts well and adds a rich flavor. You can also try pepper jack for a spicy kick. To prevent your tortillas from tearing, warm them before use. Heat them in a skillet for a few seconds on each side. This makes them soft and easy to roll. You can also wrap them in a damp cloth and microwave for 30 seconds. To elevate the taste of your enchiladas, consider adding spices like smoked paprika or oregano. These spices add depth to the dish. A pinch of cayenne can bring some heat if you like it spicy. For enchilada sauce, I recommend brands like Old El Paso or Verde. They offer great flavor and save time. Just pour it straight from the can and enjoy! One common mistake is overfilling the tortillas. Too much filling can make them burst during baking. Stick to about one-third cup of filling per tortilla. Another mistake is not covering the dish while it bakes. Covering enchiladas with foil helps them cook evenly. It also keeps them moist. After 20 minutes, you can remove the foil to let the cheese brown. {{image_2}} You can make your beef enchiladas even more exciting by swapping out ingredients. Try using chicken instead of beef. Shredded chicken works well and gives a lighter taste. If you want a meat-free option, use beans. Black beans or pinto beans add great texture and protein. Another swap is the tortillas. While flour tortillas are tasty, corn tortillas can add a nice crunch. They also work well for gluten-free diets. Just remember to warm them before filling. This helps them roll without breaking. Want to kick up the flavor? Add jalapenos for some heat. Slice them thin and mix them into your beef filling. If you prefer a milder taste, leave them out. You can also add veggies to your enchiladas. Chopped bell peppers, onions, or spinach are great choices. They not only boost the flavor but also add nutrients. Plus, they make your meal colorful and fun. If you're looking for gluten-free options, corn tortillas are your best friend. Just check the package to ensure they are certified gluten-free. For those who prefer vegetarian meals, you can make a vegetarian version of beef enchiladas. Use beans, cheese, and veggies as the filling. This version still tastes great and satisfies all the cheesy cravings. For the full recipe, check out the Cheesy Beef Enchiladas Fiesta. To store leftover enchiladas, place them in an airtight container. Make sure they cool down first. This method helps keep them fresh. You can enjoy cooked enchiladas in the fridge for up to three days. To freeze beef enchiladas, wrap each one tightly in plastic wrap. After wrapping, place them in a freezer-safe bag. Remove as much air as possible before sealing. You can keep them frozen for about three months without losing flavor. For best results when reheating, let them thaw in the fridge overnight. This helps maintain their taste and texture. You have two great options for reheating: the oven or the microwave. - Oven Method: Preheat your oven to 350°F (175°C). Place the enchiladas in a baking dish. Cover with foil to prevent drying. Heat for about 20 minutes or until hot. - Microwave Method: Place enchiladas on a microwave-safe plate. Cover with a damp paper towel to keep moisture. Heat in 1-minute intervals until warm. To restore texture, let them sit for a few minutes after reheating. This step helps the flavors settle back in. The best sauce for enchiladas often depends on your taste. Red enchilada sauce has a rich, bold flavor. It comes from dried red chilies, tomatoes, and spices. Green enchilada sauce, made from tomatillos, is milder and tangy. Both sauces work well. If you want a smoky taste, try red sauce. For a fresher taste, go for green sauce. You can even mix both for a unique blend. Yes, you can prepare enchiladas in advance. To do this, follow these steps: Make the filling and assemble the enchiladas. Place them in a baking dish and cover it. You can store the dish in the fridge for up to 24 hours. When ready to cook, add sauce and cheese, then bake. This method saves time on busy nights. To complete your meal, pair enchiladas with tasty side dishes. Here are some ideas: - Mexican rice - Refried beans - Guacamole - Chips and salsa - A fresh salad or corn salad These sides add color and flavor to your plate, making for a satisfying meal. You can substitute beef with various proteins or plant-based options. Consider these choices: - Ground chicken or turkey for a leaner meat. - Black beans or lentils for a vegetarian option. - Shredded chicken for a different texture. - Tofu for a plant-based protein. These options still create tasty enchiladas. To add heat to your enchiladas, try these tips: - Use spicy enchilada sauce or add chili powder. - Chop fresh jalapeños and mix them into the filling. - Add crushed red pepper flakes to the sauce. - Serve with hot salsa on the side. These ideas will help you achieve your desired spice level. For the full recipe, see the Cooking section above. To wrap up, making delicious enchiladas is simple! You learned about the main ingredients and their roles. I shared easy step-by-step instructions to guide you. Remember to use the tips for perfecting your dish and avoid common mistakes. You can explore variations to fit any diet or taste. Lastly, I provided storage and reheating advice to keep your leftovers tasty. Enjoy creating and sharing these delightful enchiladas!

Easy Beef Enchiladas Simple and Flavorful Meal

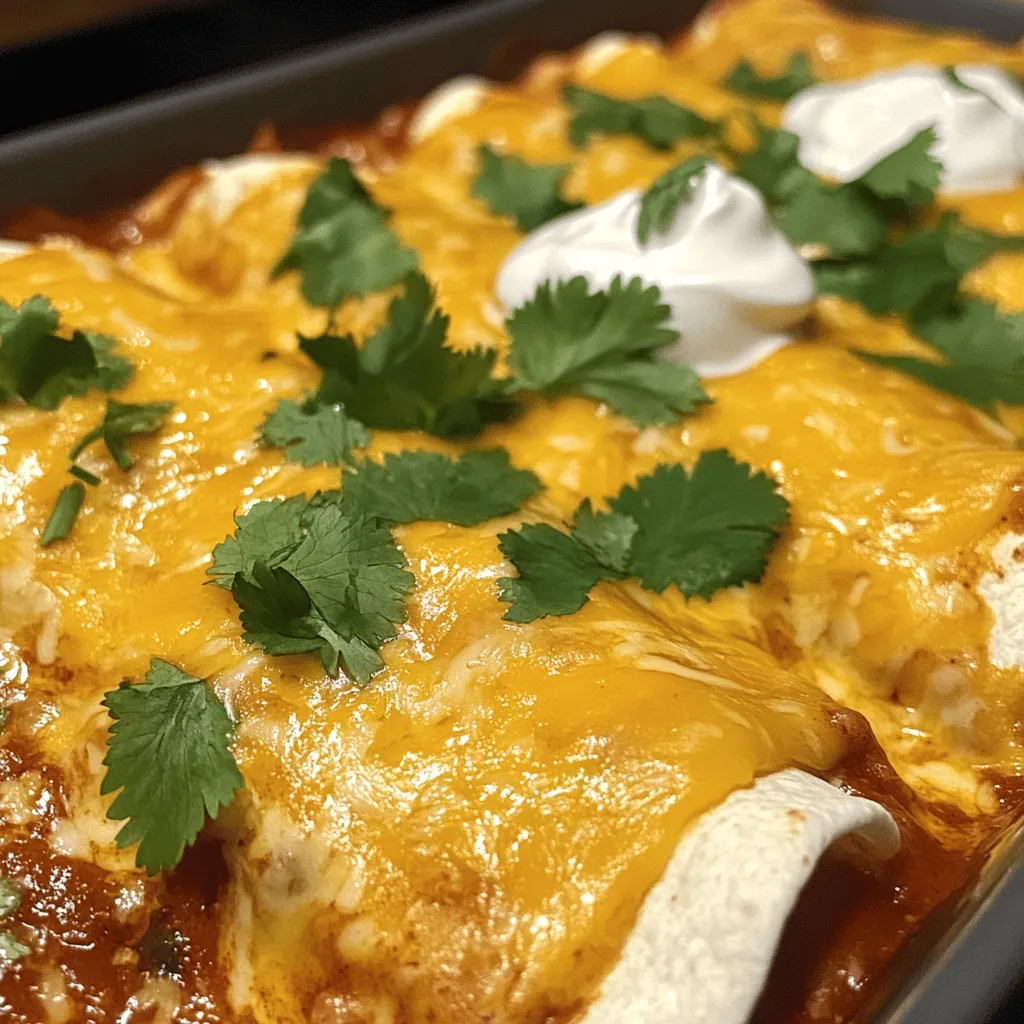
If you crave a simple, tasty meal, these easy beef enchiladas are perfect. With just a few ingredients, you can

- 4 large bell peppers (any color) - 1 lb ribeye steak, thinly sliced - 1 onion, sliced - 1 green bell pepper, sliced - 1 cup mushrooms, sliced - 2 cloves garlic, minced - 1 teaspoon olive oil - 1 teaspoon Worcestershire sauce - Salt and pepper to taste - 1 cup provolone cheese, shredded - 2 tablespoons fresh parsley, chopped (for garnish) Gathering the right ingredients makes a big difference in flavor. I love using large bell peppers because they hold a lot of filling. Ribeye steak adds rich taste. Slice it thin for tender bites. Onions and green bell pepper bring sweetness and crunch. Mushrooms add earthiness, while garlic gives a nice kick. Worcestershire sauce is key. It adds umami, making the dish more flavorful. Don’t forget salt and pepper to enhance the taste. Provolone cheese melts beautifully over the stuffed peppers. Finally, fresh parsley adds a pop of color and freshness. For the full recipe, check the detailed instructions. Enjoy the process of cooking! - Preheat your oven to 375°F (190°C). - Slice the tops off the bell peppers and remove the seeds and membranes. Place them upright in a baking dish. - In a large skillet, heat the olive oil over medium-high heat. Add sliced onions, green bell pepper, and mushrooms. Sauté until softened, about 5 minutes. - Stir in minced garlic and sauté for an additional minute until fragrant. - Add thinly sliced ribeye steak to the skillet. Season with salt, pepper, and Worcestershire sauce. Cook until the steak is browned, about 5-7 minutes. - Remove the skillet from heat. Stir in half of the provolone cheese until melted. - Stuff each bell pepper with the cheesesteak mixture, pressing down lightly. - Top each pepper with the remaining provolone cheese. - Cover the baking dish with aluminum foil and bake for 25 minutes. Remove the foil and bake for an extra 10 minutes, until the cheese is bubbly and golden. - After baking, let the peppers cool for a few minutes before garnishing with fresh parsley. For the complete guide, check out the [Full Recipe]. To get the best steak, choose ribeye. It has great flavor and tenderness. Slice it thin so it cooks fast. Cook the steak until browned but not tough. Keep an eye on it. For stuffed peppers, pre-cook them a bit. This helps them stay firm while baking. Bake them for 25 minutes covered and 10 minutes uncovered. This gives a nice cheese crust on top. Garnish your stuffed peppers with parsley for color. It makes them look fresh and appealing. Serve them on a large platter to impress. For a full meal, pair them with sweet potato fries. The sweetness balances the savory flavors. You could also add a side salad with a light dressing for crunch. You can make these stuffed peppers ahead of time. Prepare everything up to the baking step and store them in the fridge. When ready to eat, just bake them. This saves time on busy nights. For a faster option, try using pre-cooked steak or ground meat. This cuts down cooking time and makes it easy to whip up. For the full recipe, check out the detailed instructions and enjoy your cooking adventure! {{image_2}} You can change the meat in this recipe. Use chicken or turkey instead of ribeye. For a vegetarian twist, try using tofu or tempeh. Cheese is another great area to swap. Instead of provolone, use cheddar or mozzarella for different tastes. Want more heat? Add jalapeños to the mix or drizzle some hot sauce on top. If you prefer mild flavors, skip the spicy stuff and keep it simple. This makes the dish family-friendly and enjoyable for everyone. For gluten-free options, ensure your sauces are gluten-free. You can also use cauliflower rice as a filling. If you are watching carbs, skip the peppers and use lettuce wraps instead. This makes a tasty, low-carb meal that stays true to the flavors you love. After making Philly cheesesteak stuffed peppers, you need to store them right. Place the leftovers in an airtight container. This keeps them fresh and tasty. You can store them in the fridge for up to three days. If you wait longer, they may lose flavor and texture. When reheating, you want to keep them moist. The best method is the oven. Preheat it to 350°F (175°C) and place the peppers in a baking dish. Cover with foil to trap steam. Heat for about 15-20 minutes. If you use a microwave, check them every minute. This prevents drying out. You can freeze stuffed peppers too! If you want to freeze, do it before baking. Wrap each pepper in plastic wrap and then in foil. They can last up to three months in the freezer. When ready to eat, thaw them overnight in the fridge. Then, bake as usual. If they are already baked, reheat directly from the freezer. Add extra time to ensure they heat through. Philly cheesesteak stuffed peppers are a fun twist on the classic sandwich. They use bell peppers as the base instead of bread. The filling includes thinly sliced ribeye steak, sautéed onions, green peppers, and mushrooms. You then mix in garlic and seasonings for flavor. Lastly, you top it all off with melted provolone cheese. This dish brings the taste of Philly right to your dinner table. You can use many types of peppers for stuffing. Bell peppers are the most common choice. They are sweet and hold their shape well. Other great options are poblano or Anaheim peppers. These add a slight kick while still being mild. Feel free to mix colors, too. Red, yellow, and green peppers add a nice visual touch. To check steak doneness, look for a nice brown color. The inside should be slightly pink but not raw. You can use a meat thermometer for best results. Aim for an internal temperature of 145°F. This ensures the steak is juicy and tender. If you cut into it and the juices run clear, it's done. Yes, you can prepare these stuffed peppers ahead of time. Make the filling and stuff the peppers. Then, cover them and store them in the fridge for up to a day. When you're ready to cook, just pop them in the oven. This saves time on busy nights. You can also freeze unbaked stuffed peppers for later use. Pair these stuffed peppers with crispy sweet potato fries for a classic combo. A simple side salad adds freshness and crunch. You can also serve them with a small bowl of marinara sauce for dipping. These options create a balanced meal that everyone will enjoy. You can find the full recipe for Philly cheesesteak stuffed peppers [here](Full Recipe). This detailed guide will help you create this tasty dish step by step. Philly Cheesesteak Stuffed Peppers blend rich flavors and easy steps. You learned about the key ingredients, from bell peppers to provolone cheese. I showed you how to prepare, cook, and assemble them for a perfect meal. Remember the tips for great presentation and quick cooking. Explore variations to suit your taste and needs. Store leftovers properly to enjoy later. Enjoy the process, and impress your family with this tasty dish. Now, it’s time to gather your ingredients and start cooking!

Philly Cheesesteak Stuffed Peppers Flavorful Dinner Option

Craving a tasty dinner that’s easy to make? You’ll love Philly Cheesesteak Stuffed Peppers! This dish combines juicy ribeye steak,

- 1 cup all-purpose flour - 1 tablespoon baking powder - 1/4 teaspoon salt - 1 tablespoon granulated sugar - 1 teaspoon ground cinnamon - 1 cup milk - 2 large eggs - 4 tablespoons unsalted butter, melted - 1 teaspoon vanilla extract - 1/2 cup granulated sugar for coating - 1 tablespoon ground cinnamon for coating - 2 tablespoons butter, melted for coating To make churro waffles, you need a few simple ingredients. The dry mix gives the base. All-purpose flour brings structure. Baking powder adds fluff. Salt enhances taste, while sugar and cinnamon add sweetness and warmth. Then, we have the wet ingredients. Milk makes it moist. Eggs provide richness, while melted butter adds flavor. Vanilla extract gives a nice touch. Finally, we coat our waffles in a sweet mix. Granulated sugar and cinnamon create that classic churro taste. Melted butter helps the coating stick. Check the full recipe for exact amounts and instructions. This sweet treat will delight everyone! - Preheat your waffle maker according to the manufacturer’s instructions. - In a large mixing bowl, whisk together the dry ingredients: - 1 cup all-purpose flour - 1 tablespoon baking powder - 1/4 teaspoon salt - 1 tablespoon granulated sugar - 1 teaspoon ground cinnamon This mix creates a sweet base for your churro waffles. - In a separate bowl, combine the wet ingredients: - 1 cup milk - 2 large eggs - 4 tablespoons unsalted butter, melted - 1 teaspoon vanilla extract - Blend the wet ingredients into the dry ingredients. Stir gently until just combined. It’s okay if a few lumps remain; this makes the waffles fluffy. - Lightly grease your waffle maker with non-stick spray or brush it with oil. - Pour a generous amount of batter into the waffle iron. Make sure not to overfill it. - Close the lid and cook according to the manufacturer’s instructions, usually about 3-5 minutes. After cooking, remove the waffles carefully. Brush both sides with melted butter right away. Dip each waffle into the cinnamon sugar mixture for the perfect churro flavor. To get the best churro waffles, avoid overmixing the batter. Mix gently until the dry and wet ingredients are just combined. A few lumps are okay. Overmixing makes the waffles tough. Cooking times matter too. Follow the recommended time in your waffle maker. Typically, it takes about 3-5 minutes to cook perfectly. You can boost the flavor of your churro waffles easily. Consider adding extra spices like nutmeg or allspice for a warm twist. A pinch of cayenne can add a fun heat. Also, think about adding extracts. A splash of almond or coconut extract can bring a new layer of flavor that pairs well with cinnamon. When serving churro waffles, think about how to make them look great. Stack them high on a plate to create a tower of sweetness. Drizzle chocolate sauce over the top or add a dollop of whipped cream for a special touch. You can also sprinkle extra cinnamon sugar on top for that classic churro look. Fresh fruit like strawberries or bananas can add color and freshness. {{image_2}} Churro waffles are fun and tasty! You can mix things up with different flavors and styles. Adding chocolate chips You can add chocolate chips to the batter. Just fold in about 1/2 cup before cooking. The chocolate melts and makes each bite even more special. Incorporating nuts Chopped nuts can add a nice crunch. Try using pecans or walnuts. About 1/4 cup works well. Just mix them in with the batter for a delicious twist. Gluten-free options If you need gluten-free churro waffles, swap out the all-purpose flour. Use a gluten-free flour blend instead. Make sure it has a good mix of starches to keep the texture right. Vegan alternatives To make these waffles vegan, replace the eggs with flax eggs. Mix 1 tablespoon of ground flaxseed with 2.5 tablespoons of water. Let it sit for a few minutes. You can also use almond or soy milk instead of regular milk. Holiday-themed churro waffles For special holidays, add festive spices. A pinch of nutmeg or ginger can make them perfect for fall. You might even top them with holiday-themed sprinkles! Breakfast vs. dessert styles Churro waffles can be a breakfast or dessert. For breakfast, serve with fresh fruit and yogurt. For dessert, drizzle with chocolate sauce or top with ice cream. Each version brings a new fun twist! Explore the Full Recipe for more tips and tricks! To keep churro waffles fresh, place them in an airtight container. Make sure they are completely cool before sealing. This helps prevent moisture buildup. You can store them in the fridge for up to three days. If you have more than you can eat, freeze them. Wrap each waffle in plastic wrap, then place them in a freezer bag. This method keeps them safe from freezer burn. When you want to enjoy your leftover churro waffles, you have two good options: the oven or the microwave. The oven is best for keeping that nice crispiness. Preheat your oven to 350°F (175°C). Place the waffles on a baking sheet and heat for about 10 minutes. They will be warm and crispy. If you choose the microwave, use it if you are in a hurry. Heat for about 20-30 seconds. But note, they may not be as crispy. Churro waffles last about three days in the fridge. In the freezer, they stay good for up to three months. Just remember to check for any signs of freezer burn before eating. These tips will help you enjoy your churro waffles even after they are made! For the complete recipe, check the Full Recipe section. Churro waffles have a rich flavor due to cinnamon and sugar. Regular waffles taste more plain. The texture of churro waffles is crispier on the outside and soft inside. Regular waffles are fluffy throughout. The sugar coating on churro waffles makes them sweet, while classic waffles often need syrup. This blend of flavors and textures makes churro waffles a special treat. Yes! You can use a skillet or griddle. Pour the batter into a lightly greased pan. Cook on medium heat until golden brown on both sides. This method gives you a different shape, but the flavor stays the same. You can also use a pancake maker for a fun twist. Just remember to adjust cooking times as needed. To make churro waffles crispier, try a few tips. First, use less milk in the batter. This helps to reduce moisture. Second, add a bit of cornstarch to the flour for extra crunch. Finally, let the cooked waffles cool on a wire rack instead of stacking them. This keeps steam from making them soggy. Enjoy your crispy churro waffles! Churro waffles blend sweet flavors with a fun texture. We covered all the key ingredients, from dry to wet, and even the coating. You learned step-by-step how to mix and cook them perfectly. I shared tips for the best texture and ways to make fun variations. Lastly, we explored how to store and reheat your delicious leftovers. Enjoy making these tasty waffles, and remember, there are endless ways to get creative with them!

Churro Waffles Irresistible Sweet Dessert Delight

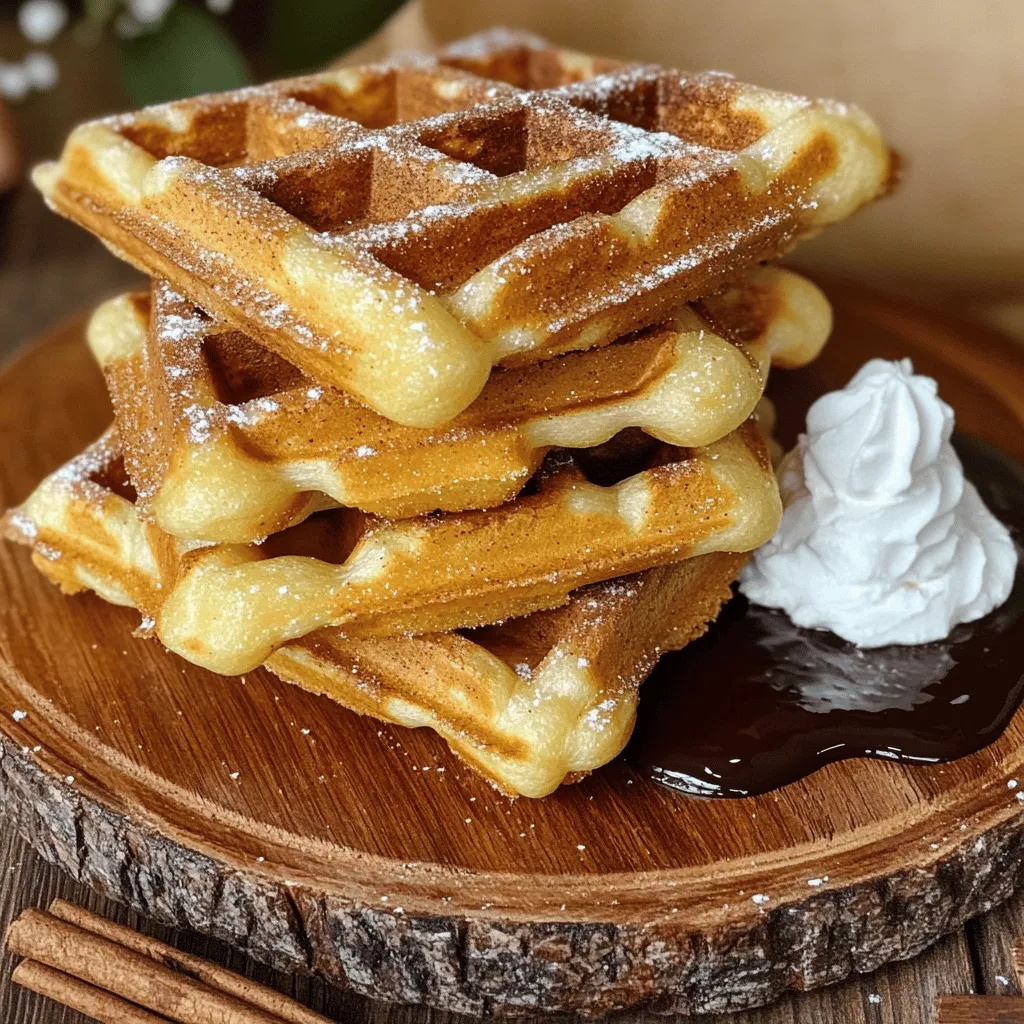
If you crave something sweet and unique, churro waffles are your answer! These delightful treats blend the crispy texture of

- 1 pre-made pizza crust - 1 cup pizza sauce - 2 cups shredded mozzarella cheese - 1/2 cup crumbled goat cheese - 1 small red onion, thinly sliced - 1 red bell pepper, sliced - 1 jalapeño, thinly sliced - 3 tablespoons hot honey - Fresh basil leaves for garnish - Salt and pepper to taste - Additional spicy peppers - Arugula or mixed greens - Sliced olives - Using regular honey with cayenne pepper - Alternative cheeses like feta or ricotta When you make hot honey drizzle pizza, the right ingredients matter. The pre-made crust gives a solid base. The pizza sauce adds a rich flavor. Mozzarella cheese melts beautifully, while goat cheese brings a creamy touch. The red onion, bell pepper, and jalapeño add crunch and heat. You can choose to add more toppings if you want. Spicy peppers can kick things up a notch. Arugula or mixed greens can add a fresh taste. Sliced olives bring a briny flavor that pairs well. If you want to change up the spice, use regular honey with a pinch of cayenne. You can also swap cheeses for feta or ricotta for a different twist. Each choice helps you make a pizza that's just right for you. For the full recipe, click here. - Preheat your oven to 475°F (245°C). If you have a pizza stone, place it inside to heat. - On a floured surface, roll out the pizza crust. Choose your preferred thickness. - Brush the crust with olive oil for a nice golden look. - Spread the pizza sauce evenly on the crust. Leave about half an inch for the crust edge. - Sprinkle the shredded mozzarella cheese over the sauce. Follow this with crumbled goat cheese. - Add your sliced vegetables on top of the cheese. Use red onion, bell pepper, and jalapeño. - Season with salt and pepper to enhance the taste. - Carefully place the pizza in the hot oven. Bake for 12-15 minutes. Look for a golden crust and bubbly cheese. - Take the pizza out and drizzle hot honey over the top. Let it soak into the cheese and veggies. - Allow it to sit for a couple of minutes. Finally, garnish with fresh basil leaves before slicing. For full details on ingredients and cooking time, check out the Full Recipe. To get a great crust, start with the right dough. If you use homemade crust, let it rest. This helps it relax and rise. Store-bought crust is quick and easy. Just follow the package instructions. Always roll it out evenly. A thin crust cooks faster and adds a nice crunch. For the best cheese blend, mix mozzarella and goat cheese. Mozzarella melts well, while goat cheese adds a tangy kick. To avoid soggy pizza, don’t overload on sauce or veggies. Keep toppings light to let the crust stay crisp. Add hot honey right after baking. This keeps the honey warm and runny. For even drizzle, use a spoon or small squeeze bottle. Start in the center and move outward. This way, every bite gets that sweet heat! For the full recipe, check out my detailed guide. {{image_2}} You can make your Hot Honey Drizzle Pizza even tastier by adding proteins. Chicken works great; grilled or shredded, it adds a nice touch. Sausage is another good choice. Try spicy Italian sausage for some extra kick. Pepperoni is a classic that never disappoints. Just layer your chosen protein on top of the cheese before baking. For a fresh and vibrant twist, try using roasted vegetables. Bell peppers, zucchini, and mushrooms bring color and flavor. You can also add spinach or artichokes for a nice change. If you want a plant-based option, use vegan cheese. This way, you still enjoy that creamy texture without dairy. Want to take your pizza to the next level? Add some pineapple for a sweet and spicy combo. The sweetness balances the heat from the hot honey. You could also try figs or peaches for a unique flavor. Just slice them thinly and place them on top before baking. The mix of sweet and spicy will surprise your taste buds! For more ideas, check out the Full Recipe for Hot Honey Drizzle Pizza. To keep your hot honey drizzle pizza fresh, wrap slices in plastic wrap. You can also use an airtight container. Store it in the fridge for up to four days. This method helps preserve the flavors and texture. Avoid stacking slices to prevent them from sticking together. For the best taste and texture, reheat in the oven. Preheat your oven to 350°F (175°C). Place the pizza on a baking sheet. Heat for about 10-15 minutes. This will keep the crust crispy and the cheese melty. You can also microwave for quick reheating, but the crust may get soggy. If you want to save some pizza for later, freezing is a great option. Let the pizza cool completely. Wrap each slice tightly in plastic wrap, then place in a freezer bag. You can freeze whole pizzas, too. Just wrap it well to prevent freezer burn. It can last up to three months in the freezer. To enjoy, thaw in the fridge overnight, then reheat as mentioned above. Remember, you can make this tasty pizza anytime using the Full Recipe! Hot honey is a sweet and spicy blend of honey infused with chili peppers. It adds a unique kick to dishes, especially pizza. You can find hot honey in many grocery stores, often in the condiment aisle. If you prefer, you can also make it at home. Just mix regular honey with a pinch of cayenne pepper to create your own spicy version. Yes, you can make this pizza without hot honey. If you want a sweet flavor, use regular honey. You can also add a sprinkle of red pepper flakes for some heat. If you don’t want any spice, just skip the honey. The pizza will still taste great with the cheese and veggies. The spice level of hot honey drizzle pizza depends on the type of hot honey you use. Some brands have a mild kick, while others can be quite spicy. To adjust the heat, use less hot honey or remove the seeds from jalapeños. You can always add more spice later if you like it hotter. Enjoy the balance of sweetness and spice! This blog post shared a simple pizza recipe featuring pre-made crust and fresh toppings. You learned how to bake a delicious pizza with mozzarella and goat cheese, plus tips for perfecting the crust. You can customize your pizza with proteins or veggies and even explore spicy and sweet combinations. Remember to store leftovers properly and reheat them correctly for the best taste. Making pizza at home can be fun and tasty, with endless options to try! Enjoy getting creative with your next pizza night!

Hot Honey Drizzle Pizza Flavor Explosion Awaiting You

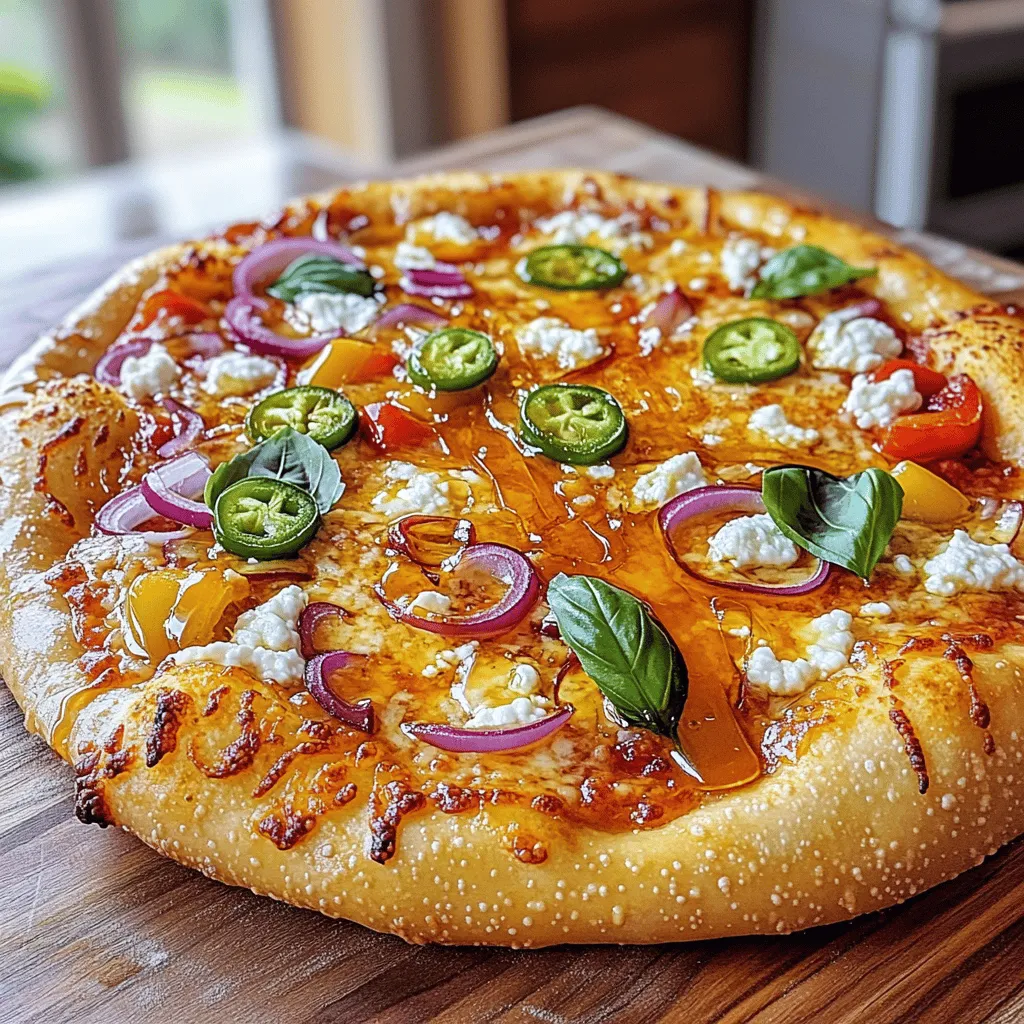
Ready for a flavor explosion? Let’s dive into Hot Honey Drizzle Pizza! This dish blends sweet and spicy perfectly, bringing

Older posts
Newer posts
← Previous Page1 … Page32 Page33 Page34 … Page51 Next →

dsad

© 2025 savoryspiral • Built with GeneratePress

Our Policies

  • Copyright Policy
  • Cookie Policy
  • GDPR Policy
  • Privacy Policy
  • Disclaimer
  • Terms Of Use

More Information

  • Home
  • About
  • Contact
  • Appetizers
  • Dessert
  • Dinner
  • Drinks
©2025, savoryspiral About Back To Top