Skip to content
DisclaimerTerms Of UseGDPR PolicyCookie Policy

savoryspiral

  • Home
  • Drinks
  • Appetizers
  • Dinner
  • Dessert
  • About
  • Contact
  • Privacy Policy
DisclaimerTerms Of UseGDPR PolicyCookie Policy

Charlotte

- 4 medium sweet potatoes, peeled and cubed - 3 tablespoons olive oil - 2 tablespoons maple syrup - 1 teaspoon smoked paprika - 1 teaspoon cayenne pepper (adjust to heat preference) - 1 teaspoon garlic powder - 1 teaspoon salt - ½ teaspoon black pepper - Fresh cilantro, chopped for garnish The ingredients for oven-roasted sweet potatoes are simple yet impactful. Sweet potatoes are the star. They bring a natural sweetness that shines when roasted. You need to peel and cube them before cooking. The olive oil adds a rich flavor and helps them crisp up. Maple syrup enhances their sweetness. Spices make each bite exciting. Smoked paprika gives a hint of smokiness. Cayenne pepper adds heat, but you can adjust it to your taste. Garlic powder brings depth to each piece. Salt and black pepper round out the flavors. Finally, fresh cilantro adds a bright touch when serving. This combination creates a dish that is not just tasty but also colorful and vibrant. For the full recipe, check the section above. A serving of these sweet potatoes holds about 180 calories. They contain 7 grams of fat and 30 grams of carbs. You also get around 2 grams of protein per serving. This makes them a healthy choice. They provide fiber and vitamins, which are great for your body. Oven-roasted sweet potatoes pair well with many dishes. Consider serving them with grilled chicken or fish. They also go great with a fresh salad. For a vegetarian option, serve them alongside quinoa. You can even add them to tacos for a sweet twist. Meal planning becomes easy with these versatile sweet potatoes! First, I preheat my oven to 425°F (220°C). This temperature helps the sweet potatoes get nice and crisp. Next, I peel the sweet potatoes. I then cube them into bite-sized pieces. This makes them cook evenly. I place the cubed sweet potatoes in a large mixing bowl. Now, I add 3 tablespoons of olive oil and 2 tablespoons of maple syrup to the bowl. I toss the sweet potatoes until they are well coated. Then, I mix 1 teaspoon each of smoked paprika, cayenne pepper, garlic powder, salt, and black pepper in a small bowl. I sprinkle the spice mix over the sweet potatoes and toss again. This ensures every piece is flavorful. Next, I spread the sweet potatoes in a single layer on a baking sheet lined with parchment paper. I bake them in the preheated oven for 25-30 minutes. I stir them halfway through to help them brown evenly. After baking, I remove the sweet potatoes from the oven. I let them cool for a few minutes. To finish, I garnish them with freshly chopped cilantro. This adds color and a fresh taste before serving. For the full recipe, check the section above. Enjoy! To get sweet potatoes that cook well, cut them into even cubes. This helps them cook at the same rate. Spread them out on the baking sheet. If they are too crowded, they will steam instead of roast. Stir them once while cooking, to help them brown nicely. Aim for a golden color and crispy edges. This adds tasty texture and flavor. You can make sweet potatoes suit your taste by changing the spices. If you want more heat, add more cayenne pepper. For a milder flavor, reduce the amount. You can also try other spices like cinnamon or chili powder. These can give a unique twist. Experimenting with herbs like rosemary or thyme can also add depth. Use a sturdy baking sheet to roast sweet potatoes. A rimmed sheet helps keep juices from spilling. Parchment paper makes for easy cleanup and helps with browning. A large mixing bowl is great to coat the sweet potatoes evenly. A good knife and cutting board help when peeling and cubing the sweet potatoes. With these tools, your cooking will be easier and more fun. For the full recipe, check the section above. {{image_2}} You can change the flavor of oven-roasted sweet potatoes easily. Try different spices or herbs. For a warm taste, use cinnamon or nutmeg. If you like heat, add chili powder or crushed red pepper. Fresh herbs like rosemary or thyme can add a nice touch. Just sprinkle them on before you roast. Experimenting with flavors keeps each batch exciting. Want to make your dish heartier? Add more veggies or proteins! Diced bell peppers or onions roast nicely with sweet potatoes. You can also toss in some carrots or zucchini for extra color and taste. For protein, consider adding chickpeas or black beans. These not only boost nutrition but also create a filling meal. Just remember to adjust your cooking time if you add new ingredients. If you’re feeling adventurous, try air frying or grilling sweet potatoes. Air frying gives you crispy edges without much oil. Cook them at 400°F (200°C) for about 20 minutes, shaking halfway through. Grilling adds a smoky flavor. Cut sweet potatoes into thick slices and grill them for about 5-7 minutes per side. These methods offer great twists on the classic oven-roasted recipe. Check out the Full Recipe for all the details on making these delicious sweet potatoes. After you enjoy your sweet potatoes, store the leftovers properly. Let them cool first. Place them in an airtight container. This keeps them fresh. You can store them in the fridge for up to five days. If you want to keep them longer, freeze them. Use freezer-safe bags or containers. They can last up to three months in the freezer. To reheat your sweet potatoes, start by taking them out of the fridge or freezer. If frozen, thaw them in the fridge overnight. Preheat your oven to 350°F (175°C). Spread the sweet potatoes on a baking sheet. Add a little olive oil to keep them moist. Heat for about 15-20 minutes. Stir halfway through to ensure even warming. This method helps keep their texture and flavor. Oven-roasted sweet potatoes last five days in the fridge. They stay good for three months in the freezer. Always check for any signs of spoilage. If they smell bad or look off, it’s best to discard them. Keeping track of storage time helps you enjoy them at their best. Yes, you can use white potatoes. They will taste different but are still great. White potatoes have less sweetness and a creamier texture. Adjust the cooking time if you use larger pieces. Sweet potatoes are done when they are soft and golden. You can test them by poking with a fork. If it goes in easily, they are ready. The edges should be crispy, too. Yes, oven-roasted sweet potatoes are healthy. They are rich in vitamins A and C. They also have fiber, which helps digestion. Plus, they are low in calories. This makes them a smart choice for meals. You can serve them with many dishes. They go well with grilled chicken or fish. Try them with salads or tacos, too. They add a nice sweetness to any meal. Yes, you can prepare them ahead of time. Roast them and let them cool, then store them in the fridge. Reheat them in the oven when you are ready to serve. You will still enjoy their tasty flavor. For the complete recipe, check out the Full Recipe. Roasting sweet potatoes is simple and rewarding. We covered key ingredients and preparation steps. You learned how spices can elevate their taste. I shared tips to ensure perfect roasting and storage advice for leftovers. Remember, you can customize your dish with various flavors and other veggies. Enjoy experimenting with this versatile ingredient. You’ll impress your family with tasty, healthy meals that are easy to make. Happy cooking!

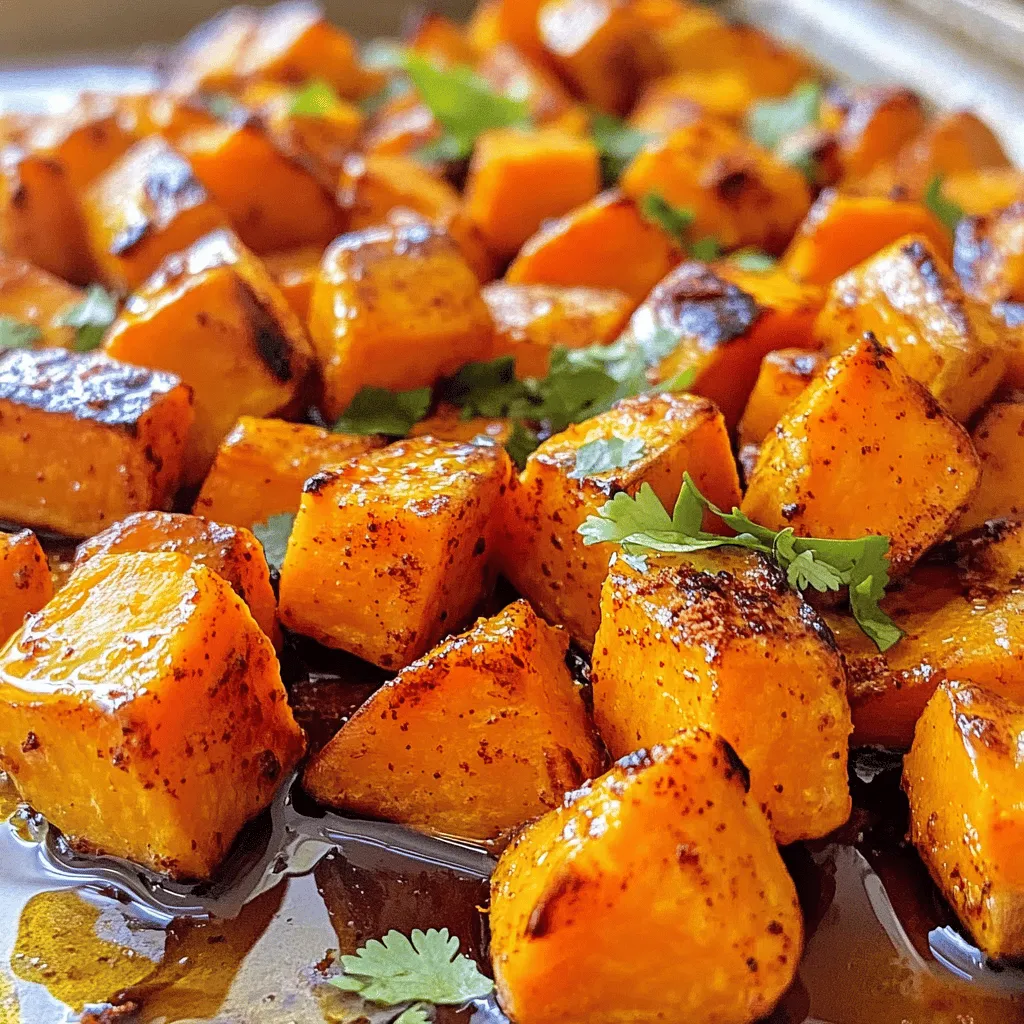
Oven Roasted Sweet Potatoes Flavorful and Healthy Dish

If you’re looking for a delicious and healthy side dish, oven-roasted sweet potatoes are the answer! They are easy to

- 1 block firm tofu - 1 red bell pepper, sliced - 1 cup broccoli florets - 1 cup snap peas - 2 cloves garlic, minced - 1 tablespoon ginger, grated The main stars of this dish are firm tofu and fresh veggies. Firm tofu holds its shape well and gives great texture. Fresh vegetables like bell pepper, broccoli, and snap peas add color and crunch. Garlic and ginger bring a fresh, zesty kick that makes everything pop. - 3 tablespoons soy sauce - 1 tablespoon sesame oil - 1 teaspoon chili paste (adjust to taste) Now, let’s talk about the sauces and oils. Soy sauce adds a salty, umami flavor. Sesame oil brings a nutty aroma that enhances our stir fry. Chili paste gives it a spicy kick, so feel free to adjust based on your taste. - 2 green onions, sliced for garnish - Sesame seeds for garnish To finish your dish, green onions add a fresh look and taste. Sesame seeds sprinkle on top for a little crunch. These garnishes make your crispy tofu stir fry not just tasty but also pretty on the plate. For the complete recipe, check out the [Full Recipe]. To start, you need to press the tofu. Remove the tofu from its package and drain any water. Wrap the tofu in a clean kitchen towel. Place a heavy pan on top for about 15 minutes. This helps remove excess moisture. Next, cut the tofu into bite-sized cubes. Aim for pieces about 1-inch thick. This size helps them cook evenly. Now, toss the tofu cubes in a mixing bowl with cornstarch. Make sure each piece is well-coated. The cornstarch gives the tofu a nice crunch when cooked. Heat vegetable oil in a large non-stick pan or wok over medium-high heat. Wait until the oil gets hot. Carefully add the coated tofu cubes in a single layer. Cook for about 5 to 7 minutes. Turn them occasionally to make sure they brown on all sides. When they are golden brown and crispy, remove the tofu from the pan and set it aside. In the same pan, add the sliced red bell pepper, broccoli florets, and snap peas. Stir fry these for 3 to 4 minutes. You want them to soften a bit but still stay crunchy. Next, add minced garlic and grated ginger to the pan. Stir fry for one more minute until you smell the great aroma. Now, return the crispy tofu to the pan. Pour in the soy sauce, sesame oil, and chili paste. Toss everything together well to coat the tofu and vegetables evenly. Cook for another 2 minutes to let the flavors mix. Remember, you can adjust the seasoning at this point. Serve it right away. Garnish with sliced green onions and sprinkle sesame seeds on top. For the full recipe, check the previous section. Tofu needs the right prep for crispiness. First, press the tofu to remove water. Use a clean towel or paper towels. Cut it into bite-sized cubes. Coat these cubes with cornstarch for a crunchy exterior. For cooking, heat your pan before adding oil. A medium-high heat works best. Add the tofu cubes in a single layer. Cook them for 5-7 minutes. Turn occasionally until they are golden brown. This step ensures each side gets that perfect crispiness. Seasoning makes a big difference. I recommend adjusting the soy sauce to your taste. If you like it spicy, add more chili paste. You can also try a mix of soy sauce and hoisin for a sweeter flavor. For sauce variations, consider adding sesame or oyster sauce. You could even mix in a splash of rice vinegar for tang. These little changes can elevate your dish. Pair your stir fry with steamed rice or noodles for a filling meal. You can also serve it with a fresh salad. This adds a nice crunch. For presentation, use a colorful plate. Layer the tofu and veggies nicely. Sprinkle green onions and sesame seeds on top. This makes your dish look as good as it tastes. For the full recipe, check out the Crispy Tofu Stir Fry 🥡 section. {{image_2}} You can easily swap tofu for other proteins. Tempeh and seitan work well. Tempeh has a nutty taste and a firm texture. Seitan is made from wheat gluten and has a chewy texture. Both options add great flavor. You can also add beans or lentils for extra protein. Chickpeas or black beans blend nicely into the stir fry. They add fiber and a hearty feel. Feel free to change up the vegetables based on what you have. Seasonal veggies like zucchini or asparagus can add freshness. You can also use frozen vegetables if fresh ones aren’t available. Organic produce often has more flavor and fewer chemicals. It might cost a bit more but is worth it for taste. If you need a gluten-free dish, choose gluten-free soy sauce. This option tastes just as good. There are many brands available in stores. Be sure to check labels for other hidden gluten sources. You can adjust the recipe by using rice noodles instead of regular noodles. This keeps the dish gluten-free while still being delicious. After enjoying your crispy tofu stir fry, store leftovers in the fridge. First, let the dish cool to room temperature. This helps keep the food fresh. Use airtight containers to avoid moisture loss. Glass containers work well because they are durable and don’t stain. Store the stir fry for up to three days. To reheat your dish without losing texture, use a skillet. Heat it on medium heat. Add a splash of water or broth to keep it moist. Stir the tofu and veggies gently for even warmth. This method helps maintain the crispy tofu. If needed, you can add a bit of soy sauce to boost the flavors. You can freeze the stir fry for later use. Place the cooled dish in a freezer-safe container. Make sure to leave some space for expansion. This dish can last up to three months in the freezer. When you're ready to enjoy it again, thaw it in the fridge overnight. Reheat in a skillet as mentioned above. This way, you can savor your crispy tofu stir fry anytime! For the full recipe, check out the [Full Recipe]. If you want to swap tofu, you have great options. Tempeh works well. It has a nutty taste and packs protein. You can also use seitan. Seitan is chewy and great for stir fries. For a lighter choice, try chickpeas. They add protein and texture. Yes, you can prepare this dish in advance. Cook the tofu and store it in the fridge. Keep the vegetables separate. This helps keep everything fresh. You can also meal prep by cutting veggies. Store them in air-tight containers. When ready, just stir-fry and heat. You can achieve crispiness without cornstarch. Use rice flour for coating instead. It gives a nice crunch. Another way is to bake the tofu. Bake it at a high temperature for a crispy texture. You can pan-fry with oil until golden brown. These methods keep your tofu tasty and crispy. For the full recipe, check out the Crispy Tofu Stir Fry details. In this blog post, we explored how to create a delicious stir fry with tofu. We covered essential ingredients like firm tofu, fresh vegetables, and flavorful sauces. I shared step-by-step instructions and key tips for achieving crispy tofu and balanced flavors. Use these tips to make variations and adapt the recipe for your taste. Remember to store leftovers properly to enjoy this meal for days. Use these methods, and you’ll impress everyone with your stir fry skills. Happy cooking!

Crispy Tofu Stir Fry Flavorful and Easy Dinner Dish

Looking for a quick, tasty dinner? My Crispy Tofu Stir Fry is the answer. This dish is packed with fresh

- 1 lb ground chicken or turkey - 3 cups coleslaw mix - 1 tablespoon sesame oil - 2 cloves garlic, minced - 1 tablespoon fresh ginger, minced - 3 tablespoons soy sauce - 1 teaspoon red pepper flakes - Sesame seeds for garnish - Salt and pepper to taste Using fresh ingredients gives your Egg Roll in a Bowl a great flavor. I love to start with ground chicken or turkey. It cooks up quickly and soaks in all the tasty flavors. The coleslaw mix is a game-changer. It adds crunch and color to the dish. Sesame oil gives it a lovely nutty taste. I always add garlic and ginger. They bring warmth and depth to the meal. Soy sauce gives it that umami kick we all crave. If you like a bit of heat, sprinkle in some red pepper flakes. For a nice finish, sprinkle sesame seeds on top before serving. Feel free to adjust the salt and pepper to your liking. This recipe is so flexible! You can find the full recipe in the section above to get all the details on how to put these ingredients together. - Heat sesame oil in a skillet over medium heat. - Brown the ground chicken or turkey until it is no longer pink. Start by adding the sesame oil to your skillet. This oil gives your dish a rich, nutty flavor. Heat it until it's just hot enough to shimmer. Next, add your ground chicken or turkey. Cook it for about 5 to 7 minutes. Use a spatula to break the meat apart while it cooks. You want it fully browned for the best taste. - Add garlic and ginger, cooking until fragrant. - Toss in the coleslaw mix, wilt cabbage. Once your meat is browned, it’s time to add flavor. Stir in minced garlic and fresh ginger. Cook these for 1 to 2 minutes until they smell amazing. Now, add the coleslaw mix. Toss everything well so the cabbage and carrots begin to wilt. This will take about 3 to 4 minutes. The mix will become soft and flavorful. - Mix soy sauce and rice vinegar in. - Season and garnish with green onions and sesame seeds. Next, pour in the soy sauce and rice vinegar. Stir everything together to combine the flavors. Let it cook for another 2 to 3 minutes to heat through. Season with salt, pepper, and optional red pepper flakes for spice. When you’re ready to serve, sprinkle sliced green onions and sesame seeds on top. This gives a nice crunch and fresh flavor. For the full recipe, check the details above. To get a nice brown on your meat, heat the skillet first. Add the ground chicken or turkey when the oil is hot. This helps lock in moisture and flavor. Cook the meat for about 5-7 minutes. Break it up with a spatula as it cooks. For the cabbage, you want it wilted but not mushy. After adding the coleslaw mix, toss it for 3-4 minutes. This gives it a nice texture while keeping the crunch. If you like it spicy, adjust the red pepper flakes. Start with a little and add more if you want heat. Taste as you go to find what you love. Fresh ginger and garlic pack a punch. They add a bright flavor that dried versions can’t match. Use fresh when you can, but if you only have dried, use half the amount. Garnishing makes your dish pop! Sprinkle sesame seeds on top for a nice touch. Add sliced green onions for color and freshness. For serving, use deep bowls. This keeps everything in one place and looks great. Layer the ingredients, starting with the meat, then the veggies, and finally the garnishes. This method makes your Egg Roll in a Bowl look like a feast! Try the Full Recipe to bring these tips to life. {{image_2}} You can make Egg Roll in a Bowl vegetarian by using tofu or jackfruit. Tofu adds a nice texture and absorbs flavors well. Press the tofu to remove excess water, then cube and sauté it in sesame oil. Jackfruit is a great meat substitute too. Use canned young jackfruit, drain it, and shred it with a fork. For sauces, try plant-based options. Use coconut aminos instead of soy sauce for a sweeter taste. You can also add hoisin sauce for extra flavor without animal products. To change up the flavor, add different sauces. Try sweet chili sauce or teriyaki sauce for a twist. You can also mix soy sauce with a splash of sriracha for heat. Adding veggies can enhance the dish's taste. Bell peppers, snap peas, or mushrooms work well. Dice them small and add them to the skillet with the cabbage. This gives you more color and crunch. For a low-carb version, consider vegetable substitutes for coleslaw mix. Use shredded zucchini or cauliflower rice instead. Both options keep the dish light and fresh. If you need a gluten-free option, make sure to use gluten-free soy sauce. Tamari is a great choice. It has a similar taste and works perfectly in this recipe. To keep your Egg Roll in a Bowl fresh, store it in the fridge. Place leftovers in airtight containers. This helps keep the meal tasty and safe. Always cool the dish before sealing it. It’s best to eat it within 3-4 days. To reheat, I suggest using a skillet. Heat it over medium heat and add a splash of water. This keeps the texture nice and moist. Stir gently as it warms. Avoid using a microwave if you can. Microwaves can make the dish soggy and less enjoyable. You can freeze Egg Roll in a Bowl for longer storage. Use freezer-safe containers or bags. Make sure to remove as much air as possible. This helps prevent freezer burn. When you're ready to eat, thaw it overnight in the fridge. Reheat it in a skillet as mentioned above. This method keeps the flavors bright and fresh. For the full recipe, check out the main article. Egg Roll in a Bowl will last about 3 to 4 days in the fridge. To store it, let it cool first. Place it in an airtight container. This keeps the flavors fresh and the veggies crisp. Don't forget to label it with the date. This way, you can enjoy leftovers without worry! Yes, you can make Egg Roll in a Bowl ahead of time! This dish is great for meal prep. Cook it and let it cool, then store it in the fridge. To make it easier, divide it into portions. This lets you grab a bowl when you need a quick meal. Just reheat it in the microwave or on the stove. For extra protein, try adding some cooked shrimp or tofu. You can also use cooked eggs for a tasty twist. Another option is to mix in some edamame. These choices add flavor and nutrients. Just remember to adjust the cooking time to ensure everything heats evenly. This blog post shows how to make a tasty Egg Roll in a Bowl. We covered the key ingredients, like ground chicken and coleslaw mix, and shared step-by-step instructions. You learned helpful tips for cooking and flavoring your dish. We even explored variations for different diets. With proper storage tips, you can enjoy this meal later. Now, you have all the tools to create a delicious Egg Roll in a Bowl at home. Enjoy your cooking adventure!

Egg Roll in a Bowl Quick and Flavorful Meal

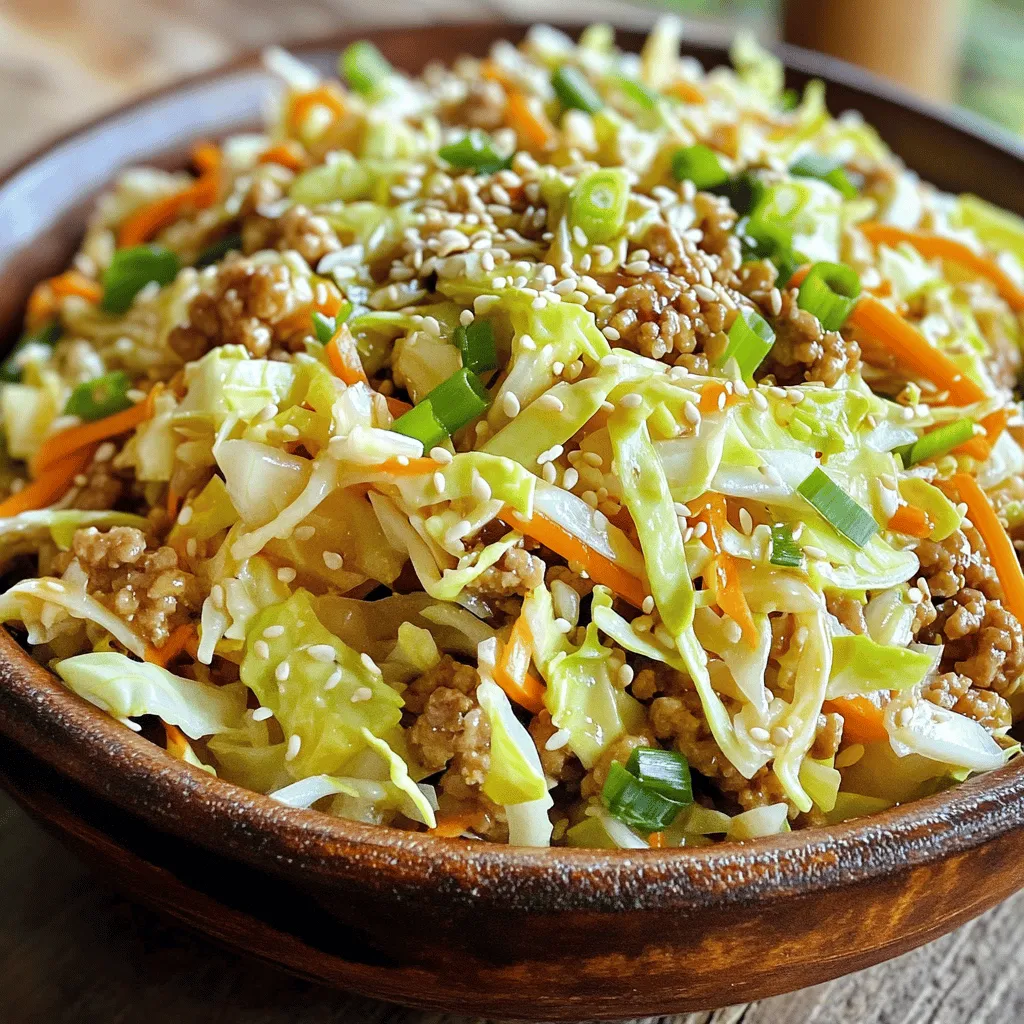
Looking for a quick and tasty meal? My Egg Roll in a Bowl recipe hits the spot! With just a

For a tasty Teriyaki Chicken Stir Fry, you need: - 1 lb (450g) boneless, skinless chicken thighs, sliced into bite-sized pieces - 2 cups broccoli florets - 1 bell pepper, sliced (any color you prefer) - 1 medium carrot, julienned - 4 green onions, chopped - 3 cloves garlic, minced - 1 tablespoon ginger, minced - 1/4 cup low-sodium soy sauce - 2 tablespoons honey - 1 tablespoon sesame oil - 1 tablespoon rice vinegar - 2 tablespoons cornstarch mixed with 2 tablespoons water (for thickening) - 2 tablespoons vegetable oil (for frying) - Cooked jasmine or brown rice, for serving These ingredients create a tasty and colorful dish that stands out. You can customize your stir fry with these extras: - Peas or snow peas for added sweetness - Mushrooms for a rich, earthy flavor - Cashews or sesame seeds for crunch - Chili flakes for some heat Feel free to mix and match. This lets you adjust the dish to your taste. Here's a quick look at the nutrition: - Calories: About 350 per serving - Protein: 25g - Carbs: 40g - Fat: 10g This dish is quite balanced. It gives you protein, carbs, and healthy fats. It's also packed with veggies, making it a wholesome meal for any day. For the full recipe, check out the details above. First, gather your ingredients. You will need chicken thighs, soy sauce, honey, sesame oil, and rice vinegar. In a large bowl, mix the chicken with these flavors. I like to let it marinate for at least 20 minutes. This helps the chicken soak up all the tasty goodness. If you have time, marinating longer makes it even better. Heat 1 tablespoon of vegetable oil in a large skillet or wok over medium-high heat. Add your marinated chicken to the pan. Remember to save some of the marinade for later. Cook the chicken until it turns brown and is cooked through, which takes about 5 to 7 minutes. After that, remove the chicken and set it aside. In the same pan, add another tablespoon of vegetable oil. Toss in minced garlic and ginger. Stir for about 30 seconds to release their flavors. Next, add broccoli, bell pepper, and carrot. Stir-fry the veggies for 3 to 4 minutes. You want them to be tender yet still crisp. Now, return the cooked chicken to the pan. Pour in the reserved marinade and the cornstarch-water mixture. Stir everything together and cook for 2 to 3 minutes. This thickens the sauce and coats the chicken and veggies. Finally, add chopped green onions and mix well. Serve your stir-fry over warm rice. Enjoy this quick and easy meal that is packed with flavor! For the full recipe, check the ingredients and instructions above. To make your teriyaki chicken stir fry taste amazing, marinating is key. Use a mix of soy sauce, honey, sesame oil, and rice vinegar. Let the chicken soak in this mix for at least 20 minutes. This time allows all the flavors to blend well into the chicken. The honey adds a sweet touch, while the soy sauce gives it depth. Don't skip this step; it's vital for a tasty dish! When it comes to stir-frying, heat is your friend. Make sure your skillet or wok is very hot before adding oil. This helps to sear the chicken quickly. Sear for about 5-7 minutes until it’s golden brown. Next, add garlic and ginger for extra flavor. Stir-fry your veggies until they are bright and crisp. This keeps them fresh and crunchy. Finally, return the chicken to the pan. Pour in the reserved marinade for a rich, thick sauce. One common mistake is overcrowding the pan. If you add too much chicken or veggies at once, they will steam instead of sear. Always work in batches if needed. Another error is not letting the pan get hot enough. This can lead to soggy chicken. Lastly, don’t skip the cornstarch mix. It thickens your sauce and gives it that glossy finish that looks restaurant-quality. Following these tips will help you create a great dish every time! For more details, check out the Full Recipe for Teriyaki Chicken Stir Fry. {{image_2}} You can switch up the protein in this dish. If you want something other than chicken, try beef or shrimp. Thinly slice beef for quick cooking. For shrimp, use large, peeled, and deveined shrimp. Both options work great with the teriyaki sauce. Just adjust the cooking time for each protein. Cook shrimp until they turn pink, and beef should be browned but still tender. You can easily make this dish vegan. Replace chicken with tofu or tempeh. Use firm tofu, press it to remove water, and cut it into cubes. Marinate it like you would chicken. Stir-fry until golden brown. For a protein boost, add edamame or chickpeas. This keeps the meal hearty and filling. Use vegetable-based soy sauce for a vegan option. Feel free to mix up the veggies in your stir fry. You can add snap peas, zucchini, or mushrooms. Use what’s fresh or in season. Just remember to cut them to similar sizes for even cooking. If you like a crunch, add water chestnuts. They give a nice texture contrast. The key is to stir-fry until they are tender but still crisp. This keeps your dish colorful and tasty. Store leftover Teriyaki Chicken Stir Fry in an airtight container. Make sure it cools down before sealing. This helps keep the dish fresh. You can keep it in the fridge for up to three days. Label the container with the date. This way, you can track how long it’s been stored. To reheat, use a microwave or a skillet. If using a microwave, place the stir fry in a bowl. Heat it on high for about two minutes. Stir halfway through to ensure even heating. If you use a skillet, add a splash of water. Heat over medium until warm, stirring often. This keeps the chicken and veggies from drying out. You can freeze Teriyaki Chicken Stir Fry for up to three months. To do this, let it cool completely. Then, pack it in freezer-safe bags. Remove as much air as possible before sealing. When you’re ready to eat, thaw it in the fridge overnight. Reheat as described above. This way, you can enjoy a quick meal anytime! For the complete cooking guide, check the Full Recipe. Your Teriyaki Chicken Stir Fry can last about 3 to 4 days in the fridge. Store it in an airtight container to keep it fresh. Make sure it cools down before putting it away. This helps maintain its texture and flavor. If you notice any odd smells or changes in color, it's best to toss it out. Yes, you can use store-bought teriyaki sauce. This can save you time and effort. Look for a low-sodium option if you want a healthier choice. If you prefer to make your own sauce, try mixing soy sauce, honey, and a bit of ginger. This adds a personal touch and enhances flavor in your dish. You can serve Teriyaki Chicken Stir Fry with jasmine rice or brown rice. Both options absorb the sauce well. You might also enjoy it with noodles for a different twist. Adding a side of steamed vegetables can make your meal more colorful and healthy. For extra crunch, try topping it with sesame seeds or chopped nuts. In this blog post, I covered the key ingredients and steps needed for a great Teriyaki Chicken Stir Fry. You learned how to marinate chicken, cook perfect stir fry, and avoid common mistakes. I also shared tips for flavor and storage, plus variations for different diets. In closing, Teriyaki Chicken Stir Fry is tasty and easy to make. Customizing it will keep it fun and fresh. Enjoy your cooking adventure!

Savory Teriyaki Chicken Stir Fry Quick and Easy Meal

Looking for a quick and tasty meal? This Savory Teriyaki Chicken Stir Fry is your answer! In just a few

To make Roasted Garlic Parmesan Brussels Sprouts, you need some key ingredients. Each one plays a part in making this dish tasty and fun to eat. Here’s what you will need: - 1 lb Brussels sprouts, trimmed and halved - 4 cloves garlic, minced - 1/4 cup grated Parmesan cheese - 3 tablespoons olive oil - 1 teaspoon balsamic vinegar - 1 teaspoon dried thyme - Salt and pepper to taste - Optional: Fresh parsley, chopped for garnish These ingredients blend to create a delicious flavor. The Brussels sprouts are tender and crispy, while the garlic adds a nice kick. The Parmesan melts beautifully, giving a rich taste. Olive oil helps everything roast to perfection. Balsamic vinegar adds a touch of sweetness that balances the dish. Thyme gives an earthy note that rounds it all out. You can add fresh parsley on top for a pop of color and freshness. For the full recipe, check out the cooking steps that follow. Each step will help you bring this delightful dish to your table! Start by washing the Brussels sprouts. Look for any bad leaves and pull them off. Trim the ends and cut each sprout in half. This helps them cook evenly. In a big bowl, combine the halved Brussels sprouts, minced garlic, olive oil, balsamic vinegar, dried thyme, salt, and pepper. Use your hands to mix everything well. Make sure each sprout gets a nice coat of the mix. This step is key for flavor. - Initial roasting Spread the Brussels sprouts on a baking sheet. Make sure they are in a single layer. This helps them roast better. Place the sheet in a preheated oven at 400°F (200°C). Roast for 20-25 minutes. Stir halfway through to ensure even cooking. You want them tender and crispy on the edges. - Adding Parmesan cheese After the first roasting, take the baking sheet out. Sprinkle the grated Parmesan cheese over the sprouts. Make sure the cheese covers them well. This adds a rich, savory flavor. - Final roasting steps Return the baking sheet to the oven. Roast for another 5 minutes. Watch for the cheese to melt and turn golden brown. Once done, remove from the oven. Let them cool slightly before serving. You can add chopped parsley for a fresh touch. For the full recipe, check out the details above. Enjoy your delicious Roasted Garlic Parmesan Brussels Sprouts! Roasting Brussels sprouts is easy if you follow some simple steps. - Cut them evenly: Halve each sprout to ensure they cook at the same rate. - Use enough oil: Coat them well with olive oil. This helps them crisp up nicely. - Spread them out: Place the sprouts on the baking sheet in a single layer. This allows hot air to reach all sides. - Stir halfway: Flip the sprouts midway to ensure even cooking and browning. To make your Brussels sprouts even tastier, try these tips: - Add spices: Sprinkle some red pepper flakes for heat. Garlic powder adds more depth. - Use fresh herbs: Fresh thyme or rosemary can bring a bright taste. - Try different cheeses: Substitute Parmesan with Pecorino Romano for a sharper flavor. - Add a splash of lemon: A squeeze of lemon juice before serving brightens the dish. Sometimes, you might not have all the ingredients on hand. Here are some easy swaps: - Brussels sprouts: Use cauliflower or broccoli for a different veggie. - Parmesan cheese: Nutritional yeast can work for a vegan option. - Olive oil: Use melted butter or avocado oil if needed. - Balsamic vinegar: Red wine vinegar or apple cider vinegar can add a nice tang. For the full recipe, refer to the above section. {{image_2}} You can easily make a cheesy garlic version of Roasted Garlic Parmesan Brussels Sprouts. Just add more cheese! Try mixing in a blend of mozzarella or Gruyère cheese. This will give your sprouts a nice, gooey texture. You can sprinkle the extra cheese on top before the final roasting step. It melts beautifully and adds to the flavor. For a vegan alternative, replace the Parmesan cheese with nutritional yeast. Nutritional yeast has a cheesy flavor without any dairy. You can also use a vegan cheese that melts well. Be sure to check the labels to confirm they are dairy-free. This option keeps the dish creamy and flavorful. You can also play with flavors to make your dish unique. Consider adding a hint of lemon juice for brightness. A sprinkle of chili flakes can add some heat. You might also try different herbs like rosemary or oregano. Each of these additions can elevate your Brussels sprouts. Experimenting with flavors makes cooking fun and personal. For more details and a full list of ingredients, check the Full Recipe. After you enjoy your Roasted Garlic Parmesan Brussels Sprouts, store the leftovers right. First, let them cool to room temperature. Next, place them in an airtight container. Keep them in the fridge for up to three days. Make sure to seal the container well. This keeps the sprouts fresh and tasty. To reheat your Brussels sprouts, use the oven for the best results. Preheat the oven to 350°F (175°C). Spread the leftovers on a baking sheet. Heat them for about 10-15 minutes or until warm. You can also use the microwave. Place them in a microwave-safe dish. Heat for 1-2 minutes or until hot. Keep an eye on them so they don’t get soggy. You can freeze Roasted Garlic Parmesan Brussels Sprouts, but they lose some texture. If you want to freeze them, do it after cooling. Place them in a freezer-safe bag or container. Squeeze out any extra air before sealing. They can stay in the freezer for up to three months. When ready to eat, thaw them in the fridge overnight. Reheat in the oven or microwave for a quick meal. For full details on making this dish, check out the Full Recipe. You can tell Brussels sprouts are done when they are tender and golden. A fork should easily pierce them. They should also be crispy on the edges. Check them around 20 minutes of roasting. If you want more crunch, roast a bit longer. Yes, you can use frozen Brussels sprouts. However, they may not get as crispy. Thaw them first and make sure to dry them well. This helps them roast better. Adjust cooking time if needed, as they may need a little more time to cook through. These Brussels sprouts pair well with many dishes. They go great with roasted chicken or steak. You can also serve them with a grain like quinoa or rice. For a lighter meal, try them with a fresh salad. Feel free to get creative and mix and match! You can find the full recipe in the earlier section. Roasted Garlic Parmesan Brussels Sprouts are simple and tasty. You learned about the key ingredients, like Brussels sprouts and garlic. I shared easy steps to roast them perfectly. Tips and tricks help boost the flavor and offer substitutes. You can also try tasty variations to match your needs. Lastly, I covered how to store and reheat leftovers. Enjoy experimenting with this dish for great meals. You’ll impress friends and family with your new skills.

Roasted Garlic Parmesan Brussels Sprouts Delightful Dish

Get ready to transform your side dish game with Roasted Garlic Parmesan Brussels Sprouts! This delightful dish is packed with

To make easy breakfast burritos, gather these simple ingredients: - 4 large flour tortillas - 4 large eggs - 1/2 cup black beans, drained and rinsed - 1/2 cup shredded cheddar cheese - 1/4 cup diced red bell pepper - 1/4 cup diced onion - 2 tablespoons fresh cilantro, chopped - 1/2 teaspoon cumin - 1/2 teaspoon paprika - Salt and pepper to taste - 1 avocado, sliced (for garnish) - Salsa (optional, for serving) With these ingredients, you create a filling and tasty meal. The black beans add fiber, while the eggs provide protein. The fresh veggies bring flavor and color. Cumin and paprika enhance the taste with warmth. You can customize the garnishes with avocado and salsa, making each bite special. This recipe is perfect for busy mornings or a cozy weekend brunch. For the full recipe, check the earlier section. Enjoy creating these easy breakfast burritos! 1. Sautéing vegetables Heat a little oil in a skillet over medium heat. Add diced onion and red bell pepper. Cook them for 3-4 minutes. Stir until they soften and smell great. 2. Preparing the egg mixture Crack the eggs into a bowl. Add cumin, paprika, salt, and pepper. Whisk it all together until mixed well. 3. Cooking and combining ingredients Pour the egg mixture into the skillet with the softened veggies. Stir gently while cooking. Keep stirring until the eggs are fully cooked, about 3-5 minutes. Then, add black beans and half of the shredded cheese. Mix well until heated through. 4. Assembling the burritos Take flour tortillas and lay them flat on a clean surface. Spoon an equal amount of the egg mixture onto each tortilla's center. Sprinkle the rest of the cheese and chopped cilantro on top. 5. Optional toasting step Fold the sides of each tortilla over the filling, then roll from the bottom up. Place the burritos seam-side down in the skillet. Toast them lightly for 1-2 minutes until golden brown. You can follow the Full Recipe for more details. Enjoy your tasty and quick breakfast burritos! To make your breakfast burrito great, start with fluffy scrambled eggs. Use fresh eggs for the best taste. Whisk them well to add air. This helps make them light and fluffy. Cook them on medium heat. Stir gently to keep them soft. Choosing fresh ingredients is key. Look for bright, firm veggies. Fresh cilantro adds a lovely flavor. Check the tortillas too. They should be soft and pliable. This makes wrapping easy. Cooking techniques matter. Sauté your onions and peppers first. This brings out their sweetness. When you add the eggs, stir often. This helps cook everything evenly. If you want a crispy outside, toast the burritos in a skillet. Just a minute or two will do. For more details, check the Full Recipe. Enjoy your tasty breakfast burritos! {{image_2}} You can easily customize your breakfast burritos to match your taste. Here are some ideas: - Vegetarian options: Skip the eggs and use tofu or tempeh. You can also add more veggies like spinach or mushrooms. These options keep it healthy and delicious. - Adding proteins like sausage or bacon: For meat lovers, add cooked sausage or crispy bacon. Just chop them up and mix them into the egg mixture. This will give your burritos a hearty flavor. - Spicy twist ideas: Want some heat? Add jalapeños or hot sauce. You can also use pepper jack cheese instead of cheddar. This will turn your breakfast into a spicy fiesta! Remember to check out the Full Recipe for more details on making these tasty burritos! To keep your breakfast burritos fresh, follow these tips: - Refrigeration guidelines: Place your burritos in an airtight container. They can stay in the fridge for up to 3 days. Make sure to let them cool before sealing. - Freezing instructions: For longer storage, freeze the burritos. Wrap each burrito tightly in plastic wrap and then place them in a freezer bag. They can last up to 3 months in the freezer. When you are ready to eat, thaw them in the fridge overnight. - Reheating tips for best results: To reheat, take a burrito and unwrap it. Place it on a microwave-safe plate. Heat on high for 1-2 minutes, or until hot. For a crispy outside, you can also use an oven. Preheat the oven to 350°F (175°C) and bake for 10-15 minutes. This keeps the tortilla crisp and tasty. Storing your breakfast burritos properly helps maintain their flavor and texture, making them a quick meal option anytime. Enjoy your delicious breakfast fiesta burritos again and again! You can find the Full Recipe to make these tasty treats. How to make breakfast burritos ahead of time? To make breakfast burritos ahead, cook the filling first. Let it cool completely. Then, fill the tortillas and wrap them tightly. Place them in a container and store in the fridge. You can easily heat them when ready to eat. Can I freeze breakfast burritos? Yes, you can freeze breakfast burritos! Wrap each burrito in plastic wrap and place them in a freezer bag. They can last up to three months. Just thaw them overnight in the fridge before reheating. What else can I add to my breakfast burrito? You can add many tasty ingredients! Try diced tomatoes, spinach, or cooked potatoes. Sausage or bacon can give it a meaty flavor. Cheese lovers can mix in different types of cheese for extra richness. How long do breakfast burritos last in the fridge? Breakfast burritos will last about 3-4 days in the fridge. Make sure they are stored in an airtight container. If you notice any odd smells or colors, it’s best to toss them out. You now have all the tools to make great breakfast burritos. We covered the best ingredients, easy steps, and handy tips. You learned how to customize your burritos and store extras safely. Enjoy making these delicious meals at home. Experiment with flavors and find your favorite mix. Breakfast burritos are fun, tasty, and simple to prepare. Get started and make your mornings better!

Easy Breakfast Burritos Tasty and Quick Meal Idea

Are you looking for a quick, tasty breakfast that packs a punch? I’ll show you how to make easy breakfast

- 1 cup unsalted butter, softened - 1 cup brown sugar, packed - 1/2 cup granulated sugar - 2 large eggs - 1 teaspoon pure vanilla extract - 2 1/2 cups all-purpose flour - 1 teaspoon baking soda - 1/2 teaspoon salt - 1 cup semi-sweet chocolate chips - 1/2 cup chopped walnuts (optional) - Ice cream for serving (optional) Using room temperature butter is key. It blends well with sugar and makes the dough fluffy. Cold butter can lead to a dense cookie. You can also use coconut sugar or maple sugar for a unique flavor twist. I recommend a cast-iron skillet for the best results. It holds heat well and gives a nice crust. You will also need a large mixing bowl, measuring cups, and a whisk for mixing your ingredients. A spatula helps in folding in chocolate chips and nuts smoothly. 1. Preheat the oven to 350°F (175°C). This step is crucial for even baking. 2. Prepare the skillet by greasing a cast-iron skillet or an oven-safe dish. This helps the cookie come out easily. 3. In a large bowl, mix the softened butter, brown sugar, and granulated sugar together. Cream them until smooth and fluffy. This process adds air, making the cookie light. 1. Beat in the eggs one at a time. Then stir in the pure vanilla extract until fully mixed. This adds flavor and moisture. 2. In a separate bowl, whisk together the all-purpose flour, baking soda, and salt. It’s important to mix them well for even distribution. 3. Gradually add the dry mix to your wet ingredients. Stir gently until just combined. Avoid overmixing; it can make the cookie tough. 4. Fold in the chocolate chips and chopped walnuts, if you choose to use them. Be gentle to keep the chips intact. 1. Spread the cookie dough evenly in the skillet. Smooth the top with a spatula. 2. Bake in the preheated oven for 25-30 minutes. Look for golden brown edges and a slightly set center. 3. To check for doneness, use a toothpick. Insert it in the center; if it comes out with a few moist crumbs, it’s ready. Make sure to follow these steps closely for that perfect chocolate chip cookie skillet experience. For the complete recipe, refer to the Full Recipe. To get the best texture in your chocolate chip cookie skillet, do not overmix the dough. Overmixing can lead to tough cookies. Mix until just combined. This keeps the dough soft and chewy. Check for doneness by looking at the edges. They should be golden brown, while the center looks slightly undercooked. This gives a nice, gooey texture. You can also gently press the center with a finger. It should bounce back slightly. The chocolate chip cookie skillet tastes best when served warm. Scoop it right from the skillet for a cozy feel. Top it with a generous scoop of ice cream. The hot cookie and cold ice cream create a delightful contrast. Try adding a drizzle of chocolate sauce or caramel for extra sweetness. Chopped nuts or whipped cream can also enhance the flavor. These toppings make your dessert look stunning. If your cookies turn out dry or crumbly, try adding a little more butter or egg. This adds moisture back into the dough. You can also use brown sugar for a chewier cookie. If you live at high altitude or in a humid area, adjust your ingredients. You may need less flour or more liquid. Keep an eye on your cookie skillet while baking, as it might cook faster. {{image_2}} You can easily change up the flavor of your cookie skillet. Try adding a sprinkle of cinnamon for warmth. It gives a nice twist and pairs well with chocolate. You can also finish with a touch of flaky sea salt. This adds a nice balance to the sweetness. If you want to swap out the chocolate, consider using white chocolate or dark chocolate. Each type brings a new taste. You can even mix different kinds of chocolate for a fun surprise in every bite. For those needing gluten-free options, use a gluten-free flour blend. Ensure it has a good mix of starches and proteins. This way, your cookie skillet will still rise and taste great. If you prefer a vegan version, replace eggs with flaxseed meal or applesauce. Use plant-based butter and dairy-free chocolate chips. These swaps keep your dessert tasty and friendly for all diets. Toppings can elevate your cookie skillet to gourmet status. Try adding fresh berries or sliced bananas. They add freshness and a pop of color. You can also drizzle caramel or chocolate sauce over the top. A dollop of whipped cream or a scoop of ice cream makes it feel special. For a crunchy texture, sprinkle some toasted nuts or crushed cookies. These little touches make your dessert even more irresistible. For the full recipe, check out the details above! To store your leftover chocolate chip cookie skillet, let it cool down first. Then, cover the skillet tightly with plastic wrap or foil. This keeps the cookie fresh and soft. You can also transfer pieces to an airtight container. Make sure to eat it within three days for the best taste. If you want to save cookie dough for later, freezing is a great option. Scoop the dough into balls and place them on a baking sheet. Freeze them until solid, then transfer to a freezer bag. They can stay in the freezer for up to three months. When you want to bake, just preheat your oven and bake the frozen dough for an extra minute or two. Don’t let leftover cookie skillet go to waste. You can crumble it over yogurt for a tasty breakfast treat. Or, use it as a base for an ice cream sundae. Just scoop some cookie into a bowl and top with ice cream and your favorite toppings. You can also turn it into cookie sandwiches by adding frosting or whipped cream between two pieces. These ideas make your dessert even more fun! You can tell when your skillet cookie is done by looking at it closely. The edges should be golden brown. The center will look slightly puffy and set. If you gently press the center, it should feel firm but soft. A toothpick inserted into the center should come out with a few moist crumbs, not wet batter. This means it’s ready to enjoy! Yes, you can use other skillets for this recipe. A cast-iron skillet works best, but you can also use an oven-safe baking dish. Just make sure it can handle high heat. Avoid using non-oven-safe materials like plastic. This will help your cookie bake evenly and look great. If you want to make this recipe vegan, there are good egg substitutes. You can use: - 1/4 cup unsweetened applesauce for each egg. - 1/4 cup mashed banana for a sweeter flavor. - 1 tablespoon ground flaxseed mixed with 3 tablespoons water, let it sit for 5 minutes to thicken. These options will help bind your cookie without using eggs. This article covered how to make a chocolate chip cookie skillet. We explored key ingredients, equipment, and step-by-step cooking instructions. You learned useful tips for perfect texture and serving ideas, along with solutions for common problems. I also shared fun variations and storage methods. Now, take this knowledge and create your own tasty skillet. Enjoy experimenting with flavors and toppings. Happy baking!

Chocolate Chip Cookie Skillet Irresistible Dessert Delight

Craving a warm, gooey chocolate chip cookie but want something special? Welcome to the Chocolate Chip Cookie Skillet—that’s your new

- 1 lb large shrimp, peeled and deveined - 6 tablespoons unsalted butter - 6 cloves garlic, minced - 1 teaspoon red pepper flakes (adjust to taste) - 1 lemon, juiced (about 2 tablespoons) - Fresh parsley for garnish - Salt and pepper to taste - Cooked pasta or crusty bread for serving I love this recipe because it uses simple, fresh ingredients. The shrimp are the star, giving each bite a sweet, ocean flavor. The butter adds richness, and garlic brings a warm, savory note. The red pepper flakes give a nice kick. You can adjust how much you use based on your spice level. A squeeze of lemon brightens the dish and cuts through the richness. Fresh parsley adds color and freshness, making it look beautiful on the plate. You can add salt and pepper to taste. Feel free to serve this dish with pasta or crusty bread. Both options soak up the tasty garlic butter sauce. For the full recipe, check the details above. Enjoy cooking! First, you need to get your shrimp ready. Peel and devein the shrimp. This means removing the shell and the dark line on the back. It takes just a few minutes. Then, mince the garlic and chop the parsley. You want the garlic pieces small to release their flavor well. The parsley adds a fresh touch at the end. Now, let’s cook! Melt the butter in a skillet. Use medium heat for a nice sizzle. Sauté garlic and red pepper flakes. Cook them for about 1-2 minutes. You want the garlic to smell great, but don’t let it brown. Next, cook shrimp until pink and tender. Add shrimp to the skillet in a single layer. It takes about 2-3 minutes on one side. When they turn pink, flip them. Pour in the lemon juice and add more butter. Cook for another 1-2 minutes. This makes the shrimp tasty and juicy. Lastly, add lemon juice and season. This gives a nice zing. Then, garnish with parsley before serving. The green color looks pretty and fresh. Serve your garlic butter shrimp on pasta or with crusty bread to soak up that yummy sauce. If you want the full recipe, check it out for all the details! How to avoid overcooking shrimp To keep shrimp tender, cook them just until they turn pink. This usually takes about 2-3 minutes per side. If you cook them too long, they can become tough and rubbery. Always watch closely as they cook. Remove them from heat as soon as they change color. Tips for achieving the best garlic flavor To get the most flavor from garlic, sauté it gently. Cook it in butter over medium heat for 1-2 minutes. You want the garlic to be fragrant, not brown. Burnt garlic can taste bitter. Use fresh garlic for the best taste. Feel free to add more garlic if you love that flavor! Best sides to accompany garlic butter shrimp Garlic butter shrimp pairs well with many sides. Some great options include: - Cooked pasta - Crusty bread - Rice - Steamed vegetables These sides soak up the delicious garlic butter sauce. They make your meal even more tasty! Ideas for using the leftover sauce Don’t waste that sauce! Drizzle it over cooked vegetables or use it to flavor rice. It is also great as a dip for bread. You can mix it into pasta dishes for extra flavor. Suggestions for additional spices or herbs To add more depth, try spices like paprika or cayenne pepper. Fresh herbs like thyme or basil can elevate the dish too. Sprinkle them in at the end for a fresh touch. Experiment with flavors to find what you love most! Pairing wine with garlic butter shrimp A light white wine works best with garlic butter shrimp. Try a Sauvignon Blanc or a Pinot Grigio. These wines complement the buttery and garlic flavors without overpowering them. A chilled glass brings out the dish's full taste. For more detailed steps and to inspire your cooking, check out the Full Recipe. {{image_2}} You can swap shrimp for chicken or fish in this dish. Chicken thighs work well. Just cut them into small pieces. Cook them until golden brown. For fish, choose firm types like cod or salmon. Cut the fish into chunks and cook until flaky. If you're looking for a vegetarian option, try using mushrooms. Button or portobello mushrooms add a nice texture. Sauté them until they are tender and golden brown. They soak up the garlic butter flavor beautifully. To change up the flavor, add fresh herbs like thyme or basil. These herbs give a fresh taste to the shrimp. You can sprinkle them in during cooking for best results. If you love heat, add chili peppers. Fresh or dried, they can spice things up. Adjust the amount to your taste. A little goes a long way! You can use different cooking methods too. Grilling adds a smoky flavor to shrimp. Just toss them on the grill until they are cooked through. If you prefer baked garlic butter shrimp, mix everything in a baking dish. Bake it in the oven until the shrimp are pink and tender. This method is hands-off and very easy. For the full recipe, be sure to check the main article! To store leftovers of garlic butter shrimp, let it cool first. Place the shrimp in an airtight container. This keeps them fresh and tasty. You can use glass or plastic containers. Make sure they seal well to prevent air from getting in. Label the container with the date. You can keep it in the fridge for up to three days. When reheating shrimp, use low heat. This helps to avoid overcooking. You can reheat them in a skillet or microwave. If using a skillet, add a bit of butter or oil. This helps refresh the flavors. Stir gently until heated through. If using a microwave, cover the dish with a lid. Heat in short bursts, checking often. To freeze garlic butter shrimp, first cool it completely. Then, place it in a freezer-safe bag. Squeeze out as much air as possible before sealing. Label the bag with the date. You can freeze it for up to three months. When ready to cook, thaw in the fridge overnight. You can also cook it from frozen, just add a few extra minutes to the cooking time. Yes, you can use frozen shrimp. Just remember to thaw them well. To thaw frozen shrimp, place them in the fridge overnight. If you're in a hurry, you can use cold water. Just put the shrimp in a bowl and cover them with cold water for about 15-20 minutes. Change the water halfway through for even thawing. Once thawed, pat them dry with a paper towel before cooking. This helps the shrimp sear better. Garlic butter shrimp can last in the fridge for 2-3 days. Store the shrimp in an airtight container. Make sure it’s sealed well to keep out air. This helps keep the shrimp fresh. When you reheat them, make sure they are heated all the way through. If they smell off or look strange, it’s best to toss them out for safety. Garlic butter shrimp pairs well with many sides. Here are some tasty ideas: - Cooked pasta, like spaghetti or linguine - Crusty bread for dipping into the sauce - Steamed vegetables like broccoli or asparagus - A light salad with lemon dressing - Rice, for a simple and filling meal Each of these sides will complement the shrimp and make your meal more filling. You can also mix and match based on what you have at home. For the full recipe, check out the full recipe section above! Garlic butter shrimp is a simple and tasty dish. You learned the key ingredients and steps to make it shine. We covered tips to avoid overcooking and ideas for serving. You can even explore variations with chicken or veggies. In the end, this dish is versatile and perfect for any meal. Enjoy cooking, and let your flavors shine!

Garlic Butter Shrimp Skillet Easy and Flavorful Meal

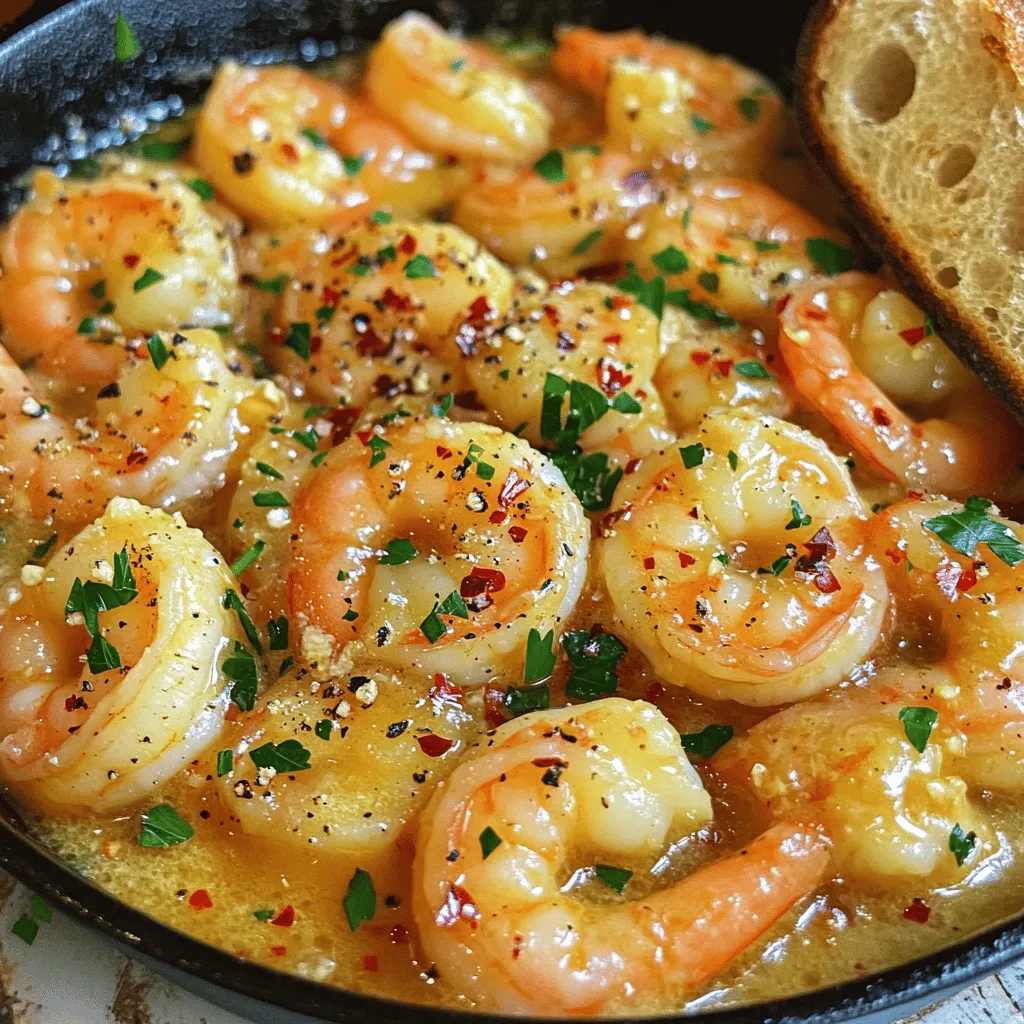
If you’re craving an easy and tasty meal, look no further than this Garlic Butter Shrimp Skillet. With simple ingredients

- Cauliflower florets - Sriracha sauce - Seasonings and spices The star of this recipe is the cauliflower. I use a large head of cauliflower, cut into bite-sized florets. This makes it easy to eat and perfect for snacking. Next, I turn to Sriracha sauce, which adds that spicy and tangy kick. For seasonings, I use garlic powder, onion powder, smoked paprika, salt, and black pepper. These spices bring depth and flavor to the bites. - Fresh cilantro - Sesame seeds Garnishing is key to presentation. I like to sprinkle fresh cilantro on top for a pop of color and freshness. Sesame seeds add a lovely crunch and a hint of nuttiness. Together, they elevate the dish and make it more appealing. - Honey or maple syrup - Flour alternatives For those who want a touch of sweetness, I recommend adding honey or maple syrup to the Sriracha mixture. It balances the heat and gives a nice glaze. If you need a gluten-free option, you can use flour alternatives like almond flour or chickpea flour. These options work just as well and keep the recipe inclusive for everyone. Check out the Full Recipe for a complete guide on making these spicy bites. 1. Preheat the oven and prepare the baking sheet: Start by preheating your oven to 425°F (220°C). This high heat will help the bites get crispy. While the oven heats up, line a baking sheet with parchment paper. This keeps the cauliflower from sticking and makes cleanup easier. 2. Prepare the batter: In a mixing bowl, combine one cup of all-purpose flour, one teaspoon of garlic powder, one teaspoon of onion powder, half a teaspoon of smoked paprika, one-fourth teaspoon of salt, and one-fourth teaspoon of black pepper. Slowly whisk in one cup of water until the batter is smooth. The batter should be thick enough to coat the cauliflower well. 1. Coat cauliflower in the batter: Take each cauliflower floret and dip it into the batter. Make sure it gets fully coated. This layer of batter is what makes the bites crispy when baked. Place the coated florets on the prepared baking sheet, leaving space between them. This helps them cook evenly and stay crispy. 2. Bake for the first time: Slide the baking sheet into the oven and bake for about 20 minutes. You want to look for a crispy and golden brown batter. This first bake sets the base for our spicy flavor. 1. Prepare the Sriracha mixture: While the cauliflower bakes, mix together half a cup of Sriracha sauce, two tablespoons of honey or maple syrup, and two tablespoons of olive oil in a separate bowl. Stir until well combined. This sauce will add a sweet and spicy kick to the bites. 2. Toss and bake again: After 20 minutes, take the baking sheet out of the oven. Drizzle the Sriracha mixture over the baked cauliflower. Use a spatula to gently toss the florets until they are well coated in the sauce. Return the baking sheet to the oven and bake for another 10 minutes. This second bake allows the sauce to caramelize, making the bites even more delicious and crispy. Enjoy your crispy and flavorful Spicy Sriracha Cauliflower Bites! For the full recipe, check out the detailed instructions. To get that perfect crunch, start with the right oven temperature. I recommend preheating your oven to 425°F (220°C). This hot temperature helps the batter crisp up nicely. Using a convection setting can also help. This setting circulates hot air around the cauliflower, making it even crispier. Want to amp up the flavor? Consider adding extra spices to the batter. A pinch of cayenne pepper or some dried herbs can make a big difference. You can also marinate the cauliflower before coating it. Letting the florets sit in the Sriracha sauce for 30 minutes adds depth and flavor. It’s a simple step that packs a punch! When it comes to serving, think outside the box. You can pair these bites with a cooling dip, like ranch or yogurt sauce. They also go well with rice or a fresh salad. For a fun twist, serve them in a taco with slaw and avocado. This adds a great crunch and makes a fun meal. {{image_2}} To make these bites vegan, you can substitute honey with maple syrup. Maple syrup adds sweetness without any animal products. For the batter, if you're gluten-free, you can use almond flour or chickpea flour instead of all-purpose flour. Both options give a nice texture and flavor. You can switch up the sauce for different tastes. Try buffalo sauce for a tangy kick or teriyaki sauce for a sweet twist. You can also add extra spices like cayenne pepper or smoked paprika to enhance the flavor. Experimenting with seasonings keeps each batch exciting. If you want crispy bites in less time, try using an air fryer. Just preheat it to 400°F (200°C) and cook for about 15 minutes. You can also fry the cauliflower in oil for a crispy texture. Heat oil in a pan and fry the coated florets until golden brown. Both methods work well for achieving that perfect crunch! To keep your Spicy Sriracha Cauliflower Bites fresh, store leftovers in an airtight container. Make sure they cool down to room temperature first. Place a paper towel in the container to absorb moisture. This helps keep them crispy. You can refrigerate them for up to three days. Reheating these bites can be tricky. You want them crispy, not soggy. The best method is to use the oven. Preheat your oven to 400°F (200°C). Spread the cauliflower bites on a baking sheet. Heat them for about 10 to 15 minutes. Check them often to ensure they do not burn. You can also use an air fryer for a quick and crispy option. Set it to 350°F (175°C) and cook for about 5 to 7 minutes. If you want to store these bites longer, freezing is a good option. First, let the bites cool completely. Then, spread them on a baking sheet in a single layer. Freeze them for about one hour until firm. After that, transfer them to a freezer-safe bag or container. Make sure to remove as much air as possible. They can last in the freezer for up to three months. To reheat, use the oven or air fryer method, just like before. Enjoy your crispy bites! For the full recipe, check out the instructions above. To make these bites vegan, swap honey for maple syrup. This keeps the dish sweet without using animal products. Use gluten-free flour if needed. Almond, coconut, or chickpea flour work well. This ensures everyone can enjoy them. Yes, you can use frozen cauliflower. Rinse the florets in cold water to thaw. Pat them dry before dipping them in the batter. This helps the batter stick well. Frozen cauliflower may need a few extra minutes to bake. Keep an eye on them to ensure they get crispy. These bites go well with many dishes. Try serving them with rice or quinoa for a full meal. They also pair nicely with a fresh salad. For drinks, a light beer or fruity soda complements the spice. You can even serve them as a snack for game day. Enjoy exploring these flavors with your favorites! You now have a complete guide to making Spicy Sriracha Cauliflower Bites. We covered the ingredients, step-by-step preparation, and tips for getting the perfect crisp. You learned about variations, including vegan options and storage methods. These bites can spice up any meal. Enjoy them as a snack or with your favorite dish. With this knowledge, you can create your own tasty twists. Dive into the kitchen, get creative, and enjoy your cooking adventure!

Spicy Sriracha Cauliflower Bites Crispy and Flavorful

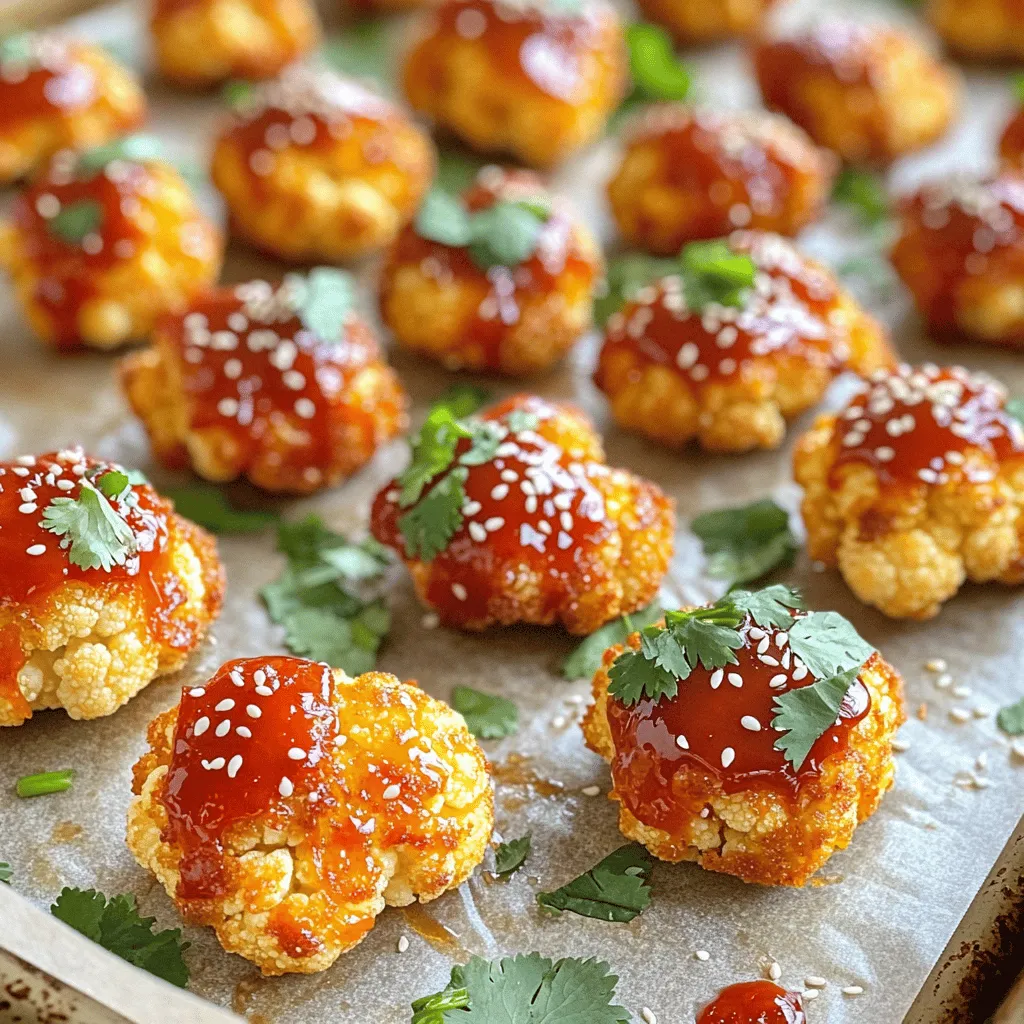
Craving a snack that’s both healthy and packed with flavor? You’ll love these Spicy Sriracha Cauliflower Bites! Crispy, zesty, and

You need 2 pounds of fresh strawberries. Look for ripe, bright red berries. They should smell sweet and feel firm. Wash them gently under cool water. Remove the green tops and dice them into small pieces. This process helps release their juices during cooking. To sweeten the jam, use 1 ½ cups of granulated sugar. The sugar helps balance the tartness of the strawberries. You’ll also need 1 tablespoon of lemon juice. This adds a nice zing and helps the jam set. Adding 1 teaspoon of vanilla extract gives a lovely depth to the flavor. You will require 1 packet (1.75 oz) of fruit pectin, like Sure-Jell. Pectin helps the jam thicken. Finally, add a pinch of ¼ teaspoon salt. This enhances the overall taste of the jam. These ingredients come together to create a sweet and fruity treat. For the full recipe, check out the Sweet Summer Strawberry Bliss Jam. Start by rinsing your strawberries well. Remove the green tops, called hulls. Dice the strawberries into small pieces. This helps them break down easily during cooking. In a large mixing bowl, add the diced strawberries and granulated sugar. Mix them gently. Let this sit for about 30 minutes. This waiting time helps the strawberries release their juices. You will see the mixture become syrupy. After 30 minutes, move the strawberry mix to a large pot. Add in the lemon juice, salt, and pectin. Stir it all together well. Place the pot on the stove over medium heat. Bring the mixture to a gentle boil. Stir it often to prevent sticking. Once it boils, lower the heat and let it simmer for about 10 minutes. Keep stirring as it cooks. You might notice foam forming on the top. Use a ladle to skim off any foam. To check if the jam is ready, take a spoonful and place it on a cool plate. Let it sit for a minute. Then, run your finger through the jam. If it holds its shape, it’s ready! If it runs back together, continue to boil for another 2-3 minutes. Repeat the test until you reach the right thickness. Once done, remove the pot from the heat and stir in the vanilla extract. Now, your homemade strawberry jam is almost ready! Remember, you can find the full recipe in the previous section for easy reference. To make great jam, you need the right mix of fruit and pectin. Use fresh strawberries for the best flavor. If your jam seems too runny, don't worry. You can cook it longer to thicken it up. Remember to test it on a cold plate. If it holds its shape, you’ve nailed it! To make your jam stand out, think about adding extra flavors. Lemon juice brightens the taste. A touch of vanilla adds warmth. If you like spice, consider a pinch of cinnamon. These small tweaks create layers in flavor that will surprise your taste buds. One common mistake is not measuring ingredients correctly. Too much sugar can make jam too sweet. Another mistake is not stirring enough while boiling. This can cause the jam to burn. Lastly, don’t skip the foam removal step. It can affect both texture and look. Follow these tips for a successful batch of homemade strawberry jam. Check the Full Recipe for more details! {{image_2}} You can mix strawberries with other berries for fun flavors. Try raspberries or blueberries. Each berry adds its own taste. For example, raspberries give a tart kick. Blueberries add sweetness. Use equal parts of each berry. This makes a jam that is both colorful and tasty. If you want a lower sugar option, you can use honey or agave syrup. These sweeteners give a nice flavor. Remember to adjust the amount. Honey is sweeter, so use less. If you use agave, start with the same amount of sugar. Test the sweetness and adjust as needed. Adding spices can take your jam to the next level. Consider cinnamon or nutmeg for warmth. A splash of balsamic vinegar can add depth. If you want a citrus boost, try orange zest. Each of these will change the flavor profile. Get creative and mix different flavors to find your favorite. For the full recipe, check the complete instructions. To keep your jam fresh, sealing jars properly is key. Start with clean, sterilized jars. After filling them with hot jam, leave a little space at the top. This gap helps the jam seal well. Use new lids each time to ensure a tight fit. Once you screw on the lids, let the jars cool completely. This cooling helps create a vacuum seal, keeping air out. You can store your homemade strawberry jam in two ways. If you seal the jars well, you can keep them in the pantry. They should stay good for a few months. If you open a jar, store it in the fridge. Open jars should last about two weeks in the fridge. This keeps the jam fresh and tasty. Homemade strawberry jam can last long if stored right. Sealed jars in the pantry can stay fresh for up to a year. Once opened, use the jam within two weeks for best flavor. Always check the jam for any signs of spoilage before using it. If you see mold or feel unsure, it is best to toss it. Enjoy your tasty strawberry jam on toast, pancakes, or as a sweet treat! For the full recipe, check the details above. Yes, you can use frozen strawberries. Just thaw them first. Drain any extra liquid before mixing with sugar. This helps keep your jam thick and tasty. Frozen strawberries work well, but fresh berries will give the best flavor and texture. To check if jam has set, do a plate test. Spoon a bit of jam onto a cool plate. Let it sit for a minute, then run your finger through it. If it holds a line, it’s ready. If it runs together, cook it a bit longer. Repeat the test until it sets. Yes, you can can this strawberry jam. After filling your sterilized jars, seal them tightly. Process the jars in a boiling water bath for about 10 minutes. This helps create a seal. Store in a cool, dark place for up to a year. Enjoy this homemade treat anytime! For the full recipe, check out the Sweet Summer Strawberry Bliss Jam! You now know how to make a great strawberry jam. We discussed fresh strawberries, sweeteners, and other key ingredients. You learned simple steps for preparation, cooking, and testing your jam. We also shared tips on consistency, flavor, and mistakes to avoid. Variations like berry combos and sugar substitutes can make your jam unique. Lastly, we covered storage tips to keep your jam fresh. Enjoy making your jam and exploring new flavors!

Homemade Strawberry Jam Tasty and Simple Recipe

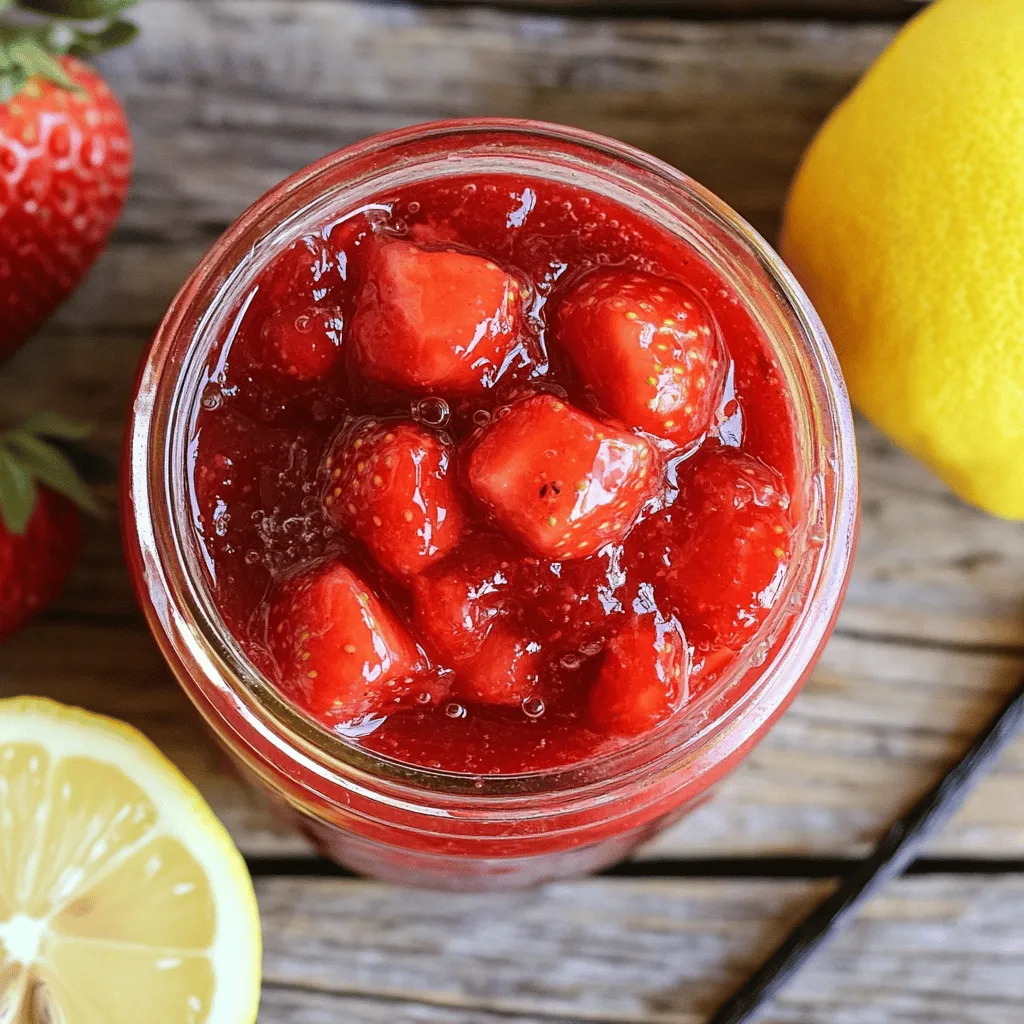
Are you ready to make delicious homemade strawberry jam? This tasty and simple recipe will guide you every step of

Older posts
Newer posts
← Previous Page1 … Page28 Page29 Page30 … Page53 Next →

dsad

© 2025 savoryspiral • Built with GeneratePress

Our Policies

  • Copyright Policy
  • Cookie Policy
  • GDPR Policy
  • Privacy Policy
  • Disclaimer
  • Terms Of Use

More Information

  • Home
  • About
  • Contact
  • Appetizers
  • Dessert
  • Dinner
  • Drinks
©2025, savoryspiral About Back To Top