Skip to content
DisclaimerTerms Of UseGDPR PolicyCookie Policy

savoryspiral

  • Home
  • Drinks
  • Appetizers
  • Dinner
  • Dessert
  • About
  • Contact
  • Privacy Policy
DisclaimerTerms Of UseGDPR PolicyCookie Policy

Charlotte

- Ground chicken - Sweet chili sauce - Soy sauce - Sesame oil - Garlic and ginger - Red bell pepper - Shredded carrots - Green onion - Fresh cilantro - Butter lettuce or iceberg lettuce - Salt and pepper - Lime wedges When I make Sweet Chili Chicken Lettuce Wraps, I love how simple the ingredients are. You only need a few key items to create a dish full of flavor. For the main ingredients, ground chicken is the star. It cooks fast and takes on all the great flavors. Sweet chili sauce gives the chicken a nice sweetness with a hint of spice. Soy sauce adds depth, while sesame oil brings a nutty flavor. Don’t forget the garlic and ginger; they add a fresh, bold taste. Next, we have the vegetables. Red bell pepper adds color and crunch. Shredded carrots give sweetness and texture. Green onion offers a mild bite, while fresh cilantro adds brightness. Finally, for the lettuce, I recommend either butter lettuce or iceberg lettuce. Both types are crisp and perfect for wrapping. A sprinkle of salt and pepper helps enhance all the flavors. Lime wedges are a must for serving, as they bring a zesty kick to each bite. For the complete recipe, check out the [Full Recipe]. This dish is easy to make and always gets rave reviews! To start, heat 1 tablespoon of sesame oil in a large skillet over medium heat. This oil gives the dish a nice nutty flavor. Once the oil is hot, add 2 cloves of minced garlic and 1 inch of grated ginger. Sauté them for about 1 minute until they smell amazing. This step builds the base flavor for your chicken mixture. Next, add 1 pound of ground chicken to the skillet. Use a spatula to break it apart as it cooks. Cook until the chicken is nicely browned, which takes about 5 to 7 minutes. After that, stir in 2 tablespoons of sweet chili sauce and 1 tablespoon of soy sauce. Mix well to coat the chicken. This sauce adds a sweet and spicy kick to the dish. Now, it’s time to add some color and crunch. Mix in 1 finely diced red bell pepper and 1 cup of shredded carrots. Cook for an additional 2 to 3 minutes until the veggies are slightly tender. Finally, remove the skillet from heat and season with salt and pepper to taste. Stir in sliced green onion and chopped cilantro for freshness. Your chicken mixture is now ready to fill the lettuce leaves! For the complete recipe, check [Full Recipe]. To make your Sweet Chili Chicken Lettuce Wraps shine, use fresh ingredients. Fresh garlic and ginger bring bright notes to your dish. The crunch of a ripe red bell pepper adds texture and color. When you cook, aim for the right times. For chicken, cook until it's no longer pink, about 5-7 minutes. Cook veggies until they are tender but still crisp, about 2-3 minutes. This keeps flavors bright and textures enjoyable. These wraps shine with a few simple accompaniments. Serve lime wedges on the side for a burst of freshness. Additional cilantro can add a nice touch. For a more filling meal, consider adding some rice or quinoa. You can also serve these wraps with dipping sauces like extra sweet chili sauce. This adds more flavor and fun to each bite. Use a large skillet for even cooking. A non-stick skillet can help prevent sticking and make cleanup easier. A good spatula is key for breaking up the chicken as it cooks. For prep, use a sharp knife for dicing vegetables. A cutting board will keep your space neat. With these tools, you will make cooking smooth and enjoyable. {{image_2}} You can switch ground chicken for turkey. Turkey works well and has a lighter taste. If you want a plant-based option, try tofu. Firm tofu gives a good texture in the wraps. Crumble it and cook it like the chicken. It absorbs all those tasty flavors. Want to kick up the heat? Add chili flakes to the chicken mix. This spice adds a nice kick without being too hot. You can also try new sauces. Hoisin sauce gives a sweet and savory taste. Mixing in sriracha can bring a spicy twist. Let your taste guide you! Lettuce is great, but there are other options. Try collard greens instead. They are sturdy and add a different taste. Rice paper wraps are another fun choice. They give a chewy texture. You can also use different types of lettuce. Romaine or butter lettuce can change the feel of your wrap. Enjoy experimenting! To store your Sweet Chili Chicken Lettuce Wraps, let them cool first. This step helps prevent moisture buildup. Once cool, place the chicken mixture in an airtight container. Glass or plastic containers work well. Keep the lettuce leaves separate to avoid sogginess. Store them in a sealed bag or container. When reheating, use a skillet over medium heat. This method helps maintain flavor and moisture. Add a splash of water or broth to keep the chicken juicy. Heat until warm, stirring often. Avoid using the microwave, as it can dry out the chicken. For freezing, let the chicken cool completely. Place it in a freezer-safe container or bag. Remove as much air as possible to prevent freezer burn. To thaw, move the chicken to the fridge overnight. Reheat it in a skillet as mentioned above. This way, you’ll enjoy a tasty meal later. For the full recipe, check out the Sweet Chili Chicken Lettuce Wraps section. To make Sweet Chili Chicken Lettuce Wraps gluten-free, use gluten-free soy sauce. Brands like Tamari offer great taste without gluten. You can also check for gluten-free sweet chili sauce. Always read labels for hidden gluten in sauces. Yes, you can prepare the filling in advance. Cook the chicken mixture and let it cool. Store it in an airtight container in the fridge. Use it within three days for the best taste. Reheat it on the stove or microwave before serving. Yes, these wraps are perfect for meal prep. Portion the filling into containers. Store the filling and lettuce separately to keep it fresh. You can grab a portion each day and enjoy a quick, healthy meal. If you want a different protein, try ground turkey or diced tofu. Ground turkey cooks similarly to chicken and has a light flavor. For tofu, use firm or extra-firm tofu. Cube it and cook for about 7-10 minutes until golden brown. In this post, you learned how to make Sweet Chili Chicken Lettuce Wraps. We reviewed the main ingredients, cooking steps, and tips for the best flavor. You also discovered variations to suit your taste and how to store leftovers. Cooking can be fun and simple. With fresh ingredients and a little practice, you can create these tasty wraps. Enjoy experimenting and sharing with friends or family. Happy cooking!

Sweet Chili Chicken Lettuce Wraps Flavorful and Easy

Are you ready to whip up a dish that’s both tasty and easy? Sweet Chili Chicken Lettuce Wraps are a

- Quinoa Quinoa is a tiny grain that packs a big punch. It is gluten-free and full of protein. You cook it by boiling it in water or broth. This makes it fluffy and tasty. - Black beans Black beans add protein and fiber to the salad. They are also rich in iron. Rinse and drain them before mixing to get rid of extra salt. - Fresh vegetables Colorful fresh veggies make the salad bright and healthy. Use diced red bell pepper, corn, and red onion for crunch and flavor. You can also add diced avocado for creaminess. - Dressing components The dressing ties all the flavors together. Use lime juice, olive oil, cumin, salt, and pepper. This mix adds tanginess and depth to the dish. Following these ingredient tips will ensure your Quinoa Black Bean Salad is fresh and full of flavor. For the complete recipe, check out the Full Recipe section. Cooking quinoa Start by bringing two cups of vegetable broth to a boil in a medium saucepan. Add one cup of rinsed quinoa to the boiling broth. Cover the pot and lower the heat. Let it simmer on low for about 15 minutes. Once the liquid is absorbed, remove it from the heat. Let it sit for five minutes. Fluff the quinoa with a fork to separate the grains. Combining ingredients In a large mixing bowl, mix the cooked quinoa with one can of rinsed and drained black beans. Next, add one diced red bell pepper, one cup of corn, one small finely chopped red onion, and one diced avocado. This mix adds color and flavor to your salad. Making the dressing In a small bowl, whisk together the juice of two limes, three tablespoons of olive oil, one teaspoon of cumin, and salt and pepper to taste. This dressing ties all the flavors together. Tossing the salad Pour the dressing over your salad mixture. Gently toss everything until well combined. Finally, fold in a quarter cup of chopped fresh cilantro. Adjust the seasoning if needed. Your salad is now ready to enjoy. For the full recipe, check the instructions above. Rinsing quinoa: Always rinse your quinoa before cooking. This removes the bitter coating called saponin. To rinse, place quinoa in a fine mesh strainer. Run cold water over it for a minute. This step makes the quinoa taste fresh and light. Ensuring maximum flavor: To boost flavor, cook quinoa in vegetable broth instead of water. The broth adds depth and richness. I like to add herbs or spices too. A pinch of cumin or garlic powder can elevate the taste. Avoiding mushy beans: Rinse your canned black beans well. This helps to remove excess sodium and starch. Drain them thoroughly and add them to the salad last. This keeps them firm and intact in the mix. Ideal pairings: Quinoa black bean salad goes well with grilled chicken or fish. It also pairs nicely with tacos or enchiladas. For a heartier meal, serve it with brown rice or quinoa. Presentation tips: Serve the salad in a large bowl. Garnish with extra cilantro and lime wedges on the side. This adds a vibrant touch. Use colorful bowls to make the dish pop. A sprinkle of feta cheese can also enhance the look and flavor. For the full recipe, check out the [Full Recipe]. {{image_2}} You can change up your quinoa black bean salad to keep it fresh. Here are some easy swaps: - Other beans and grains: You can use chickpeas or kidney beans instead of black beans. If you want a different grain, try using farro or brown rice. Each option adds a unique taste. - Additional vegetables: Feel free to add diced cucumbers, cherry tomatoes, or shredded carrots. These veggies bring more color and crunch to your salad. - Alternative dressings: Instead of the lime and olive oil dressing, try a balsamic vinaigrette or a tahini dressing. Each will give your salad a new flavor profile. This salad is already healthy, but you can tweak it to fit your needs. - Vegan and gluten-free options: This recipe is vegan since it has no animal products. It’s gluten-free too, so anyone can enjoy it without worry. - Lower-carb variations: To lower carbs, skip the corn and focus on more greens. You might add spinach or kale for a nutrient boost without the extra carbs. Feel free to explore these variations! They can help you make the quinoa black bean salad your own. Enjoy this healthy delight in any way you like. For the full recipe, check the earlier section. To keep your quinoa black bean salad fresh, store it in an airtight container. Place it in the fridge. It will stay good for about three days. If you want to freeze it, use a freezer-safe bag. Remove as much air as you can. This way, it can last up to three months. Just remember that some veggies may lose their crunch when frozen. You can reheat quinoa black bean salad in several ways. The best method is to use a microwave. Put it in a bowl and cover it loosely. Heat it in short bursts, stirring in between, to avoid hot spots. If you prefer a fresh taste, enjoy it cold. Add a sprinkle of lime juice and a dash of olive oil for extra flavor. You can also toss in freshly chopped herbs to revive its taste. How long does quinoa black bean salad last? Quinoa black bean salad stays fresh in the fridge for about 3 to 5 days. Store it in an airtight container to keep it tasty. After that, the veggies may lose their crunch. Can I make quinoa black bean salad ahead of time? Yes, you can make this salad a day in advance. Making it ahead lets the flavors blend well. Just cover it tightly and keep it in the fridge until you are ready to serve. What other ingredients can I add to the salad? You can add many tasty ingredients. Try cherry tomatoes, cucumbers, or jalapeños for extra flavor. Chopped spinach or kale can add more greens. Cheese, like feta or cotija, gives a creamy touch. Is quinoa black bean salad healthy? Yes, this salad is very healthy. Quinoa is a good source of protein and fiber. Black beans provide more protein, while veggies add vitamins and minerals. This salad is great for a balanced meal. How to serve quinoa black bean salad as a meal? Serve the salad on a plate or in a bowl. You can pair it with grilled chicken or shrimp for protein. It also works well as a side dish. For a light lunch, enjoy it on its own. Don't forget to check out the Full Recipe for more details! To wrap up, we broke down the key ingredients, steps, and tips for making quinoa black bean salad. You learned how to maximize flavor and prepare it perfectly. We also explored fun variations and storage ideas. This salad is healthy, easy to make, and adaptable. You can enjoy it fresh or as leftovers. Now you have all the tools to create a tasty and satisfying dish. Enjoy experimenting with your own twist!

Quinoa Black Bean Salad Fresh and Healthy Delight

Are you looking for a quick, fresh, and healthy meal? Quinoa Black Bean Salad is the perfect choice! This colorful

Here’s what you need for creamy avocado pasta. Gather these fresh ingredients to make your dish shine: - 2 ripe avocados, pitted and peeled - 2 cloves garlic, minced - 1 tablespoon fresh lemon juice - 1/4 cup fresh basil leaves - 1/4 cup grated Parmesan cheese (or nutritional yeast for a vegan option) - 1/2 teaspoon red pepper flakes (optional) - Salt and pepper to taste - 8 oz spaghetti or your choice of pasta - 2 tablespoons olive oil - 1/4 cup cherry tomatoes, halved (for garnish) - Extra basil leaves for garnish Using ripe avocados is key. They give the sauce its creamy texture. Fresh basil adds a lovely flavor that pops in every bite. Garlic brings warmth, while lemon juice brightens the dish. You can swap Parmesan with nutritional yeast for a vegan twist. The red pepper flakes? They add a hint of heat, but it’s up to you! This creamy avocado pasta recipe is quick and easy. You can use any pasta you like. I often choose spaghetti, but penne or fusilli works too. Don’t forget the cherry tomatoes for a splash of color and flavor. For the full recipe, check the instructions later on. Happy cooking! To cook pasta al dente, boil a pot of salted water. Add your pasta and stir it gently. Check the package for cooking time. Typically, this takes about 8 to 10 minutes. You want it to be firm but not hard. When your pasta is ready, reserve 1/2 cup of pasta water before draining it. This water helps thin the sauce later. Next, let's prepare the avocado sauce. In a food processor, combine the ripe avocados, minced garlic, fresh lemon juice, basil leaves, and Parmesan cheese. Blend these until smooth. If the sauce is too thick, add some reserved pasta water. You want it creamy but not runny. Adjust the flavor with salt and pepper to your liking for the best taste. Now, it's time to mix the pasta with the sauce. In a large bowl, toss the cooked pasta with the avocado sauce. Make sure the pasta is well coated. For extra flavor, drizzle 2 tablespoons of olive oil over the top. Toss the pasta again to blend everything together. This adds richness and a lovely shine to your dish. To make creamy avocado pasta, you need ripe avocados. Look for avocados that feel soft but not mushy. Gently press the skin; if it gives a little, it’s ready. Dark green skin often means ripeness. If your avocados are hard, leave them at room temperature for a few days. Check them daily until they feel just right. You can make this dish even more tasty with extra herbs and spices. Try adding fresh parsley or cilantro for a new twist. A pinch of cumin can add warmth. Always taste before you serve. Adjust the salt and pepper to suit your liking. This step is key for a great flavor. Creamy avocado pasta pairs well with many foods. I love to serve it with grilled chicken or shrimp for protein. Add a side salad with fresh greens for crunch. For garnish, use halved cherry tomatoes and extra basil leaves. They add color and freshness to your dish. You can find the Full Recipe above to create this delightful meal. {{image_2}} To make this dish vegan, swap the Parmesan cheese for nutritional yeast. Nutritional yeast gives a cheesy flavor without any dairy. This change keeps the creaminess while being plant-based. You still get that rich taste, and it’s perfect for vegans. Just use the same amount of nutritional yeast as the cheese in the recipe. You can easily add protein to your creamy avocado pasta. Chicken, shrimp, or beans work well here. Grilled chicken adds a nice touch and pairs well with the creamy sauce. Shrimp cooks quickly and gives a lovely flavor. If you prefer a plant-based option, black beans or chickpeas will add protein and fiber. Cook your protein separately, then toss it in with the pasta. If you need a gluten-free option, choose gluten-free pasta types like brown rice, quinoa, or chickpea pasta. These options cook similarly to regular pasta and taste great. Check the package instructions for cooking time, as it varies. Using gluten-free pasta keeps this dish inclusive for everyone. Enjoy the creamy avocado sauce with your favorite gluten-free pasta for a delightful meal. To keep your creamy avocado pasta fresh, store it in an airtight container. Make sure to refrigerate it within two hours of cooking. This pasta is best eaten within two days. The avocado can brown, so try to eat it soon. You can freeze the avocado sauce, but it's not ideal for the pasta. The texture might change after thawing. To freeze, place the sauce in a freezer-safe bag. Remove as much air as possible before sealing. It can stay frozen for up to three months. To reheat, use a stovetop pan over low heat. Add a splash of water or olive oil to help it stay creamy. Stir gently to avoid burning. You can also use a microwave. Heat in short bursts, stirring in between. This way, you keep the pasta's texture nice and smooth. Creamy avocado pasta stays fresh for about 2 days in the fridge. Keep it in an airtight container. The sauce may darken slightly due to the avocado, but it will still taste good. To keep it fresh, you can add a bit more lemon juice before storing. This helps slow down browning. Yes, you can prepare creamy avocado pasta in advance. Cook the pasta and let it cool before storing. For the sauce, blend the ingredients and store them separately in the fridge. Mix them together just before serving to keep everything fresh. If you want to add flavor later, toss in fresh herbs or extra spices right before you eat. This recipe is perfect for kids! The creamy sauce makes the pasta smooth and tasty. Kids love the mild flavor of avocado. You can also let them help with the mixing. Adding cherry tomatoes on top can make it fun and colorful, too! If you want to add protein, try grilled chicken or beans to make it even better. This blog post covered how to make creamy avocado pasta, step by step. We started with the key ingredients and then discussed cooking and preparing tips. You learned how to select ripe avocados and enhance flavors for the perfect dish. Overall, this recipe is easy, quick, and kid-friendly. You can customize it to fit your diet and enjoy fresh, healthy meals. I hope you feel inspired to try this creamy delight!

Creamy Avocado Pasta Quick and Easy Delight

Craving something quick, creamy, and delicious? You’ve come to the right place! In this quick and easy recipe, I’ll show

- 1 cup brown rice - 1 can black beans, rinsed and drained - 1 cup corn kernels (fresh or frozen) - 1 red bell pepper, diced - 1 avocado, diced - ½ cup cherry tomatoes, halved - 1 small red onion, finely chopped - 1 cup fresh cilantro, chopped - 1 cup shredded lettuce - Optional toppings: Greek yogurt, hot sauce These ingredients create a perfect blend of flavors and colors. The brown rice provides a hearty base. Black beans add protein, while corn gives a sweet crunch. The fresh vegetables bring a burst of color and nutrients. I love using ripe avocado for creaminess. - 1 teaspoon cumin - 1 teaspoon chili powder - Juice of 1 lime - Salt and pepper to taste Seasoning is key to flavor. Cumin and chili powder add warmth. A splash of lime juice brightens the entire dish. Salt and pepper enhance all the flavors. Don’t skip this step! - Servings: 4 - Calories per serving: Approximately 350 - Key nutrients: Fiber, protein, vitamins A and C This recipe serves four, making it great for family meals. Each serving packs about 350 calories. It is rich in fiber and protein, which keeps you full. Plus, you get plenty of vitamins from the fresh veggies. For the full recipe, check out the detailed instructions above. To cook the brown rice, start by measuring one cup of rice. Add it to a saucepan with two cups of water. Bring the water to a boil on high heat. Once it boils, lower the heat and cover the pot. Let it simmer for about 45 minutes. Check the rice to make sure the water is absorbed. Fluff the rice with a fork to keep it light and airy. This method helps the rice stay fluffy and not sticky. While the rice is cooking, let's prepare the veggies. In a large bowl, mix together the black beans, corn, and diced red bell pepper. I like to add halved cherry tomatoes and chopped red onion for color and taste. Don’t forget to rinse the black beans first. Rinsing removes extra salt and makes them taste fresh. Add chopped cilantro for a burst of flavor. Now, it’s time to build your burrito bowls! Start with a scoop of the fluffy brown rice at the bottom of each bowl. Next, add a generous layer of the colorful vegetable mixture on top of the rice. This layering creates great flavor. For toppings, add diced avocado and shredded lettuce. You can also add a dollop of Greek yogurt or sour cream. If you like heat, drizzle some hot sauce on top! For the full recipe and more tips, refer to the [Full Recipe]. Using fresh ingredients brings out the best taste in your burrito bowl. Fresh herbs like cilantro are key. They add a burst of flavor. You can also add spices to change the taste. Try smoked paprika for a smoky kick. A pinch of cayenne pepper can give you heat. Colorful bowls make your meal more inviting. Use bowls that pop with color. This makes the dish look fun. Arrange toppings in sections for visual appeal. Layering the ingredients shows off their colors. A sprinkle of extra cilantro on top adds a fresh touch. Storing your bowls properly keeps them fresh. Use airtight containers to lock in flavors. When you reheat, add a splash of water. This keeps the rice from drying out. For meal prep, pack ingredients separately. This helps maintain the crunch of veggies. {{image_2}} You can add protein to your burrito bowls in many ways. Tofu is a great choice. It soaks up flavors well and adds a nice texture. Cut it into cubes and sauté until golden. You can also use tempeh. It has a nutty taste and works well with spices. Another option is to swap beans for lentils. Lentils cook quickly and offer a different flavor. Try using green or brown lentils for a hearty bite. Feel free to mix in different veggies. Zucchini and spinach can add great taste. You can also try roasted sweet potatoes for sweetness. Seasonal vegetables can change the flavor. In summer, add fresh corn or bell peppers. In fall, consider adding butternut squash or kale. This keeps your bowls fresh and exciting. Dressings can take your burrito bowls to the next level. A simple lime vinaigrette can brighten up the dish. You can also use a creamy dressing for richness. Try homemade salsa or guacamole for a fresh twist. Both add flavor and a nice texture. Experiment with different sauces to find your favorite. For the full recipe, check out the detailed instructions above. To keep your vegetarian burrito bowls fresh, store leftovers in the fridge. Use airtight containers to prevent air and moisture from affecting the food. Properly stored, these bowls last up to four days. If you have prepared ingredients separately, they last even longer. For example, cooked brown rice can stay fresh for about five to six days. If you want to prep for later, freezing is a great option. For meal prep, divide the bowls into portions and place them in freezer-safe containers. The bowls can last in the freezer for about three months. When you're ready to eat, thaw them overnight in the fridge. For reheating, you can use the microwave or the oven until the food is hot. Use glass or plastic containers with tight lids for storage. They keep food fresh and help avoid spills. Always label your containers with the date. This way, you know when to use them. Keeping track of what you have makes meal planning easier. To make your burrito bowls vegan, skip the Greek yogurt or sour cream. Use avocado or a vegan yogurt instead. You can also top your bowls with fresh salsa, guacamole, or a drizzle of lime juice. These add creaminess and flavor without dairy. Always check labels for hidden dairy in store-bought toppings. Yes, you can use quinoa instead of brown rice. Quinoa cooks faster and has more protein. It also adds a nice nutty flavor to your bowl. Quinoa is gluten-free and packed with fiber, which is great for your health. You can try many toppings for your burrito bowls. Here are some ideas: - Chopped green onions - Sliced jalapeños - Black olives - Roasted sweet potatoes - Grated cheese or vegan cheese - Fresh lime wedges - Pineapple salsa Mix and match to find your favorite combinations. Don't be afraid to get creative! For the full recipe, check out the recipe section. Make tasty vegetarian burrito bowls with simple steps and fresh ingredients. Start with cooking brown rice, then mix in black beans, corn, and your favorite veggies. Flavor them with cumin, chili powder, and lime juice for a punch. You can easily customize these bowls with toppings or protein. Store leftovers well for another meal. Enjoy this flexible dish that’s full of nutrients, flavor, and color! Create, serve, and savor your delicious bowls today.

Vegetarian Burrito Bowls Flavorful and Easy Recipe

Are you ready to enjoy a burst of flavor without the meat? In this post, I’ll show you how to

- 2 boneless, skinless chicken thighs - 2 tablespoons olive oil - 2 cloves garlic, minced - 1 teaspoon ground cumin - 1 teaspoon ground coriander - 1 teaspoon smoked paprika - ½ teaspoon ground turmeric - ½ teaspoon cinnamon - ½ teaspoon cayenne pepper (adjust to taste) - Salt and black pepper to taste - 1 large cucumber, diced - 1 large tomato, diced - ½ red onion, thinly sliced - 1 cup cooked quinoa (or rice) - ½ cup plain Greek yogurt - Juice of 1 lemon - Fresh parsley, chopped (for garnish) - Different types of meat or plant-based alternatives for variations - Additional toppings like feta cheese or avocado When I create Chicken Shawarma Bowls, I start with these key ingredients. The chicken thighs give a juicy bite, while the marinade adds rich flavor. I use olive oil and garlic for a tasty base. The spices—cumin, coriander, smoked paprika, turmeric, cinnamon, and cayenne—bring the shawarma taste to life. For the fresh crunch, I add diced cucumber, tomato, and thin slices of red onion. This mix brightens each bite. For a hearty base, I choose cooked quinoa or rice. Greek yogurt adds creaminess, and lemon juice gives a zesty touch. Finally, fresh parsley tops it all off with vibrant color. Feel free to customize your bowls! You can swap out the chicken for other meats or plant-based options. Adding toppings like feta cheese or avocado can also enhance taste and texture. Check out the Full Recipe for more details on making these bowls delicious! Start by gathering your marinade ingredients. In a large bowl, mix together: - 2 tablespoons olive oil - 2 cloves garlic, minced - 1 teaspoon ground cumin - 1 teaspoon ground coriander - 1 teaspoon smoked paprika - ½ teaspoon ground turmeric - ½ teaspoon cinnamon - ½ teaspoon cayenne pepper (adjust to taste) - Salt and black pepper to taste Next, add the chicken thighs to the bowl. Make sure they get a nice coat of the marinade. Cover the bowl and place it in the fridge. Let the chicken marinate for at least 30 minutes. For the best flavor, try to marinate for up to 2 hours. Before you start cooking, preheat your grill or frying pan over medium-high heat. This step is key for a good sear. When the grill is hot, place the marinated chicken on it. Cook the chicken for about 5-7 minutes on each side. You want the internal temperature to reach 165°F (75°C). Once done, remove it from heat and let it rest for a few minutes. Then, slice the chicken into strips. Now it’s time to build your bowl! Start with a base of cooked quinoa or rice. Place the sliced chicken right on top. Next, mix together diced cucumber, tomatoes, and red onion in a separate bowl. Add lemon juice, salt, and pepper to this mix. Now layer this vibrant salad over the chicken. For the finishing touch, drizzle some plain Greek yogurt on top. Garnish with freshly chopped parsley. This adds color and flavor. Use colorful bowls for serving. It makes the meal even more inviting! Check out the Full Recipe for more details. To get the best flavor, marinate the chicken for at least 30 minutes. For richer taste, let it sit for up to 2 hours. This allows the spices to soak in well. To keep the chicken juicy, make sure it is well-coated in the marinade. You can also cover the bowl with plastic wrap to seal in moisture during marination. If you don’t want to grill, try baking or broiling the chicken. Preheat your oven to 400°F (200°C). Bake for about 20-25 minutes, flipping halfway. For broiling, keep a close eye to avoid burning. You can use leftover chicken in salads, wraps, or stir-fries. This adds flavor without needing to cook again. Make your bowl look fantastic by arranging the ingredients with care. Start with a base of quinoa or rice. Then, layer the sliced chicken on top. Add the cucumber-tomato salad next. Drizzle Greek yogurt over everything. For a pop of color, sprinkle fresh parsley on top. You can even add lemon wedges on the side for extra zing. {{image_2}} You can make Chicken Shawarma Bowls fit your needs. If you want a gluten-free meal, swap rice with quinoa. Quinoa is tasty and packed with protein. For a vegan or vegetarian option, use chickpeas or tofu instead of chicken. Both options are hearty and full of flavor. To give your bowls a twist, try adding different spices. Harissa brings heat, while za’atar adds a unique flavor. You might also toss in sweet fruits like pomegranate. The burst of sweetness pairs well with savory chicken. Beyond Greek yogurt, explore new dressings. A zesty tahini dressing adds creaminess. Or, try an avocado dressing for a rich taste. Each dressing can change the whole dish and keep it exciting. For the full recipe, check the earlier section. Chicken shawarma bowls stay fresh in the fridge for about three days. Store the chicken, veggies, and grains separately. This keeps everything fresh and tasty. Use airtight containers to prevent moisture loss. Reheat chicken in a skillet over medium heat. This method keeps it juicy. You can also use the microwave, but be careful not to heat it too long. Serve leftovers in a wrap or salad for a fun twist. You can freeze chicken shawarma bowls for up to three months. Wrap the chicken tightly in plastic wrap, then place it in a freezer bag. For best results, freeze individual parts, like the chicken and grains, separately. This way, you can mix and match later. You can serve many tasty sides with Chicken Shawarma Bowls. Here are some ideas: - Hummus for a creamy dip. - Pita bread for a great bite. - Roasted vegetables for added crunch. - A light salad to freshen the meal. - Pickled vegetables for tangy flavor. These sides add fun and balance to your meal. They also help to enhance the shawarma's rich taste. Yes, you can use chicken breast. Here are the pros and cons: - Pros: Chicken breast is leaner and lower in fat. - Cons: It may dry out faster than thighs. If you use chicken breast, watch the cooking time. Cook until it reaches 165°F. Keep it juicy by marinating it well. To spice up your Chicken Shawarma Bowls, try these tips: - Add more cayenne pepper to the marinade. - Use chili powder for a different flavor. - Include sliced jalapeños in your salad. - Drizzle hot sauce over the finished bowl. Adjust the heat to your liking. Start small and add more spice as needed. Chicken Shawarma Bowls are healthy and filling. Here’s a quick breakdown: - Calories: About 400-500 per serving, depending on portion size. - Protein: Chicken provides about 25-30g of protein. - Carbs: Quinoa adds healthy carbs and fiber. - Vitamins: Fresh veggies offer many vitamins and minerals. This meal is balanced and satisfying, making it a great choice for lunch or dinner. For the full recipe, check the details above. In this article, we explored how to make delicious chicken shawarma bowls. We covered essential ingredients, marination, cooking techniques, and tips for perfecting your dish. You learned about variations and storage options to enjoy your meal longer. Remember, you can customize with different proteins and spices. This dish not only tastes great but is also flexible to fit your needs. Dive in, get creative, and savor your homemade chicken shawarma bowls!

Savory Chicken Shawarma Bowls Flavorful and Filling Meal

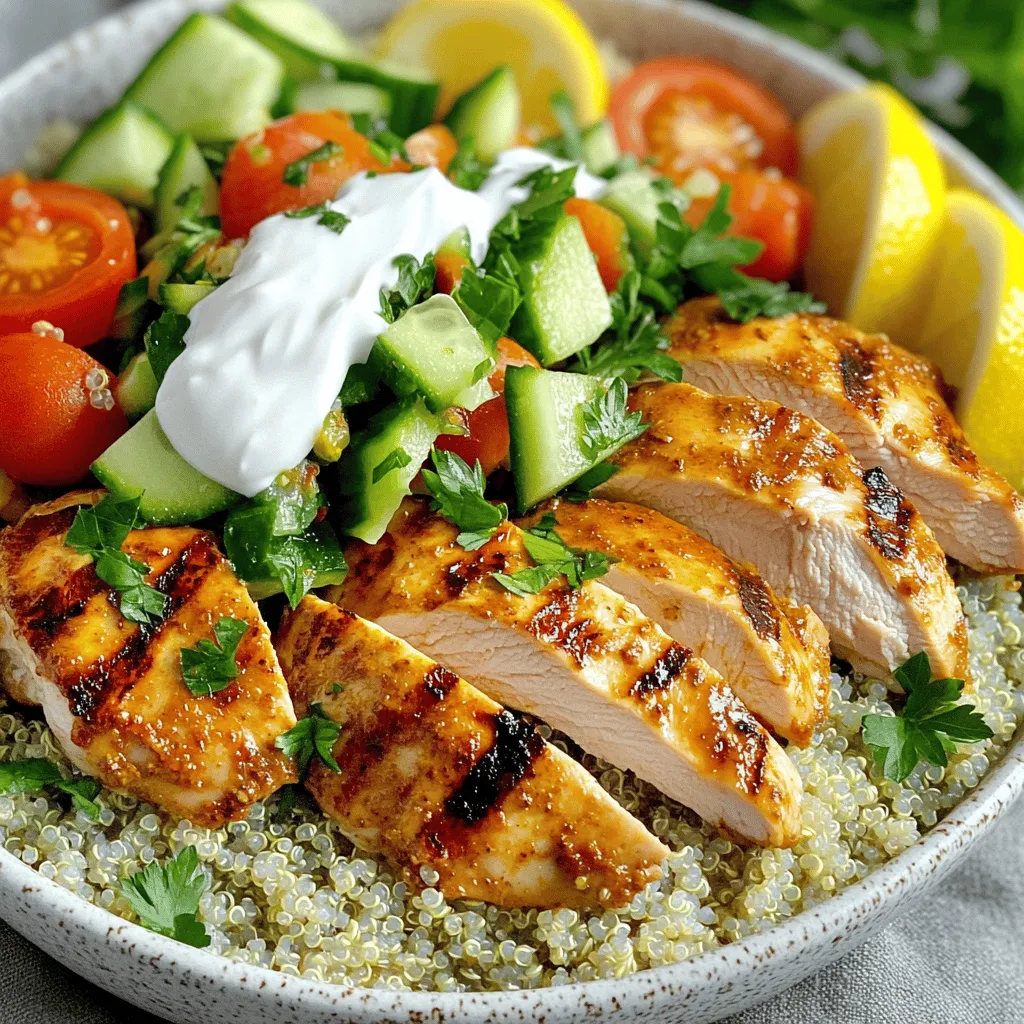
Looking for a delicious and filling meal that brings big flavor to your table? Chicken shawarma bowls are your answer!

To make One-Pot Creamy Garlic Pasta, you will need these ingredients: - 12 oz fettuccine pasta - 4 cups vegetable broth - 1 tablespoon olive oil - 6 cloves garlic, minced - 1 cup heavy cream - 1 cup grated Parmesan cheese - 1 teaspoon garlic powder - 1 teaspoon onion powder - Salt and pepper to taste - Fresh parsley, chopped (for garnish) - Red pepper flakes (optional, for added spice) You can swap ingredients based on what you have. If you need a gluten-free option, use gluten-free pasta. Instead of heavy cream, you can use cashew cream or coconut milk for a lighter sauce. If you don't have Parmesan, try nutritional yeast for a cheesy flavor without dairy. Fresh garlic is best, but garlic powder can work in a pinch. Vegetable broth adds flavor, but chicken broth is also fine. To cook this dish, gather these kitchen tools: - A large pot for cooking - A wooden spoon for stirring - A cutting board and knife for chopping garlic and parsley - A measuring cup for liquids - A grater for the Parmesan cheese - A serving spoon for plating These tools will help you create a delicious meal with ease. Enjoy cooking! To make One-Pot Creamy Garlic Pasta, follow these simple steps: 1. Heat olive oil. 2. Sauté minced garlic. 3. Add vegetable broth and bring to simmer. 4. Stir in fettuccine pasta. 5. Cook until al dente. 6. Mix in heavy cream and cheese. 7. Season and serve. First, gather your ingredients. You will need 12 oz of fettuccine pasta, 4 cups of vegetable broth, and 1 tablespoon of olive oil. Then, take 6 cloves of minced garlic, 1 cup of heavy cream, and 1 cup of grated Parmesan cheese. You also need 1 teaspoon of garlic powder, 1 teaspoon of onion powder, salt, and pepper. Optional red pepper flakes will add some heat. 1. Heat the Olive Oil: In a large pot, pour the olive oil over medium heat. 2. Sauté the Garlic: Add the minced garlic. Cook for about 1-2 minutes. Watch it closely to avoid burning. 3. Add the Broth: Pour in the vegetable broth. Bring this mixture to a gentle simmer. 4. Cook the Pasta: Add the fettuccine pasta. Stir occasionally. Cook it according to the package instructions, usually 10-12 minutes. 5. Make it Creamy: Once the pasta is al dente, lower the heat. Add heavy cream, Parmesan cheese, garlic powder, onion powder, salt, and pepper. Stir until the cheese melts and the sauce becomes creamy. 6. Adjust the Sauce: If the sauce is thick, add a splash of broth. This helps reach your desired consistency. 7. Season to Taste: Taste your dish. Add more salt or pepper if needed. If you like heat, sprinkle in some red pepper flakes. 8. Let it Rest: Remove the pot from the heat. Allow it to sit for a minute. This helps the sauce thicken. 9. Garnish and Serve: Serve hot. Top each serving with fresh parsley. For perfect pasta, keep these tips in mind: - Use Enough Liquid: Always use enough broth. It helps the pasta cook and absorb flavors. - Stir Frequently: Stirring prevents the pasta from sticking together. - Check for Doneness: Taste the pasta a minute before the time is up. It should be firm yet tender. - Adjust the Sauce: If the sauce is too thick, add more broth or cream until it’s just right. Follow these steps, and you will enjoy a delicious One-Pot Creamy Garlic Pasta. Don't forget to check out the Full Recipe for more details! To make your One-Pot Creamy Garlic Pasta shine, focus on fresh garlic. Fresh garlic gives a brighter taste than garlic powder. You can also add herbs like thyme or basil for depth. A splash of lemon juice adds zest. If you want a kick, use red pepper flakes. They bring warmth without overpowering the dish. Taste as you cook, and adjust flavors to your liking. One common mistake is overcooking the pasta. It should be al dente, or firm to the bite. If you cook it too long, it will become mushy. Another mistake is not stirring enough. Stirring prevents the pasta from sticking together. Lastly, don’t skip the resting time after cooking. Letting it sit for a minute helps the sauce thicken. To lighten this dish, swap heavy cream for half-and-half or Greek yogurt. You can also use whole grain fettuccine for extra fiber. Adding spinach or kale boosts nutrition without changing flavor. For a lower sodium option, use low-sodium vegetable broth. These small changes keep the dish tasty while making it healthier. For the full recipe, check out the One-Pot Creamy Garlic Pasta section. {{image_2}} You can easily add protein to your One-Pot Creamy Garlic Pasta. Chicken is a great choice. Just dice it and cook it in the pot before adding the garlic. Cook until golden. Shrimp also works well. Toss them in after the garlic and sauté until pink. For a plant-based option, use tofu. Cube it and sauté it just like the chicken. These protein additions make the dish heartier. If you want a vegetarian option, simply skip the meat and add more veggies. Mushrooms, spinach, or bell peppers are tasty choices. For a vegan version, swap the heavy cream for coconut milk or cashew cream. Replace the Parmesan with a vegan cheese or nutritional yeast. These swaps keep the dish creamy while fitting your diet. Get creative with add-ins! You can toss in vegetables like broccoli, zucchini, or peas. These add color and nutrition. Fresh herbs like basil or thyme can brighten the flavors. You can also mix in different cheeses. Try feta or goat cheese for a tangy twist. These additions make each meal unique and fun to explore. For the full recipe, check out the One-Pot Creamy Garlic Pasta. To keep your One-Pot Creamy Garlic Pasta fresh, store it in an airtight container. Let the pasta cool to room temperature before sealing it. This helps prevent moisture build-up, which can make the pasta mushy. Leftovers can last in the fridge for up to three days. Make sure to label the container with the date so you know when to use it. When you are ready to enjoy your leftovers, reheat them gently on the stove. Add a splash of vegetable broth or water to help loosen the sauce as it warms. Stir it frequently over low heat to avoid burning. You can also use the microwave for a quick option. Heat it in short bursts, stirring in between, until it’s hot throughout. If you want to freeze your pasta, it’s best to do so before adding the cream and cheese. Cook the pasta and let it cool, then freeze it in portions. When you’re ready to eat, thaw it overnight in the fridge. You can then add cream and cheese while reheating. This method helps keep the flavors fresh and the sauce creamy. Making One-Pot Creamy Garlic Pasta takes about 25 minutes. You spend 10 minutes prepping and 15 minutes cooking. It’s a quick meal for busy nights. Yes, you can use gluten-free pasta. Just make sure to check the cooking time on the package. Some gluten-free pasta cooks faster than regular pasta. You can use half-and-half or coconut cream as a substitute. If you want a lighter option, try using milk with a bit of flour for thickness. Absolutely! You can double or halve the recipe. Just adjust the amounts of each ingredient to fit your needs. This makes it easy to serve more or less. For the full recipe, check out the details above. One-Pot Creamy Garlic Pasta is a simple, tasty dish. We explored key ingredients, tools, and cooking steps. You learned how to enhance flavors and avoid common mistakes. I shared variations for protein and healthy options. Lastly, you discovered storage and reheating tips. This dish is great for quick meals and custom flavors. Enjoy making it your own!

One-Pot Creamy Garlic Pasta Easy Weeknight Meal

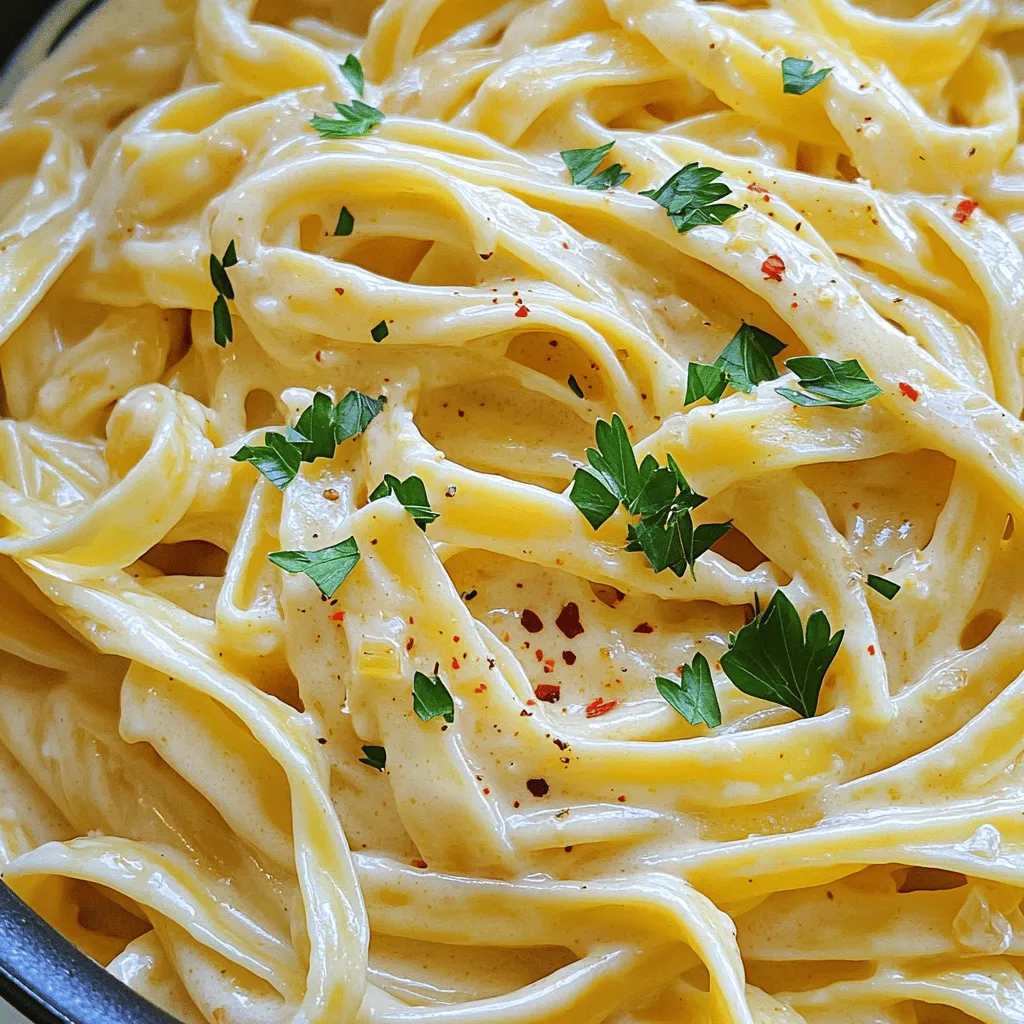
Looking for an easy weeknight meal that satisfies everyone? You’re in the right place! This One-Pot Creamy Garlic Pasta is

For a great veggie stir fry, you need fresh veggies. Here are the main ones: - 1 cup broccoli florets - 1 red bell pepper, sliced - 1 yellow bell pepper, sliced - 1 cup snap peas - 1 medium carrot, julienned These vegetables not only taste good, but they also pack a lot of nutrients. Broccoli adds crunch and vitamins. Bell peppers bring sweetness and color. Snap peas add a crisp bite, while carrots give a nice texture. A stir fry shines with the right flavors. Here’s what to include: - 3 cloves garlic, minced - 1-inch piece of ginger, grated - 2 tablespoons soy sauce (low sodium) - 1 tablespoon sesame oil - 1 tablespoon olive oil Garlic and ginger are key. They add depth and warmth. Soy sauce brings saltiness, while sesame oil gives a nutty flavor. Olive oil works well for cooking. Add some flair with these garnishes: - 1 tablespoon sesame seeds - Fresh cilantro - Chopped green onions - Salt and pepper to taste These garnishes enhance the dish. Sesame seeds add a nice crunch. Fresh herbs brighten the flavors. A little salt and pepper can tie everything together. For the full recipe, check the details above. This stir fry is quick, healthy, and delicious! - First, wash all your vegetables under cool water. - Chop the broccoli into small florets. - Slice the red and yellow bell peppers into strips. - Julienne the carrot into thin matchsticks. - Rinse the snap peas and set them aside. - Heat 1 tablespoon of olive oil in a large skillet over medium-high heat. - Add 3 cloves of minced garlic and 1-inch grated ginger; sauté for 30 seconds. - Toss in the broccoli and carrot; stir-fry for 2-3 minutes until they soften. - Next, add the bell peppers and snap peas; stir-fry for another 3-4 minutes. - All veggies should look bright and tender-crisp now. - Pour 2 tablespoons of soy sauce and 1 tablespoon of sesame oil over the veggies. - Stir to coat everything well and cook for an extra minute. - Season with salt and pepper to taste. - Sprinkle sesame seeds on top and garnish with fresh cilantro or green onions before serving. For a complete guide, check the Full Recipe. When picking vegetables, look for bright colors. This shows they are fresh. Feel for firmness and avoid any that are soft or bruised. Seasonal vegetables taste the best. They are often cheaper, too. For example, spring brings fresh asparagus and summer brings sweet corn. Buying what's in season helps your stir fry shine. Stir-frying is a quick method that keeps veggies crunchy. This technique uses high heat and a small amount of oil. It seals in flavors and nutrients. Always preheat your pan before adding oil. This ensures the veggies cook evenly. To keep colors vibrant, don’t overcrowd the pan. Stir the veggies fast to keep them crisp. Serve your stir fry over rice or quinoa for a complete meal. This adds fiber and makes it filling. Use a colorful bowl to show off your dish. Drizzle with a bit of extra sesame oil for added flavor. Garnish with fresh cilantro or green onions for a nice touch. For a fun twist, use chopsticks to enjoy every bite! {{image_2}} You can swap veggies based on what you have. Seasonal and favorite veggies work best. Try zucchini, asparagus, or mushrooms. Each brings its own flavor. Adding leafy greens like spinach or bok choy gives a nice boost. They cook quickly and add great color. Tofu or tempeh can turn this dish into a filling meal. They soak up flavors well. Just cube them and sauté with your veggies. Nuts and seeds also add a nice crunch. Try cashews or sunflower seeds for extra texture. They enhance both flavor and nutrition. Changing sauces and spices can create new tastes. Try teriyaki sauce or hoisin for a twist. You can also add herbs like basil or cilantro. If you like heat, sprinkle in chili flakes. Adjust the amount to your spice preference. These additions keep your stir fry exciting and flavorful. For the complete experience, check out the Full Recipe. To keep your veggie stir fry fresh, use airtight containers. Glass or plastic containers work well. Make sure they seal tightly to prevent air from getting in. You can store your stir fry in the fridge for about three to four days. This way, you can enjoy a quick meal later in the week without cooking again. If you want to save some for later, freezing is a great option. Start by letting the stir fry cool down completely. Then, transfer it to a freezer-safe container or a zip-top bag. Squeeze out as much air as you can. This helps prevent freezer burn. You can freeze the stir fry for up to three months. When you're ready to eat, thaw it in the fridge overnight. This method keeps the veggies from getting mushy. To reheat your stir fry, you have a few choices. You can use the microwave, stovetop, or even an air fryer. The microwave is quick, but be careful not to overcook it. If you choose the stovetop, heat a little oil in a pan and add your stir fry. Cook it just until warm. No matter how you reheat, aim to keep the veggies crisp and colorful. This way, your meal stays tasty and appealing. You can use several options if you need a soy sauce substitute. - Gluten-free alternatives: Tamari is a great choice. It has a similar taste but is gluten-free. Coconut aminos is another good option. It is sweeter and less salty. - Homemade sauce options: You can mix water, vinegar, and a pinch of salt. This blend can mimic the flavor of soy sauce. To keep your veggies looking fresh and colorful, follow these tips. - Tips for cooking time: Stir-fry quickly over high heat. This method helps veggies retain their color and crunch. - Techniques: Add a splash of cold water to the pan. This steams the vegetables and keeps them vibrant. Yes, this stir fry works well for meal prep. - Ideas for batch cooking: You can double or triple the recipe. Store extra portions in containers for easy meals later. - Storage solutions for meal prep: Use airtight containers. They keep your stir fry fresh in the fridge for up to four days. You can also freeze it in portions for longer storage. This recipe is perfect for a quick, healthy dinner. Check out the Full Recipe for more details! This blog post covered a tasty stir-fry recipe that includes essential veggies and seasonings. I shared steps on prepping, cooking, and garnishing your dish. You also learned tips on choosing fresh produce and variations for personalizing your meal. Remember, stir-frying keeps veggies crisp and colorful. Don’t hesitate to get creative with proteins and flavors. Cooking should be fun and adaptable to your taste! Enjoy making your stir-fry, and feel free to experiment with the ingredients you love most.

Simple Veggie Stir Fry Quick and Healthy Dinner Idea

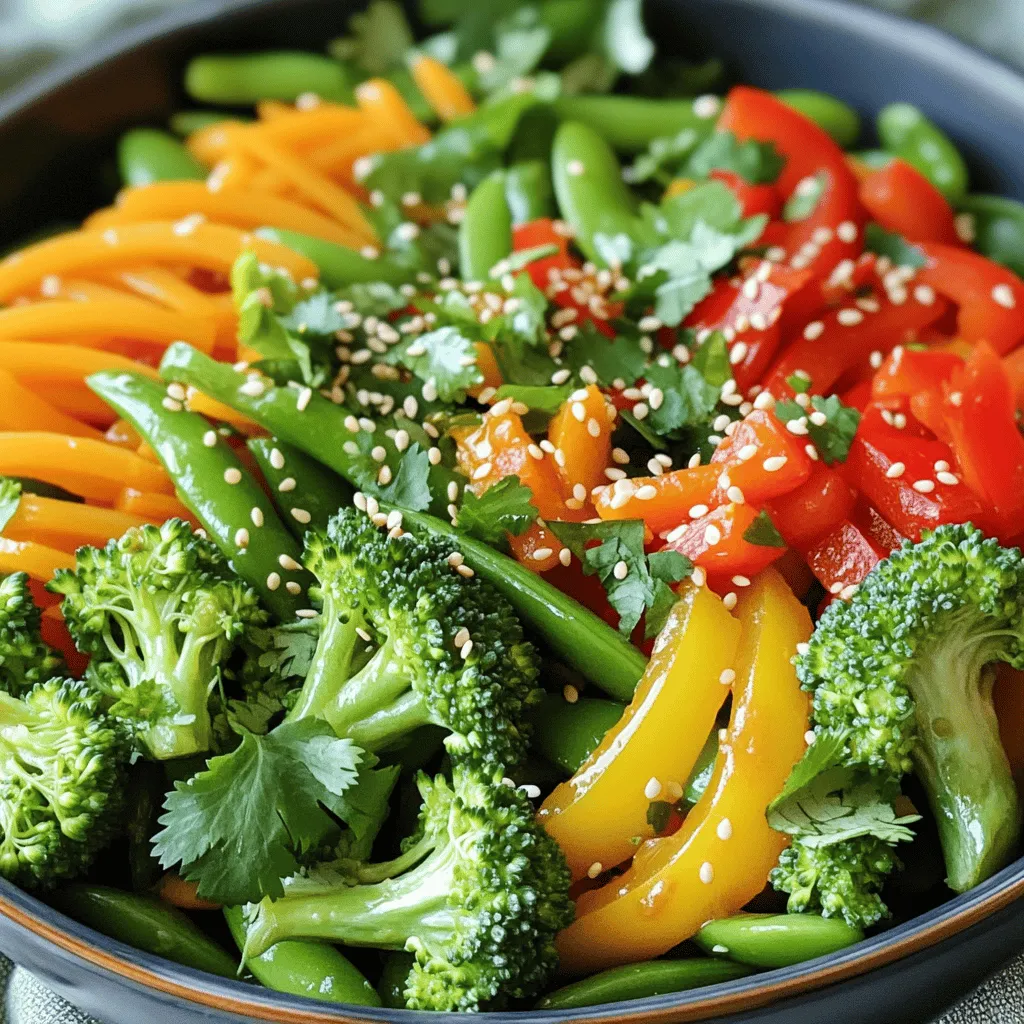
Looking for a quick and healthy dinner? Let me introduce you to my Simple Veggie Stir Fry! Packed with fresh

- 2 cups cooked chicken, shredded - 1 cup black beans, drained and rinsed - 1 cup corn (fresh or frozen) The heart of any great enchilada is the filling. For these easy chicken enchiladas, I use shredded chicken. You can use leftover chicken, rotisserie chicken, or even boil fresh chicken. Black beans add protein and fiber. Corn gives sweetness and color. - 1 teaspoon cumin - 1 teaspoon chili powder These spices bring warmth and depth to the dish. Cumin has a nutty flavor, while chili powder adds a kick. You can adjust the amount based on your taste. - ½ cup sour cream (for topping) - Fresh cilantro, chopped (for garnish) Adding sour cream makes the dish creamy and cools down the heat. Fresh cilantro adds brightness and color. You can also try other toppings like avocado or lime juice. For the full recipe, check out the Easy Chicken Enchiladas section. First, preheat your oven to 375°F (190°C). This temperature helps the enchiladas cook evenly. While the oven heats, grease a 9x13 inch baking dish with olive oil. This step keeps the enchiladas from sticking. In a large mixing bowl, combine the main filling ingredients. Use 2 cups of shredded chicken, 1 cup of black beans, and 1 cup of corn. Add 1 teaspoon of cumin and 1 teaspoon of chili powder for flavor. Pour in half of the salsa. Mix everything until well combined. This filling is packed with flavor and nutrition. Now, take an 8 small flour tortillas. Place about ¼ cup of the chicken mixture in the center of each tortilla. Sprinkle a little cheese on top. Roll the tortilla tightly around the filling. Next, arrange the rolled tortillas seam-side down in the greased baking dish. This keeps them from unrolling during baking. Cover the baking dish with foil. Bake the enchiladas in the preheated oven for 20 minutes. After that, remove the foil. Bake for an additional 10 minutes. This helps the cheese get bubbly and slightly golden. Your kitchen will smell amazing during this time. After baking, allow the enchiladas to cool for a few minutes. Top with sour cream and fresh cilantro before serving. Enjoy every bite of your easy chicken enchiladas! For the complete details, check [Full Recipe]. Making ahead of time You can prepare these enchiladas earlier in the day. Assemble them and cover with foil. Store in the fridge for up to 8 hours. When you're ready, bake them straight from the fridge. Just add a few extra minutes to the baking time. Using leftover chicken Leftover chicken works great in this recipe. Shred it and add it to your filling. You can even use rotisserie chicken for extra flavor. This saves you time and reduces waste in your kitchen. Pairing side dishes These enchiladas pair well with simple sides. Consider serving them with rice or a fresh salad. Black beans, avocado, or grilled vegetables also add color and taste. Best beverages to serve For drinks, try serving a light beer or a fruity margarita. A refreshing iced tea works too. These drinks enhance the meal without overpowering it. Cheese types and combinations Choose cheeses that melt well for your enchiladas. Cheddar and Monterey Jack are fantastic choices. You can mix them for a richer flavor. A Mexican cheese blend adds a nice touch too. Baking techniques for a bubbly top To achieve that bubbly cheese top, bake the enchiladas uncovered for the last ten minutes. This allows the cheese to brown nicely. Make sure your oven is hot enough, around 375°F, for the best results. For the full recipe, refer back to the beginning. Enjoy your cooking! {{image_2}} You can easily make enchiladas without chicken. Just swap the chicken for beans or veggies. Black beans work great here. You can also use cooked zucchini, bell peppers, or mushrooms. These options give you tasty flavors and great texture. Don't forget to season your filling well! If you like heat, try adding jalapeños or hot salsa. Chopped jalapeños add a nice kick. You can mix them into the filling or sprinkle on top. Hot salsa can also boost flavor and spice. Just pick a salsa that matches your heat preference! Tortillas come in many types. You can choose between corn or flour tortillas. Corn tortillas bring a nice earthy taste. They can be a bit more fragile, so handle them with care. Flour tortillas are soft and easy to roll. They hold up well with filling. Choose what you like best for your enchiladas! To keep your enchiladas fresh, store them in an airtight container. Place them in the fridge right after they cool. They last about three to four days. Make sure to cover them well to avoid drying out. If you use a glass dish, cover with plastic wrap or foil. This keeps the flavors intact. Freezing enchiladas is a great way to save time. Here’s how to do it step-by-step: 1. Cool Completely: First, let the enchiladas cool to room temperature. 2. Wrap Individually: Wrap each enchilada tightly in plastic wrap. This helps prevent freezer burn. 3. Use a Freezer Bag: Place the wrapped enchiladas in a freezer-safe bag. Squeeze out as much air as possible. 4. Label and Date: Write the date on the bag so you remember when you made them. 5. Store: Place the bag flat in the freezer. They can last up to three months. To enjoy your enchiladas again, it's best to reheat them carefully. Here are the best methods: - Oven Method: Preheat your oven to 350°F (175°C). Place the enchiladas in a baking dish. Cover with foil to keep moisture in. Bake for about 20 minutes or until heated through. - Microwave Method: Place one enchilada on a microwave-safe plate. Cover it with a damp paper towel. Heat for 1-2 minutes, checking often to avoid drying it out. Following these tips will keep your easy chicken enchiladas tasty and ready to enjoy! For all the steps and details, check out the Full Recipe. To make Easy Chicken Enchiladas, you start with simple steps. First, gather your ingredients: - 2 cups cooked chicken, shredded - 1 cup black beans, drained and rinsed - 1 cup corn (fresh or frozen) - 1 teaspoon cumin - 1 teaspoon chili powder - 1 cup salsa (your choice of heat) - 1 ½ cups shredded cheese (cheddar or a Mexican blend) - 8 small flour tortillas - ½ cup sour cream (for topping) - Fresh cilantro, chopped (for garnish) - Olive oil (for greasing the baking dish) You mix the chicken, beans, corn, spices, and half the salsa in a bowl. Next, place some of this mixture in each tortilla. Roll them up and place them seam-side down in a greased dish. Pour the rest of the salsa on top and sprinkle with cheese. Bake until bubbly. For the full recipe, check out the details above. Yes, using rotisserie chicken is a great idea! It saves time and adds flavor. You can skip cooking the chicken. Simply shred the rotisserie chicken and mix it with your other ingredients. This shortcut keeps your meal quick and easy, perfect for busy days. If you want a dairy-free option, try using nutritional yeast. It adds a cheesy flavor without the dairy. You can also use vegan cheese. Look for brands that melt well. Another option is to skip the cheese altogether and load up on extra veggies for flavor. Cooked chicken enchiladas last about 3 to 4 days in the fridge. Store them in an airtight container to keep them fresh. If you want to keep them longer, consider freezing them. This way, you can enjoy them later without losing flavor. To sum up, easy chicken enchiladas are simple to make and delicious. You need cooked chicken, black beans, corn, and some spices. Mixing these ingredients leads to tasty stuffed tortillas. Don’t forget to add your favorite toppings for extra flavor. With these tips, you can customize your dish and store leftovers easily. Enjoy experimenting with variations like spicy or vegetarian enchiladas. Now, you're ready to create a meal that everyone will love. Cooking can be fun. Go ahead and try it!

Easy Chicken Enchiladas Simple and Flavorful Recipe

Craving a simple and tasty dinner? You’ll love these Easy Chicken Enchiladas! With just a few simple ingredients, you can

To make tasty chicken tenders, you need a few key items. Here’s what you will use: - 1 lb (450g) boneless, skinless chicken breasts, cut into strips - 1 cup buttermilk - 1 cup breadcrumbs (preferably panko for extra crunch) - ½ cup grated Parmesan cheese - 1 teaspoon garlic powder - 1 teaspoon onion powder - 1 teaspoon smoked paprika - ½ teaspoon salt - ½ teaspoon black pepper - 2 tablespoons fresh parsley, chopped (for garnish) - Cooking spray or olive oil for baking These ingredients work together to create crispy and flavorful chicken tenders. The buttermilk helps the chicken stay moist, while the panko breadcrumbs give a nice crunch. You can add extra flavors to your chicken tenders if you like. Consider these options: - Lemon zest for a fresh taste - Cayenne pepper for a spicy kick - Fresh herbs like thyme or oregano for depth - Honey or maple syrup for a hint of sweetness These optional ingredients let you customize your chicken tenders to match your taste. To prepare these chicken tenders, you will need some basic kitchen tools: - A mixing bowl for the buttermilk and chicken - A second bowl for the breadcrumb mixture - A baking sheet lined with parchment paper - A spatula for flipping the chicken tenders - An oven to bake them Having the right equipment will make your cooking easier and more fun. If you want to see the complete steps, check the Full Recipe. 1. First, preheat your oven to 400°F (200°C). This helps the chicken bake perfectly. 2. Line a baking sheet with parchment paper. Spray it lightly with cooking spray or brush it with olive oil. This keeps the chicken from sticking. 3. Take your chicken strips and place them in a bowl. Pour buttermilk over them. Make sure each piece is well coated. This adds flavor and moisture. 4. Cover the bowl and place it in the fridge. Let the chicken marinate for at least 30 minutes. You can marinate for up to 2 hours if you want more flavor. 5. While the chicken marinates, grab another bowl. Combine breadcrumbs, Parmesan cheese, garlic powder, onion powder, smoked paprika, salt, and black pepper. Mix these well. This will be your tasty coating. 6. Once the chicken has marinated, take it out of the fridge. Let the excess buttermilk drip off each strip. 7. Dredge each chicken strip in the breadcrumb mix. Press gently to help the crumbs stick. 8. Place the coated strips on your prepared baking sheet. Make sure they don’t touch each other. This helps them cook evenly. 9. Lightly spray the tops with more cooking spray or drizzle some olive oil. This step adds extra crunch. 10. Bake in the oven for 20-25 minutes. Flip the tenders halfway through. They should turn golden brown and crispy when done. 11. Remove the chicken tenders from the oven. Let them cool slightly on the baking sheet. This helps keep them juicy. 12. Once cooled, garnish with fresh parsley. You can serve these tenders with dipping sauces like honey mustard or BBQ. 13. For a colorful touch, add lemon wedges to your platter. This makes your dish look extra special. For the full recipe, check out the detailed instructions above. Enjoy your crispy baked chicken tenders! To get the crispiest chicken tenders, use panko breadcrumbs. They are lighter and airier than regular breadcrumbs. After coating the chicken, spray the tops with cooking spray. This helps them brown and become crunchy. Bake the tenders on parchment paper to keep them from sticking. Flipping them halfway through cooking also helps both sides crisp up nicely. Marinating chicken in buttermilk adds flavor and moisture. Let the chicken soak for at least 30 minutes. If you have time, marinate it longer, up to 2 hours. This allows the flavors to soak in deeply. Always cover the bowl to keep the chicken fresh. Make sure to drain off excess liquid before coating the chicken in breadcrumbs. One common mistake is overcrowding the baking sheet. Give each tender space to breathe while cooking. Another mistake is not preheating the oven. A hot oven helps the chicken cook evenly and crisps the coating. Lastly, skipping the light spray of oil can lead to less crispy tenders. Follow these tips for the best results! For a detailed guide, check the Full Recipe. {{image_2}} To make spicy chicken tenders, add hot sauce to the buttermilk. Use about two tablespoons. This gives your chicken a nice kick. You can use your favorite hot sauce. Marinate the chicken as usual. This method adds heat without losing flavor. Pair these spicy tenders with cooling dips like ranch or blue cheese. For a gluten-free option, replace regular breadcrumbs with gluten-free ones. Look for brands that use rice or corn flour. You can also use crushed gluten-free crackers for texture. Make sure your buttermilk is gluten-free as well. This way, everyone can enjoy crispy chicken tenders! If you want to switch up the flavor, try different breadcrumbs. Use Italian-seasoned breadcrumbs for added herbs. You could also use cornmeal for a crunchier texture. If you want something more unique, try crushed nuts like almonds or pecans. This gives your chicken a nutty flavor and a delightful crunch. Each option brings its own special twist to the dish. For the full recipe, check out the detailed steps above. After enjoying your crispy baked chicken tenders, let them cool. Place them in an airtight container. Layer parchment paper between tenders if you stack them. This keeps them from sticking together. Store the container in the fridge. Leftovers stay fresh for up to three days. To reheat your chicken tenders, use the oven for the best results. Preheat your oven to 350°F (175°C). Place the tenders on a baking sheet. Heat them for about 10-15 minutes. This keeps them crispy. You can also use a microwave, but they may lose some crunch. If you want to keep chicken tenders longer, freezing is a good option. Let them cool completely first. Wrap each tender in plastic wrap. Then place them in a freezer bag. Squeeze out as much air as possible. These can last for up to three months in the freezer. When you're ready to eat, thaw in the fridge overnight before reheating. For the full recipe, check earlier sections. You should marinate the chicken for at least 30 minutes. This helps the chicken absorb the flavors. If you have more time, marinate for up to 2 hours. It makes a big difference in taste. Yes, you can use an air fryer for this recipe. Set your air fryer to 400°F (200°C). Cook the chicken tenders for about 10-15 minutes. Flip them halfway through for even cooking and crispiness. Some great dipping sauces include: - Honey mustard - BBQ sauce - Ranch dressing - Ketchup - Sweet and sour sauce Choose your favorite or mix and match for fun! To make the tenders healthier, consider these tips: - Use whole grain breadcrumbs. - Bake instead of frying. - Add herbs and spices for flavor, not extra calories. - Serve with fresh veggies or a salad on the side. You can find the full recipe for Crispy Baked Chicken Tenders [here](insert-link). It details all the steps and ingredients to make this delicious meal. You learned how to make crispy baked chicken tenders. We covered key ingredients, steps, and tips. You can try variations like spicy or gluten-free options. Storing and reheating leftovers is easy too. Remember to marinate for the best flavor and avoid common mistakes for perfect results. With these insights, you can impress your family and friends. Enjoy your cooking adventure and turn dinner into a tasty experience!

Crispy Baked Chicken Tenders Simple and Tasty Meal

Are you ready to enjoy a delicious meal that’s easy to make? Crispy baked chicken tenders are the perfect dish

To make Buffalo Chicken Dip, gather these ingredients: - 2 cups shredded cooked chicken - 1 cup cream cheese, softened - 1/2 cup Greek yogurt - 1/2 cup buffalo sauce (adjust to taste) - 1 cup shredded cheddar cheese - 1/4 cup crumbled blue cheese (optional) - 1 tablespoon ranch seasoning mix - 1/2 teaspoon garlic powder - Salt and pepper to taste - Chopped green onions for garnish - Tortilla chips or veggie sticks for serving You can swap some ingredients for different flavors. If you don’t like blue cheese, skip it. Instead, add more cheddar or use feta cheese. For a lighter dip, replace cream cheese with cottage cheese. If you want less fat, use low-fat Greek yogurt. If you prefer a milder taste, choose a mild buffalo sauce. Use fresh, high-quality chicken for the best flavor. Store-bought rotisserie chicken works well and saves time. When choosing cheese, select a block of cheddar and shred it at home for a creamier texture. Look for buffalo sauce with a good balance of heat and flavor. Finally, always pick fresh green onions. They add a nice pop of color and taste. For the full recipe, check out the details above! To make Buffalo Chicken Dip, start by gathering your ingredients. You will need: - 2 cups shredded cooked chicken - 1 cup cream cheese, softened - 1/2 cup Greek yogurt - 1/2 cup buffalo sauce (adjust to taste) - 1 cup shredded cheddar cheese - 1/4 cup crumbled blue cheese (optional) - 1 tablespoon ranch seasoning mix - 1/2 teaspoon garlic powder - Salt and pepper to taste - Chopped green onions for garnish - Tortilla chips or veggie sticks for serving First, preheat your oven to 350°F (175°C). In a large bowl, mix the softened cream cheese and Greek yogurt. Add in the buffalo sauce, ranch seasoning, garlic powder, and a little salt and pepper. Stir until it’s smooth. Next, fold in the shredded chicken and half of the cheddar cheese. Mix it well. Pour the mixture into a baking dish, about 8x8 inches. Spread it evenly. Top it off with the rest of the cheddar cheese and, if you like, the crumbled blue cheese. Bake your dip in the preheated oven for about 20 minutes. You’ll know it’s ready when it’s bubbly and the cheese is melted and slightly golden. After baking, take it out and let it cool for a few minutes. This helps avoid burns when you dig in. Garnish your dip with chopped green onions for some color and flavor. Serve it hot with tortilla chips or veggie sticks for dipping. The heat and creaminess make it a perfect snack for parties. This dish is sure to please everyone! For the full recipe, check out the details above. Enjoy your cooking! To give your dip a kick, add more buffalo sauce. You can also mix in diced jalapeños or hot sauce. If you love heat, try using a spicy ranch dressing. Each of these will amp up the flavor. Just remember, taste as you go! A smooth dip is key. Start with softened cream cheese for easy mixing. Use Greek yogurt for a creamy texture and a slight tang. Mixing in extra cheddar cheese also helps keep it rich. Avoid overcooking, as this can make it dry. You can prepare your Buffalo chicken dip in advance. Mix all the ingredients and store it in the fridge. When you are ready to serve, just bake it. This makes hosting easy and fun! You can also freeze the dip, but be sure to let it thaw in the fridge overnight before cooking. For the full recipe, check out the detailed steps above. {{image_2}} You can make Buffalo chicken dip in a slow cooker. This method keeps the dip warm and creamy. Start by mixing all the ingredients in the slow cooker. Set it on low for two hours. Stir it every so often. When it's hot and bubbly, it’s ready to serve. This is a great option for parties. You can enjoy the dip without worrying about it cooling down. You can easily make a vegetarian version. Instead of chicken, use shredded jackfruit or cooked cauliflower. Both options soak up the spicy buffalo sauce well. Use the same cream cheese and yogurt mix. Add a bit more buffalo sauce for extra flavor. This dip is still creamy and delicious. Your vegetarian friends will love it too. Want to try something different? Add unique ingredients to your dip. Try mixing in diced celery for crunch. You could also add chopped pickles for a tangy twist. For a smoky flavor, sprinkle in some smoked paprika. If you like heat, add diced jalapeños. These small changes can elevate your dip. They add fun flavors that surprise your guests. Try these variations to make your Buffalo chicken dip more exciting! You can find the full recipe to get started. After your party, store any leftover buffalo chicken dip in an airtight container. This keeps it fresh and tasty. Make sure to let it cool first before sealing it up. Place it in the fridge right away. It will stay good for about 3 to 4 days. To reheat buffalo chicken dip, first take it out of the fridge. You can warm it in the oven or microwave. If using the oven, preheat it to 350°F (175°C). Place the dip in a safe dish and heat for about 15 minutes. Stir halfway through to make sure it warms evenly. In the microwave, heat it in short bursts of 30 seconds. Stir after each burst until it's hot. You can freeze buffalo chicken dip for later use. First, make sure it is cool. Transfer it to a freezer-safe container. You can also use freezer bags. Press out as much air as you can before sealing. This will help prevent freezer burn. It can last up to 3 months in the freezer. When you are ready to use it, thaw it overnight in the fridge before reheating. Enjoy your dip again at your next gathering! For the full recipe, check out the details above. Buffalo Chicken Dip can last up to four days in the fridge. Make sure it is in an airtight container. Always check for any signs of spoilage before eating. If it smells off or looks strange, it's best to toss it out. Yes, you can make Buffalo Chicken Dip without cream cheese. You can use Greek yogurt instead. It keeps the dip creamy. You can also try sour cream or cottage cheese. Just note that the flavor will change slightly. You can serve Buffalo Chicken Dip with tortilla chips or veggie sticks. Carrot sticks, celery, or bell pepper slices work great. They add crunch and freshness. You could also use pita chips or crackers for a different twist. This blog post covers the key parts of making Buffalo Chicken Dip. We explored the ingredients, helpful substitutions, and tips for picking the best items. I shared steps for preparation and cooking, along with serving ideas. We also looked at tips for adding spice and creaminess, plus options for making it ahead. Various recipes let you try new flavors, and I explained how to store and reheat leftovers. In conclusion, Buffalo Chicken Dip is fun and easy to customize. Enjoy creating your perfect dish!

Buffalo Chicken Dip Savory and Easy Party Snack

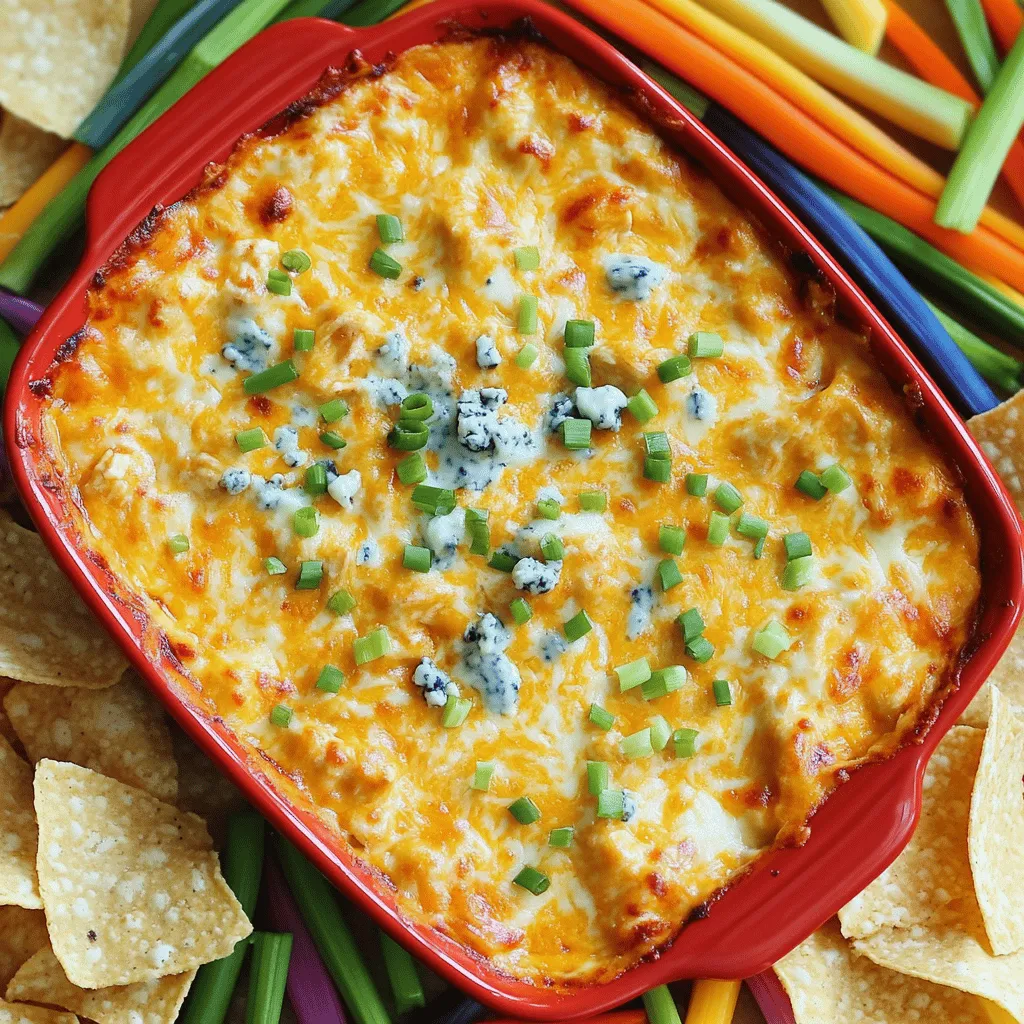
Buffalo Chicken Dip is a tasty and simple snack for any party. You can whip it up in no time

Older posts
Newer posts
← Previous Page1 … Page26 Page27 Page28 … Page53 Next →

dsad

© 2025 savoryspiral • Built with GeneratePress

Our Policies

  • Copyright Policy
  • Cookie Policy
  • GDPR Policy
  • Privacy Policy
  • Disclaimer
  • Terms Of Use

More Information

  • Home
  • About
  • Contact
  • Appetizers
  • Dessert
  • Dinner
  • Drinks
©2025, savoryspiral About Back To Top