Skip to content
DisclaimerTerms Of UseGDPR PolicyCookie Policy

savoryspiral

  • Home
  • Drinks
  • Appetizers
  • Dinner
  • Dessert
  • About
  • Contact
  • Privacy Policy
DisclaimerTerms Of UseGDPR PolicyCookie Policy

Charlotte

To make Fiesta Chicken Burrito Bowls, gather these simple ingredients: - 2 boneless, skinless chicken breasts - 1 teaspoon chili powder - 1 teaspoon cumin - 1 teaspoon garlic powder - 1 teaspoon paprika - 1 tablespoon olive oil - Salt and pepper to taste - 1 cup cooked brown rice - 1 can black beans, rinsed and drained - 1 cup corn kernels (fresh or frozen) - 1 red bell pepper, diced - 1 avocado, sliced - 1 cup cherry tomatoes, halved - 1 cup shredded lettuce - 1 lime, cut into wedges - Fresh cilantro for garnish You will need a few key tools to prepare this dish: - A grill or cast-iron skillet - A small bowl for mixing spices - A sharp knife for slicing chicken and veggies - Serving bowls for your burrito bowls These items help you cook and serve your meal with ease. Feel free to add your favorite toppings for extra flavor. Here are some ideas: - Sour cream or Greek yogurt - Shredded cheese, like cheddar or Monterey Jack - Jalapeños for a spicy kick - Salsa for added zest - Extra cilantro for garnish These toppings let you customize your Fiesta Chicken Burrito Bowls to your taste. For the full recipe, check out the detailed steps that follow! Start by gathering your ingredients. Make sure you have everything ready. This will save time later. Preheat your grill or a cast-iron skillet over medium-high heat. Grab a small bowl and mix your spices. You will need chili powder, cumin, garlic powder, paprika, salt, and pepper. This spice mix adds great flavor to the chicken. Rub this mix evenly over both sides of the chicken breasts. Don’t skip this step! Drizzle some olive oil on the grill or skillet. Place the seasoned chicken breasts on it. Cook for about 6-7 minutes on each side. You want the chicken cooked through. It should reach an internal temperature of 165°F (75°C). Once cooked, remove the chicken from the heat. Let it rest for 5 minutes before slicing it into strips. This helps keep the chicken juicy. Now, it’s time to build your burrito bowls. Start by placing cooked brown rice at the bottom of four serving bowls. This gives a nice base. Next, add black beans, corn, and diced red bell pepper. Then, layer on the sliced avocado and halved cherry tomatoes. Finish with a mound of shredded lettuce. Arrange the sliced chicken strips on top of each bowl. Squeeze fresh lime juice over the bowls and garnish with cilantro. For the full recipe, check the earlier section. Enjoy your delicious Fiesta Chicken Burrito Bowls! To make the chicken tasty, use fresh ingredients. I recommend using boneless, skinless chicken breasts. The spice mix is key. Combine chili powder, cumin, garlic powder, and paprika. Rub this mix on both sides of the chicken. Let it sit for a bit to soak in the flavor. Grill or pan-sear the chicken on medium-high heat. Cook until the chicken is golden and reaches 165°F (75°C). Rest it for five minutes before slicing. This helps keep it juicy. You can change the flavors to suit your taste. For a smoky flavor, add chipotle powder. Want it a bit zesty? Mix in lime zest. If you like sweet, try adding a touch of honey to the spice mix. You can also use different proteins. Shrimp or tofu work great too. Feel free to switch up the beans. Pinto beans or chickpeas are good options. Serve your Fiesta Chicken Burrito Bowls in fun bowls. Start with a layer of brown rice. Add black beans, corn, and diced bell pepper. Then, pile on sliced avocado and cherry tomatoes. Top with the grilled chicken. Squeeze fresh lime juice over everything. Don’t forget to sprinkle some fresh cilantro for a pop of color and taste. These bowls are perfect for family dinners or meal prep. If you want more ideas, check out the Full Recipe for inspiration. {{image_2}} You can make a great vegetarian version of Fiesta Chicken Burrito Bowls. Just swap the chicken for grilled veggies. Use bell peppers, zucchini, and mushrooms. Season them with the same spices for flavor. You can also add extra beans for protein. Black beans or pinto beans work well. This option tastes fresh and colorful. You still get all those nice layers! To make a low-carb version, skip the brown rice. Instead, use cauliflower rice. It’s a great swap that keeps it light. You can also add more veggies like spinach or kale. They add nutrients and make the bowl filling. This way, you enjoy the same taste without all the carbs. It’s perfect for anyone watching their carbs! If you like heat, add a spicy twist! You can mix some diced jalapeños into the bowl. For more flavor, try a chipotle sauce. Drizzle it on top for an extra kick. You can also use spicy salsa instead of regular salsa. This will make each bite exciting and bold. Your taste buds will love the added spice! After you enjoy your Fiesta Chicken Burrito Bowls, store any leftovers. Place the bowls in airtight containers. Make sure to separate the chicken and fresh toppings. This keeps them fresh longer. Store in the fridge for up to three days. Use clear labels to track when you stored them. To reheat, use the microwave or stove. For the microwave, place the bowl in for 1-2 minutes. Stir halfway through to heat evenly. If using the stove, heat the chicken and rice in a pan over medium heat. Add a splash of water to keep it moist. Stir often until hot. You can freeze the chicken and rice for up to three months. Use freezer-safe containers or bags. Make sure to remove as much air as possible. When ready to eat, thaw the chicken and rice in the fridge overnight. Reheat as mentioned above. Fresh toppings like avocado and lettuce should not be frozen. Add them just before serving. For the complete recipe, refer to the Full Recipe section. Fiesta Chicken Burrito Bowls stay fresh in the fridge for about 3 to 4 days. To keep them tasty, store them in an airtight container. This helps keep the flavors intact. I recommend eating them within this time for the best taste and quality. Yes, you can use frozen chicken for this recipe. Just make sure to thaw it first. You can do this by placing it in the fridge overnight. If you're in a hurry, place it in a sealed bag and run it under cold water. Once thawed, season and cook it as per the recipe. If you want a change, you can swap brown rice for white rice or quinoa. Cauliflower rice is a great low-carb option. It adds a nice texture and absorbs flavors well. Just cook it slightly before layering it in your bowl. Each choice brings a new taste to your Fiesta Chicken Burrito Bowls. For the full recipe, check out the details above. This blog gave you all the steps to make Fiesta Chicken Burrito Bowls. You learned about key ingredients, cooking methods, and storage tips. Remember, you can adjust flavors and try different toppings for fun. Don’t forget the vegetarian and low-carb options! These bowls can fit anyone's taste. Enjoy your cooking, and make it your own! Dive in and create a bowl that you love.

Fiesta Chicken Burrito Bowls Flavorful and Easy Recipe

Are you ready to spice up your dinner routine? My Fiesta Chicken Burrito Bowls pack a punch of flavor without

To make Garlic Parmesan Zucchini Chips, you need a few key ingredients. These ingredients help create that crispy and tasty snack you will love. Here’s what you need: - 2 medium zucchinis, thinly sliced - 1/2 cup grated Parmesan cheese - 2 tablespoons olive oil - 3 cloves garlic, minced - 1 teaspoon onion powder - 1/2 teaspoon smoked paprika - Salt and pepper to taste - Fresh parsley, chopped (for garnish) These zucchinis are the star of the show. Their mild flavor pairs well with the cheese and garlic. The Parmesan adds a rich taste. Olive oil helps the chips crisp up nicely in the oven. The seasonings make these chips really pop! Garlic and onion powder add depth to the flavor. Smoked paprika gives a hint of warmth and a bit of smokiness. Here are some tips to keep in mind: - Use fresh garlic for a stronger flavor. - Slice the zucchinis thinly for the best crunch. - Coat the zucchini well in olive oil. This helps the seasonings stick. - Don’t skip the salt! It enhances all the flavors. Make sure to taste your mixture before baking. Adjust the salt and pepper as needed to suit your taste. Feel free to get creative! You can add optional ingredients to change the flavor. Here are a few ideas: - Add red pepper flakes for a spicy kick. - Try other cheeses, like cheddar or mozzarella, for a twist. - Mix in dried herbs like oregano or thyme for extra aroma. These variations can make your chips even more fun. Don’t be afraid to experiment and find your favorite mix! For the full recipe, check the details above. First, wash the zucchinis well under cold water. This removes any dirt. Next, slice the zucchinis into thin rounds. Aim for about 1/8 inch thick. Thin slices help them crisp up nicely. Use a sharp knife or a mandoline for even slices. Once sliced, place them in a large bowl. Add 2 tablespoons of olive oil to the bowl with the zucchini. Then, add 3 minced garlic cloves, 1 teaspoon of onion powder, and 1/2 teaspoon of smoked paprika. Sprinkle salt and pepper to taste. Toss everything together until the zucchini slices are fully coated. This mixture gives the chips their great flavor. Next, lay the seasoned zucchini slices on a baking sheet lined with parchment paper. Make sure they are in a single layer. Do not let them overlap; this helps them bake evenly. Now, sprinkle 1/2 cup of grated Parmesan cheese over the top. Preheat your oven to 225°F (110°C). Place the baking sheet in the oven and bake for about 2 hours. Keep an eye on them after the first hour. The chips should look dry and crisp when they are done. Once finished, take the chips out of the oven. Let them cool for a few minutes before serving. They will get crispier as they cool. For a nice touch, sprinkle some fresh chopped parsley on top. Enjoy your Garlic Parmesan Zucchini Chips! For the complete details, check the Full Recipe. To get your zucchini chips crisp, it’s key to slice them thin. Aim for about 1/8 inch thick. Thinner slices dry out better. You also want to bake at a low temperature. Setting your oven to 225°F (110°C) helps them dry slowly. This method prevents burning while keeping them crunchy. Lastly, space the slices apart on the baking sheet. They should not touch or overlap. This ensures even air flow and crispiness. One big mistake is not drying the zucchini enough. After slicing, pat them dry with paper towels. This step removes excess moisture. Another issue is overcrowding the baking sheet. If the slices overlap, they won’t cook evenly. Also, be careful with the seasoning. Too much salt can draw out moisture and make them soggy. Lastly, don't skip the cooling step. Letting them cool helps them crisp up even more. For even cooking, make sure your zucchini slices are uniform. If some are thicker, they will cook slower. Keep an eye on them as they bake. After the first hour, check for doneness. Rotate the baking sheet halfway through. This helps all sides get equal heat. Remember to let them cool for a few minutes after baking. They will continue to become crispy during this time. Follow these tips, and you’ll enjoy perfect Garlic Parmesan Zucchini Chips every time. For the full recipe, check this [Full Recipe]. {{image_2}} To make spicy garlic Parmesan zucchini chips, add some heat. Mix in red pepper flakes or cayenne pepper. Start with a pinch, then taste and adjust. This spice will add a nice kick. The heat balances well with the rich cheese. For herb-infused zucchini chips, add dried herbs to the mix. Try oregano, thyme, or basil. These herbs will bring fresh flavors to your chips. Simply mix them in with the other seasonings. You can even use fresh herbs if you have them. If you want to switch up the cheese, try different options. Nutritional yeast gives a cheesy flavor without dairy. You can also use cheddar or mozzarella. Each cheese brings a unique taste to your chips. Feel free to experiment and find what you love! For the full recipe, check out the Garlic Parmesan Zucchini Chips section above. After you make your Garlic Parmesan Zucchini Chips, let them cool completely. Once they are cool, place them in an airtight container. You can store them at room temperature for up to three days. If you want to keep them longer, store them in the fridge for up to a week. Just remember, the longer they sit, the less crispy they become. To keep your zucchini chips crispy, make sure they are completely dry before storing. If they feel a bit moist, pop them back in the oven for a few minutes. You can also add a small packet of silica gel to the container. This helps absorb any moisture. Avoid stacking the chips on top of each other. This can cause them to lose their crunch. To reheat your leftover zucchini chips, use the oven. Preheat the oven to 300°F (150°C). Spread the chips on a baking sheet in a single layer. Heat them for about five to ten minutes. This brings back their crunch and flavor. Avoid using the microwave, as it can make them soft and chewy. Enjoy your crispy chips just like when they were fresh! For the full recipe, check out the detailed steps above. Yes, you can! An air fryer cooks zucchini chips quickly and gives them a nice crunch. Set your air fryer to 375°F (190°C). Arrange the zucchini slices in a single layer. Cook them for about 10 to 15 minutes. Shake the basket halfway through to ensure even cooking. Keep an eye on them. Each air fryer is different! You will know the chips are done when they are golden brown and crispy. They should feel dry to the touch. If they bend easily, they need more time. The baking time can vary, so check around the 1 hour mark. Let them cool for a few minutes. They will get crispier as they cool. Garlic Parmesan Zucchini Chips pair well with many dishes. You can serve them as a snack on their own. They also make a great side dish with grilled meats. Try them with dips like ranch or tzatziki. They add a nice crunch to salads too! For the full recipe, check out the details above. Garlic Parmesan Zucchini Chips are easy to make and delicious. We covered key ingredients, seasonings, and tips for the best crispiness. I shared variations to keep it exciting and how to store and reheat them. For maximum taste, get creative with herbs and spices. Remember to avoid common mistakes for perfect chips every time. Enjoy your snack, knowing you made something healthy and tasty. Embrace your kitchen skills and keep experimenting!

Garlic Parmesan Zucchini Chips Crispy and Flavorful

Are you craving a snack that’s both crunchy and packed with flavor? Look no further than my Garlic Parmesan Zucchini

To make your Summer Berry Trifle, gather these simple ingredients: - 2 cups mixed summer berries (strawberries, blueberries, raspberries) - 1 cup heavy whipping cream - 1/2 cup powdered sugar - 1 teaspoon vanilla extract - 1 cup vanilla sponge cake, cut into cubes (store-bought or homemade) - 1/2 cup Greek yogurt - Fresh mint leaves for garnish Choose berries that are bright, firm, and free from blemishes. Look for: - Color: Vivid colors show ripeness. - Firmness: They should feel solid, not mushy. - Smell: Fresh berries have a sweet scent. Avoid any containers with mold or crushed fruit. Rinse them gently under cold water before use. Pat them dry with a paper towel. This keeps your trifle from being soggy. You can switch ingredients based on your taste or diet. Here are some ideas: - Berries: Use blackberries, peaches, or cherries for variety. - Cake: Swap sponge cake for pound cake or ladyfingers. - Greek Yogurt: Use regular yogurt or a dairy-free option for a lighter touch. - Cream: Substitute whipped coconut cream for a vegan option. These swaps can help you make a trifle that fits your needs while still being delicious. For the full recipe, check the earlier sections. First, wash your mixed berries. I like to use strawberries, blueberries, and raspberries. If you choose strawberries, slice them into quarters. This step makes the berries easier to layer and eat. After washing and slicing, set them aside to drain. This helps remove extra water and keeps your trifle from getting soggy. Next, grab a mixing bowl. Combine one cup of heavy whipping cream, half a cup of powdered sugar, and one teaspoon of vanilla extract. Use an electric mixer to whip this mixture until soft peaks form. This means the cream should hold its shape but still be fluffy. In a separate bowl, mix half a cup of Greek yogurt with one spoonful of whipped cream. This lightens the yogurt. Gently fold the rest of the whipped cream into the yogurt. This creates a smooth and airy mix, perfect for your trifle. Now it’s time to build your trifle. Take a large trifle bowl or individual glasses. Start with a layer of sponge cake cubes. Then, add a layer of mixed berries on top. Next, spread a layer of the yogurt and whipped cream mix over the berries. Use a spatula to smooth it out. Repeat this layering until you reach the top of your bowl or glasses. Finish with a layer of the cream mixture. Top your trifle with the remaining berries and a few fresh mint leaves for a pop of color. Finally, refrigerate your trifle for at least two hours. This wait allows the flavors to blend and the cake to soak up berry juices. For the full recipe, check out the details above. To make perfect whipped cream, start with cold tools. Use a cold bowl and beaters. This helps the cream whip faster. Pour in 1 cup of heavy whipping cream. Add 1/2 cup of powdered sugar and 1 teaspoon of vanilla extract. Beat on medium speed until soft peaks form, which takes about 2-3 minutes. Avoid over-whipping, or it will turn grainy. You can make the trifle ahead of time. Prepare the whipped cream and yogurt mixture up to a day before. Store them in the fridge, covered. This saves time on the day you serve it. You can also cut the sponge cake into cubes ahead. Just keep it in an airtight container. Assemble the trifle a few hours before serving for the best taste. Layering is key for a great trifle. Start with the sponge cake at the bottom. It soaks up berry juices and keeps it moist. Follow with a layer of mixed berries. Then add the yogurt and whipped cream mixture. Repeat until you reach the top. Finish with whipped cream and extra berries. This looks beautiful and tastes great! For the full recipe, check out the Summer Berry Trifle. {{image_2}} You can mix and match berries in your trifle. Use strawberries, blueberries, and raspberries for a classic look. You can also try blackberries for a richer flavor. If you want something unique, add peaches or cherries. Each berry gives a different taste and color to your trifle. Try different combos to find your favorite mix! The cake is key in your trifle. You can use vanilla sponge cake, but other options work well too. Angel food cake is light and fluffy. Pound cake offers a denser texture, which some may like. For a fun twist, use brownies or even cookies. Just remember to cut them into small pieces for layering. Your choice can change the whole feel of the dessert! If you need a non-dairy trifle, I have great options. For whipping cream, use coconut cream. It whips up nicely and adds a tropical touch. Instead of yogurt, try almond or soy yogurt. These alternatives keep the trifle creamy without dairy. You can still enjoy a tasty dessert that fits your diet! For the full recipe, check out the Summer Berry Trifle section. To keep your summer berry trifle fresh, store it in the fridge. Use a tight lid or cover it with plastic wrap. This helps keep the flavors and textures intact. Make sure to avoid pressing the wrap down on the cream layers. This can cause them to lose their shape. The trifle will stay good for about three days in the fridge. After that, the berries may start to lose their charm. The cream can also become watery. If you use fresh ingredients, they help the trifle taste best for that time. Always check for any signs of spoilage before serving. Freezing the trifle is not the best choice. The cream and berries may change texture when thawed. However, you can freeze the sponge cake layers. Wrap them well in plastic wrap and then foil. They will keep for up to three months. When ready to use, just thaw at room temperature and layer with fresh berries and cream. For the best taste, enjoy your trifle fresh. Try the Full Recipe to savor every bite! The best berries for a summer trifle are strawberries, blueberries, and raspberries. These berries add color and flavor. Strawberries are sweet and juicy. Blueberries are small and pop in your mouth. Raspberries have a tart taste that pairs well with cream. You can mix them or use just one type. Fresh berries are best, but frozen can work too. Just thaw them and drain extra juice. Yes, you can make this trifle the night before. This gives the flavors time to blend. It also helps the cake soak up the berry juices. Just be sure to cover it well and keep it in the fridge. The trifle will be ready to serve the next day. However, make sure not to add the fresh mint leaves until right before serving. This keeps them fresh and vibrant. To make this dessert gluten-free, use gluten-free cake instead of regular sponge cake. You can find pre-made gluten-free cakes at many stores. You can also make your own using gluten-free flour blends. Check the labels on all your ingredients to ensure they are gluten-free. This way, everyone can enjoy this tasty summer treat without worry. You learned how to make a delicious berry trifle, starting from selecting fresh berries. Use tips for the best whipped cream and layering techniques. Remember, you can swap ingredients to fit your taste. Store it properly to keep it fresh. This dessert is flexible and fun to make. Enjoy creating your own version and impressing others with your skills!

Summer Berry Trifle Delicious and Easy Dessert Recipe

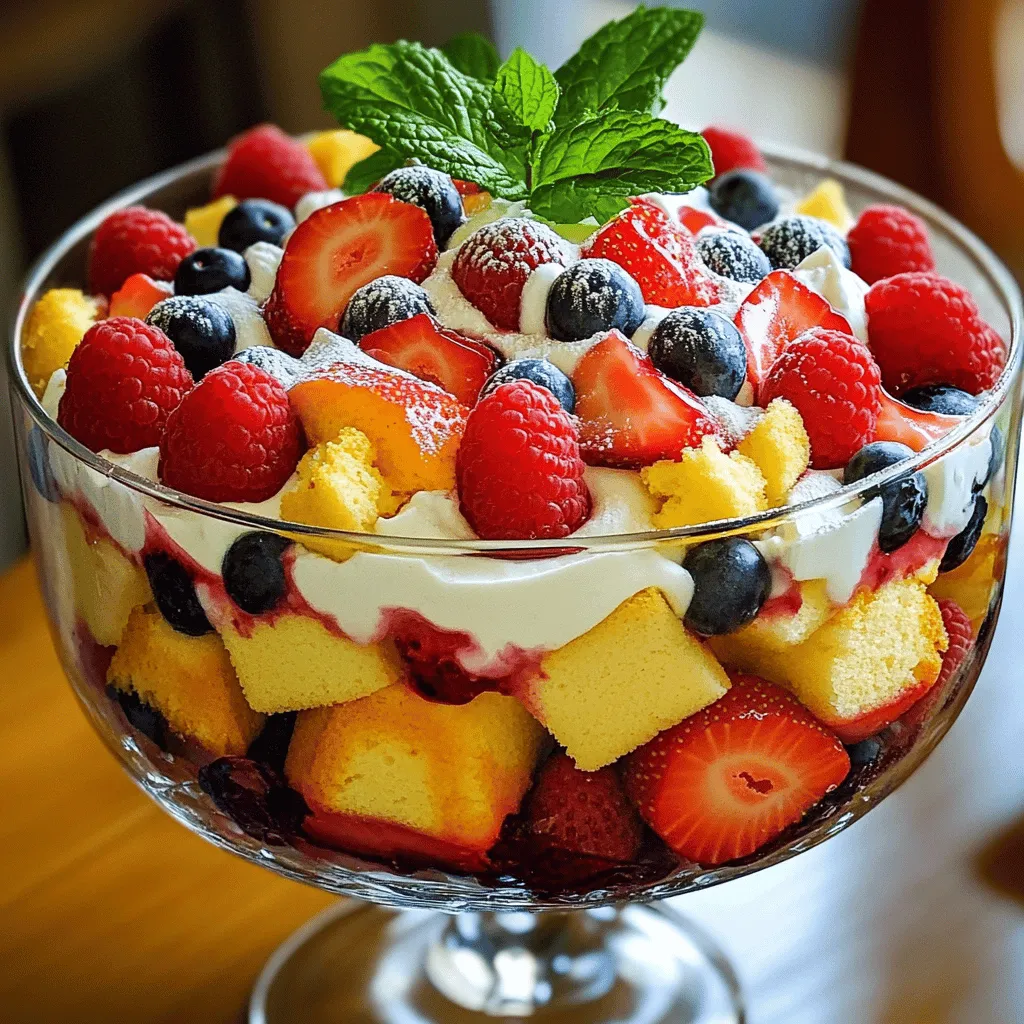
Looking for a dessert that screams summer? My Summer Berry Trifle is easy to make and bursting with flavor. You’ll

- 1 cup canned black beans, drained and rinsed - 1 cup sweet corn (frozen or canned) - 1 cup shredded cheese (cheddar or a blend) - 1 medium red bell pepper, diced - 1 small red onion, finely chopped - 1 teaspoon ground cumin - 1 teaspoon chili powder - Salt and pepper to taste - 4 large flour tortillas - 2 tablespoons olive oil - Fresh cilantro, chopped (for garnish) - Lime wedges (for serving) To make black bean and corn quesadillas, you start with a few simple ingredients. Canned black beans are your base. They give a nice texture and protein. Sweet corn adds a touch of sweetness. You can use frozen or canned corn, whichever you prefer. Next, choose your cheese. I like a blend of cheddar and Monterey Jack. It melts well and adds flavor. Fresh vegetables like red bell peppers and onions bring color and crunch. The spices, such as cumin and chili powder, give the quesadillas warmth and depth. You’ll need large flour tortillas. They hold everything together nicely. Olive oil is essential for cooking. It helps the tortillas get golden brown and crispy. Finally, garnish with fresh cilantro and serve with lime wedges for a burst of freshness. Check out the Full Recipe for more details on how to create this delicious dish! 1. Mixing the filling In a large bowl, combine the black beans, sweet corn, diced red bell pepper, and chopped red onion. Add ground cumin, chili powder, salt, and pepper. Stir until everything is mixed well. This filling packs great flavor! 2. Cooking process for tortillas Heat 1 tablespoon of olive oil in a large skillet over medium heat. Place one tortilla in the skillet. Sprinkle half of it with cheese, about 1/2 cup. Spoon some of the black bean and corn mixture over the cheese. Add more cheese on top and fold the tortilla in half. 3. Serving instructions Cook the quesadilla for about 3-4 minutes until golden brown. Carefully flip it and cook the other side for 3-4 more minutes. Remove it from the skillet and let it cool for a minute. Cut it into wedges. Repeat this with the rest of the tortillas and filling. Serve warm, topped with fresh cilantro and lime wedges for a zesty touch. - Heat settings Use medium heat for cooking the tortillas. This helps them cook evenly and get nice and crispy. - Timing for each cooking stage Each quesadilla takes around 6-8 minutes total—3-4 minutes on each side. Adjust your heat and timing as needed to avoid burning. Remember, patience is key for that perfect quesadilla! To make the perfect quesadilla, start with the cheese. You want it to melt just right. Use a cheese that melts well, like cheddar or a blend. This creates a gooey, savory center that holds the filling together. Next, let's talk about the tortillas. For a crispy finish, heat your skillet over medium-high heat. Use a bit of olive oil on the pan. This helps the tortilla brown nicely, adding texture and flavor. Don’t rush this step; let it cook until golden. You can also enhance flavors. Try adding spices like smoked paprika or fresh herbs. This adds an extra layer of taste to your quesadillas. A squeeze of lime juice before serving brightens everything up. One common mistake is oversaturating the filling. If you add too much, the quesadilla can fall apart. Aim for a balanced amount of beans, corn, and cheese. This keeps the quesadilla intact and easy to eat. Another mistake is using the wrong heat level. Too high, and your tortilla will burn before the cheese melts. Too low, and it will turn soggy. Keep an eye on the heat to ensure a perfect cook. Adjust it as needed while cooking. {{image_2}} You can switch up the beans in this recipe. Pinto beans or kidney beans work well. If you want protein, try cooked chicken, beef, or tofu. You can also add seasonal veggies. Fresh spinach or zucchini can brighten the dish. Don't hesitate to experiment with flavors and colors! If you follow a vegan diet, skip the cheese or use a plant-based version. You can also try nutritional yeast for a cheesy flavor. For gluten-free options, use corn tortillas. They hold up well and taste great. These changes ensure everyone can enjoy this tasty meal! To keep your black bean and corn quesadillas fresh, store them in the fridge. Place them in an airtight container. You can enjoy them for up to three days. If you want to keep them longer, freezing is a great option. Wrap each quesadilla tightly in plastic wrap. Then, place them in a freezer bag. They can last up to three months in the freezer. When you're ready to eat your leftovers, reheating is key. To keep quesadillas crispy, use a skillet. Heat it over medium heat and add a little oil. Place the quesadilla in the skillet for about three minutes on each side. This method helps maintain that golden crunch. You can also use an oven. Preheat it to 350°F (175°C). Place the quesadilla on a baking sheet and heat for about 10 minutes. These techniques ensure your quesadillas taste great every time you enjoy them. For the full recipe, check out the original source. How do I make them spicier? To add some heat, use jalapeños or hot sauce. You can mix in diced jalapeños with the filling. You might also try adding cayenne pepper to the black bean mixture. Start with a little and add more to suit your taste. Can I use different cheeses? Yes, you can! Feel free to use mozzarella, pepper jack, or a cheese blend. Each cheese brings a different flavor and texture. Just make sure the cheese melts well for a tasty quesadilla. Are these quesadillas freezer-friendly? Absolutely! You can freeze the cooked quesadillas for easy meals. Wrap each quesadilla in foil or plastic wrap. Store them in a freezer bag. They will keep well for up to three months. To reheat, bake them in the oven for a crispy texture. What to serve with quesadillas? Quesadillas pair well with salsa, guacamole, or sour cream. A fresh salad or rice can also complement them nicely. You could try a simple corn salad for a tasty side. How to make homemade tortillas? Making tortillas at home is easy! You need flour, salt, water, and oil. Mix the ingredients, knead the dough, and let it rest. Roll it into thin circles and cook on a hot skillet for about 1 minute per side. Fresh tortillas add a lovely touch to your meal. For the full recipe, check the link above! This blog post covered how to make tasty black bean and corn quesadillas. We explored ingredients, cooking steps, and timing. I shared tips for perfecting your dish and common mistakes to avoid. We also talked about variations, storage, and answered FAQs. Quesadillas are fun to make and can be adapted to fit your taste. So grab your ingredients and start cooking your perfect quesadilla today! Enjoy delicious meals now and in the future.

Savory Black Bean and Corn Quesadillas Recipe

Are you ready to make a quick and tasty meal? Black Bean and Corn Quesadillas are perfect for lunch or

- Main Ingredients: Rice Noodles and Fresh Vegetables - 8 oz rice noodles - 1 cup red cabbage, shredded - 1 cup carrots, julienned - 1 cup bell peppers (mixed colors), thinly sliced - 1 cucumber, thinly sliced - 1/2 cup green onions, chopped - 1/4 cup fresh cilantro, chopped - 1/4 cup peanuts, roughly chopped These fresh vegetables add color and crunch. Each bite bursts with flavor. The rice noodles provide a great base. They soak up the dressing well. - Peanut Dressing Components - 3 tablespoons peanut butter - 2 tablespoons soy sauce - 1 tablespoon sesame oil - 1 tablespoon lime juice - 1 tablespoon maple syrup (or honey) - 1 teaspoon ginger, grated - 1 clove garlic, minced - Water (to thin out the dressing as needed) This dressing ties the salad together. The peanut butter gives a rich taste. Lime juice adds freshness. Ginger and garlic enhance the flavor too. - Optional Garnishes - Chopped green onions - Fresh cilantro - Chopped peanuts These garnishes add a nice touch. They provide extra crunch and flavor. You can use them based on your taste. For the full recipe, check out the Crunchy Thai Peanut Noodle Salad 🥡🥜. To cook the rice noodles, start by boiling water in a large pot. Add the noodles and cook them for about 4 to 6 minutes. You want them to be al dente, not mushy. After cooking, drain the noodles and rinse them under cold water. This cools them down and stops the cooking process. For perfect texture, be sure not to overcook them. It helps to stir the noodles while they cook, so they don’t stick together. While the noodles cook, it’s time to prepare the vegetables. Use a sharp knife to shred the red cabbage finely. Julienning the carrots into thin strips adds a nice crunch. Slice the bell peppers and cucumber thinly for a colorful touch. Fresh produce makes a big difference in flavor and texture, so choose bright, firm vegetables. Once chopped, place all the veggies in a large mixing bowl. Now, let’s make the peanut dressing. In a small bowl, combine peanut butter, soy sauce, sesame oil, lime juice, maple syrup, grated ginger, and minced garlic. Whisk these ingredients together until smooth. If it feels too thick, add a bit of water to reach your desired consistency. The dressing should be creamy and flavorful, enhancing the salad. With everything ready, it’s time to assemble the salad. Add the cooled noodles to the bowl with the vegetables. Pour the peanut dressing over the top. Toss everything gently but thoroughly to coat the noodles and veggies evenly. You want every bite to be full of flavor, so take your time with this step. For an attractive presentation, garnish the salad with chopped green onions, fresh cilantro, and roughly chopped peanuts. This not only adds flavor but also a nice crunch. Serve the salad in large bowls or on a platter. If you like, add a lime wedge on the side for a fresh squeeze before eating. This salad looks good and tastes even better! For the complete recipe, refer to the Full Recipe section. To make your Crunchy Thai Peanut Noodle Salad shine, focus on flavor and texture. Here are some tricks: - Fresh Herbs: Add extra cilantro for a bright taste. - Crunch Factor: Use fresh, crispy vegetables like bell peppers and cucumbers. - Peanut Butter Quality: Choose a natural, creamy peanut butter for a rich dressing. Common mistakes include: - Overcooking Noodles: Follow the package instructions closely for perfect noodles. - Skipping the Rinse: Rinse noodles with cold water to stop cooking and keep them firm. - Too Much Dressing: Use just enough dressing to coat without drowning the ingredients. To save time while cooking, try these tips: - Prep Ahead: Chop vegetables and make the dressing a day before. - Batch Cooking: Cook extra rice noodles for future salads or meals. - Efficient Chopping: Use a food processor for quick veggie prep. This salad can be a balanced meal by keeping a few key factors in mind: - Nutritional Balance: Add protein like grilled chicken or tofu for a filling dish. - Diet Modifications: Substitute gluten-free noodles for a gluten-free option. - Watch the Dressing: Use less peanut butter or maple syrup for a lighter dressing. For the full recipe, check out the Crunchy Thai Peanut Noodle Salad section. {{image_2}} You can change ingredients to suit your taste. If you cannot find rice noodles, try using soba or glass noodles. For a gluten-free option, use tamari instead of soy sauce. You can replace peanuts with sunflower seeds for a nut-free version. If you prefer a vegan salad, swap the honey for maple syrup. You can also add tofu or chickpeas for protein. These swaps keep the dish fresh and exciting, allowing you to make it your own. Sometimes, a little extra flavor can make a big difference. Sprinkle sesame seeds on top for added crunch. You can also add sliced jalapeños for a spicy kick. Fresh herbs like mint or basil can bring new life to the dish. If you want a different dressing, try adding coconut milk for creaminess. A splash of rice vinegar can brighten up the flavors. Mix and match these ideas to find what you love best. Using seasonal veggies makes this salad more vibrant. In spring, add asparagus or snap peas for a fresh crunch. In summer, try cherry tomatoes or zucchini to enhance color and taste. In fall, roasted sweet potatoes can add warmth and sweetness. During winter, use hearty greens like kale or Brussels sprouts. Adapting the recipe this way keeps it exciting in any season. For the full recipe, check out the Crunchy Thai Peanut Noodle Salad! To keep your Crunchy Thai Peanut Noodle Salad fresh, store it in an airtight container. This helps prevent moisture loss and keeps flavors intact. Place the salad in the fridge right after serving. It should stay good for up to three days. If you want to preserve the crunch, store the dressing separately. Mix it in just before eating. For meal prep, you can make this salad ahead of time. Cook the rice noodles and chop the veggies, but keep them in separate containers. This way, the noodles won’t get mushy, and the veggies stay crisp. You can also prepare the peanut dressing in advance. Just store it in a jar and shake it before use. This method helps maintain freshness and flavor. If you have leftovers, you don’t really need to reheat this salad. It tastes great cold. However, if you prefer it warm, you can quickly heat the noodles. Place them in a microwave-safe bowl and warm for 20-30 seconds. Stir in some dressing after heating. This keeps the flavors bright and tasty. For the freshest experience, enjoy the salad cold and crisp. The salad lasts about 3 to 5 days in the fridge. Keep it in an airtight container. After a few days, the veggies may lose some crunch. If you want the best taste, eat it fresh. Yes, you can make the dressing a few days ahead. Store it in a sealed jar in the fridge. It may thicken, so add a bit of water when you’re ready to use it. This way, you save time on busy days. To make it a full meal, add protein like grilled chicken, shrimp, or tofu. You can also mix in edamame or chickpeas for a boost. These additions make the salad filling and nutritious. Yes, this recipe works great for meal prep. Portion the salad into containers. Keep the dressing separate to avoid sogginess. When you’re ready to eat, just mix them together for a fresh taste. Freezing is not recommended for this salad. The noodles and veggies lose texture when thawed. If you want to prepare ahead, freeze just the dressing instead. Use it later with fresh ingredients for a quick and tasty meal. In this article, we explored how to make a Crunchy Thai Peanut Noodle Salad. We covered ingredients, cooking methods, and tips for perfecting the dish. I shared storage tips and ways to customize it for your taste. This salad is a fresh, fun meal option. It’s healthy and can adapt to your needs. You can enjoy it any time. Now, go ahead and create your own delicious version!

Crunchy Thai Peanut Noodle Salad Fresh and Flavorful

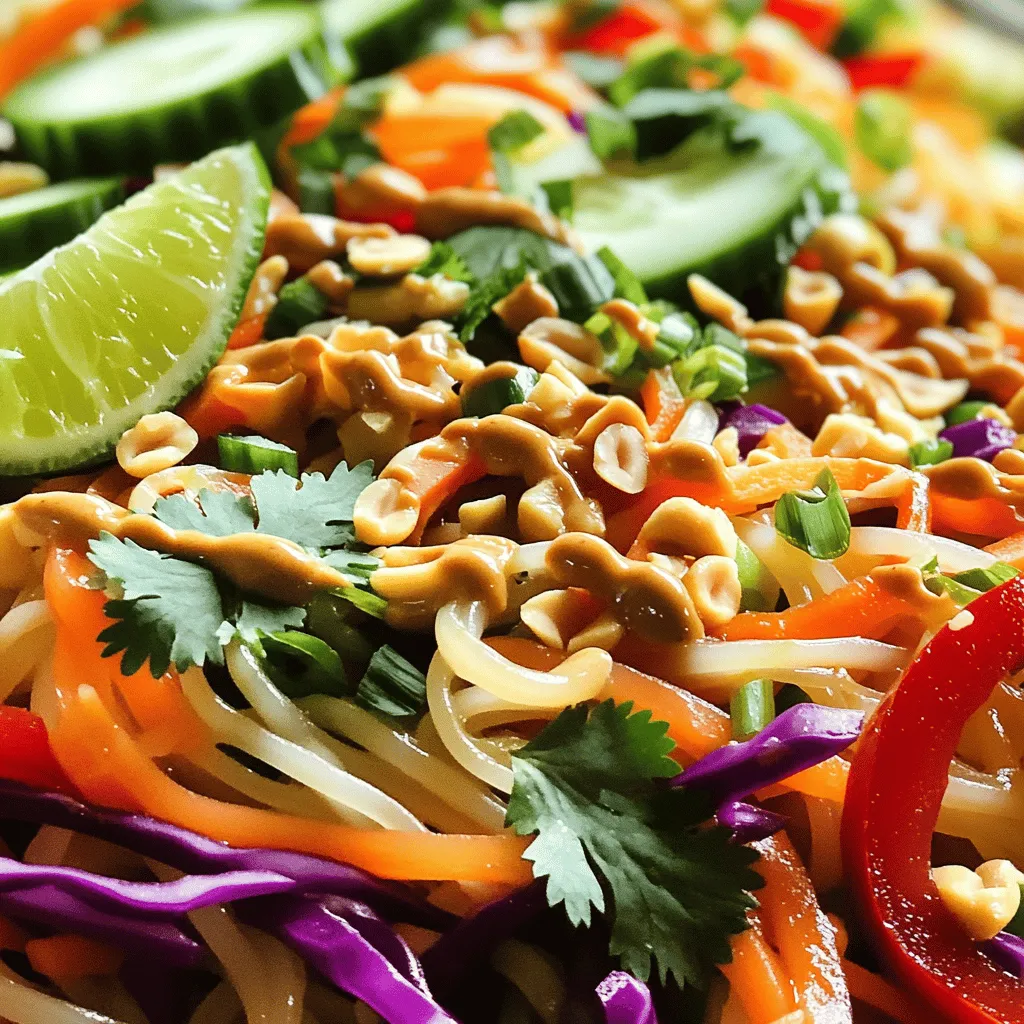
Are you ready to dive into a bowl of pure delight? My Crunchy Thai Peanut Noodle Salad packs vibrant flavors

For this tasty treat, gather these simple ingredients: - 2 cups plain Greek yogurt - 1/4 cup honey or maple syrup - Zest of 1 lemon - 2 tablespoons lemon juice - 1 cup fresh blueberries - 1/2 cup granola (for topping) - A pinch of sea salt These ingredients come together to create a creamy, refreshing snack. The Greek yogurt gives a rich base, while the honey or maple syrup adds just the right sweetness. The lemon zest and juice bring a bright, tangy flavor that pairs perfectly with the blueberries. You can mix things up by adding some optional ingredients. Consider trying: - Sliced almonds or walnuts for extra crunch - Shredded coconut for a tropical twist - Chopped strawberries or raspberries for more fruity flavors - A sprinkle of cinnamon for warmth These add-ins let you personalize the bark to your taste. They also make it more fun and exciting. If you have specific dietary needs, you can easily swap some ingredients. Here are a few ideas: - Use dairy-free yogurt for a vegan option. - Replace honey with agave syrup for a plant-based sweetener. - Use a sugar-free yogurt if you want to cut down on sugar. These substitutions keep the bark delicious while fitting your lifestyle. Enjoy making this snack your own! To make Lemon Blueberry Greek Yogurt Bark, you need to prepare your tools and ingredients. First, gather a baking sheet and parchment paper. You will also need a large mixing bowl and a spatula. 1. Line your baking sheet with parchment paper. Make sure some paper hangs over the edges. This helps with easy removal later. 2. In your mixing bowl, add 2 cups of plain Greek yogurt. Then, pour in 1/4 cup of honey or maple syrup. 3. Add the zest of 1 lemon and 2 tablespoons of lemon juice. Don't forget a pinch of sea salt. Mix everything well until it's smooth and creamy. 4. Next, pour the yogurt mix onto the baking sheet. Use the spatula to spread it evenly. Aim for about 1/2 inch thick. 5. Now, sprinkle 1 cup of fresh blueberries on top. Gently press them down, so they stick in the yogurt. 6. For extra crunch, add 1/2 cup of granola on top. Spread it evenly across the surface. 7. Place the baking sheet in the freezer. Let it freeze for at least 3 hours. You want it completely frozen. 8. After freezing, take the bark out. Peel it off the parchment paper. You can break it into pieces or cut it into squares. To get a creamy texture, use full-fat Greek yogurt. This keeps the bark smooth and rich. When spreading the yogurt, make sure it's even. This helps it freeze uniformly. If you want a bit more crunch, add more granola. Enjoy your refreshing Lemon Blueberry Greek Yogurt Bark! For detailed ingredient measurements, check the Full Recipe. To get a creamy yogurt bark, use full-fat Greek yogurt. It has more fat and gives a richer taste. Mix your yogurt well with honey or maple syrup. This helps create a smooth base. Adding lemon zest and juice adds flavor and brightness. When freezing your yogurt bark, ensure it’s spread evenly. Aim for about 1/2 inch thick. This thickness helps it freeze well. Use parchment paper for easy removal. Leave some paper hanging over the edges. This makes it easier to lift out later. Serve your yogurt bark as a snack or dessert. It pairs nicely with fresh fruit or nuts. You can also drizzle chocolate on top for extra sweetness. Enjoy it with a cup of tea or coffee for a refreshing treat. For the complete steps, check out the Full Recipe. {{image_2}} You can swap blueberries for other fruits. Strawberries add sweetness and color. Raspberries give a tart kick. Sliced peaches offer a juicy bite. Bananas bring creaminess, too. Feel free to mix and match for fun flavors. Just remember to keep the fruit fresh and ripe. Try adding a splash of vanilla for warmth. A pinch of cinnamon can add spice. If you want some crunch, add nuts or seeds. For a tropical twist, use coconut flakes or mango. Mixing in a bit of chocolate can make it extra special. Be creative and find what you love. To make this bark dairy-free, use coconut yogurt. Almond or cashew yogurt also works well. Replace honey with maple syrup for a vegan option. You can add nut butter for extra creaminess. With these swaps, you can enjoy this treat without dairy. To keep your lemon blueberry Greek yogurt bark fresh, store it in an airtight container. This helps prevent freezer burn and keeps the bark from absorbing other odors. Make sure to layer parchment paper between pieces if stacking. This way, the pieces won’t stick together. When stored properly, your yogurt bark will last for up to two months in the freezer. After this time, it may lose some flavor and texture. To enjoy the best taste, aim to eat it within four weeks. To enjoy your yogurt bark, take it out of the freezer. Let it sit at room temperature for about 5 to 10 minutes. If you want, you can also place it in the fridge overnight to thaw. Avoid using a microwave, as this can make the bark too soft. Instead, let it thaw naturally for the best texture. For the full recipe, check the earlier section. You can use any yogurt you like, but Greek yogurt works best. It has a thick and creamy texture. This makes the bark rich and satisfying. Other yogurts may not hold their shape well when frozen. The yogurt bark needs about 3 hours to freeze fully. If it is too soft, let it freeze longer. Check it after 3 hours. It should be hard and ready to break into pieces. To cut the frozen bark, use a sharp knife. Warm the knife in hot water for easier cutting. Clean the knife after each cut to keep the edges neat. You can also break it into pieces with your hands for a rustic look. Yes, you can make it a few days in advance. Just store it in an airtight container in the freezer. This way, you can enjoy a refreshing snack whenever you want. Absolutely! Kids love the sweet taste and fun texture. It's a great way to get them to eat yogurt and fruit. You can even let them help with adding toppings for added fun. For the full recipe, check the earlier sections. Lemon Blueberry Greek Yogurt Bark is simple and fun to make. We explored its main ingredients and how to customize your bark. I shared tips for a great texture and discussed storage options. Remember, you can mix flavors and fruits for variety. This treat is not only tasty but also healthy. Try it out and enjoy a refreshing snack you can make with ease. It’s a fun way to get creative in the kitchen!

Lemon Blueberry Greek Yogurt Bark Refreshing Snack Treat

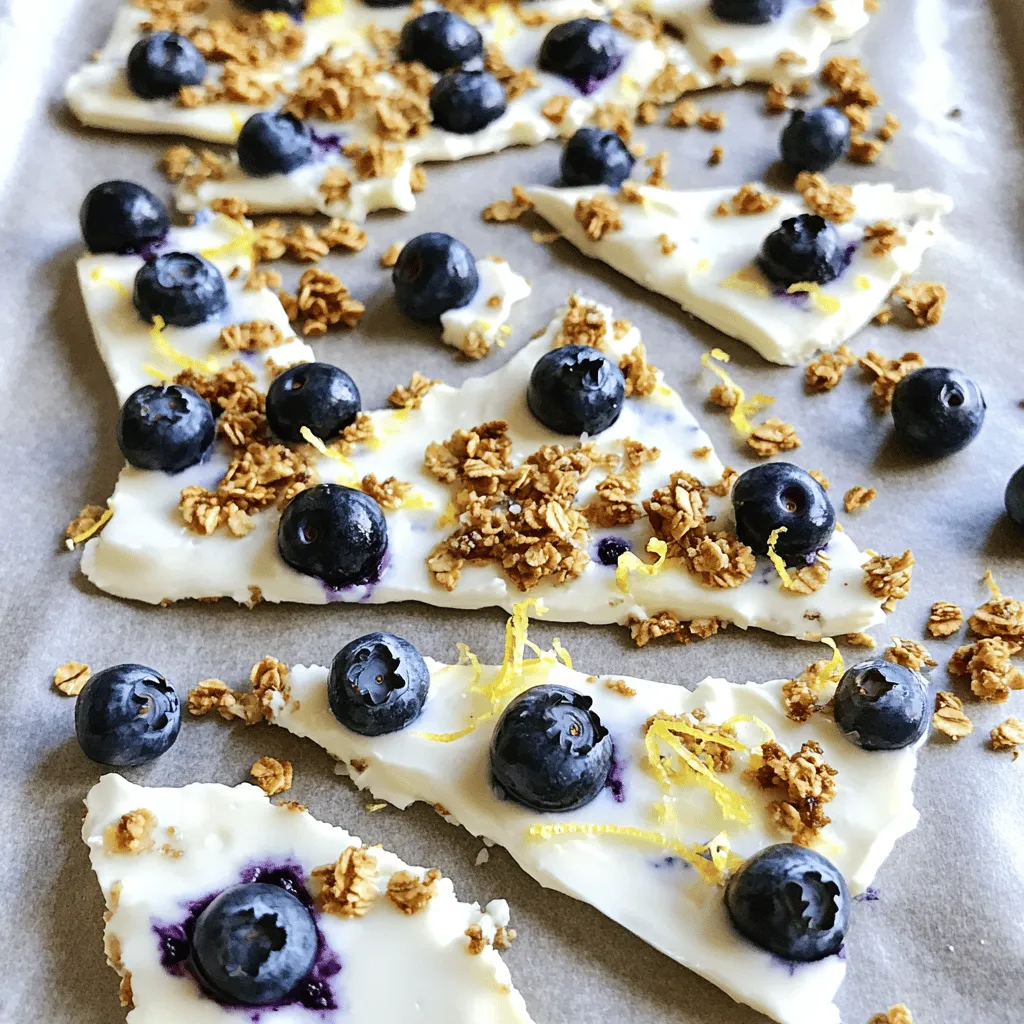
Looking for a cool, tasty treat that’s both refreshing and healthy? Lemon Blueberry Greek Yogurt Bark is the perfect snack

Creating Chocolate Hazelnut Protein Bites is easy and fun. Here is what you need: - 1 cup raw hazelnuts - 1/2 cup rolled oats - 1/4 cup cocoa powder - 1/2 cup natural peanut butter or almond butter - 1/4 cup maple syrup or honey - 1/4 cup chocolate protein powder - 1/4 teaspoon salt - 1 teaspoon vanilla extract - 1/4 cup dark chocolate chips (optional) These ingredients come together to make a delicious and healthy snack. The hazelnuts bring a rich flavor and crunch, while the oats add a nice texture. Cocoa powder gives that deep chocolate taste we all love. You can choose either peanut butter or almond butter based on your taste. Sweetness comes from maple syrup or honey, making it just right. Adding chocolate protein powder boosts the nutrition, making these bites great for a quick energy boost. The optional dark chocolate chips add even more flavor. If you love chocolate, do not skip them! Each ingredient plays a role in making these bites both tasty and nutritious. You can find the full recipe below to guide you through the process. Enjoy making these bites as a healthy treat! First, preheat your oven to 350°F (175°C). This step is important for roasting the hazelnuts. Spread the raw hazelnuts evenly on a baking sheet. Roast them for about 10-12 minutes until they smell great. Once they are done, let them cool down. You can chop them finely or pulse them in a food processor until they are coarsely ground. This gives your protein bites a nice texture. Grab a large bowl for the next step. Combine the ground hazelnuts, rolled oats, cocoa powder, chocolate protein powder, and salt. Mixing these dry ingredients well is key. This step ensures even flavor and texture in every bite. In a separate bowl, mix the natural peanut butter or almond butter, maple syrup or honey, and vanilla extract. Stir until you have a smooth and creamy mixture. This part adds sweetness and richness to your bites. Now, it's time to merge the wet and dry mixtures. Pour the smooth wet mixture into the bowl with the dry ingredients. Stir until everything is well combined. If you want a bit of extra chocolatey goodness, fold in the dark chocolate chips at this point. They add a nice surprise in each bite. Next, scoop out tablespoon-sized portions of the mixture. Roll each portion into a ball using your hands. Place the balls on a parchment-lined baking sheet. This helps them keep their shape. After shaping, refrigerate the protein bites for at least 30 minutes. This chilling time helps them firm up before you enjoy them. For the full recipe, check out the complete guide on making these delightful bites. To get the best texture in your Chocolate Hazelnut Protein Bites, choose your nut butter wisely. You can use peanut butter or almond butter. Each one gives a slightly different taste. If you want a creamier bite, almond butter works great. For a richer flavor, stick with peanut butter. Next, you can adjust the sweetness level. If you like a sweeter snack, add more maple syrup or honey. Start with the suggested amount, then taste the mixture. You can always add more if needed. Just keep in mind that too much sweetness can mask the rich chocolate flavor. These bites are great on their own, but you can make them even better. Pair them with fresh fruits like bananas or strawberries. The fruity taste balances the rich chocolate well. You can also serve them with yogurt for a creamy treat. This adds protein and makes for a fun snack. Using high-quality ingredients makes all the difference. Look for organic and raw nuts. They are fresher and healthier. Raw hazelnuts keep their nutrients better than roasted ones. You can also check the labels on your nut butter and protein powder. Choose options with no added sugars or unhealthy fats. Quality matters, especially in a healthy snack. {{image_2}} To make these bites vegan, you can swap honey for maple syrup. Maple syrup adds sweetness without animal products. You might also try agave nectar as another option. Both choices keep the flavor rich and delicious. Using certified gluten-free oats is key for a gluten-free version. Many oats may have gluten due to cross-contamination. So, always check the label to ensure they're safe. This way, you can enjoy these bites without worry. You can experiment with extra flavors to make these bites even better. Try adding a pinch of cinnamon or nutmeg for warmth. Dried fruits like cranberries or apricots also add a nice touch. Get creative and find your favorite combo! To keep your chocolate hazelnut protein bites fresh, store them in an airtight container. This method helps lock in moisture and flavors. It also prevents them from absorbing other smells from your fridge. Make sure the container is clean and dry before adding the bites. These protein bites will last about one week in the fridge. If you want to enjoy them longer, you can freeze them. Just make sure they are in an airtight container or freezer bag to avoid freezer burn. When you're ready to eat, let them thaw in the fridge overnight. For longer-term storage, freezing is a great option. You can freeze the bites for up to three months. To freeze, place them in a single layer on a baking sheet. Once they are frozen solid, transfer them to a freezer-safe bag or container. This way, you can grab one or two whenever you want a tasty snack. For the full recipe and more tips, refer to the section above! To make these bites gluten-free, simply swap the rolled oats for certified gluten-free oats. This small change keeps the texture and taste intact while ensuring everyone can enjoy them safely. Always check the labels on your oats to be sure they meet gluten-free standards. Yes, you can use different protein powders based on your needs. If you prefer plant-based options, try pea protein or rice protein. For those who want whey, that's a great choice too. Each powder adds its unique flavor and nutrition. Just ensure it blends well with the other ingredients for the best texture. These protein bites provide many health advantages. They are rich in protein, which helps build and repair muscles. Hazelnuts offer healthy fats, fiber, and vitamins. The oats contribute energy and more fiber. With natural sweeteners like honey or maple syrup, you avoid refined sugars. Overall, these bites are a smart snack option. For the full recipe, check out the Chocolate Hazelnut Protein Bites section. You learned how to make Chocolate Hazelnut Protein Bites with simple ingredients and steps. Start by prepping and mixing your dry and wet components, then combine them. Shape the mixture into balls, chill, and enjoy! Experiment with flavors and textures for a personal touch. These bites are easy to store and perfect for snacks. With these tips, you can create delicious treats that fit your diet and taste. Enjoy your cooking journey!

Chocolate Hazelnut Protein Bites Tasty and Healthy Snack

Do you crave a sweet, healthy snack? Chocolate Hazelnut Protein Bites are the perfect treat! Packed with protein and nutrients,

- 20 cherry tomatoes - 20 fresh basil leaves - 20 small mozzarella balls (bocconcini) - 2 tablespoons balsamic glaze - 1 tablespoon extra virgin olive oil - Salt and freshly ground black pepper to taste - Skewers (7-inch or 10-inch) - For mozzarella, you can use burrata or feta cheese. Both add unique flavors. - Instead of cherry tomatoes, try using grape tomatoes or heirloom varieties for a twist. - If you don’t have balsamic glaze, you can mix balsamic vinegar with honey for a quick replacement. Making Classic Caprese Salad Skewers is fun and easy. The fresh tomatoes, basil, and cheese create a colorful dish. I love how each bite bursts with flavor. The balsamic glaze adds a sweet touch, while the olive oil brings a smooth finish. This dish is great for parties or a light meal. Check out the Full Recipe for step-by-step details! To start, you need to prepare your skewers. If you use wooden skewers, soak them in water for about 10-15 minutes. This step stops them from burning when you grill or serve. Next, rinse your cherry tomatoes and fresh basil leaves under cold water. After rinsing, gently pat them dry with a paper towel. Drying is important to keep the skewers neat and tasty. Now it's time to assemble the skewers. Take one skewer and start with a cherry tomato. Then, add a fresh basil leaf, followed by a small mozzarella ball. Repeat this pattern two more times, creating three sets on each skewer. Make sure to leave some space at the ends of the skewers. This space helps you hold the skewers without making a mess. Once your skewers are built, place them on a serving platter. Drizzle balsamic glaze and extra virgin olive oil evenly over the skewers. This adds a rich flavor that really pops. Next, season your skewers with salt and freshly ground black pepper to taste. You can also sprinkle some crushed red pepper flakes for an extra kick if you like. For the full recipe, check out the complete guide on Classic Caprese Salad Skewers. Enjoy your fresh and flavorful bites! To keep your assembled skewers fresh, store them in a sealed container. Use plastic wrap or a lid to keep air out. This helps keep the tomatoes and basil from wilting. If you haven’t assembled them yet, store each ingredient separately. Place tomatoes and mozzarella in the fridge. Keep basil leaves in a damp paper towel in a bag. To display your skewers, try standing them in a tall glass. This makes them look fun and inviting! You can also lay them on a platter. Add some color by garnishing with extra basil leaves. For a special touch, offer a small dish of balsamic glaze on the side for dipping. These skewers pair well with a light drink. Try serving them with sparkling water or a crisp white wine. They are perfect for summer picnics and backyard parties. You can also serve them as a fun appetizer at dinner parties. They are easy to grab and enjoy, making them a crowd favorite. For more ideas, check out the Full Recipe for unique serving styles. {{image_2}} You can easily change the taste of your Caprese salad skewers. A simple way is to add crushed red pepper flakes. This will give your dish a nice kick. Just sprinkle some on top after you finish assembling. You can also try adding other herbs. Instead of basil, try fresh oregano or parsley. These herbs can change the flavor and make it unique. You can mix and match to find your favorite combination. If you're looking for a vegan option, use plant-based cheese instead of mozzarella. Many brands offer tasty alternatives that melt well. You can enjoy the same great flavors without dairy. For gluten-free needs, just use gluten-free skewers. Most wooden skewers are naturally gluten-free. This makes it easy for everyone to enjoy your dish. You can serve these skewers in many fun ways. For appetizers, mini skewers work great. Just use smaller tomatoes and cut the mozzarella into smaller pieces. This makes them easy to grab and eat. Another idea is to create Caprese salad bowls. Instead of skewers, layer the ingredients in a bowl. This makes it easy to serve and share. You can drizzle the balsamic glaze on top for added flavor. For more tips, check out the Full Recipe for Classic Caprese Salad Skewers. To keep your Classic Caprese Salad Skewers fresh, store them in the fridge. Use an airtight container to prevent them from drying out. They are best eaten within two days. If you have leftovers, cover them tightly and enjoy them for lunch or dinner. This way, you’ll still get that fresh taste! Can you freeze assembled skewers? I do not recommend freezing the whole skewer. The tomatoes and cheese may change texture. Instead, freeze the ingredients separately. Place the mozzarella and tomatoes in freezer bags. When you’re ready to enjoy them, just thaw and assemble fresh skewers. Should you reheat skewers? I suggest not reheating them. Caprese skewers taste best fresh. If you must reheat, do it gently. Use a microwave at low power for a few seconds. This way, you won’t overcook the fresh flavors. Enjoy every bite of your delicious creation! What is the best type of mozzarella to use? I recommend using fresh mozzarella balls, also known as bocconcini. They are soft and creamy. They pair well with the fresh basil and juicy tomatoes. You can also use burrata for a richer taste. Can I make Classic Caprese Salad Skewers in advance? Yes, you can prepare these skewers a few hours ahead of time. Store them in the fridge. Just add the balsamic glaze before serving for the best flavor. How many servings does this recipe make? This recipe makes 10 skewers. Each skewer holds a delicious mix of flavors. Perfect for parties or family gatherings. What can I serve with Classic Caprese Salad Skewers? These skewers work great as an appetizer. Pair them with crusty bread or a light salad. They also complement grilled meats well. How to grill Caprese Salad Skewers? To grill, soak wooden skewers first. Then, heat your grill. Cook the skewers for about 2-3 minutes on each side. This adds a nice smoky flavor. Can I use a different type of glaze? Absolutely! You can use a honey glaze or a citrus vinaigrette. Both will add a unique twist to your skewers. Feel free to experiment with flavors! Classic Caprese Salad Skewers combine fresh ingredients for a perfect snack or appetizer. You learned about the key ingredients and how to assemble the skewers step by step. We explored tips for storage, presentation, and serving ideas. You can even switch up flavors and cater to dietary needs. Whether for a gathering or a cozy meal, these skewers are a hit. Enjoy making them and impressing your friends with your new skills!

Classic Caprese Salad Skewers Fresh and Flavorful Bite

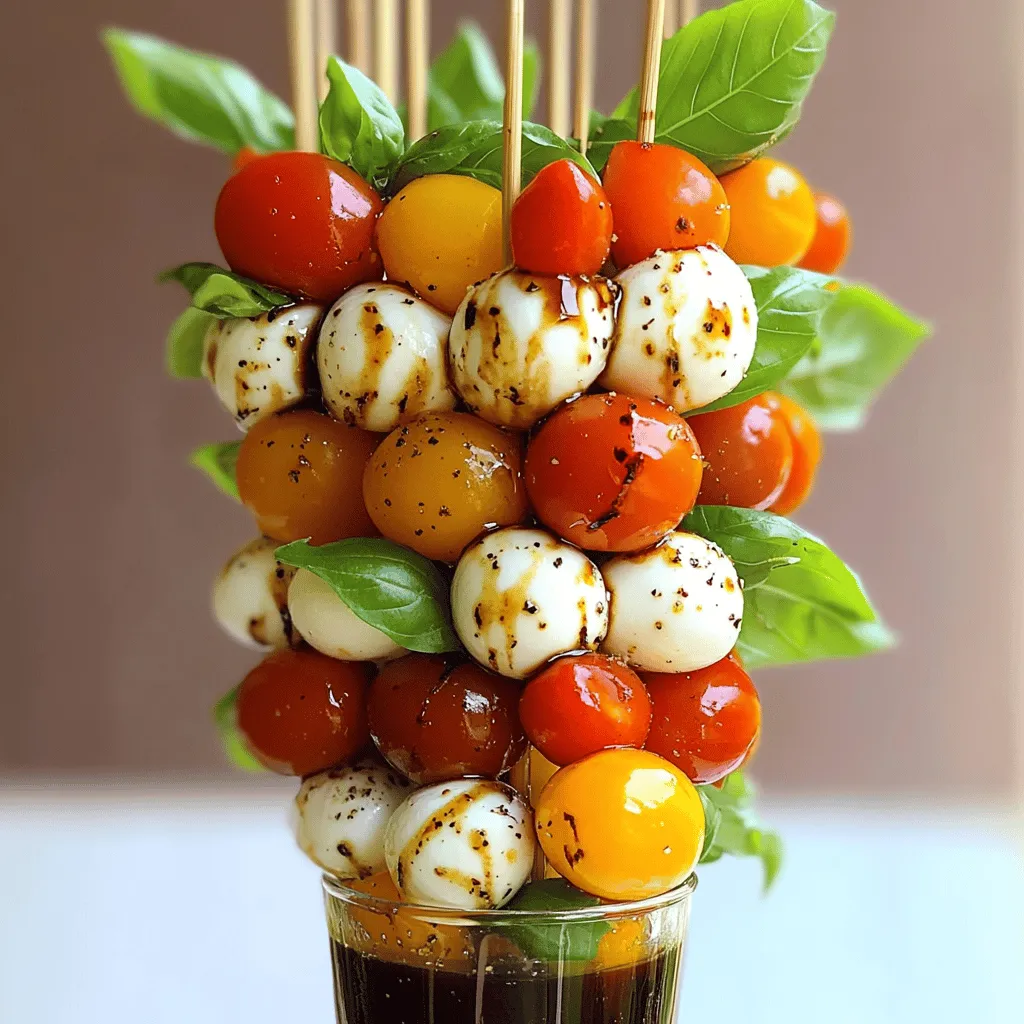
Summer gatherings call for fresh, vibrant flavors, and nothing beats Classic Caprese Salad Skewers! These colorful bites combine juicy cherry

- 1 cup rolled oats - 2 cups almond milk (or any milk of choice) - 2 tablespoons maple syrup - 1 teaspoon ground cinnamon I love using rolled oats for this recipe. They soak up the almond milk well. The oats get soft and creamy overnight, making them perfect for breakfast. Almond milk gives a nice, mild flavor. If you prefer, you can use any milk you like. The maple syrup adds sweetness, while the ground cinnamon gives warmth and spice. - 1/4 cup Greek yogurt (or dairy-free alternative) - 1/4 cup chopped nuts (e.g., walnuts or pecans) - 1/2 apple, diced (for topping) Adding Greek yogurt makes the oats even creamier. If you need a dairy-free option, use a plant-based yogurt. Chopped nuts add a nice crunch. You can choose walnuts, pecans, or any nut you enjoy. Diced apple on top adds a fresh taste. It gives a sweet, juicy bite that pairs well with the oats. - 1/2 teaspoon vanilla extract - A pinch of salt A touch of vanilla extract brings out all the flavors. It makes the oats smell amazing. Just a pinch of salt helps balance the sweetness. It brings out the rich taste of the maple syrup and cinnamon. For the full recipe, check out the details above. You’ll see how easy it is to make these tasty oats! To start, grab a medium bowl. Combine these ingredients: - 1 cup rolled oats - 2 cups almond milk - 2 tablespoons maple syrup - 1 teaspoon ground cinnamon - 1/2 teaspoon vanilla extract - A pinch of salt Stir well to mix everything together. The oats need to soak up the liquid. Next, add 1/4 cup Greek yogurt. This gives the oats a nice creamy texture. Stir again until smooth. Now, it's time to divide the mixture. Use jars or airtight containers. Pour the oats evenly into them. On top of each jar, add: - 1/4 cup chopped nuts - 1/2 apple, diced This adds crunch and flavor. Seal the containers tightly. Place the jars in the fridge. Let them rest overnight or for at least 4 hours. This helps the oats absorb all the yummy flavors. When you're ready to eat, take them out and give a good stir. If you want, add a drizzle of maple syrup or more nuts. Enjoy your creamy and delicious Maple Cinnamon Overnight Oats! - Use rolled oats for best results. They soak up liquid well. - Adjust the liquid for a creamier or thicker consistency. More milk makes them creamier. - Add more or less maple syrup to fit your taste. This lets you control the sweetness. - Try different toppings for sweetness variations. Fresh fruits or nuts can add flavor and crunch. - Use clear jars to show off your ingredients. This makes your meal look inviting. - Garnish with cinnamon and fresh fruit to enhance visual appeal. A sprinkle of cinnamon adds warmth. Enjoy the full recipe to create your perfect Maple Cinnamon Overnight Oats! {{image_2}} You can easily make this recipe dairy-free. Just swap almond milk for coconut or oat milk. Both options add nice flavor. Try using dairy-free yogurt instead of Greek yogurt. This choice keeps your oats creamy without any dairy. Do you want to mix things up? Add cocoa powder for a chocolate twist. You can also stir in nut butters for a rich taste. Different spices work well too. Try nutmeg or cardamom for a new layer of flavor. Using seasonal fruits can make your oats even better. Berries in summer add freshness. In fall, pears bring a warm taste. Adjust your spices to fit the season. This keeps your oats exciting all year long. For the full recipe, be sure to check out the complete instructions. Store your maple cinnamon overnight oats in an airtight container. This keeps them fresh and tasty. I recommend eating them within 3-5 days for the best flavor. The oats soak up the milk and flavors over time, making them creamy and delicious. If you want to warm your oats, just pop them in the microwave. Heat them for about 30 seconds to 1 minute. After reheating, add a splash of milk. This helps adjust the texture to your liking. You can make a big batch of overnight oats for freezing. Divide the mixture into portions before freezing. When you're ready to eat, thaw one jar overnight in the fridge. It will be ready for you in the morning! Overnight oats can be stored in the fridge for 3-5 days. This makes them a great choice for busy mornings. Just keep them in a sealed container to stay fresh. It's not recommended as instant oats may become mushy. Rolled oats hold their shape better and give a nice texture. This helps keep your oats creamy and satisfying. Yes, you can omit yogurt or substitute it with a dairy-free option. If you skip the yogurt, your oats will still taste great. They may be a bit less creamy, but still delicious. Absolutely, they are perfect for meal prep and can be made for the entire week. Just prepare a few jars at once and store them in the fridge. This way, you have a quick breakfast ready to go. For the full recipe, check out the details above. Maple cinnamon overnight oats are simple and delicious. We covered the key ingredients, like oats, almond milk, and maple syrup. You can customize with yogurt, nuts, or fruit. Remember to store them in airtight containers for freshness. These oats last 3-5 days in the fridge. Feel free to use your favorite flavors and toppings. Make your mornings easier and tastier with this healthy breakfast! Enjoy your oats!

Maple Cinnamon Overnight Oats Creamy and Delicious Mix

Start your day with a bowl of Maple Cinnamon Overnight Oats—creamy, sweet, and so easy to make! With just a

- 1 cup fresh strawberries, hulled and sliced - 1/4 cup fresh basil leaves, gently bruised - 4 cups filtered water - Ice cubes (optional) - Lemon slices (for extra flavor, optional) To create the best strawberry basil infused water, you need fresh ingredients. Start with ripe strawberries, which give a sweet taste. Choose basil leaves that are bright and fragrant. These two flavors mix well and make water fun to drink. You can add ice cubes if you want your drink cold. Slice some lemon for a zesty kick. This simple mix of flavors makes hydration exciting and tasty. For a detailed guide to making this drink, check out the Full Recipe. Enjoy the process and feel free to adjust based on your taste! - Wash strawberries and basil leaves thoroughly. - Slice strawberries and bruise basil leaves. - Combine ingredients in a pitcher. First, clean the strawberries and basil under running water. This step helps remove dirt and any chemicals. Next, slice the strawberries into thin pieces. This will help them release their flavor. For the basil, gently bruise the leaves with the back of a spoon. This action releases the oils that give basil its strong aroma and taste. Now, place the sliced strawberries and bruised basil in a pitcher. - Pour water over strawberries and basil. - Cover and refrigerate for infusing. Once your ingredients are in the pitcher, pour 4 cups of filtered water over them. Make sure the fruit and herbs are fully submerged. If you want, add lemon slices for a zesty kick. Cover the pitcher with a lid or plastic wrap. Place it in the refrigerator. Let it infuse for at least 2 hours. You can also leave it for up to 24 hours for a stronger flavor. - Stir before serving. - Serve in glasses with ice cubes. - Garnish with strawberries or basil leaves. When you're ready to serve, stir the mixture gently to blend the flavors. Fill glasses with ice cubes for a cool drink. Pour the infused water into the glasses. For a lovely touch, garnish each glass with a strawberry slice or a basil leaf. This adds a nice look and extra flavor. Enjoy your refreshing drink! For the complete guide, check out the Full Recipe. To boost the taste of your strawberry basil infused water, use chilled filtered water. Chilled water makes the drink crisp and refreshing. You can also play with other fruits or herbs. Try adding slices of lime or sprigs of mint. Each addition adds fun and new flavors. For the best flavor, let your water infuse for at least 2 hours. This time allows the strawberries and basil to release their tasty oils. If you want a stronger flavor, leave it for up to 24 hours. Adjust the time based on your personal taste. If you prefer a milder drink, just infuse for a shorter time. Always taste your water as it infuses to find the perfect balance for you. {{image_2}} You can mix strawberry basil infused water with other flavors. One great choice is lemon. Adding lemon brings a bright taste. The citrus pairs well with sweet strawberries. Just add a few slices of lemon when you combine the ingredients. Another fun option is adding mint or cucumber. Mint gives a cool twist and fresh aroma. You can add a handful of mint leaves to the pitcher. Cucumber provides a crisp taste. Simply slice a cucumber and toss it in with the other ingredients. Both options make your drink even more refreshing! Using seasonal fruits can take your infused water to a new level. Try mixing in other berries like raspberries or blueberries. These berries add different flavors and colors. They also boost the health benefits of your drink. You can also infuse your water with citrus fruits. Oranges and limes work well. Just slice them and add to the pitcher. This change adds a zesty kick to your drink. Try these variations to enjoy strawberry basil infused water all year long! For the complete recipe, check out the [Full Recipe]. To keep your strawberry basil infused water fresh, store it in the fridge. Use a clean pitcher with a tight lid. This helps prevent any odors from your fridge from mixing in. The infused water tastes best when chilled. How long does it last? Generally, your infused water stays fresh for about 3 days. After this, the flavors start to fade. If you notice any off smell or taste, it’s best to toss it out. You can reuse the same strawberries and basil for a second infusion. However, keep in mind that the flavor will be weaker. To do this, simply pour fresh water over the used ingredients. Let it sit for a few hours in the fridge. For safety, always check the ingredients before reusing. If the strawberries look mushy or have an odd smell, throw them away. Freshness is key for the best taste! Strawberry basil infused water offers many health perks. First, strawberries are full of hydration. They also provide vitamins C and K. These vitamins support your immune system and bone health. Basil, on the other hand, is more than just a tasty herb. It has anti-inflammatory properties and can aid digestion. This combination helps you stay refreshed and healthy. Yes, you can prepare this drink ahead of time. For best results, infuse it for at least 2 hours. If you have a gathering, making it the night before is smart. Allow the flavors to blend overnight for a stronger taste. Just remember to keep it in the fridge until ready to serve. Most people can enjoy this refreshing drink. However, check for allergies. Some may be allergic to strawberries or basil. If you have concerns, consult a doctor. This drink is generally safe for kids and adults alike. Scaling the recipe is easy. Simply double or triple the ingredients based on how many people you serve. For example, use 2 cups of strawberries and 1/2 cup of basil for eight servings. Maintain the same ratio of water for the best taste. Yes, frozen strawberries work well in this recipe. They will change the texture slightly. However, they still add great flavor. When using frozen fruit, let them thaw a bit before adding to the water. This helps release their taste faster. If the flavor is too strong, simply add more water. This dilutes the taste without losing freshness. You can also add extra ice to cool it down. Taste as you adjust until it meets your liking. You now have a simple guide to make delicious strawberry basil infused water. We covered the ingredients, preparation, infusion process, and variations. Each step helps you create a refreshing drink that’s easy to enjoy. Remember, feel free to experiment with flavors and adjust the infusion time to suit your taste. Have fun with this recipe and share it with friends. This drink is not only tasty but also good for your health. Enjoy staying refreshed with your new creation!

Strawberry Basil Infused Water Refreshing Hydration

Looking for a refreshing drink that’s both tasty and easy to make? Strawberry Basil Infused Water is your answer! With

Older posts
Newer posts
← Previous Page1 … Page24 Page25 Page26 … Page54 Next →

dsad

© 2025 savoryspiral • Built with GeneratePress

Our Policies

  • Copyright Policy
  • Cookie Policy
  • GDPR Policy
  • Privacy Policy
  • Disclaimer
  • Terms Of Use

More Information

  • Home
  • About
  • Contact
  • Appetizers
  • Dessert
  • Dinner
  • Drinks
©2025, savoryspiral About Back To Top