Skip to content
DisclaimerTerms Of UseGDPR PolicyCookie Policy

savoryspiral

  • Home
  • Drinks
  • Appetizers
  • Dinner
  • Dessert
  • About
  • Contact
  • Privacy Policy
DisclaimerTerms Of UseGDPR PolicyCookie Policy

Charlotte

- 1 can (15 oz) chickpeas, drained and rinsed - 2 cups cooked quinoa - 1 cup cherry tomatoes, halved - 1 cucumber, diced - 2 cups fresh spinach or mixed greens Chickpeas are the star of this bowl. They give protein and fiber. I love how they get crispy in the oven. Quinoa adds a nice texture and is full of nutrients. Fresh veggies bring color and crunch to the dish. - 1 tablespoon olive oil - 1 teaspoon smoked paprika - 1/2 teaspoon garlic powder - 1/2 teaspoon cumin - Salt and pepper to taste - 1/4 cup tahini - 2 tablespoons lemon juice - 1 tablespoon water The right seasonings make this meal pop. Olive oil helps the spices stick. Smoked paprika gives a lovely smoky flavor. Tahini dressing adds creaminess and depth. The lemon juice brightens it all up. - 1 avocado, sliced - Sesame seeds for garnish Avocado adds creaminess and healthy fats. Sesame seeds offer a nice crunch. You can also use other toppings like nuts or sprouts. Feel free to customize this bowl to your taste. For the full recipe, check out the detailed steps to create this delicious dish. 1. Preheat your oven to 400°F (200°C). This temperature helps the chickpeas get crispy. 2. In a bowl, toss the drained chickpeas with olive oil, smoked paprika, garlic powder, cumin, salt, and pepper. Make sure every chickpea gets coated well. 1. Spread the seasoned chickpeas out in a single layer on a baking sheet lined with parchment paper. This helps them roast evenly. 2. Roast the chickpeas in the oven for about 25-30 minutes. Shake the pan halfway through to ensure they cook evenly. Look for a nice golden brown color and crisp texture. 1. Start with the cooked quinoa as the base in a large bowl. This gives your bowl a hearty foundation. 2. Add fresh spinach or mixed greens on top of the quinoa. This adds color and nutrients. 3. Next, artfully arrange the halved cherry tomatoes, diced cucumber, and sliced avocado around the bowl. This makes it look beautiful and inviting. 4. Once the chickpeas are done roasting, add them on top of the vegetables. They will be warm and crunchy. 5. For the dressing, whisk together tahini, lemon juice, and water until smooth. If it’s too thick, add a bit more water. 6. Drizzle the tahini dressing over the assembled bowl and sprinkle sesame seeds on top for a nice finish. For the full recipe, check the recipe card above. Enjoy your meal! To get the best crispy chickpeas, start by draining and drying them well. Excess moisture will make them soggy. After rinsing, pat them dry with a clean towel. This simple step makes a big difference. Next, set your oven to 400°F (200°C). This temperature helps the chickpeas roast perfectly. Spread them out on a baking sheet in a single layer. This ensures even cooking. Shake the pan halfway through roasting for crispiness all around. If you want to mix things up, try different grains. Instead of quinoa, use brown rice or farro for a unique twist. Each grain brings its own flavor and texture. You can also swap veggies based on what you have. Use bell peppers or shredded carrots if you want a color boost. Plating is key for a beautiful Buddha bowl. Start with a base of quinoa in the center. Then, arrange the spinach and veggies around it. This creates a colorful display. When adding the chickpeas, place them in a way that shows off their crispiness. For serving, drizzle the tahini dressing over the top just before eating. This keeps everything fresh. Don't forget to sprinkle sesame seeds for a nice finish. For more ideas on plating, check out the Full Recipe. {{image_2}} To make the Crispy Chickpea Buddha Bowl gluten-free, choose gluten-free grains like quinoa or brown rice. Both grains add great texture and nutrition. For dressings, use tamari instead of soy sauce. This swap keeps the flavor while ensuring gluten-free status. This recipe is already vegan, but double-check your ingredients. Make sure the chickpeas and all veggies are plant-based. If you want more protein, add tofu or tempeh. Both options blend well with the chickpeas and keep the bowl filling. Using seasonal vegetables makes your bowl fresh and vibrant. In summer, add sweet corn or bell peppers. In fall, consider roasted squash or sweet potatoes. Adjust spices too. For spring, try adding fresh herbs. In winter, warming spices like cinnamon or nutmeg can enhance your bowl's flavor. Mix and match these ideas to keep your Crispy Chickpea Buddha Bowl exciting. You can always check the Full Recipe for more details. To keep your crispy chickpea Buddha bowl fresh, store leftovers in the fridge. Use an airtight container to keep moisture out. The bowl will stay good for 3 to 4 days. When reheating chickpeas, the oven is best. Preheat it to 375°F (190°C). Spread the chickpeas on a baking sheet for about 10 minutes. This keeps them crispy. For the bowl, you can reheat the quinoa and veggies in the microwave. Just heat them until warm, then reassemble your bowl. To save time, prepare ingredients ahead of time. You can cook the quinoa and roast the chickpeas in advance. Store them separately in the fridge. When you’re ready to eat, just assemble your bowl. Add fresh veggies and drizzle with tahini dressing for quick meals. This method makes enjoying your crispy chickpea Buddha bowl easy! For the full recipe, check out the Crispy Chickpea Buddha Bowl section. Chickpeas are small but mighty! They offer many health benefits. Here’s a quick look at their nutritional profile: - High in protein - Packed with fiber - Rich in vitamins and minerals Chickpeas are great for your health. Fiber helps with digestion. It keeps you full longer too. Protein builds and repairs body tissue. It is essential for muscle growth. Eating chickpeas can help control blood sugar and cholesterol levels. You can store the Crispy Chickpea Buddha Bowl in the fridge for up to 3 days. Keep the chickpeas separate if possible. This keeps them crispy. Use an airtight container to keep it fresh. Absolutely! You can make the Buddha bowl your own. Here are some ideas: - Swap chickpeas for black beans or lentils - Use brown rice instead of quinoa - Add seasonal veggies like bell peppers or zucchini If you follow a specific diet, you can still enjoy this meal. Make it vegan by sticking to plant-based options. Gluten-free grains are also an option. Explore your preferences and enjoy! For the complete recipe, check out the Full Recipe link. This blog post shared how to make a Crispy Chickpea Buddha Bowl. We covered the key ingredients, from chickpeas to fresh veggies and tasty dressings. I shared step-by-step instructions for roasting chickpeas and assembling your bowl. You learned tips for crispy chickpeas and various ingredient swaps. Remember, your bowl can change with the seasons or your preferences. Enjoy creating your own delicious and healthy meals. Make it fun and fill it with what you love!

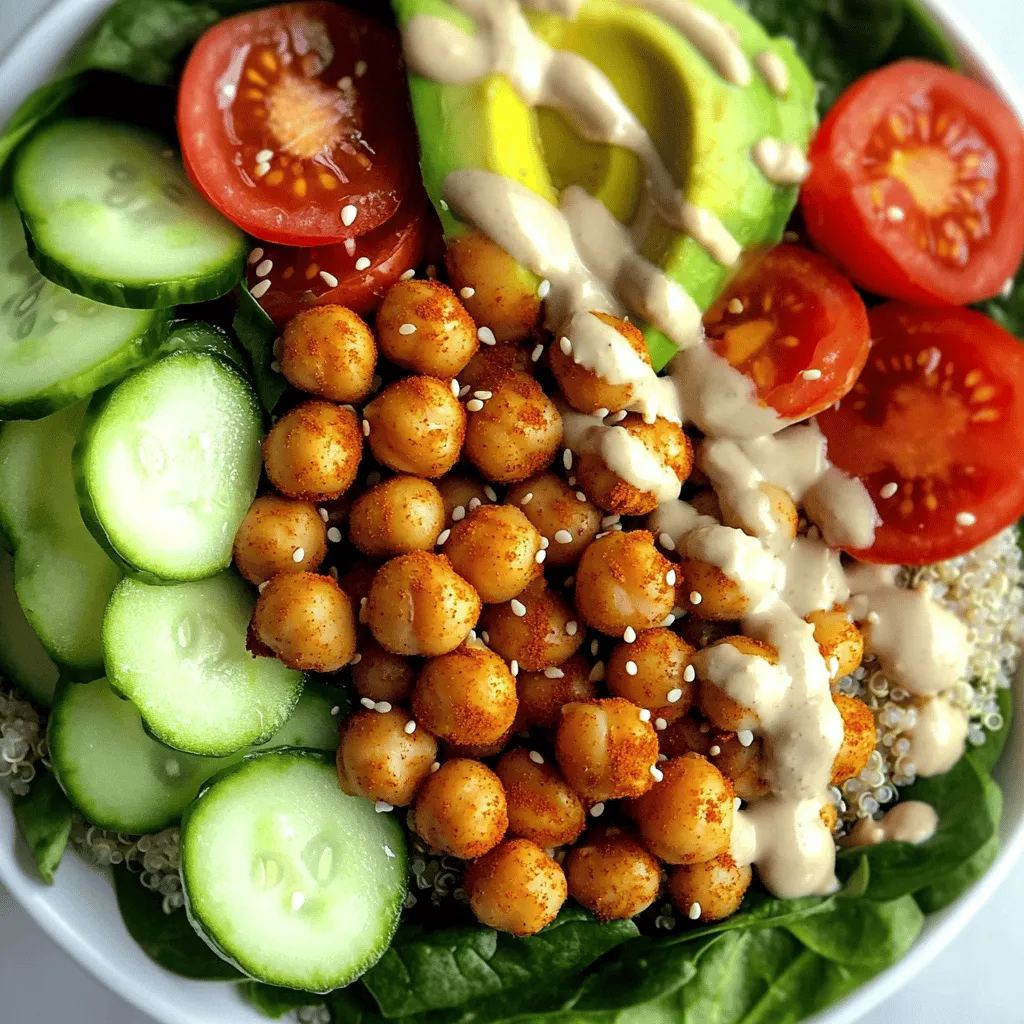
Crispy Chickpea Buddha Bowl Flavorful and Nutritious Meal

Looking for a meal that’s both delicious and packed with nutrients? The Crispy Chickpea Buddha Bowl is the answer! This

- 2 cups cooked rotini pasta - 2 cups cooked chicken breast, shredded - 2 cups Alfredo sauce (store-bought or homemade) - 1 cup broccoli florets, steamed - 1 cup mozzarella cheese, shredded - 1/2 cup parmesan cheese, grated - 1 teaspoon garlic powder - 1 teaspoon Italian seasoning - Salt and pepper to taste - Fresh parsley for garnish (optional) Gathering the right ingredients is key to making your Easy Chicken Alfredo Bake a hit. Start with rotini pasta, as its curls hold the sauce well. You will need cooked chicken breast, which can be shredded from leftovers or rotisserie chicken. The Alfredo sauce adds creaminess, so choose your favorite brand or make your own. Next, add steamed broccoli for some color and nutrition. The cheeses—mozzarella and parmesan—bring a lovely stretch and flavor. For seasoning, garlic powder and Italian seasoning enhance the dish. Finally, salt and pepper add a touch of balance. If you like, sprinkle fresh parsley on top for a pop of freshness. Make sure to check out the Full Recipe for detailed steps on how to bring these ingredients together into a delicious meal. 1. Preheat your oven to 350°F (175°C). This step warms up the oven, so your dish bakes evenly. 2. In a large mixing bowl, combine the cooked rotini pasta, shredded chicken, steamed broccoli, Alfredo sauce, garlic powder, Italian seasoning, salt, and pepper. Mix well until all ingredients are evenly coated. This ensures each bite is full of flavor. 1. Transfer the mixture into a greased 9x13 inch baking dish and spread it evenly. This will help the dish cook nicely. 2. Sprinkle the shredded mozzarella cheese and grated parmesan cheese evenly over the top. The cheese will melt and create a tasty crust. 3. Cover the baking dish with aluminum foil and bake in the preheated oven for 20 minutes. This helps the flavors blend together. 1. Remove the foil and bake for an additional 10 minutes, or until the cheese is bubbly and golden brown. This is when your kitchen will start to smell amazing. 2. Once baked, let it cool for a few minutes. This cooling time helps set the dish. You can garnish with fresh parsley if you like. Now, it’s ready to serve and enjoy! - Use leftover rotini or rotini from previous meals. It saves time and reduces waste. - Pre-cook chicken breast to save time. This step makes your dish come together faster. - Serve with garlic bread or mixed greens. This adds flavor and complements the meal well. - Ideal for meal prep and family gatherings. It’s easy to make and feeds many people. - Adjust seasoning to taste. Add more salt, pepper, or garlic powder if needed. - Experiment with different cheeses. Try cheddar or gouda for a new flavor twist. By following these tips, you can make your Easy Chicken Alfredo Bake even better. For the complete recipe, check out the Full Recipe section. {{image_2}} You can change this dish up easily. Use penne pasta instead of rotini. This swap gives a new look and feel to your meal. If you want to try something different, swap chicken for shrimp or beef. Both proteins cook well and add unique flavors. If you love a homemade touch, try making your own Alfredo sauce. It can taste even better than store-bought. You can also experiment with a cream sauce or a cheese blend. Mixing different cheeses can create a rich and creamy texture. Want to make it more colorful and healthy? You can add vegetables like bell peppers or spinach. They will add crunch and nutrition. If you like spice, try adding crushed red pepper. This simple addition gives your dish a nice kick. Store any leftovers in airtight containers. This keeps your Easy Chicken Alfredo Bake fresh for up to 3 days. Make sure to let it cool before sealing it up. This way, it won’t get soggy. You can freeze your Easy Chicken Alfredo Bake before baking it. Just prepare the dish and cover it well. It’s perfect for a quick meal later. When you're ready to bake, thaw it in the fridge overnight. This ensures even cooking and great texture. For the best texture, reheat your dish in the oven. Set it to 350°F (175°C) and cover it with foil. This keeps it moist. You can also microwave it for quick meals. Just use a microwave-safe dish and cover it loosely. Heat in short bursts to avoid overheating. Yes, you can make this dish a day before. Just prepare it and store it in the fridge. When you are ready to bake, take it out and follow the baking steps. This makes it easy for busy days and family dinners. To make homemade Alfredo sauce, melt butter in a pan. Add heavy cream and heat until warm. Stir in grated parmesan cheese and season with salt and pepper. This sauce is creamy and rich. You can also add garlic or herbs for extra flavor. You can use tofu or chickpeas instead of chicken. This makes it a great vegetarian option. Tofu will soak up the sauce well, while chickpeas add a nice texture. Feel free to add your favorite veggies too. Check for bubbling cheese on top. The cheese should also be golden brown. If both of these signs are present, your dish is ready to enjoy. The smell will also fill your kitchen, making it hard to wait! This dish combines rotini, chicken, Alfredo sauce, and veggies. It makes a creamy, tasty meal. You can customize it with different proteins and sauces. Store it easily and enjoy leftovers for days. Remember, experimenting with flavors enhances your dish. Now, gather your ingredients, follow the steps, and enjoy a delicious homemade meal. Cooking should be fun, so enjoy every bite!

Easy Chicken Alfredo Bake Comforting Family Meal

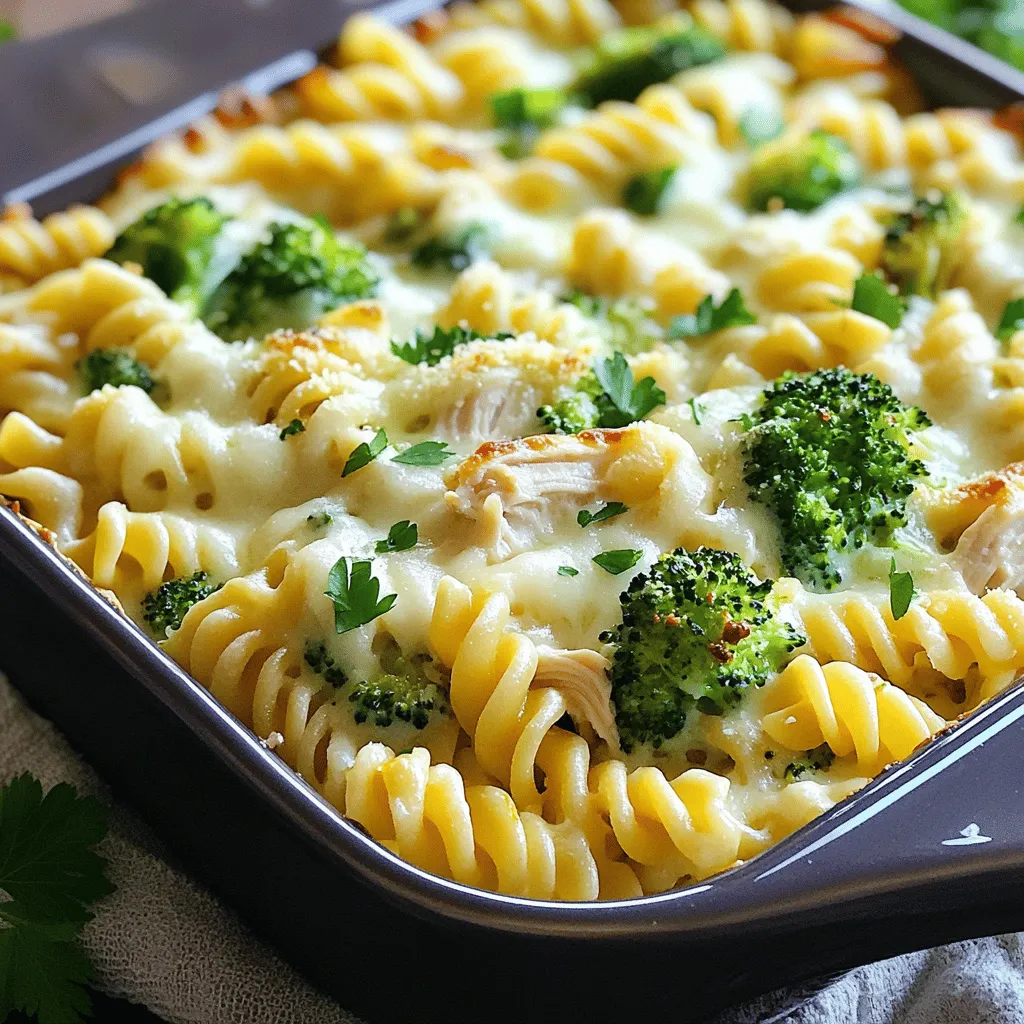
Looking for a comforting family meal that’s quick and easy? You’ve come to the right place! This Easy Chicken Alfredo

To make your healthy Greek yogurt parfaits, gather these key ingredients: - 2 cups Greek yogurt (plain or vanilla) - 1 cup granola (preferably low-sugar) - 2 cups mixed berries (strawberries, blueberries, raspberries) - 2 tablespoons honey or maple syrup (optional for sweetness) - 1 teaspoon vanilla extract - 1/4 cup sliced almonds or walnuts (for added crunch) - Fresh mint leaves (for garnish) Greek yogurt is a great choice for your parfaits. It is thick and creamy. It has more protein than regular yogurt. This helps you feel full and satisfied. Greek yogurt is also lower in sugar, making it a healthy option. It is rich in probiotics, which support gut health. These good bacteria boost your immune system. Plus, Greek yogurt provides calcium for strong bones. It is a smart choice for snacking. When choosing fruits and nuts, look for freshness. For berries, pick those that are firm and bright. Avoid any that are mushy or have mold. Smell the berries; they should have a sweet aroma. For nuts, choose whole nuts without added salt or sugar. Check for any signs of rancidity. Buy them in small amounts to keep them fresh. You can also try different fruits based on seasons. Apples, peaches, or bananas can add fun flavors to your parfaits. First, grab your mixing bowl. Add 2 cups of Greek yogurt. Mix in 1 teaspoon of vanilla extract. If you want sweet parfaits, add 2 tablespoons of honey or maple syrup. Stir until creamy and smooth. Next, take your serving glasses or bowls. Start with a large spoonful of the yogurt mix at the bottom. This makes a nice base. Then, add a layer of granola. Use about 1/4 cup for this layer. After that, add 1/2 cup of mixed berries on top. You can use strawberries, blueberries, and raspberries. Repeat these layers until you fill the glasses. Finish with another layer of yogurt on top. Finally, sprinkle a bit more granola on each parfait. Add a handful of fresh berries and some sliced almonds or walnuts for crunch. For the best look, use clear glasses. This shows off the colorful layers. Start with yogurt, then granola, and berries. Keep repeating this order. End with yogurt to create a smooth top. This way, you get a lovely view of the layers. Add a mint leaf on each parfait. It gives a nice touch and some color. Make sure to serve them right after assembling for a fresh taste. You can change these parfaits to fit your taste. Use different fruit, like peaches or bananas. If you like, swap Greek yogurt for coconut yogurt for a vegan option. Want more flavor? Try adding a scoop of nut butter between the layers. You can also mix in chia seeds or protein powder for extra benefits. The choice is yours! For the full recipe, check out the detailed steps and ingredients above. Enjoy your healthy Greek yogurt parfaits! You can easily prepare these Greek yogurt parfaits ahead of time. Start by mixing the Greek yogurt, vanilla extract, and honey or maple syrup. Store this mixture in the fridge. Layer your parfaits in clear glasses or bowls. Cover them with plastic wrap or a tight lid. It’s best to keep the granola separate until you are ready to eat. This keeps it crunchy. Serve the parfaits within two days for the best taste. If you need gluten-free options, choose certified gluten-free granola. You can also use nuts or seeds for crunch. For vegan parfaits, swap Greek yogurt for coconut yogurt or almond yogurt. Use maple syrup to sweeten. Fresh fruit is always a great addition. It adds natural sweetness and flavor. To keep your parfaits fresh, store them in the fridge. Use airtight containers to prevent them from drying out. If you make them in advance, eat them within two days. This will ensure the best flavor and quality. If you have leftovers, keep the granola in a separate bag. This will help it stay crisp. For longer storage, you can freeze the yogurt mixture, but it's best to enjoy it fresh. For the full recipe, refer to the section above. {{image_2}} You can switch up the fruits in your parfaits. In spring, use fresh strawberries and blueberries. In summer, add peaches or mangoes for a tropical twist. Fall brings apples and pears, while winter is perfect for citrus fruits like oranges and grapefruits. Each season offers unique flavors. Using what's in season can enhance taste and nutrition. Want to mix it up? Add chocolate or nut butter! Swirl in cocoa powder or chocolate syrup for a treat. For a nutty flavor, try almond or peanut butter. Both options add richness and protein. You can also layer in chocolate chips or nut butter for extra fun. This gives you a tasty way to enjoy your parfaits. Think outside the box with your ingredients. Swap Greek yogurt for coconut yogurt for a dairy-free option. This adds a hint of coconut flavor. You can also mix in chia seeds for added health benefits. Chia seeds are high in fiber and omega-3s. They also help with texture. These unique swaps can take your parfaits to the next level. For more ideas, check out the Full Recipe. Storing leftover Greek yogurt parfaits is easy. Use airtight containers to keep them fresh. This helps prevent the yogurt from absorbing other odors in the fridge. If you stacked your parfaits in glasses, cover them with plastic wrap. For freshness, store your parfaits in the fridge for up to 2 days. After that, the berries may lose their texture, and the granola can become soggy. It’s best to eat them sooner rather than later for the best taste. If you want to save them longer, consider freezing. You can freeze the yogurt mixture in ice cube trays. Once frozen, pop them out and store them in a zip-top bag. When ready to enjoy, blend them into smoothies or let them thaw for a quick snack. Just avoid freezing the granola or fresh fruits, as they won’t hold up well. Try these storage tips to keep your wholesome Greek yogurt parfaits fresh and tasty! For the full recipe, check back to create your delicious snack. Greek yogurt is rich in protein. It helps keep you full longer. It also contains probiotics, which are good for your gut. These beneficial bacteria support digestion and immune health. Greek yogurt is lower in sugar than regular yogurt. It’s a great choice for a healthy snack. Yes, you can use non-dairy yogurt. Almond, coconut, or soy yogurt are great options. Just make sure to choose unsweetened types. This will keep your parfait healthy. The texture may change slightly, but the taste will still be good. To make your parfaits more filling, try adding protein. You can mix in nut butter or seeds. You can also use more nuts in your layers. Adding a scoop of protein powder to the yogurt works well too. Another option is to layer in some oats. This will give extra fiber and keep you satisfied longer. For more details on making these parfaits, check the Full Recipe. In summary, we explored the key ingredients that make a delicious parfait. Greek yogurt offers many health benefits, while fresh fruits and nuts enhance flavor and nutrition. I shared step-by-step instructions to build the perfect parfait and tips for creating great layers. We discussed how to customize your parfaits and prepare them ahead of time. There are many variations to enjoy throughout the seasons. Finally, I provided storage advice to keep your parfaits fresh. Enjoy making these easy, tasty treats that are good for you!

Healthy Greek Yogurt Parfaits for Nutritious Snacking

Looking for a tasty and healthy snack? Greek yogurt parfaits are the perfect choice! They are easy to make, packed

To make Zesty Black Bean Corn Salsa, gather these simple ingredients: - 1 can (15 oz) black beans, drained and rinsed - 1 cup corn kernels (fresh, frozen, or canned) - 1 red bell pepper, diced - 1 small red onion, finely chopped - 1 jalapeño pepper, seeded and minced - 1/4 cup fresh cilantro, chopped - 2 tablespoons lime juice - 1 tablespoon olive oil - 1 teaspoon ground cumin - Salt and pepper to taste These ingredients create a vibrant and colorful dip. Each one adds a unique flavor that makes your salsa pop. Do you need to swap some items? Here are some easy substitutions: - Black beans: Use pinto beans or kidney beans if you prefer. - Corn: Try using diced zucchini or bell peppers if you want a twist. - Red bell pepper: Yellow or green bell peppers work well too. - Red onion: Use green onions or sweet onions for a milder taste. - Jalapeño: If you like less heat, use a mild pepper like a banana pepper. - Lime juice: You can replace it with lemon juice for a different zing. These swaps can fit your taste and what you have at home. Want to make your salsa even more exciting? Here are some fun add-ins: - Diced avocado for creaminess. - Chopped tomatoes for extra freshness. - Black olives for a salty bite. - Crumbled feta cheese for a tangy twist. - Diced mango for a sweet touch. Feel free to mix and match based on your cravings. Each option enhances flavor and texture, making your salsa unique. You can find the full recipe to guide you through the process of creating this delicious dip. Start by gathering all your ingredients. You will need black beans, corn, red bell pepper, red onion, jalapeño, cilantro, lime juice, olive oil, and spices. 1. Open the can of black beans and drain them. Rinse them well under cold water. This step helps remove excess salt and keeps your salsa fresh. 2. Measure out one cup of corn. You can use fresh, frozen, or canned corn. Each option works great! 3. Dice the red bell pepper into small pieces. This will give your salsa a nice crunch and color. 4. Finely chop the red onion. A small onion adds a strong flavor. 5. Remove the seeds from the jalapeño. Then, mince it into tiny bits. Adjust the amount for spice level. 6. Chop the fresh cilantro. It adds a bright taste and herbal note to the salsa. Now it’s time to mix everything together. 1. In a large mixing bowl, combine the black beans, corn, diced red bell pepper, chopped red onion, and minced jalapeño. 2. Add the chopped cilantro to the bowl. Make sure it’s spread evenly throughout the mixture. 3. In a small bowl, whisk together the lime juice, olive oil, ground cumin, salt, and pepper. Mix until it is well blended. 4. Pour this dressing over the bean and corn mixture. Gently toss everything together. Ensure every piece gets coated in the dressing. To make your salsa even tastier, consider these tips. - Taste the salsa after mixing. Adjust the seasoning by adding more lime juice or salt if needed. - Let the salsa sit in the refrigerator for at least 30 minutes. This helps the flavors blend and deepen. - Garnish with extra cilantro when serving for added color and freshness. For the complete recipe, check out the Full Recipe. Enjoy making your zesty black bean corn salsa! When cutting vegetables, keep it simple. Use a sharp knife for clean cuts. Start by cutting the ends off each vegetable. For the bell pepper, slice it in half and remove the seeds. Next, cut it into thin strips. Then, dice the strips into small pieces. For onions, slice them in half first. Make small cuts from root to tip. Finally, cut across to create tiny cubes. This method helps with even cooking and better texture in your salsa. To change the heat in your salsa, focus on the jalapeño. If you want more spice, add more jalapeño or leave in some seeds. For less heat, remove all the seeds and the white ribs. You can also swap jalapeño for a milder pepper, like a green bell pepper. If you accidentally make it too spicy, add more corn or beans to balance the heat. This keeps the flavor bright without overwhelming your taste buds. Serve your salsa in a bright bowl. It looks great with fresh cilantro on top. Pair it with tortilla chips for dipping, or use fresh veggie sticks like carrots and cucumbers. You can also serve it over grilled chicken or fish for a tasty meal. This salsa makes a great topping for tacos or burritos too. For an extra touch, add slices of avocado or a dollop of sour cream on top. For the full recipe, check out the details above. {{image_2}} You can make your salsa unique by adding fruit. Fruits like mango or pineapple give a sweet flavor. Just chop them into small pieces and mix them in. The sweetness balances the spice from the jalapeño. You can also try peach or even kiwi for new tastes. This will make your salsa bright and fun! While black beans are great, you can switch things up. Use pinto beans or kidney beans instead. They both add a different texture and taste. Mixing beans can also boost protein content. You can even try chickpeas for a twist! Just remember to drain and rinse them first. This helps keep your salsa fresh and tasty. The dressing in the full recipe is simple but you can change it. Try adding a splash of apple cider vinegar for zing. You could also use a dash of hot sauce for more heat. If you want a creamier texture, mix in some Greek yogurt. Herbs like oregano or thyme can add depth. Experimenting with these options makes your salsa special! After you enjoy your zesty black bean corn salsa, you will want to store any leftovers. Place the salsa in an airtight container. This keeps it fresh and tasty. If you use plastic wrap, press it against the salsa to limit air exposure. Store it in the fridge. The salsa will stay good for several days. If you have more salsa than you can eat, freezing is a great option. First, make sure the salsa is cool. Pour it into a freezer-safe container. Leave some space at the top for expansion. You can also use freezer bags, just squeeze out the air. When you want to use it, thaw the salsa in the fridge overnight. In the fridge, your salsa lasts about 3 to 5 days. If you freeze it, it can last for up to 3 months. Always check for any off smells or changes in texture before eating. For the best taste, enjoy your salsa fresh or within the first week. You can serve this salsa with tortilla chips for a crunchy dip. It also pairs well with grilled chicken or fish. Use it as a topping for tacos or burritos. You can even spoon it over a fresh salad for added flavor. Yes, you can make this salsa ahead of time. In fact, letting it sit in the fridge for a while helps the flavors blend. Make it a few hours or a day before your event for the best taste. Just cover it tightly and store it in the fridge. Absolutely! This salsa is vegan-friendly. It contains no animal products. You can enjoy it guilt-free and share it with your vegan friends. Zesty Black Bean Corn Salsa lasts about 3 to 5 days in the fridge. Store it in an airtight container to keep it fresh. If you notice any strange smells or colors, it's best to toss it. Yes, canned corn works perfectly! Just drain it well before adding it to the salsa. This saves you time and still gives great flavor. For even pieces, use a sharp knife and a stable cutting board. Dice the bell pepper and onion into small, uniform pieces. This helps the salsa look nice and taste better. Yes, feel free to get creative! You can add diced avocado for creaminess or chopped mango for sweetness. Just remember to adjust the seasoning if you add new ingredients. In this blog post, we explored the tasty world of Zesty Black Bean Corn Salsa. We covered essential ingredients, substitutions, and optional add-ins. The step-by-step instructions made it easy to prepare and combine. You learned tips for cutting veggies and adjusting spice. Plus, we shared fun variations and storage tips. Remember, this salsa is not just a dip; it’s a versatile dish. Enjoy it your way, and feel free to experiment!

Zesty Black Bean Corn Salsa Fresh and Flavorful Dip

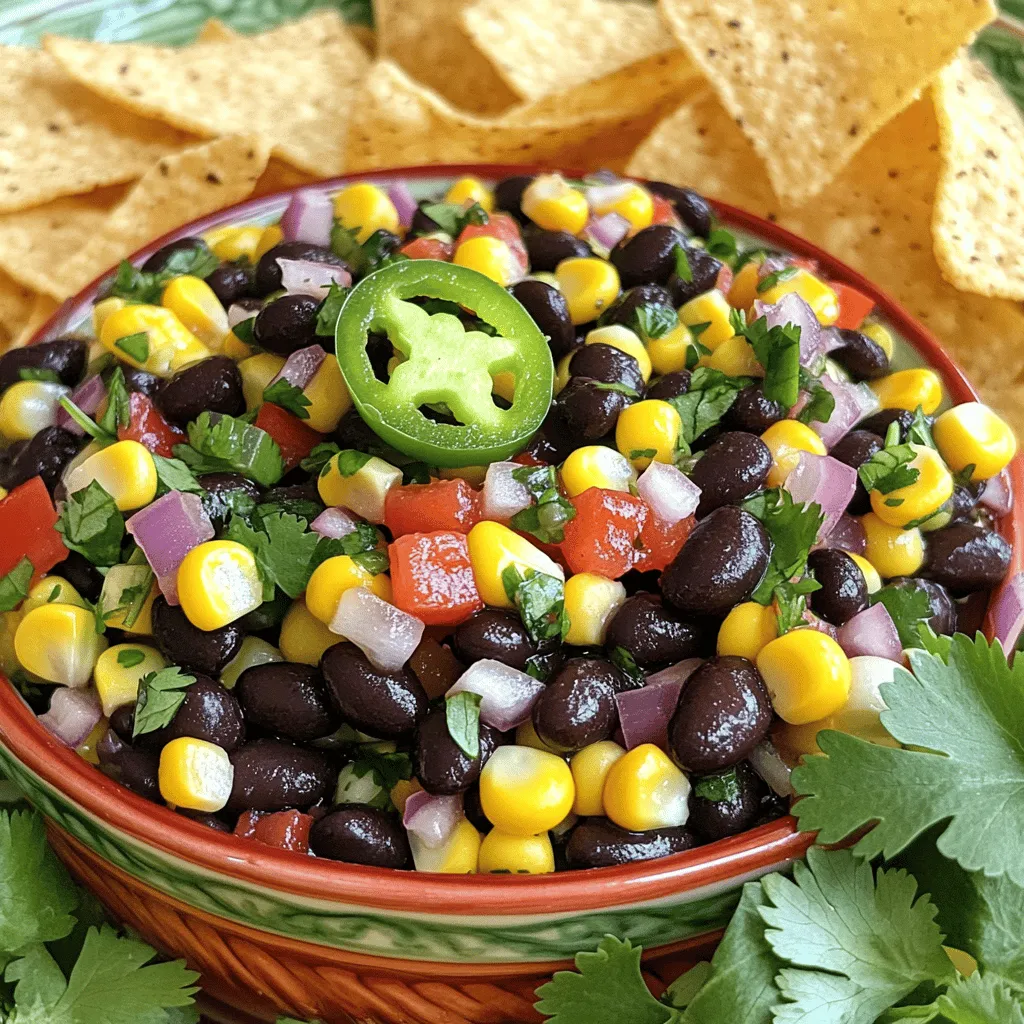
Are you ready to elevate your snack game? This Zesty Black Bean Corn Salsa is the perfect dip for any

- 4 boneless, skinless chicken breasts - 1/2 cup sweet chili sauce - 2 tablespoons soy sauce (or tamari for gluten-free) - 2 tablespoons fresh lime juice - 1 teaspoon lime zest - 1 tablespoon honey - 1 tablespoon sesame oil - 3 cloves garlic, minced - 1 teaspoon fresh ginger, grated - Salt and pepper to taste - Fresh cilantro, for garnish - Lime wedges, for serving - Red pepper flakes for extra heat - Sesame seeds for garnish - Additional herbs like parsley or green onions Gather these ingredients before you start cooking. The sweet chili sauce gives this dish its signature flavor. The lime juice adds a zesty punch that balances the sweetness. Fresh garlic and ginger enhance the dish's aroma. If you want more heat, consider adding red pepper flakes. They can spice up the dish nicely. Sesame seeds add a crunchy texture, and fresh herbs brighten the plate. The key is to use fresh ingredients whenever possible. For the full experience, check out the Full Recipe for detailed steps and tips. To make the marinade, combine the sweet chili sauce, soy sauce, lime juice, lime zest, honey, sesame oil, minced garlic, and grated ginger in a bowl. Mix well. Season this mixture with salt and pepper. Place the chicken breasts in a zip-top bag or shallow dish, and pour the marinade over the top. Seal the bag or cover the dish. For the best flavor, marinate the chicken for at least 30 minutes. If you have more time, let it sit for up to 4 hours. You can cook the chicken either on the grill or in the oven. - Grilling: Preheat your grill to medium heat. Remove the chicken from the marinade and place it on the grill. Cook for about 6-7 minutes on one side. Flip it and cook for another 5-6 minutes until the chicken reaches an internal temperature of 165°F (75°C). - Baking: Preheat your oven to 400°F (200°C). Place the marinated chicken on a parchment-lined baking sheet. Bake for about 25-30 minutes. Flip the chicken halfway through cooking to ensure even cooking. Once the chicken is cooked, take it off the heat. Let it rest for about 5 minutes. This step helps keep the chicken juicy. For serving, slice the chicken and arrange it on a platter. Drizzle with any leftover marinade, but make sure to boil it first to ensure safety. Garnish with fresh cilantro and serve with lime wedges for an extra burst of flavor. You can find the Full Recipe for more details. Marinating is key to great flavor. It allows the chicken to soak up all those tasty juices. I recommend marinating for at least 30 minutes. If you have more time, go for four hours or even overnight. This adds depth to the taste. If you want more sweetness, add a bit more honey. For extra heat, mix in red pepper flakes or sriracha. Adjust according to your taste. To ensure juicy chicken, cook it evenly. If grilling, preheat to medium heat. If baking, set your oven to 400°F (200°C). Always flip the chicken halfway through cooking. This gives a nice, even crust. Using a meat thermometer is a must. Check that the internal temperature reaches 165°F (75°C). This guarantees your chicken is safe to eat and perfectly cooked. Garnishing adds a nice touch. Fresh cilantro brightens the dish. Simply chop some and sprinkle it on top before serving. Lime wedges are great for squeezing on the chicken just before eating. Consider serving with a side of rice or a fresh salad. This balances the meal and complements the sweet chili lime chicken. For a fun twist, serve it in tacos with crunchy veggies. For the full recipe, refer back to the Sweet Chili Lime Chicken section. {{image_2}} You can swap chicken for shrimp or tofu. Shrimp cooks fast, so reduce the grill time to about 3-4 minutes per side. Tofu needs extra prep. Press it to remove water, then cut it into thick slices. Marinate it for at least 30 minutes. Cook tofu on medium heat for about 5-6 minutes on each side until golden brown. Want more heat? Add chili paste or fresh peppers. You can start with a pinch of red pepper flakes for a mild kick. If you prefer sweet over spicy, use agave syrup or maple syrup instead of honey. Just keep the same amount for balance. Get creative with how you serve this dish! Turn it into tacos by placing sliced chicken in soft tortillas. Add fresh veggies and a drizzle of lime juice. You can also create a bowl with rice, quinoa, or salad. Mix in some black beans or corn for a hearty meal. For the complete guide, check the [Full Recipe]. Store your leftovers in an airtight container. Glass or plastic containers work well. This keeps the chicken fresh. Place it in the fridge for up to three days. If you want to eat it later, freezing is a great option. To freeze marinated chicken, place it in a zip-top bag. Make sure to remove as much air as possible. This helps prevent freezer burn. You can freeze it for up to three months. When you're ready to cook it, thaw the chicken overnight in the fridge. This keeps it safe and tasty. The best way to reheat chicken is in the oven. Preheat your oven to 350°F (175°C). Place the chicken in a baking dish and cover it with foil. This keeps the moisture in. Heat for about 15-20 minutes. If you prefer the stovetop, use a skillet over medium heat. Cook for about 5-7 minutes, flipping halfway through. Always check that the chicken is heated to at least 165°F (75°C). This keeps it safe and delicious. To make Sweet Chili Lime Chicken gluten-free, simply swap soy sauce for tamari. Tamari is a great choice since it has a similar taste and is safe for those with gluten issues. You can also look for gluten-free sweet chili sauce. Many brands offer gluten-free options, so check the label while shopping. Yes, you can use frozen chicken for this recipe. Cooking from frozen will take longer, so plan for extra time. If grilling, add 5-10 minutes to the cooking time. For baking, increase the time by about 10-15 minutes. Always check the internal temperature. It should reach 165°F (75°C) for safe eating. Sweet Chili Lime Chicken goes well with many sides. Here are a few great options: - Steamed jasmine rice - Grilled veggies like zucchini and bell peppers - Fresh green salad with lime vinaigrette - Corn on the cob - Roasted sweet potatoes These sides will enhance the flavors of the chicken and make your meal even better. For the full recipe, check out the entire guide! In this post, we explored the tasty Sweet Chili Lime Chicken recipe. We covered the main ingredients, from chicken to sauces, and shared step-by-step cooking methods. I provided tips for perfecting your marinade and even suggested variations for protein and serving style. Remember to store leftovers properly and follow the reheating tips for the best flavor. Now, get cooking! Enjoy the rich flavors and impress your family with this dish. Your efforts will lead to smiles and satisfaction at the dinner table.

Savory Sweet Chili Lime Chicken Simple Dinner Recipe

Looking for a quick and tasty dinner? You’ll love this Savory Sweet Chili Lime Chicken recipe! With just a few

The joy of making Quick Avocado Egg Salad starts with gathering your fresh ingredients. Here’s what you will need: - 4 hard-boiled eggs, peeled and chopped - 1 ripe avocado, mashed - 2 tablespoons Greek yogurt - 1 tablespoon Dijon mustard - 2 tablespoons fresh chives, finely chopped - 1 tablespoon lemon juice - Salt and pepper to taste - Optional: 1/4 teaspoon paprika These simple ingredients come together to create a creamy, flavorful salad. The hard-boiled eggs provide protein, while the avocado adds healthy fats. Greek yogurt gives a tangy flavor and creamy texture. Chives and lemon juice brighten up the dish. You can adjust the salt, pepper, and paprika to suit your taste. This recipe makes a great snack or a light meal. For the full recipe, check the details above. 1. Combine chopped hard-boiled eggs and mashed avocado. Start by peeling and chopping your hard-boiled eggs. Then, take a ripe avocado and mash it in a bowl. Mix the eggs and avocado together until they are well combined. 2. Add Greek yogurt, Dijon mustard, lemon juice, and chives. Next, add two tablespoons of Greek yogurt for creaminess. Then, add one tablespoon of Dijon mustard for a bit of tang. Squeeze in one tablespoon of lemon juice to brighten the flavors, and toss in two tablespoons of finely chopped chives for freshness. 3. Mix ingredients until combined, keeping it chunky. Use a fork to gently mix everything. You want it to be well blended but still have some chunks. This gives your salad a nice texture. 4. Season with salt, pepper, and optional paprika. Add salt and pepper to taste. If you like a little heat, sprinkle in a quarter teaspoon of paprika. This step is key for bringing everything together. 5. Serve on toast, in lettuce wraps, or as a dip. Now, it's time to enjoy! You can spread the salad on whole-grain toast, use it in lettuce wraps, or serve it as a dip with veggie sticks. This recipe is versatile and fun! For the full recipe, check out the details above. Enjoy your healthy delight! You can easily swap Greek yogurt for mayonnaise. This change gives your salad a lighter feel. If you want a creamier texture, use more yogurt. Fresh herbs add life to this dish. Try adding parsley, dill, or basil. These herbs bring bright flavors and aroma. To mash the avocado, use a fork. This method keeps it chunky. Avoid over-mashing; you want a mix of smooth and bits. Balancing flavors is key. Taste as you mix. If it needs more zest, add more lemon juice. Salt and pepper enhance all the flavors too. Whole-grain bread is the best choice for serving. It adds fiber and a nutty taste. Lettuce wraps are a fun, low-carb option. Pair your salad with fresh veggies like carrots and bell peppers. It makes a great snack or light meal. For an extra kick, add some spicy mustard on the side. For the full recipe, check out the details above. {{image_2}} You can make your avocado egg salad even more fun by adding extra veggies. Diced bell peppers add crunch and color. Chopped celery gives a nice texture. Both options keep the dish fresh and vibrant. Spices can also boost the flavor. Try adding a pinch of cumin for warmth. Garlic powder gives a light kick and pairs well with the creamy avocado. These small tweaks make your salad unique and tasty. If you want a vegan option, swap the eggs for tofu or chickpeas. Silken tofu blends well and gives a creamy texture. Chickpeas add protein and a hearty bite. Both options keep the dish satisfying. For a gluten-free meal, serve your salad in lettuce wraps. You can also use gluten-free bread for a sandwich. These choices ensure everyone enjoys this healthy delight. For the full recipe, check out the Avocado Egg Salad Delight 🥑🥚 above! To keep your avocado egg salad fresh, place it in an airtight container. This helps prevent air from getting in and causing browning. You can also press plastic wrap directly onto the salad's surface before sealing the container. This extra step keeps the salad from drying out. When stored properly in the fridge, your avocado egg salad will stay fresh for about 2 to 3 days. After that, the flavors may fade, and the texture can change. Always check for any off smells or changes in color before eating leftovers. Freezing avocado egg salad is not the best option. Avocado can become mushy when thawed, which changes the texture. If you must freeze it, consider freezing just the hard-boiled eggs and avocado separately. Then mix them when you're ready to eat. This keeps the dish fresher and more enjoyable. For best results, use the Full Recipe to make it fresh when you want to enjoy it! You can serve avocado egg salad in many ways. Here are some ideas: - Spread it on whole-grain toast for a quick meal. - Use it as a filling in lettuce wraps for a fresh crunch. - Serve it as a dip with carrot sticks, celery, or cucumber slices. - Pair it with crackers for a tasty snack. - Add it to a salad for extra protein and creaminess. These options make it easy to enjoy this dish at any meal. Yes, you can make this salad ahead of time. Here are tips for doing so: - Prepare the salad and store it in an airtight container. - Keep it in the fridge for up to two days. - If you want to make it even earlier, boil the eggs and mash the avocado separately. - Mix them together when you are ready to eat. This way, your salad stays fresh and tasty! To keep the avocado fresh, follow these techniques: - Add lemon juice right after mashing. The acid slows browning. - Store the salad in a container with a tight lid. - Press plastic wrap against the salad to limit air exposure. - Use a little extra lemon juice before serving to brighten it up. These steps will help keep your avocado egg salad looking nice and green. You can create a delicious avocado egg salad with just a few simple steps. We started with key ingredients, combined them, and shared tips for perfecting texture. You learned how to customize and add variations to suit different tastes and diets. Remember to store leftovers properly to keep them fresh. This salad is not just tasty; it is also quick to prepare. Enjoy experimenting with your own twists on this easy dish!

Quick Avocado Egg Salad Easy and Healthy Delight

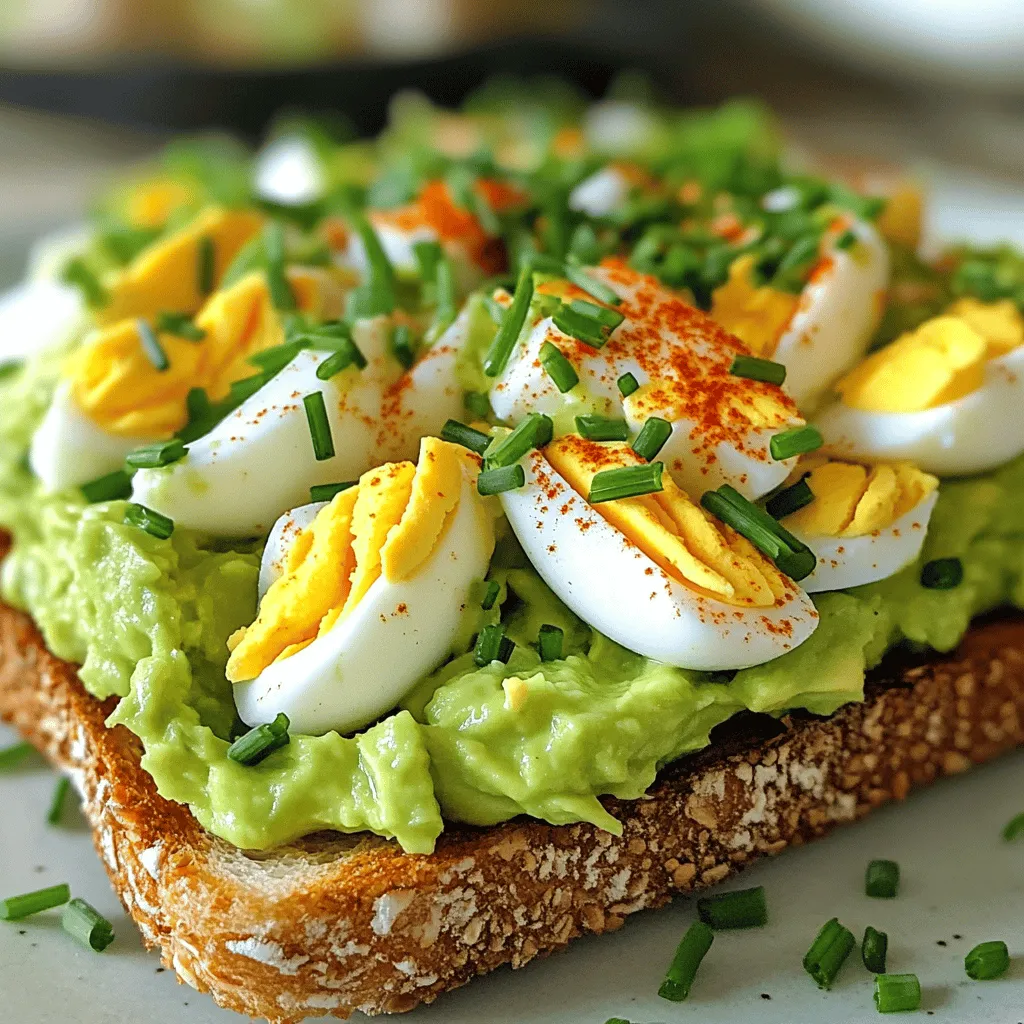
Looking for a simple, healthy dish? My Quick Avocado Egg Salad is just the thing! With just a few ingredients,

To make cheesy stuffed bell peppers, you need just a few main ingredients. These include: - 4 large bell peppers (any color) - 1 cup cooked quinoa (or rice) - 1 cup black beans, rinsed and drained - 1 cup corn kernels (fresh or canned) - 1 cup diced tomatoes (fresh or canned) - 1 cup shredded cheddar cheese Each ingredient brings flavor and texture. The bell peppers add crunch, while the quinoa gives a nice base. Black beans add protein, and corn brings a sweet touch. Diced tomatoes help keep the mix moist. You can also add optional ingredients to make this dish your own. Try these: - ½ cup diced red onion - ¼ cup fresh cilantro, chopped (for garnish) Diced red onion gives a nice bite. Fresh cilantro adds brightness and color. Seasonings play a big role in flavor. Here are the key ones: - 1 teaspoon cumin - 1 teaspoon smoked paprika - ½ teaspoon garlic powder - Salt and pepper to taste Cumin adds warmth. Smoked paprika gives a hint of smoke, while garlic powder amps up the savory notes. Adjust salt and pepper to suit your taste. These spices make the filling pop and keep it interesting. For the full recipe, check out the [Full Recipe]. Start by preheating your oven to 375°F (190°C). Take the bell peppers and cut off the tops. Remove all seeds and membranes inside. Place the peppers upright in a baking dish. This helps them hold the filling well. In a large bowl, mix the cooked quinoa, black beans, corn, and diced tomatoes. Add cumin, smoked paprika, garlic powder, salt, and pepper. Stir this mixture until it is well combined. Next, mix in half of the shredded cheddar cheese. This adds great flavor to the filling. Fill each bell pepper with the stuffing mixture. Press it down gently to pack it in. Once they are filled, top each pepper with the remaining cheddar cheese. Cover the baking dish with aluminum foil. Bake for 30 minutes, then remove the foil. Bake for another 15 minutes until the cheese is bubbly and golden. Let them cool for a few minutes, then add fresh cilantro for garnish. Enjoy your meal! For the full recipe, check out the earlier section. To make stuffed peppers extra tasty, choose fresh peppers. Look for peppers that are firm and bright. Wash them well before you start. Cut off the tops and scoop out the seeds. This helps the flavors blend better. When mixing your stuffing, don’t rush. Take time to mix well. Make sure every bite has flavor. Pack the stuffing tightly into each pepper. This keeps them from falling apart. Top each pepper with cheese for that gooey, delicious finish. One common mistake is overcooking the peppers. If you cook them too long, they become mushy. Bake them just until the cheese is bubbly. This keeps the peppers crisp and tasty. Another mistake is using too much salt. Taste your stuffing before you add more salt. You can always add more later. Also, don’t forget to cover the dish with foil. This helps the peppers cook evenly. To reheat leftovers, use the oven for best results. Preheat your oven to 350°F (175°C). Place the peppers in a baking dish. Cover them with foil to keep moisture in. Bake for about 15-20 minutes until they are warm. You can also use the microwave, but it may not taste as good. If you microwave, heat for about 2-3 minutes. Check to see if they are warm all the way through. Enjoy your cheesy stuffed peppers again with these easy tips! {{image_2}} You can make cheesy stuffed bell peppers with or without meat. For a vegetarian meal, use black beans and quinoa as the base. They add protein and flavor. If you want meat, try ground turkey or beef. Cook the meat first, then mix it into the stuffing. This will give you a hearty dish that still tastes great. To keep this dish gluten-free, stick to quinoa or rice as your base. Both options are naturally gluten-free. Make sure to check the labels on canned goods like beans and corn. Some brands may add gluten as a filler. You can enjoy cheesy stuffed bell peppers without any worries about gluten. Get creative with your stuffing! You can add extra veggies like spinach or zucchini for more nutrition. For a spicy kick, toss in some jalapeños or crushed red pepper flakes. Top your peppers with avocado slices or a dollop of sour cream for added flavor. These small changes can make your meal feel new every time. For the full recipe, check out the section above. To keep your cheesy stuffed bell peppers fresh, place them in an airtight container. Make sure to let them cool first. Store them in the fridge for up to three days. If you want to keep them longer, consider freezing. To freeze stuffed peppers, wrap each one in plastic wrap. Then, place them in a freezer-safe bag or container. This way, they won't stick together. You can freeze them for up to three months. Thaw in the fridge overnight before reheating. When ready to eat, preheat your oven to 350°F (175°C). Place the peppers in a baking dish. Cover with foil to keep them moist. Heat for about 20-25 minutes. Check that the cheese is melted and the peppers are warm. Enjoy the flavors just like fresh from the oven! Yes, you can use any cheese you like! Mozzarella, Monterey Jack, or even feta work well. Each cheese adds its own flavor and texture. Experimenting with different cheeses can make the dish fun and unique. For a stronger flavor, try blue cheese or goat cheese. Just remember, the cheese should melt nicely to create that gooey, cheesy delight we all love. Stuffed peppers can last about 3 to 5 days in the fridge. Make sure to store them in an airtight container to keep them fresh. If you notice any changes in smell or color, it’s best to throw them out. Enjoy them as leftovers for lunch or dinner. They make a great quick meal! Absolutely! You can prepare the filling and stuff the peppers a day in advance. Just store them in the fridge until you're ready to bake. This saves time on busy nights. If you want, you can even freeze them before baking. Just ensure to thaw them in the fridge overnight before cooking. This makes it easy to enjoy a tasty meal anytime. For the full recipe, check the earlier section. Cheesy stuffed bell peppers are versatile, tasty, and easy to make. We covered key ingredients, step-by-step instructions, and helpful tips. I shared variations for different diets and how to store leftovers. Remember, customizing these peppers makes them perfect for you. Use fresh, flavorful ingredients, and avoid common mistakes for the best results. With these tips, your stuffed peppers will shine. Enjoy your cooking and impress your friends and family with your delicious meals.

Cheesy Stuffed Bell Peppers Simple and Tasty Recipe

Are you ready to elevate your weeknight dinners? Cheesy stuffed bell peppers are the answer! This simple and tasty recipe

- 2 ripe peaches - 8 ounces burrata cheese - 4 cups arugula (or mixed greens) - 1/4 cup toasted pecans - 1/4 cup balsamic glaze - 2 tablespoons olive oil - Salt and pepper to taste - Fresh basil leaves for garnish To create a tasty Grilled Peach Burrata Salad, we start with fresh, ripe peaches. You want them sweet and juicy for the best flavor. Burrata cheese adds a creamy touch that pairs well with the fruit. Arugula or mixed greens serve as a fresh base and add a peppery crunch. Next, we have toasted pecans. They offer a nice crunch and nutty flavor. The balsamic glaze brings sweetness and tang, while olive oil enhances the overall taste. For seasoning, add salt and pepper to balance the flavors. Lastly, fresh basil leaves not only look good but also brighten the dish. You can find the full recipe to guide you through every step of making this delightful salad! - Preheat the grill to medium-high heat. - Brush the cut side of the peach halves with olive oil. - Sprinkle a pinch of salt over the peaches. Start by getting your grill ready. Medium-high heat is perfect for grilling peaches. It helps them get that nice char and soft texture. I love brushing the peaches with olive oil. It adds flavor and helps them grill evenly. A pinch of salt really brings out the peach's sweetness. - Place peaches cut-side down on the grill. - Grill until softened and charred. Now, place the peaches cut-side down on the grill. Let them cook for about three to four minutes. You will see lovely grill marks, and they will soften a bit. After that, flip them and grill for another one to two minutes. This will give them a nice smoky flavor. - Layer arugula on a serving platter. - Add burrata cheese and grilled peach wedges. - Top with pecans and drizzle with balsamic glaze. For the salad, layer arugula evenly on a large platter. Then, tear the burrata cheese into pieces and scatter it among the arugula. Next, slice the grilled peaches into wedges and arrange them on top. Finally, scatter toasted pecans over everything. A drizzle of balsamic glaze will add a sweet and tangy finish. You can find the Full Recipe for more details. Enjoy the fresh flavors of this salad with each bite! Grilling peaches requires the right temperature. Set your grill to medium-high heat. This temperature allows peaches to cook evenly and achieve that perfect char. To tell when peaches are done, look for grill marks. They should be soft but not mushy. A good rule is to grill them for 3-4 minutes cut-side down. Then flip and grill for 1-2 more minutes. Pair your salad with a crisp white wine. A Sauvignon Blanc complements the peaches and burrata well. You can also serve it alongside grilled chicken for a heartier meal. For serving style, consider a rustic wooden board. This allows the vibrant colors of the salad to shine. A platter works well too, but a board adds a fun, casual touch. Boost the flavor with fresh herbs. Basil and mint work great with this salad. You can also sprinkle in some thyme for an earthy touch. For dressings, try a honey vinaigrette or a citrus-infused olive oil. These options add a bright twist to the dish. They pair nicely with the sweet and savory notes of the salad. For the full recipe, check out the earlier section. Enjoy your delicious Grilled Peach Burrata Salad! {{image_2}} You can play with this salad by swapping out the greens. Instead of arugula, try spinach or kale. Each green brings its own taste and texture. For the nuts, consider walnuts or almonds. They add a different crunch and flavor. You can also use feta or goat cheese instead of burrata. This gives a tangy twist to the salad. If you want a vegan version, use cashew cheese or a tofu-based substitute for burrata. These options still offer creaminess but fit a plant-based diet. For gluten-free needs, this salad is naturally gluten-free. Just be cautious with any added dressings or toppings. Always check labels to ensure they meet gluten-free standards. You can switch the peaches for other fruits during different seasons. In summer, try plums or nectarines. In fall, apples or pears work well. Each fruit adds a unique flavor to the dish. Adapting this recipe for winter? Use roasted or grilled citrus like oranges or grapefruits. They add brightness and balance to the salad, making it enjoyable year-round. For the full recipe, check the section above. Enjoy this fresh delight no matter the season! Store any leftover salad in an airtight container. Keep the salad components separate for best flavor. Place the grilled peaches in a separate container. This helps keep them fresh and prevents sogginess. You can refrigerate the salad for up to two days. However, the grilled peaches taste best when fresh. You can freeze grilled peaches, but they may lose some texture. To freeze, slice the peaches and place them in a single layer on a baking sheet. Freeze until solid, then transfer to a freezer bag. Use within three months for the best flavor. You can freeze the pecans, too. Store them in an airtight bag to prevent freezer burn. To revive the salad, gently warm the grilled peaches in a skillet over low heat. Avoid using high heat, as this can make them mushy. You can also microwave them for a few seconds, but watch closely. The salad will taste best when served fresh. If you must reheat, do it carefully to maintain flavor and texture. For the best flavor, use fresh burrata. Look for burrata that feels soft and creamy. The outer layer should be firm, while the inside should be rich and runny. This balance gives a great taste and texture. If you can, buy burrata from a local cheese shop. They often have higher quality options. Yes, you can prep some parts ahead. Slice the peaches and store them in the fridge. Keep the burrata and greens separate. This way, the salad stays fresh and tasty. Add the dressing just before serving to keep everything crisp. Check for a firm yet slightly soft feel when you press them. Ripe peaches should have a sweet scent and a golden color. If they are hard, give them a few days at room temperature. You want them ripe for the best grilling and flavor. This blog post covered the delicious grilled peach and burrata salad. We looked at essential and additional ingredients, and I shared simple steps to create the dish. I also offered tips for grilling and how to enhance flavors. Incorporating variations lets you tailor this salad to your taste. Remember to store any leftovers properly for later enjoyment. Try making this dish for your next gathering. It’s sure to impress!

Grilled Peach Burrata Salad Flavorful and Fresh Delight

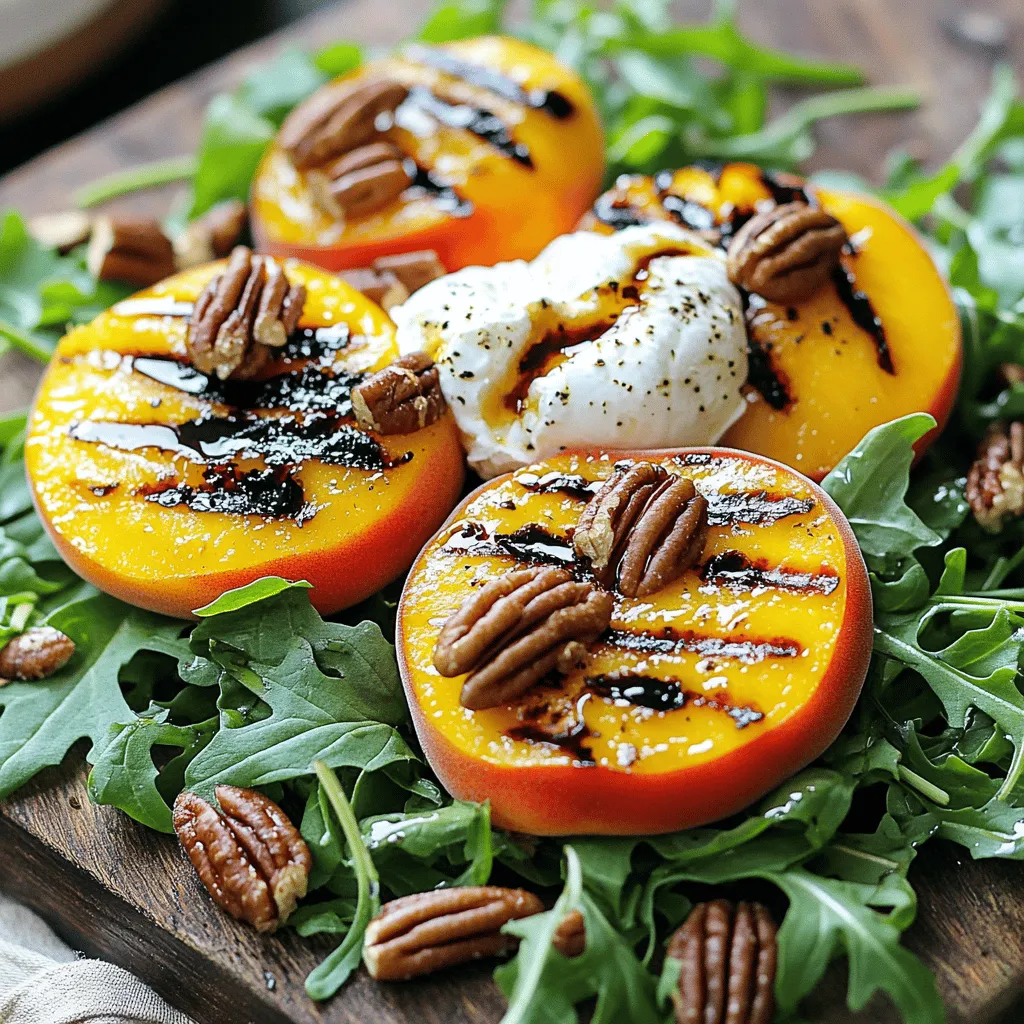
Looking for a bright and tasty salad that sings of summer? My Grilled Peach Burrata Salad combines the sweet, smoky

To make this creamy delight, gather these fresh ingredients: - 12 oz (340g) penne pasta - 1 can (14 oz) diced tomatoes, with juice - 2 cups vegetable broth - 1 cup heavy cream - 1 cup fresh basil leaves, roughly chopped - 1 small onion, finely chopped - 4 cloves garlic, minced - 1 teaspoon dried oregano - 1/2 teaspoon red pepper flakes (optional) - Salt and pepper to taste - 1 cup grated Parmesan cheese (plus extra for serving) - 2 tablespoons olive oil You will need a large pot for this recipe. A wooden spoon works well for stirring. Measuring cups and spoons make it easy to get the right amounts of each ingredient. A sharp knife is key for chopping onion and garlic. A cutting board helps keep your workspace clean. Lastly, using a ladle can help serve the pasta smoothly. For the full recipe, refer to the detailed steps provided. Start with a large pot. Heat two tablespoons of olive oil over medium heat. Once hot, add one small onion, finely chopped. Sauté it for about 3-4 minutes until it turns clear. Next, add four cloves of minced garlic. Cook for one more minute. You want to smell that garlic! Then, pour in one can of diced tomatoes, including the juice. Add two cups of vegetable broth and one cup of heavy cream. Stir it well until everything mixes nicely. Now it's time for the pasta. Add 12 ounces of penne pasta to the pot. Sprinkle in one teaspoon of dried oregano and half a teaspoon of red pepper flakes if you like some heat. Season with salt and pepper. Bring the mix to a boil. After it bubbles, lower the heat to simmer. Cook it for 12-15 minutes. Stir occasionally to prevent sticking. You want the pasta to be firm but not hard. Once the pasta is done, take the pot off the heat. Stir in one cup of fresh basil leaves, roughly chopped. Also, add one cup of grated Parmesan cheese. Mix until it melts into a creamy sauce. Taste it and adjust the salt or pepper as needed. Serve right away, topped with extra Parmesan cheese and a few basil leaves for a nice touch. For a detailed list of ingredients, check the Full Recipe. To make your One-Pot Creamy Tomato Basil Pasta even better, try these tips: - Use fresh herbs: Fresh basil adds a bright taste. You can also add fresh parsley or thyme for more depth. - Add more garlic: Extra garlic can make the dish sing. Try using six cloves instead of four. - Incorporate wine: A splash of white wine can elevate the sauce. Add it after sautéing the onion and garlic. - Mix in cheese: Experiment with different cheeses like mozzarella or goat cheese for extra creaminess and flavor. Here are some common mistakes to watch for when making this dish: - Overcooking the pasta: Keep an eye on the pasta. Cook it until it’s just al dente for the best texture. - Not stirring enough: Stir the pasta often to prevent it from sticking to the pot. - Skipping salt and pepper: Seasoning is key. Don’t forget to add salt and pepper to taste. - Using low-quality tomatoes: Choose high-quality canned tomatoes. They greatly affect the sauce’s flavor. When serving your One-Pot Creamy Tomato Basil Pasta, consider these ideas: - Garnish with fresh basil: Add some whole basil leaves on top for color and flavor. - Sprinkle extra cheese: A little extra Parmesan on top makes it look fancy. - Serve with crusty bread: Fresh bread pairs well. It’s perfect for soaking up the sauce. - Add a side salad: A simple green salad can balance the richness of the pasta. These tips can help you create a delicious meal. For the full recipe, check the previous section. {{image_2}} This dish is already vegetarian. You can make it even heartier. Add more veggies like spinach, bell peppers, or zucchini. These will boost flavor and nutrients. You can also mix in mushrooms for a meaty texture. Just sauté them with the onions. If you want to add protein, there are many choices. Grilled chicken is great for extra flavor. Shrimp cooks fast and pairs well with the sauce. You can also use chickpeas for a plant-based option. Simply stir them in during the last few minutes of cooking. To make this recipe dairy-free, swap heavy cream for coconut cream or cashew cream. These options keep it creamy. Use nutritional yeast instead of Parmesan for a cheesy taste. You can also find dairy-free cheese at many stores. Just sprinkle it on top before serving. Explore the full recipe for more tips on making this dish your own! After you enjoy your One-Pot Creamy Tomato Basil Pasta, store leftovers in the fridge. Use an airtight container to keep it fresh. It lasts up to three days in the fridge. Before storing, let the pasta cool to room temperature. This helps prevent sogginess. If you want to save some for later, freezing is a great option! Place the cooled pasta in a freezer-safe container. Make sure to leave some space at the top for expansion. This dish stays good in the freezer for up to three months. To thaw, move it to the fridge overnight or use the microwave. When you’re ready to enjoy your pasta again, reheating is simple. You can use the stove or microwave. If using the stove, add a splash of water or broth to keep it creamy. Heat on low and stir often until hot. For the microwave, cover it and heat in short bursts, stirring in between. Enjoy your meal just like the first time! For the full recipe, refer to the earlier section. Yes, you can use other pasta shapes. Short pasta like fusilli or shells work well. Longer pasta like spaghetti can also be used, but the cooking time may vary. Just make sure to adjust the cooking time to keep your pasta al dente. Always check the package instructions for the best results. If you want a lighter option, use whole milk or half-and-half. You can also try coconut milk for a dairy-free choice. For a thicker sauce, mix milk with cornstarch. This helps to mimic the creaminess without the heaviness of heavy cream. Leftovers can be stored for up to three days in the fridge. Keep them in an airtight container to stay fresh. When you reheat, add a splash of water or broth to keep the pasta creamy. If you want to save it longer, consider freezing it for up to three months. Just remember that the texture may change a bit after freezing. Enjoy your One-Pot Creamy Tomato Basil Pasta again! For the Full Recipe, refer back to the top of the article. In this blog post, we explored the key ingredients, cooking steps, and helpful tips. I shared ways to enhance flavor and avoid common mistakes. You learned about variations like vegetarian options and how to store your dish safely. Use these insights to create a meal that impresses. Cooking can be simple and rewarding. Enjoy your time in the kitchen as you try these ideas!

One-Pot Creamy Tomato Basil Pasta Delight Tonight

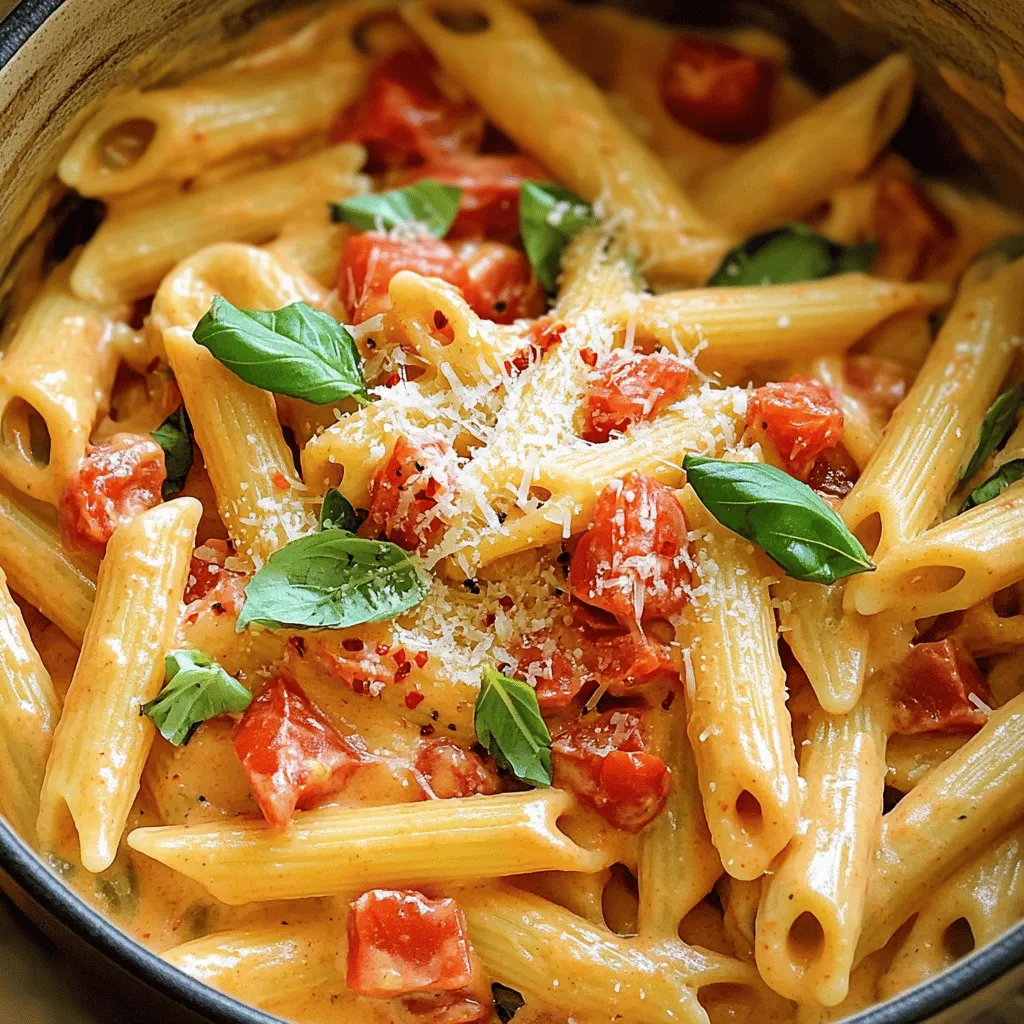
Ready for a quick and tasty dinner? This One-Pot Creamy Tomato Basil Pasta is your solution! It combines fresh flavors

- 3 ripe bananas, mashed - 1/3 cup melted coconut oil - 1 teaspoon vanilla extract - 1 teaspoon baking soda - Pinch of salt - 1/2 cup brown sugar - 1 large egg, beaten - 1 cup all-purpose flour - 1/2 cup dark chocolate chips - 1/4 cup chopped walnuts (optional) These ingredients come together to create a moist, sweet, and chocolatey banana bread. Each one plays a key role in the final product. The ripe bananas add natural sweetness and moisture. The coconut oil keeps the bread tender. You can use any oil you like if you don't have coconut oil. The brown sugar adds depth of flavor. You can swap brown sugar with granulated sugar, but the bread will taste different. The egg gives structure to the bread. If you want a vegan option, you can replace the egg with 1/4 cup of applesauce or mashed banana. - Coconut oil alternatives: You can use canola oil or melted butter if you prefer. - Sugar options: Brown sugar gives a richer flavor. Granulated sugar will make it lighter. - Vegan substitutes for egg: Use 1/4 cup of unsweetened applesauce or mashed banana instead of egg. This recipe is flexible and allows for personal touches. You can adjust it based on what you have at home. You can find the full recipe for Chocolate Chip Banana Bread in this article. Enjoy making this delightful treat! 1. Preheat your oven to 350°F (175°C). Grease a 9x5-inch loaf pan. You can also line it with parchment paper for easy removal later. 2. In a large mixing bowl, mash 3 ripe bananas with a fork. Then, add 1/3 cup of melted coconut oil. Mix well until both are smooth. 3. Next, stir in 1 teaspoon of vanilla extract and 1 beaten egg. Make sure everything is blended nicely. 4. In another bowl, mix 1 teaspoon of baking soda and a pinch of salt. Slowly add this to your banana mixture. Stir gently. 5. Now, mix in 1/2 cup of brown sugar. Keep stirring until it blends fully into the banana mix. 6. Gradually add 1 cup of all-purpose flour. Stir until just combined. Be careful not to overmix! 7. Fold in 1/2 cup of dark chocolate chips and, if you want, add 1/4 cup of chopped walnuts. Make sure they are spread evenly in the batter. 8. Pour the batter into your prepared loaf pan. Use a spatula to smooth the top. 9. Bake in your preheated oven for about 60 minutes. To check if it's done, insert a toothpick into the center. It should come out clean. 10. Let the banana bread cool in the pan for about 10 minutes. Then, move it to a wire rack to cool completely. You can find the Full Recipe for more details. How to choose ripe bananas for maximum flavor Select bananas that are dark yellow with brown spots. These bananas are sweet and flavorful. Avoid green bananas, as they are not sweet enough. Overripe bananas give the best taste for your bread. Avoiding common baking mistakes Make sure you measure ingredients correctly. Too much flour can make the bread dry. Always check that your baking soda is fresh. Old baking soda won't help the bread rise. Best practices for mixing to prevent overmixing Mix the batter gently. Combine wet and dry ingredients until just blended. Overmixing can make the bread tough. Stir in chocolate chips and walnuts lightly. Adding spices like cinnamon or nutmeg A pinch of cinnamon or nutmeg adds warmth to your banana bread. These spices work well with the sweetness of the bananas. Just a little can elevate the taste. Tips for balancing moisture If your bread seems too wet, add a bit more flour. If it’s too dry, try more bananas or a splash of milk. This balance keeps the bread soft and moist. Enjoy a slice of chocolate chip banana bread with a drizzle of chocolate for extra flavor. Check out the Full Recipe for details. {{image_2}} For a gluten-free version, you can swap regular flour for gluten-free flour. I recommend using almond flour or a gluten-free all-purpose blend. These options give great flavor and texture. You might need to adjust moisture levels. Gluten-free flours can absorb more liquid. Add a bit of extra banana or a splash of milk to keep it moist. To make this banana bread vegan, replace the egg with a flax egg. Mix one tablespoon of ground flaxseed with three tablespoons of water. Let it sit until it thickens. For milk, use almond, soy, or oat milk. Coconut oil works well as a butter substitute. Vegan baking can be tricky, so remember to check your batter. It should be thick but pourable. You can add your favorite nuts, seeds, or fruits to this recipe. Chopped pecans or walnuts add crunch. You can also mix in dried fruit like cranberries or raisins for sweetness. If you love chocolate, try different types of chocolate chips. White chocolate or milk chocolate can change the taste and make it unique. You could even add a swirl of peanut butter for an extra kick! For the full recipe, check the earlier section. To keep your chocolate chip banana bread fresh, store it in an airtight container. This helps to block out air and moisture. Place a paper towel in the container to absorb extra moisture. This keeps the bread moist and soft. A cool, dark place is ideal for storage. Avoid direct sunlight or hot areas. For short-term storage, the bread lasts about 3 days at room temperature. If you want it to last longer, refrigerate it. In the fridge, it stays fresh for up to a week. Just be aware that refrigeration can make it a bit dry. Freezing banana bread is a great way to enjoy it later. First, let the bread cool completely. Wrap it tightly in plastic wrap or foil. Then, place it in a freezer-safe bag. This helps to prevent freezer burn. When you want to eat it, take it out of the freezer. Let it thaw in the fridge overnight. You can also thaw it at room temperature for a few hours. Frozen banana bread can last about 3 months. After this time, it may lose flavor or texture. So, mark the date on your bag to keep track. Enjoy your homemade treat whenever you like! For the complete recipe, check out the Full Recipe section. To check if your banana bread is done, look for a few signs: - The edges should pull away from the pan. - The top will be golden brown. - A toothpick inserted in the center comes out clean. If the toothpick has wet batter, bake it a bit longer. Keep checking every few minutes. Yes, you can use frozen bananas! Here are some tips: - Thaw the bananas in the fridge or at room temperature. - Drain any extra liquid before mixing. - If they are very mushy, that’s fine! It adds flavor. Using frozen bananas can make your bread even sweeter. You can enjoy banana bread in many ways. Here are some ideas: - Serve warm with butter or cream cheese. - Drizzle with melted chocolate for extra sweetness. - Pair with coffee or tea for a cozy treat. Banana bread also goes well with ice cream for dessert! Homemade banana bread can last: - About 2-3 days at room temperature. - Up to a week in the fridge, if wrapped well. To keep it fresh, store it in an airtight container. Freezing it can extend its life to about three months. Chocolate chip banana bread is easy and fun to make. You need ripe bananas and simple ingredients. We covered essential tips for getting the best flavor and texture. I also shared ways to store it and even freeze leftovers. Now you can bake with confidence! Enjoy your warm, sweet bread with family and friends. Experiment with new flavors, or stick to the classic. Happy baking!

Chocolate Chip Banana Bread Easy and Delicious Recipe

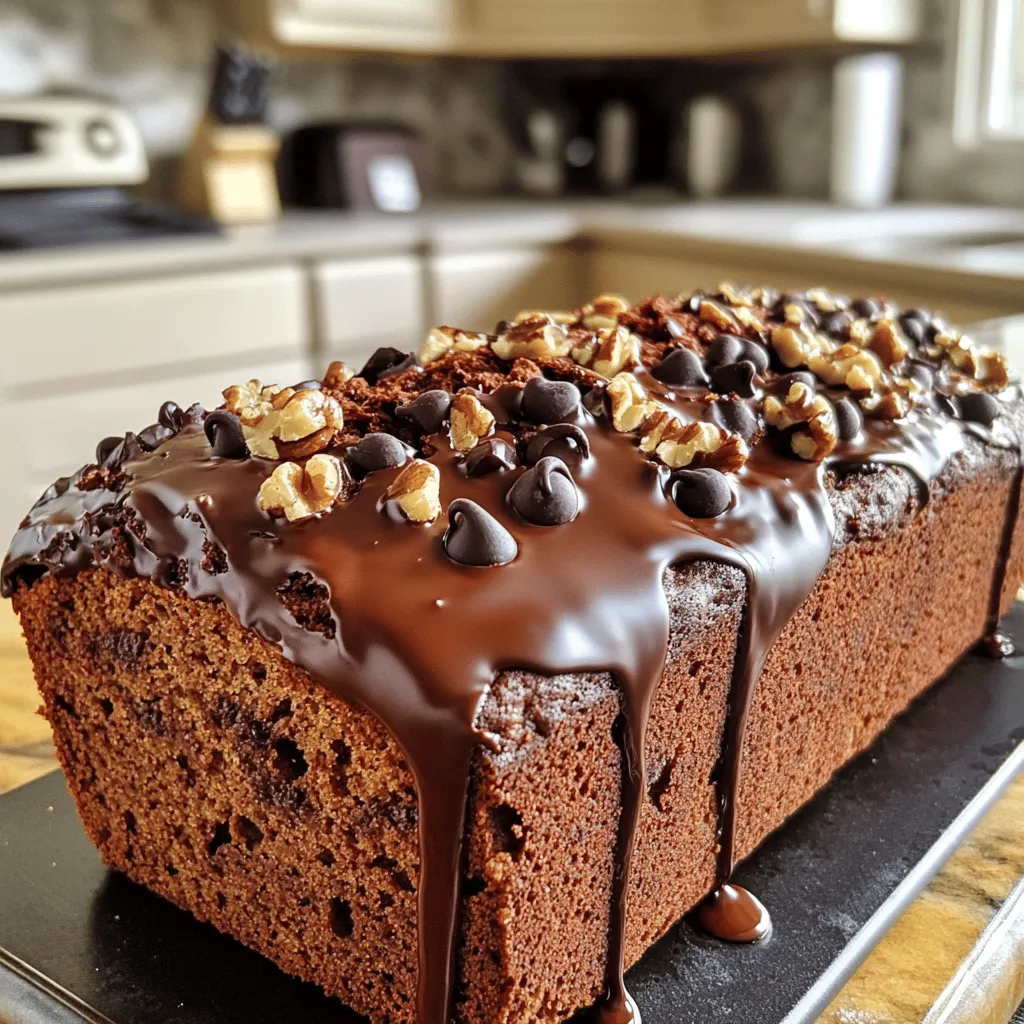
If you love warm, melt-in-your-mouth treats, then it’s time to bake Chocolate Chip Banana Bread! This easy and delicious recipe

Older posts
Newer posts
← Previous Page1 … Page23 Page24 Page25 … Page54 Next →

dsad

© 2025 savoryspiral • Built with GeneratePress

Our Policies

  • Copyright Policy
  • Cookie Policy
  • GDPR Policy
  • Privacy Policy
  • Disclaimer
  • Terms Of Use

More Information

  • Home
  • About
  • Contact
  • Appetizers
  • Dessert
  • Dinner
  • Drinks
©2025, savoryspiral About Back To Top