![To make this tasty dish, you need some key ingredients. Here’s what you will need: - 1 large round loaf of bread (sourdough or artisan bread) - 1 cup cream cheese, softened - 1 cup shredded cheddar cheese - 1/2 cup shredded mozzarella cheese - 1/4 cup pickled jalapeños, chopped - 2 tablespoons fresh chives, chopped - 2 tablespoons garlic butter (melted) - 1 teaspoon onion powder - 1 teaspoon smoked paprika - Salt and pepper to taste These ingredients create a creamy, cheesy filling that makes each pull apart piece a delight. You can add more flavors to your pull apart bread. Here are some optional ingredients: - Cooked bacon, chopped, for a smoky taste - Fresh herbs like parsley or cilantro for extra freshness - Different cheeses such as pepper jack or gouda for varied flavors - Diced tomatoes for a juicy bite Feel free to mix and match these options to make the recipe your own. Choosing the right bread is key to a great pull apart bread. Here are some tips: - Look for a large round loaf that is fresh. Sourdough or artisan bread works best. - Check the crust; it should be firm but not too hard. This helps hold the filling. - Make sure the inside is soft enough to pull apart easily. This ensures each piece is tender. Finding the right loaf makes your Cheesy Jalapeño Popper Pull Apart Bread even more enjoyable. For the full recipe, check the instructions above. To start, gather your ingredients for the filling. In a bowl, mix the cream cheese, cheddar cheese, and mozzarella cheese. Add the chopped jalapeños, fresh chives, garlic butter, onion powder, smoked paprika, salt, and pepper. Stir until everything is well mixed. This creamy mixture will be the heart of your Cheesy Jalapeño Popper Pull Apart Bread. Next, let's focus on slicing the bread. Use a serrated bread knife for this task. Slice the loaf in a grid pattern. Make cuts about 1 inch apart, but be careful not to cut all the way through the bottom. This keeps the loaf intact and helps hold the filling. After slicing, gently pull apart the cuts to create space for the cheesy mixture. Now it's time to bake your masterpiece. Preheat your oven to 350°F (175°C). Fill each cut in the bread with your cheese mixture. Wrap the loaf in aluminum foil and place it on a baking sheet. Bake for 15 minutes. Then, remove the foil and bake for another 10 to 15 minutes. You want the cheese to be bubbly and golden brown. Once done, let it cool for a few minutes. This allows the cheese to settle. For the full recipe, check out the complete guide. To get that perfect cheese melt, use a mix of cheeses. I love combining cheddar and mozzarella. Cheddar gives a strong flavor, while mozzarella melts beautifully. Make sure the cream cheese is soft. This helps the cheese blend well with the other ingredients. You can microwave it for a few seconds if needed. Keep an eye on your bread while it bakes. Start checking around the 20-minute mark. You want the cheese to be bubbly and golden. If the top gets too dark, cover it with foil. This will help prevent burning. If the cheese is not bubbling after 30 minutes, it may need more time. Serve your pull apart bread warm. It pairs well with salsa or guacamole. A side of ranch dressing can add a cool touch. For a fun twist, offer a selection of dipping sauces. You can also add fresh veggies, like carrot sticks or bell pepper slices, for a crunchy contrast. For the full recipe, check the main section. Enjoy your cheesy jalapeño popper pull apart bread! {{image_2}} You can mix and match cheeses for fun flavors. Try pepper jack for heat. Gouda gives a smoky touch. Fontina melts beautifully and adds creaminess. Each cheese brings its own vibe. Want to add protein? Cooked bacon adds a crispy bite. Chop it finely and mix it in. Shredded chicken makes the bread heartier. Both options pair well with the cheese. You can make this dish vegan and gluten-free! Use a gluten-free bread loaf. Swap cream cheese for cashew cheese or tofu. Nutritional yeast adds a cheesy flavor. Vegan cheese melts nicely too. Enjoy your tasty twist! Check out the [Full Recipe] for all the details and make it your own! To keep leftover pull apart bread fresh, wrap it well. Use plastic wrap or aluminum foil. Store it at room temperature for up to two days. If you want it to last longer, place it in the fridge. This will keep it good for about a week. Just remember, the bread may dry out a bit in the fridge. Reheating is easy and quick. Preheat your oven to 350°F (175°C). Wrap the bread in foil to keep it moist. Bake it for about 10-15 minutes. If you want a crispy top, unwrap it for the last few minutes. You can also use a microwave, but it may not be as tasty. Heat it for 30 seconds to a minute. Check to see if it’s warm enough. Freezing is a great way to save your pull apart bread. Wrap it tightly in plastic wrap first. Then, place it in a freezer bag. This will keep it fresh for up to three months. When you're ready to eat it, thaw it in the fridge overnight. Reheat it in the oven as mentioned above. Enjoying this tasty treat again will be easy! For the full recipe, check out the details provided earlier. Yes, you can make this bread ahead of time. Prepare the filling and slice the bread the night before. Store the bread in the fridge, wrapped in foil. When ready to bake, take it out and let it sit at room temperature for about 30 minutes. This helps the cheese melt better. Then, bake it as directed in the Full Recipe. Enjoy warm, gooey goodness anytime! This pull apart bread pairs well with many dishes. You can serve it with: - A fresh salad - Spicy salsa - Guacamole - Creamy ranch dip - Grilled meats These options enhance the meal and add variety. The bread itself is a fun appetizer or a side for a main dish. To adjust the spice, you have a few easy options. If you want less heat, use fewer jalapeños or substitute them with sweet peppers. For a spicier kick, add more chopped jalapeños or include some cayenne pepper in the cheese mix. You can also try adding hot sauce to the filling. This way, you can make the bread suit your taste perfectly! You learned how to make Cheesy Jalapeño Popper Pull Apart Bread. We covered the key ingredients and shared tips on bread selection. I explained step-by-step preparation, and baking techniques for the best result. You explored fun variations to suit your taste and learned how to store leftovers. In the end, this dish is easy to customize and share. It’s sure to impress friends and family at your next gathering. Enjoy your delicious creation!](https://savoryspiral.com/wp-content/uploads/2025/07/a35fd01d-eb3d-49a2-a427-2aee706492bb.webp)
Cheesy Jalapeño Popper Pull Apart Bread Delight
Ready to spice up your snack game? Cheesy Jalapeño Popper Pull Apart Bread is the ultimate crowd-pleaser! Imagine warm, gooey
Ready to spice up your snack game? Cheesy Jalapeño Popper Pull Apart Bread is the ultimate crowd-pleaser! Imagine warm, gooey
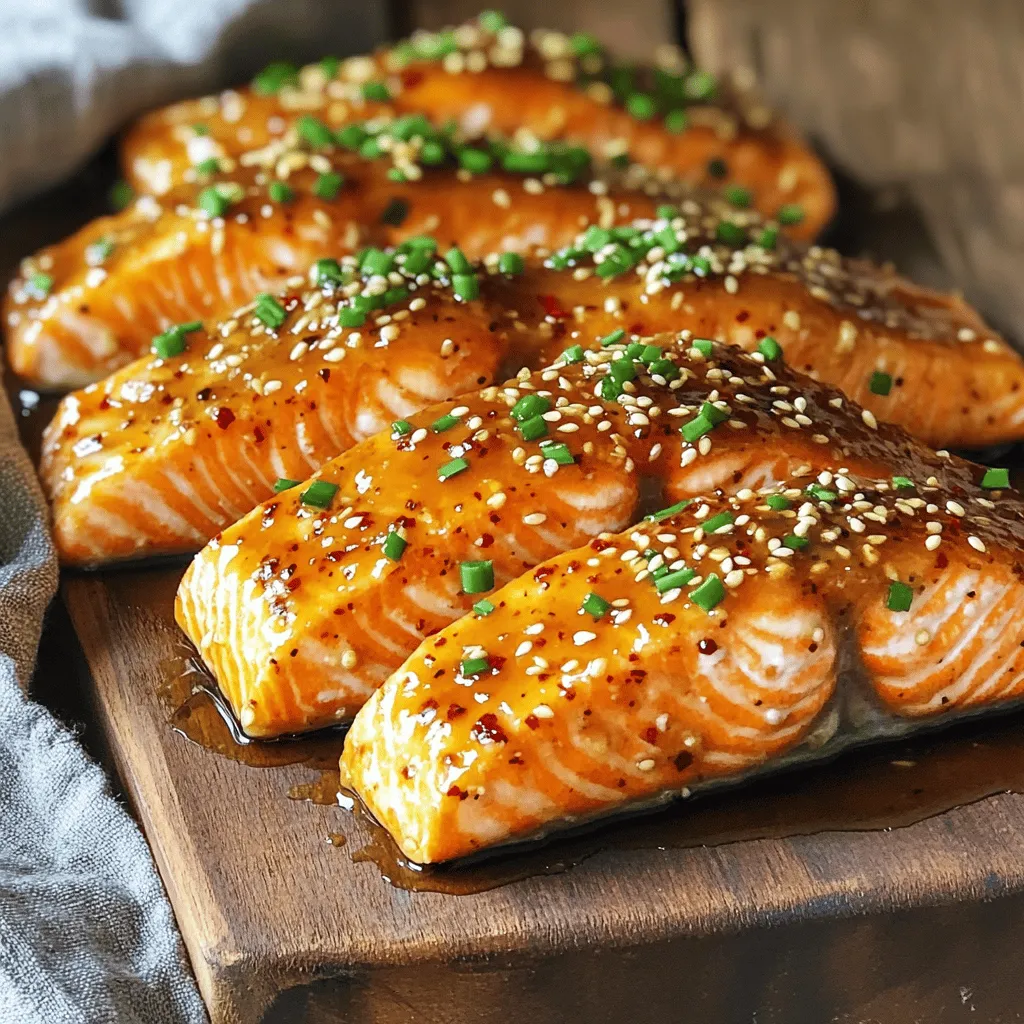
If you’re looking for a quick and tasty dinner, Air Fryer Honey Garlic Salmon is your answer! This dish combines
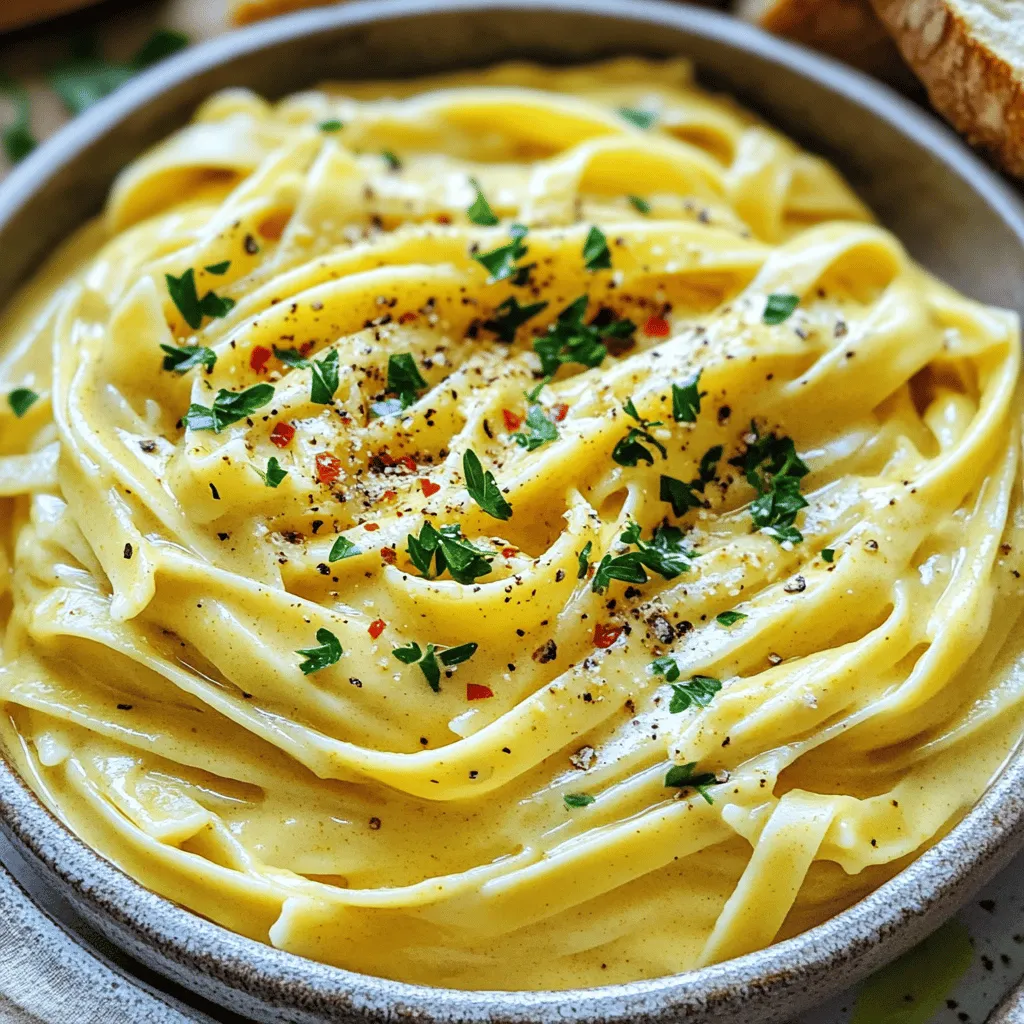
Get ready to indulge in a creamy, dreamy dish that’s perfect for any occasion! This Vegan Pumpkin Alfredo Pasta brings
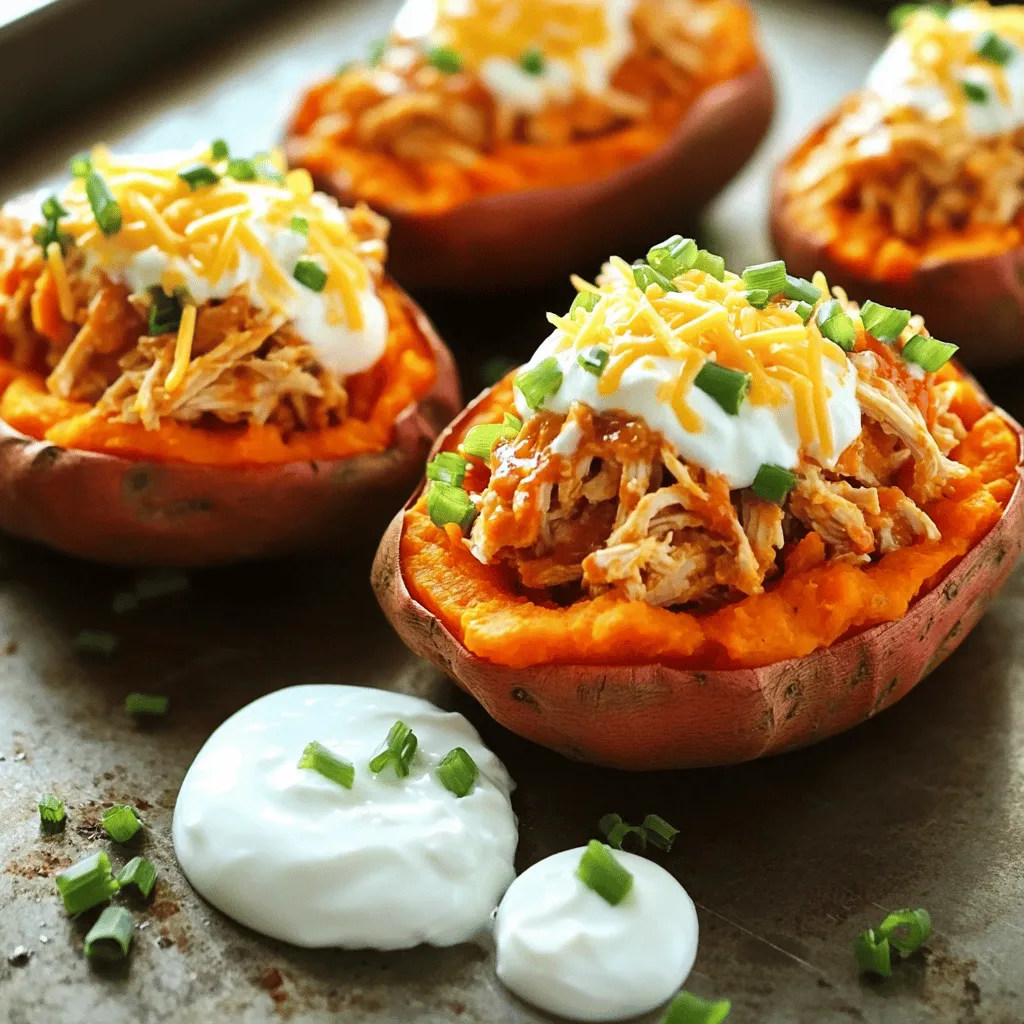
Looking to add some excitement to your dinner routine? Buffalo Chicken Stuffed Sweet Potatoes are the perfect dish to spice
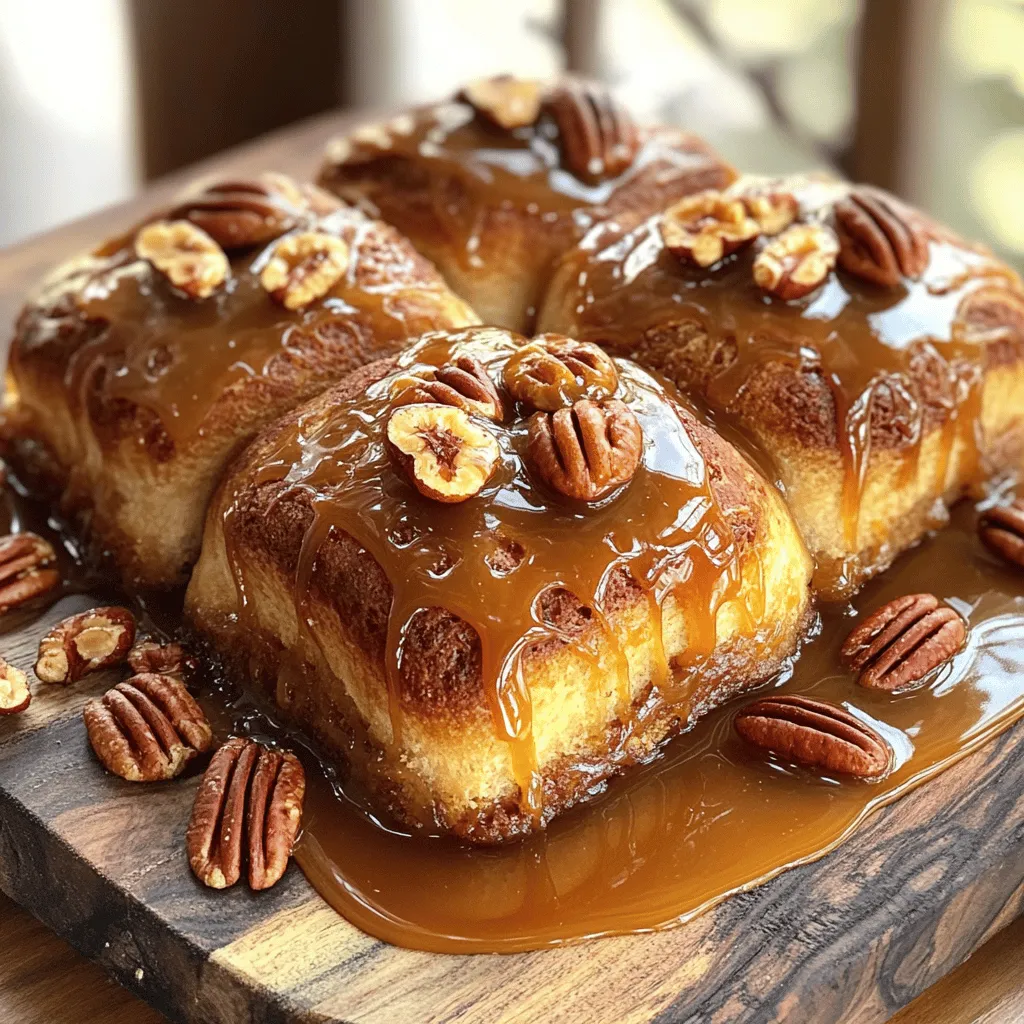
Imagine pulling warm, gooey Caramel Pecan Sticky Buns out of your oven. The sweet smell fills your kitchen, and you
. 1. Preheat oven and prepare potatoes: Start by preheating your oven to 400°F (200°C). While it heats, scrub your russet potatoes under cold water. Make sure to dry them well. This step helps the skins get crispy. 2. Baking the potatoes until tender: Use a fork to poke holes in each potato. This allows steam to escape while baking. Rub the potatoes with olive oil and sprinkle a little salt on them. Place the potatoes directly on the oven rack. Bake for 45 to 60 minutes. They should feel soft when poked with a fork. 1. Cooling and cutting the baked potatoes: After baking, carefully take the hot potatoes out of the oven. Let them cool for a few minutes. This makes handling easier. Reduce the oven temperature to 375°F (190°C). 2. Scooping out the flesh and preparing for filling: Cut each potato in half lengthwise. Use a spoon to scoop out some of the flesh. Leave about 1/4 inch of potato intact for support. Save the scooped-out potato for another recipe, like mashed potatoes. 1. Adding ground meat and cheese: Brush the inside of each potato skin with olive oil. Sprinkle with salt and pepper. Fill each skin with the seasoned ground meat. Next, top with shredded cheddar cheese for that gooey goodness. 2. Final baking for melting cheese: Place the filled potato skins on a baking sheet, cut side up. Bake them for another 15 to 20 minutes. The cheese should melt and bubble. Now your Loaded Taco Potato Skins are ready to be topped with diced tomatoes, red onions, and olives. You can drizzle sour cream and guacamole on top. For the full recipe, check out the details earlier. Enjoy your tasty creation! To ensure crispy potato skins, start with your potatoes. Choose large russet potatoes. They have thick skins that crisp up well. Before baking, poke holes in them. This lets steam escape. After baking, brush the insides with olive oil and sprinkle salt. This adds flavor and helps them crisp. For seasoning the filling, use a good taco seasoning. You can mix it with your cooked ground beef or turkey. Then, add a pinch of salt and pepper. This will enhance the taste. Don't forget to taste the filling before stuffing the skins! Pair your loaded taco potato skins with drinks like soda or beer. They also go well with a fresh salad or guacamole on the side. For gatherings, serve them on a colorful platter. Add some fresh cilantro on top for a nice touch. This makes them look appealing and inviting. To prep potatoes beforehand, wash and poke them. You can then wrap them in foil and store them in the fridge. This will keep them fresh for later use. Yes, you can freeze taco potato skins! After baking, let them cool. Then, wrap each skin in plastic wrap and place them in a freezer bag. When you're ready to eat, thaw them overnight in the fridge. Reheat in the oven for that crispy texture. For the full recipe, check out the [Full Recipe]. {{image_2}} You can easily make loaded taco potato skins vegetarian. Instead of meat, use veggies like mushrooms or bell peppers. You can also add beans, such as black beans or pinto beans. These add protein and keep the dish hearty. For cheese lovers, try vegan cheese to keep it plant-based. It melts well and tastes great. Cheese is key to great flavor. Try different types of cheese to mix things up. Pepper jack adds a nice kick, while mozzarella gives a creamy texture. You can also play with spices. Sprinkle in cumin or smoked paprika for extra depth. Fresh herbs like cilantro or parsley can brighten the dish too. Toppings can change the whole vibe of your potato skins. Sour cream is classic, but you can also use Greek yogurt for a twist. Avocado is a great addition if you love creamy textures. Want it spicy? Add sliced jalapeños or a drizzle of hot sauce. You can mix and match toppings to suit your taste. Enjoy exploring different combinations! To keep your loaded taco potato skins fresh, store them in the fridge. First, let them cool to room temperature. Then, place them in an airtight container. Make sure to stack them carefully. This helps keep the toppings intact. You should eat them within three days for best taste. When you're ready to enjoy your leftovers, use the oven to reheat. Preheat it to 350°F (175°C). Place the potato skins on a baking sheet. Heat them for about 10-15 minutes. This method keeps the skins crispy. If you're in a hurry, you can use the microwave, but it may make them soft. To keep the flavor, add a bit of fresh topping after reheating. To freeze your loaded taco potato skins, first cool them completely. Wrap each skin tightly in plastic wrap. Then, place them in a freezer bag. Try to remove as much air as possible. They can last up to three months. When you're ready to eat, take them out and let them thaw in the fridge overnight. To reheat, follow the oven method mentioned above. This way, you maintain that yummy texture and flavor. Enjoy your loaded taco potato skins anytime! For the full recipe, check out the section above. To make the best Loaded Taco Potato Skins, start with large russet potatoes. They have a good balance of starch and moisture. Look for potatoes that feel firm and have smooth skin. Avoid any with bruises or green spots. Common mistakes include overcooking the potatoes or not scooping enough flesh out. You want a sturdy skin that holds toppings well. Also, be generous with taco seasoning. It adds depth and flavor to the meat. Yes, you can use different types of meat. Ground turkey, chicken, or even plant-based meat work well. Each option gives a unique taste and texture. Beef gives a rich flavor, while turkey is lighter. If you choose a leaner meat, add a little olive oil to keep it moist. This change helps keep the potato skins juicy. Loaded Taco Potato Skins last about 3-4 days in the fridge. Store them in an airtight container. This keeps them fresh and safe to eat. Watch for signs of spoilage, like a sour smell or mushy texture. If you see mold, toss them out right away. For the best taste, enjoy them within a few days. Loaded taco potato skins are a fun dish that anyone can make. We covered ingredients like russet potatoes, ground meat, and cheese. I shared easy steps to prepare and bake them, along with tips for making them crispy and flavorful. You can also customize your toppings and try vegetarian options. Remember, proper storage helps your leftovers last longer. Enjoy making these tasty treats, and don’t hesitate to get creative with flavors and toppings. The joy of cooking is all about experimenting and sharing great food with others.](https://savoryspiral.com/wp-content/uploads/2025/07/665558e1-554d-438f-a94c-1ed289fabfb4.webp)
Are you ready to spice up your snack game? Loaded Taco Potato Skins are the perfect blend of hearty and
![To make crispy garlic Parmesan Brussels sprouts, you need just a few simple items. Here’s the complete list of ingredients: - 1 pound Brussels sprouts, trimmed and halved - 4 cloves garlic, minced - 1/4 cup grated Parmesan cheese - 1/4 cup olive oil - 1 teaspoon salt - 1/2 teaspoon black pepper - 1/2 teaspoon red pepper flakes (optional for a kick) - Fresh lemon wedges for serving Each ingredient plays a vital role in creating a tasty dish. The Brussels sprouts give a nice crunch, while garlic adds rich flavor. Parmesan cheese brings a salty, creamy touch that makes everything better. Olive oil helps everything roast nicely, and the spices add warmth. You can find the full recipe in the earlier sections. This dish is not only easy to make, but it’s also packed with flavor and nutrition. Enjoy! Start by trimming the ends of the Brussels sprouts. Remove any yellow or damaged leaves. Then, cut each sprout in half. This helps them cook evenly and get crispy. Next, peel and mince the garlic. Fresh garlic adds a great punch to the flavor. In a large bowl, combine the halved Brussels sprouts with olive oil, minced garlic, salt, black pepper, and red pepper flakes if you want some heat. Mix well to coat all the sprouts evenly. This step is key for ensuring every bite is tasty. Preheat your oven to 425°F (220°C). This high heat helps achieve that crispy texture. Spread the Brussels sprouts on a baking sheet lined with parchment paper. Make sure they are in a single layer to roast properly. Bake for 20-25 minutes. Stir them halfway through for even cooking. When they turn golden brown and crispy, they are ready. After roasting, sprinkle grated Parmesan cheese on top while they are hot. The heat will help the cheese melt and stick. Toss gently to mix the cheese in. Serve them warm with fresh lemon wedges on the side for a bright finish. For the full recipe, check out the detailed steps above. To get that perfect crunch, start with the right oven temperature. Preheat your oven to 425°F (220°C). This high heat helps the Brussels sprouts roast quickly. They will turn brown and crispy on the outside. Make sure to space the Brussels sprouts on the baking sheet. If they are too close, they will steam instead of roast. Spread them out in a single layer for the best results. You can boost the flavor of your Brussels sprouts with herbs or spices. Try adding thyme, rosemary, or even a pinch of garlic powder. These will add depth to each bite. If you want a twist on the classic, consider using nutritional yeast instead of Parmesan. It gives a cheesy flavor without dairy, making it great for vegan diets. These Brussels sprouts pair well with many dishes. Serve them alongside grilled chicken or steak for a complete meal. They also make a great side for pasta dishes. For presentation, arrange the sprouts on a nice platter. Add fresh lemon wedges to the side for a pop of color and flavor. You can also sprinkle extra Parmesan on top before serving for a lovely finish. For the complete recipe, check out the [Full Recipe]. {{image_2}} You can easily make this dish vegan. Just replace the Parmesan cheese with nutritional yeast. Nutritional yeast gives a cheesy flavor without using dairy. It also adds some great nutrients. For cooking oil, you can swap olive oil for avocado oil or coconut oil. These oils work well and add unique flavors. Want some heat? Add more red pepper flakes to your mix. A little extra spice makes the dish more exciting. You can also drizzle some hot sauce on top after baking. This will kick up the flavor and give a nice kick to each bite. Feel free to mix in seasonal vegetables. Carrots, sweet potatoes, or bell peppers can add color and flavor. You can also toss in nuts or seeds for some extra crunch. Pine nuts or sunflower seeds are great options. They add texture and make the dish even more delightful. For the full recipe, check out the Crispy Garlic Parmesan Brussels Sprouts. To keep your crispy garlic parmesan Brussels sprouts fresh, first let them cool. Place the cooled sprouts in an airtight container. Store them in the fridge for up to three days. For freezing, spread them on a baking sheet. Once frozen, transfer them to a freezer bag. This helps prevent clumping and keeps them crisp. The best way to reheat these sprouts is in the oven. Preheat your oven to 375°F (190°C). Place the sprouts on a baking sheet and bake for about 10 minutes. This method keeps them crispy. If you use the microwave, they may become soggy. Heat them only for a short time if you must use the microwave. Crispy garlic parmesan Brussels sprouts will last in the fridge for about three days. Look for signs of spoilage, such as a mushy texture or an off smell. If they lose their crunch or smell bad, it's best to throw them away. Enjoy your dish while it’s fresh for the best taste! Brussels sprouts are small, green cabbage-like veggies. They grow on tall stalks and belong to the cruciferous family. Nutritionally, Brussels sprouts are packed with vitamins and minerals. They are high in vitamin C, vitamin K, and fiber. Eating Brussels sprouts can boost your immune system and aid digestion. They also contain antioxidants that help fight free radicals. Overall, they are a healthy choice for any meal. Yes, you can use frozen Brussels sprouts. However, fresh ones are often better. Frozen Brussels sprouts may be softer and less crispy after cooking. They are also blanched before freezing, which can change their texture. If you use frozen sprouts, adjust the cooking time. Cook them longer to ensure they become crispy like fresh ones. To make this recipe ahead of time, you can prep the Brussels sprouts. Trim and halve them, then store in the fridge for up to two days. You can also mix the oil and spices in a separate bowl. This way, you save time on cooking day. For reheating, use the oven for the best texture. Heat them at 425°F (220°C) for about 10 minutes. This helps keep them crispy, just like when you first made them. This blog post aimed to simplify cooking Brussels sprouts. You learned the key ingredients, step-by-step instructions, and tips for the best results. We looked at variations to suit different tastes and how to store leftovers. Remember, a few tweaks can make this dish truly yours. Enjoy exploring flavors and serving delicious sprouts. Happy cooking!](https://savoryspiral.com/wp-content/uploads/2025/07/3f6f9079-a9cc-4fda-a387-2263380a0955.webp)
Are you ready to elevate your veggie game? Crispy Garlic Parmesan Brussels Sprouts Delight is the perfect blend of crunchy,
![- Ripe bananas - Granulated sugar - Brown sugar - Butter - Eggs - All-purpose flour Bananas give our muffins moisture and sweetness. Choose ripe bananas; they should be brown and soft. The sugars add flavor and help the muffins rise. Butter keeps them rich and soft. Eggs bind everything together and add fluffiness. All-purpose flour brings structure. - Brown sugar - Ground cinnamon - Melted butter This filling creates a sweet and warm swirl. Brown sugar adds caramel notes, while cinnamon gives that classic spice flavor. Melted butter helps combine these ingredients smoothly. - Chopped walnuts - Glaze ingredients (powdered sugar and milk) Add walnuts for crunch and extra flavor. A simple glaze made from powdered sugar and milk makes your muffins shine. Drizzle it on top right before serving for a special touch. For the full recipe and more details, check out the [Full Recipe]. 1. Preheat your oven to 350°F (175°C). 2. Prepare a muffin tin by lining it with paper liners or greasing it with cooking spray. 3. In a large bowl, mash the ripe bananas. 4. Add granulated sugar, brown sugar, and melted butter to the bowl. 5. Mix until the mixture is smooth and well combined. 1. In another bowl, whisk together baking powder, baking soda, salt, and flour. 2. Gradually mix the dry ingredients with the wet banana mixture. 3. Stir gently until just combined. A few lumps are okay; do not overmix. 1. In a small bowl, mix brown sugar, ground cinnamon, and melted butter. 2. Fill each muffin cup halfway with banana batter. 3. Add a small dollop of cinnamon filling on top of the batter. 4. Use a toothpick to swirl the filling into the batter gently. 5. Top with the remaining banana batter until each cup is about three-quarters full. 6. Optionally, sprinkle chopped walnuts on top for added crunch. Follow these steps, and you will create delightful Banana Bread Cinnamon Roll Muffins! For the complete recipe, refer to the Full Recipe. To avoid overmixing, mix the batter until just combined. You want a few lumps; they are fine. Overmixing makes muffins dense and chewy. Gentle mixing keeps them light and fluffy. Ensuring even baking is key. Place your muffin tin in the center of the oven. This spot has the best heat flow. Rotate the tin halfway through baking for a uniform cook. Serve these muffins warm for the best taste. They shine when fresh from the oven. A drizzle of glaze adds a sweet touch. Make a simple glaze with powdered sugar and milk. You can also sprinkle extra cinnamon on top for flavor. Try serving them with fresh fruit. Berries or sliced bananas pair nicely. This adds color and taste to your plate. To store muffins for freshness, place them in an airtight container. They stay soft for up to three days at room temperature. You can also freeze muffins for long-term storage. Wrap each muffin in plastic wrap and place them in a freezer bag. They last up to three months in the freezer. When ready to eat, thaw them in the fridge overnight. You can warm them in the oven for a few minutes. Enjoy your Banana Bread Cinnamon Roll Muffins with a warm, fresh taste! {{image_2}} You can make these muffins even better. Try adding chocolate chips for a sweet twist. You can also mix in dried fruits like raisins or cranberries. They bring a nice chewiness. If you like nuts, add different types. Walnuts work well, but pecans or almonds are great too. Each nut adds its unique flavor and crunch. If you need gluten-free muffins, swap the all-purpose flour. Use a gluten-free blend. Many of these blends work well in recipes like this one. For a vegan option, replace eggs with flax eggs. Mix one tablespoon of flaxseed meal with three tablespoons of water. Let it sit for a few minutes to thicken. Also, use plant-based butter instead of regular butter. These changes keep the muffins tasty and fluffy. You can change the flavors based on the season. In fall, add spices like nutmeg or pumpkin spice. These spices give warmth and coziness. For the holidays, think about mixing in cranberries or orange zest. They add a festive touch and brighten the flavor. You can enjoy a new twist on your Banana Bread Cinnamon Roll Muffins every time! For the full recipe, check out the other sections of this article. Each muffin has about 180 calories. This recipe gives you some key nutrients. Each muffin contains around 2 grams of fiber, 3 grams of protein, and 10 grams of sugars. This means you get a nice balance of energy and taste. This recipe is lighter than many traditional banana bread recipes. It uses less sugar and butter. You can also swap in whole wheat flour for a healthier twist. You can use unsweetened applesauce instead of butter to cut fat while keeping flavor. I suggest one muffin per person as a serving size. If you want smaller muffins, fill the cups less. You can also make larger muffins by filling the cups more. Adjust baking times accordingly—smaller muffins bake faster, while larger ones need more time. How to tell when muffins are done? You can check if muffins are done by inserting a toothpick into the center. If it comes out clean, they're ready. The tops should be golden brown and spring back when lightly touched. Can I use frozen bananas? Yes, frozen bananas work well for this recipe. Just thaw them first and drain excess moisture. They add great flavor and sweetness to the muffins. What can I use instead of eggs? You can use unsweetened applesauce or mashed banana as an egg substitute. Use about 1/4 cup for each egg. This keeps the muffins moist and adds flavor. Is there a substitute for all-purpose flour? Yes, you can use whole wheat flour or gluten-free flour blends. Just keep in mind that the texture may change slightly. Adjust liquid as needed for the best results. How long do the muffins last? These muffins stay fresh for about three days at room temperature. You can store them in an airtight container to keep them moist. Best ways to reheat muffins for optimal texture? To reheat, place muffins in a microwave for about 10-15 seconds. You can also warm them in an oven at 350°F (175°C) for a few minutes. This keeps them soft and delicious. You now know how to make delicious banana muffins with a cinnamon swirl. We covered the main ingredients, the step-by-step process, tips for baking, and fun variations. Remember to adjust for dietary needs or add flavors you love. These muffins not only taste great but also provide key nutrients. Enjoy baking and sharing your creation. Your kitchen will smell amazing and the results will impress everyone. Happy baking!](https://savoryspiral.com/wp-content/uploads/2025/07/9a24f18a-417c-41fe-9fa0-3c83ac4de13e.webp)
Are you ready to take your breakfast to the next level? These Banana Bread Cinnamon Roll Muffins blend the best
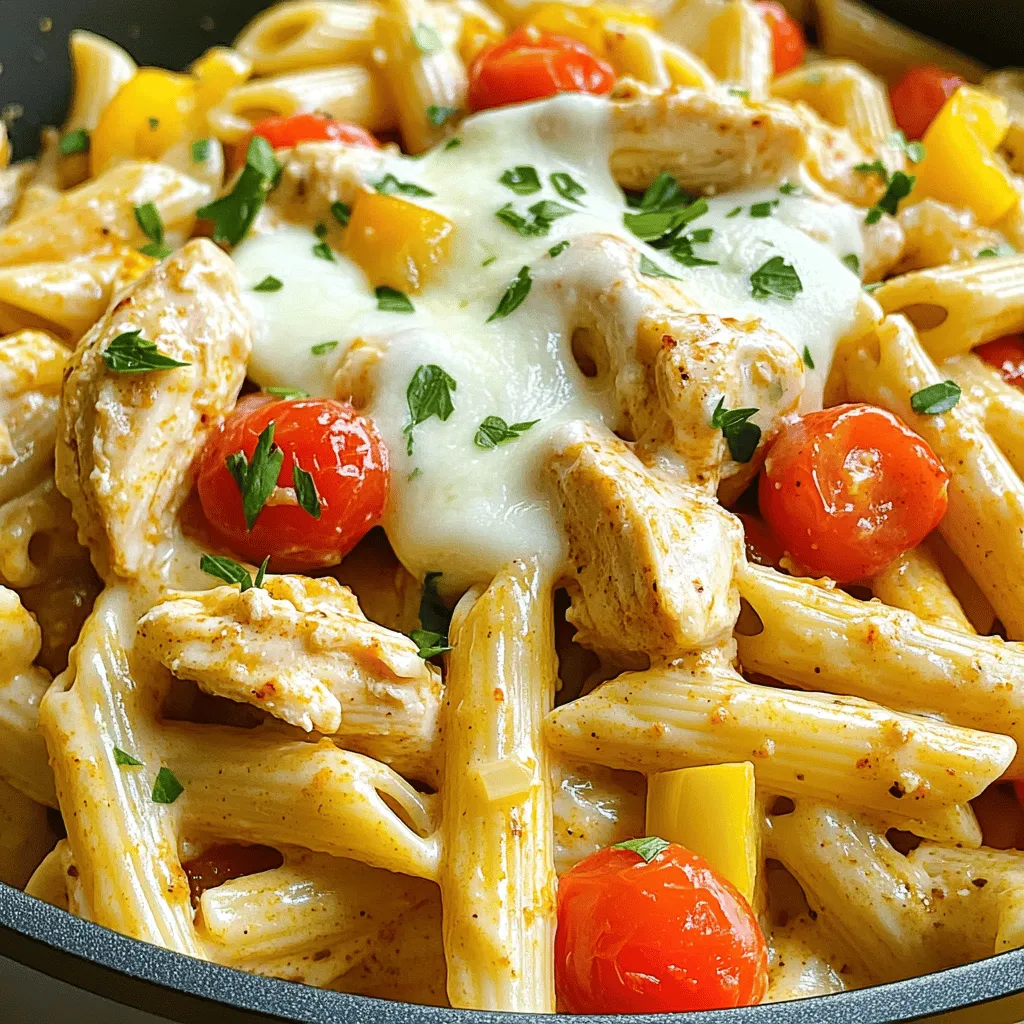
Looking for a quick and tasty dinner? This Creamy One Pot Cajun Chicken Pasta will be your new go-to! With
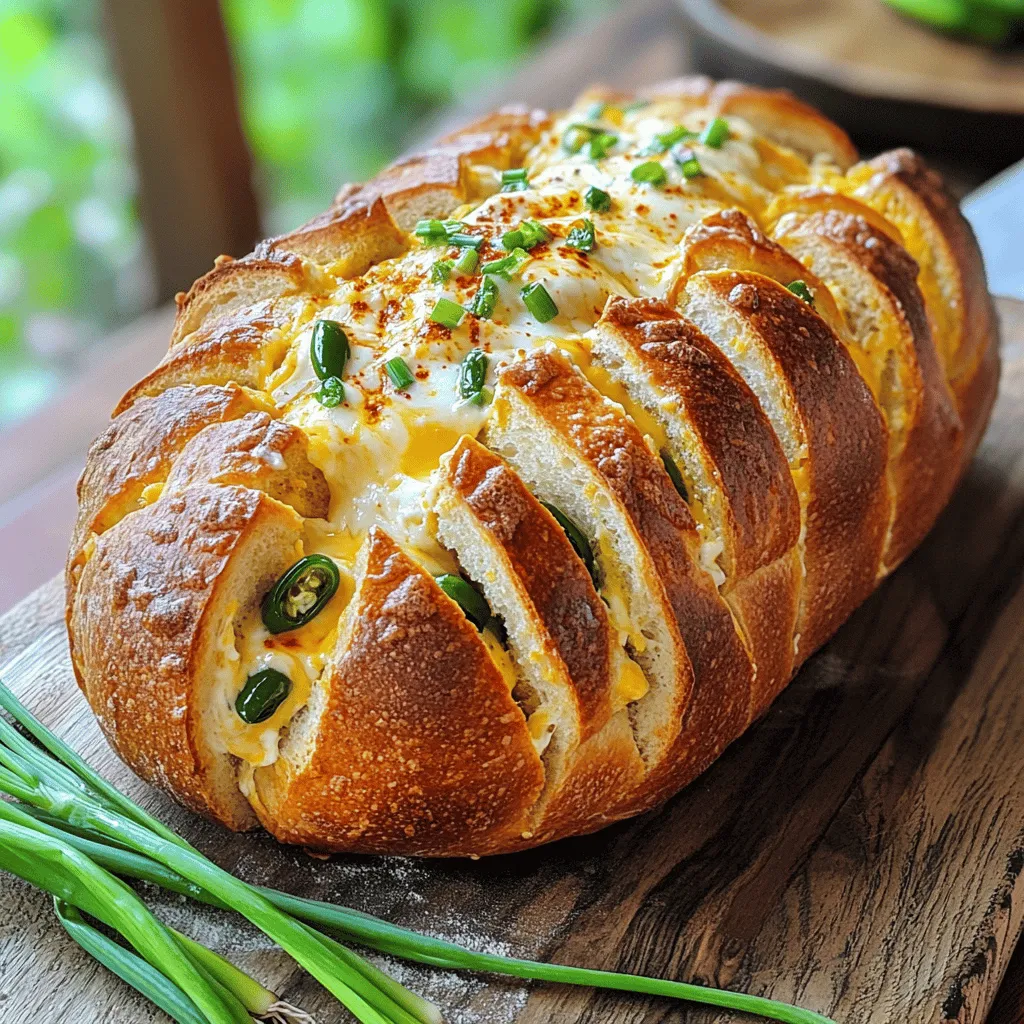
Get ready to tantalize your taste buds with Cheesy Jalapeño Popper Pull Apart Bread! This warm, gooey treat combines the
