WANT TO SAVE THIS RECIPE?
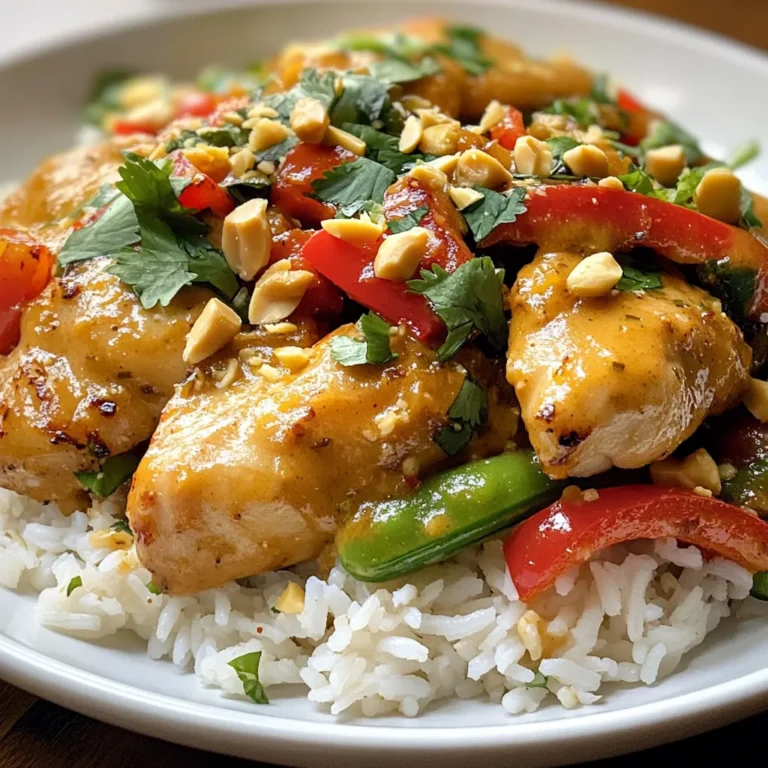
Ready for a family dinner that’s both delicious and easy? Thai Peanut Chicken packs bold flavors and simple steps, making it perfect for busy nights. You’ll love the tender chicken, fresh veggies, and creamy peanut sauce. Plus, with just a few ingredients, you can create a meal that delights everyone at the table. Let’s dive into this tasty recipe that your family will ask for again and again!
Why I Love This Recipe
- Bold Flavors: This dish combines the rich, nutty taste of peanut butter with a hint of sweetness and spice, creating a fantastic flavor profile.
- Quick and Easy: With a total preparation and cooking time of just 25 minutes, it’s perfect for busy weeknights.
- Healthy Ingredients: Featuring fresh vegetables and lean chicken, this recipe is both nutritious and satisfying.
- Customizable: You can easily adjust the spice level or swap out vegetables based on your preference, making it versatile.
Ingredients
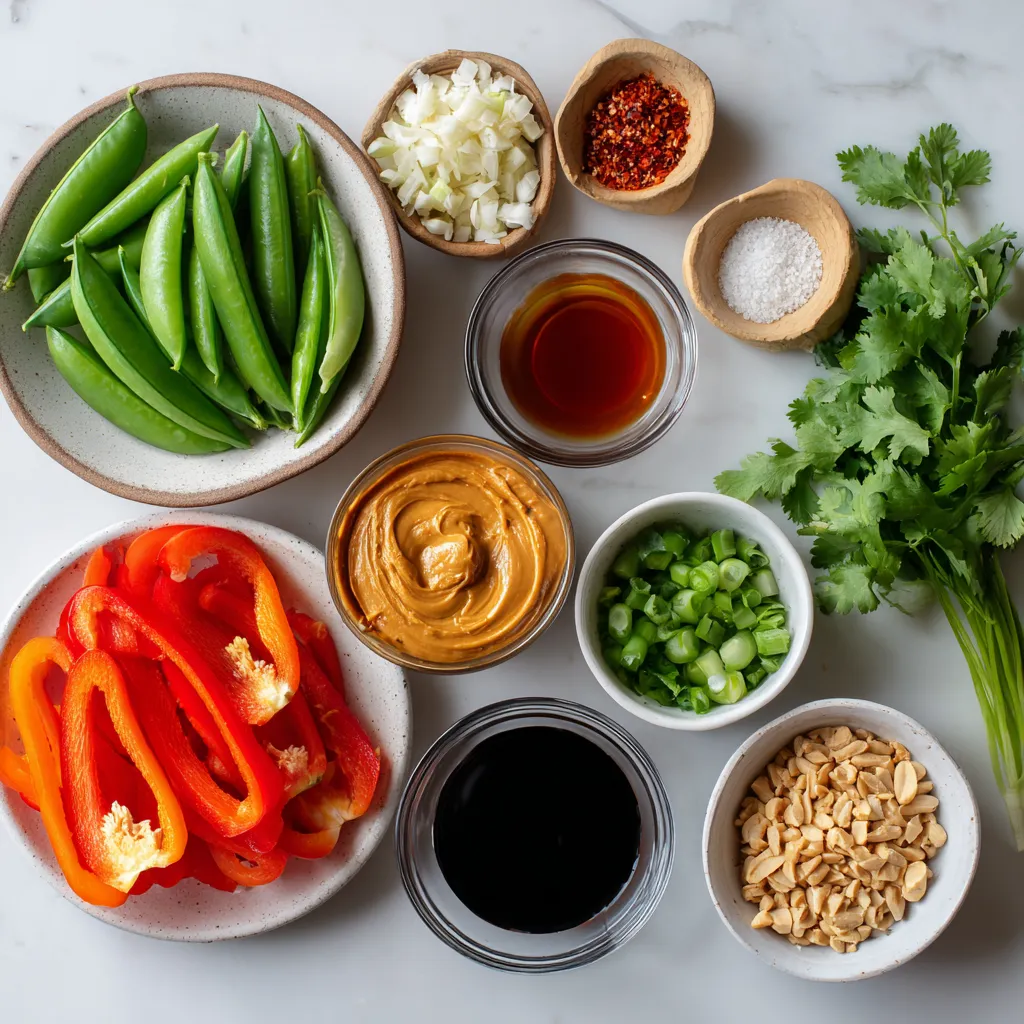
Main Ingredients for Thai Peanut Chicken
– 1 lb boneless, skinless chicken thighs, cut into bite-sized pieces
– 1 tablespoon vegetable oil
– 1 red bell pepper, sliced
– 1 cup snap peas
– 3 green onions, chopped
– ½ cup creamy peanut butter
– 2 tablespoons soy sauce
– 1 tablespoon sesame oil
– 1 tablespoon rice vinegar
The main ingredients create a tasty base for Thai Peanut Chicken. Chicken thighs give a rich flavor. Fresh vegetables like red bell pepper and snap peas add crunch and color. Peanut butter provides that creamy, nutty taste many love.
Additional Ingredients for Flavor
– 2 cloves garlic, minced
– 1 tablespoon fresh ginger, grated
– 2 tablespoons honey or maple syrup
– 1 teaspoon red pepper flakes (optional)
Garlic and ginger give the dish warmth and depth. Honey or maple syrup balance the flavors, adding sweetness. If you like heat, add red pepper flakes for a zesty kick.
Garnishing Ingredients
– Fresh cilantro
– Crushed peanuts
Garnishes enhance the dish’s look and taste. Fresh cilantro adds a bright note, while crushed peanuts give extra crunch. Together, they make your meal more appealing and delicious.

Step-by-Step Instructions
Preparing the Chicken
First, heat 1 tablespoon of vegetable oil in a large skillet over medium-high heat. Add the bite-sized chicken pieces. Cook the chicken until it turns golden brown. This takes about 6 to 8 minutes. Make sure the chicken is cooked through. Once done, remove the chicken from the skillet and set it aside on a plate.
Cooking the Vegetables
Next, in the same skillet, add the sliced red bell pepper and snap peas. Stir-fry these for 2 to 3 minutes until they are tender-crisp. Then, toss in the chopped green onions, minced garlic, and grated ginger. Cook for one more minute while stirring frequently. This step brings out the fresh flavors of the veggies.
Making the Peanut Sauce
Now, it’s time to whip up the peanut sauce. In a mixing bowl, combine ½ cup of creamy peanut butter, 2 tablespoons of soy sauce, 1 tablespoon of sesame oil, 2 tablespoons of honey (or maple syrup), and 1 tablespoon of rice vinegar. If you like spice, add 1 teaspoon of red pepper flakes. Whisk these ingredients together until smooth. If the sauce is too thick, adjust the consistency by adding a bit of warm water.
Combining Chicken, Vegetables, and Sauce
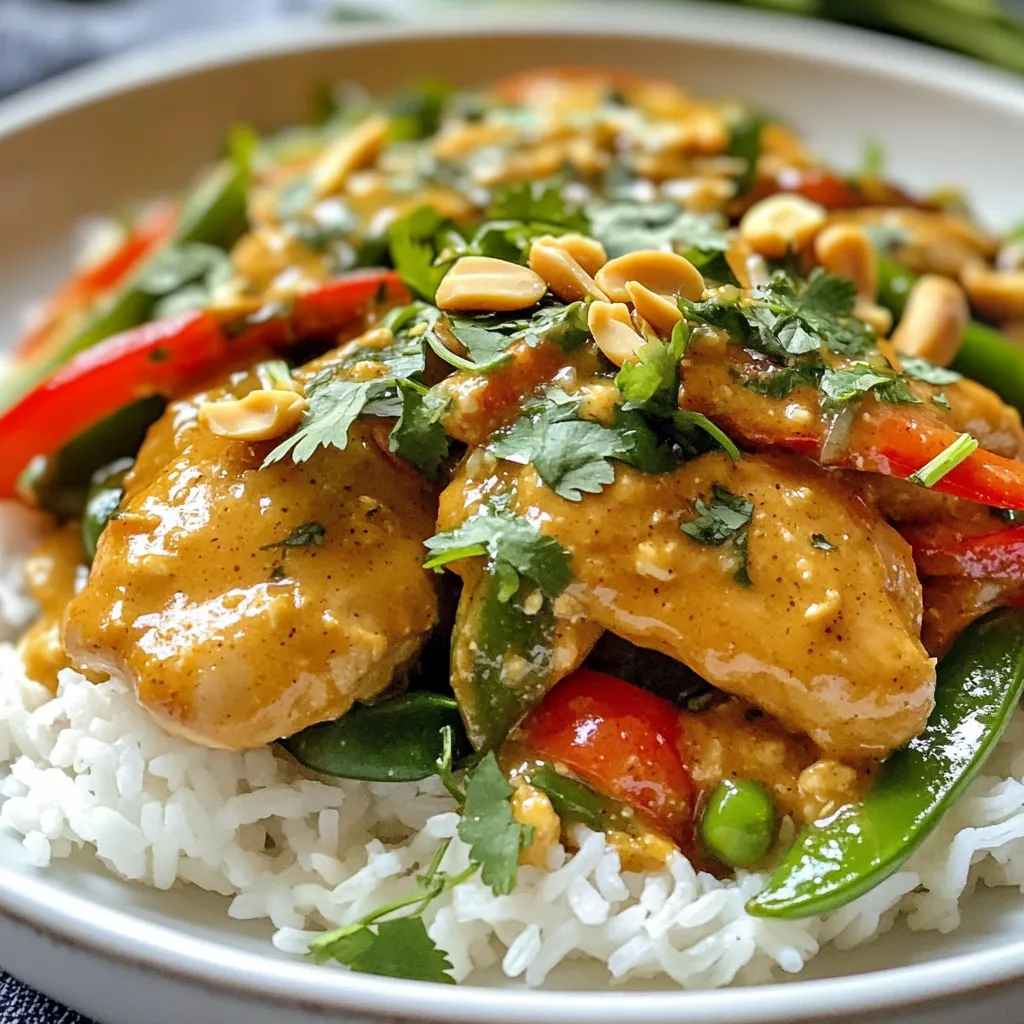
Finally, return the cooked chicken to the skillet. Pour the peanut sauce over the chicken and vegetables. Toss everything together until it is evenly coated. Heat through for about 2 minutes. This step ensures that all flavors blend perfectly. Once heated, remove from heat and get ready to serve.
Tips & Tricks
Cooking Techniques
– Best practices for stir-frying:
Start with a hot skillet or wok. This helps cook food fast and keeps it crisp. Use a bit of oil to coat the pan. Stir often to ensure even cooking.
– How to properly cook chicken thighs:
Cut chicken into bite-sized pieces. This helps them cook evenly. Sear them for about 6-8 minutes until they turn golden brown. Remove them from the pan to avoid overcooking.
Achieving the Perfect Peanut Sauce
– Tips for making the sauce creamy:
Use creamy peanut butter for a smooth texture. Whisk in warm water if the sauce is too thick. This makes it easy to coat the chicken and veggies.
– Adjusting flavors to preference:
Taste the sauce as you mix. If you want it sweeter, add more honey or maple syrup. For a spicy kick, sprinkle in more red pepper flakes.
Presentation and Serving Suggestions
– Ideas for serving over rice or quinoa:
Serve your Thai peanut chicken over jasmine rice or fluffy quinoa. This adds a nice base and absorbs the sauce well.
– Enhancing visual appeal with garnishes:
Top your dish with fresh cilantro and crushed peanuts. Add lime wedges on the side for a pop of color. This makes the dish look inviting and fresh.
Pro Tips
- Marinate for Flavor: For a deeper flavor, marinate the chicken in the peanut sauce for at least 30 minutes before cooking. This allows the flavors to penetrate the chicken more thoroughly.
- Vegetable Variations: Feel free to add or substitute other vegetables like broccoli, carrots, or zucchini. Just ensure they are cut into similar sizes for even cooking.
- Peanut Butter Choices: Choose a natural creamy peanut butter for a smoother sauce. Avoid brands with added sugar or hydrogenated oils for a healthier dish.
- Serving Suggestions: Serve this dish over jasmine rice or quinoa, and add a squeeze of fresh lime juice for an extra citrusy kick that enhances the flavors.
Variations
Protein Alternatives
You can swap chicken for tofu or shrimp. Tofu adds a nice texture and soaks up flavors. Use firm tofu, and press it to remove extra moisture. Cook it for about 6-8 minutes until golden. If you choose shrimp, they cook fast. Add shrimp to the pan for about 3-4 minutes until they turn pink.
Vegetable Substitutions
Feel free to mix up the veggies! You can add broccoli, carrots, or zucchini. If you have seasonal produce, use that for freshness. For a summer twist, try adding corn or bell peppers. If you want, omit any veggies your family does not enjoy.
Dietary Modifications
If you need gluten-free options, use tamari instead of soy sauce. This keeps the dish safe for those with gluten issues. For vegan substitutions, replace chicken with tofu and honey with maple syrup. These changes keep the dish tasty while meeting dietary needs.
Storage Info
Storing Leftovers
To store your Thai Peanut Chicken, place it in an airtight container. Make sure it cools to room temperature before sealing it. This helps keep it fresh. In the fridge, it lasts about 3 to 4 days. If you want to keep it longer, freezing is a great option.
Reheating Instructions
To reheat, you can use a microwave or a skillet. If using a microwave, heat in 30-second bursts. Stir in between to avoid hot spots. If using a skillet, add a splash of water or broth to keep it moist. Heat over low until it’s warm. This helps keep the chicken and veggies tender.
Freezing Tips
To freeze Thai Peanut Chicken, pack it in a freezer-safe container. Leave some space at the top for expansion. It can stay good for up to 3 months. When ready to eat, thaw it overnight in the fridge. Reheat it using the methods mentioned above for best results.
FAQs
How do I make Thai Peanut Chicken spicier?
To add spice, you can use more red pepper flakes. Start with two teaspoons. If you want more heat, add sliced fresh chili peppers. You might try a splash of sriracha in the sauce too. Adjust the spice to fit your taste.
Can I use crunchy peanut butter instead?
Yes, you can use crunchy peanut butter. It will give the dish a different texture. The flavor remains rich, but you will get little crunchy bits. This adds fun to each bite. If you love that nutty crunch, enjoy the change!
What can I serve with Thai Peanut Chicken?
I suggest serving this dish with jasmine rice or quinoa. Both soak up the sauce nicely. You could also add steamed broccoli or a fresh salad. A side of spring rolls pairs well too. These sides make the meal complete.
Is this recipe suitable for meal prep?
Yes, this recipe is great for meal prep. Cook it in advance and store it in the fridge. It stays fresh for up to four days. To reheat, use a microwave or a skillet. This saves time on busy nights while keeping meals tasty.
How can I customize this recipe for kids?
To make this dish kid-friendly, reduce the heat. Use less red pepper flakes or skip them. You can also cut the veggies smaller for easier eating. Offering extra rice can help balance the flavors. Kids will love the creamy peanut sauce!
This blog post covers how to make Thai Peanut Chicken. We looked at the main ingredients, like chicken thighs and fresh veggies, and the delicious peanut sauce. I shared step-by-step instructions for cooking the dish, tips for perfecting the flavors, and ways to make it your own. You can even store leftovers for later. With these insights, you can create a tasty meal that fits your needs. Enjoy cooking and experimenting with this dis
Thai Peanut Chicken with a Twist
A delicious and flavorful Thai-inspired chicken dish with a creamy peanut sauce.
Prep Time 15 minutes mins
Cook Time 10 minutes mins
Total Time 25 minutes mins
Course Main Course
Cuisine Thai
- 1 lb boneless, skinless chicken thighs, cut into bite-sized pieces
- 1 tablespoon vegetable oil
- 1 piece red bell pepper, sliced
- 1 cup snap peas
- 3 pieces green onions, chopped
- 2 cloves garlic, minced
- 1 tablespoon fresh ginger, grated
- 0.5 cup creamy peanut butter
- 2 tablespoons soy sauce (or tamari for gluten-free)
- 1 tablespoon sesame oil
- 2 tablespoons honey or maple syrup
- 1 tablespoon rice vinegar
- 1 teaspoon red pepper flakes (optional)
- 1 bunch fresh cilantro for garnish
- to taste crushed peanuts for garnish
In a large skillet or wok, heat the vegetable oil over medium-high heat. Add the chicken pieces and cook until golden brown and cooked through, about 6-8 minutes. Remove from the skillet and set aside.
In the same skillet, add the sliced red bell pepper and snap peas. Stir-fry for about 2-3 minutes until they are tender-crisp. Add the chopped green onions, garlic, and grated ginger, and cook for an additional minute, stirring frequently.
In a mixing bowl, whisk together the peanut butter, soy sauce, sesame oil, honey (or maple syrup), rice vinegar, and red pepper flakes until smooth. Adjust the consistency with a bit of warm water if it's too thick.
Return the cooked chicken to the skillet, and pour the peanut sauce over the chicken and vegetables. Toss everything together until evenly coated and heated through for about 2 minutes.
Remove from heat and garnish with fresh cilantro and crushed peanuts before serving.
Serve over jasmine rice or quinoa, garnished with lime wedges and additional cilantro.
Keyword chicken, peanut sauce, quick meal, Thai cuisine
WANT TO SAVE THIS RECIPE?