No-Bake White Chocolate Pumpkin Truffles Delight

WANT TO SAVE THIS RECIPE?

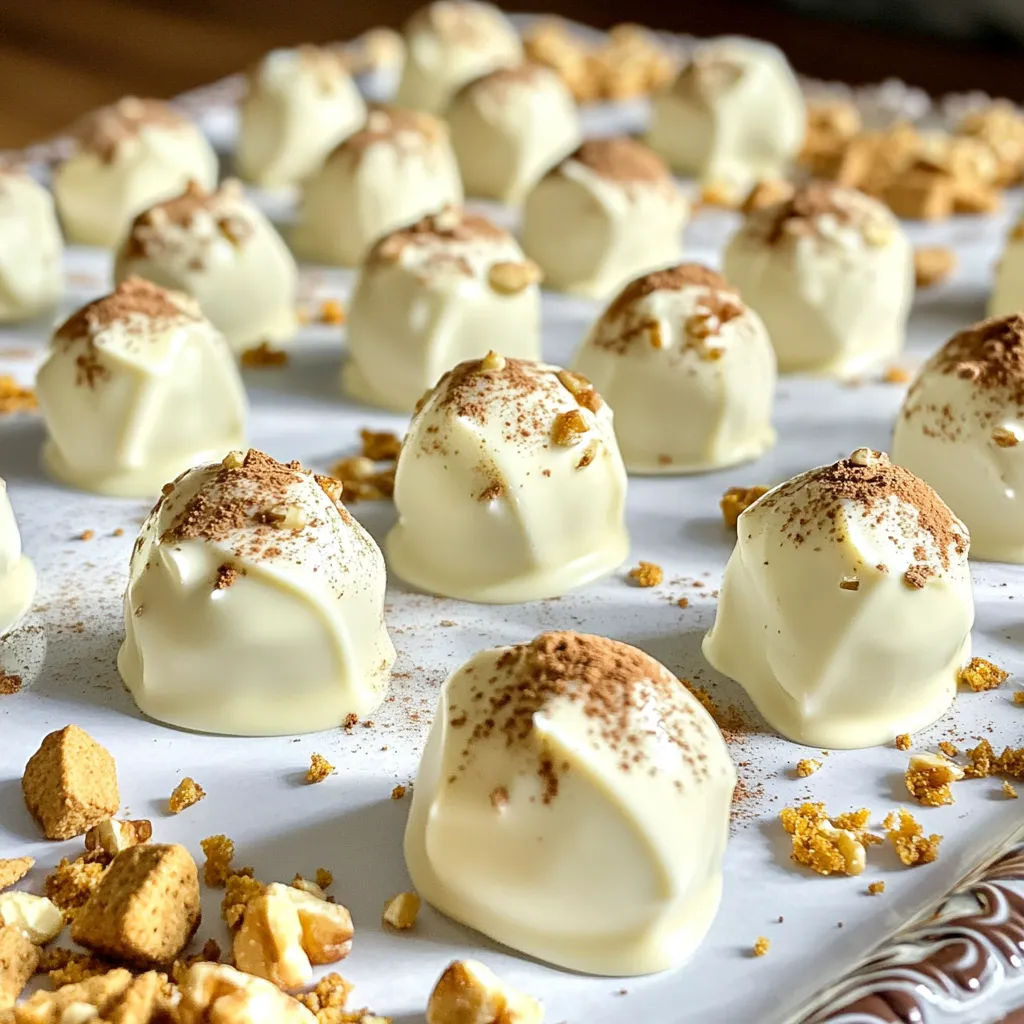
Get ready to treat yourself to a sweet delight! In this post, I’ll show you how to make No-Bake White Chocolate Pumpkin Truffles that are rich and creamy. Perfect for fall or any celebration, these truffles are easy to whip up without an oven. Whether you’re a baking novice or a pro, you’ll find helpful tips and tricks to impress your friends and family. Let’s dive in and start creating something delicious!

Ingredients

Complete List of Ingredients

– 1 cup pumpkin puree

– 1 cup crushed graham crackers

– 1/2 cup powdered sugar

– 1 teaspoon pumpkin pie spice

– 8 ounces white chocolate, melted

– 1/2 cup cream cheese, softened

– 1/4 teaspoon vanilla extract

– Extra white chocolate for drizzling (optional)

– Chopped nuts or shredded coconut for rolling (optional)

Ingredient Notes and Substitutions

Pumpkin puree is key for flavor. Use canned for ease or make your own from fresh pumpkins. Graham crackers give a nice crunch. If you need a gluten-free option, try crushed gluten-free cookies instead. Powdered sugar sweetens the truffles. For a less sweet option, you can cut this in half. Pumpkin pie spice adds warmth. If you don’t have it, mix cinnamon, nutmeg, and ginger. White chocolate is essential for coating. You can use dark chocolate if you prefer a richer taste. Cream cheese keeps the truffles creamy and smooth. For a dairy-free version, use plant-based cream cheese. Vanilla extract enhances the flavor. You can skip it if you want a pure pumpkin taste.

Where to Find Pumpkin Puree

You can find pumpkin puree in most grocery stores. Look in the canned goods aisle. It usually comes in 15-ounce cans. If you prefer fresh pumpkin, select a small sugar pumpkin. Roast it, scoop out the flesh, and blend it until smooth. This fresh puree can be a great alternative. Just make sure to drain excess water for the best results in your truffles.

Step-by-Step Instructions

Mixing the Truffle Base

First, grab a medium bowl. Add 1 cup of pumpkin puree. Then, toss in 1 cup of crushed graham crackers. Next, mix in 1/2 cup of powdered sugar. Don’t forget 1 teaspoon of pumpkin pie spice for flavor. Add 1/2 cup of softened cream cheese and 1/4 teaspoon of vanilla extract. Stir well until everything is smooth and combined. This mix will create a tasty truffle base.

Chilling the Mixture

Now, cover the bowl and put it in the fridge. Chill the mixture for about 30 minutes. This step is key. It helps the mixture firm up, making it easier to shape later. You want it to be nice and cold before forming the truffles.

Shaping and Dipping the Truffles

After chilling, take the bowl from the fridge. Use a small cookie scoop or your hands to form small balls, about 1 inch wide. Place them on a parchment-lined baking sheet. Once you shape them all, it’s time to dip. Melt some white chocolate in a bowl. Take each truffle and dip it into the chocolate. Use a fork or toothpick for this. Let any extra chocolate drip off. Place the dipped truffles back on the sheet. If you want, drizzle more melted white chocolate over the top. You can also roll them in chopped nuts or shredded coconut for a fun touch. Finally, let the truffles set in the fridge for at least 30 minutes to harden.

Tips & Tricks

How to Avoid Messy Dipping

To keep your kitchen clean, use a deep bowl for dipping. This way, you can fully submerge your truffles in melted white chocolate. Use a fork or toothpick to dip each truffle. After dipping, gently shake off the excess chocolate. This helps prevent drips. You can also use a cooling rack lined with parchment paper. It catches any drips and keeps the truffles off the sheet.

Storing Leftover Truffles

Store leftover truffles in an airtight container. Keep them in the fridge for up to a week. If you want them to last longer, you can freeze them. Just place them in a freezer-safe bag. They can stay fresh for about three months. When you’re ready to enjoy, let them thaw in the fridge for a few hours.

Decorating Ideas for Presentation

Make your truffles look fancy with some simple touches. Drizzle extra melted white chocolate on top for a nice look. Rolling them in chopped nuts or shredded coconut adds texture and flavor. Arrange the truffles on a pretty platter. Sprinkle some pumpkin pie spice or cocoa powder around them. This makes for an inviting display that will impress your guests.

Variations

Flavor Variations

You can change the taste of these truffles with spices. Try adding cinnamon or nutmeg. These spices add warmth and extra flavor. You can also add a pinch of salt for balance. If you love chocolate, mix in cocoa powder for a richer taste. Feel free to experiment with flavors like orange zest or almond extract. Each change can give your truffles a unique twist.

Alternative Coatings

The coating can also change how your truffles taste. Instead of white chocolate, you can use dark or milk chocolate. This gives you a different sweetness level. For a fun texture, roll the truffles in sprinkles or crushed nuts. You can also use shredded coconut for a tropical vibe. These coatings add color and interest to your treats. You can mix and match to find your favorite combination.

Vegan or Dairy-Free Adjustments

Making vegan or dairy-free truffles is easy. Replace cream cheese with vegan cream cheese or cashew cream. Use dairy-free white chocolate for coating. Check labels to ensure it’s truly dairy-free. You can even use maple syrup instead of powdered sugar for sweetness. This way, you can enjoy these truffles without dairy. They still taste great and keep the fun alive!

Storage Info

Best Practices for Storing Truffles

To keep your no-bake white chocolate pumpkin truffles fresh, store them in an airtight container. Place a layer of parchment paper between each layer of truffles. This helps prevent sticking. Keep the container in the fridge. The cool temperature keeps the chocolate firm and the flavors fresh. You can enjoy the truffles for up to one week.

Freezing Truffles for Long-Term Storage

If you want to save some truffles for later, freezing works great. First, place the truffles on a baking sheet in a single layer. Freeze them for about an hour until firm. Then, transfer them to a freezer-safe bag or container. Make sure to remove as much air as possible. Frozen truffles can last for up to three months. When you are ready to eat them, thaw them in the fridge overnight.

How to Reheat and Serve

These truffles are best served cold. If you prefer them warm, you can gently warm them. Place a truffle in the microwave for about five seconds. Check to see if it’s warm enough. Be careful not to melt the chocolate too much. Serve them on a nice platter, and enjoy the blend of pumpkin and chocolate flavors.

FAQs

Can I use fresh pumpkin instead of canned?

Yes, you can use fresh pumpkin. Just make sure to cook and puree it first. Fresh pumpkin can add a nice flavor. However, canned pumpkin is more consistent. It has the right texture and moisture. If you choose fresh, make sure to drain any extra liquid. This helps the truffles hold their shape well.

How long do no-bake truffles last?

No-bake truffles can last up to one week in the fridge. Store them in an airtight container to keep them fresh. You can also freeze them for up to three months. Just let them thaw in the fridge before serving. This way, you can enjoy them later without losing taste or texture.

Can I make these truffles in advance for a party?

Absolutely! Making these truffles ahead of time is perfect for a party. They taste even better after chilling for a few hours. You can prepare them a day or two before your event. Keep them in the fridge until you’re ready to serve. This saves you time and stress on the day of the party.

This blog post covered the key elements of making delicious pumpkin truffles. We discussed ingredients, helpful tips, and variations to try. Proper storage ensures your truffles stay fresh and tasty. Remember, these treats are easy to customize and fun to make. Enjoy your truffle-making journey, and don’t hesitate to experiment! You can make these treats your own. Happy truffle-making!

- 1 cup pumpkin puree - 1 cup crushed graham crackers - 1/2 cup powdered sugar - 1 teaspoon pumpkin pie spice - 8 ounces white chocolate, melted - 1/2 cup cream cheese, softened - 1/4 teaspoon vanilla extract - Extra white chocolate for drizzling (optional) - Chopped nuts or shredded coconut for rolling (optional) Pumpkin puree is key for flavor. Use canned for ease or make your own from fresh pumpkins. Graham crackers give a nice crunch. If you need a gluten-free option, try crushed gluten-free cookies instead. Powdered sugar sweetens the truffles. For a less sweet option, you can cut this in half. Pumpkin pie spice adds warmth. If you don’t have it, mix cinnamon, nutmeg, and ginger. White chocolate is essential for coating. You can use dark chocolate if you prefer a richer taste. Cream cheese keeps the truffles creamy and smooth. For a dairy-free version, use plant-based cream cheese. Vanilla extract enhances the flavor. You can skip it if you want a pure pumpkin taste. You can find pumpkin puree in most grocery stores. Look in the canned goods aisle. It usually comes in 15-ounce cans. If you prefer fresh pumpkin, select a small sugar pumpkin. Roast it, scoop out the flesh, and blend it until smooth. This fresh puree can be a great alternative. Just make sure to drain excess water for the best results in your truffles. First, grab a medium bowl. Add 1 cup of pumpkin puree. Then, toss in 1 cup of crushed graham crackers. Next, mix in 1/2 cup of powdered sugar. Don't forget 1 teaspoon of pumpkin pie spice for flavor. Add 1/2 cup of softened cream cheese and 1/4 teaspoon of vanilla extract. Stir well until everything is smooth and combined. This mix will create a tasty truffle base. Now, cover the bowl and put it in the fridge. Chill the mixture for about 30 minutes. This step is key. It helps the mixture firm up, making it easier to shape later. You want it to be nice and cold before forming the truffles. After chilling, take the bowl from the fridge. Use a small cookie scoop or your hands to form small balls, about 1 inch wide. Place them on a parchment-lined baking sheet. Once you shape them all, it's time to dip. Melt some white chocolate in a bowl. Take each truffle and dip it into the chocolate. Use a fork or toothpick for this. Let any extra chocolate drip off. Place the dipped truffles back on the sheet. If you want, drizzle more melted white chocolate over the top. You can also roll them in chopped nuts or shredded coconut for a fun touch. Finally, let the truffles set in the fridge for at least 30 minutes to harden. To keep your kitchen clean, use a deep bowl for dipping. This way, you can fully submerge your truffles in melted white chocolate. Use a fork or toothpick to dip each truffle. After dipping, gently shake off the excess chocolate. This helps prevent drips. You can also use a cooling rack lined with parchment paper. It catches any drips and keeps the truffles off the sheet. Store leftover truffles in an airtight container. Keep them in the fridge for up to a week. If you want them to last longer, you can freeze them. Just place them in a freezer-safe bag. They can stay fresh for about three months. When you’re ready to enjoy, let them thaw in the fridge for a few hours. Make your truffles look fancy with some simple touches. Drizzle extra melted white chocolate on top for a nice look. Rolling them in chopped nuts or shredded coconut adds texture and flavor. Arrange the truffles on a pretty platter. Sprinkle some pumpkin pie spice or cocoa powder around them. This makes for an inviting display that will impress your guests. {{image_2}} You can change the taste of these truffles with spices. Try adding cinnamon or nutmeg. These spices add warmth and extra flavor. You can also add a pinch of salt for balance. If you love chocolate, mix in cocoa powder for a richer taste. Feel free to experiment with flavors like orange zest or almond extract. Each change can give your truffles a unique twist. The coating can also change how your truffles taste. Instead of white chocolate, you can use dark or milk chocolate. This gives you a different sweetness level. For a fun texture, roll the truffles in sprinkles or crushed nuts. You can also use shredded coconut for a tropical vibe. These coatings add color and interest to your treats. You can mix and match to find your favorite combination. Making vegan or dairy-free truffles is easy. Replace cream cheese with vegan cream cheese or cashew cream. Use dairy-free white chocolate for coating. Check labels to ensure it's truly dairy-free. You can even use maple syrup instead of powdered sugar for sweetness. This way, you can enjoy these truffles without dairy. They still taste great and keep the fun alive! To keep your no-bake white chocolate pumpkin truffles fresh, store them in an airtight container. Place a layer of parchment paper between each layer of truffles. This helps prevent sticking. Keep the container in the fridge. The cool temperature keeps the chocolate firm and the flavors fresh. You can enjoy the truffles for up to one week. If you want to save some truffles for later, freezing works great. First, place the truffles on a baking sheet in a single layer. Freeze them for about an hour until firm. Then, transfer them to a freezer-safe bag or container. Make sure to remove as much air as possible. Frozen truffles can last for up to three months. When you are ready to eat them, thaw them in the fridge overnight. These truffles are best served cold. If you prefer them warm, you can gently warm them. Place a truffle in the microwave for about five seconds. Check to see if it's warm enough. Be careful not to melt the chocolate too much. Serve them on a nice platter, and enjoy the blend of pumpkin and chocolate flavors. Yes, you can use fresh pumpkin. Just make sure to cook and puree it first. Fresh pumpkin can add a nice flavor. However, canned pumpkin is more consistent. It has the right texture and moisture. If you choose fresh, make sure to drain any extra liquid. This helps the truffles hold their shape well. No-bake truffles can last up to one week in the fridge. Store them in an airtight container to keep them fresh. You can also freeze them for up to three months. Just let them thaw in the fridge before serving. This way, you can enjoy them later without losing taste or texture. Absolutely! Making these truffles ahead of time is perfect for a party. They taste even better after chilling for a few hours. You can prepare them a day or two before your event. Keep them in the fridge until you're ready to serve. This saves you time and stress on the day of the party. This blog post covered the key elements of making delicious pumpkin truffles. We discussed ingredients, helpful tips, and variations to try. Proper storage ensures your truffles stay fresh and tasty. Remember, these treats are easy to customize and fun to make. Enjoy your truffle-making journey, and don’t hesitate to experiment! You can make these treats your own. Happy truffle-making!

No-Bake White Chocolate Pumpkin Truffles

Indulge in the festive flavors of autumn with these No-Bake White Chocolate Pumpkin Truffles! Easy to make and perfect for sharing, these delightful treats combine creamy pumpkin puree, sweet graham crackers, and rich white chocolate. In just 15 minutes, you can create a batch of 20-24 truffles that will impress your friends and family. Click through for the full recipe and enjoy a deliciously simple treat this season!

Ingredients
  

1 cup pumpkin puree

1 cup crushed graham crackers

1/2 cup powdered sugar

1 teaspoon pumpkin pie spice

8 ounces white chocolate, melted

1/2 cup cream cheese, softened

1/4 teaspoon vanilla extract

Extra white chocolate for drizzling (optional)

Chopped nuts or shredded coconut for rolling (optional)

Instructions
 

In a medium mixing bowl, combine the pumpkin puree, crushed graham crackers, powdered sugar, pumpkin pie spice, softened cream cheese, and vanilla extract. Mix until well combined and smooth.

    Refrigerate the mixture for about 30 minutes to firm up. This will make it easier to shape the truffles.

      Once chilled, use a small cookie scoop or your hands to form the mixture into small balls, about 1 inch in diameter. Place them on a baking sheet lined with parchment paper.

        Dip each truffle into the melted white chocolate using a fork or toothpick, allowing the excess chocolate to drip off before placing them back on the parchment-lined sheet.

          If desired, drizzle additional melted white chocolate over the top of each truffle for decoration. You can also roll them in chopped nuts or shredded coconut for added texture.

            Allow the truffles to set in the refrigerator for at least 30 minutes until the chocolate has hardened.

              Prep Time: 15 minutes | Total Time: 1 hour | Servings: 20-24 truffles

                - Presentation Tips: Arrange the truffles in a decorative box or on a serving platter with a sprinkle of pumpkin pie spice or cocoa powder around them for an attractive touch.

                  WANT TO SAVE THIS RECIPE?

                  Leave a Comment

                  Recipe Rating