No-Bake Biscoff Cookie Butter Bars Easy Dessert Treat

WANT TO SAVE THIS RECIPE?

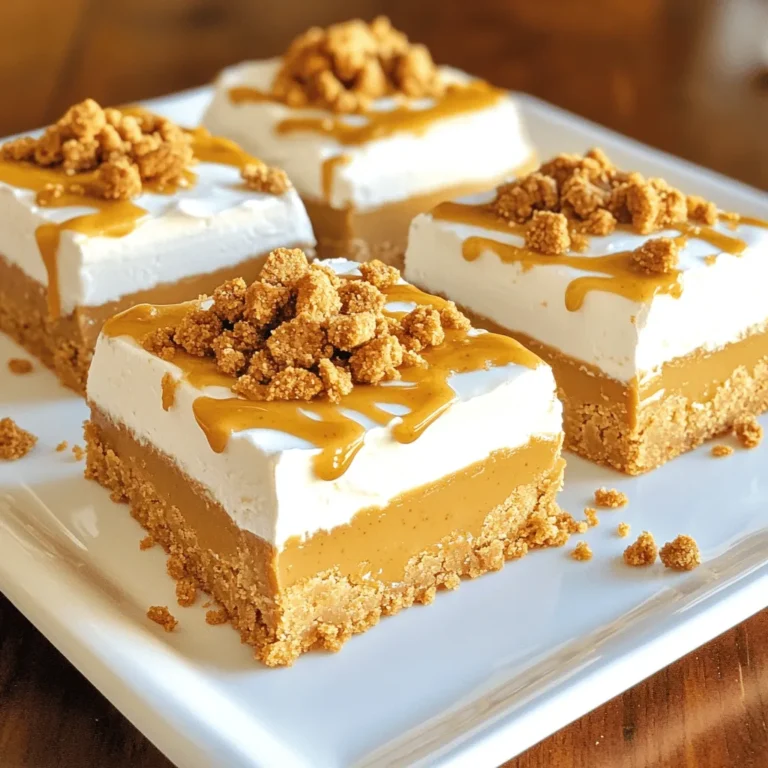
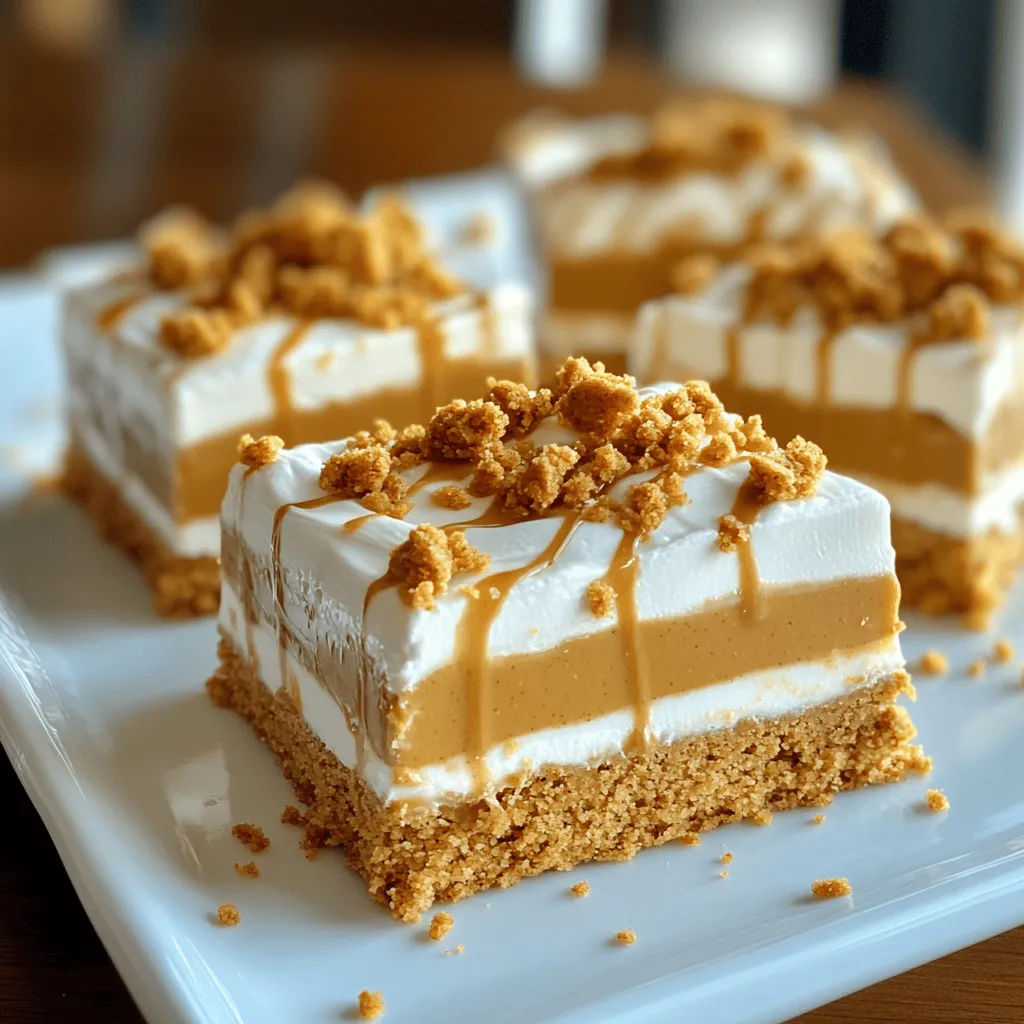
Craving a sweet and easy treat? Look no further than these No-Bake Biscoff Cookie Butter Bars! With just a few simple ingredients, you’ll whip up a dessert that’s creamy, crunchy, and utterly delicious. Perfect for gatherings or just a cozy night in, these bars are a must-try. Let’s dive into the easy recipe and tips that will make you the star of any dessert table!

Ingredients

Essential Ingredients for No-Bake Biscoff Cookie Butter Bars

– 2 cups Biscoff cookie crumbs

– 1/2 cup unsalted butter, melted

– 1 cup cookie butter (Biscoff spread)

– 1 cup powdered sugar

– 1/2 teaspoon vanilla extract

– 1 cup whipped cream (or whipped topping)

– A pinch of sea salt

– 1/2 cup Biscoff cookies, crushed (for topping)

These ingredients create a rich and tasty treat. Biscoff cookie crumbs provide a sweet base. The melted butter helps bind everything together. Cookie butter adds a creamy layer with a unique flavor.

You can use regular butter or a plant-based one if you want. Just ensure the whipped cream is cold for the best texture.

A pinch of sea salt enhances the sweetness. The crushed Biscoff cookies on top give a nice crunch.

Make sure you have everything ready before you start. This will help the process go smoothly. The bars are easy to make and perfect for sharing. Enjoy the fun of making them!

Step-by-Step Instructions

Preparing the Crumb Base

To start, gather your ingredients. In a large mixing bowl, combine 2 cups of Biscoff cookie crumbs and 1/2 cup of melted unsalted butter. Mix them well until the crumbs are fully coated. This creates a tasty and sturdy base for your bars. Next, take a lined 9×9 inch baking dish. Press the crumb mixture firmly into the bottom. Make sure it is even and compact. This step gives your bars a great texture.

Making the Cookie Butter Filling

Now, let’s make the filling. In another bowl, whisk together 1 cup of cookie butter, 1 cup of powdered sugar, 1/2 teaspoon of vanilla extract, and a pinch of sea salt. Mix until the mixture is smooth and creamy. This is where the magic happens! Then, gently fold in 1 cup of whipped cream. This adds fluffiness to your filling. Be careful not to overmix, as you want it light and airy.

Assembling the Bars

It’s time to bring everything together. Spread the cookie butter and whipped cream mixture evenly over your crumb base in the baking dish. Use a spatula to smooth it out nicely. For the finishing touch, sprinkle 1/2 cup of crushed Biscoff cookies on top of the filling. This adds a nice crunch and flavor. Cover the dish with plastic wrap or foil and refrigerate for at least 4 hours. This chilling time helps the bars set perfectly. After that, cut them into bars and enjoy your delicious creation!

Tips & Tricks

Tips for Perfect Bars

– Ensure all ingredients are at room temperature. This helps them mix well.

– Press the crumb base firmly for better texture. A good base gives a strong bar.

How to Serve

– Serve the bars chilled on a beautiful platter. This makes them look fancy.

– Garnish with extra crushed Biscoff cookies. A drizzle of cookie butter sauce adds flair.

Common Mistakes to Avoid

– Don’t overmix the cookie butter filling. This can make it too dense.

– Make sure to refrigerate long enough. Bars need at least 4 hours to set well.

Variations

Flavor Combinations

You can switch up the taste by using other flavored cookie butters. Try speculoos, gingerbread, or even chocolate cookie butter for fun twists. Each will bring a new flavor to your bars. You can also add layers of chocolate. Melt dark or milk chocolate, then drizzle it on top. This adds a rich taste that pairs well with the cookie butter.

Dietary Modifications

If you need gluten-free options, use gluten-free cookie crumbs. Many brands offer these, so check your store. For vegan choices, swap out the butter for coconut oil. You can replace whipped cream with a plant-based cream. These adjustments let everyone enjoy the bars without worry.

Storage Info

How to Properly Store

To keep your No-Bake Biscoff Cookie Butter Bars fresh, refrigerate them. First, cover the dish tightly with plastic wrap or foil. This helps prevent any odors in the fridge from affecting the taste. If you want to store them for longer, freezing is a great option. Cut the bars into pieces before freezing for easy serving later. Wrap each piece in plastic wrap and place them in a freezer-safe bag. This way, they stay fresh and ready to enjoy.

Shelf Life

In the refrigerator, the bars last about 5 to 7 days. Just make sure they are well covered. If you freeze them, they can last up to 3 months. Keep an eye out for signs of spoilage. If you see any discoloration or an off smell, it’s best to toss them. Always trust your senses when it comes to food safety.

FAQs

Can I use another type of cookie butter?

Yes, you can use other cookie butters. Some popular choices include speculoos, peanut butter, or almond butter. Each type brings a unique flavor to your bars. However, I recommend keeping the texture similar. For the best results, choose a creamy spread.

How long do No-Bake Biscoff Cookie Butter Bars last?

These bars last about one week in the fridge. Store them in an airtight container. This helps maintain their creamy texture and flavor. After a week, they may still be safe to eat, but the quality might drop. Always check for any signs of spoilage before enjoying.

Can I make these bars ahead of time?

Yes, you can make these bars a few days in advance. Just follow the recipe and refrigerate them. They actually taste better after chilling overnight. This allows the flavors to blend nicely. If you plan to serve them later, keep them covered to stay fresh.

In this post, we explored how to make delicious no-bake Biscoff cookie butter bars. We covered the key ingredients, step-by-step instructions, and tips for perfect results. You learned about variations and storage options to keep your bars fresh. Remember to keep your ingredients at room temperature and avoid common mistakes like overmixing. These bars are easy to make and perfect for sharing. Enjoy creating this tasty treat and impressing your friends with your baking skills!

- 2 cups Biscoff cookie crumbs - 1/2 cup unsalted butter, melted - 1 cup cookie butter (Biscoff spread) - 1 cup powdered sugar - 1/2 teaspoon vanilla extract - 1 cup whipped cream (or whipped topping) - A pinch of sea salt - 1/2 cup Biscoff cookies, crushed (for topping) These ingredients create a rich and tasty treat. Biscoff cookie crumbs provide a sweet base. The melted butter helps bind everything together. Cookie butter adds a creamy layer with a unique flavor. You can use regular butter or a plant-based one if you want. Just ensure the whipped cream is cold for the best texture. A pinch of sea salt enhances the sweetness. The crushed Biscoff cookies on top give a nice crunch. Make sure you have everything ready before you start. This will help the process go smoothly. The bars are easy to make and perfect for sharing. Enjoy the fun of making them! To start, gather your ingredients. In a large mixing bowl, combine 2 cups of Biscoff cookie crumbs and 1/2 cup of melted unsalted butter. Mix them well until the crumbs are fully coated. This creates a tasty and sturdy base for your bars. Next, take a lined 9x9 inch baking dish. Press the crumb mixture firmly into the bottom. Make sure it is even and compact. This step gives your bars a great texture. Now, let’s make the filling. In another bowl, whisk together 1 cup of cookie butter, 1 cup of powdered sugar, 1/2 teaspoon of vanilla extract, and a pinch of sea salt. Mix until the mixture is smooth and creamy. This is where the magic happens! Then, gently fold in 1 cup of whipped cream. This adds fluffiness to your filling. Be careful not to overmix, as you want it light and airy. It’s time to bring everything together. Spread the cookie butter and whipped cream mixture evenly over your crumb base in the baking dish. Use a spatula to smooth it out nicely. For the finishing touch, sprinkle 1/2 cup of crushed Biscoff cookies on top of the filling. This adds a nice crunch and flavor. Cover the dish with plastic wrap or foil and refrigerate for at least 4 hours. This chilling time helps the bars set perfectly. After that, cut them into bars and enjoy your delicious creation! - Ensure all ingredients are at room temperature. This helps them mix well. - Press the crumb base firmly for better texture. A good base gives a strong bar. - Serve the bars chilled on a beautiful platter. This makes them look fancy. - Garnish with extra crushed Biscoff cookies. A drizzle of cookie butter sauce adds flair. - Don’t overmix the cookie butter filling. This can make it too dense. - Make sure to refrigerate long enough. Bars need at least 4 hours to set well. {{image_2}} You can switch up the taste by using other flavored cookie butters. Try speculoos, gingerbread, or even chocolate cookie butter for fun twists. Each will bring a new flavor to your bars. You can also add layers of chocolate. Melt dark or milk chocolate, then drizzle it on top. This adds a rich taste that pairs well with the cookie butter. If you need gluten-free options, use gluten-free cookie crumbs. Many brands offer these, so check your store. For vegan choices, swap out the butter for coconut oil. You can replace whipped cream with a plant-based cream. These adjustments let everyone enjoy the bars without worry. To keep your No-Bake Biscoff Cookie Butter Bars fresh, refrigerate them. First, cover the dish tightly with plastic wrap or foil. This helps prevent any odors in the fridge from affecting the taste. If you want to store them for longer, freezing is a great option. Cut the bars into pieces before freezing for easy serving later. Wrap each piece in plastic wrap and place them in a freezer-safe bag. This way, they stay fresh and ready to enjoy. In the refrigerator, the bars last about 5 to 7 days. Just make sure they are well covered. If you freeze them, they can last up to 3 months. Keep an eye out for signs of spoilage. If you see any discoloration or an off smell, it’s best to toss them. Always trust your senses when it comes to food safety. Yes, you can use other cookie butters. Some popular choices include speculoos, peanut butter, or almond butter. Each type brings a unique flavor to your bars. However, I recommend keeping the texture similar. For the best results, choose a creamy spread. These bars last about one week in the fridge. Store them in an airtight container. This helps maintain their creamy texture and flavor. After a week, they may still be safe to eat, but the quality might drop. Always check for any signs of spoilage before enjoying. Yes, you can make these bars a few days in advance. Just follow the recipe and refrigerate them. They actually taste better after chilling overnight. This allows the flavors to blend nicely. If you plan to serve them later, keep them covered to stay fresh. In this post, we explored how to make delicious no-bake Biscoff cookie butter bars. We covered the key ingredients, step-by-step instructions, and tips for perfect results. You learned about variations and storage options to keep your bars fresh. Remember to keep your ingredients at room temperature and avoid common mistakes like overmixing. These bars are easy to make and perfect for sharing. Enjoy creating this tasty treat and impressing your friends with your baking skills!

No-Bake Biscoff Cookie Butter Bars

Indulge in the creamy goodness of No-Bake Biscoff Cookie Butter Bars that are perfect for any occasion! With just a few simple ingredients like Biscoff cookie crumbs and creamy cookie butter, these bars are easy to whip up and absolutely delicious. Discover how to make this irresistible treat with our simple steps and enjoy a sweet delight that everyone will love. Click through for the full recipe and treat yourself today!

Ingredients
  

2 cups Biscoff cookie crumbs

1/2 cup unsalted butter, melted

1 cup cookie butter (Biscoff spread)

1 cup powdered sugar

1/2 teaspoon vanilla extract

1 cup whipped cream (or whipped topping)

A pinch of sea salt

1/2 cup Biscoff cookies, crushed (for topping)

Instructions
 

In a large mixing bowl, combine the Biscoff cookie crumbs and melted butter. Mix until the crumbs are evenly coated.

    Press this mixture firmly into the bottom of a lined square baking dish (9x9 inch) to form the base layer.

      In another bowl, whisk together the cookie butter, powdered sugar, vanilla extract, and a pinch of sea salt until smooth and creamy.

        Gently fold in the whipped cream into the cookie butter mixture until well combined and fluffy.

          Spread this cookie butter and whipped cream mixture evenly over the crumb base in the baking dish.

            Sprinkle the crushed Biscoff cookies on top of the filling for added crunch and texture.

              Cover the dish with plastic wrap or foil and refrigerate for at least 4 hours, or until set.

                Once set, remove from the refrigerator and cut into bars.

                  Prep Time: 15 min | Total Time: 4 hr 15 min | Servings: 16 bars

                    - Presentation Tips: Serve the bars chilled on a beautiful platter. Garnish with additional crushed Biscoff cookies and a drizzle of cookie butter sauce for an indulgent touch.

                      WANT TO SAVE THIS RECIPE?

                      Leave a Comment

                      Recipe Rating