If you’re craving a sweet treat that requires no baking, you’re in luck! These No-Bake Oreo Cookie Dough Truffles are easy to whip up and perfect for any occasion. With just a handful of simple ingredients, you’ll create a delicious dessert that is sure to impress. Join me as I guide you through each step to delight your taste buds and satisfy your sweet tooth with these amazing truffles.
Ingredients
Main Ingredients
– 1 package (15.25 oz) Oreo cookies (regular or double stuff)
– ½ cup unsalted butter, softened
– 1 cup all-purpose flour (heat-treated)
– 1 cup powdered sugar
– ½ teaspoon vanilla extract
– 1 cup chocolate chips (milk or dark)
– 1 tablespoon coconut oil (for melting the chocolate)
– Extra crushed Oreos (for coating, optional)
To make No-Bake Oreo Cookie Dough Truffles, gather your main ingredients first. Start with the Oreo cookies. You can use regular or double stuff, depending on your taste. The cookies give the truffles their rich flavor.
Next, you need unsalted butter. Make sure it is softened. This helps blend the ingredients smoothly. Then, heat-treat your all-purpose flour. This step is key to keeping your truffles safe to eat. It removes any harmful bacteria.
After that, grab powdered sugar and vanilla extract. These add sweetness and flavor. For the chocolate coating, use chocolate chips. You can choose milk or dark chocolate based on your preference. Finally, add coconut oil to help melt the chocolate smoothly.
If you want to make your truffles even more special, consider extra crushed Oreos for garnishing. These will add a nice touch when you decorate your truffles!
Step-by-Step Instructions
Crushing the Oreos
To crush Oreo cookies, start with a food processor. Add the cookies and pulse them until they turn into fine crumbs. This process should take about 30 seconds. If you don’t have a food processor, you can place the cookies in a zip-top bag and crush them with a rolling pin. Just make sure the crumbs are small and even. Set aside some crumbs for later use.
Mixing the Cookie Dough
In a large bowl, combine the softened butter, heat-treated flour, powdered sugar, vanilla extract, and the crushed Oreos. Mix these ingredients together with a spatula or your hands. You want to form a dough that is thick but easy to shape. Make sure there are no dry spots left in the dough.
Shaping and Chilling the Truffles
Take about one tablespoon of the dough and roll it into a ball between your hands. Try to make all the balls the same size for even cooking. Place the rolled balls on a baking sheet lined with parchment paper. After shaping all the truffles, place the baking sheet in the fridge for about 30 minutes. This chilling step helps the truffles hold their shape later.
Melting and Coating in Chocolate
To melt the chocolate, put the chocolate chips and coconut oil in a microwave-safe bowl. Heat it in the microwave in 30-second bursts, stirring each time until it’s smooth. If you prefer, you can use a double boiler. Once melted, dip each truffle into the chocolate. Make sure the truffles are fully coated. Use a fork to lift them out and tap off the excess chocolate before returning them to the baking sheet.
Decorating the Truffles
While the chocolate is still wet, you can sprinkle the reserved crushed Oreos on top. This adds a nice touch and extra flavor. You can also get creative with other toppings like sprinkles or chopped nuts. Just remember to add these decorations before the chocolate hardens for the best results.
Tips & Tricks
Achieving the Best Texture
To get the right texture, use heat-treated flour. Raw flour can carry germs, so it’s best to heat-treat it first. You can do this by baking it at 350°F for about five minutes. This step ensures your truffle dough is safe and tasty. To make sure your dough is moldable, mix the butter well with the flour and sugar. If the mixture feels too dry, add a spoonful of milk to help it come together.
Smart Chocolate Melting Tips
Melting chocolate can be tricky. To prevent it from seizing, avoid getting water in it. Water can ruin the smooth texture. Use a microwave-safe bowl and heat the chocolate in short bursts. Stir in between to ensure even melting. You can also use a double boiler. Simply place a bowl over simmering water, and stir the chocolate until it melts smoothly.
Serving Suggestions
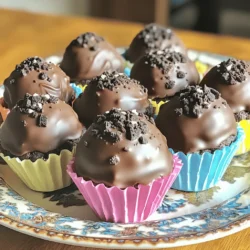
Presentation adds joy to any treat. Arrange your No-Bake Oreo Cookie Dough Truffles on a nice platter. You can also use decorative boxes for gifting. For a fun touch, place each truffle in a cupcake liner. This not only looks great but also makes them easy to grab. Adding extra crushed Oreos on top gives it a nice finish. Enjoy your tasty treats in style!

Variations
Flavor Variations
You can change the cookie type for fun new flavors. Try using Golden Oreos for a lighter taste. If you want to add a twist, use other cookies like peanut butter or mint Oreos. You can also add flavor extracts. A few drops of mint or almond extract can give your truffles an extra kick. Be careful not to add too much, as it can overpower the Oreo taste.
Topping Options
The coating options for these truffles are endless. You can use white chocolate instead of milk or dark chocolate for a sweet contrast. Crushed nuts give a nice crunch. Mix your toppings for fun textures. Try combining crushed Oreos with sprinkles or chopped nuts for a colorful look. This makes each truffle unique and fun to eat.
Dietary Adjustments
If you want vegan truffles, use dairy-free chocolate and vegan butter. This keeps the treat tasty and friendly for all diets. For gluten-free options, you can find gluten-free Oreos and a gluten-free flour blend. This way, everyone can enjoy these sweet bites without worry. Adjusting the recipe means anyone can join in on the fun!
Storage Info
Best Practices for Storing Truffles
To keep your truffles fresh, use an airtight container. A glass or plastic container works well. Line the bottom with parchment paper to prevent sticking. Store the truffles in a cool, dry place. The best temperature is around 65°F to 70°F. Avoid places with heat or direct sunlight.
Shelf Life
Truffles can last up to two days at room temperature. If you store them in the fridge, they can last up to a week. The cool air helps maintain their texture and flavor. Just make sure to keep them covered so they don’t dry out.
Freezing Instructions
To freeze your truffles, place them in a single layer on a baking sheet. Freeze them for about an hour until firm. Once they are solid, transfer them to an airtight container or freezer bag. They can last for up to three months in the freezer. When ready to eat, thaw them in the fridge overnight for the best texture.
FAQs
Can I use different types of chocolate for coating?
Yes, you can use different types of chocolate for coating your truffles. Milk chocolate gives a sweet taste, while dark chocolate adds richness. You can also use white chocolate for a sweeter, creamier flavor. If you’re looking for something unique, try caramel or peanut butter chips. Each type of chocolate will change the taste and look of your truffles.
Is it safe to eat raw flour in cookie dough?
Raw flour can contain harmful bacteria, so it may not be safe to eat. To make it safe, you should heat-treat the flour. Simply spread it on a baking sheet and bake it at 350°F (175°C) for about five minutes. This process kills any harmful bacteria and makes your cookie dough safe to eat.
Can I make these truffles in advance?
Yes, you can make these truffles in advance. They stay fresh for about a week in the fridge. You can also freeze them for up to three months. To freeze, place the truffles in an airtight container. When you’re ready to enjoy them, let them thaw in the fridge for a few hours.
What can I use instead of coconut oil?
If you don’t have coconut oil, there are several great alternatives. You can use vegetable oil, canola oil, or even butter. These will all work well for melting chocolate. Just keep in mind that each option may slightly change the flavor of your truffles.
You now have a complete guide to making No-Bake Oreo Cookie Dough Truffles. We explored the key ingredients, step-by-step instructions, and helpful tips to create these tasty treats. Remember to experiment with flavors and toppings for unique variations. Store them properly to enjoy their deliciousness longer. With these insights, I encourage you to try making these delightful truffles at home. You won’t regret it. Happy baking!