![To make these tasty no-bake chocolate oat bars, you need a few key items: - 2 cups rolled oats - 1 cup almond butter (or any nut butter you like) - 1/2 cup honey or maple syrup These main ingredients form the heart of the bars. Rolled oats give them a chewy texture. Nut butter adds richness and helps bind everything together. Sweeteners bring the right amount of sweetness to each bite. You can customize your bars with fun add-ins: - 1/4 cup dark chocolate chips (plus more for topping) - Optional: 1/4 cup chopped nuts or dried fruit - Flavor enhancers like 1 teaspoon vanilla extract Adding chocolate chips gives a nice chocolatey burst. Chopped nuts or dried fruit adds crunch and flavor. Vanilla extract enhances the overall taste, making each bite more enjoyable. To make these bars, you'll need: - A large mixing bowl - An 8-inch square baking dish - Parchment paper A mixing bowl helps combine all the ingredients well. The baking dish shapes the bars, while parchment paper ensures easy removal and clean-up. Using the right equipment makes the process smooth and fun. For the [Full Recipe], follow the steps to create these delicious treats. To start, gather your ingredients. In a large mixing bowl, combine: - 2 cups rolled oats - 1 cup almond butter (or your favorite nut butter) - 1/2 cup honey or maple syrup - 1/2 cup unsweetened cocoa powder - 1/4 teaspoon sea salt - 1 teaspoon vanilla extract Stir the dry ingredients and nut butter together. Mix until it looks like thick dough. If you like, fold in: - 1/4 cup dark chocolate chips - Optional: 1/4 cup chopped nuts or dried fruit This adds texture and flavor. Next, line an 8-inch square baking dish with parchment paper. Leave some paper hanging over the sides. This helps with easy removal. Press the oat mixture into the bottom of the dish. Make it even and firm. Now, melt more chocolate chips. Use a microwave-safe bowl. Heat for about 30 seconds, then stir until smooth. Drizzle or spread this melted chocolate over the top layer of the oat mixture. Refrigerate the bars for at least 1 hour. This firms them up, making them easier to cut. Once set, lift the bars out using the parchment overhang. Cut them into squares or rectangles. Enjoy your tasty no-bake chocolate oat bars! For the full recipe, check the details above. You can easily change the nut butter in your bars. Almond butter works well, but peanut butter is a great choice too. If you want a nut-free option, try sun butter. You can also vary the sweetness. If you prefer less sugar, use less honey or maple syrup. For a sweeter taste, add a bit more. Just remember to keep the balance. Getting the right texture is key. The mixture should be thick and sticky but not too dry. If it feels crumbly, add a touch of nut butter or sweetener. When pressing the mix into the dish, make sure to pack it down firmly. This helps the bars hold together well. Use a spatula to smooth the top for even layering. These bars pair well with dips or toppings. Try serving them with yogurt or a drizzle of melted chocolate. You can also top the bars with chopped nuts or fresh fruit for added flavor. For a fun presentation, cut them into fun shapes. Use cookie cutters to make them look special for parties or snacks. {{image_2}} You can easily make these bars fit your diet. For a gluten-free option, use certified gluten-free rolled oats. This simple swap lets everyone enjoy these treats. If you need a vegan version, replace honey with maple syrup. This keeps the bars sweet without any animal products. Get creative with flavors! You can add spices like cinnamon or nutmeg for warmth. A dash of vanilla extract boosts the taste as well. Want to change the chocolate? Use milk chocolate for a sweeter taste or dark chocolate for a richer flavor. Each choice gives you a new twist on this classic treat. Seasonal fruits can brighten your bars. Try adding dried cranberries in fall or fresh strawberries in summer. You can also make holiday-themed bars by mixing in peppermint extract or festive sprinkles. These fun touches make your no-bake chocolate oat bars special for any occasion. For the full recipe, check the previous section. To keep your No-Bake Chocolate Oat Bars fresh, use an airtight container. This helps prevent moisture loss and keeps the bars from drying out. Glass or plastic containers work well. You can also wrap them in wax paper and place them in a zip-top bag for added protection. Store the bars in a cool, dry place out of direct sunlight. In the fridge, your No-Bake Chocolate Oat Bars can last for about one week. They stay fresh due to the moisture from the almond butter and sweeteners. If you want to keep them longer, consider freezing them. They can last up to three months in the freezer. Just make sure to wrap them well to avoid freezer burn. If you freeze the bars, let them thaw in the fridge overnight before eating. You can also serve them cold, which makes for a refreshing treat. If you prefer them warm, you can microwave a bar for about 10-15 seconds. This will melt the chocolate slightly and give a softer texture, enhancing the flavor. Enjoy them as a tasty snack anytime! To make No-Bake Chocolate Oat Bars, start by mixing the dry and wet ingredients. 1. In a bowl, combine rolled oats, almond butter, honey, cocoa powder, salt, and vanilla. 2. Stir until everything blends into a thick dough. 3. If you want, add dark chocolate chips and any nuts or dried fruit. 4. Line an 8-inch baking dish with parchment paper. 5. Press the mixture into the dish evenly. 6. Melt more chocolate chips and drizzle over the top. 7. Chill in the fridge for at least one hour. 8. Cut into bars once firm. You can find the full recipe in the article above. Yes, you can use other sweeteners. Maple syrup is a great option. It gives a nice flavor and works well. You can also try agave nectar or brown rice syrup. Each sweetener will change the taste a little. Just remember that some sweeteners are thinner than honey. You may need to adjust the amount of oats to keep the right texture. No-Bake Chocolate Oat Bars can last up to one week in the fridge. Store them in an airtight container for best results. If you want to keep them longer, you can freeze them. They will stay good for about three months in the freezer. Just wrap them well to prevent freezer burn. No-bake chocolate oat bars are easy and fun to make. We covered the main ingredients, like rolled oats and nut butter, and explored tasty add-ins. You learned the step-by-step process, along with tips for perfecting texture and storage. These bars are flexible, letting you adjust flavors and make them fit your diet. Whether enjoyed cold or warmed, they make a great snack. Now you can create endless variations to share or enjoy yourself. Get started, and let your creativity shine with these delicious treats!](https://savoryspiral.com/wp-content/uploads/2025/07/08acb057-3ac0-45af-8280-066707a38dd8-768x768.webp)
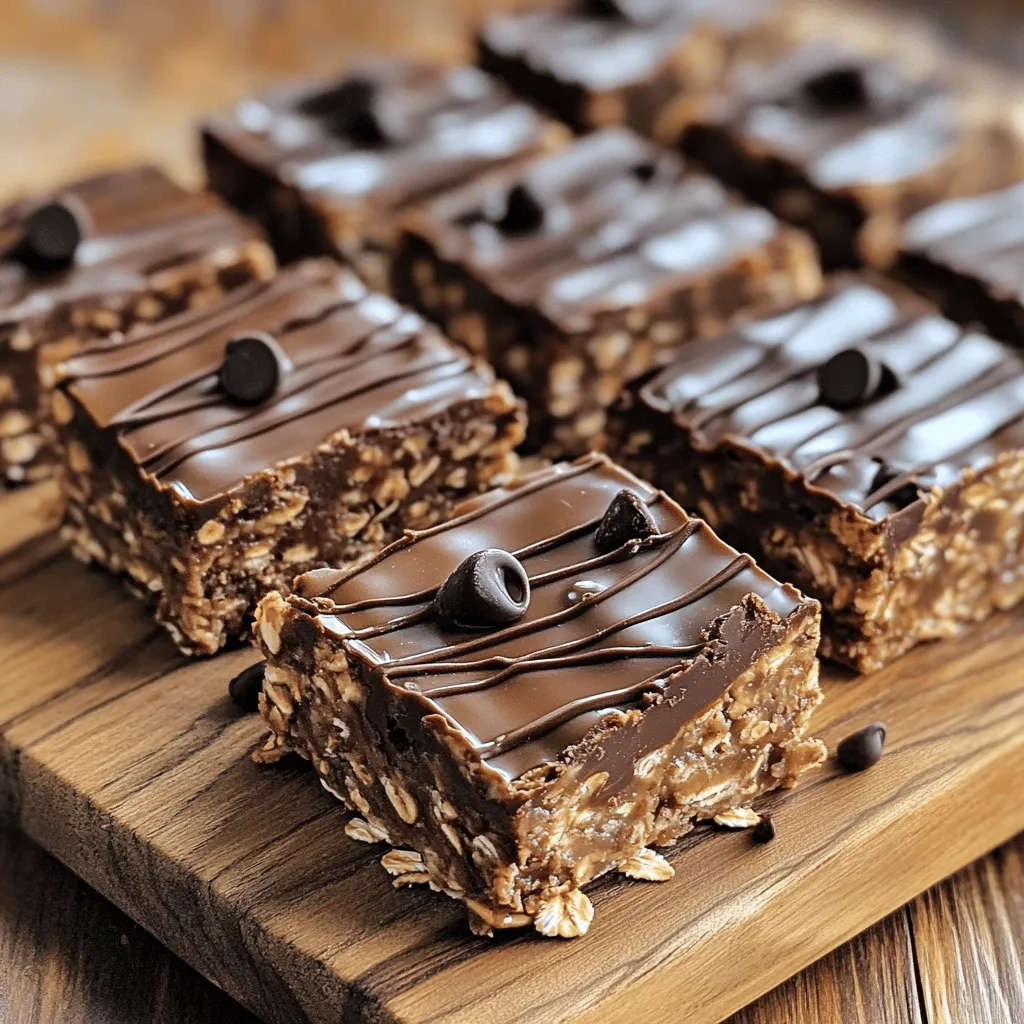
Craving a quick, delicious treat? You’re in the right place! These No-Bake Chocolate Oat Bars are simple to make and packed with flavors you’ll love. With just a few ingredients like rolled oats and nut butter, you can whip up a delicious snack in no time. Perfect for kids and adults alike, this recipe offers a fun way to satisfy your sweet tooth without turning on the oven. Let’s dive into the details!
Ingredients
Main Ingredients
To make these tasty no-bake chocolate oat bars, you need a few key items:
– 2 cups rolled oats
– 1 cup almond butter (or any nut butter you like)
– 1/2 cup honey or maple syrup
These main ingredients form the heart of the bars. Rolled oats give them a chewy texture. Nut butter adds richness and helps bind everything together. Sweeteners bring the right amount of sweetness to each bite.
Add-ins
You can customize your bars with fun add-ins:
– 1/4 cup dark chocolate chips (plus more for topping)
– Optional: 1/4 cup chopped nuts or dried fruit
– Flavor enhancers like 1 teaspoon vanilla extract
Adding chocolate chips gives a nice chocolatey burst. Chopped nuts or dried fruit adds crunch and flavor. Vanilla extract enhances the overall taste, making each bite more enjoyable.
Equipment Needed
To make these bars, you’ll need:
– A large mixing bowl
– An 8-inch square baking dish
– Parchment paper
A mixing bowl helps combine all the ingredients well. The baking dish shapes the bars, while parchment paper ensures easy removal and clean-up. Using the right equipment makes the process smooth and fun.
Step-by-Step Instructions
Preparation
To start, gather your ingredients. In a large mixing bowl, combine:
– 2 cups rolled oats
– 1 cup almond butter (or your favorite nut butter)
– 1/2 cup honey or maple syrup
– 1/2 cup unsweetened cocoa powder
– 1/4 teaspoon sea salt
– 1 teaspoon vanilla extract
Stir the dry ingredients and nut butter together. Mix until it looks like thick dough. If you like, fold in:
– 1/4 cup dark chocolate chips
– Optional: 1/4 cup chopped nuts or dried fruit
This adds texture and flavor.
Assembling the Bars
Next, line an 8-inch square baking dish with parchment paper. Leave some paper hanging over the sides. This helps with easy removal. Press the oat mixture into the bottom of the dish. Make it even and firm.
Now, melt more chocolate chips. Use a microwave-safe bowl. Heat for about 30 seconds, then stir until smooth. Drizzle or spread this melted chocolate over the top layer of the oat mixture.
Chilling and Serving
Refrigerate the bars for at least 1 hour. This firms them up, making them easier to cut. Once set, lift the bars out using the parchment overhang. Cut them into squares or rectangles. Enjoy your tasty no-bake chocolate oat bars!
Tips & Tricks
Customization Options
You can easily change the nut butter in your bars. Almond butter works well, but peanut butter is a great choice too. If you want a nut-free option, try sun butter. You can also vary the sweetness. If you prefer less sugar, use less honey or maple syrup. For a sweeter taste, add a bit more. Just remember to keep the balance.
Perfecting Texture
Getting the right texture is key. The mixture should be thick and sticky but not too dry. If it feels crumbly, add a touch of nut butter or sweetener. When pressing the mix into the dish, make sure to pack it down firmly. This helps the bars hold together well. Use a spatula to smooth the top for even layering.
Serving Ideas
These bars pair well with dips or toppings. Try serving them with yogurt or a drizzle of melted chocolate. You can also top the bars with chopped nuts or fresh fruit for added flavor. For a fun presentation, cut them into fun shapes. Use cookie cutters to make them look special for parties or snacks.
Variations
Dietary Modifications
You can easily make these bars fit your diet. For a gluten-free option, use certified gluten-free rolled oats. This simple swap lets everyone enjoy these treats. If you need a vegan version, replace honey with maple syrup. This keeps the bars sweet without any animal products.
Flavor Variations
Get creative with flavors! You can add spices like cinnamon or nutmeg for warmth. A dash of vanilla extract boosts the taste as well. Want to change the chocolate? Use milk chocolate for a sweeter taste or dark chocolate for a richer flavor. Each choice gives you a new twist on this classic treat.
Seasonal Variations
Seasonal fruits can brighten your bars. Try adding dried cranberries in fall or fresh strawberries in summer. You can also make holiday-themed bars by mixing in peppermint extract or festive sprinkles. These fun touches make your no-bake chocolate oat bars special for any occasion.
Storage Info
Best Storage Practices
To keep your No-Bake Chocolate Oat Bars fresh, use an airtight container. This helps prevent moisture loss and keeps the bars from drying out. Glass or plastic containers work well. You can also wrap them in wax paper and place them in a zip-top bag for added protection. Store the bars in a cool, dry place out of direct sunlight.
Shelf Life
In the fridge, your No-Bake Chocolate Oat Bars can last for about one week. They stay fresh due to the moisture from the almond butter and sweeteners. If you want to keep them longer, consider freezing them. They can last up to three months in the freezer. Just make sure to wrap them well to avoid freezer burn.
Reheating Instructions
If you freeze the bars, let them thaw in the fridge overnight before eating. You can also serve them cold, which makes for a refreshing treat. If you prefer them warm, you can microwave a bar for about 10-15 seconds. This will melt the chocolate slightly and give a softer texture, enhancing the flavor. Enjoy them as a tasty snack anytime!
FAQs
How do you make No-Bake Chocolate Oat Bars?
To make No-Bake Chocolate Oat Bars, start by mixing the dry and wet ingredients.
1. In a bowl, combine rolled oats, almond butter, honey, cocoa powder, salt, and vanilla.
2. Stir until everything blends into a thick dough.
3. If you want, add dark chocolate chips and any nuts or dried fruit.
4. Line an 8-inch baking dish with parchment paper.
5. Press the mixture into the dish evenly.
6. Melt more chocolate chips and drizzle over the top.
7. Chill in the fridge for at least one hour.
8. Cut into bars once firm.
Can I use other sweeteners besides honey?
Yes, you can use other sweeteners. Maple syrup is a great option. It gives a nice flavor and works well. You can also try agave nectar or brown rice syrup. Each sweetener will change the taste a little.
Just remember that some sweeteners are thinner than honey. You may need to adjust the amount of oats to keep the right texture.
How long do No-Bake Chocolate Oat Bars last?
No-Bake Chocolate Oat Bars can last up to one week in the fridge. Store them in an airtight container for best results. If you want to keep them longer, you can freeze them. They will stay good for about three months in the freezer. Just wrap them well to prevent freezer burn.
No-bake chocolate oat bars are easy and fun to make. We covered the main ingredients, like rolled oats and nut butter, and explored tasty add-ins. You learned the step-by-step process, along with tips for perfecting texture and storage.
These bars are flexible, letting you adjust flavors and make them fit your diet. Whether enjoyed cold or warmed, they make a great snack. Now you can create endless variations to share or enjoy yourself. Get started, and let your creativity shine with these delicious treats!
![To make these tasty no-bake chocolate oat bars, you need a few key items: - 2 cups rolled oats - 1 cup almond butter (or any nut butter you like) - 1/2 cup honey or maple syrup These main ingredients form the heart of the bars. Rolled oats give them a chewy texture. Nut butter adds richness and helps bind everything together. Sweeteners bring the right amount of sweetness to each bite. You can customize your bars with fun add-ins: - 1/4 cup dark chocolate chips (plus more for topping) - Optional: 1/4 cup chopped nuts or dried fruit - Flavor enhancers like 1 teaspoon vanilla extract Adding chocolate chips gives a nice chocolatey burst. Chopped nuts or dried fruit adds crunch and flavor. Vanilla extract enhances the overall taste, making each bite more enjoyable. To make these bars, you'll need: - A large mixing bowl - An 8-inch square baking dish - Parchment paper A mixing bowl helps combine all the ingredients well. The baking dish shapes the bars, while parchment paper ensures easy removal and clean-up. Using the right equipment makes the process smooth and fun. For the [Full Recipe], follow the steps to create these delicious treats. To start, gather your ingredients. In a large mixing bowl, combine: - 2 cups rolled oats - 1 cup almond butter (or your favorite nut butter) - 1/2 cup honey or maple syrup - 1/2 cup unsweetened cocoa powder - 1/4 teaspoon sea salt - 1 teaspoon vanilla extract Stir the dry ingredients and nut butter together. Mix until it looks like thick dough. If you like, fold in: - 1/4 cup dark chocolate chips - Optional: 1/4 cup chopped nuts or dried fruit This adds texture and flavor. Next, line an 8-inch square baking dish with parchment paper. Leave some paper hanging over the sides. This helps with easy removal. Press the oat mixture into the bottom of the dish. Make it even and firm. Now, melt more chocolate chips. Use a microwave-safe bowl. Heat for about 30 seconds, then stir until smooth. Drizzle or spread this melted chocolate over the top layer of the oat mixture. Refrigerate the bars for at least 1 hour. This firms them up, making them easier to cut. Once set, lift the bars out using the parchment overhang. Cut them into squares or rectangles. Enjoy your tasty no-bake chocolate oat bars! For the full recipe, check the details above. You can easily change the nut butter in your bars. Almond butter works well, but peanut butter is a great choice too. If you want a nut-free option, try sun butter. You can also vary the sweetness. If you prefer less sugar, use less honey or maple syrup. For a sweeter taste, add a bit more. Just remember to keep the balance. Getting the right texture is key. The mixture should be thick and sticky but not too dry. If it feels crumbly, add a touch of nut butter or sweetener. When pressing the mix into the dish, make sure to pack it down firmly. This helps the bars hold together well. Use a spatula to smooth the top for even layering. These bars pair well with dips or toppings. Try serving them with yogurt or a drizzle of melted chocolate. You can also top the bars with chopped nuts or fresh fruit for added flavor. For a fun presentation, cut them into fun shapes. Use cookie cutters to make them look special for parties or snacks. {{image_2}} You can easily make these bars fit your diet. For a gluten-free option, use certified gluten-free rolled oats. This simple swap lets everyone enjoy these treats. If you need a vegan version, replace honey with maple syrup. This keeps the bars sweet without any animal products. Get creative with flavors! You can add spices like cinnamon or nutmeg for warmth. A dash of vanilla extract boosts the taste as well. Want to change the chocolate? Use milk chocolate for a sweeter taste or dark chocolate for a richer flavor. Each choice gives you a new twist on this classic treat. Seasonal fruits can brighten your bars. Try adding dried cranberries in fall or fresh strawberries in summer. You can also make holiday-themed bars by mixing in peppermint extract or festive sprinkles. These fun touches make your no-bake chocolate oat bars special for any occasion. For the full recipe, check the previous section. To keep your No-Bake Chocolate Oat Bars fresh, use an airtight container. This helps prevent moisture loss and keeps the bars from drying out. Glass or plastic containers work well. You can also wrap them in wax paper and place them in a zip-top bag for added protection. Store the bars in a cool, dry place out of direct sunlight. In the fridge, your No-Bake Chocolate Oat Bars can last for about one week. They stay fresh due to the moisture from the almond butter and sweeteners. If you want to keep them longer, consider freezing them. They can last up to three months in the freezer. Just make sure to wrap them well to avoid freezer burn. If you freeze the bars, let them thaw in the fridge overnight before eating. You can also serve them cold, which makes for a refreshing treat. If you prefer them warm, you can microwave a bar for about 10-15 seconds. This will melt the chocolate slightly and give a softer texture, enhancing the flavor. Enjoy them as a tasty snack anytime! To make No-Bake Chocolate Oat Bars, start by mixing the dry and wet ingredients. 1. In a bowl, combine rolled oats, almond butter, honey, cocoa powder, salt, and vanilla. 2. Stir until everything blends into a thick dough. 3. If you want, add dark chocolate chips and any nuts or dried fruit. 4. Line an 8-inch baking dish with parchment paper. 5. Press the mixture into the dish evenly. 6. Melt more chocolate chips and drizzle over the top. 7. Chill in the fridge for at least one hour. 8. Cut into bars once firm. You can find the full recipe in the article above. Yes, you can use other sweeteners. Maple syrup is a great option. It gives a nice flavor and works well. You can also try agave nectar or brown rice syrup. Each sweetener will change the taste a little. Just remember that some sweeteners are thinner than honey. You may need to adjust the amount of oats to keep the right texture. No-Bake Chocolate Oat Bars can last up to one week in the fridge. Store them in an airtight container for best results. If you want to keep them longer, you can freeze them. They will stay good for about three months in the freezer. Just wrap them well to prevent freezer burn. No-bake chocolate oat bars are easy and fun to make. We covered the main ingredients, like rolled oats and nut butter, and explored tasty add-ins. You learned the step-by-step process, along with tips for perfecting texture and storage. These bars are flexible, letting you adjust flavors and make them fit your diet. Whether enjoyed cold or warmed, they make a great snack. Now you can create endless variations to share or enjoy yourself. Get started, and let your creativity shine with these delicious treats!](https://savoryspiral.com/wp-content/uploads/2025/07/08acb057-3ac0-45af-8280-066707a38dd8-250x250.webp)
