
Are you ready for a quick and tasty meal? These Easy Chicken Quesadillas are the perfect solution for busy days. With just a few simple ingredients and steps, you can whip up these delicious treats in no time. Not only are they packed with flavor, but you can also customize them to fit your taste. Let’s dive into this fun and easy recipe that will delight your family!
Ingredients
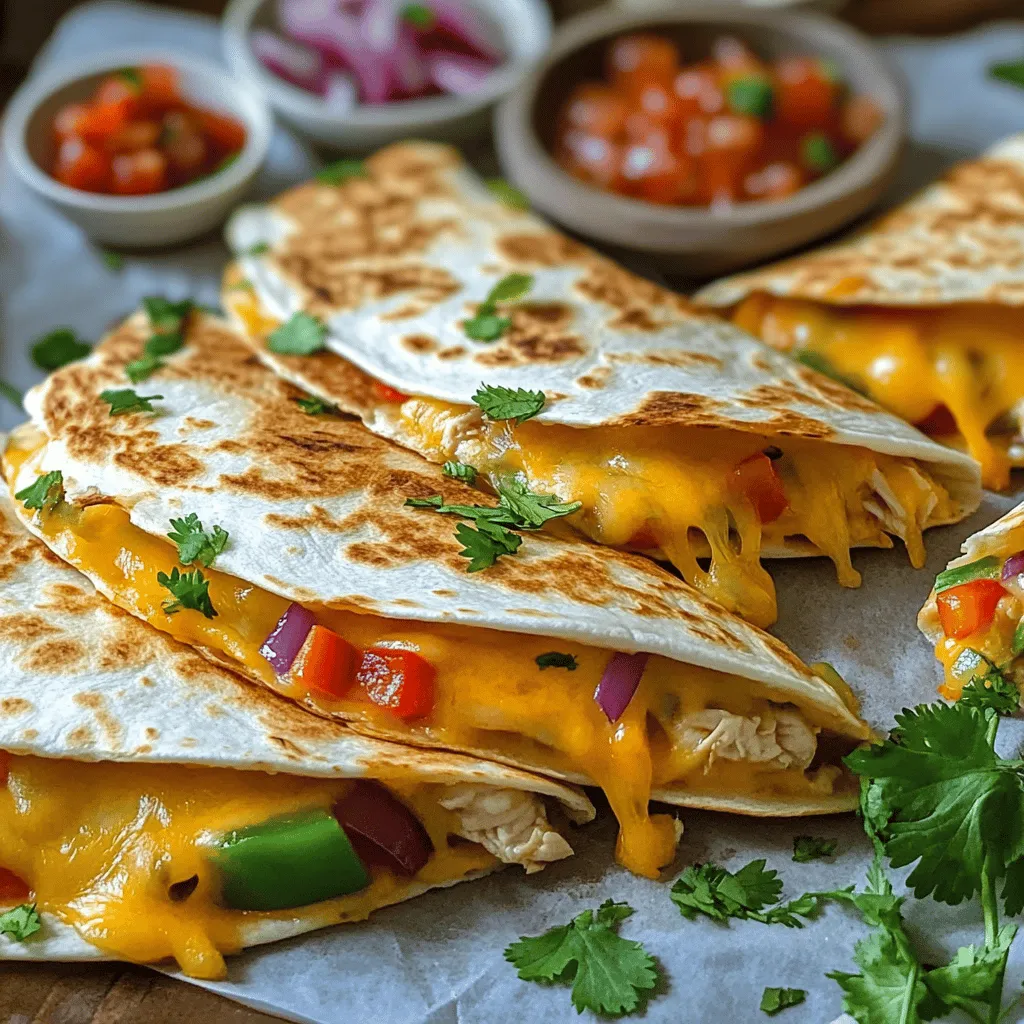
Essential Ingredients for Easy Chicken Quesadillas
– 2 cups cooked chicken, shredded
– 1 cup shredded cheddar cheese
– 1 cup shredded mozzarella cheese
– 4 large flour tortillas
To make these easy chicken quesadillas, you need some key items. The first is shredded chicken. You can use leftover chicken or rotisserie chicken. This makes it quick and easy. Next, you need cheese. I like to use both cheddar and mozzarella for a lovely melt. Finally, you need large flour tortillas. They hold everything together nicely.
Vegetables and Seasoning
– 1 bell pepper, thinly sliced (any color)
– 1 small red onion, thinly sliced
– 2 tablespoons olive oil
– 1 teaspoon cumin
– 1 teaspoon paprika
– Salt and pepper to taste
Adding vegetables makes the quesadillas colorful and tasty. I suggest using a bell pepper and a red onion. Slice them thin for even cooking. You’ll also need olive oil to sauté the veggies. For seasoning, cumin and paprika add great flavor. Don’t forget salt and pepper to taste!
Optional Serving Suggestions
– Fresh cilantro, chopped (for garnish)
– Salsa and sour cream (for serving)
Garnishes can make your dish pop. Fresh cilantro adds a nice touch. Serve the quesadillas with salsa and sour cream for dipping. These extras enhance the flavor and make the meal even more enjoyable.
Step-by-Step Instructions
Preparing the Chicken Mix
Start by mixing the spices with the chicken. In a large bowl, combine 2 cups of shredded chicken, 1 teaspoon of cumin, and 1 teaspoon of paprika. Add salt and pepper to taste. This blend will give your chicken a great flavor. Make sure to mix well so that all the chicken pieces get coated. This step is key for tasty quesadillas.
Sautéing the Vegetables
Next, it’s time to sauté the vegetables. Heat 1 tablespoon of olive oil in a skillet over medium heat. Add one thinly sliced bell pepper and one small red onion. Cook them for about 5 minutes, stirring often. You want them to become soft and lightly caramelized. This adds sweetness and depth to your dish. Once done, take them out of the skillet and set them aside.
Assembling and Cooking the Quesadillas
Now, let’s assemble the quesadillas. In the same skillet, add another tablespoon of olive oil. Place one large flour tortilla in the pan. Sprinkle half of the cheddar and mozzarella cheeses on top. Then, spread half of the sautéed veggies and half of the spiced chicken over the cheese. Top it with the rest of the cheese and cover it with another tortilla.
Cook the quesadilla for about 3-4 minutes on one side. You want it to be golden and the cheese to melt. Carefully flip it using a spatula, and cook the other side for another 3-4 minutes. Once cooked, take it out and let it cool for a minute. Cut it into wedges and serve with salsa and sour cream.
Tips & Tricks
Achieving the Perfect Crispness
To make your quesadillas crunchy, focus on the heat. Use medium heat to cook them. This helps the tortillas become golden brown without burning. Cook each side for about 3-4 minutes. If you want extra crispness, lightly brush the tortillas with olive oil before cooking. This simple trick makes a big difference.
Cheese Melting Techniques
For perfectly melted cheese, use a mix of cheddar and mozzarella. Start by layering cheese on the bottom. This helps the cheese melt evenly. Cover the quesadilla with a lid while cooking. This traps heat, helping the cheese melt faster. If you want extra gooeyness, let the quesadilla rest for a minute after cooking. This allows the cheese to set nicely.
What to Do with Leftover Ingredients
If you have leftover chicken or veggies, don’t waste them! Use extra chicken in salads or wraps. They add great flavor and protein. Any leftover bell peppers and onions work well in omelets or as a side dish. Mix them with rice for a tasty meal. Being creative with leftovers saves time and cuts food waste.
Variations
Different Proteins to Use
You can switch up the protein in your quesadillas. Try using beef or shrimp. For beef, ground beef works great. Season it well with spices, just like the chicken. For shrimp, use cooked and peeled shrimp. Sauté them quickly until they are pink and cooked through. Both options add a unique flavor and texture.
Vegetarian Alternatives
If you want a meatless option, there are many choices. Use black beans or chickpeas for protein. Add sautéed mushrooms for a hearty bite. You can also use roasted vegetables like zucchini or sweet potatoes. These tasty substitutes keep your quesadillas filling and flavorful.
Flavor Enhancements
You can elevate the taste with a few simple changes. Add spices like chili powder or garlic powder for a kick. Try different cheeses, like pepper jack or feta, for a new twist. Mixing cheese types can give a creamy texture and rich taste. Don’t shy away from experimenting with fresh herbs, too! They can brighten your dish and make it pop.
Storage Info
How to Store Leftover Quesadillas
To keep your quesadillas fresh, let them cool first. Place them in a single layer on a plate. Once cooled, wrap them in plastic wrap or foil. This keeps them from drying out. If you have many quesadillas, stack them with parchment paper between each one. Then, store them in an airtight container. You can keep them in the fridge for up to three days.
Reheating Instructions
The best way to reheat quesadillas is in a skillet. Heat the skillet over medium heat and add a tiny bit of oil. Place the quesadilla in the skillet and cook for about 2-3 minutes on each side. This method keeps them crispy. You can also use a microwave, but they may get soft. If you use the microwave, place a damp paper towel over the quesadilla. Heat it for about 30 seconds to 1 minute.
Freezing Quesadillas for Future Use
To freeze your quesadillas, first let them cool completely. Wrap each quesadilla in plastic wrap. Then, place them in a freezer bag. Make sure to squeeze out the air before sealing. You can freeze them for up to two months. When you’re ready to eat, thaw them in the fridge overnight. Reheat them using the skillet method for the best taste.
FAQs
How do you make quesadillas crispy?
To get crispy quesadillas, use a hot skillet. I like to heat the skillet over medium-high heat. Use enough oil to coat the bottom of the pan. This helps achieve a nice crunch. Cook each side for about 3-4 minutes until golden brown. Don’t rush the cooking. A little patience goes a long way!
Can I use corn tortillas instead of flour?
Yes, corn tortillas are a great choice! They add a nice flavor and texture. Corn tortillas are also gluten-free, so they work for more diets. They tend to hold their shape well and add a crunch. If you prefer a different taste, give corn tortillas a try!
What can I serve with chicken quesadillas?
I love serving quesadillas with salsa and sour cream. They add flavor and creaminess. You can also add a side salad or guacamole. These sides balance the meal and make it even tastier. Try pairing them with beans or rice for a full meal.
How long do chicken quesadillas last in the refrigerator?
Chicken quesadillas last about 3-4 days in the fridge. Store them in an airtight container to keep them fresh. If you want to enjoy them later, make sure they cool down before you store them. Check for any signs of spoilage before eating. Freshness is key!
Making easy chicken quesadillas requires just a few key ingredients and steps. You learned about essential items like shredded chicken, cheese, and tortillas. We covered sautéing veggies and layering your quesadilla for the best taste. Tips for perfect crispness and creative variations ensure you enjoy this dish in many ways.
In closing, I hope you feel inspired to whip up these tasty quesadillas. With a little practice, you can impress friends and family with your skills! Enjoy your cooking journey and have fun with your meals!