Peanut Butter Blossoms Delicious Cookie Recipe

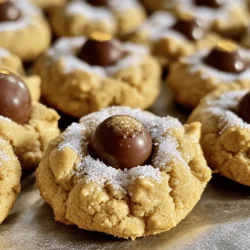
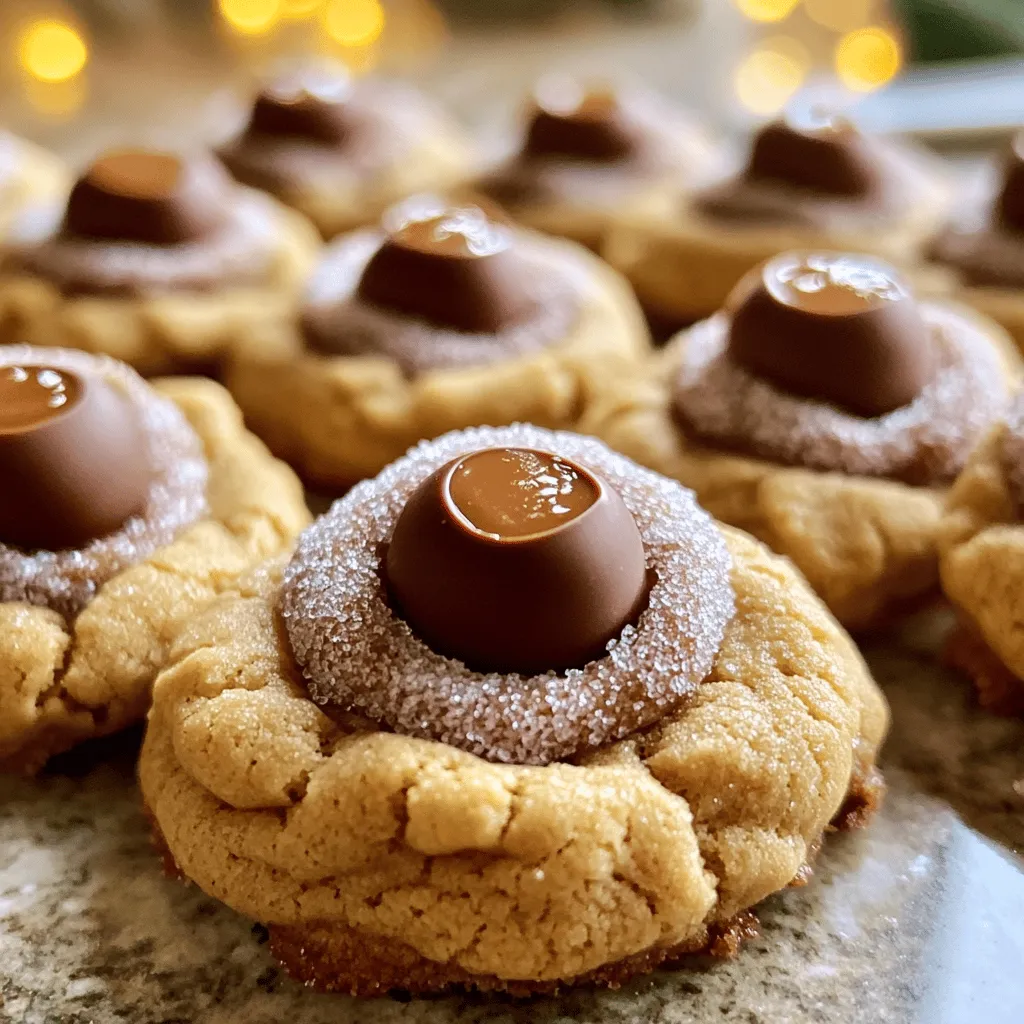
Craving a sweet treat that’s fun to make? Look no further than Peanut Butter Blossoms! These classic cookies combine creamy peanut butter with sweet chocolate kisses for a delightful bite. Whether you’re baking for a party or indulging yourself, I’ll guide you through crafting these delicious cookies step by step. Follow along to discover tips, variations, and the perfect way to store your tasty creations. Let’s bake some magic together!

Ingredients

Main Ingredients

– 1 cup creamy peanut butter

– 1 cup granulated sugar

– 1 cup packed brown sugar

– 1 large egg

– 1 teaspoon vanilla extract

– 1 teaspoon baking soda

– ½ teaspoon salt

– 1 ½ cups all-purpose flour

These ingredients bring the magic to Peanut Butter Blossoms. Creamy peanut butter adds rich taste. The sugars ensure sweetness and a chewy texture. The egg binds it all together, while the vanilla gives a warm flavor. Baking soda helps the cookies rise, and salt balances the sweetness. All-purpose flour makes the dough smooth and easy to work with.

Optional Ingredients

– Different types of chocolate kisses

– Nuts, sprinkles, or sea salt

You can mix it up with optional ingredients. Try dark chocolate or even caramel kisses for a twist. Adding nuts gives a nice crunch. Sprinkles make them festive, while a sprinkle of sea salt enhances the flavor.

Necessary Equipment

– Mixing bowls

– Baking sheet and parchment paper

To get started, gather your equipment. You need mixing bowls to combine the ingredients. A baking sheet lined with parchment paper makes for easy cleanup. This setup helps your cookies bake evenly and prevents sticking.

For the full recipe, check the section above.

Step-by-Step Instructions

Preparation

First, preheat your oven to 350°F (175°C). This is key for baking. While the oven heats, line a baking sheet with parchment paper. This helps prevent sticking and makes cleanup easy.

Next, you’ll need a large mixing bowl. In it, combine 1 cup of creamy peanut butter, 1 cup of granulated sugar, and 1 cup of packed brown sugar. Mix until it’s all blended and creamy. It should look smooth and thick.

Now, add 1 large egg, 1 teaspoon of vanilla extract, 1 teaspoon of baking soda, and ½ teaspoon of salt to the peanut butter mix. Stir well until everything is combined.

Gradually add 1 ½ cups of all-purpose flour. Mix until a smooth dough forms. This part is fun; you’ll feel the dough come together nicely.

Dough Creation

Now, it’s time to form the dough balls. Take about 1 tablespoon of dough and roll it into a ball, about 1 inch wide. Roll each ball in granulated sugar to coat it. This gives the cookies a sweet sparkle.

Once rolled, place the sugar-coated dough balls on the prepared baking sheet. Make sure to leave about 2 inches between each ball. They will spread as they bake.

Baking Process

Bake your cookies in the preheated oven for 10-12 minutes. Watch for the edges to turn lightly golden. This means they are ready.

When you take the baking sheet out of the oven, press a chocolate kiss into the center of each cookie right away. The cookie will crack around the edges, which is perfect!

Let the cookies cool on the baking sheet for about 5 minutes. Then, transfer them to a wire rack to cool completely. This cooling step ensures they keep their shape and flavor. Enjoy your Peanut Butter Blossoms! For the full recipe, check out the detailed steps above.

Tips & Tricks

Baking Tips

Measuring ingredients correctly is key. Use dry measuring cups for flour and sugar. For peanut butter, a liquid measuring cup works best. This ensures your dough has the right texture.

To get the perfect cookie texture, mix the dough just until combined. Overmixing makes cookies tough. You want them soft and chewy. Chill the dough for 30 minutes before baking. This helps the cookies hold their shape.

Common Mistakes to Avoid

One big mistake is overmixing the dough. This makes cookies dense. Underbaking is another issue. Cookies should be slightly golden around the edges. They will continue to bake after you take them out.

Don’t forget to space your cookies on the baking sheet. Leave about 2 inches between each ball. This stops them from merging into one giant cookie.

Serving Suggestions

These cookies pair well with milk or hot cocoa. For a fun twist, serve them with ice cream. They are also great to share at parties.

Display your cookies on a festive plate. Add a few chocolate kisses on the side. This makes them look extra special for holidays or gatherings. If you want to impress, try the Full Recipe for more details.

Variations

Chocolate Kiss Variants

You can switch up the chocolate kiss on top of your cookies. Dark chocolate kisses work well for a richer taste. You can also try flavored kisses, like caramel or mint. These small changes add fun to your cookies. You might even try using other candies, like Reese’s Pieces or M&Ms, for a colorful touch.

Dietary Modifications

If you need gluten-free options, you can use gluten-free flour instead of all-purpose flour. Make sure to check the flour’s label to ensure it is safe for your diet. For vegan substitutions, replace the egg with a flaxseed or chia seed mixture. Mix one tablespoon of flaxseed meal with three tablespoons of water and let it sit for a few minutes. This mixture helps bind the ingredients just like an egg.

Custom Flavor Additions

Want to add more flavor? You can mix in spices like cinnamon or nutmeg into the dough. Just a pinch can elevate the taste. Adding chocolate chips or dried fruits can also add texture and sweetness. Both options make your cookies even more delightful. Experimenting with these variations makes your Peanut Butter Blossoms unique and tasty. For the full recipe, check out the details above.

Storage Info

Short-term Storage

To keep your Peanut Butter Blossoms fresh, store them at room temperature. Use an airtight container. This helps keep the cookies soft and tasty. Place a layer of wax paper between layers of cookies to avoid sticking. Do not stack them too high. They can last up to one week this way.

Long-term Storage

If you want to save some for later, freezing is a great option. Place the cookies in a freezer-safe bag or container. Make sure to remove as much air as possible. They can stay frozen for about three months. When you’re ready to eat them, take out the cookies and let them thaw at room temperature. If you want them warm, pop them in the microwave for a few seconds.

Shelf Life

Peanut Butter Blossoms can last about a week at room temperature. If you freeze them, they can last up to three months. Check for signs of spoilage like an off smell or hard texture. If they feel dry or crumbly, it’s time to toss them. Enjoy these delightful treats while they are fresh! For the full recipe, check out the provided link.

FAQs

What is the best way to store Peanut Butter Blossoms?

To keep your Peanut Butter Blossoms fresh, store them in an airtight container. Place a piece of wax paper between layers of cookies to prevent sticking. They stay good for about a week at room temperature. For longer storage, freeze them. Wrap each cookie in plastic wrap and place them in a freezer-safe bag. They can last for up to three months. When you’re ready to eat them, thaw the cookies at room temperature.

Can I make Peanut Butter Blossoms without eggs?

Yes, you can make Peanut Butter Blossoms without eggs. Use a mashed banana or applesauce instead. For each egg, use 1/4 cup of applesauce or 1/2 a mashed banana. This change keeps the cookies moist but may make them softer. The taste will still be delicious, but the texture might be a bit different.

What makes Peanut Butter Blossoms different from regular peanut butter cookies?

Peanut Butter Blossoms stand out due to their signature chocolate kiss on top. Regular peanut butter cookies do not have this chocolate addition. The kiss adds a sweet and creamy contrast to the salty peanut butter. The dough is also rolled in sugar before baking, giving it a nice crunch. This extra step makes them special and fun to eat.

How can I make Peanut Butter Blossoms healthier?

You can swap regular sugar for coconut sugar or a sugar substitute. Use whole wheat flour instead of all-purpose flour for added fiber. You can also try natural peanut butter, which has less sugar. For a nut-free option, use sunflower seed butter. Adding oats can also boost nutrition. These changes help make the cookies healthier while still being tasty. For more detailed steps, check the Full Recipe.

This blog post covered all you need to know about making Peanut Butter Blossoms. We discussed main ingredients, optional add-ins, and necessary tools. You learned step-by-step instructions for baking, tips for best results, and variations to try. We also shared storage options and answered common questions.

You can easily impress others with these cookies. They are simple yet delicious and adaptable. Use this guide to create your own unique Peanut Butter Blossoms. Baking brings joy, so enjoy the process!

- 1 cup creamy peanut butter - 1 cup granulated sugar - 1 cup packed brown sugar - 1 large egg - 1 teaspoon vanilla extract - 1 teaspoon baking soda - ½ teaspoon salt - 1 ½ cups all-purpose flour These ingredients bring the magic to Peanut Butter Blossoms. Creamy peanut butter adds rich taste. The sugars ensure sweetness and a chewy texture. The egg binds it all together, while the vanilla gives a warm flavor. Baking soda helps the cookies rise, and salt balances the sweetness. All-purpose flour makes the dough smooth and easy to work with. - Different types of chocolate kisses - Nuts, sprinkles, or sea salt You can mix it up with optional ingredients. Try dark chocolate or even caramel kisses for a twist. Adding nuts gives a nice crunch. Sprinkles make them festive, while a sprinkle of sea salt enhances the flavor. - Mixing bowls - Baking sheet and parchment paper To get started, gather your equipment. You need mixing bowls to combine the ingredients. A baking sheet lined with parchment paper makes for easy cleanup. This setup helps your cookies bake evenly and prevents sticking. For the full recipe, check the section above. First, preheat your oven to 350°F (175°C). This is key for baking. While the oven heats, line a baking sheet with parchment paper. This helps prevent sticking and makes cleanup easy. Next, you’ll need a large mixing bowl. In it, combine 1 cup of creamy peanut butter, 1 cup of granulated sugar, and 1 cup of packed brown sugar. Mix until it’s all blended and creamy. It should look smooth and thick. Now, add 1 large egg, 1 teaspoon of vanilla extract, 1 teaspoon of baking soda, and ½ teaspoon of salt to the peanut butter mix. Stir well until everything is combined. Gradually add 1 ½ cups of all-purpose flour. Mix until a smooth dough forms. This part is fun; you’ll feel the dough come together nicely. Now, it’s time to form the dough balls. Take about 1 tablespoon of dough and roll it into a ball, about 1 inch wide. Roll each ball in granulated sugar to coat it. This gives the cookies a sweet sparkle. Once rolled, place the sugar-coated dough balls on the prepared baking sheet. Make sure to leave about 2 inches between each ball. They will spread as they bake. Bake your cookies in the preheated oven for 10-12 minutes. Watch for the edges to turn lightly golden. This means they are ready. When you take the baking sheet out of the oven, press a chocolate kiss into the center of each cookie right away. The cookie will crack around the edges, which is perfect! Let the cookies cool on the baking sheet for about 5 minutes. Then, transfer them to a wire rack to cool completely. This cooling step ensures they keep their shape and flavor. Enjoy your Peanut Butter Blossoms! For the full recipe, check out the detailed steps above. Measuring ingredients correctly is key. Use dry measuring cups for flour and sugar. For peanut butter, a liquid measuring cup works best. This ensures your dough has the right texture. To get the perfect cookie texture, mix the dough just until combined. Overmixing makes cookies tough. You want them soft and chewy. Chill the dough for 30 minutes before baking. This helps the cookies hold their shape. One big mistake is overmixing the dough. This makes cookies dense. Underbaking is another issue. Cookies should be slightly golden around the edges. They will continue to bake after you take them out. Don't forget to space your cookies on the baking sheet. Leave about 2 inches between each ball. This stops them from merging into one giant cookie. These cookies pair well with milk or hot cocoa. For a fun twist, serve them with ice cream. They are also great to share at parties. Display your cookies on a festive plate. Add a few chocolate kisses on the side. This makes them look extra special for holidays or gatherings. If you want to impress, try the Full Recipe for more details. {{image_2}} You can switch up the chocolate kiss on top of your cookies. Dark chocolate kisses work well for a richer taste. You can also try flavored kisses, like caramel or mint. These small changes add fun to your cookies. You might even try using other candies, like Reese's Pieces or M&Ms, for a colorful touch. If you need gluten-free options, you can use gluten-free flour instead of all-purpose flour. Make sure to check the flour's label to ensure it is safe for your diet. For vegan substitutions, replace the egg with a flaxseed or chia seed mixture. Mix one tablespoon of flaxseed meal with three tablespoons of water and let it sit for a few minutes. This mixture helps bind the ingredients just like an egg. Want to add more flavor? You can mix in spices like cinnamon or nutmeg into the dough. Just a pinch can elevate the taste. Adding chocolate chips or dried fruits can also add texture and sweetness. Both options make your cookies even more delightful. Experimenting with these variations makes your Peanut Butter Blossoms unique and tasty. For the full recipe, check out the details above. To keep your Peanut Butter Blossoms fresh, store them at room temperature. Use an airtight container. This helps keep the cookies soft and tasty. Place a layer of wax paper between layers of cookies to avoid sticking. Do not stack them too high. They can last up to one week this way. If you want to save some for later, freezing is a great option. Place the cookies in a freezer-safe bag or container. Make sure to remove as much air as possible. They can stay frozen for about three months. When you're ready to eat them, take out the cookies and let them thaw at room temperature. If you want them warm, pop them in the microwave for a few seconds. Peanut Butter Blossoms can last about a week at room temperature. If you freeze them, they can last up to three months. Check for signs of spoilage like an off smell or hard texture. If they feel dry or crumbly, it's time to toss them. Enjoy these delightful treats while they are fresh! For the full recipe, check out the provided link. To keep your Peanut Butter Blossoms fresh, store them in an airtight container. Place a piece of wax paper between layers of cookies to prevent sticking. They stay good for about a week at room temperature. For longer storage, freeze them. Wrap each cookie in plastic wrap and place them in a freezer-safe bag. They can last for up to three months. When you're ready to eat them, thaw the cookies at room temperature. Yes, you can make Peanut Butter Blossoms without eggs. Use a mashed banana or applesauce instead. For each egg, use 1/4 cup of applesauce or 1/2 a mashed banana. This change keeps the cookies moist but may make them softer. The taste will still be delicious, but the texture might be a bit different. Peanut Butter Blossoms stand out due to their signature chocolate kiss on top. Regular peanut butter cookies do not have this chocolate addition. The kiss adds a sweet and creamy contrast to the salty peanut butter. The dough is also rolled in sugar before baking, giving it a nice crunch. This extra step makes them special and fun to eat. You can swap regular sugar for coconut sugar or a sugar substitute. Use whole wheat flour instead of all-purpose flour for added fiber. You can also try natural peanut butter, which has less sugar. For a nut-free option, use sunflower seed butter. Adding oats can also boost nutrition. These changes help make the cookies healthier while still being tasty. For more detailed steps, check the Full Recipe. This blog post covered all you need to know about making Peanut Butter Blossoms. We discussed main ingredients, optional add-ins, and necessary tools. You learned step-by-step instructions for baking, tips for best results, and variations to try. We also shared storage options and answered common questions. You can easily impress others with these cookies. They are simple yet delicious and adaptable. Use this guide to create your own unique Peanut Butter Blossoms. Baking brings joy, so enjoy the process!

Peanut Butter Blossoms

Indulge in the deliciousness of Peanut Butter Blossoms with this easy recipe! Made with creamy peanut butter and topped with chocolate kisses, these cookies are sure to be a hit. Follow our simple steps to create a batch of 36 mouthwatering treats perfect for any occasion. Get ready to impress your friends and family! Click to explore the full recipe and elevate your baking game today!

Ingredients
  

1 cup creamy peanut butter

1 cup granulated sugar

1 cup packed brown sugar

1 large egg

1 teaspoon vanilla extract

1 teaspoon baking soda

½ teaspoon salt

1 ½ cups all-purpose flour

36 chocolate kisses, unwrapped

Granulated sugar for rolling

Instructions
 

Preheat your oven to 350°F (175°C). Line a baking sheet with parchment paper.

    In a large mixing bowl, combine the peanut butter, granulated sugar, and brown sugar. Mix until well blended and creamy.

      Add the egg, vanilla extract, baking soda, and salt to the peanut butter mixture. Stir until well incorporated.

        Gradually mix in the all-purpose flour until a smooth dough forms.

          Roll the dough into 1-inch balls, then roll each ball in granulated sugar to coat.

            Place the sugar-coated dough balls on the prepared baking sheet, leaving about 2 inches between each.

              Bake in the preheated oven for 10-12 minutes, or until the edges are lightly golden.

                Remove the baking sheet from the oven and immediately press a chocolate kiss into the center of each cookie. The cookie will crack around the edges.

                  Allow the cookies to cool on the baking sheet for about 5 minutes, then transfer them to a wire rack to cool completely.

                    Prep Time: 15 minutes | Total Time: 30 minutes | Servings: Approximately 36 cookies

                      Leave a Comment

                      Recipe Rating