WANT TO SAVE THIS RECIPE?
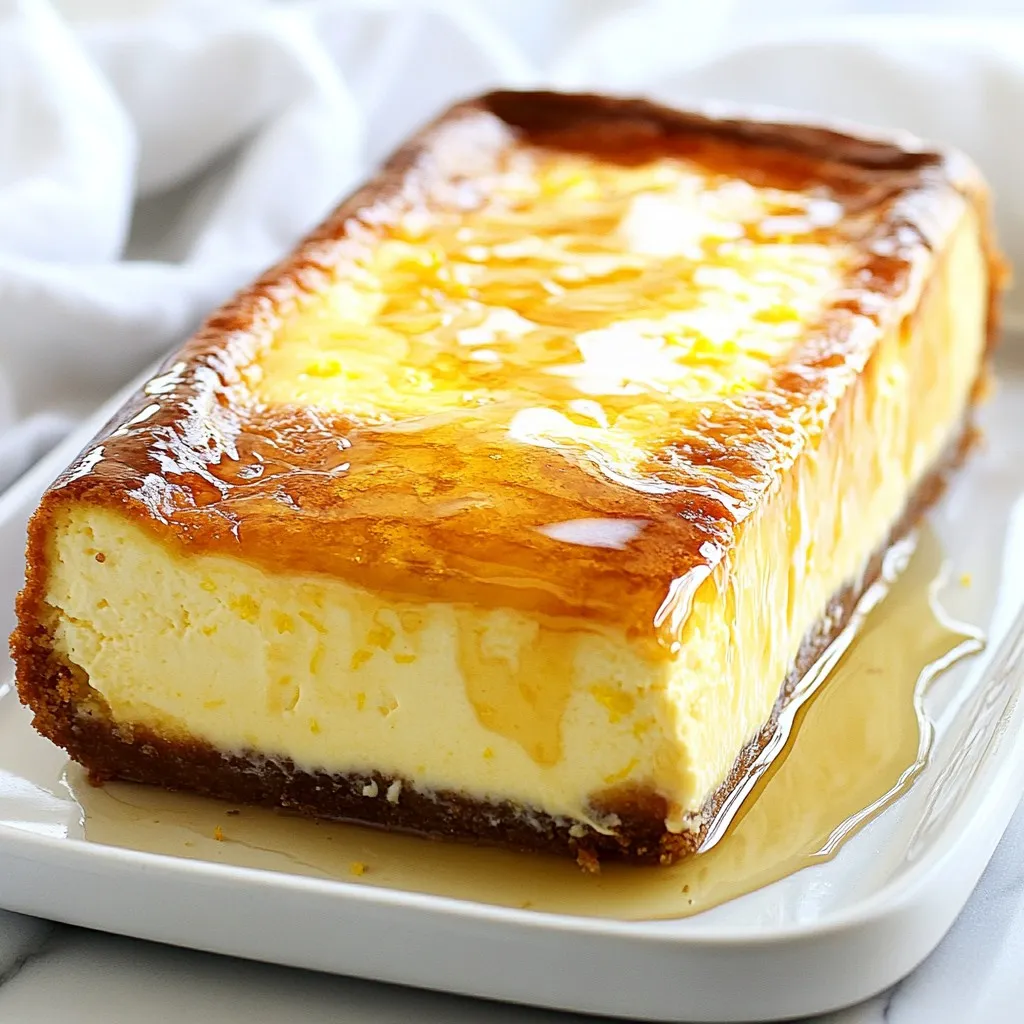
Welcome to your next favorite dessert adventure! Today, we’re making a creamy and rich Loaf Pan Basque Cheesecake that you can serve at any occasion. This simple recipe requires just a few key ingredients and offers a delightful, slightly burnt top that makes it unique. Whether you’re a baking novice or a pro, you’ll enjoy every step. Let’s dive into this delicious, melt-in-your-mouth treat that will impress your friends and family!
Why I Love This Recipe
- Decadent Flavor: This Basque cheesecake is rich and creamy with a perfectly caramelized top, making it an indulgent treat for any occasion.
- Simple Ingredients: Made with just a few pantry staples, this recipe is accessible and easy to whip up whenever the craving strikes.
- Stunning Presentation: With its beautiful golden-brown crust and smooth texture, this cheesecake is sure to impress at gatherings and dinner parties.
- Make-Ahead Delight: It can be made ahead of time and stored in the fridge, allowing flavors to develop and making it a great dessert for busy days.
Ingredients
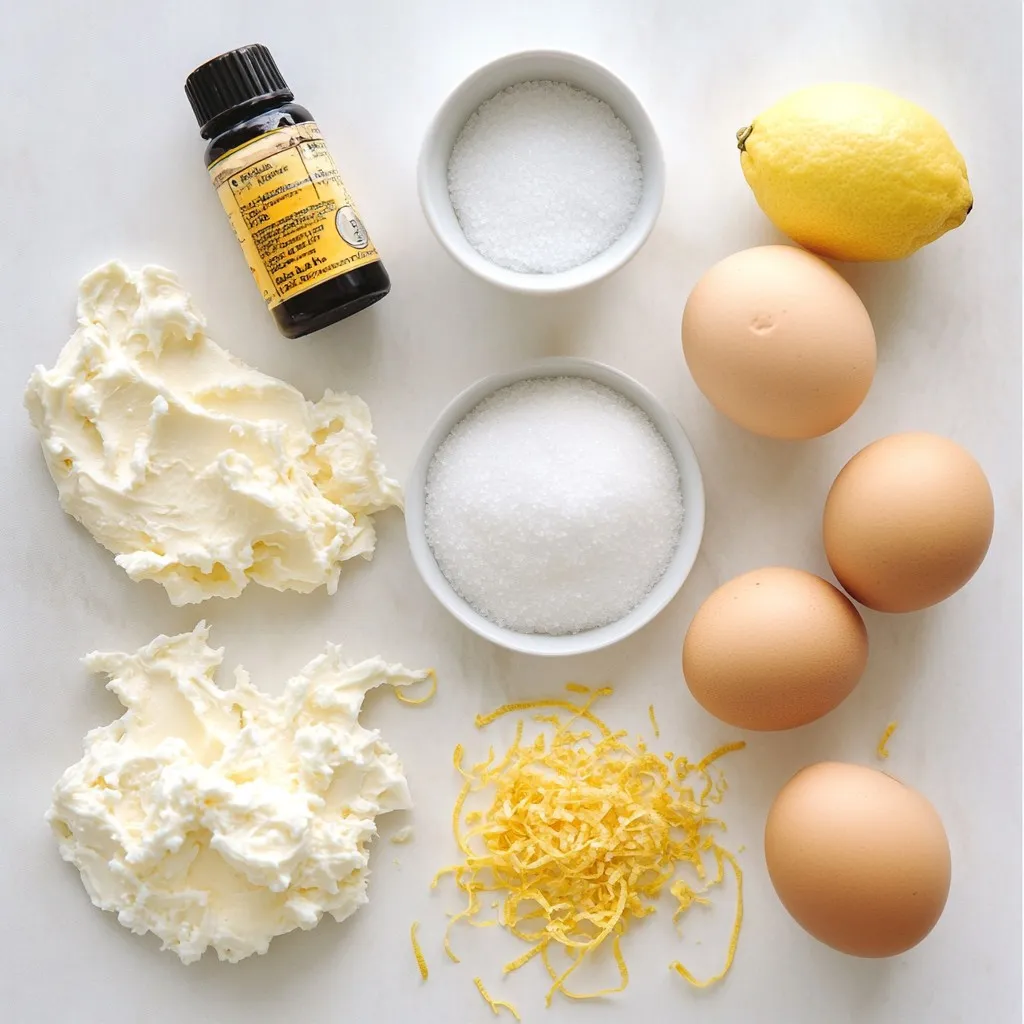
Main Ingredients for Loaf Pan Basque Cheesecake
– 2 cups cream cheese, softened
– 1 cup granulated sugar
– 1 teaspoon vanilla extract
– 1/2 teaspoon salt
To make a great Basque cheesecake, start with these main ingredients. Cream cheese gives it that rich, creamy texture. Sugar adds sweetness, while vanilla and salt balance the flavors perfectly.
Additional Ingredients
– 3 large eggs
– 1 1/4 cups heavy cream
– 1/4 cup all-purpose flour
– Zest of 1 lemon
Now, let’s add some extra magic! Eggs help the cheesecake set. Heavy cream makes it extra rich and smooth. Flour gives it structure, and lemon zest brightens the flavor. Each part plays a key role in creating a delicious dessert.
Optional Garnishes
– Fresh berries
– Drizzle of honey
– Mint leaves for decoration
Garnishes can take your cheesecake to the next level. Fresh berries add color and a fruity burst. A drizzle of honey gives a touch of sweetness. Finally, mint leaves add a fresh look. These options make your dessert look as good as it tastes!

Step-by-Step Instructions
Prepping the Pan and Preheating
– Preheat the oven to 400°F (200°C).
– Line a 9×5 inch loaf pan with parchment paper.
Start by prepping your pan. Preheating the oven is key. A hot oven helps the cheesecake rise and set. The parchment paper makes it easy to lift the cheesecake later. Make sure to leave some overhang. This helps with easy removal.
Mixing the Batter
– Beat the cream cheese until smooth.
– Gradually add sugar, vanilla, and salt.
– Incorporate eggs one at a time.
Next, let’s mix the batter. Use an electric mixer to beat the cream cheese. You want it to be smooth and creamy. This takes about two minutes. Slowly add the sugar, vanilla, and salt. Keep mixing until it blends well. Then, add the eggs one at a time. Mix each egg fully before adding the next.
Finalizing the Cheesecake Batter
– Mix in heavy cream.
– Sift in flour and lemon zest.
– Pour batter into prepared loaf pan.
Now, it’s time to finalize the batter. Pour in the heavy cream and mix well. This adds richness and creaminess. Sift in the flour and lemon zest. Gently fold these in until just combined. Be careful not to overmix, as this can change the texture. Finally, pour the batter into your prepared loaf pan. Smooth the top with a spatula for a nice finish.
Tips & Tricks
Baking to Perfection
– Monitoring oven temperature: Always check your oven temp with an oven thermometer. Ovens can be off by quite a bit. Set it at 400°F (200°C) for the best results.
– Tips for achieving the perfect golden top: Bake until the top turns a deep, golden brown. This color means it’s done. The edges should be firm, but the center must still jiggle a bit.
Avoiding Common Mistakes
– Overmixing the batter: Mix just until combined. If you mix too much, your cheesecake may turn out dense. You want it light and airy.
– Ensuring the center remains jiggly: When you pull it from the oven, the center should wobble slightly. This means it will set perfectly as it cools.
Cooling and Storing
– Importance of gradual cooling in the oven: Letting the cheesecake cool in the oven prevents cracks. Turn off the heat and leave it inside for one hour.
– Recommended chilling time before serving: Chill the cheesecake in the fridge for at least four hours. Overnight is best for full flavor and texture.
Pro Tips
- Room Temperature Ingredients: Ensure your cream cheese and eggs are at room temperature for a smoother batter and better incorporation.
- Don’t Overmix: Gently fold in the flour and lemon zest to avoid a dense cheesecake. Overmixing can introduce too much air.
- Cooling Gradually: Leaving the cheesecake in the oven after baking helps prevent cracking by allowing it to cool slowly.
- Chill for Flavor: Refrigerate the cheesecake for at least 4 hours or overnight for the best flavor and texture.
Variations
Flavor Variations
You can switch up the zest in your cheesecake. Lemon zest gives a fresh taste. But you might try orange or lime zest for a new flavor. Each citrus adds its own twist. You can also mix in chocolate or caramel swirls. These additions bring richness and a fun texture. Just fold in the swirls right before baking. This way, you keep the creamy cheesecake base intact.
Dietary Substitutions
If you need a gluten-free option, use gluten-free flour. This keeps the cake just as creamy. You won’t lose any flavor! For a vegan version, try plant-based cream cheese. It works well and still tastes great. You can also use flax eggs instead of regular eggs. Just mix one tablespoon of ground flaxseed with three tablespoons of water. Let it sit until it thickens. This provides the binding you need for your cheesecake.
Serving Suggestions
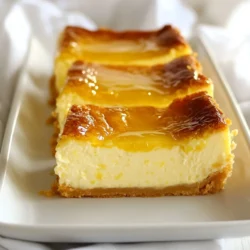
Pair slices of cheesecake with tasty sauces. A berry sauce or chocolate drizzle adds sweetness. You can also sprinkle fresh berries on top for color and flavor. For special events, get creative with presentation. Serve slices on a rustic wooden board. Add a few mint leaves for a pop of green. This makes your dessert look fancy and inviting.
Storage Info
Immediate Storage Tips
To keep your loaf pan Basque cheesecake fresh, refrigerate it right away. Once cooled, cover it with plastic wrap. This helps keep it moist. Enjoy the cheesecake within three to four days for the best taste and texture.
Freezing Guidelines
If you want to save some for later, freezing works well. First, let the cheesecake cool completely in the fridge. Then, wrap it tightly in plastic wrap. You can also use aluminum foil for extra protection. Place it in an airtight container or a freezer bag. This keeps out air and prevents freezer burn. To thaw, move it to the fridge overnight. This way, you’ll keep its creamy texture and rich flavor.
Shelf Life
In the fridge, the cheesecake lasts about four to five days. After that, its taste and texture may change. Signs of spoilage include a sour smell or a change in color. If you see any mold, it’s best to throw it away. Always trust your senses when it comes to food safety!
FAQs
What is a Basque cheesecake?
A Basque cheesecake is a unique dessert. It comes from the Basque region of Spain. This cheesecake has a rich and creamy texture. It is different because it has a dark, burnt top. The inside is soft and smooth, while the outside is caramelized. This contrast makes it special. Unlike traditional cheesecakes, it does not have a crust. Instead, the batter forms a crust while baking. The flavor is rich, with hints of vanilla and lemon zest. This dessert is perfect for any occasion.
Can I use a different pan size?
Yes, you can use different pan sizes. However, this can change the baking time. A smaller pan may need a longer bake time. A larger pan may cook faster. If you change the size, keep a close eye on it. Check for the golden top and jiggly center. You want the cheesecake to bake evenly. If using a different size, adjust the time based on how thick the batter is in the pan.
How do I prevent cracking on the cheesecake?
To avoid cracks, follow these tips. First, mix the batter gently. Overmixing can add too much air. Next, bake at the right temperature. A too-hot oven can cause cracks. After baking, let the cheesecake cool slowly in the oven. Turn off the heat and keep the door shut for an hour. This helps the cheesecake settle. Finally, chill it in the fridge for at least four hours. A gradual cooling process makes a smooth top.
In this blog post, we explored how to make a Basque cheesecake with simple ingredients. You learned about the main components, from cream cheese to sugar and eggs. I shared step-by-step instructions for mixing and baking, along with key tips to avoid mistakes. Variations and storage advice help you customize and keep your cheesecake fresh.
Making this dessert can be easy and fun. Enjoy experimenting with flavors and sharing your delicious result
Loaf Pan Basque Cheesecake
A rich and creamy Basque cheesecake baked in a loaf pan, featuring a caramelized top and a smooth texture.
Prep Time 20 minutes mins
Cook Time 45 minutes mins
Total Time 6 hours hrs
Course Dessert
Cuisine Spanish
Servings 8
Calories 350 kcal
- 2 cups cream cheese, softened
- 1 cup granulated sugar
- 1 teaspoon vanilla extract
- 0.5 teaspoon salt
- 3 large eggs
- 1.25 cups heavy cream
- 0.25 cup all-purpose flour
- 1 zest of 1 lemon
Preheat the oven to 400°F (200°C) and line a 9x5 inch loaf pan with parchment paper, leaving some overhang for easy removal later.
In a large mixing bowl, use an electric mixer to beat the softened cream cheese until smooth and creamy, about 2 minutes.
Gradually add the granulated sugar and continue to beat until well incorporated.
Mix in the vanilla extract and salt, combining until smooth.
Add in the eggs, one at a time, mixing well after each addition.
Pour in the heavy cream and mix until fully combined.
Sift in the all-purpose flour and lemon zest, and gently fold into the batter until just combined. Do not overmix.
Pour the cheesecake batter into the prepared loaf pan and smooth the top with a spatula.
Bake in the preheated oven for 40-45 minutes or until the top is a deep golden brown and the edges are set while the center remains a bit jiggly.
Once baked, turn off the oven and leave the cheesecake inside for an additional hour to cool gradually, which helps prevent cracking.
Remove the cheesecake from the oven and allow it to cool to room temperature before refrigerating for at least 4 hours or overnight for best flavor.
Carefully lift the chilled cheesecake from the pan using the overhanging parchment paper, slice, and serve.
Serve slices on a rustic wooden board, garnished with fresh berries or a drizzle of honey for a touch of elegance.
Keyword Basque, cheesecake, dessert, loaf pan
WANT TO SAVE THIS RECIPE?